Free original lessons
Cross-Contour Face Drawing: Surface Lines for Cheek, Nose, and Brow
Learn to draw a face using cross-contour lines that wrap cheek, nose, and brow surfaces. Includes convention, rubric, worked example, and four practice tasks.
Free lesson
Four exercises
Worked answers
Object Drawing Lessons
Cross-contour drawing describes form by drawing lines that appear to wrap around a surface, like elevation lines on a map but following the face's curvature. This lesson focuses only on surface lines across the cheek, nose, and brow, not outline-only drawing, shading, or full portrait rendering. You will use a simple convention: draw light construction lines first, then place cross-contour lines at consistent spacing so each line changes direction where the surface turns. Because letter styles and line spacing vary, the rubric rewards clear surface description and consistent spacing rather than one exact line pattern. All measurements below are hypothetical examples; measure your own paper and reference before drawing.
Practice materials: Printable downloads are not available for this lesson yet. Use the instructions and four exercises below.
Reference illustration
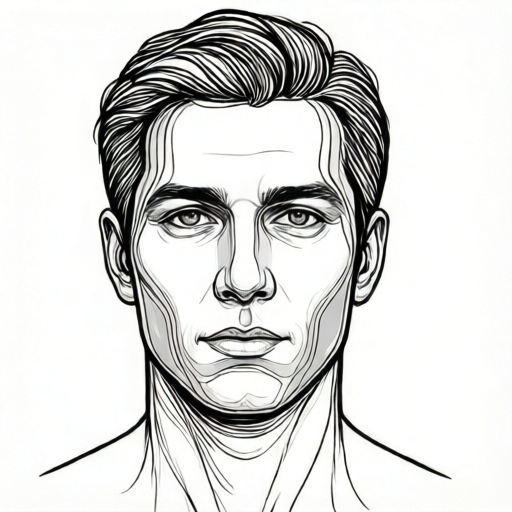
Use the stated measurements and conventions for each exercise.
Define the cross-contour convention
A cross-contour line is a line drawn across a form to show its curvature, not its outer edge. On a face, a cheek line might start near the ear, curve forward over the cheekbone, and turn downward toward the jaw. A nose line might wrap from the bridge around the nostril wing. A brow line might follow the forehead's curve above the eyebrow.
Use a consistent convention: pencil grade is your choice, but keep line weight even and spacing between adjacent lines roughly equal. Label any numerical spacing as a hypothetical example, such as 8 mm on a 15 cm face outline. Measure your actual paper and reference to set your own spacing.
- Draw a light face outline and mark the cheek, nose, and brow zones with small dots.
- Choose a spacing value by measuring your reference and record the measured value; if you have not measured, use a clearly labeled hypothetical example instead.
- Draw one cheek line from the outer cheek toward the nose, changing direction at the cheekbone.
- Draw one nose line wrapping from the bridge around the nostril wing.
- Draw one brow line following the forehead curve above the eyebrow.
- Check that each line turns where the surface turns and that spacing stays roughly even.
Place cheek, nose, and brow lines
Cheek lines usually fan from the side of the face toward the nose, curving more sharply near the cheekbone. Nose lines are shorter and wrap around the bridge and nostril wing. Brow lines follow the forehead's rounded surface above the eyebrow and should not become eyebrow hairs.
Keep the three zones separate at first. Draw two or three lines per zone, then compare their direction changes. If a line looks like an outline, redraw it so it crosses the surface rather than tracing the edge.
- Draw two cheek lines with a clear direction change at the cheekbone.
- Draw two nose lines that wrap around the nostril wing without touching the outline.
- Draw two brow lines that follow the forehead curve above the eyebrow.
- Compare spacing: adjacent lines should be roughly equal, within about one line-width of the chosen spacing.
- Erase any line that only traces the face edge and replace it with a surface-crossing line.
Check and refine surface description
A useful check is to trace each line with your finger and ask whether it describes a rounded, flat, or hollow area. Cross-contour lines should make the cheek feel rounded, the nose feel cylindrical near the bridge, and the brow feel curved above the eye.
Valid alternatives include different line spacing, curved versus slightly angular turns, and different starting points, provided the lines still wrap the named surfaces. Do not add shading or full portrait details; this task is about surface lines only.
- Trace each line and name the surface it describes.
- Check that no line is a pure outline.
- Check that spacing is consistent within each zone.
- Check that cheek, nose, and brow zones are all present.
- Redraw one weak line and note why the new version describes the surface better.
Worked example
On a 15 cm face outline, draw one cheek line, one nose line, and one brow line using a hypothetical 8 mm spacing. Describe where each line turns.
Worked answer
The cheek line starts 3 cm from the outline near the ear, curves forward, and turns downward at the cheekbone about 5 cm along the line from its start. The nose line starts at the bridge, wraps around the nostril wing, and turns outward about 2 cm along the line from its start. The brow line starts above the eyebrow, follows the forehead curve, and turns slightly upward about 4 cm along the line from its start. Spacing between adjacent lines is about 8 mm. All distances and the 8 mm spacing are hypothetical example measurements, independent of the 15 cm outline width; measure your own reference before drawing.
Four practice exercises
Exercise 1
A face outline is 12 cm wide. You mark a cheek zone 3 cm in from the outline and a nose zone 2 cm from the center. Draw two cheek lines and two nose lines with hypothetical 6 mm spacing. State where each line turns.
Show answer and check
On the 12 cm wide outline, the center is 6 cm from each edge. The cheek zone is 3 cm in from the outline, leaving 3 cm to the center; the nose zone is 2 cm from the center, so the cheek and nose zones are separated by 1 cm. Cheek lines start near the 3 cm mark, curve forward, and turn downward at the cheekbone about 1.5 cm along the line from its start, staying within the 3 cm span to the center. Nose lines start near the 2 cm mark, wrap the nostril wing, and turn outward about 1 cm along the line from its start. Spacing is about 6 mm, a hypothetical example; measure your own reference to confirm it fits the 1 cm gap between zones.
Why: The zones are separated by 1 cm so cheek and nose lines do not merge. Each line changes direction where the surface turns, and spacing is consistent within each zone.
Check: Measure spacing between adjacent lines; confirm each line crosses a named surface and is not an outline.
Exercise 2
Draw one brow line above an eyebrow on a 10 cm forehead curve. The line starts 3 cm from the center and ends 5 cm from the start. Describe the turn and give a spacing check for a second brow line at a hypothetical 7 mm spacing.
Show answer and check
The brow line starts 3 cm from the center and runs 5 cm total. It follows the forehead curve and turns slightly upward about 4 cm along the 5 cm line from its start, which lies between the stated start and end points. A second line placed 7 mm below is a hypothetical example; measure your own reference to confirm spacing.
Why: The brow line must follow the forehead's rounded surface, not the eyebrow hairs. The turn shows curvature, and the spacing check keeps lines readable.
Check: Trace the line with a finger; it should feel curved above the eye. Measure the gap to the second line and compare with your recorded spacing.
Exercise 3
A student draws three cheek lines that are all parallel and do not change direction. Identify the problem and describe a corrected version using the convention.
Show answer and check
The lines describe a flat surface, not a rounded cheek. Correct by starting each line at a different point near the ear, curving forward, and turning downward at the cheekbone. Keep spacing within about one line-width.
Why: Cross-contour lines must change direction where the surface turns. Parallel lines without turns do not describe the cheek's curvature.
Check: Check that each corrected line has a visible direction change at the cheekbone and that no line traces the outline.
Exercise 4
On a face outline, place two nose lines and two brow lines. One nose line touches the outline; one brow line becomes an eyebrow hair. Fix both and state a check method.
Show answer and check
Move the nose line inward so it wraps the nostril wing without touching the outline. Redraw the brow line as a smooth curve above the eyebrow, not as a hair. Check by tracing each line and naming the surface it describes.
Why: Nose lines should cross the nose surface, and brow lines should follow the forehead curve. Touching the outline or drawing hairs breaks the convention.
Check: Confirm no line touches the outline and no brow line resembles a hair; verify spacing within each zone.
Common mistakes
- Drawing only the face outline and calling it cross-contour. Add lines that cross the cheek, nose, and brow surfaces and change direction where the surface turns.
- Making all lines parallel and evenly curved, so the face looks flat. Vary direction changes at the cheekbone, nostril wing, and forehead curve.
- Adding shading or facial details instead of surface lines. Remove shading and keep only construction and cross-contour lines.
- Using wildly uneven spacing that hides the surface rhythm. Measure your reference and keep adjacent lines within about one line-width of each other.
Self-check rubric
- Cheek zone has at least two cross-contour lines that change direction at the cheekbone.
- Nose zone has at least two lines wrapping the bridge or nostril wing.
- Brow zone has at least two lines following the forehead curve above the eyebrow.
- No line is a pure outline; each line crosses a named surface.
- Spacing within each zone is roughly consistent, within about one line-width.
- No shading or full portrait rendering is added.
- Valid alternatives in line style, spacing, and starting points are accepted if surface description remains clear.
Questions and answers
Do I need to draw a realistic face first?
No. A light outline with marked cheek, nose, and brow zones is enough; the task is surface lines, not portrait rendering.
How many lines should I draw?
Two or three lines per zone is enough to show curvature. More lines can help, but keep spacing consistent.
Can I use a ruler?
Yes, for spacing checks. Measure your own paper and reference; any numerical value is a hypothetical example unless you measured it.
What if my lines look different from someone else's?
That is valid if your lines wrap the named surfaces and follow the convention. The rubric allows alternative line styles and spacing.