Reference diagram
LETTER · Download PDF (1 page)
Free original resources
Learn to draw a balance scale holding three objects with clear weight cues, using a simple convention and a checkable rubric for valid alternatives.
Original reference diagrams, four practice exercises and separate worked answers. All files are free. No signup required.
LETTER · Download PDF (1 page)
LETTER · Download PDF (1 page)
LETTER · Download PDF (4 pages)
Choose A4 or US Letter for your printer. The reference and answer illustrations are not physical rulers; follow the scale instruction printed on the practice worksheet.
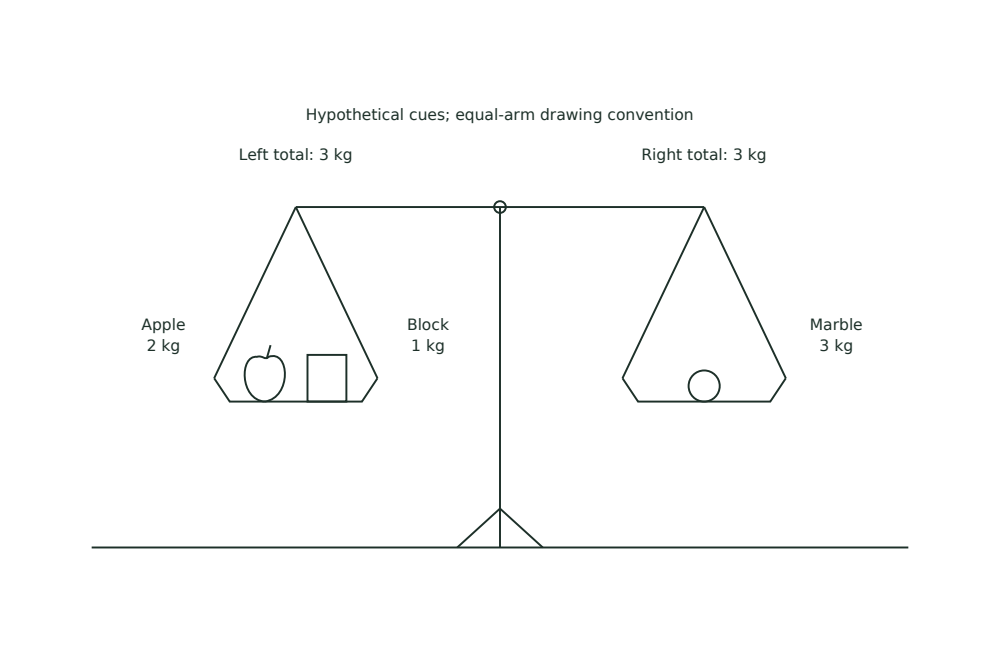
This lesson teaches a drawing convention for a balance scale that holds three distinct objects in its pans, with weight cues that make the comparison readable. You will plan the scale, place the objects, and check the drawing against a rubric that allows different lettering and object styles. The focus is on clear placement and weight cues, not realistic shading or reading measurements. The free kit below includes a reference plate with a blank redraw panel, a one-page worksheet with all four tasks, and a separate worked answer key.
Use a simple line convention: a horizontal baseline for the ground, a vertical post, a horizontal beam, and two pans hanging from the beam ends. Draw the beam as a straight line and mark its center point. The pans are shallow curves or trapezoids, not deep bowls. Objects sit inside the pan outline, touching the pan floor.
For weight cues, write a small number and unit beside each object, such as 2 kg, 1 kg, and 0.5 kg. These are hypothetical examples; choose your own simple values that add up clearly. Keep units consistent. The scale is balanced when the total weight on each side is equal. If the totals differ, tilt the beam slightly toward the heavier side and show the pans at different heights.
Choose three objects that are easy to distinguish by outline: for example, an apple (round with a stem), a block (rectangle), and a marble (small circle). Place two objects in the left pan and one in the right pan, or vice versa. Leave a small gap between objects so their outlines do not merge. Each object should sit on the pan floor, not float.
Weight cues must be readable: place the number and unit just above or beside each object, not overlapping the outline. Use the same handwriting style for all cues. If you use abbreviations, define them once in a small key at the bottom. The drawing is valid if a reader can identify three objects and compare the totals without guessing.
Add the weight cues on each side. If the totals are equal, draw the beam level and the pans at the same height. If the totals differ, tilt the beam toward the heavier side by a small angle, and lower that pan slightly. The tilt should be visible but not extreme; a slight slope is enough to show the comparison.
Use simple arithmetic to check: for example, left pan 2 kg + 1 kg = 3 kg; right pan 3 kg = 3 kg, so the beam is level. If the right pan were 2.5 kg, the left side is heavier, so tilt left. Keep all units the same. Do not invent printer tolerances or hardware standards; measure your own paper and pencil if needed, and label any chosen numerical values as hypothetical examples.
Darken the scale outlines and object outlines. Keep weight cues smaller than object outlines so they do not dominate. If an object outline is ambiguous, add one simple detail: a stem for the apple, a corner mark for the block, a highlight dot for the marble. Avoid realistic shading; the goal is a clear diagram.
Check that the drawing shows exactly three objects, two pans, one beam, and one post. The baseline should be level. The beam center should align with the post. If you tilted the beam, the center point stays on the post. A reader should be able to state which side is heavier or that the scale is balanced.
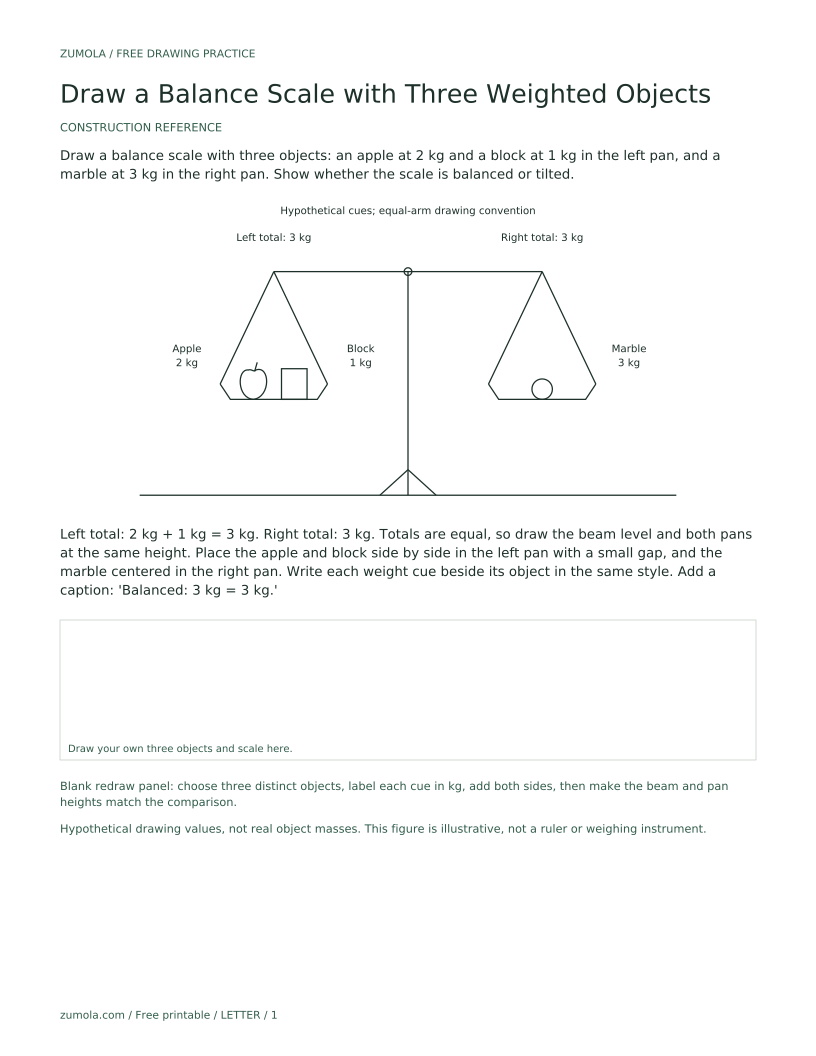
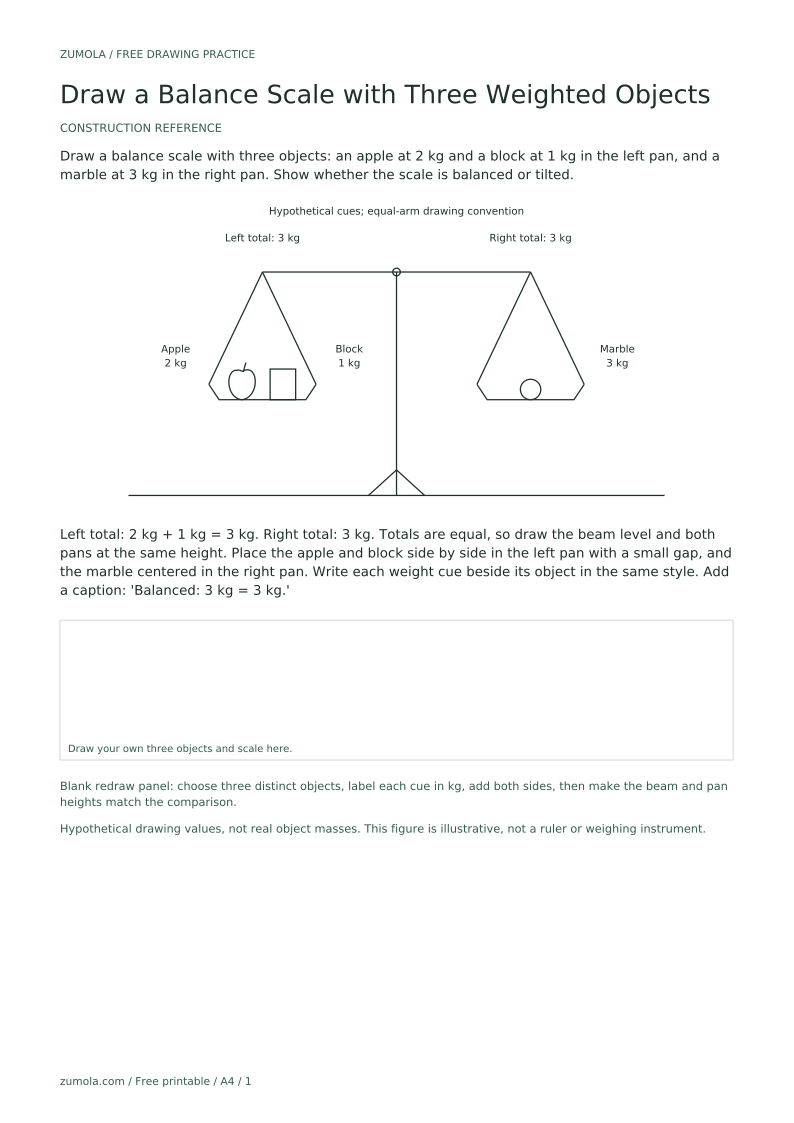
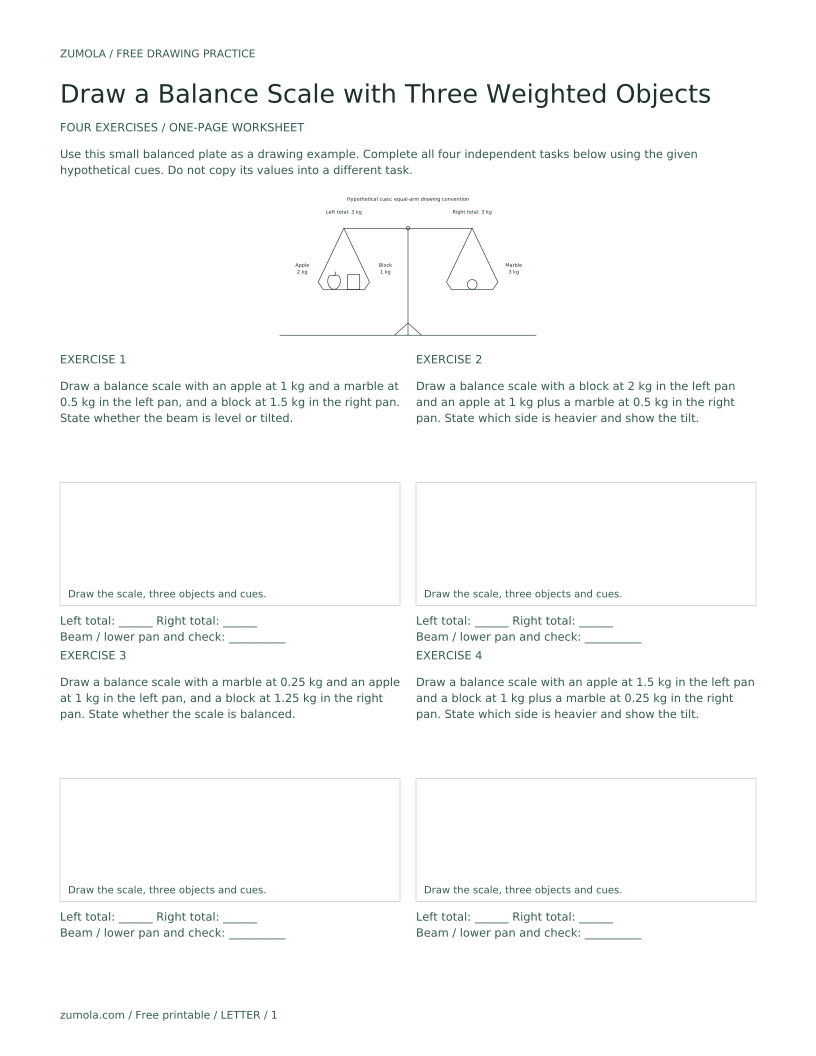
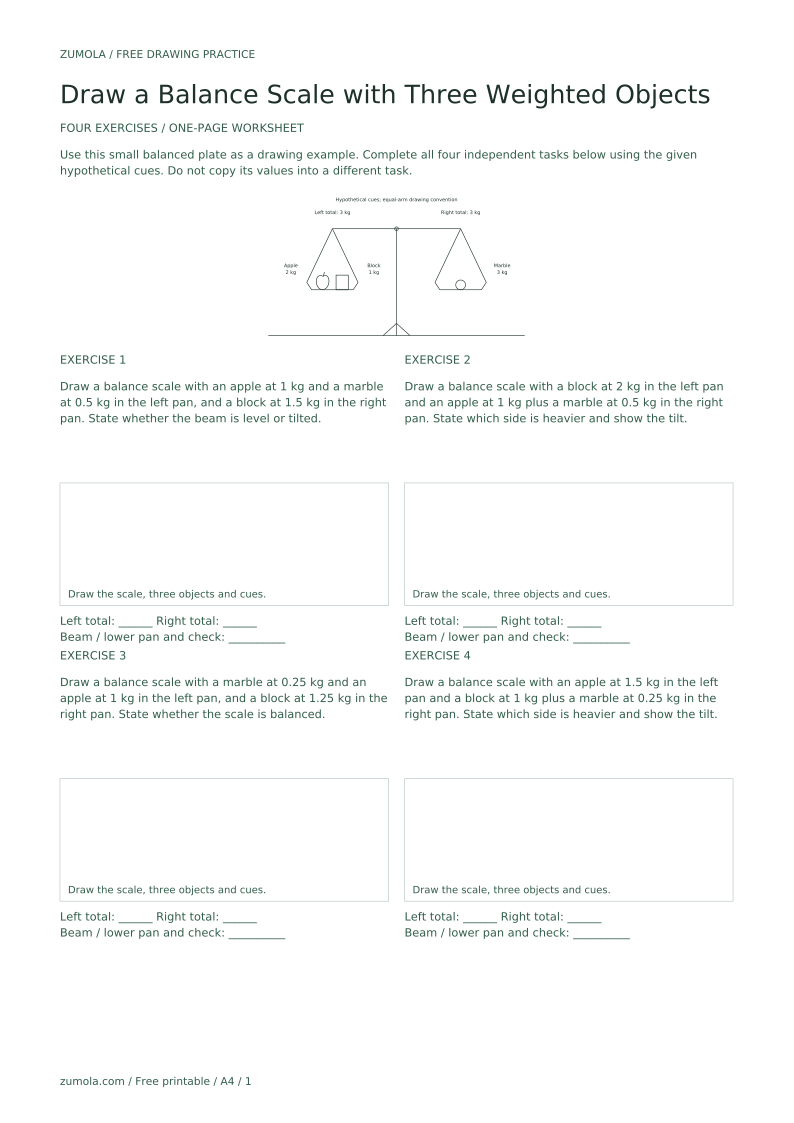
Draw a balance scale with three objects: an apple at 2 kg and a block at 1 kg in the left pan, and a marble at 3 kg in the right pan. Show whether the scale is balanced or tilted.
Left total: 2 kg + 1 kg = 3 kg. Right total: 3 kg. Totals are equal, so draw the beam level and both pans at the same height. Place the apple and block side by side in the left pan with a small gap, and the marble centered in the right pan. Write each weight cue beside its object in the same style. Add a caption: 'Balanced: 3 kg = 3 kg.'
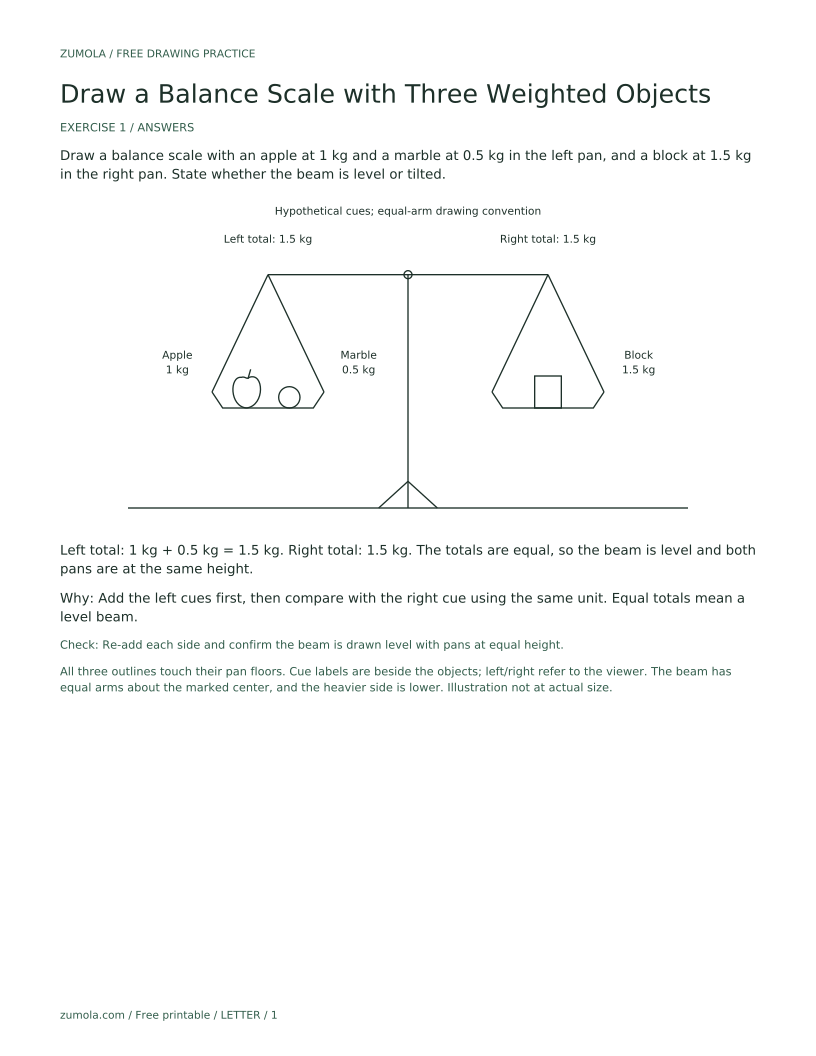
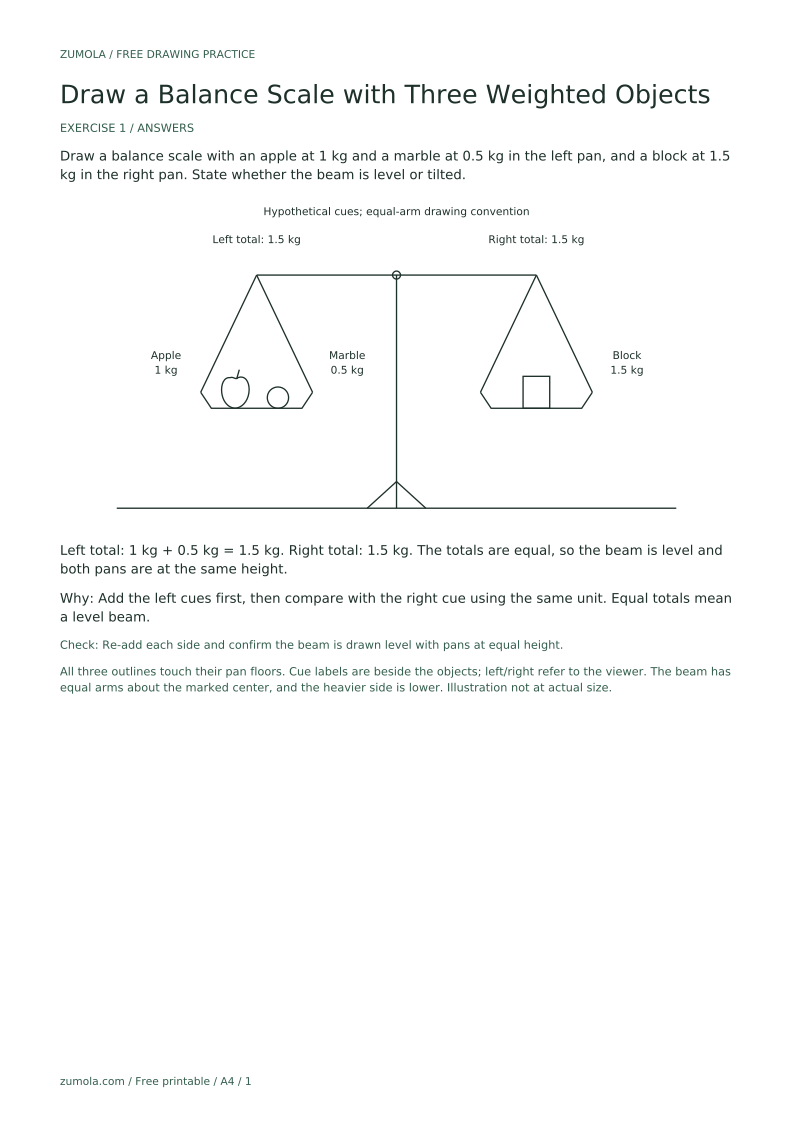
Draw a balance scale with an apple at 1 kg and a marble at 0.5 kg in the left pan, and a block at 1.5 kg in the right pan. State whether the beam is level or tilted.
Left total: 1 kg + 0.5 kg = 1.5 kg. Right total: 1.5 kg. The totals are equal, so the beam is level and both pans are at the same height.
Add the left cues first, then compare with the right cue using the same unit. Equal totals mean a level beam.
Check: Re-add each side and confirm the beam is drawn level with pans at equal height.
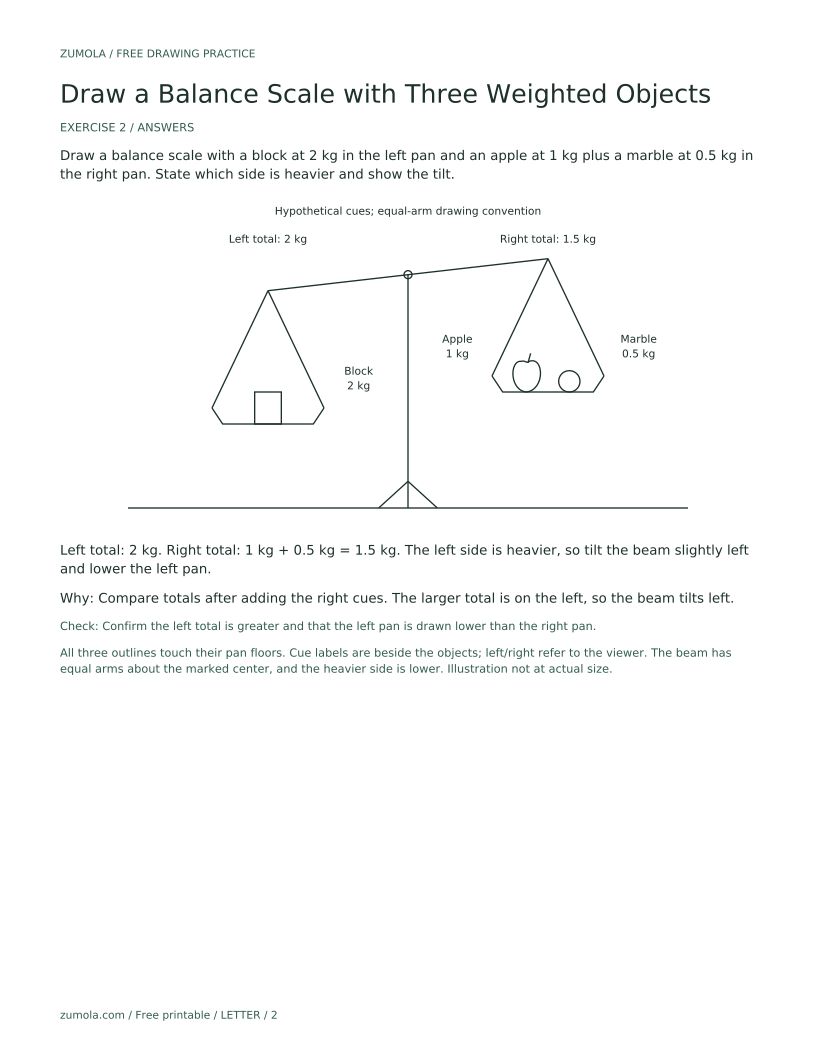
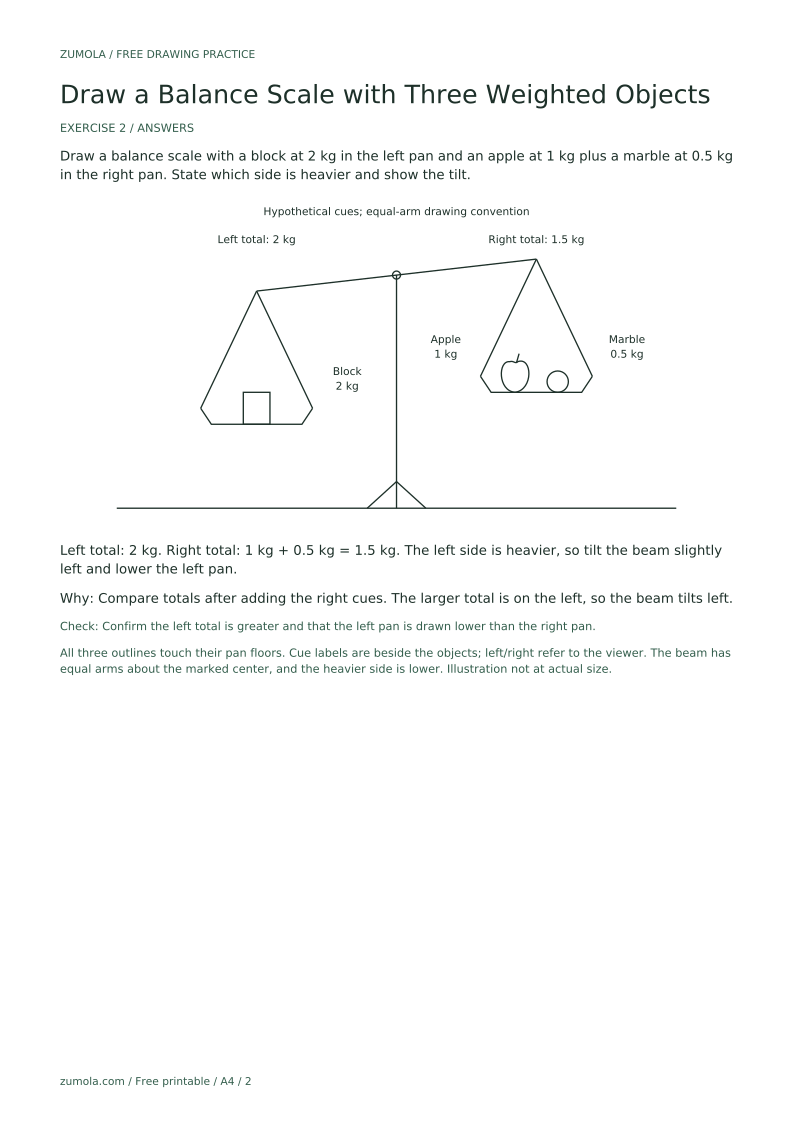
Draw a balance scale with a block at 2 kg in the left pan and an apple at 1 kg plus a marble at 0.5 kg in the right pan. State which side is heavier and show the tilt.
Left total: 2 kg. Right total: 1 kg + 0.5 kg = 1.5 kg. The left side is heavier, so tilt the beam slightly left and lower the left pan.
Compare totals after adding the right cues. The larger total is on the left, so the beam tilts left.
Check: Confirm the left total is greater and that the left pan is drawn lower than the right pan.
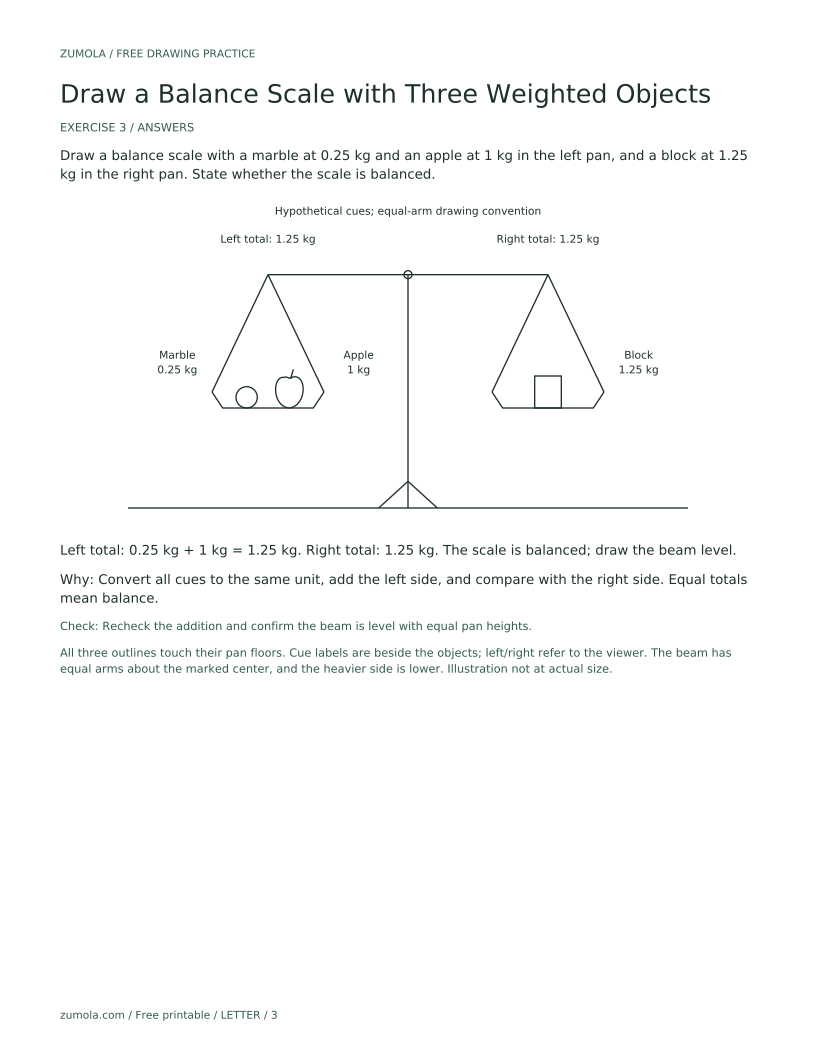
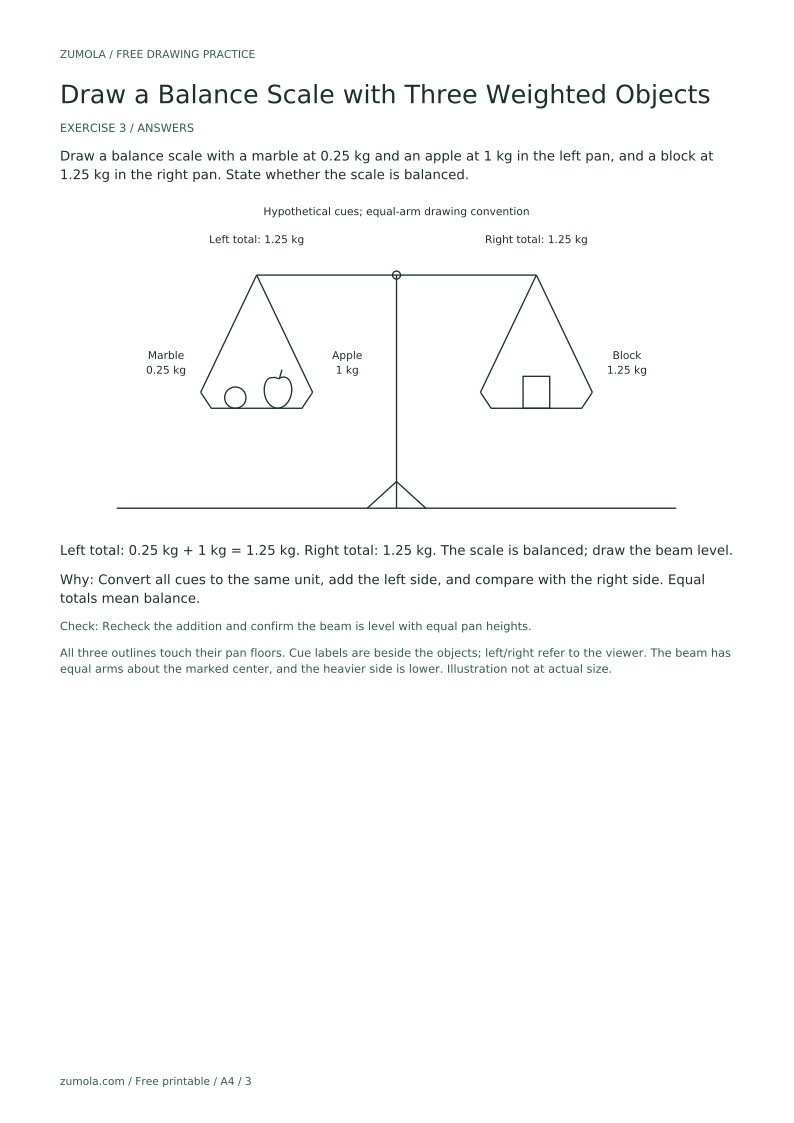
Draw a balance scale with a marble at 0.25 kg and an apple at 1 kg in the left pan, and a block at 1.25 kg in the right pan. State whether the scale is balanced.
Left total: 0.25 kg + 1 kg = 1.25 kg. Right total: 1.25 kg. The scale is balanced; draw the beam level.
Convert all cues to the same unit, add the left side, and compare with the right side. Equal totals mean balance.
Check: Recheck the addition and confirm the beam is level with equal pan heights.
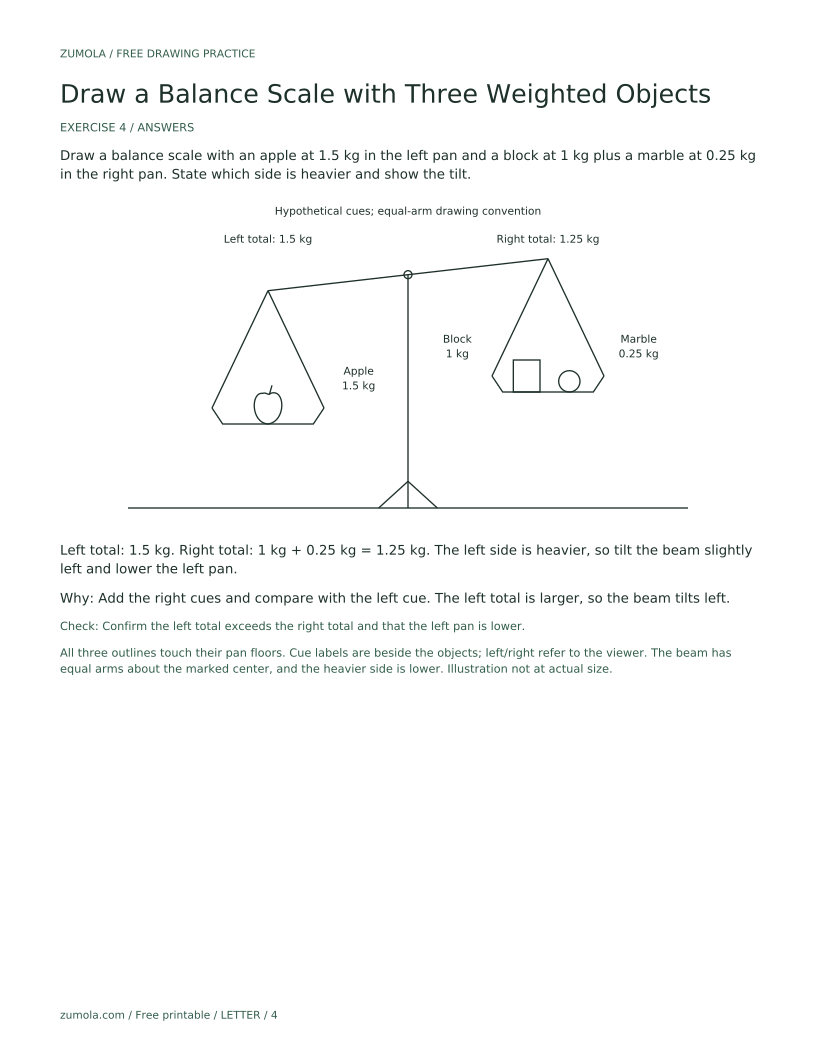
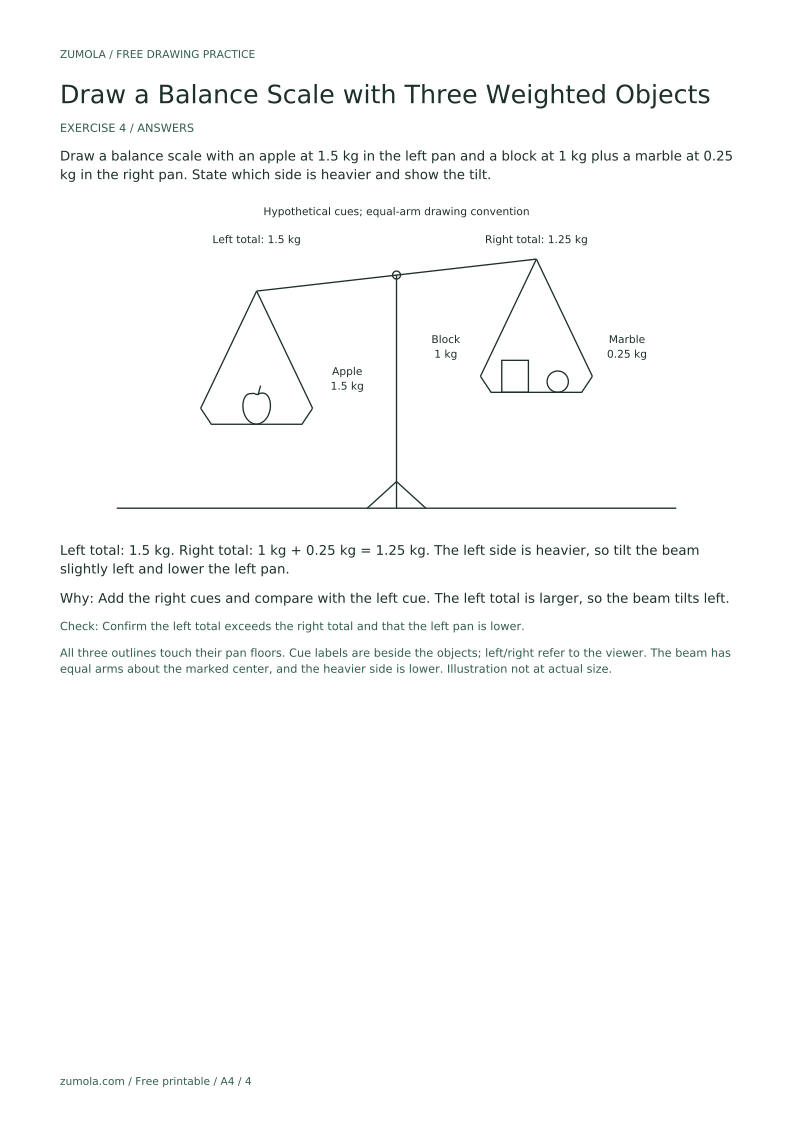
Draw a balance scale with an apple at 1.5 kg in the left pan and a block at 1 kg plus a marble at 0.25 kg in the right pan. State which side is heavier and show the tilt.
Left total: 1.5 kg. Right total: 1 kg + 0.25 kg = 1.25 kg. The left side is heavier, so tilt the beam slightly left and lower the left pan.
Add the right cues and compare with the left cue. The left total is larger, so the beam tilts left.
Check: Confirm the left total exceeds the right total and that the left pan is lower.
Use shallow curves or trapezoids and keep object outlines above the pan rim.
Place cues beside or above objects with a small gap, using one consistent style.
Lower the heavier pan slightly and raise the lighter pan to match the tilt.
Convert all cues to one unit before comparing totals.
No. The drawing may show a balanced scale or a tilt toward the heavier side. The key is that the weight cues and tilt agree.
No. The brief requires objects placed in the pans to show weighting; use both pans so a comparison is visible.
No. This lesson excludes realistic shading studies. Use clear outlines and simple details for identification.
Letter styles vary. The rubric allows valid alternatives as long as cues are readable and consistent.