Reference diagram
LETTER · Download PDF (2 pages)
Free original resources
Guide children to draw a simple balance scale using shapes, step cues, and a repeatable convention. Includes a six-box worksheet, four practice tasks, and separate worked answers.
Original reference diagrams, four practice exercises and separate worked answers. All files are free. No signup required.
LETTER · Download PDF (2 pages)
LETTER · Download PDF (5 pages)
LETTER · Download PDF (4 pages)
Choose A4 or US Letter for your printer. The reference and answer illustrations are not physical rulers; follow the scale instruction printed on the practice worksheet.
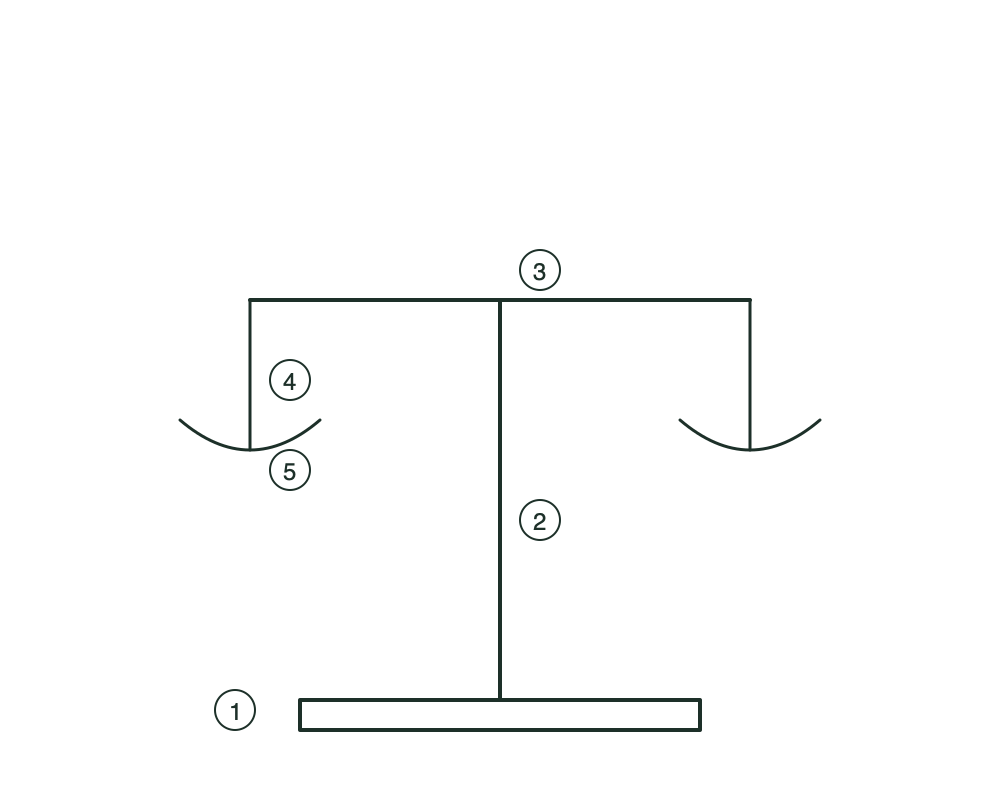
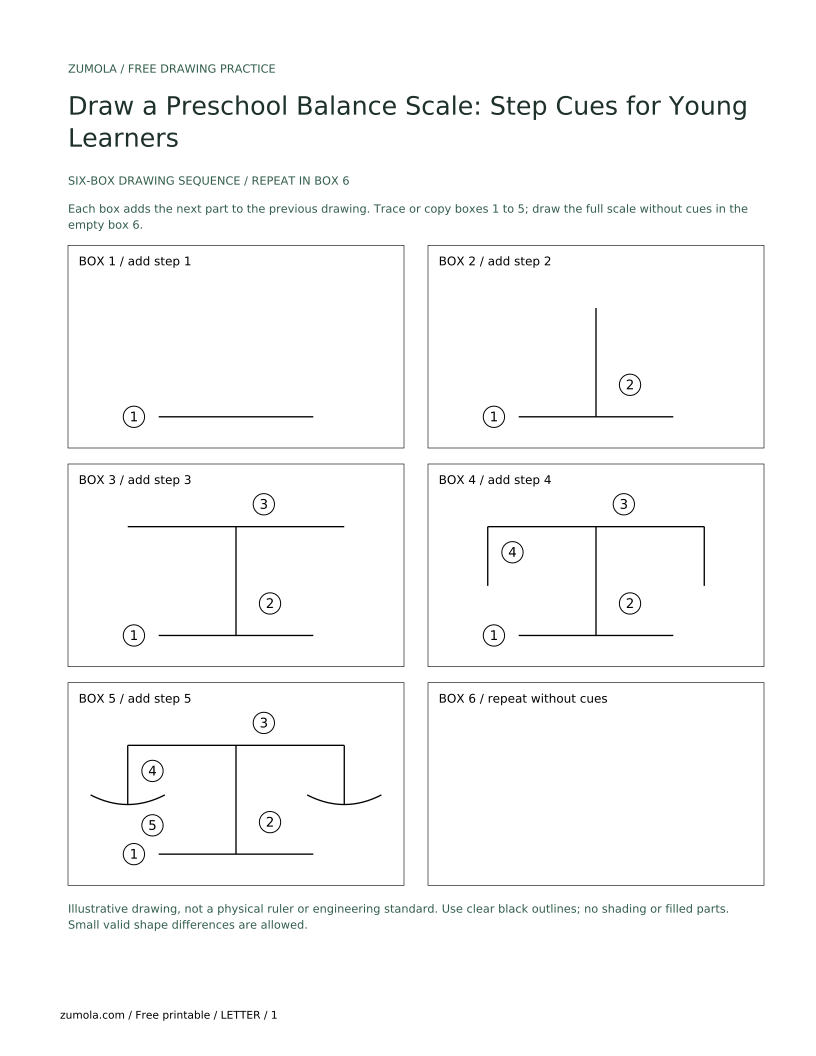
This lesson teaches a step-by-step drawing of a preschool balance scale using a clear convention: a central post, a horizontal beam, two hanging pans, and simple step cues. The drawing is black and white line art suitable for young learners. Letter styles and small shape variations are allowed; the rubric rewards recognizable structure and consistent step order rather than a single perfect copy.
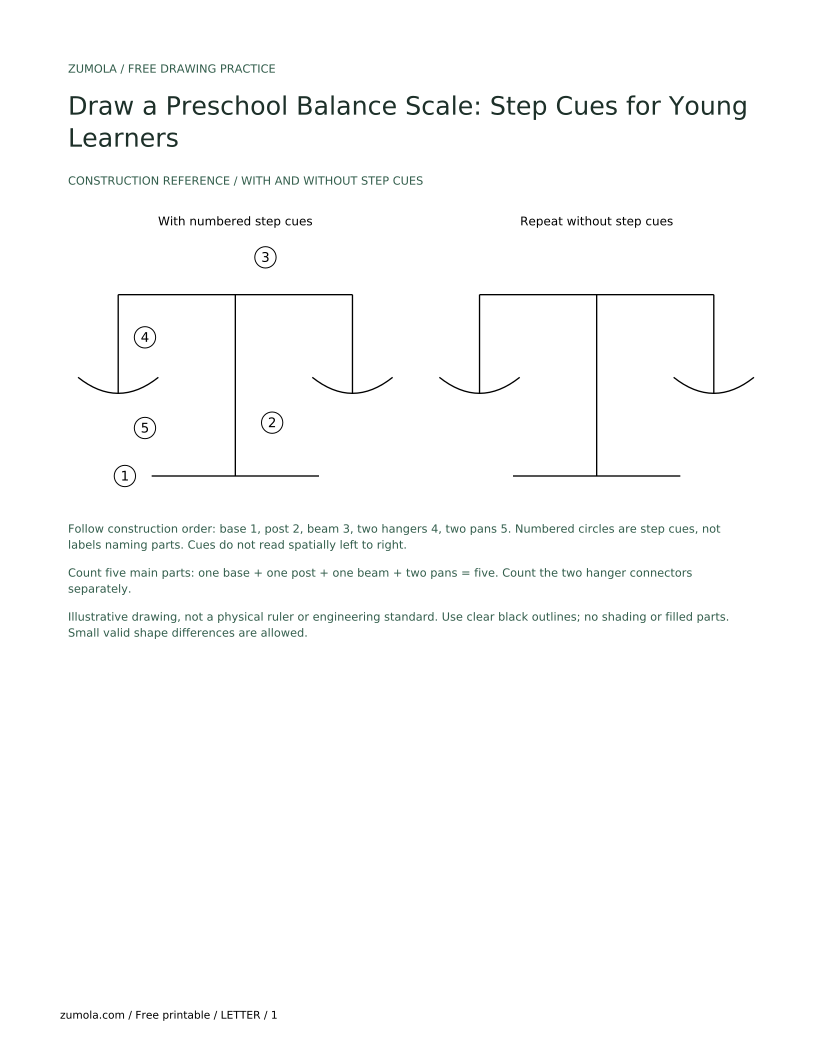
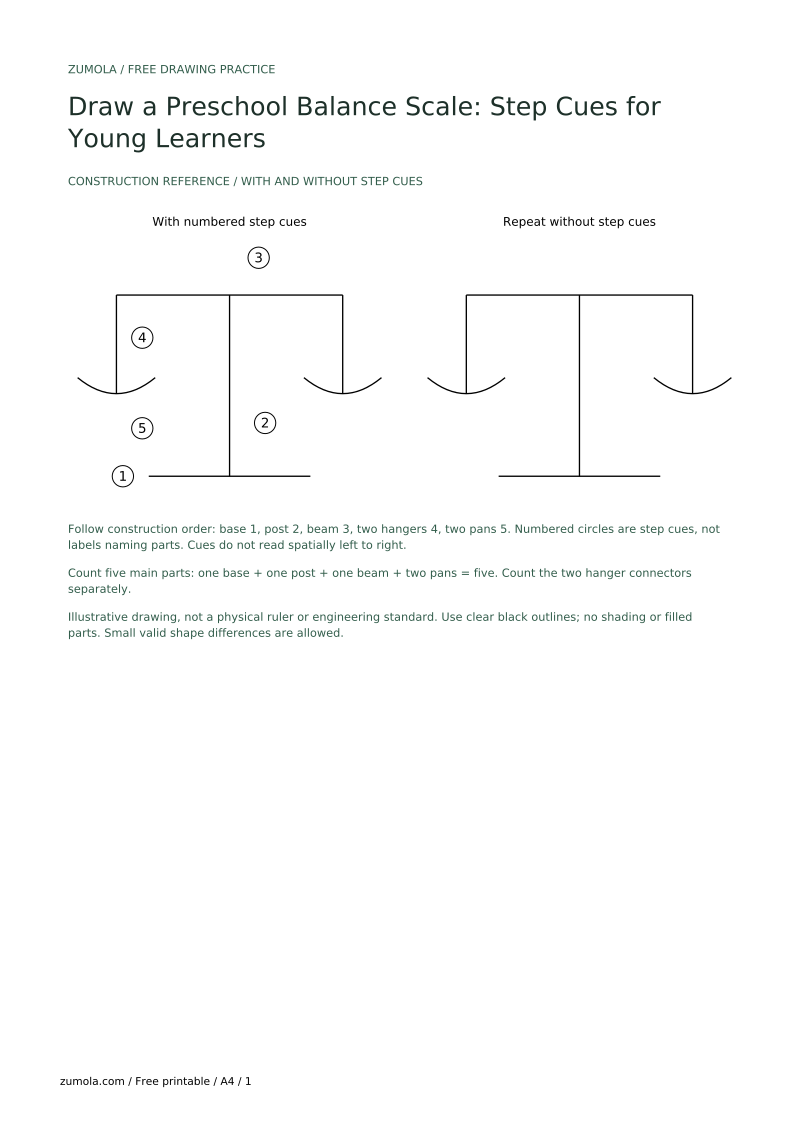
Use a simple convention so children can repeat the drawing: the post is a vertical line from the base to the beam; the beam is a horizontal line crossing the post near its top; each pan hangs from an end of the beam by a short vertical line and is drawn as a shallow curve or a small bowl shape. Step cues are small numbered circles placed beside each new line or shape, not labels naming parts.
Black and white means outlines only: no shading, no color fills. Keep line weight consistent. X-height is baseline to midline for any letters in step cues; letter styles vary, so a child may use uppercase, lowercase, or mixed case as long as the cue is readable. Numerical values in examples are hypothetical and chosen for easy counting.
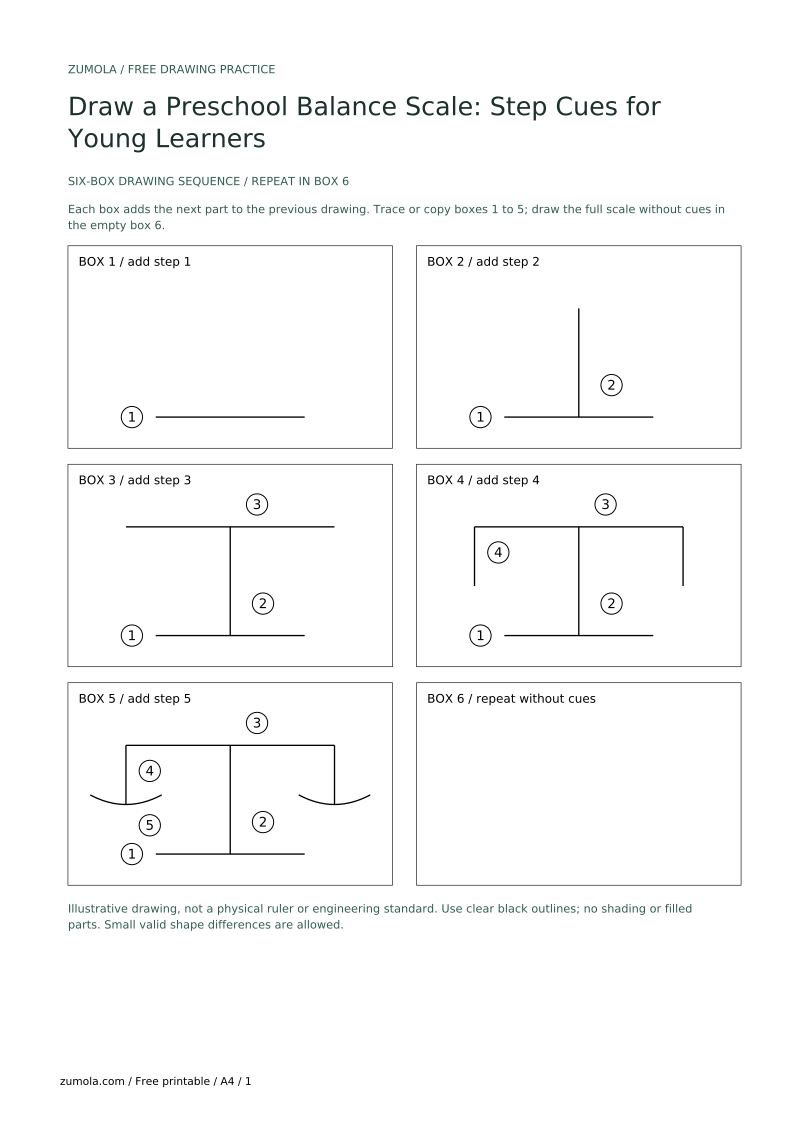
The sequence builds from the ground up. First the base, then the post, then the beam, then the hangers, then the pans. Step cues are added after each part so the child can see the order. A completed reference shows all cues in place; blank boxes let the learner repeat each step.
Keep the beam level in the reference drawing. A level beam is easier to check than a tilted one. If a child draws a slight tilt, the rubric still accepts it when the post, beam, and two pans are recognizable and the step cues are in order.
Check structure first: one base, one post, one beam, two hangers, two pans. Then check order: cues 1 to 5 appear beside the correct parts. Then check readability: lines are clear, pans are under hangers, and the beam crosses the post. Count the parts aloud with the child.
Use simple arithmetic in checks: two pans plus one beam plus one post plus one base gives five main parts. Hangers are counted separately as connectors, so the full structure has five main parts plus two hangers. If a child adds extra pans, ask them to count again. The goal is a recognizable preschool balance scale, not a measured engineering drawing.
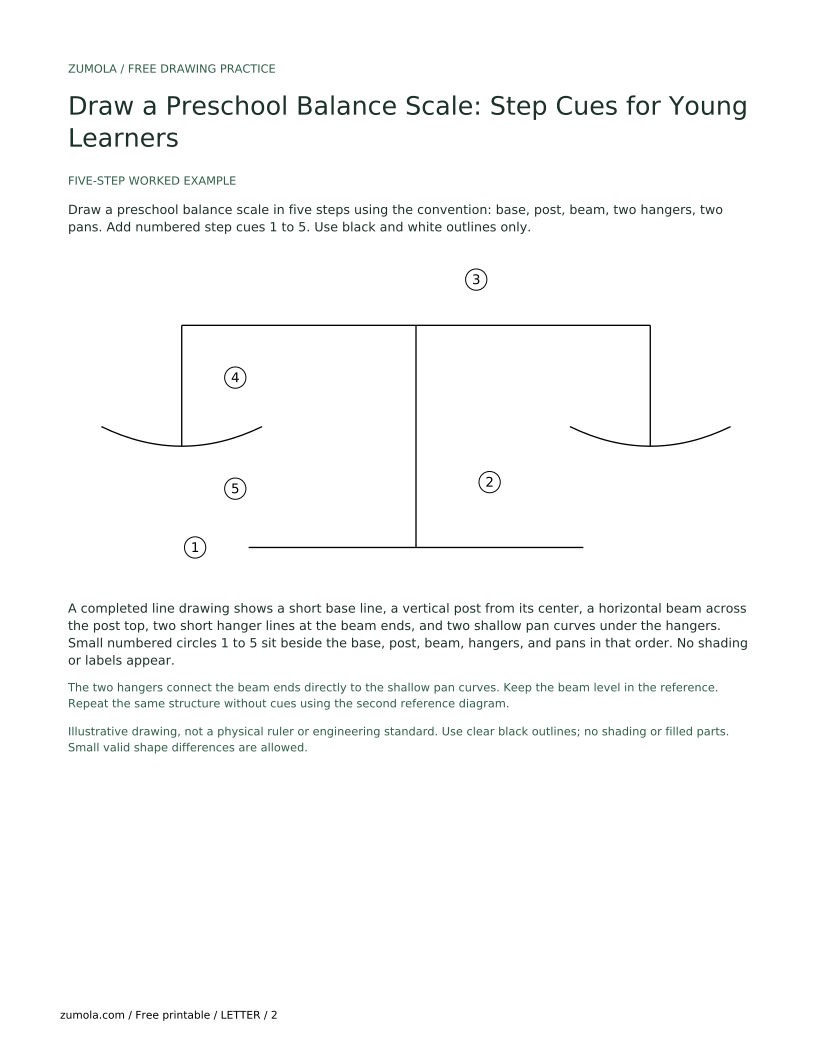
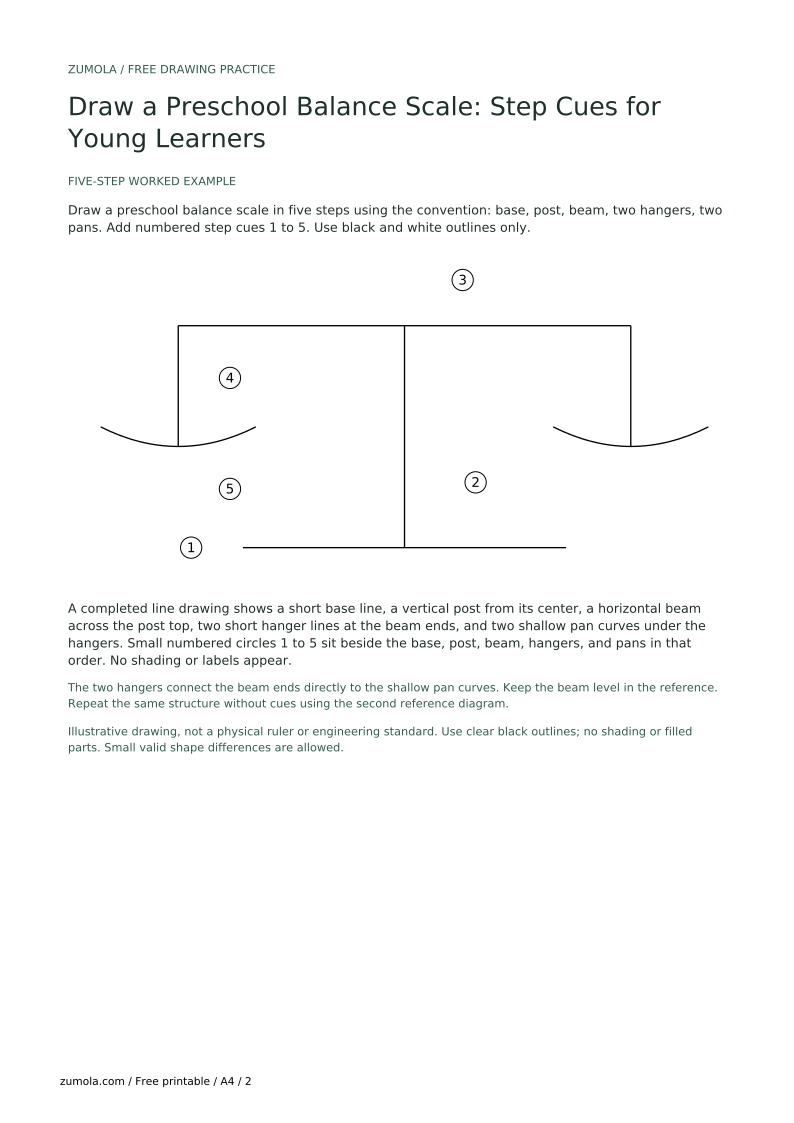
Draw a preschool balance scale in five steps using the convention: base, post, beam, two hangers, two pans. Add numbered step cues 1 to 5. Use black and white outlines only.
A completed line drawing shows a short base line, a vertical post from its center, a horizontal beam across the post top, two short hanger lines at the beam ends, and two shallow pan curves under the hangers. Small numbered circles 1 to 5 sit beside the base, post, beam, hangers, and pans in that order. No shading or labels appear.
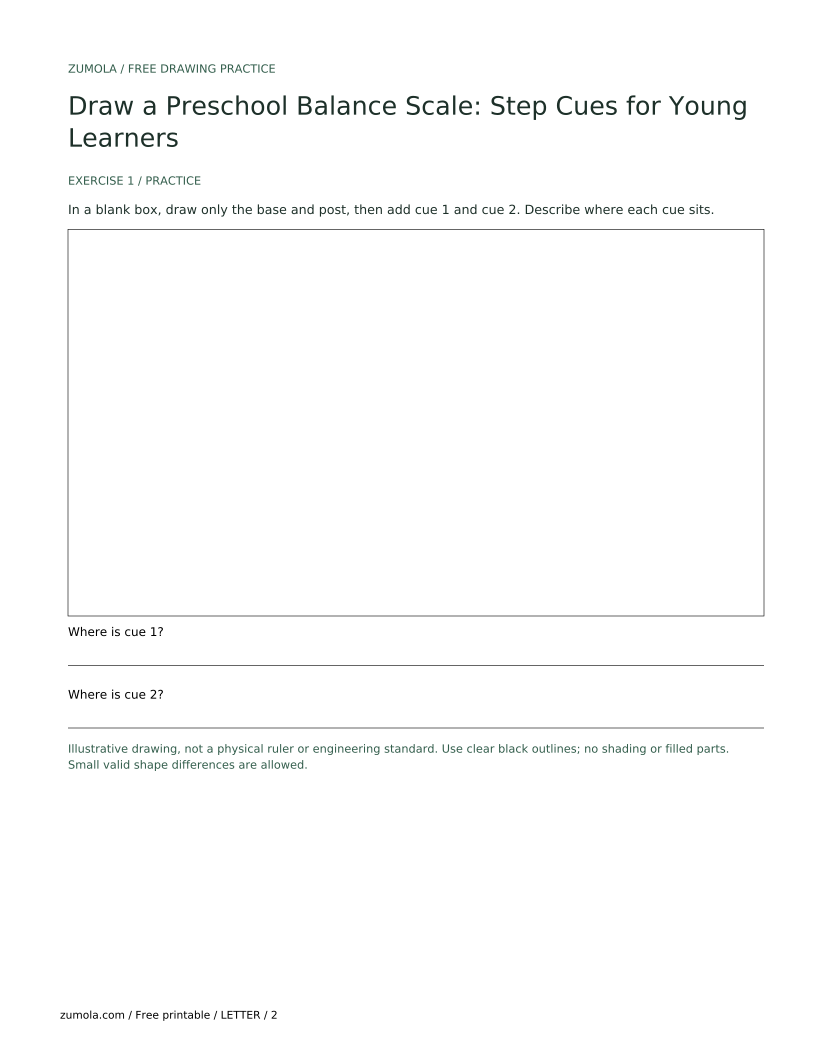
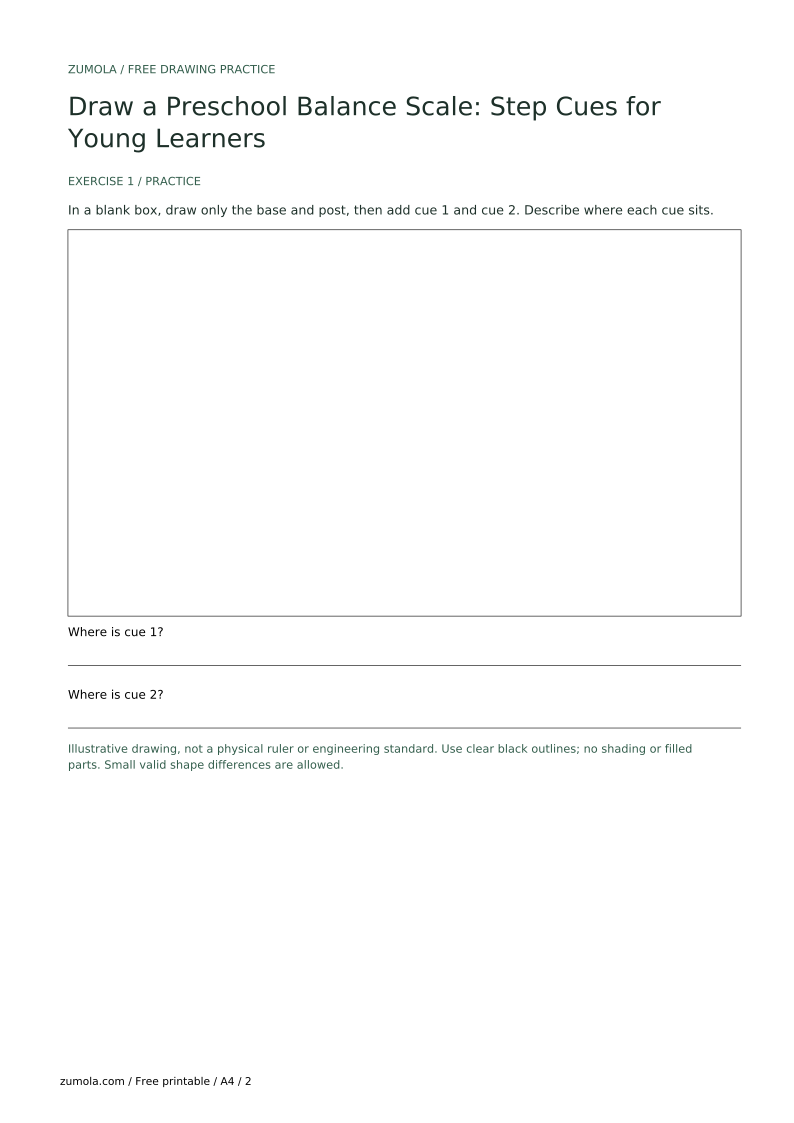
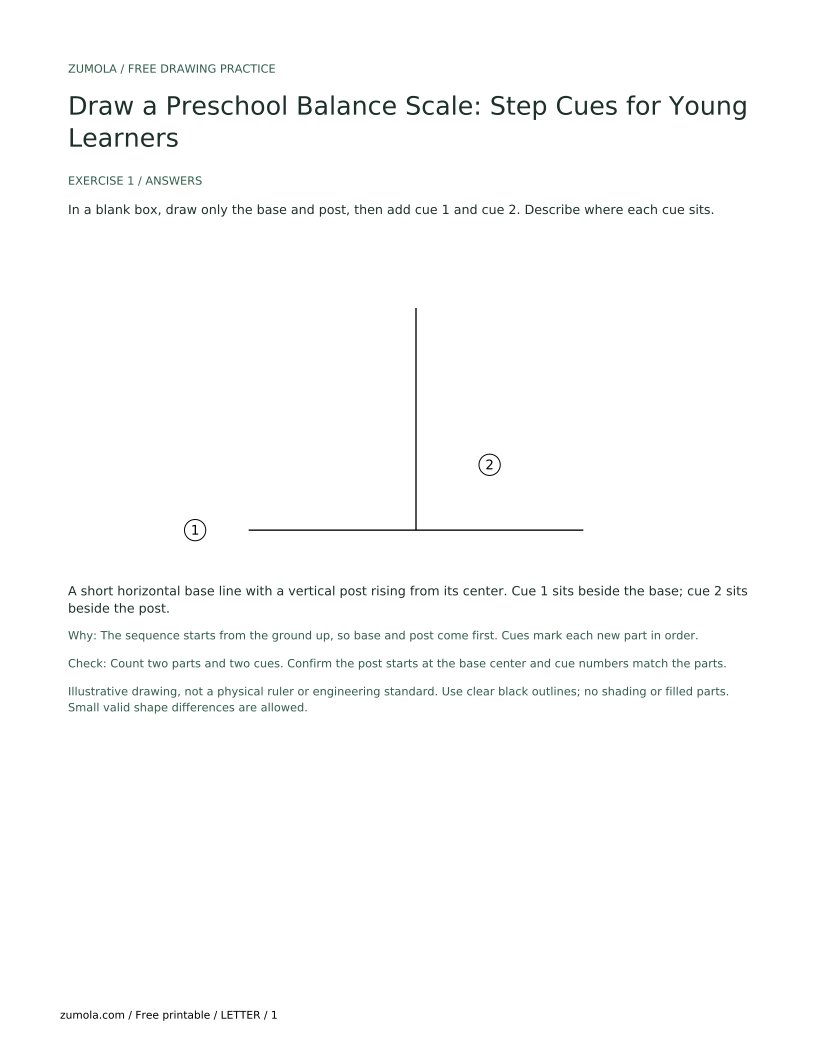
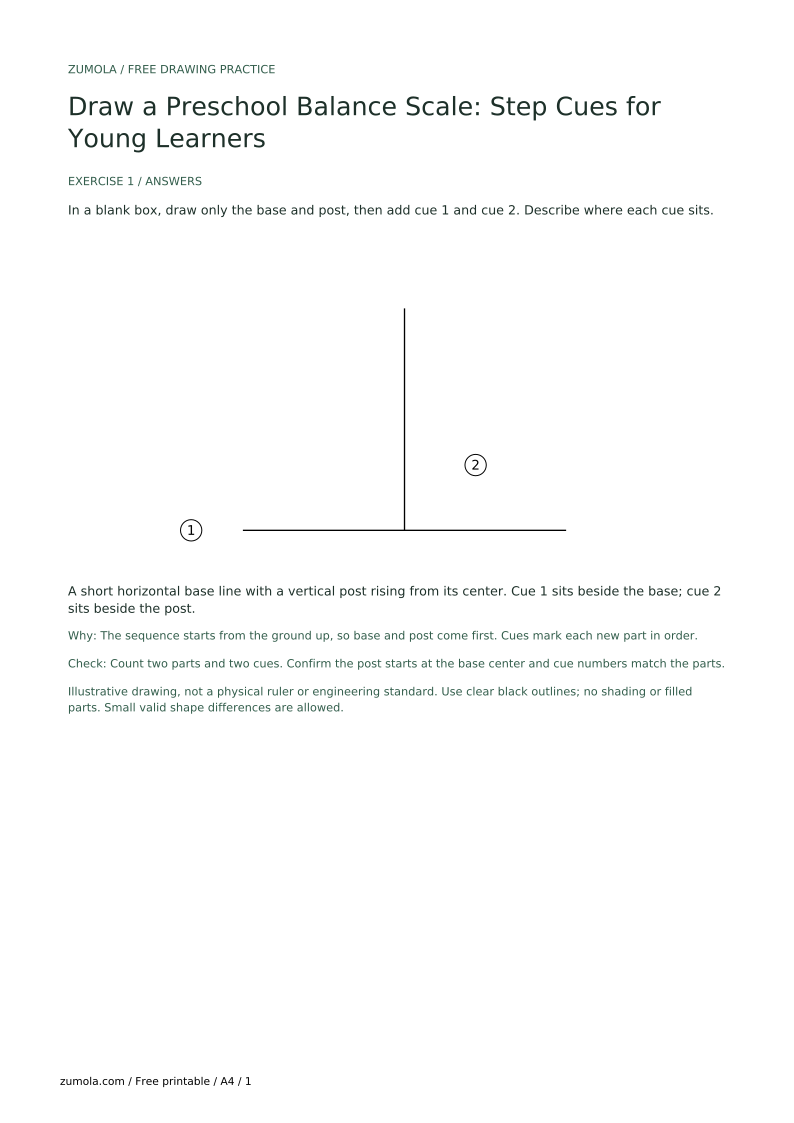
In a blank box, draw only the base and post, then add cue 1 and cue 2. Describe where each cue sits.
A short horizontal base line with a vertical post rising from its center. Cue 1 sits beside the base; cue 2 sits beside the post.
The sequence starts from the ground up, so base and post come first. Cues mark each new part in order.
Check: Count two parts and two cues. Confirm the post starts at the base center and cue numbers match the parts.
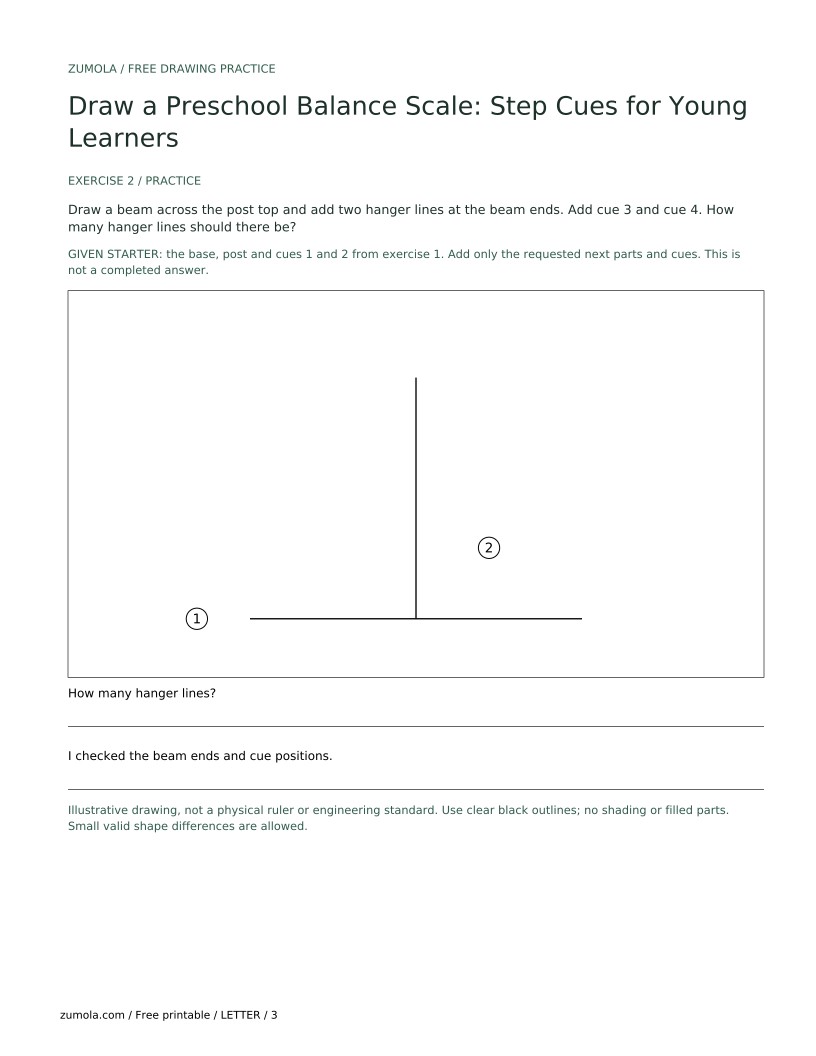
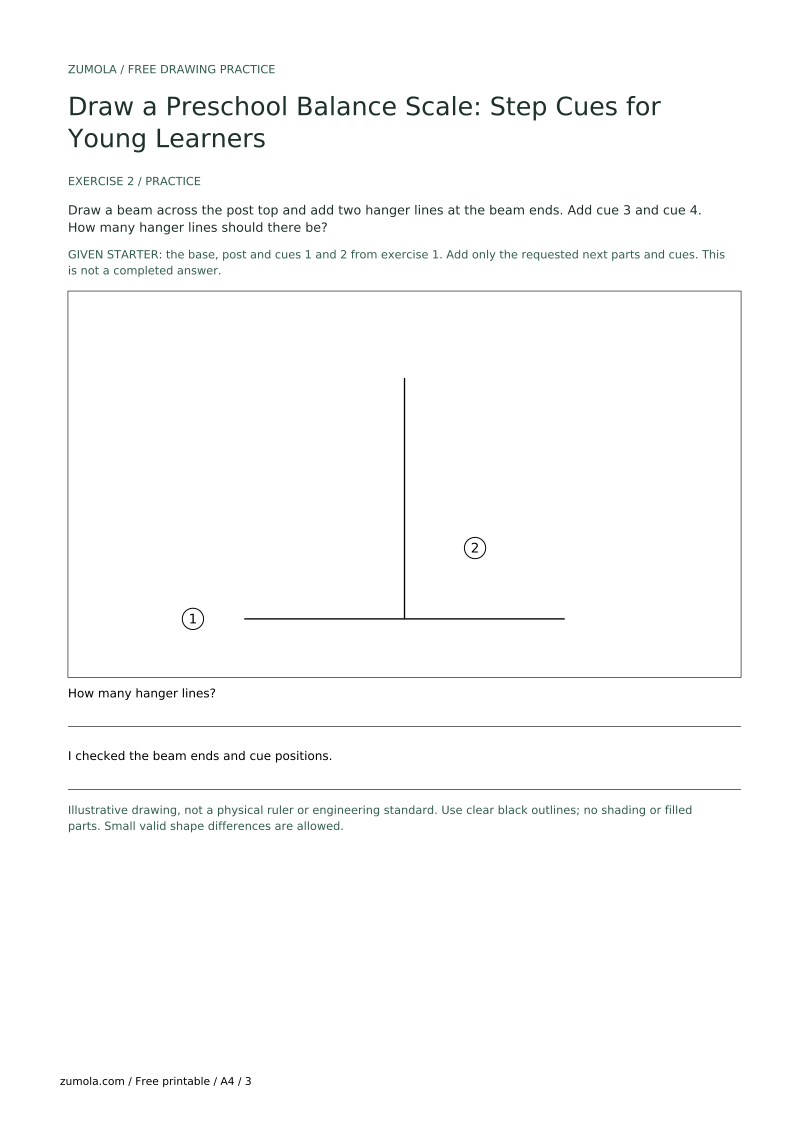
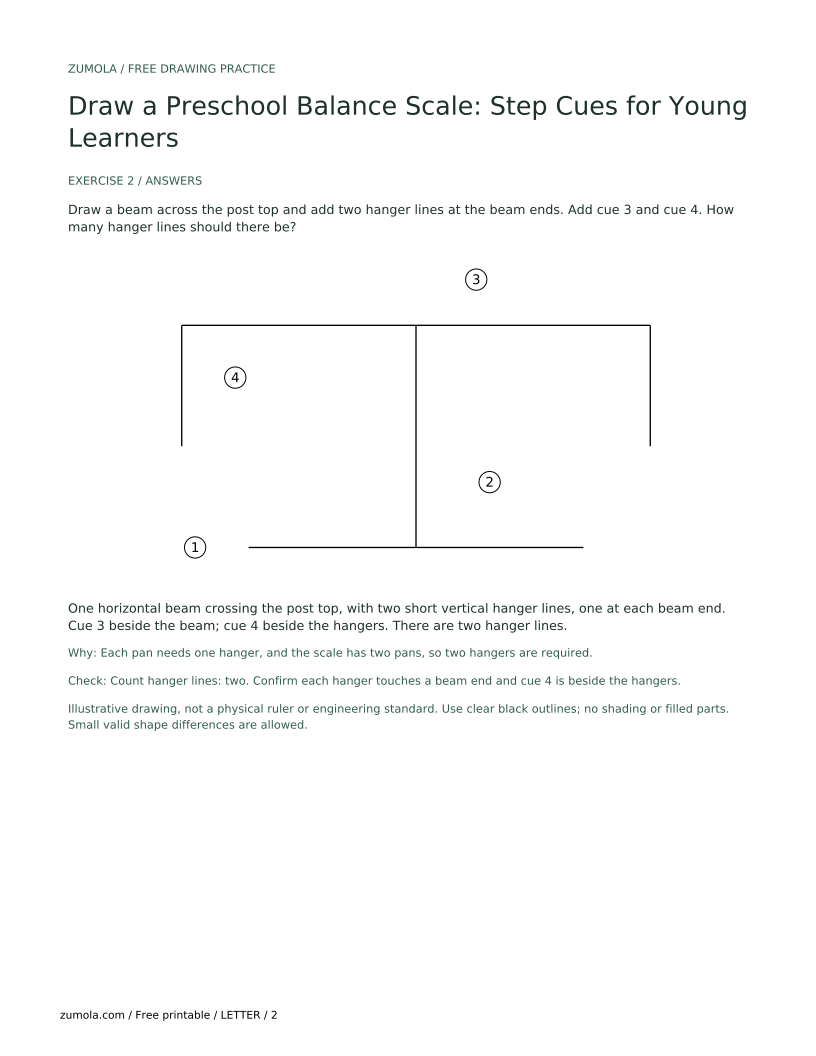
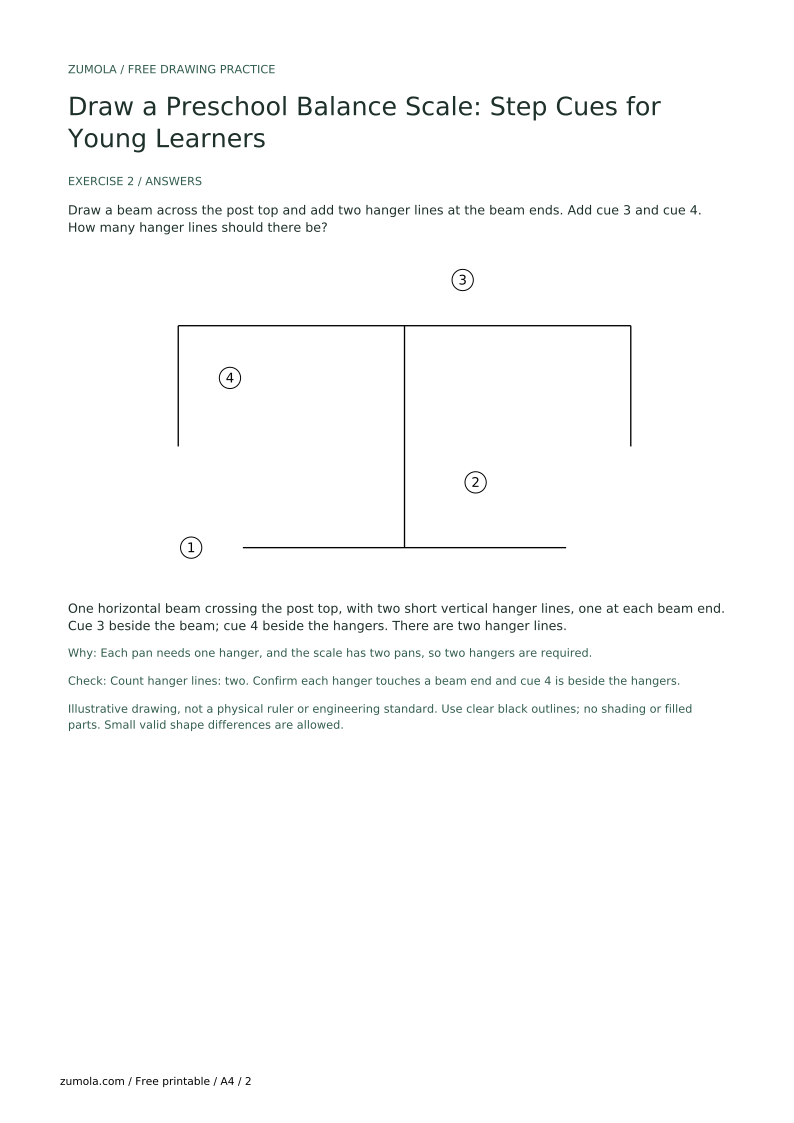
Draw a beam across the post top and add two hanger lines at the beam ends. Add cue 3 and cue 4. How many hanger lines should there be?
One horizontal beam crossing the post top, with two short vertical hanger lines, one at each beam end. Cue 3 beside the beam; cue 4 beside the hangers. There are two hanger lines.
Each pan needs one hanger, and the scale has two pans, so two hangers are required.
Check: Count hanger lines: two. Confirm each hanger touches a beam end and cue 4 is beside the hangers.
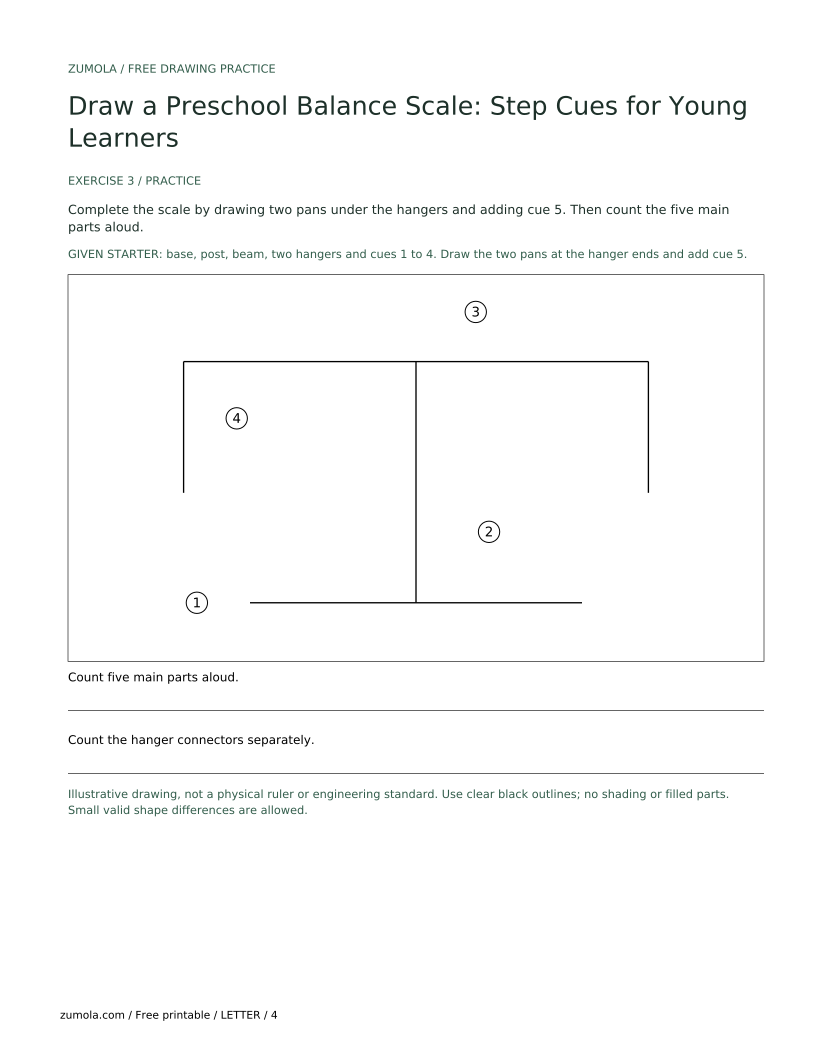
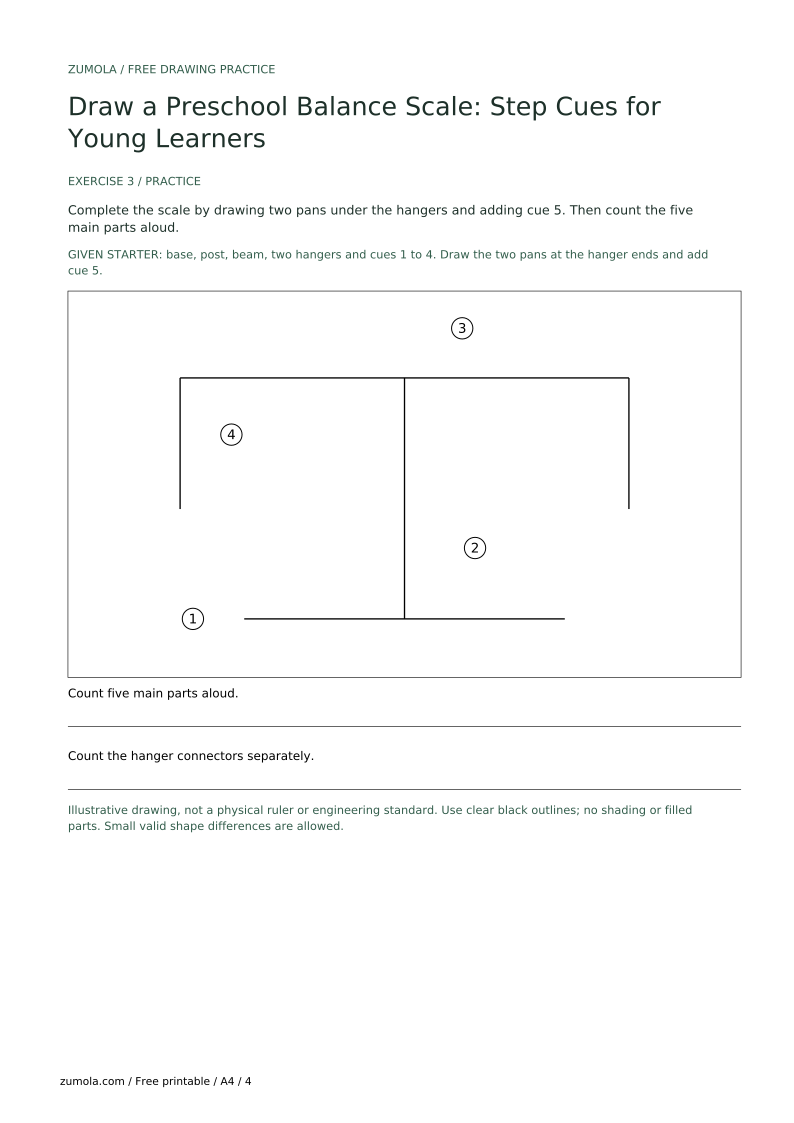
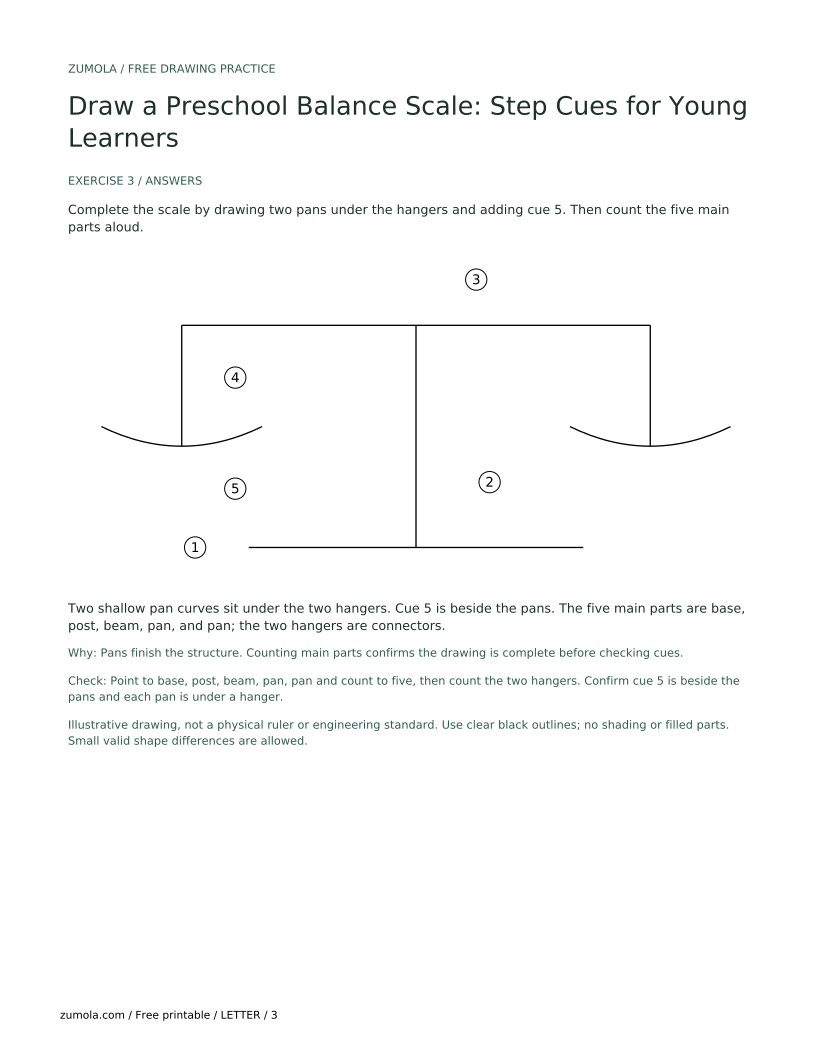
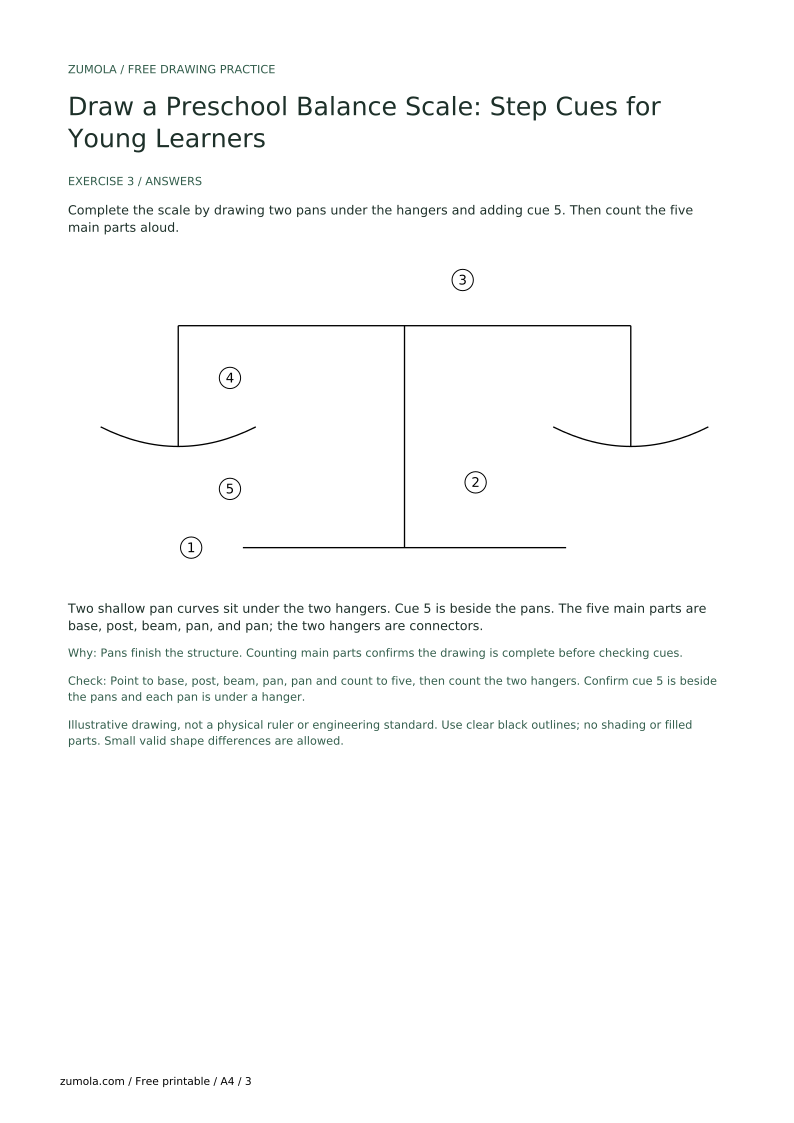
Complete the scale by drawing two pans under the hangers and adding cue 5. Then count the five main parts aloud.
Two shallow pan curves sit under the two hangers. Cue 5 is beside the pans. The five main parts are base, post, beam, pan, and pan; the two hangers are connectors.
Pans finish the structure. Counting main parts confirms the drawing is complete before checking cues.
Check: Point to base, post, beam, pan, pan and count to five, then count the two hangers. Confirm cue 5 is beside the pans and each pan is under a hanger.
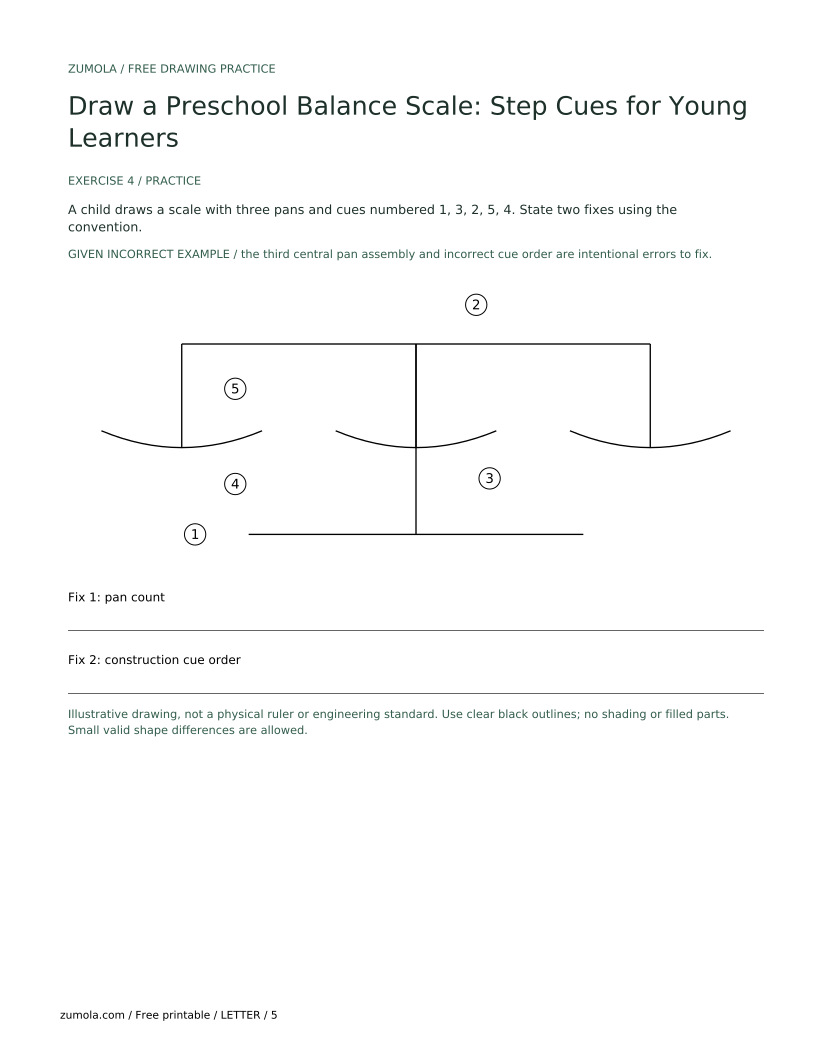
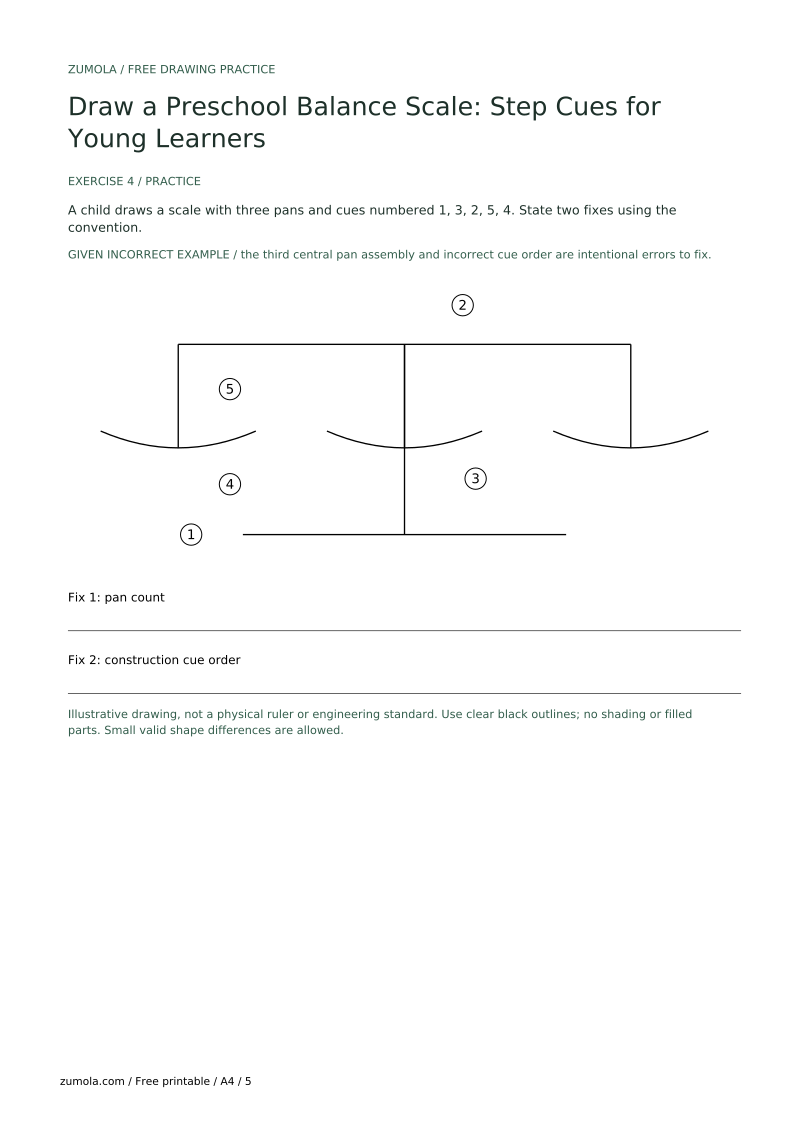
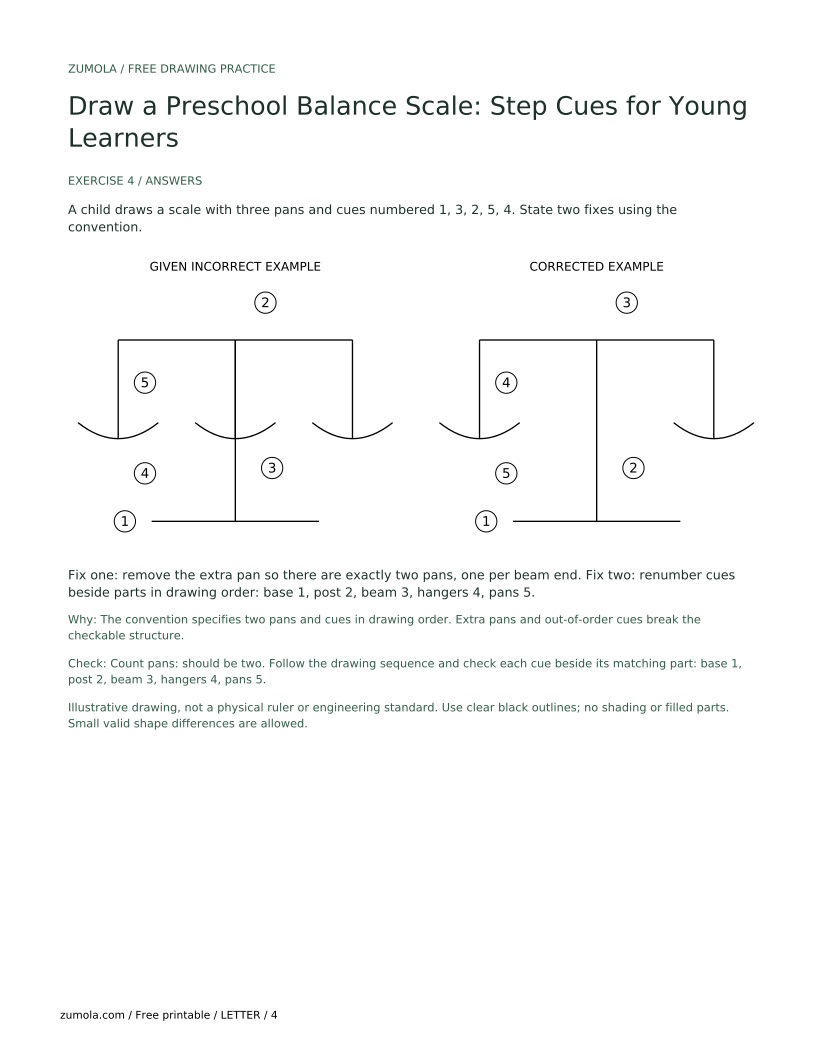
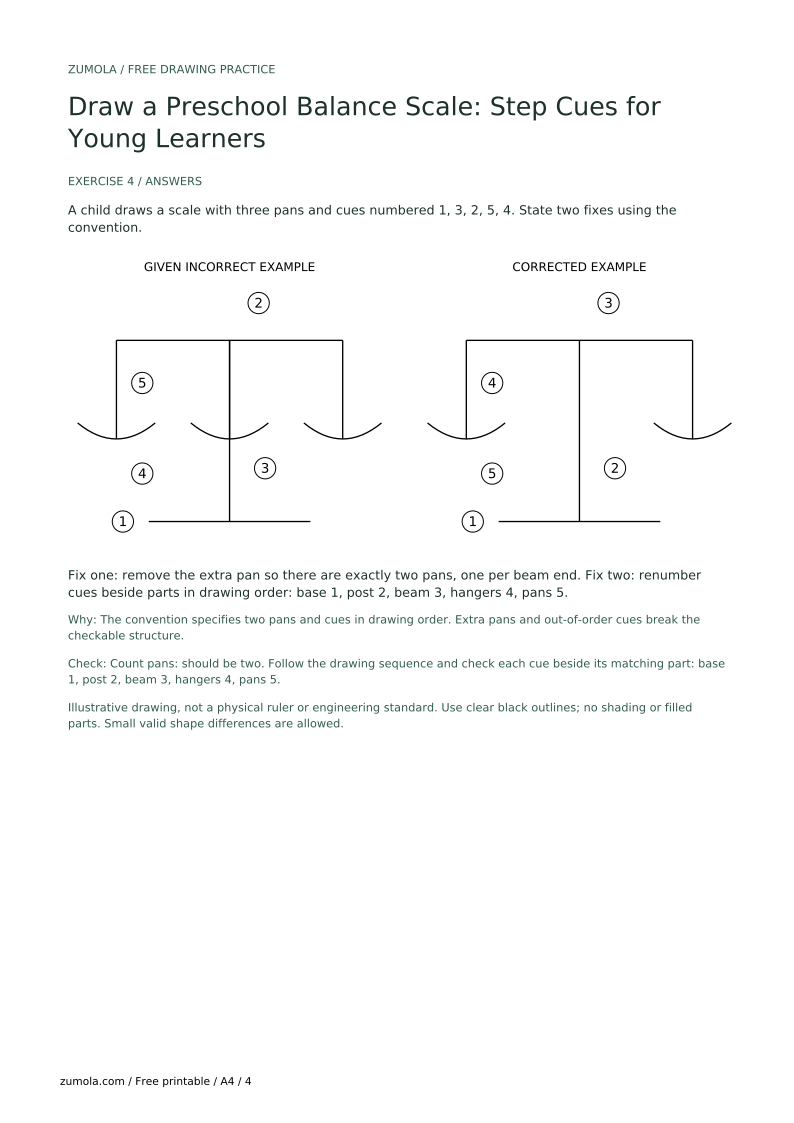
A child draws a scale with three pans and cues numbered 1, 3, 2, 5, 4. State two fixes using the convention.
Fix one: remove the extra pan so there are exactly two pans, one per beam end. Fix two: renumber cues beside parts in drawing order: base 1, post 2, beam 3, hangers 4, pans 5.
The convention specifies two pans and cues in drawing order. Extra pans and out-of-order cues break the checkable structure.
Check: Count pans: should be two. Follow the drawing sequence and check each cue beside its matching part: base 1, post 2, beam 3, hangers 4, pans 5.
Add a short vertical hanger from each beam end to its pan.
Renumber cues beside the parts in drawing order: base, post, beam, hangers, pans.
Extend the beam so each end has space for one hanger and one pan.
Replace labels with small numbered circles beside each new part.
No. The rubric accepts small differences in pan size or hanger length when the structure is clear and the step cues are in order.
Yes. X-height is baseline to midline, and letter styles vary. A readable cue in any case is acceptable.
No. They are hypothetical examples chosen for easy counting and checking.
The brief asks for black and white line drawing, so outlines only. No shading or color fills.