Free original lessons
Character Face Drawing: Proportion Grid and Expression Variants
Learn to place features on a character face using a simple proportion grid, then adapt the same construction for three distinct expressions.
Free lesson
Four exercises
Worked answers
Object Drawing Lessons
This lesson teaches a repeatable method for drawing a stylized character face. You will build a proportion grid, place the eyes, nose, mouth, and ears using checkable landmarks, and then vary those placements to create three expressions. The focus is on construction and expression, not realistic portraiture or full-body design. All measurements use a single unit: the face height. Work on paper with a pencil and eraser. The convention for art and handwriting is defined below so that valid alternatives are accepted rather than a single universal answer.
Practice materials: Printable downloads are not available for this lesson yet. Use the instructions and four exercises below.
Reference illustration
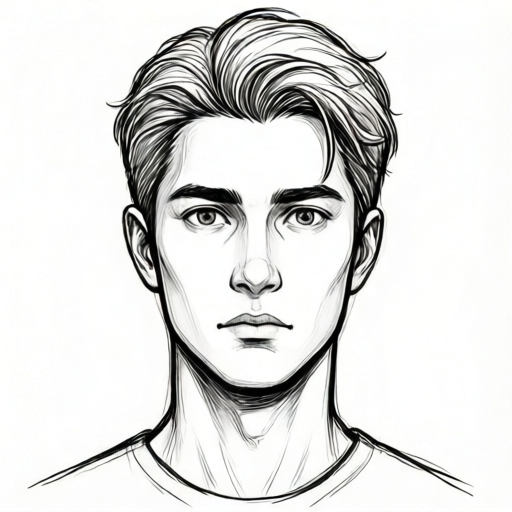
Use the stated measurements and conventions for each exercise.
Build the proportion grid
Start with a vertical oval for the face. Mark the top and bottom of the oval. The distance between them is one face height, written as 1H. Draw a vertical center line from top to bottom. Draw a horizontal midline halfway down; this is the eye line. Divide the lower half into three equal bands: the nose line sits at the first third below the midline, and the mouth line sits at the second third. The chin is the bottom of the oval.
Add a horizontal brow line slightly above the eye line, for example about 0.4H to 0.42H from the top, so it sits clearly between the top of the oval and the eye line. Mark ear zones between the brow line and the nose line on both sides of the oval. These landmarks are guides, not rigid rules; adjust them slightly for your character style while keeping the order top, brow, eye, nose, mouth, chin.
- Draw a vertical oval and label top and bottom; record 1H as the distance between them.
- Draw the vertical center line and the horizontal eye line at 0.5H from the top.
- Mark the nose line at 2/3 H (about 0.67H) and the mouth line at 5/6 H (about 0.83H) from the top, consistent with dividing the lower half into three equal bands.
- Add the brow line slightly above the eye line, for example about 0.4H to 0.42H from the top, so it stays clearly above the eye line and below the top of the oval.
- Check that all lines are horizontal or vertical and that the order of landmarks is correct.
Place features with checkable spacing
Place the eyes on the eye line. A common stylized convention is to leave one eye-width between the eyes and about half an eye-width from each eye to the side of the face. Draw the eyes as simple shapes first, then refine. Place the nose tip on the nose line at the center line. Place the mouth centered on the mouth line; its width can be about one and a half eye-widths for a neutral expression.
Ears sit in the ear zones, roughly between the brow and nose lines. Keep left and right features mirrored around the center line. Use light pencil so you can erase guides later. The convention here is that x-height for any lettering on the plate runs from baseline to midline; letter styles may vary, so accept any legible style that fits the space.
- Mark eye centers on the eye line using the one-eye-width gap convention.
- Draw eye shapes and check left-right symmetry against the center line.
- Place the nose tip on the nose line and the mouth center on the mouth line.
- Add ears in the ear zones and check that their tops and bottoms align with brow and nose lines.
- Erase construction lines only after a final landmark check.
Create three expression variants
Expression comes from small, consistent changes to the same grid. For a neutral face, keep brows level, eyes open, and mouth a gentle horizontal line. For a surprised face, raise the brows above the brow line, widen the eyes slightly, and open the mouth into a small oval centered on the mouth line. For a worried face, angle the inner brow ends upward, lower the outer brow ends slightly, and curve the mouth downward.
Keep the nose and ears in place across variants so the character remains recognizable. Change only the features that carry the expression. Label each variant with a short word using the x-height convention: baseline to midline, any legible letter style.
- Draw the neutral variant first and label it.
- Copy the grid and change only brow, eye, and mouth shapes for surprise.
- Copy the grid again and change only brow and mouth shapes for worry.
- Compare the three variants and confirm that nose and ear placement stayed consistent.
Check and refine
Use simple arithmetic checks. If 1H is 12 cm, the eye line is at 6 cm from the top, the nose line at about 8 cm, and the mouth line at about 10 cm. Measure your actual drawing with a ruler and compare. These numerical values are hypothetical examples; measure your own paper and equipment rather than assuming a standard.
Check symmetry by folding the paper along the center line or by measuring left and right distances. Check expression by asking whether the change is visible at a glance and whether the character still reads as the same person.
- Measure landmark heights and compare with your recorded 1H fractions.
- Check left-right symmetry of eyes and ears.
- Confirm each expression changes at least two features and keeps the nose fixed.
- Erase guides and darken final lines.
Worked example
A student draws a face with 1H equal to 10 cm. Where should the eye line, nose line, and mouth line be placed from the top?
Worked answer
Eye line at 5 cm, nose line at about 6.7 cm (2/3 of 10 cm), mouth line at about 8.3 cm (5/6 of 10 cm) from the top.
Four practice exercises
Exercise 1
A face has 1H equal to 16 cm. Calculate the height from the top for the eye line, nose line, and mouth line using the lesson fractions.
Show answer and check
Eye line 8 cm, nose line about 10.7 cm (2/3 of 16 cm), mouth line about 13.3 cm (5/6 of 16 cm).
Why: Multiply 16 cm by 0.5 for the eye line, by 2/3 (about 0.67) for the nose line, and by 5/6 (about 0.83) for the mouth line, then round to one decimal place.
Check: Add the distances back: 8 cm to the eye line, then about 2.7 cm to the nose line, then about 2.6 cm to the mouth line, totaling about 13.3 cm, leaving about 2.7 cm to the chin. The rounded values differ slightly from exact thirds (about 2.67 cm per band); measure your drawing and compare with the calculated positions.
Exercise 2
A student places the eyes 3 cm apart and each eye is 2 cm wide. Using the one-eye-width gap convention, what is the total width from the outer edge of the left eye to the outer edge of the right eye?
Show answer and check
6 cm.
Why: Left eye 2 cm + gap 2 cm + right eye 2 cm = 6 cm from outer edge to outer edge.
Check: Measure the drawn distance from the outer edge of the left eye to the outer edge of the right eye with a ruler and compare with 6 cm.
Exercise 3
Describe how to change a neutral face into a surprised face using the grid, and state one feature that must stay fixed.
Show answer and check
Raise the brows above the brow line, widen the eyes slightly, and open the mouth into a small oval on the mouth line; the nose tip stays on the nose line.
Why: Surprise is carried by raised brows, wider eyes, and an open mouth, while the nose anchor keeps the character consistent.
Check: Compare the two drawings and confirm at least two features changed and the nose position matches.
Exercise 4
A worried variant angles the inner brow ends upward and curves the mouth downward. If the mouth line is at 8.3 cm from the top on a 10 cm face, what is the distance from the mouth line to the chin?
Show answer and check
1.7 cm.
Why: Subtract 8.3 cm from 10 cm to find the remaining distance to the bottom of the oval.
Check: Measure the drawn distance from mouth line to chin and compare with 1.7 cm.
Common mistakes
- Placing the eyes too high or too low without measuring. Measure the eye line at half of 1H from the top and mark it before drawing eyes.
- Changing the nose position between expression variants. Keep the nose tip on the nose line in all variants; change only brows, eyes, and mouth.
- Making the mouth wider than the space between the outer eye corners. Use the one-and-a-half eye-width convention for a neutral mouth and check against the eye corners.
- Using heavy pencil for construction lines. Draw guides lightly so they erase cleanly and final features remain clear.
Self-check rubric
- Grid includes top, bottom, center line, eye line, brow line, nose line, and mouth line in correct order.
- Features are placed on the correct landmark lines with left-right symmetry.
- Three expression variants are present and each changes at least two features while keeping the nose fixed.
- Labels use the defined x-height convention and are legible.
- Final drawing is clean after erasing guides, and measurements are recorded and checked.
Questions and answers
Do I have to use the exact fractions given?
No. The fractions are a starting convention. Keep the order of landmarks and record your own chosen values so your checks remain consistent.
Can I use a different letter style for labels?
Yes. The convention defines x-height as baseline to midline; any legible letter style that fits the space is acceptable.
How many expressions should I draw?
Three variants are required for this lesson: neutral, surprised, and worried. You may add more if time allows.
What if my character has a different face shape?
Adjust the oval while keeping the landmark order and your recorded fractions. The method still applies.