Free original lessons
Charcoal Portrait Drawing: Facial Planes and Tonal Modeling
Learn to draw a charcoal portrait by mapping facial planes and building tonal modeling. Includes a worked example, four practice tasks, and a validation plan.
Free lesson
Four exercises
Worked answers
Object Drawing Lessons
This lesson teaches a structured approach to charcoal portrait drawing using facial planes and tonal modeling. You will learn to simplify the face into geometric planes, assign values to those planes, and blend charcoal to create depth. The method works for any face and allows personal style. All resources described are planned and free, not yet built. The convention for x-height is baseline to midline; letter styles vary, so handwriting is not graded on a single universal form. Numerical values in examples are hypothetical and should be replaced by measurements of your actual equipment.
Practice materials: Printable downloads are not available for this lesson yet. Use the instructions and four exercises below.
Reference illustration
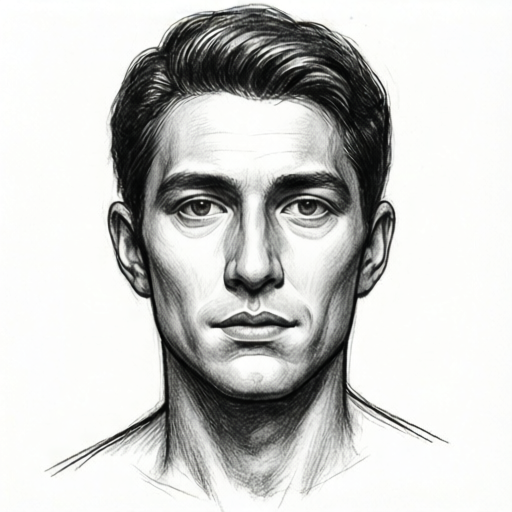
Use the stated measurements and conventions for each exercise.
Mapping Facial Planes
Facial planes are flat surfaces that approximate the curved forms of the face. Begin by drawing a simple oval for the head, then divide it with a vertical midline and a horizontal line through the eyes. Mark the brow ridge, the plane of the forehead, the cheekbone plane, the jaw plane, and the nose plane. These are not outlines but zones that will receive different tones.
Use a light charcoal stick or pencil to sketch these planes. Keep lines loose. The goal is to see the face as a collection of angled surfaces rather than a smooth mask. Check that the plane of the forehead tilts back slightly, the cheek plane angles toward the viewer, and the jaw plane slopes down and back.
- Draw a vertical oval and a crosshair for the eye line and midline.
- Mark the brow ridge and the top of the forehead plane.
- Sketch the cheekbone plane as a triangle from the outer eye corner to the jaw.
- Indicate the nose plane with two angled lines from the bridge to the nostrils.
- Draw the jaw plane as a curved band from the ear to the chin.
Assigning Tonal Values
Tonal modeling means using light and dark values to show form. Decide on a light source, for example from the upper left. Planes facing the light receive lighter charcoal; planes turning away receive darker charcoal. Use a value scale of five steps: very light, light, mid, dark, very dark. Assign each facial plane a value based on its angle to the light.
Keep the values consistent across the face. The forehead plane may be light, the cheek plane mid, the jaw plane dark, and the nose plane light with a dark side. Avoid blending too early; first block in the values with the side of the charcoal, then refine.
- Choose a light direction and mark it on your paper.
- Block the forehead plane with a light value.
- Block the cheek plane with a mid value.
- Block the jaw plane with a dark value.
- Add a dark accent under the nose and along the jawline.
- Blend gently with a paper stump or finger, keeping plane edges visible.
Refining Edges and Transitions
Edges between planes can be sharp or soft. A sharp edge occurs where two planes meet at a steep angle, such as the side of the nose. A soft edge occurs where planes curve gradually, such as the cheek to jaw. Use the charcoal tip for sharp edges and the side for soft transitions.
Check your drawing by squinting. Squinting reduces detail and reveals whether the tonal masses read correctly. If a plane disappears, increase its value contrast. If a plane looks too dark, lift charcoal with a kneaded eraser. Keep the overall value pattern simple and readable.
- Squint at the drawing to check tonal masses.
- Sharpen edges at the nose and brow.
- Soften the transition from cheek to jaw.
- Lift excess charcoal with a kneaded eraser where needed.
- Add final dark accents at the nostrils and mouth corners.
Worked example
A face is lit from the upper right. The forehead plane faces the light, the left cheek plane turns away, the jaw plane is in shadow, and the nose plane is split. Assign hypothetical values from a five-step scale (1 very light to 5 very dark) and describe the charcoal application.
Worked answer
Forehead plane: value 2 (light). Left cheek plane: value 4 (dark). Jaw plane: value 5 (very dark). Nose plane: right side value 2, left side value 4. Apply charcoal with the side of the stick for broad planes, then sharpen edges at the nose bridge and jawline. Blend the cheek-to-jaw transition softly. Check by squinting: the left side of the face should read darker than the right.
Four practice exercises
Exercise 1
Draw a face oval and mark four facial planes: forehead, cheek, jaw, nose. Use a hypothetical light from the left. Assign values 1 to 5 and shade each plane with charcoal or pencil.
Show answer and check
Forehead value 2, cheek value 3, jaw value 4, nose value 2 with a dark side value 4. Shade with the side of the charcoal, keeping plane edges visible.
Why: Planes facing the light receive lighter values; planes turning away receive darker values. The nose is split because it has two angled sides.
Check: Squint at the drawing. The left side should appear lighter overall. Verify that four distinct values are visible and that plane edges are not fully blended away.
Exercise 2
Sketch a face with a light source from above. Divide the forehead into two planes and the jaw into two planes. Assign values and describe where you would use a sharp edge and where a soft edge.
Show answer and check
Forehead top plane value 1, forehead lower plane value 3. Jaw upper plane value 3, jaw lower plane value 5. Sharp edge between forehead planes; soft edge from jaw to neck.
Why: A steep angle between planes creates a sharp edge; a gradual curve creates a soft edge. The top forehead faces the light directly.
Check: Check that the top forehead is the lightest area and the lower jaw is the darkest. Confirm the sharp edge is visible at the forehead break and the jaw transition is blended.
Exercise 3
Using a five-step value scale, model a nose plane with a light side and a dark side. State the values and the charcoal technique for each side.
Show answer and check
Light side value 2 applied with the flat side of the charcoal; dark side value 4 applied with the tip and blended slightly toward the bridge.
Why: The nose has two angled planes; the side facing the light is lighter. The tip allows precise dark accents.
Check: Squint to confirm the dark side reads clearly darker. Check that the transition at the bridge is not a hard outline but a value change.
Exercise 4
Draw a jaw plane in shadow with value 5 and an adjacent cheek plane with value 3. Describe how you would lift charcoal if the jaw becomes too dark and how you would check the result.
Show answer and check
Lift charcoal with a kneaded eraser in small dabs, then reapply value 5 lightly. Check by comparing the jaw to the cheek; the jaw should remain darker but not uniformly black.
Why: Kneaded erasers lift charcoal without damaging paper. Reapplying lightly restores the intended value.
Check: Use a scrap paper value scale to compare. Squint at the drawing; the jaw should read as the darkest plane while still showing some variation.
Common mistakes
- Outlining the face with a single dark line. Replace outlines with plane edges and value changes; let the charcoal tone define the form.
- Blending everything until planes disappear. Blend selectively and keep at least three distinct plane edges visible.
- Using inconsistent light direction. Mark the light source on the paper and check every plane against it.
- Making all planes the same value. Assign five distinct values and test them on a scrap paper before applying.
Self-check rubric
- Planes are clearly indicated for forehead, cheek, jaw, and nose.
- At least four distinct tonal values are used consistently.
- Light direction is consistent across all planes.
- Edges are sharp where planes meet steeply and soft where they curve.
- Charcoal is applied with control; excessive smudging is avoided.
- The portrait reads as a three-dimensional form when squinted at.
- Valid alternative plane divisions and personal stylistic choices are accepted if the tonal logic holds.
Questions and answers
Do I need special charcoal paper?
Any paper with some tooth works. Measure your paper's texture by testing a charcoal stroke; if it smudges too easily, use a smoother paper.
How do I keep the portrait from looking flat?
Increase value contrast between adjacent planes and keep edges sharp where planes meet at steep angles.
Can I use pencil instead of charcoal?
Yes. The same plane and value method applies; adjust pressure to match the tonal steps.
How do I fix a plane that is too dark?
Lift charcoal with a kneaded eraser and reapply a lighter value, checking against your value scale.