Free original lessons
Cat Contour Drawing: Single-Line Outline and Blind-Contour Practice
Learn cat contour drawing with a continuous single-line outline, blind-contour drills, and edge-focus prompts for ears, tail, and paws. Includes rubric and four practice tasks.
Free lesson
Four exercises
Worked answers
Object Drawing Lessons
Contour drawing records the visible edge of a subject with one continuous line, without shading or fur texture. For a cat, the challenge is to keep the pencil moving while tracking the silhouette: the curve of the head, the points of the ears, the sweep of the tail, and the small bumps of the paws. This lesson separates two skills. First, blind contour: you draw without looking at the paper, training your eye to follow edges slowly. Second, single-line contour: you look at the paper but keep one unbroken line, planning the route around the cat. You will use a simple convention: x-height means the distance from the baseline to the midline of lowercase letters, used here only to describe relative proportions in a diagram, not a fixed measurement. Letter styles vary, so treat any numerical proportion as a hypothetical example you can adjust. All resources described are planned and free; none are built yet.
Practice materials: Printable downloads are not available for this lesson yet. Use the instructions and four exercises below.
Reference illustration
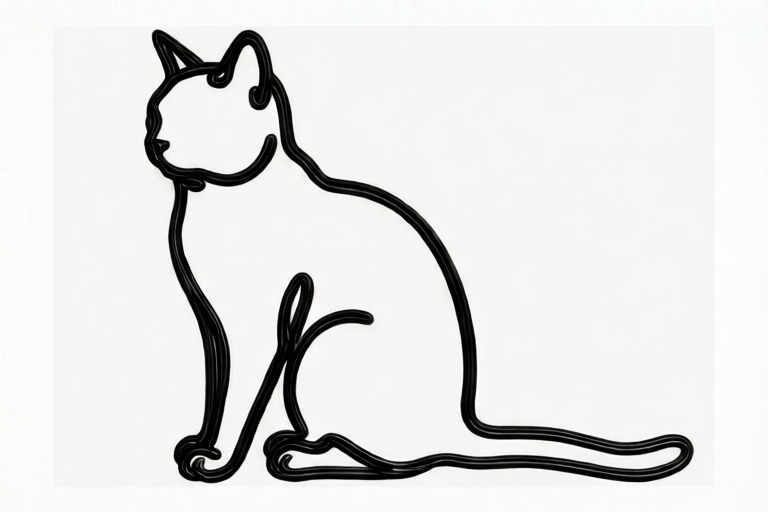
Use the stated measurements and conventions for each exercise.
See the edge before you draw it
Contour drawing begins with slow looking. Trace the cat's outline in the air with your finger before touching the paper. Start at the nose, move over the forehead, around one ear, down the back, along the tail, and return under the paws to the chin. Say the direction aloud: up, curve, point, down. This air-trace builds a mental route so the single line does not stall.
Use edge-focus prompts to guide attention. For ears, notice where the outer edge turns sharply and where the inner edge meets the head. For the tail, follow the outer curve and the tip without adding fur. For paws, look for the small rounded bumps where the leg meets the floor. Keep the line on the silhouette; do not draw whiskers, eyes, or fur tufts in this stage.
- Place the cat reference or a simple outline plate in front of you.
- Air-trace the full contour once, naming each turn.
- Set the pencil at the nose and begin a blind contour for 60 seconds without looking at the paper.
- Rest, then make a single-line contour while looking at the paper, keeping the pencil down.
- Compare the two drawings and mark one edge that surprised you.
Blind contour: train the eye, not the paper
Blind contour means your eyes stay on the subject while the pencil moves on the paper. The drawing will look distorted; that is expected. The goal is to record the sequence of edges, not to produce a polished cat. Work slowly enough that the pencil speed matches your eye speed. If you rush, the line jumps and invents shapes.
Use a timer and a small box on the page. Keep the blind-contour drawing inside the box so you can compare it later with a single-line version. Do not erase. If the line leaves the box, continue; the exercise is about following the edge, not about neatness.
- Draw a rectangle about the size of your palm as the blind-contour box.
- Choose a starting point on the cat's outline, such as the left ear tip.
- Look only at the cat and move the pencil as if tracing the edge.
- Continue for 60 to 90 seconds without lifting the pencil or looking at the paper.
- Stop at the starting point or when the timer ends; then look at the result.
Single-line contour: plan the route
A single-line contour keeps one unbroken line around the cat. You may look at the paper, but you do not lift the pencil. Plan the route before starting: nose to forehead, over the first ear, down the neck, along the back, around the tail, back along the belly, and under the paws to the chin. If the line must cross itself, allow one crossing rather than lifting.
Keep the line simple. Exclude fur texture and internal anatomy. The boundary of this task is the cat contour, so the outline should read as a cat silhouette with ears, tail, and paws. Use the x-height convention only to compare relative heights in a diagram: for example, if the head height is about two x-heights, the tail length might be about three x-heights in a hypothetical example. Adjust these proportions to your own reference.
- Sketch a faint route on scrap paper: list the order of edges you will follow.
- Place the pencil at the nose and begin the single line.
- Keep the pencil down; if you need to cross, cross once and continue.
- Follow the planned route around ears, tail, and paws.
- End where you started, then check that the silhouette reads as a cat.
Check your contour with a simple rubric
Use a four-part check: continuity, edge accuracy, completeness, and clarity. Continuity means the line is unbroken except for allowed crossings. Edge accuracy means the line follows the visible silhouette rather than invented shapes. Completeness means ears, tail, and paws are included. Clarity means a viewer can identify the cat without labels. Score each part from 1 to 3 and note one improvement for the next attempt.
Valid alternatives are allowed. A cat may face left or right, sit or stand, and have a curled or straight tail. The rubric does not require one universal answer; it checks whether your chosen contour is followed consistently. If you use numerical proportions, label them as hypothetical examples and measure your own reference instead of assuming a standard.
- Score continuity: 1 if broken often, 2 if one or two breaks, 3 if unbroken or one planned crossing.
- Score edge accuracy: compare three turns with the reference.
- Score completeness: confirm ears, tail, and paws are present.
- Score clarity: ask someone to identify the animal without hints.
- Write one specific change for the next drawing.
Worked example
A simple cat outline faces left. The head is about two x-heights tall, the body about three x-heights long, and the tail about three x-heights long. Draw a single-line contour starting at the nose, going over the ears, along the back, around the tail, under the paws, and back to the chin. Keep the pencil down and allow no more than one crossing.
Worked answer
The line begins at the nose, rises over the forehead, points at the left ear, dips between the ears, points at the right ear, curves down the neck, follows the back to the tail base, sweeps around the tail tip, returns along the belly, bumps under the front paws, and ends at the chin. The silhouette reads as a cat; ears, tail, and paws are present. One crossing occurs near the tail base and is allowed. The proportions are hypothetical examples, not fixed standards.
Four practice exercises
Exercise 1
Blind contour: a cat sits facing right. The outline has two pointed ears, a rounded back, a tail curled to the left, and two front paws. Draw for 60 seconds without looking at the paper, starting at the left ear tip and ending at the right front paw.
Show answer and check
A distorted but continuous line that follows the ear points, rounded back, tail curl, and paw bumps in order. The drawing may not look like a cat, but the sequence of edges is recorded.
Why: Blind contour trains eye-hand tracking; accuracy of shape is secondary to following the edge sequence.
Check: Confirm the pencil never lifted and the eyes stayed on the subject. Check that the line includes two ear points, a back curve, a tail curl, and two paw bumps in the stated order.
Exercise 2
Single-line contour: a cat stands facing left. The head is about two x-heights tall and the body about three x-heights long in a hypothetical example. Draw one unbroken line from nose to tail tip, including ears and paws, allowing at most one crossing.
Show answer and check
A single line that starts at the nose, goes over the ears, down the back, around the tail tip, under the paws, and returns to the chin, with no more than one crossing.
Why: Planning the route keeps the line continuous and includes the required contour parts.
Check: Count breaks: zero or one crossing is acceptable. Confirm ears, tail, and paws are present. Ask a viewer to identify the animal without labels.
Exercise 3
Edge-focus drill: draw only the ears and tail of a cat as two separate single-line contours. The ears form two points with a dip between them; the tail is a curved line with a rounded tip. Do not draw the body.
Show answer and check
Two separate contours: one for the ear pair with two points and a dip, and one for the tail with a curve and rounded tip.
Why: Isolating edges builds attention to sharp turns and curves before combining them.
Check: Check that the ear contour has two points and one dip, and the tail contour has one continuous curve ending in a rounded tip. No fur texture should appear.
Exercise 4
Correction task: a single-line contour of a cat has three breaks and includes whiskers. Describe two specific changes to make it follow the task boundary, then redraw one section as a continuous line.
Show answer and check
Remove the whiskers because they are outside the contour boundary, and join the three breaks into one continuous line or one planned crossing. Redraw the section from the ear to the paw without lifting the pencil.
Why: The boundary excludes fur texture and whiskers, and continuity is a core requirement.
Check: Confirm the redrawn section has no breaks and no whiskers. Check that the full contour still includes ears, tail, and paws.
Common mistakes
- Lifting the pencil to fix a line. Continue from the same point or allow one planned crossing; do not erase during the exercise.
- Looking at the paper during blind contour. Place the paper slightly out of view or cover it with a light sheet, keeping eyes on the cat.
- Adding fur texture or whiskers. Return to the silhouette only; mark fur and whiskers as outside the boundary of this task.
- Rushing the line so it invents shapes. Slow the pencil to match eye speed; name each edge as you draw it.
Self-check rubric
- Continuity: 3 = unbroken or one planned crossing; 2 = two breaks; 1 = many breaks.
- Edge accuracy: 3 = three checked turns match the reference; 2 = two match; 1 = one or none match.
- Completeness: 3 = ears, tail, and paws included; 2 = one missing; 1 = two or more missing.
- Clarity: 3 = identified as a cat without hints; 2 = identified with a hint; 1 = not identifiable.
- Valid alternatives: left or right facing, sitting or standing, curled or straight tail are all acceptable if followed consistently.
Questions and answers
Do I need a real cat to practice?
No. A simple outline plate or a photograph works. The planned printable plate will show a continuous outline, but you can use any clear cat silhouette.
How long should a blind contour take?
Start with 60 seconds and extend to 90 seconds. The goal is slow looking, not speed.
Can I cross the line?
Yes, allow one crossing rather than lifting the pencil. More than one crossing weakens continuity.
What does x-height mean here?
It is a relative height convention from baseline to midline of lowercase letters, used only to compare proportions in a diagram. Letter styles vary, so treat any number as a hypothetical example.