Free original lessons
Draw a Cute Bunny: Ear, Body, and Paw Construction
Learn to build a cute bunny from simple ear shapes, body ovals, and paw placement, then practice redrawing it at three sizes on a grid.
Free lesson
Four exercises
Worked answers
Object Drawing Lessons
This lesson teaches a repeatable way to draw a cute bunny using three construction parts: ears, body, and paws. You will combine simple shapes, place paws deliberately, and check proportions with a small set of measurements. The approach works for any cute bunny drawing because it focuses on structure rather than fur detail or brand characters. Two conventions keep the drawing checkable: the body oval overlaps the head oval by about one quarter of the head height, and each paw is about one third of the head width. Numerical values in examples are hypothetical and should be replaced by measurements of your actual paper and tools.
Practice materials: Printable downloads are not available for this lesson yet. Use the instructions and four exercises below.
Reference illustration
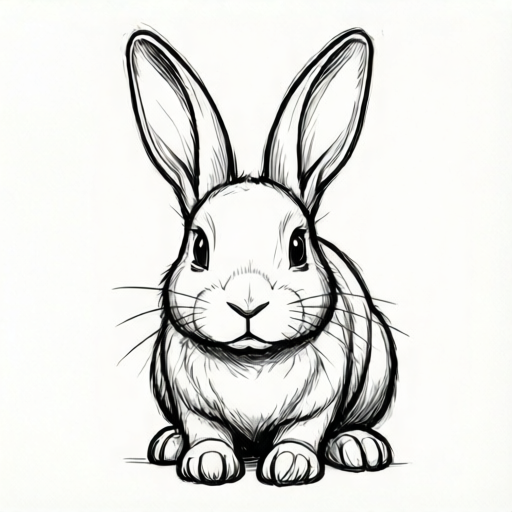
Use the stated measurements and conventions for each exercise.
Build the ear shapes first
Start with two ear shapes that read as long ovals or rounded triangles. Cute bunny ears usually taper toward the tip and widen at the base. Draw the left ear and right ear as separate shapes so you can adjust each one. Keep each ear base width no more than half the head width, and record head height, body height, and paw width on your practice sheet so the proportions are checkable rather than assumed.
Use light pencil lines so you can revise. Check that the ear bases sit close together at the top of the head area. If one ear looks much wider, redraw only that ear rather than erasing the whole figure.
- Draw a light vertical guideline for the figure center.
- Sketch the left ear as a tapered oval, about as long as the planned body height.
- Sketch the right ear with a similar length and a slightly different tilt for character.
- Check that both ear bases meet the head area without a gap.
Add the body ovals and head connection
The body is built from two overlapping ovals: a smaller head oval and a larger body oval. Place the head oval so its top touches the ear bases. The body oval sits below and slightly behind the head, overlapping by about one quarter of the head height. This overlap keeps the bunny looking connected rather than stacked.
Measure the head oval and body oval with a ruler if you want repeatable proportions. For example, a hypothetical head height of 3 cm and body height of 5 cm can be used to practice recording proportions. Record your own values on the practice grid so you can redraw the same figure at three sizes.
- Draw the head oval and mark its height and width.
- Draw the body oval below, overlapping the head by about one quarter of the head height.
- Check that the body oval is wider than the head oval for a stable base.
- Lightly mark the paw placement points before drawing paws.
Place the paws deliberately
Paws are small rounded shapes attached to the body oval. Place two front paws near the lower front of the body and two back paws at the lower sides. Keep paw size consistent: each paw width should be between 0.9 and 1.1 times one third of the head width (a ±10% multiplicative tolerance around head width ÷ 3). This keeps the figure cute and avoids oversized feet.
Check paw placement by drawing a horizontal line through the lowest point of the body oval. Each paw should touch the body oval and reach at least to that baseline. Paws may attach at slightly different points along the body sides, but every paw's lowest extent must reach the baseline. If a paw floats above the baseline, move it down. If a paw sits far below, raise it.
- Mark four paw points: two front and two back.
- Draw each paw as a small rounded shape, about one third of the head width.
- Check that each paw touches the body oval and reaches at least to the lowest body line.
- Adjust any paw that looks too large or too far from the body.
Redraw at three sizes on the practice grid
Use the blank practice grid to redraw the same bunny at small, medium, and large sizes. Keep the construction order the same: ears, head oval, body oval, paws. Measure each size with a ruler and record the head height, body height, and paw width. This makes the redraw checkable rather than guesswork.
A valid alternative is to change ear tilt or paw spacing while keeping the construction order and the overlap rule. The rubric accepts any bunny that follows the defined convention and passes the measurement checks.
- Draw the small bunny using the same four construction steps.
- Draw the medium bunny with head height doubled from the small version.
- Draw the large bunny with head height tripled from the small version.
- Measure and record head height, body height, and paw width for each size.
Worked example
Draw a cute bunny with head height 3 cm, head width 3 cm, body height 5 cm, and paw width 1 cm. Check that the body overlaps the head by about 0.75 cm, that each paw width is within the accepted range, and that all paws touch the lowest body line.
Worked answer
The finished bunny has two tapered ears with bases meeting the head oval, a 3 cm head oval (3 cm wide), a 5 cm body oval overlapping the head by 0.75 cm, and four 1 cm paws touching the lowest body line. One third of the 3 cm head width is 1 cm, so the accepted paw range is 0.9 cm to 1.1 cm; a 1 cm paw width sits in the middle of that range. The construction order is ears, head, body, paws.
Four practice exercises
Exercise 1
Draw a bunny with head height 2 cm, head width 2 cm, body height 4 cm, and paw width 0.7 cm. Check the overlap and paw placement.
Show answer and check
A bunny with a 2 cm head oval (2 cm wide), a 4 cm body oval overlapping the head by about 0.5 cm, and four 0.7 cm paws whose lowest points reach the horizontal line through the lowest point of the body oval. One third of the 2 cm head width is 2/3 cm ≈ 0.667 cm, so the accepted paw range is 0.9 × 2/3 = 0.6 cm to 1.1 × 2/3 = 0.7333... cm (11/15 cm) inclusive; a 0.7 cm paw width lies within this range.
Why: The overlap is one quarter of the head height: 2 cm divided by 4 equals 0.5 cm. One third of the 2 cm head width is 2/3 cm ≈ 0.667 cm, and 0.7 cm is within the accepted range of 0.6 cm to 0.7333... cm inclusive.
Check: Measure the head height, body height, overlap, and paw width with a ruler. Draw a horizontal line through the lowest point of the body oval and confirm all four paws reach at least to that line. Confirm each paw width is between 0.9 and 1.1 times one third of the 2 cm head width, that is between 0.6 cm and 0.7333... cm (11/15 cm) inclusive; 0.7 cm passes this check.
Exercise 2
Redraw the same bunny at double size. If the small bunny has head height 2 cm and paw width 0.7 cm, what are the doubled values?
Show answer and check
Head height 4 cm and paw width 1.4 cm. Body height doubles from 4 cm to 8 cm, and overlap doubles from 0.5 cm to 1 cm.
Why: Doubling every measured value keeps the proportions consistent. Each value is multiplied by 2.
Check: Multiply each recorded small-size measurement by 2 and compare with the ruler measurements on the doubled drawing.
Exercise 3
A drawn bunny has a 3 cm head oval and a 5 cm body oval, but the body sits 1.5 cm below the head with no overlap. Describe the fix and the new overlap value.
Show answer and check
Move the body oval up until it overlaps the head by about 0.75 cm, which is one quarter of the 3 cm head height.
Why: The overlap rule is one quarter of head height: 3 cm divided by 4 equals 0.75 cm. Moving the body up restores the connection.
Check: Measure the vertical distance the body oval overlaps the head oval. Confirm it is about 0.75 cm.
Exercise 4
Draw a bunny with head height 4 cm, head width 4 cm, and paw width 1.2 cm. Check whether the paw width is within the suggested range of one third of head width.
Show answer and check
One third of 4 cm is 4/3 cm, about 1.33 cm. The accepted range is 0.9 to 1.1 times that value: the lower bound is 0.9 × 4/3 = 1.2 cm exactly, and the upper bound is 1.1 × 4/3 = 4.4/3 cm, about 1.47 cm. A paw width of 1.2 cm equals the lower boundary and is accepted as within the inclusive range.
Why: Divide head width by 3: 4 divided by 3 equals about 1.33 cm. The drawn paw width of 1.2 cm is close to that value.
Check: Measure each paw width and compare with one third of the measured head width. Accept values from 0.9 to 1.1 times that value, the tolerance defined in the lesson. For a 4 cm head width, accept paw widths from 1.2 cm to about 1.47 cm inclusive.
Common mistakes
- Drawing ears that are much wider than the head oval. Redraw each ear so its base width is no more than half the head width, then check the taper toward the tip.
- Stacking the head oval directly on top of the body oval with no overlap. Move the body oval up so it overlaps the head by about one quarter of the head height.
- Placing paws far from the body oval. Move each paw until it touches the body oval and crosses the lowest body line.
- Changing the construction order when redrawing at a new size. Repeat the same order every time: ears, head oval, body oval, paws.
Self-check rubric
- Two ear shapes are present, tapered toward the tip, with bases meeting the head area.
- Head oval and body oval are both present and overlap by about one quarter of the head height.
- Four paws are present, each paw width between 0.9 and 1.1 times one third of the head width, and all paws touch the body oval and reach at least to the lowest body line.
- The construction order ears, head, body, paws is followed.
- Measurements for head height, body height, and paw width are recorded for each practice size.
- Valid alternatives such as different ear tilt or paw spacing are accepted if the construction and measurement checks pass.
Questions and answers
Do I need to draw realistic fur?
No. This lesson focuses on ear, body, and paw construction. Fur rendering is outside the boundary of this task.
Can I change the ear tilt or paw spacing?
Yes. Valid alternatives are allowed as long as the construction order, overlap rule, and measurement checks are followed.
How do I record measurements on the practice grid?
Write the head height, body height, and paw width beside each of the three practice drawings. Use the same units for every value so the small, medium, and large versions can be compared directly.
Are the numerical values in the examples required?
No. They are hypothetical examples. Measure your actual paper and tools, then record your own values.