Free original lessons
Detailed Tree Drawing: Bark Cracks, Twig Networks, and Leaf Layering
Learn to render a detailed tree with convincing bark cracks, a structured twig network, and layered leaf masses using a clear, checkable drawing convention.
Free lesson
Four exercises
Worked answers
Object Drawing Lessons
This lesson teaches a repeatable method for drawing a detailed tree that reads as a single living structure rather than a stack of separate parts. You will establish a trunk axis and taper, build a branching network from large limbs to fine twigs, incise bark cracks that follow the trunk's curvature, and layer leaf masses from dark interior to light exterior. The convention is explicit: x-height means the distance from baseline to midline in any lettering or label you add, and letter styles may vary, so labels are judged for placement and legibility rather than a single universal handwriting. All numerical values below are hypothetical examples chosen for practice; measure your own paper and tools and label any values you adopt. The goal is a detailed tree plate that can be checked by simple arithmetic and visual tests, not a species identification.
Practice materials: Printable downloads are not available for this lesson yet. Use the instructions and four exercises below.
Reference illustration
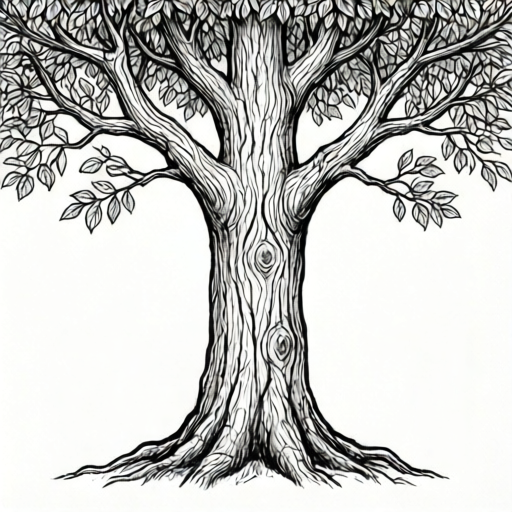
Use the stated measurements and conventions for each exercise.
Establishing the trunk axis and taper
Begin with a single vertical axis line for the trunk. Mark a ground baseline and a crown top. Divide the trunk height into four equal bands using a ruler; these bands guide taper and branch attachment. A hypothetical example: on 20 cm of trunk height, each band is 5 cm. Measure your actual paper and substitute your own values.
Taper means the trunk is widest at the ground and narrows upward. Choose a base width and a top width that are easy to check. For instance, base width 4 cm and top width 2 cm gives a 2 cm reduction over four bands, or 0.5 cm per band. Draw the left and right trunk edges as gentle curves that meet these widths at each band boundary. Check with a ruler at each boundary; the measured width should match your planned width within your own chosen tolerance, which you state before drawing.
- Mark baseline and crown top; measure total trunk height.
- Divide trunk height into four equal bands and label them lightly.
- Choose base and top widths; compute per-band reduction.
- Draw left and right edges as curves meeting planned widths at each boundary.
- Measure widths at boundaries and record any deviation.
Building the twig network from large limbs to fine twigs
A twig network is a hierarchy. Draw three to five primary limbs leaving the trunk at different heights, then two to three secondary branches per primary limb, then fine twigs. Keep attachment angles consistent: for practice, use a hypothetical 35 to 55 degrees from the parent stem, and state your chosen range. Each child branch should be thinner than its parent; a simple rule is child width equals half the parent width, rounded to a measurable value.
Check the network by counting. If you draw 4 primary limbs, 3 secondary branches per primary, and 4 fine twigs per secondary, the fine twig count is 4 times 3 times 4 equals 48. Record your planned counts before drawing and compare with actual counts. Overlap is allowed, but each twig should be traceable to its parent without ambiguity. Use a light pencil for the network so bark and leaf layers can be added later without confusion.
- Draw 3 to 5 primary limbs at different trunk heights.
- Add 2 to 3 secondary branches per primary limb.
- Add fine twigs at the ends, keeping child width about half parent width.
- Count planned versus drawn twigs and note the difference.
- Trace one fine twig back to the trunk to test network clarity.
Incising bark cracks that follow curvature
Bark cracks are not random scratches; they follow the trunk's surface direction. On a curved trunk, crack lines should bend with the edge curvature. Draw cracks as narrow tapered lines, wider at the center and closing at the ends. A hypothetical spacing example: place major cracks every 2 cm along the trunk height, with minor cracks between them. Measure your actual trunk height and choose spacing that fits your paper.
Use a close-up practice box for bark: a 6 cm by 6 cm square is a hypothetical example. Inside it, draw five vertical cracks with slight curvature and three horizontal connector cracks. Check that no crack crosses the trunk edge and that crack width at the center is measurable, for example 2 mm, tapering to 0 mm at the ends. Vary crack length but keep the taper rule consistent so the bark reads as a system rather than isolated marks.
- Draw a close-up practice box and mark its dimensions.
- Draw major cracks following trunk curvature, spaced by your chosen interval.
- Taper each crack from center width to zero at both ends.
- Add minor connector cracks between major cracks.
- Check that cracks stay inside the trunk edges and taper consistently.
Layering leaf masses from interior to exterior
Leaf layering uses three tonal zones: a dark interior mass, a mid-tone middle layer, and a light outer edge. Draw the dark interior first as a compact shape inside the crown, then the mid-tone layer overlapping it, then the light outer layer with small leaf clusters. Overlap should increase toward the interior so the crown reads as depth. A hypothetical example: allocate 40 percent of crown area to dark interior, 35 percent to mid-tone, and 25 percent to light outer edge; measure your crown area roughly by counting grid squares.
Check layering by squinting: the dark interior should sit behind mid-tone, and mid-tone behind light. If any light cluster appears fully surrounded by dark without a mid-tone transition, add a mid-tone bridge. Keep leaf cluster size consistent within each layer; for practice, use clusters about 1 cm across in the outer layer and 1.5 cm in the mid-tone. These are hypothetical values; measure your own crown and choose sizes that fit.
- Outline the crown and divide it into three tonal zones.
- Draw the dark interior mass first.
- Overlap the mid-tone layer, leaving dark visible at edges.
- Add light outer clusters with consistent size.
- Squint-test the layer order and add transition clusters where needed.
Worked example
On a 24 cm tall trunk divided into four bands, choose base width 5 cm and top width 3 cm. Compute the per-band width reduction, state the width at each band boundary, and describe how many fine twigs result from 3 primary limbs, 2 secondary branches per primary, and 5 fine twigs per secondary.
Worked answer
Per-band reduction is (5 minus 3) divided by 4 equals 0.5 cm per band. Widths at boundaries from ground upward are 5.0 cm, 4.5 cm, 4.0 cm, 3.5 cm, and 3.0 cm. Fine twig count is 3 times 2 times 5 equals 30. Check: measure each boundary width with a ruler and compare to the listed values; count fine twigs and compare to 30.
Four practice exercises
Exercise 1
A trunk is 16 cm tall and divided into four equal bands. Base width is 4 cm and top width is 2 cm. Compute the per-band reduction and list the width at each boundary from ground to top.
Show answer and check
Per-band reduction is (4 minus 2) divided by 4 equals 0.5 cm. Widths from ground upward are 4.0 cm, 3.5 cm, 3.0 cm, 2.5 cm, and 2.0 cm.
Why: Subtract top width from base width, divide by the number of bands, then subtract the reduction cumulatively at each boundary.
Check: Measure each boundary width on your drawing with a ruler and compare to the listed values; differences should fall within your stated tolerance.
Exercise 2
You plan 4 primary limbs, 3 secondary branches per primary, and 4 fine twigs per secondary. Compute the total fine twig count. Then state one visual test to confirm the network is traceable.
Show answer and check
Total fine twigs are 4 times 3 times 4 equals 48. Visual test: trace three fine twigs back to the trunk without ambiguity.
Why: Multiply the counts through the hierarchy: primary times secondary times fine. Traceability is tested by following a twig to its parent and onward to the trunk.
Check: Count drawn fine twigs and compare to 48; perform the trace test on three twigs and record any ambiguous attachment.
Exercise 3
In a 6 cm by 6 cm bark practice box, you draw five major cracks spaced 1.2 cm apart vertically. Compute the total vertical span used by the spacing between the first and fifth crack centers, and state the taper rule for each crack.
Show answer and check
There are four intervals between five cracks, so the span is 4 times 1.2 cm equals 4.8 cm. Taper rule: each crack is widest at its center, for example 2 mm, and tapers to 0 mm at both ends.
Why: The number of intervals is one less than the number of cracks. The taper rule is stated as a measurable width at center and zero at ends.
Check: Measure the distance between first and fifth crack centers and compare to 4.8 cm; measure center width of each crack and confirm taper to zero at ends.
Exercise 4
A crown is divided into three tonal zones with hypothetical allocations of 40 percent dark interior, 35 percent mid-tone, and 25 percent light outer edge. If the crown covers 20 grid squares, compute the square count for each zone. Then state the squint test for layer order.
Show answer and check
Dark interior is 0.40 times 20 equals 8 squares; mid-tone is 0.35 times 20 equals 7 squares; light outer edge is 0.25 times 20 equals 5 squares. Squint test: dark should appear behind mid-tone, and mid-tone behind light, with no light cluster fully surrounded by dark without a mid-tone bridge.
Why: Convert percentages to decimals and multiply by total grid squares. The squint test checks perceived depth order by reducing detail.
Check: Count grid squares assigned to each zone and compare to 8, 7, and 5; squint at the drawing and verify the layer order, adding a mid-tone bridge where needed.
Common mistakes
- Drawing bark cracks as straight vertical lines on a curved trunk. Bend each crack to follow the trunk edge curvature, and check that crack direction changes where the trunk edge changes direction.
- Making all twigs the same thickness. Apply the half-width rule: each child twig is about half the width of its parent, measured at the attachment point.
- Placing light leaf clusters directly against dark interior without a mid-tone. Insert a mid-tone bridge cluster between dark and light zones, then re-check the squint test.
- Letting cracks cross the trunk edge or run into branch attachments. Stop each crack before the edge or attachment, taper it to zero, and verify with a ruler that no crack line crosses the boundary.
Self-check rubric
- Trunk axis is vertical and taper widths at band boundaries match the stated plan within the chosen tolerance.
- Primary limbs, secondary branches, and fine twigs form a traceable hierarchy with child widths about half parent widths.
- Bark cracks follow trunk curvature, taper to zero at both ends, and do not cross trunk edges or branch attachments.
- Leaf layers show dark interior, mid-tone middle, and light outer edge with overlap increasing toward the interior.
- Labels, if any, are legible and placed without obscuring the drawing; x-height convention is stated and applied consistently.
- All numerical values are labeled as hypothetical examples or measured from the actual paper and tools.
Questions and answers
Do I need to identify the tree species?
No. This lesson focuses on rendering structure and texture, not species identification. Use any tree form and apply the same axis, network, crack, and layer checks.
What does x-height mean here?
X-height is the distance from baseline to midline in any lettering or label you add. Letter styles vary, so labels are checked for placement and legibility rather than a single universal handwriting.
Can I change the numerical examples?
Yes. All numbers are hypothetical examples. Measure your actual paper and tools, state your chosen values, and keep units consistent so your checks remain simple arithmetic.
How do I know the twig network is clear enough?
Trace at least three fine twigs back to the trunk without ambiguity. If a twig cannot be traced, redraw its attachment or reduce overlap in that area.