Free original lessons
Floral Print Drawing: Motif Repeats and Pattern Layout
Learn to draw a floral print with a repeating motif and plan a pattern layout using a grid, spacing rules, and a simple half-drop repeat.
Free lesson
Four exercises
Worked answers
Object Drawing Lessons
A floral print is not one flower drawn many times by eye. It is a motif plus a repeat rule. This lesson shows how to design a small floral motif, place it on a measured grid, and build a layout that repeats cleanly across a panel. Use a simple convention: the repeat unit is a square whose side equals the motif spacing, and all measurements are in centimetres. Any numbers given are hypothetical examples to be replaced by measurements of your actual paper and tools.
Practice materials: Printable downloads are not available for this lesson yet. Use the instructions and four exercises below.
Reference illustration
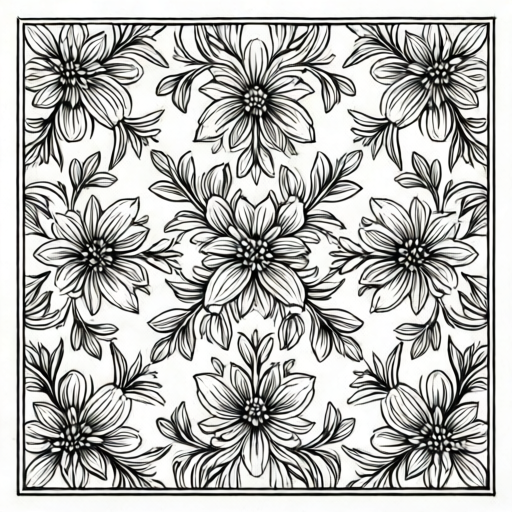
Use the stated measurements and conventions for each exercise.
Define the motif and its repeat unit
Start with a single floral motif: a stem, two leaves, and a five-petal bloom. Keep the motif inside a square repeat unit so it can be copied without overlap. Choose a unit size that fits your paper, for example a 4 cm by 4 cm square. This is a hypothetical example; measure your own paper and decide a unit that divides the panel evenly.
Draw the motif once in pencil. Mark the centre of the bloom, the stem base, and the leaf tips. These anchor points let you copy the motif accurately. The motif does not need to be symmetrical, but its outer edges must stay inside the repeat unit.
- Measure the panel width and height in centimetres and record them.
- Choose a repeat unit size that divides both dimensions without a remainder, or accept a planned margin.
- Draw one square repeat unit and sketch the floral motif inside it.
- Mark anchor points: bloom centre, stem base, left leaf tip, right leaf tip.
- Check that no part of the motif crosses the square edge.
Plan the pattern layout with a grid
A grid turns a single motif into a print. For a straight repeat, copy the motif into every square of the grid. For a half-drop repeat, shift every second column down by half the unit height. Half-drop repeats look less rigid and are common in floral prints.
Label the grid columns A, B, C and so on, and label rows according to the actual repeat count. For a 12 cm by 8 cm panel with a 4 cm unit, that gives 3 columns and 2 rows, so label columns A, B, C and rows 1, 2. In a straight repeat, motif centres sit at the same position in every square. In a half-drop repeat, column B motifs sit half a unit lower than column A motifs. Keep the shift consistent across the whole panel.
- Draw the grid lightly in pencil across the panel.
- Label columns and rows so you can track the repeat rule.
- Place the first motif in column A, row 1.
- Copy the motif to all squares in column A.
- For column B, shift each motif down by half the unit height.
- Repeat the shift for column C, then check that the pattern reads evenly.
Refine spacing and visual rhythm
Even spacing is not the same as equal spacing. A floral print can look crowded if large blooms sit next to each other. Vary the motif size slightly between repeats, or alternate a bloom-only motif with a stem-and-leaf motif. Keep the variation planned, not random.
Check the print at arm's length. If one area pulls the eye too strongly, reduce the bloom size there or add a small filler leaf. Record any change on the grid so the repeat stays consistent.
- View the panel from about one metre away.
- Identify any cluster that looks heavier than the rest.
- Adjust one motif size or add a filler leaf in that square.
- Mark the change on the grid and copy it to matching squares.
- Recheck the whole panel for even rhythm.
Finalise the print and label the layout
Once the pencil layout is even, go over the motif lines with a fine pen. Erase the grid only after the ink is dry. Add a small layout key at the corner of the page: a square showing the repeat unit and an arrow showing the half-drop shift. This key is for your own reference and does not need to be part of the print.
If you plan to reproduce the print, measure the actual paper and printer margins rather than assuming standard sizes. Any numerical values in this lesson are hypothetical examples.
- Ink the motif outlines and erase pencil grid lines.
- Draw a small layout key showing the repeat unit and shift direction.
- Measure the final panel and record the repeat count.
- Check that every motif follows the same repeat rule.
Worked example
A panel is 12 cm wide and 8 cm high. You choose a 4 cm by 4 cm repeat unit. How many repeats fit across and down, and where do the motif centres sit in a straight repeat?
Worked answer
Across: 12 divided by 4 equals 3 repeats. Down: 8 divided by 4 equals 2 repeats. In a straight repeat, motif centres sit at the centre of each square: across at 2 cm, 6 cm, and 10 cm from the left edge; down at 2 cm and 6 cm from the top edge. These are hypothetical example measurements; measure your own panel.
Four practice exercises
Exercise 1
A panel is 16 cm wide and 12 cm high. You choose a 4 cm by 4 cm repeat unit. How many repeats fit across and down?
Show answer and check
Across: 16 divided by 4 equals 4 repeats. Down: 12 divided by 4 equals 3 repeats.
Why: Divide each panel dimension by the unit size. Both divisions give whole numbers, so the unit fits without a remainder.
Check: Multiply back: 4 repeats times 4 cm equals 16 cm across; 3 repeats times 4 cm equals 12 cm down. Both match the panel dimensions.
Exercise 2
A panel is 10 cm wide and 10 cm high. You want a half-drop repeat with a 5 cm by 5 cm unit. Describe where the motif centres sit in column A and column B.
Show answer and check
With a 5 cm unit on a 10 cm panel, column A centres sit at 2.5 cm and 7.5 cm from the top edge. Column B centres shifted down by half the unit height (2.5 cm) would sit at 5 cm and 10 cm from the top edge. The 10 cm centre lies exactly on the panel edge, so a 5 cm unit does not keep every centre strictly inside the panel. To keep all centres strictly inside, use a smaller unit, for example 4 cm: column A centres at 2 cm and 6 cm, column B centres at 4 cm and 8 cm.
Why: A 5 cm unit has its centre at 2.5 cm from the square edge. A half-drop shift moves every second column by half the unit height, which is 2.5 cm. On a two-row panel that shift pushes one centre onto the edge, so choose a unit that leaves room for the half-unit shift. With a 4 cm unit, half the unit height is 2 cm, and the shifted centres at 4 cm and 8 cm stay inside the 10 cm panel.
Check: Check that the shift equals half of the chosen unit height. For the 4 cm unit, half is 2 cm. Confirm that column A centres at 2 cm and 6 cm and column B centres at 4 cm and 8 cm all fall strictly inside the 10 cm by 10 cm panel, and that each column B centre is exactly 2 cm lower than the matching column A centre.
Exercise 3
A panel is 9 cm wide. You choose a 4 cm repeat unit. How many full repeats fit across, and what margin remains?
Show answer and check
Two full repeats fit across, using 8 cm. The remaining margin is 1 cm, which can be split as 0.5 cm on each side.
Why: Divide 9 by 4: two full units use 8 cm, and 1 cm remains. A planned equal margin keeps the layout balanced.
Check: Add the parts: 0.5 cm margin plus 8 cm of repeats plus 0.5 cm margin equals 9 cm.
Exercise 4
You have drawn a straight repeat on a 12 cm by 8 cm panel with a 4 cm unit. You now want a half-drop repeat. Describe the change to column B and state one check to confirm the new layout is consistent.
Show answer and check
Shift every motif in column B down by 2 cm, which is half of the 4 cm unit height. Keep column A and column C unchanged. Check that every column B motif is exactly 2 cm lower than the matching column A motif, and that no motif crosses the panel edge.
Why: A half-drop repeat shifts alternate columns by half the unit height. With a 4 cm unit, half is 2 cm. The shift must be applied to every square in column B, not just some.
Check: Measure the vertical distance between a column A motif centre and the nearest column B motif centre. It should be 2 cm. Repeat for two more pairs to confirm consistency.
Common mistakes
- Drawing each motif freehand without anchor points, so repeats drift. Mark bloom centre, stem base, and leaf tips in every square before drawing the motif.
- Using a repeat unit that does not divide the panel, leaving an uneven margin. Measure the panel first and choose a unit that fits, or plan a deliberate margin and keep it equal on all sides.
- Mixing straight and half-drop shifts in the same column. Write the shift rule at the top of the page and apply it to every square in that column.
- Making all blooms the same size, which can look flat or crowded. Plan a small size variation or alternate motif types, and record the variation on the grid.
Self-check rubric
- The motif stays inside its repeat unit with no unintended overlap.
- The grid divides the panel evenly or has a planned equal margin.
- Every motif follows the same repeat rule, either straight or half-drop.
- Anchor points are marked consistently in each square.
- Spacing reads evenly at arm's length, with any variation planned and recorded.
- The layout key correctly shows the repeat unit and shift direction.
- Valid alternatives are accepted: different motif styles, different unit sizes, and either straight or half-drop repeats, provided the rule is consistent and checkable.
Questions and answers
What is the difference between a motif and a pattern layout?
A motif is the single floral drawing. A pattern layout is the rule that places copies of the motif across the panel, such as a straight grid or a half-drop repeat.
How do I choose a repeat unit size?
Measure your panel in centimetres. Pick a unit that divides the panel evenly, or accept a planned margin. A 4 cm unit on a 20 cm panel gives five repeats across, but measure your own paper rather than assuming.
Can I use a half-drop repeat with any motif?
Yes, but check that the motif does not look disconnected when shifted. Motifs with a clear stem base usually shift well because the stem can point downward in every repeat.
How do I know the print is evenly spaced?
View it from about one metre away and look for heavy clusters. If one area pulls the eye, adjust one motif size or add a filler leaf, then copy the change to matching squares.