Free original lessons
Funny Face Drawing: Exaggerated Eyes and Mouths
Learn to draw funny faces by exaggerating eyes and mouths. Practice expression boxes, avoid common mistakes, and use a clear rubric for original cartoon faces.
Free lesson
Four exercises
Worked answers
Object Drawing Lessons
Funny face drawing starts with choosing one or two features to exaggerate while keeping the rest simple. This lesson focuses on eyes and mouths because they carry most of an expression. You will use a convention for placement, practice three expression boxes, and finish a blank outline face. The goal is a readable, original funny face, not a realistic portrait or a known cartoon character. All measurements are examples you can adjust to your paper and tools.
Practice materials: Printable downloads are not available for this lesson yet. Use the instructions and four exercises below.
Reference illustration
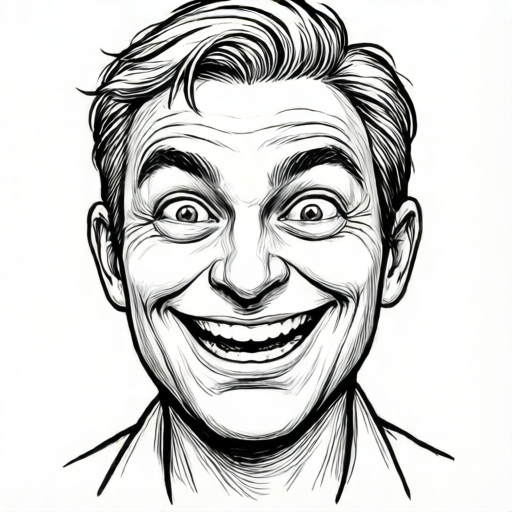
Use the stated measurements and conventions for each exercise.
Set a Simple Face Map
Draw a light oval for the head. Mark a vertical midline and a horizontal midline. In this lesson, the horizontal midline is the eye line. Place two eye shapes on that line, spaced about one eye-width apart. This spacing is a convention, not a rule; you may widen or narrow it for effect.
Add a nose mark halfway between the eye line and the chin. Place the mouth below the nose mark. Keep these guide marks light so you can erase or cover them. The face map helps you exaggerate one feature without losing the overall structure.
- Draw a light oval about 10 cm tall and 7 cm wide on plain paper.
- Mark a vertical midline and a horizontal eye line at the middle of the oval.
- Place two eye shapes on the eye line, leaving about one eye-width between them.
- Mark a nose point halfway between the eye line and the chin.
- Mark a mouth line below the nose point, leaving space for the chin.
Exaggerate Eyes with Purpose
Choose one eye change: size, shape, or direction. For a surprised face, make both eyes taller than wide and add small pupils near the top. For a sleepy face, use half-closed lids and place pupils near the bottom. For a silly face, make one eye a circle and the other a narrow oval.
Keep the pupils consistent with the expression. Large pupils can look excited; tiny pupils can look shocked. Draw the eye outline first, then the pupil, then any lids or lashes. If you change eye size, keep the eye line as your anchor so the face still reads as one face.
- Pick one eye change: taller, wider, half-closed, or mismatched.
- Draw the eye outlines on the eye line.
- Add pupils that match the chosen expression.
- Add lids or lashes only if they support the expression.
- Check that both eyes still sit on the same eye line.
Vary the Mouth for Comedy
The mouth can be a line, a curve, an open shape, or a wavy shape. A wide open mouth with a visible tongue suggests laughing. A tiny pursed mouth suggests confusion. A lopsided curve suggests a smirk. Choose one mouth variation and make it clearly different from a neutral line.
Place the mouth below the nose mark. If the mouth is open, keep the opening shape simple: an oval, a rounded rectangle, or a crescent. Add teeth as one or two simple blocks, not detailed rows. The mouth should be readable from a distance of about one meter.
- Choose a mouth type: wide open, tiny pursed, lopsided, or wavy.
- Draw the outer mouth shape below the nose mark.
- Add a simple tongue or teeth shape if the mouth is open.
- Keep the mouth centered or deliberately off-center for effect.
- Step back one meter and check that the expression is clear.
Use Expression Practice Boxes
Divide a practice sheet into three boxes, each about 6 cm by 6 cm. In box one, draw a surprised face with tall eyes and an open oval mouth. In box two, draw a sleepy face with half-closed eyes and a tiny mouth. In box three, draw a silly face with mismatched eyes and a wavy mouth.
Each box uses the same face map but different eye and mouth choices. This shows that exaggeration is a set of decisions, not a single correct drawing. Keep your lines light until you are satisfied, then darken the final lines.
- Draw three boxes about 6 cm by 6 cm on a practice sheet.
- In box one, draw a surprised face using tall eyes and an open oval mouth.
- In box two, draw a sleepy face using half-closed eyes and a tiny mouth.
- In box three, draw a silly face using mismatched eyes and a wavy mouth.
- Label each box with the expression word.
Worked example
Draw a surprised funny face on a 10 cm by 7 cm oval. Use tall eyes, small pupils near the top, and an open oval mouth. Describe the placement and the final check.
Worked answer
Draw the oval and mark the eye line at the middle. Place two tall eye shapes on the eye line, each about 2 cm tall and 1 cm wide, with about 1 cm between them. Add small pupils near the top of each eye. Mark the nose halfway between the eye line and the chin. Draw an open oval mouth about 3 cm wide and 2 cm tall below the nose. Step back one meter: the tall eyes and open mouth should read as surprise. Check that both eyes are on the eye line and the mouth is below the nose.
Four practice exercises
Exercise 1
Draw a sleepy funny face on a 10 cm by 7 cm oval. Use half-closed eyes with pupils near the bottom and a tiny pursed mouth. Describe where you place the eyes and mouth.
Show answer and check
Place two half-closed eye shapes on the eye line, each about 1.5 cm wide and 0.8 cm tall. Put small pupils near the bottom of each eye. Draw a tiny pursed mouth about 1 cm wide below the nose mark. The face should read as sleepy because the lids cover the top of the eyes and the mouth is small.
Why: Half-closed lids and low pupils signal drowsiness. A tiny mouth keeps the expression quiet rather than excited. Keeping the eyes on the eye line preserves the face structure.
Check: Step back one meter. Confirm both eyes sit on the eye line, the pupils are near the bottom, and the mouth is smaller than the eye spacing.
Exercise 2
Draw a silly funny face on a 10 cm by 7 cm oval. Use one round eye and one narrow oval eye on the same eye line. Add a wavy mouth about 3 cm wide. Describe the eye spacing and mouth placement.
Show answer and check
Place the round eye about 2 cm wide on the left side of the eye line. Place the narrow oval eye about 1 cm wide on the right side, leaving about 1 cm between them. Draw a wavy mouth about 3 cm wide below the nose mark. The mismatched eyes and wavy mouth create a silly expression.
Why: Mismatched eye shapes are a simple exaggeration that reads as comic. A wavy mouth adds asymmetry without needing detailed teeth or tongue.
Check: Check that both eyes are on the same eye line and that the mouth is below the nose. Step back one meter and confirm the face looks intentionally silly, not broken.
Exercise 3
Draw a laughing funny face on a 10 cm by 7 cm oval. Use wide eyes with large pupils and a wide open mouth with a simple tongue shape. Describe the mouth size and the eye placement.
Show answer and check
Place two wide eye shapes on the eye line, each about 2 cm wide and 1.5 cm tall, with large pupils centered. Draw a wide open mouth about 4 cm wide and 2.5 cm tall below the nose. Add a simple tongue shape inside the lower half of the mouth. The wide eyes and open mouth should read as laughing.
Why: Wide eyes and large pupils suggest excitement. A wide open mouth with a tongue shape signals laughter. Keeping the tongue simple avoids clutter.
Check: Confirm the eyes are on the eye line and the mouth is wider than the space between the eyes. Step back one meter and check that the tongue shape is visible but simple.
Exercise 4
Draw a confused funny face on a 10 cm by 7 cm oval. Use one raised eye and one lowered eye, and a lopsided mouth. Describe how you keep the face readable.
Show answer and check
Place both eyes on the eye line. Make the left eye about 1.5 cm tall and the right eye about 1 cm tall, with the right eye slightly lower on the same line. Draw a lopsided mouth about 3 cm wide, with one corner higher than the other, below the nose. Keep the nose and ears simple so the eye and mouth changes stand out.
Why: A raised and lowered eye pair suggests uncertainty. A lopsided mouth adds asymmetry. Keeping other features simple prevents clutter and keeps the expression readable.
Check: Check that both eyes still touch the eye line and that the mouth is below the nose. Step back one meter and confirm the face reads as confused rather than angry or sad.
Common mistakes
- Exaggerating every feature at once, so the face looks cluttered. Choose one or two features to exaggerate and keep the nose, ears, and hair simple.
- Placing eyes far off the eye line, making the face look broken. Keep both eyes on the horizontal eye line unless you deliberately tilt the whole head.
- Making the mouth too small to read as an expression. Increase the mouth size or change its shape so it is clearly different from a neutral line.
- Copying a known cartoon character instead of making an original face. Change at least two features from any reference and combine your own eye and mouth choices.
Self-check rubric
- The face uses a clear oval head and a visible eye line.
- At least one eye feature is exaggerated in size, shape, or direction.
- The mouth is clearly varied from a neutral line and supports the expression.
- The face is original and does not copy a known cartoon character.
- The final drawing is readable from about one meter away.
- Valid alternatives are accepted: mismatched eyes, wavy mouths, or off-center features are allowed if the expression remains clear.
Questions and answers
Do I need to be good at realistic drawing?
No. This lesson uses simple shapes and a face map. The focus is on clear exaggeration, not realism.
How large should the face be?
A 10 cm by 7 cm oval is a convenient example. You can use any size that fits your paper, as long as the eye line and mouth placement remain clear.
Can I use a ruler?
Yes. A ruler helps with the midline and eye line. Light pencil marks are easy to erase later.
What if my funny face looks strange?
Strange can be funny. Check that the eyes sit on the eye line and the mouth is readable. If both are true, the exaggeration is working.