Free original lessons
Layered Cake Drawing: Tier Heights and Frosting Bands
Plan and draw a multi-tier cake using tier height ratios, frosting band placement, and ellipse construction for clean, proportional results.
Free lesson
Four exercises
Worked answers
Object Drawing Lessons
This lesson teaches a repeatable method for drawing a layered cake with multiple tiers. You will set tier height ratios, place frosting bands at consistent intervals, and construct ellipses so the cake reads as a solid three-dimensional object. The approach uses simple arithmetic and a defined drawing convention: tier height is measured from the baseline upward, and decorative shapes may vary. All measurements are checkable with a ruler. Numerical values given here are hypothetical examples; measure your own paper and tools. The method works for any tier count from two upward, but this lesson focuses on three tiers to keep the arithmetic clear.
Practice materials: Printable downloads are not available for this lesson yet. Use the instructions and four exercises below.
Reference illustration
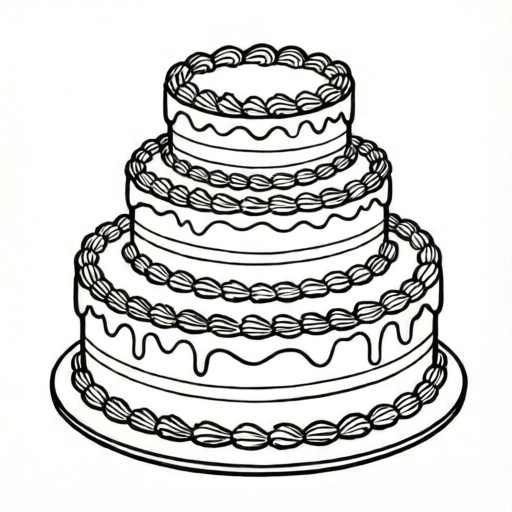
Use the stated measurements and conventions for each exercise.
Setting tier height ratios
A layered cake reads clearly when each tier's height follows a simple ratio. A common choice is 3:2:1 from bottom to top, meaning the bottom tier is three units tall, the middle two units, and the top one unit. Choose a unit that fits your paper. For example, if one unit equals 2 cm, the tiers are 6 cm, 4 cm, and 2 cm tall. These numbers are hypothetical; substitute your own unit and check that the total height fits the page with room for decoration.
Draw a vertical center line first. Mark the baseline for the bottom tier, then measure upward and mark each tier boundary. Label each boundary lightly so you can erase later. The ratio keeps the cake stable visually: a top tier that is too tall looks top-heavy, and one that is too short disappears.
- Draw a light vertical center line on your paper.
- Choose a unit length and write the ratio, for example 3:2:1.
- Mark the baseline, then measure and mark each tier boundary upward.
- Check that the total height leaves space above for decoration.
Constructing frosting bands with ellipses
Frosting bands sit at tier boundaries and sometimes midway up a tier. Each band is drawn as a flattened ellipse: a closed curve wider than it is tall. To construct one, draw a horizontal line at the band's height, mark the left and right edges at the tier's width, then sketch the front curve downward and the back curve upward. Keep the ellipse's height roughly one-fifth of its width for a natural look; adjust to taste.
Place bands at every tier boundary and optionally one band centered on each tier. Using the 3:2:1 example with a 2 cm unit, the tiers are 6 cm, 4 cm, and 2 cm tall, so boundaries sit at 6 cm and 10 cm from the baseline and the total height is 12 cm. Mid-tier bands centered on each tier sit at 3 cm, 8 cm, and 11 cm. That gives five bands total: 3, 6, 8, 10, and 11 cm. Measure each band's height from the baseline and mark it before drawing the ellipse.
- Mark the height of each frosting band on the center line.
- Draw a horizontal guide line at each band height.
- Mark left and right edges at the tier width.
- Sketch the front curve down and the back curve up to close the ellipse.
- Erase guides and darken the final band.
Stacking tiers and checking proportions
Each tier sits on the one below, so the bottom tier is widest and the top narrowest. A simple width rule is to reduce each tier's width by one unit per step. If the bottom tier is 10 cm wide, the middle is 8 cm and the top is 6 cm. These are hypothetical values; measure your own paper and keep units consistent.
After drawing all tiers and bands, check three things: tier heights match your ratio, band heights are evenly spaced where intended, and each tier's width is smaller than the one below. A quick arithmetic check: add the tier heights and confirm the total equals your planned cake height. If the total is off by more than half a unit, adjust before finalizing.
- Draw the bottom tier as a rectangle with an ellipse top.
- Center the middle tier on the bottom tier and draw it narrower.
- Center the top tier on the middle tier and draw it narrower still.
- Add frosting bands at boundaries and optional mid-tier positions.
- Measure and verify heights, widths, and band spacing.
Decoration placement and finishing
Decorations such as dots, swirls, or fruit shapes should follow the cake's curvature. Place them along the front curve of each frosting band, spacing them evenly. A simple convention: mark decoration positions at equal intervals along the band's front curve, then draw each decoration centered on its mark. Decorative shapes may vary; the rubric rewards consistent spacing and clear placement, not a single correct style.
Finish by erasing construction lines and darkening outlines. Keep frosting bands visually distinct from tier edges by using a slightly thicker line or a light hatch pattern. Check that no decoration crosses a tier boundary unless intended.
- Mark evenly spaced points along each band's front curve.
- Draw decorations centered on the marks.
- Erase construction lines.
- Darken outlines and add light hatching to frosting bands if desired.
Worked example
Draw a two-tier cake with tier heights in a 2:1 ratio, one frosting band at the boundary, and three evenly spaced decorations on that band. Use a unit of 3 cm. State the tier heights and band height.
Worked answer
Bottom tier height = 2 units = 6 cm. Top tier height = 1 unit = 3 cm. Total cake height = 9 cm. Frosting band at the boundary = 6 cm from the baseline. Three decorations spaced evenly along the band's front curve. Check: 6 + 3 = 9 cm total, and the band height matches the boundary.
Four practice exercises
Exercise 1
A three-tier cake uses a 4:2:1 ratio with a unit of 2 cm. State the height of each tier and the total cake height.
Show answer and check
Bottom = 8 cm, middle = 4 cm, top = 2 cm, total = 14 cm.
Why: Multiply each ratio part by the unit: 4×2=8, 2×2=4, 1×2=2. Add: 8+4+2=14 cm.
Check: Re-add the tier heights and confirm the sum equals the total; confirm each height is a multiple of the unit.
Exercise 2
A frosting band is drawn at 5 cm from the baseline on a tier that is 10 cm tall. A second band is placed midway between the first band and the top of the tier. At what height is the second band?
Show answer and check
7.5 cm from the baseline.
Why: Midway between 5 cm and 10 cm is (5+10)/2 = 7.5 cm.
Check: Confirm the second band is equidistant from 5 cm and 10 cm: 7.5−5=2.5 and 10−7.5=2.5.
Exercise 3
A bottom tier is 12 cm wide. Each higher tier is 2 cm narrower. State the widths of the middle and top tiers for a three-tier cake.
Show answer and check
Middle = 10 cm, top = 8 cm.
Why: Subtract 2 cm per tier: 12−2=10, 10−2=8.
Check: Confirm each width is smaller than the one below by exactly 2 cm.
Exercise 4
You plan five frosting bands on a cake that is 15 cm tall. Bands are at 3 cm, 6 cm, 9 cm, 12 cm, and 15 cm. Are the bands evenly spaced? If not, state a corrected set of five evenly spaced heights from 3 cm to 15 cm inclusive.
Show answer and check
The given bands are evenly spaced at 3 cm intervals. A corrected set is not needed; if starting at 3 cm and ending at 15 cm with five bands, the spacing is (15−3)/4 = 3 cm, giving 3, 6, 9, 12, 15 cm.
Why: Even spacing means equal differences between consecutive heights. The differences are all 3 cm, so the set is even. The formula (last−first)/(count−1) confirms the spacing.
Check: Subtract consecutive heights and confirm all differences are equal.
Common mistakes
- Making the top tier as tall as the bottom tier. Apply the chosen ratio consistently; measure each tier height from the baseline and compare to the ratio before drawing.
- Drawing frosting bands as flat lines instead of ellipses. Use the ellipse construction: horizontal guide, left and right edge marks, front curve down, back curve up.
- Letting a higher tier be wider than the tier below. Reduce width by a fixed amount per tier and check each width against the one below.
- Spacing decorations unevenly along a band. Mark equal intervals along the front curve first, then center each decoration on its mark.
Self-check rubric
- Tier heights follow a stated ratio and are measurable with a ruler.
- Each higher tier is narrower than the tier below.
- Frosting bands are drawn as ellipses with a clear front and back curve.
- Band heights are marked from the baseline and spacing is even where intended.
- Decorations are evenly spaced along band curves; shape and style may vary.
- Construction lines are erased and final outlines are clear.
Questions and answers
Do I have to use the 3:2:1 ratio?
No. Any consistent ratio works. The rubric checks that heights follow your stated ratio, not a specific one.
How many frosting bands should I draw?
At minimum one at each tier boundary. Optional mid-tier bands add detail; keep spacing even if you add them.
What if my ellipse looks too tall?
Reduce the ellipse height relative to its width. A height about one-fifth of the width is a useful starting point.
Can decorations be different shapes?
Yes. The convention allows varied shapes as long as spacing and placement are consistent and checkable.