Free original lessons
Realistic Cake Drawing: Cylinder Perspective, Shading, and Highlights
Learn to draw a realistic cake using cylindrical perspective, consistent light direction, and controlled highlights. Includes a worked example, four practice tasks, and a validation plan.
Free lesson
Four exercises
Worked answers
Object Drawing Lessons
A cake is a cylinder with a top surface, a curved side, and often a plate beneath it. Realism comes from three decisions made before any detail: the ellipse that defines the top, a single light direction that governs shading, and highlight placement that follows the same light. This lesson treats decoration as secondary; the goal is believable form. Work on plain paper with a graphite pencil, a soft eraser, and a blending tool such as a paper stump or your finger. Keep the light direction fixed for the whole drawing. All measurements below are hypothetical examples chosen for teaching; measure your own paper and tools if you scale the drawing.
Practice materials: Printable downloads are not available for this lesson yet. Use the instructions and four exercises below.
Reference illustration
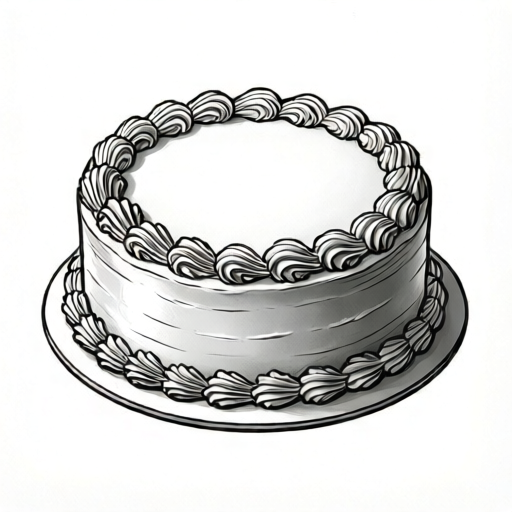
Use the stated measurements and conventions for each exercise.
Establishing cylindrical perspective
A cake seen from slightly above shows its top as an ellipse, not a circle. The ellipse is wider than it is tall, and its curvature is gentler at the sides than at the front and back. Draw a light horizontal line for the plate edge first, then place the cake's top ellipse so its center sits above the plate line. The side of the cake is bounded by two near-vertical lines dropping from the widest points of the ellipse. The bottom ellipse is mostly hidden by the plate rim, so draw only the short visible arc at the front.
Perspective consistency matters more than exact proportion. If the top ellipse is very open, the viewer is high above the cake; if it is nearly flat, the viewer is close to eye level. Choose one and keep the bottom arc consistent with it. A common error is drawing the top ellipse too circular, which makes the cake look like a drum seen from directly above while the side suggests a lower viewpoint.
- Draw a faint horizontal plate line and mark the cake's center point above it.
- Sketch the top ellipse with light pressure, checking that its left and right edges are the widest points.
- Drop two near-vertical side lines from those widest points to the plate line.
- Add a short front arc for the bottom edge, matching the top ellipse's openness.
- Erase construction lines only after the form reads as a solid cylinder.
Shading with a single light direction
Choose a light direction before shading, for example from the upper left. The side of the cake facing the light receives the lightest values; the opposite side falls into shadow. On a cylinder, the transition from light to shadow is gradual, with a darker core shadow just before the reflected light near the bottom edge. The top surface is usually lighter than the side because it faces the light more directly, but it can carry a soft gradient if the light is angled.
Use directional pencil strokes that follow the curve of the side. Build value in two or three passes rather than pressing hard once. Keep the plate shadow consistent: it falls away from the light and touches the cake's base. A cast shadow that points toward the light immediately breaks realism.
- Mark a small arrow outside the drawing to record the light direction.
- Shade the side facing away from the light with light strokes, following the curve.
- Darken the core shadow band, leaving a narrow lighter strip near the bottom for reflected light.
- Shade the top surface with a gentle gradient toward the shadow side.
- Add the cast shadow on the plate, extending away from the light.
Placing highlights that follow the form
Highlights sit where the surface faces the light most directly. On the curved side, that is a vertical band slightly toward the light side, not a single dot. On the top ellipse, the highlight is broader and softer. Keep highlights as reserved paper or lifted graphite rather than white pencil over dark shading, which looks chalky. The highlight band should narrow near the top edge and widen slightly at the middle of the side.
A second, weaker highlight can appear on the plate rim if the plate is glossy, but keep it subordinate. Avoid placing highlights on the shadow side; even reflected light is dimmer than the main highlight. Check by squinting: the highlight should be the brightest area, the core shadow the darkest, and the reflected light between them in value.
- Reserve a vertical band on the light-facing side before shading.
- Soften the band's edges so it blends into the surrounding light value.
- Add a broader, softer highlight on the top surface near the light side.
- Lift any graphite that dulls the highlight with a clean eraser corner.
- Confirm the highlight is brighter than the top surface and the plate.
Checking realism before adding detail
Before drawing any decoration, check three things: the ellipse reads as a top surface, the shading follows one light direction, and the highlight sits on the light-facing side. Turn the drawing upside down or view it in a mirror; inconsistencies in perspective and value become easier to see. If the cake looks flat, the likely cause is a missing core shadow or a highlight placed centrally rather than toward the light.
Only after the form reads clearly should you add simple surface texture. Keep texture subordinate to the shading; a few short strokes suggesting frosting are enough. The rubric below rewards consistent form and light over decorative complexity.
- View the drawing in a mirror and check the ellipse and shadow direction.
- Confirm the darkest value is the core shadow, not an outline.
- Check that the cast shadow points away from the light.
- Add minimal texture only where it does not disturb the highlight band.
Worked example
Draw a cake from a slightly elevated viewpoint with light from the upper right. The cake sits on a plate. Show the top ellipse, the curved side, a core shadow, reflected light, a highlight band, and a cast shadow.
Worked answer
Place the plate line first. Draw a moderately open top ellipse centered above it, then drop two near-vertical side lines from the ellipse's widest points to the plate line. Add a short front arc for the bottom edge. Mark a light arrow at the upper right. Shade the left side of the cylinder with curved strokes, darkening a core shadow band and leaving a narrow lighter strip near the bottom for reflected light. Shade the top with a gentle gradient toward the left. Reserve a vertical highlight band on the right side and a broader soft highlight on the top's right area. Add a cast shadow on the plate extending to the left, away from the light. Check in a mirror that the ellipse, shadow direction, and highlight placement agree.
Four practice exercises
Exercise 1
Draw a cake seen from a high viewpoint with light from the left. Use a wide, open top ellipse and show the cast shadow on the plate.
Show answer and check
A wide top ellipse, side lines from its widest points, shading on the right side, a highlight band on the left, and a cast shadow extending to the right.
Why: A high viewpoint opens the ellipse; light from the left puts the shadow on the right and the highlight on the left. The cast shadow must point away from the light.
Check: View in a mirror: the ellipse should look wide, the darkest band should be on the right, and the cast shadow should extend right.
Exercise 2
Draw a cake at near eye level with light from the upper front. Keep the top ellipse nearly flat and place the highlight on the front of the side.
Show answer and check
A nearly flat top ellipse, a front-facing highlight band, shading toward the back and sides, and a cast shadow behind the cake.
Why: Near eye level flattens the ellipse; front light places the highlight on the front and the shadow toward the back.
Check: Squint: the front band should be brightest, the back darker, and the cast shadow should fall behind the cake.
Exercise 3
Draw a cake with light from the upper right but deliberately place the highlight slightly too far toward the center. Then correct it.
Show answer and check
The corrected drawing moves the highlight band toward the right side and keeps the core shadow on the left.
Why: A central highlight contradicts the light direction and flattens the cylinder. Moving it toward the light restores form.
Check: Compare the highlight position with the light arrow; the highlight should be on the same side as the arrow.
Exercise 4
Draw a cake on a plate and add a second, weaker highlight on the plate rim. Keep the cake's highlight dominant.
Show answer and check
A strong vertical highlight band on the cake's light-facing side and a faint highlight on the plate rim near the light, with the cake highlight clearly brighter.
Why: Secondary highlights are acceptable if subordinate. The cake's form must remain the brightest element.
Check: Check values: the cake highlight should be lighter than the plate highlight, and both should sit on the light-facing side.
Common mistakes
- Drawing the top as a full circle. Flatten the ellipse and check that its widest points align with the side lines.
- Shading with strokes that run straight across the side. Curve the strokes to follow the cylinder's surface.
- Placing the highlight in the center of the side. Move the highlight toward the light-facing side and keep it as a vertical band.
- Making the cast shadow point toward the light. Redraw the cast shadow so it extends away from the light source.
- Using a hard outline around the whole cake. Replace the outline with value changes at the edges, keeping only soft boundary lines where needed.
Self-check rubric
- Top ellipse reads as a surface, not a circle, and aligns with the side lines.
- Side lines drop from the ellipse's widest points and the bottom arc matches the viewpoint.
- One light direction governs shading, core shadow, reflected light, and cast shadow.
- Highlight is a vertical band on the light-facing side and is the brightest area.
- Values are built in layers with curved strokes; no hard outline flattens the form.
- Valid alternatives: any consistent light direction, any reasonable ellipse openness, and either reserved-paper or lifted-graphite highlights are acceptable if the logic holds.
Questions and answers
How open should the top ellipse be?
Choose an openness that matches your viewpoint and keep the bottom front arc consistent. A moderately open ellipse suggests looking down at the cake from a standing height.
Can I use a ruler for the side lines?
A ruler helps keep the sides near-vertical, but slight taper is acceptable if the perspective suggests it. Check that both sides drop from the ellipse's widest points.
Do I need to draw the plate?
A plate line and cast shadow help ground the cake. A full plate is optional, but the cast shadow should still fall on a surface.
How do I keep highlights clean?
Reserve the paper before shading or lift graphite with a clean eraser corner. Avoid white pencil over dark graphite.