Free original lessons
Side Nose Drawing: Profile Construction with Bridge, Tip and Nostril Line
Learn to draw a profile nose by building the bridge curve, tip angle and nostril line in three stages, then practice with varied bridge heights.
Free lesson
Four exercises
Worked answers
Object Drawing Lessons
A profile nose is easiest to draw when you treat it as three connected decisions rather than one outline. First you place the bridge curve from the brow area down toward the tip. Next you set the tip angle, which controls whether the nose reads as upturned, straight or downturned. Finally you add the nostril line, a short curve that sits under the tip and meets the face. This lesson uses a simple convention: the nose sits inside a soft vertical band, and all measurements are relative to that band. You will work through a worked example, then four self-contained practice tasks. Every task can be solved from the text alone; where a diagram would help, the text describes what to imagine. Keep your pencil light for the first two stages and darken only the final contour.
Practice materials: Printable downloads are not available for this lesson yet. Use the instructions and four exercises below.
Reference illustration
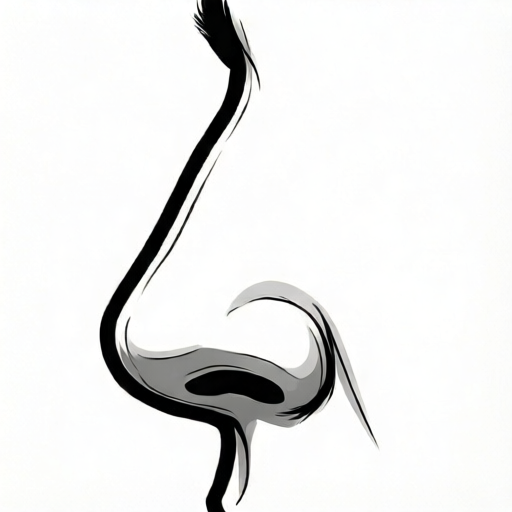
Use the stated measurements and conventions for each exercise.
Stage 1: Place the bridge curve
Begin with a vertical guide line representing the front of the face. Mark a top point at brow height and a bottom point at chin height. The bridge starts slightly below the brow point and curves gently outward before turning back toward the tip. Think of it as a shallow S: nearly straight at the top, then a soft outward bow near the middle.
Use a light pencil. Draw the bridge as a single continuous curve from the top mark to a temporary lower bridge mark. The curve should not wobble; if it does, redraw it as two arcs joined smoothly. The bridge height is the horizontal distance from the face guide to the most outward point of this curve. In the worked example this distance is 2 units, but any consistent unit works.
- Draw a vertical face guide and mark brow and chin points.
- Mark a bridge start just below the brow point.
- Draw a shallow S-curve outward and back to a temporary lower bridge mark.
- Label the most outward point as the bridge peak.
Stage 2: Set the tip angle
The tip angle is the direction the nose points at its lowest forward point. Draw a short straight segment forward from the bridge peak to a new tip point; this segment's angle from horizontal is the tip angle. Then decide the tip angle relative to horizontal: an upturned tip angles upward, a straight tip is nearly horizontal, and a downturned tip angles downward. In this lesson, angles are measured from horizontal, with upward angles positive.
Keep the tip segment short, about one-third the length of the bridge curve. A common mistake is making the tip too long, which makes the nose look like a beak. Check the angle by holding your pencil at the intended slope before committing.
- Draw a short straight segment forward from the bridge peak to a new tip point.
- Choose an angle: positive for upturned, zero for straight, negative for downturned.
- Compare the segment length to the bridge curve; keep it about one-third.
- Adjust the tip point until the segment's angle matches your choice.
Stage 3: Add the nostril line
The nostril line is a short curve under the tip that connects the tip point to the face guide. It usually starts at the tip point, dips slightly, and rises to meet the face at a point below the bridge start. The nostril line should not cross the tip segment; it sits beneath it.
Draw the nostril line lightly, then check that the space between the tip segment and the nostril line is narrow and even. This space represents the underside of the nose. If it is too wide, the nose looks bulbous; if too narrow, the nostril line disappears. Darken the final contour only after both the tip angle and nostril line look correct.
- Start at the tip point and draw a short dip downward.
- Curve back up to meet the face guide below the bridge start.
- Check that the nostril line stays under the tip segment.
- Darken the final contour from bridge start to nostril meeting point.
Varying bridge height
Bridge height changes the character of the profile. A taller bridge (greater horizontal distance from the face guide) reads as a stronger, more prominent nose. A shorter bridge reads as flatter. Keep the tip angle and nostril line proportional: if you increase bridge height, lengthen the tip segment slightly and widen the nostril dip a little.
Practice by drawing the same three stages with bridge heights of 1, 2 and 3 units. Use the same tip angle for all three so you can see how height alone changes the result. Then repeat with a different tip angle. This controlled variation builds reliable muscle memory.
- Draw three profiles with bridge heights 1, 2 and 3 units.
- Keep the tip angle identical across all three.
- Compare how the nostril line changes with height.
- Repeat with a different tip angle to see the combined effect.
Worked example
Draw a profile nose with bridge height 2 units, tip angle +15 degrees (upturned), and a nostril line that dips 0.5 units below the tip. Describe each stage.
Worked answer
Stage 1: Draw a vertical face guide. Mark brow and chin points. Start the bridge just below the brow and draw a shallow S-curve outward to a bridge peak 2 units from the guide, then back to a temporary lower bridge mark. Stage 2: Draw a short straight segment forward from the bridge peak to a new tip point at +15 degrees from horizontal, about one-third the bridge length. Stage 3: From the tip point, draw a nostril line dipping 0.5 units and rising to meet the face guide below the bridge start. Check that the nostril line stays under the tip segment and that the bridge peak is the most outward point.
Four practice exercises
Exercise 1
Draw a profile nose with bridge height 1 unit, tip angle 0 degrees (straight), and a nostril dip of 0.3 units. Describe the three stages and the final contour.
Show answer and check
Stage 1: Face guide with brow and chin marks; bridge starts below brow, bows outward 1 unit to the peak, returns to a temporary lower bridge mark. Stage 2: Draw a short straight segment forward from the bridge peak to a new tip point, horizontal (0 degrees), about one-third the bridge length. Stage 3: Nostril line dips 0.3 units from the tip point and rises to the face guide below the bridge start. Final contour runs from bridge start to nostril meeting point.
Why: A 1-unit bridge is short, so the tip segment and nostril dip are kept small to stay proportional. A zero angle means the tip segment is horizontal, which is a valid straight-tip profile.
Check: Verify the bridge peak is 1 unit from the guide, the tip segment is horizontal, and the nostril line does not cross the tip segment.
Exercise 2
Draw a profile nose with bridge height 3 units, tip angle -10 degrees (downturned), and a nostril dip of 0.7 units. Describe the three stages and one proportional adjustment you made.
Show answer and check
Stage 1: Bridge bows outward 3 units to the peak and returns to a temporary lower bridge mark. Stage 2: Draw a short straight segment forward from the bridge peak to a new tip point, angled downward at -10 degrees, about one-third the bridge length. Stage 3: Nostril line dips 0.7 units from the tip point and rises to the face guide. Proportional adjustment: because the bridge is tall, the tip segment and nostril dip are slightly larger than in a 1-unit bridge.
Why: A taller bridge needs a slightly longer tip segment and wider nostril dip to keep the nose from looking pinched. The negative angle makes the tip point downward.
Check: Confirm the bridge peak is 3 units from the guide, the tip segment slopes downward, and the nostril dip is wider than in the 1-unit example.
Exercise 3
A student draws a bridge height of 2 units but makes the tip segment as long as the bridge curve. Identify the likely visual problem and describe how to fix it using the three stages.
Show answer and check
The tip segment is too long, so the nose will look like a beak. Fix: redraw Stage 2 with a short straight segment forward from the bridge peak to a new tip point, about one-third the bridge length, keeping the same tip angle; then redraw Stage 3 so the nostril line starts at the new tip point and stays beneath the tip segment.
Why: The tip segment should be short relative to the bridge. Lengthening it distorts the profile and pushes the nostril line out of proportion.
Check: Measure the tip segment against the bridge curve; it should be roughly one-third. Check that the nostril line still meets the face guide below the bridge start.
Exercise 4
Draw two profile noses side by side: one with bridge height 2 units and tip angle +15 degrees, the other with bridge height 2 units and tip angle -15 degrees. Keep the nostril dip at 0.5 units for both. Describe how the nostril line differs.
Show answer and check
Both have the same bridge height and nostril dip. In the +15-degree profile, the tip segment points upward, so the tip point sits higher and the nostril line starts higher and dips less steeply. In the -15-degree profile, the tip segment points downward, so the tip point sits lower and the dip appears deeper relative to the tip. The nostril line still meets the face guide below the bridge start in both.
Why: Tip angle changes the starting height of the nostril line even when the dip value is the same. The downward tip lowers the start point, making the dip look deeper.
Check: Compare the tip heights: the +15-degree tip should be higher than the -15-degree tip. Check that both nostril lines stay under their tip segments and meet the face guide at the same relative point.
Common mistakes
- Making the bridge curve too sharp, creating a hooked outline. Redraw the bridge as two gentle arcs joined smoothly; the outward bow should be shallow.
- Drawing the tip segment too long, so the nose looks like a beak. Keep the tip segment about one-third the length of the bridge curve and recheck the angle.
- Letting the nostril line cross the tip segment. Start the nostril line at the tip and keep it entirely beneath the tip segment.
- Changing bridge height without adjusting the nostril dip. Widen the nostril dip slightly when bridge height increases, and narrow it when height decreases.
Self-check rubric
- Bridge curve is a smooth shallow S with a single most outward point.
- Tip segment is short, about one-third the bridge length, and its angle matches the chosen direction.
- Nostril line starts at the tip, dips, and meets the face guide without crossing the tip segment.
- Bridge height is consistent with the stated unit and the nostril dip is proportional.
- Final contour is darkened only after the three stages are checked.
- Valid alternatives are accepted: any tip angle, any bridge height, and any nostril dip that stays proportional and does not cross the tip segment.
Questions and answers
Do I need a ruler for the units?
No. Any consistent unit works, such as pencil-widths or grid squares. The numbers in the examples are hypothetical and only need to be consistent within a drawing.
Can the tip angle be zero?
Yes. A zero angle means the tip segment is horizontal. This is a valid straight-tip profile.
How do I know the nostril line is in the right place?
It should start at the tip, dip slightly, and meet the face guide below the bridge start without crossing the tip segment.
What if my bridge height is very small?
Keep the tip segment short and the nostril dip narrow. The three stages still apply; only the proportions shrink.