Free original lessons
Realistic Phoenix Drawing: Feather Anatomy and Shading
Learn layered wing and tail feather anatomy, directional shading, and overlap cues to draw a realistic phoenix with a printable plate and practice plan.
Free lesson
Four exercises
Worked answers
Object Drawing Lessons
A realistic phoenix reads as a bird first: feathers follow anatomical layers, and shading explains how those layers overlap. This lesson defines a practical feather convention, then walks through wing primaries, secondaries, coverts, tail plumes, and body contour feathers. You will use consistent directional strokes and simple value steps to show depth without inventing species-specific standards. All measurements are hypothetical examples; measure your own paper and tools before drawing.
Practice materials: Printable downloads are not available for this lesson yet. Use the instructions and four exercises below.
Reference illustration
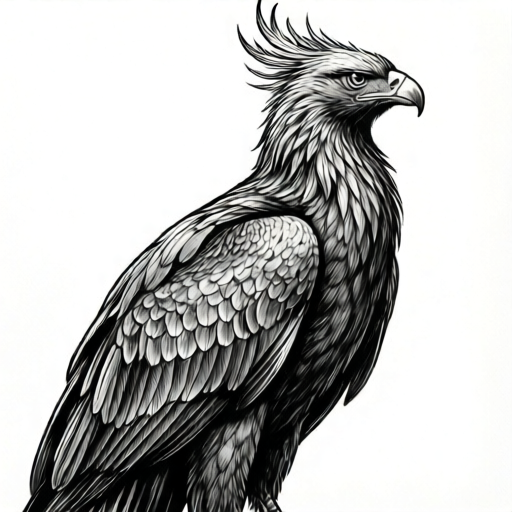
Use the stated measurements and conventions for each exercise.
Feather Anatomy Convention
Treat each feather as a tapered shape with a central shaft (rachis) and two vanes. Draw the shaft as a light line that stops before the tip. The vane nearest the body is the inner vane; the outer vane faces away. For a realistic phoenix, keep wing feathers layered from body outward: small coverts near the shoulder, medium coverts below them, secondaries along the forearm, and primaries at the hand. Tail plumes attach at the tail base and fan outward; each plume has a shaft and a soft, slightly asymmetric vane.
Use a consistent stroke direction: draw vane lines from shaft toward edge, following the feather's growth direction. On the left wing, strokes flow outward and slightly down; on the right wing, mirror them. Body contour feathers point toward the tail. This convention is a drawing choice, not a biological standard, and valid alternatives exist if stroke direction stays consistent across the plate.
- Lightly mark the wing's leading edge and trailing edge before adding feathers.
- Place coverts first as small overlapping ovals, then secondaries, then primaries.
- Draw each shaft as a short line, leaving a gap at the tip.
- Add vane lines from shaft to edge, keeping spacing even within one feather.
Shading Overlap and Value Steps
Shading should explain which feather sits on top. Use three values: light on the exposed upper vane, mid on the shaft area, and dark in the gap under an overlapping feather. Keep the darkest line at the overlap edge, not around the whole feather. For the tail, shade the underside of each plume where it crosses another plume. A hypothetical example: if your paper is 20 cm wide, keep the darkest overlap band about 2 mm wide so it reads as a shadow, not a black outline.
Blend only within one value step. Leave the lightest vane untouched. On wings, alternate light and mid feathers to suggest layering without making a stripe pattern. On the body, use short directional strokes that follow contour feather direction, and reserve dark accents for the shoulder and under-wing gaps.
- Test three values on scrap paper under your actual lighting.
- Shade each feather's lower edge where the next feather overlaps it.
- Keep overlap shadows narrow and consistent across the wing.
- Check the drawing at arm's length: the wing should read as layered, not flat.
Tail Plume Arrangement and Practice Plate
The tail is where a phoenix can look realistic rather than generic. Build a fan of five to seven plumes from the tail base. Give each plume a shaft, a soft vane, and a slight curve. Vary length by no more than one third of the longest plume so the fan stays balanced. Overlap plumes in a clear order: center plume on top, then alternating side plumes beneath. Shade the underside of each crossing plume.
For practice, redraw the same phoenix with a different tail arrangement: move the longest plume from center to left, and reverse the overlap order on the right side. Keep wing anatomy unchanged so the comparison isolates tail structure. The planned printable plate will include labeled wing layers, tail plume structure, body feather direction, a shading guide, and a practice area for this redraw.
- Mark the tail base and fan angle before drawing plumes.
- Draw center plume first, then alternate left and right plumes.
- Number the overlap order lightly at the tail base.
- Redraw with the longest plume shifted and overlap order reversed.
Worked example
On a 20 cm wide sheet, place a wing with three covert rows, five secondaries, and four primaries. Shade overlap edges with a 2 mm dark band. Describe the order and one check.
Worked answer
Draw the leading edge first. Place three rows of small coverts near the shoulder, then five secondaries along the forearm, then four primaries at the hand. Shafts stop before tips. Shade a 2 mm band under each overlapping feather, keeping the upper vane light. Check at arm's length that the primaries read as the longest layer and that no outline surrounds a whole feather.
Four practice exercises
Exercise 1
A wing has 3 covert feathers, 5 secondaries, and 4 primaries. How many wing feathers are drawn in total?
Show answer and check
12 feathers.
Why: Count coverts as 3, secondaries as 5, and primaries as 4; 3 + 5 + 4 = 12.
Check: Recount each layer separately and add the three numbers once.
Exercise 2
On 20 cm paper, a 2 mm overlap band is used. If 6 overlap edges are shaded, what total band length is shaded along those edges?
Show answer and check
12 mm total.
Why: Each band is 2 mm; 6 bands × 2 mm = 12 mm.
Check: Multiply band width by number of edges and confirm units are millimetres.
Exercise 3
A tail fan has a longest plume of 9 cm. What is the maximum allowed length of a shorter plume if variation stays within one third of the longest?
Show answer and check
6 cm minimum, so shorter plumes must be at least 6 cm.
Why: One third of 9 cm is 3 cm; 9 cm − 3 cm = 6 cm.
Check: Subtract one third of the longest length and compare each shorter plume to that minimum.
Exercise 4
You draw 7 tail plumes with overlap order: center on top, then alternating left and right beneath. If the center plume is number 1, how many plumes are beneath it?
Show answer and check
6 plumes.
Why: Total plumes 7 minus the top center plume 1 equals 6 beneath.
Check: Count plumes not numbered 1 and confirm the total returns to 7.
Common mistakes
- Drawing every feather as an isolated outline with no overlap. Place feathers in layers and shade only the gap under the upper feather.
- Using the same stroke direction on both wings. Mirror stroke direction across the body while keeping growth direction consistent.
- Making tail plumes equal length and evenly spaced like a fan. Vary length within one third of the longest plume and alternate overlap order.
- Shading the whole feather dark instead of the overlap edge. Keep three values and reserve the darkest band for the overlap shadow.
Self-check rubric
- Wing shows coverts, secondaries, and primaries in layered order.
- Each feather has a shaft that stops before the tip and two vanes.
- Stroke direction is consistent and mirrored across wings.
- Three values are used, with darkest band at overlap edges.
- Tail plumes vary in length within one third of the longest and have clear overlap order.
- Body contour feathers point toward the tail.
- Valid alternative conventions are accepted if consistency and overlap clarity are maintained.
Questions and answers
How many wing feather layers should I show?
Show at least coverts, secondaries, and primaries. Add medium coverts if space allows.
Can I use a different feather stroke direction?
Yes, if it stays consistent across the plate and follows each feather's growth direction.
How wide should overlap shadows be?
Measure your paper and choose a narrow band; a 2 mm band on 20 cm paper is a hypothetical example.
Do I need to draw every tail plume separately?
Yes, each plume needs a shaft and vane, but you may simplify vane lines if overlap remains clear.