Free original lessons
Charcoal Silhouette and Value Contrast for Scary Scenes
Learn to draw a scary charcoal scene using silhouette shapes and strong value contrast. Includes a worked example, four practice tasks, and a rubric for self-checking.
Free lesson
Four exercises
Worked answers
Object Drawing Lessons
Scary images often rely on what you cannot see. Charcoal is ideal for this because it can go from deep black to soft gray and back to bright white paper. In this lesson you will plan a scene using silhouette (shapes that read as dark against light) and value contrast (the difference between light and dark areas). You will measure your own paper and charcoal, set a simple value scale, and then build a scene where the dark shapes carry the mood. The goal is not realistic detail but a clear, unsettling balance of dark and light that a viewer can read at a glance.
Practice materials: Printable downloads are not available for this lesson yet. Use the instructions and four exercises below.
Reference illustration
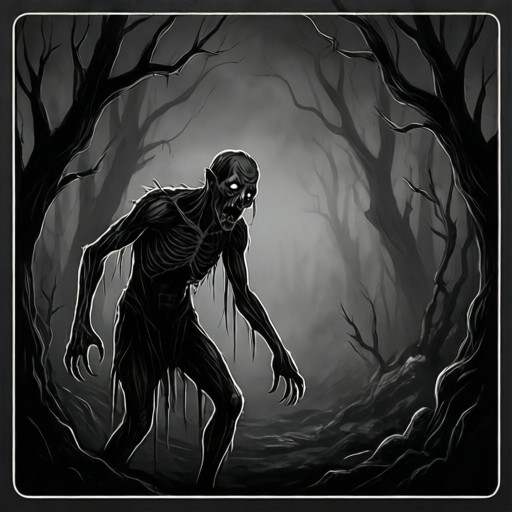
Use the stated measurements and conventions for each exercise.
Set up a value scale and measure your materials
Before drawing the scene, make a small value scale on scrap paper. Use your charcoal to create at least four patches: white paper, light gray, dark gray, and near-black. Label them 1 to 4 from lightest to darkest. This scale is your reference for the whole drawing. Because charcoal brands and paper textures vary, test on the actual paper you will use. Measure your paper with a ruler and write the dimensions in centimeters or inches, keeping one unit throughout. For example, a hypothetical sheet might be 20 cm by 25 cm; your measurement may differ.
Decide on a simple convention for your silhouette shapes: any area you intend to read as a dark shape should be at least as dark as patch 3 on your scale. Any area you intend to read as light should be no darker than patch 2. This convention is not a universal rule but a checkable choice you make and then follow. It helps you avoid muddy mid-tones that weaken the scary effect.
- Measure your paper and record length and width in one unit.
- Make a four-patch value scale on scrap paper using your charcoal.
- Write the patch numbers 1 to 4 beside each patch.
- Choose a threshold: silhouette areas must be patch 3 or darker; light areas patch 2 or lighter.
Plan silhouette shapes that carry the mood
A scary scene often uses a few strong dark shapes against a lighter background. Think of a doorway, a tree, a figure, or a hanging shape. Keep the number of silhouette shapes small, perhaps two or three, so the contrast stays clear. Sketch the shapes lightly with a hard charcoal stick or a pencil, then check that each shape is simple enough to read from across the room. Avoid thin, fussy outlines; the power comes from solid dark areas.
Place the largest dark shape off-center to create unease. Leave a lighter area where the viewer's eye can rest, but keep that light area smaller than the dark mass. This imbalance is a deliberate choice, not a rule. Test your plan by squinting: if the dark shapes still read clearly, the silhouette is working.
- Sketch two or three simple silhouette shapes lightly.
- Check that each shape is a solid area, not a thin outline.
- Place the largest dark shape off-center.
- Squint at the sketch to confirm the shapes still read.
Build value contrast with charcoal layers
Start with the lightest areas and work toward the darkest. Leave white paper where you want the brightest light. Add light gray with the side of a charcoal stick, then dark gray, then near-black in the silhouette shapes. Use a blending stump or your finger only if you want soft edges; keep the silhouette edges crisp where the shape matters. Check your drawing against the value scale: the silhouette areas should match patch 3 or 4, and the light areas should match patch 1 or 2.
If an area becomes too dark, lift charcoal with a kneaded eraser rather than adding more. If an area is too light, add another layer of charcoal. Work in small steps and step back often. The contrast between the darkest silhouette and the lightest paper is what creates the scary effect.
- Leave white paper for the brightest light areas.
- Add light gray with the side of the charcoal stick.
- Darken silhouette shapes to patch 3 or 4 on your scale.
- Step back and compare the drawing to your value scale.
Refine edges and check the dark-light balance
Once the main values are in place, refine the edges. Crisp edges on silhouette shapes make them feel solid and threatening; soft edges can suggest fog or distance. Use a kneaded eraser to pull out small light shapes inside a dark area if you need a highlight, such as a window or an eye. Keep these highlights small so the dark mass still dominates.
Finally, check the balance. Count the approximate area of dark shapes versus light shapes. A scary scene often has more dark than light, but the exact ratio is your choice. Write down your ratio, for example two parts dark to one part light, and check that the drawing matches your plan. This self-check makes the result repeatable and easy to discuss.
- Refine silhouette edges to be crisp where the shape matters.
- Use a kneaded eraser for small highlights inside dark areas.
- Estimate the dark-to-light area ratio and write it down.
- Compare the finished drawing to your planned ratio and value scale.
Worked example
On a hypothetical 20 cm by 25 cm sheet, plan a scary scene with one large dark doorway shape and a smaller dark figure shape. The light area is the wall around the doorway. Describe the value choices and the dark-to-light ratio.
Worked answer
Measure the sheet as 20 cm by 25 cm. Make a four-patch value scale. Choose the doorway and figure to be patch 4 (near-black) and the wall to be patch 1 or 2 (white or light gray). Place the doorway off-center, occupying roughly one third of the sheet area, and the figure smaller beside it. The dark shapes together cover about half the sheet, so the dark-to-light ratio is about one to one, but the dark mass is concentrated and the light area is broken up. Squint to confirm the doorway and figure still read as solid dark shapes. Check the silhouette areas against patch 4 and the wall against patch 1 or 2.
Four practice exercises
Exercise 1
Plan a scary scene on a hypothetical 15 cm by 20 cm sheet. You will use one large dark shape (a tree) and one small dark shape (a figure). State the value threshold for the silhouette areas and the approximate dark-to-light ratio. Describe where each shape sits on the sheet.
Show answer and check
Measure the sheet as 15 cm by 20 cm. Make a value scale and set the silhouette threshold at patch 3 or darker. Place the tree off-center, covering about one third of the sheet, and the figure small near the lower edge. The dark shapes cover roughly half the sheet, giving a dark-to-light ratio of about one to one. The light area is the sky and ground around the shapes.
Why: The plan uses simple solid shapes and a stated threshold so the silhouette will read clearly. Off-center placement and a small figure create unease. The ratio is estimated from the described areas.
Check: Squint at your sketch. Confirm the tree and figure still read as dark masses. Compare the silhouette areas to patch 3 or darker on your value scale, and check that the estimated dark area is about half the sheet.
Exercise 2
You have a drawing where the silhouette shape is patch 2 on your value scale and the background is patch 1. The scene does not feel scary. Describe two specific changes you could make using charcoal and eraser, and state how you would check the result.
Show answer and check
First, darken the silhouette shape to patch 3 or 4 by adding more charcoal. Second, enlarge the dark shape slightly or reduce the light background area so the dark mass dominates. Check by squinting and by comparing the silhouette to patch 3 or 4 on the value scale.
Why: The original contrast is too weak because patch 2 is close to patch 1. Increasing the darkness of the silhouette and the proportion of dark area strengthens the contrast.
Check: After the changes, squint at the drawing. The silhouette should read as a solid dark shape. Compare the silhouette area to patch 3 or 4 and confirm the dark area is larger than before.
Exercise 3
On a hypothetical 18 cm by 24 cm sheet, you want a dark-to-light ratio of two parts dark to one part light. The dark shapes are a doorway and a hanging shape. Estimate the area of each dark shape in square centimeters and state whether your plan meets the ratio.
Show answer and check
The sheet area is 18 cm times 24 cm, which equals 432 square centimeters. A two-to-one ratio means dark areas should total about 288 square centimeters and light areas about 144 square centimeters. Plan the doorway at about 200 square centimeters and the hanging shape at about 88 square centimeters, totaling 288 square centimeters. The plan meets the ratio.
Why: The total area is calculated from the measured dimensions. The ratio is applied by dividing the total into three parts and assigning two parts to dark areas. The individual shape estimates sum to the dark total.
Check: Multiply the length and width to confirm 432 square centimeters. Add the two dark shape estimates and confirm they equal about 288 square centimeters. Check that the remaining light area is about 144 square centimeters.
Exercise 4
Describe how to use a kneaded eraser to add a small highlight inside a near-black silhouette shape without breaking the silhouette. State the size limit for the highlight and how you would check that the silhouette still reads.
Show answer and check
Press the kneaded eraser into the dark shape to lift a small amount of charcoal, creating a highlight no larger than one tenth of the silhouette shape's area. Keep the highlight near an edge or inside the shape, not across the whole shape. Check by squinting: the shape should still read as one dark mass with a small light detail.
Why: A small highlight adds interest without destroying the solid dark area. Limiting the size to one tenth keeps the dark mass dominant. Squinting tests whether the silhouette still reads.
Check: Estimate the highlight area as no more than one tenth of the silhouette area. Squint at the drawing and confirm the silhouette still reads as a single dark shape. Compare the dark area to patch 3 or 4 on your value scale.
Common mistakes
- Using many mid-gray tones so the silhouette no longer reads as a distinct dark shape. Limit the scene to four values from your scale and keep silhouette areas at patch 3 or darker.
- Making the light area larger than the dark mass, which reduces the uneasy contrast. Shrink the light area or enlarge the main dark shape, then squint to confirm the dark mass still dominates.
- Drawing thin outlines instead of solid silhouette shapes. Fill the shape with charcoal until it matches patch 3 or 4 on your value scale.
- Adding too many small details inside the dark shape, which breaks the silhouette. Keep interior highlights small and few; check that the shape still reads as one dark mass from a distance.
Self-check rubric
- The drawing uses a stated value scale with at least four patches, and the silhouette areas match the chosen dark threshold.
- At least two solid silhouette shapes are present and read clearly when squinting.
- The dark-to-light area ratio is stated and roughly matches the drawing.
- Edges of silhouette shapes are crisp where the shape matters, and any interior highlights are small.
- The scene communicates a scary mood through dark-light balance rather than through detailed line work.
Questions and answers
Do I need special charcoal paper?
No. Use the paper you have and test your charcoal on it first. Measure the paper and note how the charcoal behaves, because texture affects how dark your patches become.
How dark should the silhouette be?
Use your own value scale. A practical convention is to make silhouette areas match patch 3 or 4, but you can choose a different threshold as long as you state it and follow it consistently.
Can I use a pencil instead of charcoal?
Yes, but charcoal is recommended because it reaches deep black easily. If you use pencil, make your own value scale and adjust the threshold numbers to match what your pencil can achieve.
How do I know if the contrast is strong enough?
Squint at the drawing or step back a few paces. If the dark shapes still read clearly against the light areas, the contrast is working. Compare the darkest and lightest areas to your value scale.