Free original lessons
Starburst Drawing: Varied Spikes and Center Burst Shading
Learn to draw a starburst with radiating spikes of different lengths and a shaded center burst. Includes steps, common mistakes, and four practice tasks.
Free lesson
Four exercises
Worked answers
Object Drawing Lessons
A starburst is a radial design with spikes extending from a central point. This guide focuses on two key skills: varying spike lengths to create visual interest and shading the center burst to suggest depth. For this guide, spike length is defined as the distance from the center point to the spike tip. All measurements are in centimeters, and any numerical values are hypothetical examples. The approach is flexible: you can vary spike count, length pattern, and shading style as long as the radial structure and center emphasis remain clear.
Practice materials: Printable downloads are not available for this lesson yet. Use the instructions and four exercises below.
Reference illustration
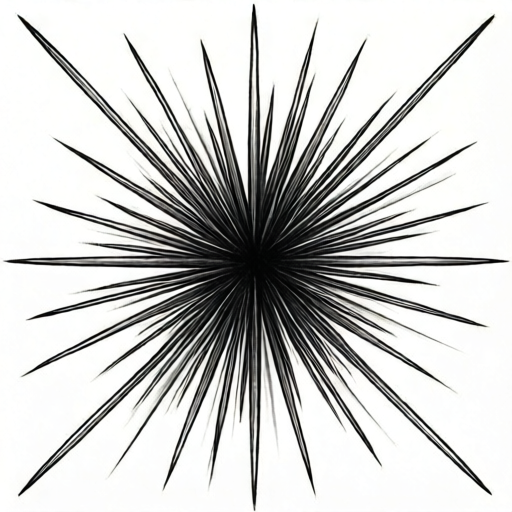
Use the stated measurements and conventions for each exercise.
Setting Up the Radial Grid
Begin by marking a center point on your paper. Use a ruler to draw a light horizontal and vertical line through the center, then add diagonal lines at 45 degrees to create eight radial guides. These guides help you place spikes evenly around the center. You can add more guides if you want more spikes, but eight is a manageable start.
Define a center circle with a radius of about 1.5 cm (hypothetical example). This circle marks the area for the center burst shading. Spikes will radiate outward from the edge of this circle. Keep your guide lines light so they can be erased later.
- Mark the center point and draw light horizontal, vertical, and diagonal guide lines.
- Draw a center circle with a 1.5 cm radius (hypothetical).
- Label each guide line with a number or letter to plan spike placement.
Drawing Spikes with Varied Lengths
Spikes should radiate from the center circle outward along the guide lines. To create variation, assign each spike a different length. For example, alternate long spikes (4 cm from center) and short spikes (2.5 cm from center), or use a pattern like long, medium, short, medium. The key is to avoid all spikes being the same length, which looks static.
Draw each spike as a narrow triangle or tapered shape. Start at the edge of the center circle and extend outward to the chosen length. Keep the base of each spike slightly wider than the tip. You can vary the width slightly for organic feel, but maintain a clear radial direction.
- Choose a length pattern for your spikes (e.g., long, short, medium, short).
- Starting at the center circle, draw a tapered spike along each guide line to the planned length.
- Check that spikes do not overlap and that the radial symmetry is preserved.
Shading the Center Burst
The center burst is the area inside the center circle. Shade it to create a sense of depth or energy. Use a gradient: darker near the center point, lighter toward the edge of the circle. You can achieve this with pencil pressure or by layering hatching lines. Alternatively, use a stippling technique with dots denser at the center.
Keep the shading consistent with the spike directions. For example, if spikes radiate outward, you can draw short lines from the center outward within the circle to reinforce the burst effect. Avoid shading outside the center circle unless you want to blend into the spikes.
- Decide on a shading method: gradient pencil, hatching, or stippling.
- Apply darker shading near the center point and gradually lighten toward the circle edge.
- Optionally, add radial lines within the circle to echo the spike directions.
Refining and Finalizing
Erase the guide lines carefully, keeping the spikes and center shading intact. Check that the spike lengths vary as planned and that the center burst is clearly shaded. You can adjust spike tips to be sharp or slightly rounded, but keep the overall radial pattern readable.
If desired, add a thin outline around the spikes to define them, but avoid heavy outlines that flatten the design. The final starburst should have a dynamic, energetic feel with a focused center.
- Erase guide lines without smudging the shading.
- Review spike length variation and center shading contrast.
- Make any final adjustments to spike tips or shading density.
Worked example
Draw a starburst with eight spikes on an eight-line radial grid. Use a center circle radius of 1.5 cm. Assign spike lengths in a repeating pattern: 4 cm, 2.5 cm, 3.5 cm, 2.5 cm, and repeat. Shade the center with a dark-to-light gradient.
Worked answer
The starburst has eight spikes radiating from the center circle. Two spikes are 4 cm long, two are 3.5 cm, and four are 2.5 cm, following the pattern. The center circle is shaded darkest at the center point and lightest at the edge, using pencil pressure. Guide lines are erased, and spike tips are sharp. The design shows clear length variation and a focused center burst.
Four practice exercises
Exercise 1
Draw a starburst with six spikes on a six-line radial grid (every 60 degrees). Use a center circle radius of 1 cm. Make spike lengths alternate: 3 cm, 2 cm, 3 cm, 2 cm, 3 cm, 2 cm. Shade the center with hatching lines that are denser at the center.
Show answer and check
A six-spike starburst with alternating long (3 cm) and short (2 cm) spikes. The center circle is shaded with hatching lines that are close together near the center point and spaced farther apart near the circle edge.
Why: The six-line grid ensures even spacing. Alternating lengths creates variation. Hatching density gradient produces the center burst effect.
Check: Verify that each spike starts at the circle edge and ends at the correct length. Check that hatching lines are denser at the center than at the edge.
Exercise 2
Draw a starburst with eight spikes. Use a center circle radius of 1.5 cm. Assign spike lengths in a pattern: 4 cm, 3 cm, 2 cm, 3 cm, 4 cm, 3 cm, 2 cm, 3 cm. Shade the center using stippling with dots denser at the center.
Show answer and check
An eight-spike starburst with lengths following the pattern. The center circle is stippled with dots that are closely packed near the center and sparser near the edge.
Why: The pattern provides three distinct lengths. Stippling density gradient creates the burst shading. The radial grid ensures even placement.
Check: Confirm spike lengths match the pattern by measuring from center to tip. Check that dot density decreases from center to edge.
Exercise 3
Draw a starburst with ten spikes on a ten-line radial grid (every 36 degrees). Use a center circle radius of 1.2 cm. Choose each spike length from the set {2, 2.5, 3, 3.5, 4} cm, and make sure no two adjacent spikes have the same length. Shade the center with a pencil gradient, darkest at the center point and lightest at the circle edge.
Show answer and check
A ten-spike starburst with lengths chosen from {2, 2.5, 3, 3.5, 4} cm and no two adjacent spikes equal. One valid sequence, going around the circle, is 3, 2.5, 4, 3, 2, 3.5, 2.5, 4, 3, 2 cm. The center circle shows a smooth pencil gradient from dark at the center point to light at the edge.
Why: Choosing from a fixed set of five lengths keeps the variation deliberate and checkable, while the no-adjacent-equal rule prevents monotony. The pencil gradient provides a clear center burst, and the ten-line grid maintains even radial spacing.
Check: Going around the circle, confirm each spike length is one of 2, 2.5, 3, 3.5, or 4 cm and that no two neighbors match. Measure from the center point to each tip. Verify the shading is darkest at the center point and lightest at the circle edge.
Exercise 4
Draw a starburst with twelve spikes on a twelve-line radial grid (every 30 degrees). Use a center circle radius of 1 cm. Use a repeating length pattern of 3.5 cm, 2.5 cm, 3 cm, 2.5 cm (repeat three times). Shade the center with cross-hatching that is denser at the center.
Show answer and check
A twelve-spike starburst with the repeating length pattern. The center circle is cross-hatched with denser lines near the center and lighter cross-hatching near the edge.
Why: The pattern gives three lengths in a cycle. Cross-hatching density gradient creates depth. The twelve-line grid ensures even spacing.
Check: Verify the length pattern repeats correctly and cross-hatching is denser at the center. Measure a few spike lengths to confirm.
Common mistakes
- Drawing all spikes the same length. Plan a length pattern before drawing, such as alternating long and short spikes, and mark the intended tip positions lightly.
- Shading the center too uniformly, losing the burst effect. Use a gradient from dark center to lighter edge, or vary dot density if stippling, to create depth.
- Spikes not radiating from the center circle edge. Start each spike exactly at the circle edge and follow the guide lines outward.
- Guide lines left visible or too dark. Draw guide lines lightly and erase them after the spikes and shading are complete.
Self-check rubric
- Radial structure: spikes radiate from the center circle along guide lines.
- Spike length variation: at least two distinct spike lengths are used in a planned pattern.
- Center burst shading: shading is darker near the center and lighter toward the circle edge.
- Neatness: guide lines are erased, spikes are cleanly drawn, and shading is controlled.
- Alternative conventions allowed: spike count, length pattern, and shading method may vary if the radial burst and center emphasis are clear.
Questions and answers
How many spikes should a starburst have?
There is no fixed number. Eight to twelve spikes are common for practice, but you can choose any number as long as they radiate evenly and lengths vary.
Can I use a different shading method?
Yes. Gradient pencil, hatching, cross-hatching, or stippling are all valid. The goal is to show a darker center fading outward.
What if my spikes overlap?
Overlap can happen if spikes are too wide or guide lines are uneven. Keep spike bases narrow and follow the guides. If overlap occurs, adjust the width or length of neighboring spikes.
Do I need a ruler?
A ruler helps with even guide lines and consistent spike lengths, but freehand is acceptable if the radial pattern remains clear.