Reference diagram
LETTER · Download PDF (2 pages)
Free original resources
Learn to draw an upside-down tree with roots at the top and canopy at the bottom. Practice tracing, labeling, and checking proportions with simple arithmetic.
Original reference diagrams, four practice exercises and separate worked answers. All files are free. No signup required.
LETTER · Download PDF (2 pages)
LETTER · Download PDF (2 pages)
LETTER · Download PDF (6 pages)
Choose A4 or US Letter for your printer. The reference and answer illustrations are not physical rulers; follow the scale instruction printed on the practice worksheet.
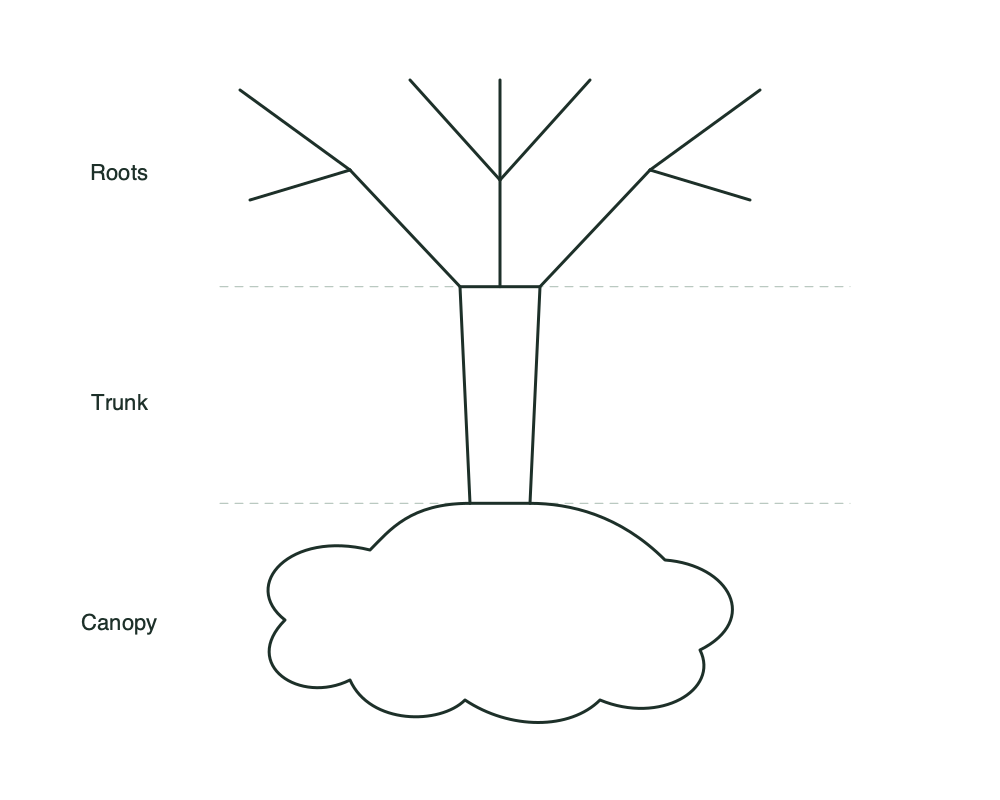
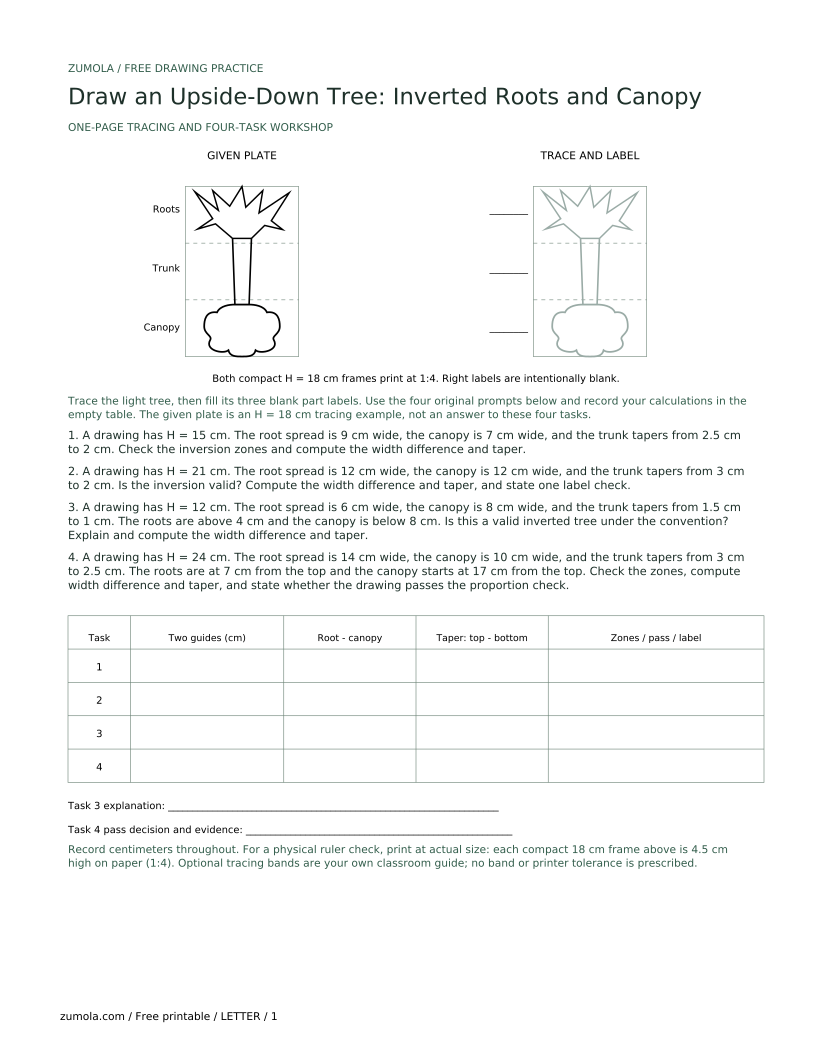
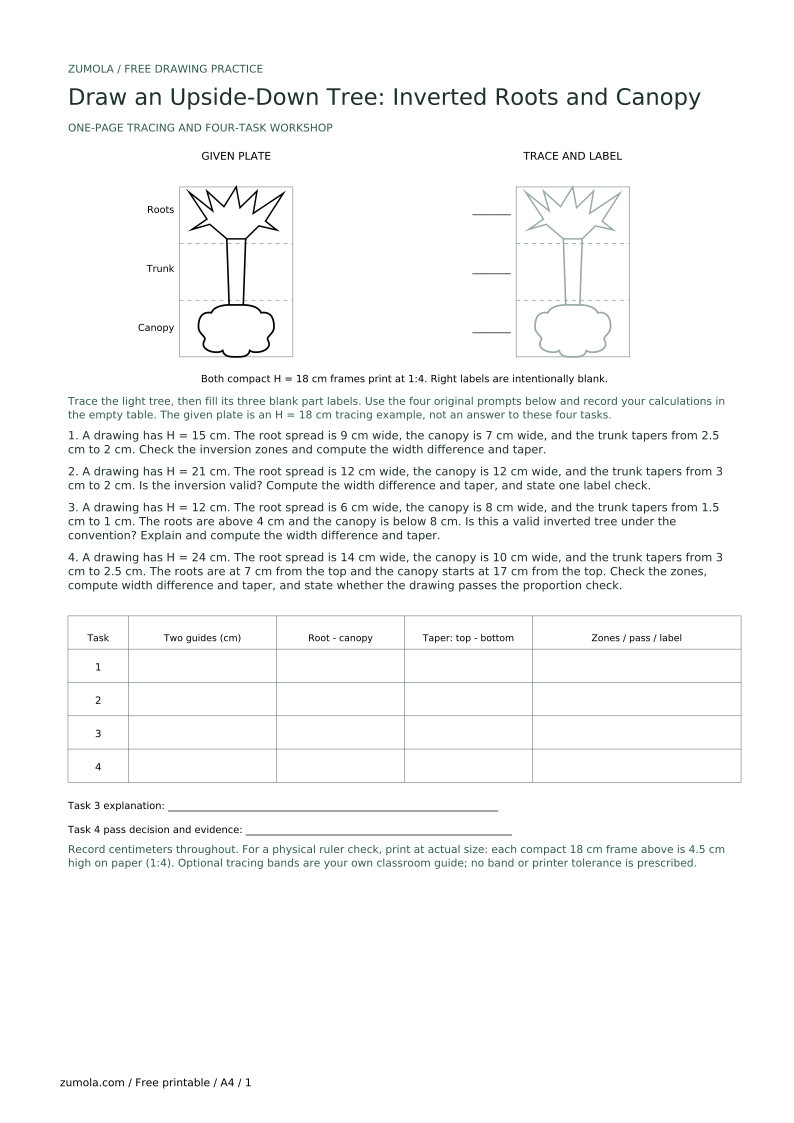
An upside-down tree flips the familiar silhouette: the root spread sits at the top of the page, the trunk descends, and the canopy hangs at the bottom. This lesson defines a clear drawing convention, gives a tracing sequence, and shows how to check your work with measurable proportions. Choose a drawing frame of height H and measure positions downward from its top. The roots occupy the upper-third zone, the canopy the lower-third zone, and the trunk connects them through the middle band. The zones need not be completely filled. Line and letter styles may vary; the rubric accepts any consistent, legible choice. All measurements below are hypothetical classroom examples.
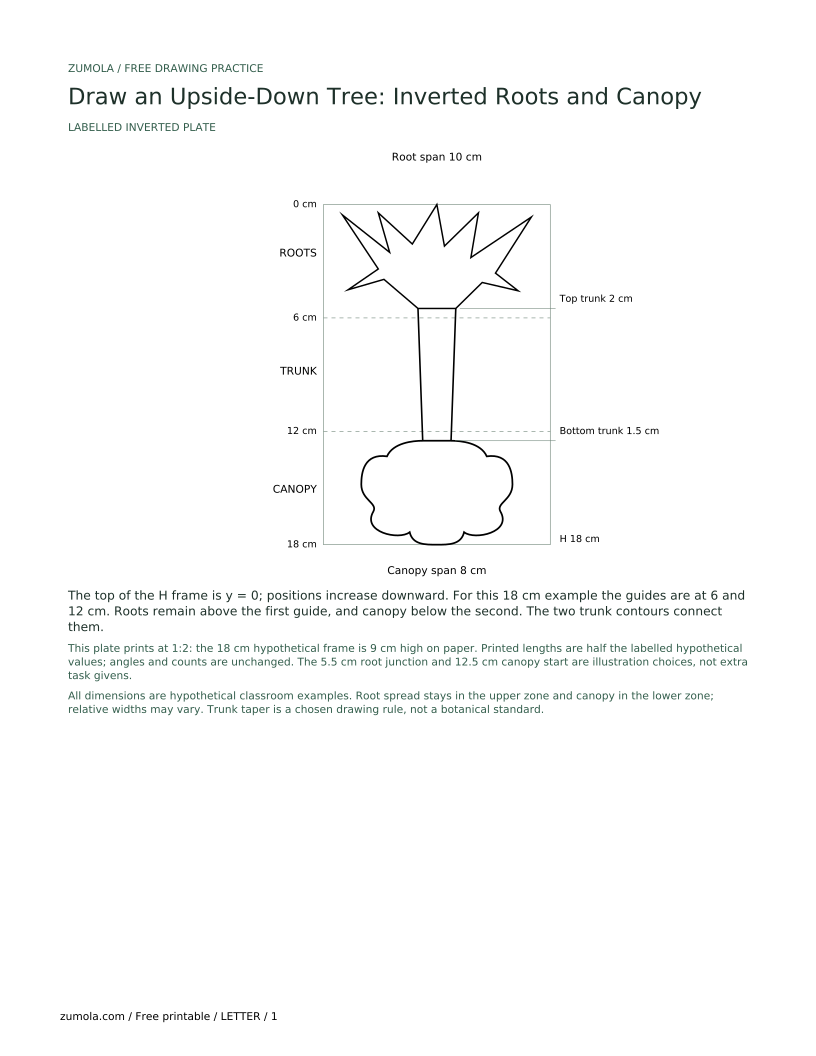
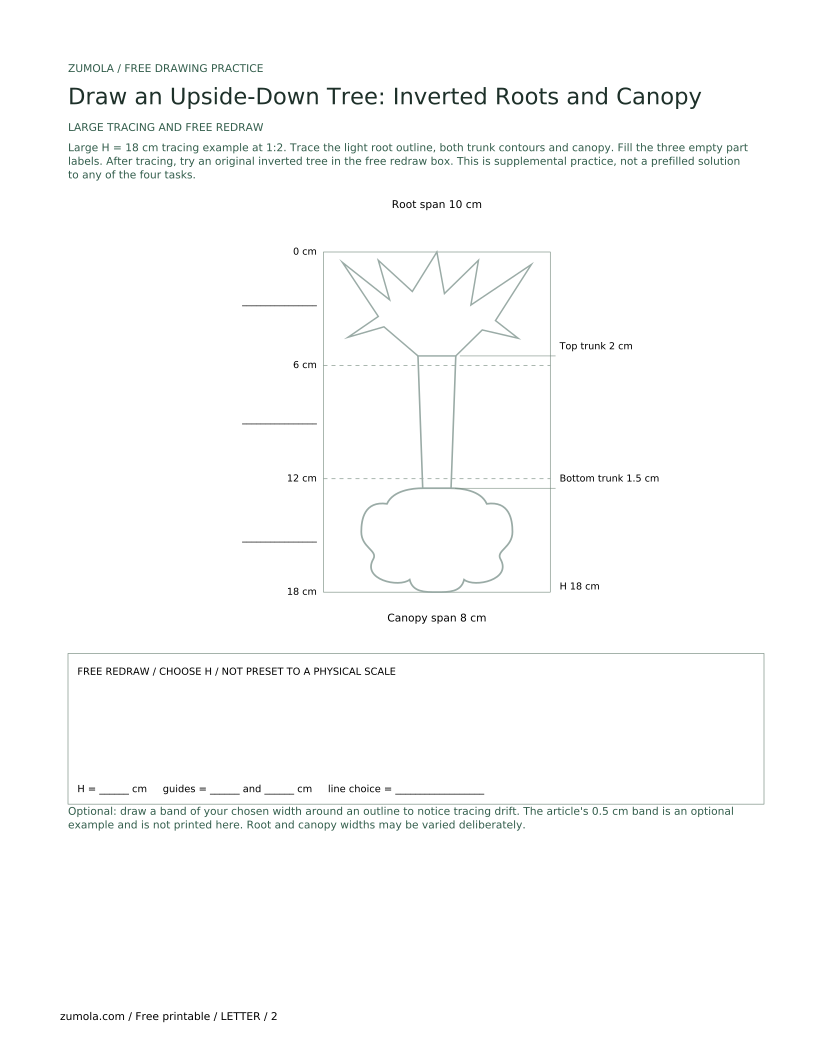
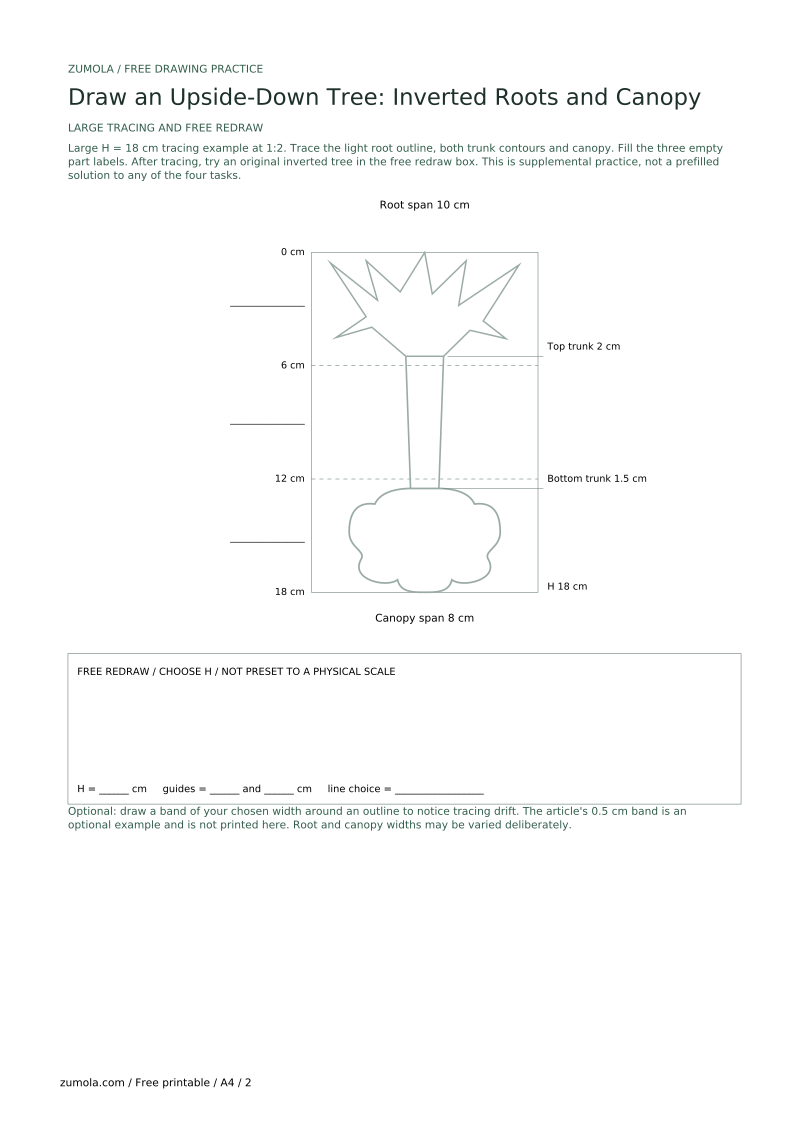
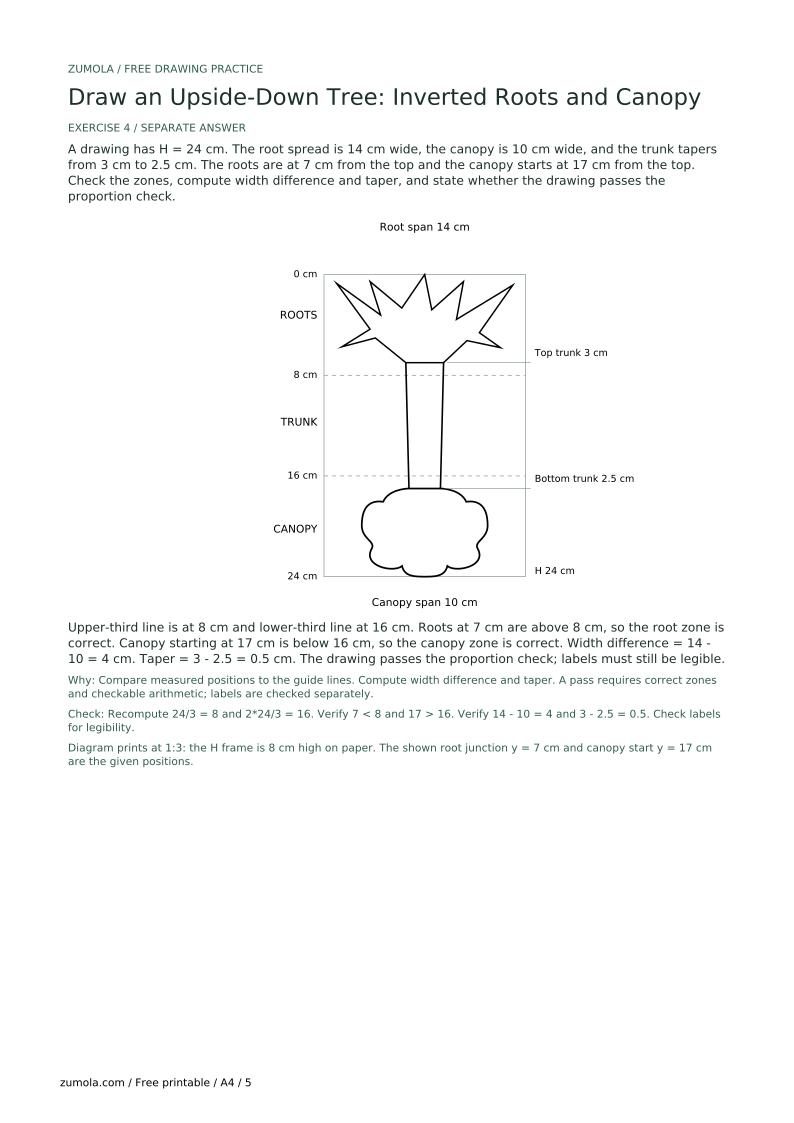
Choose a drawing frame of height H. Measure vertical positions downward from 0 at its top to H at its bottom. For a hypothetical H = 18 cm frame, the upper-third guide is at 6 cm and the lower-third guide at 12 cm. Keep the root spread above the 6 cm guide and the canopy below the 12 cm guide. The trunk connects the root junction to the top of the canopy and passes through the middle band. A root junction may be above the upper-third guide and the canopy may start below the lower-third guide; their positions need not coincide with the guides. In exercise 4, the 7 cm root position means the lowest root junction, and 17 cm means the top of the canopy.
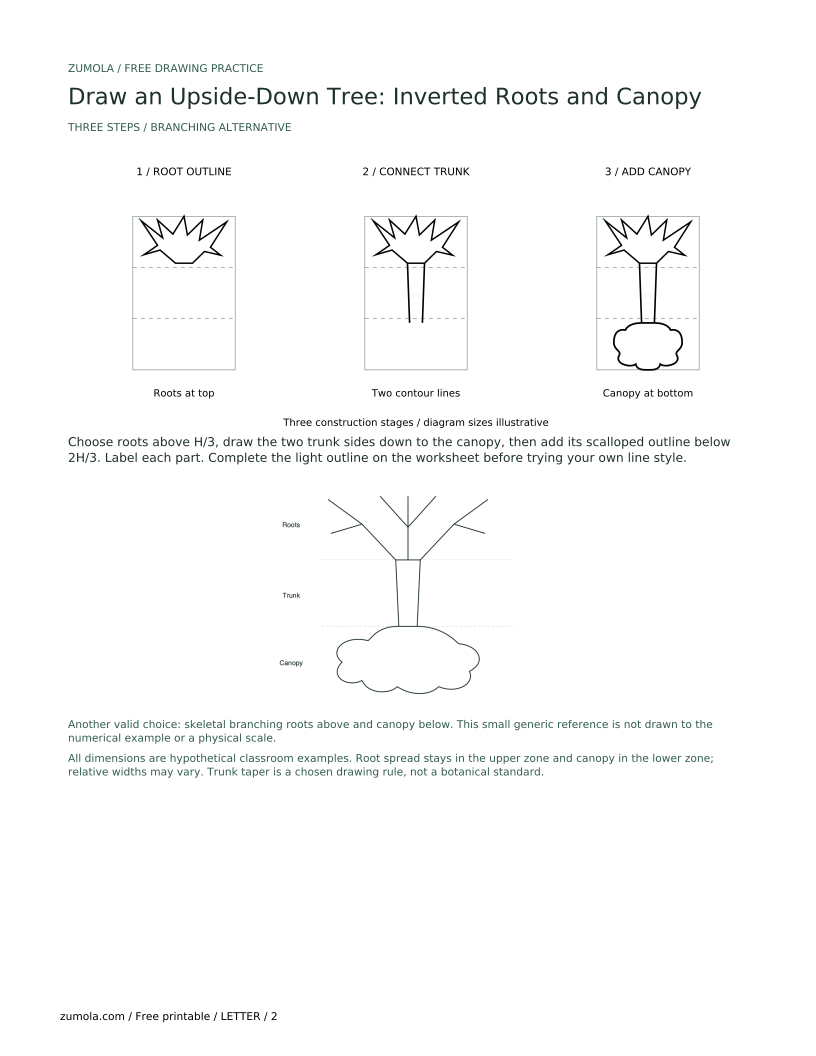
Define your line convention before drawing. One option is a continuous branching outline around the root mass, two contour lines for the trunk, and a scalloped canopy outline. A skeletal branching root drawing is also acceptable if its top position and connection to the trunk remain clear. Smooth curves, angular branches, or consistent mixed line weights are valid when roots, trunk, and canopy are distinguishable. The illustrated trunk narrows downward by the stated amount as a chosen drawing rule, not a botanical requirement. Label roots, trunk, and canopy legibly; letter style may vary.
Tracing helps you practice the inversion. Place a light outline or branching structure of an inverted tree on your page, or draw one lightly yourself. Trace the root spread first, then the trunk, then the canopy, following your stated line convention. An optional 0.5 cm band around an outline is a classroom tracing guide, not a printer or tool tolerance; choose a useful band for your own drawing.
After tracing, compare the traced shape to the original outline. The root spread should remain at the top, the trunk should not flip direction, and the canopy should stay at the bottom. Check that no branch crosses the guide lines in a way that confuses the three zones. Label the traced parts and note any area where the tracing drifted.
Use checkable arithmetic to confirm the inversion. With H = 18 cm, the upper third is 6 cm and the lower third is 6 cm. If the root spread width is hypothetically 10 cm and the canopy width is 8 cm, the root spread is wider by 2 cm. The trunk width at the top might be 2 cm and at the bottom 1.5 cm, a taper of 0.5 cm. These numbers are examples; measure your actual drawing and keep units consistent.
A valid drawing does not need these exact numbers. The rubric checks that the root spread is at the top, the canopy at the bottom, the trunk connects them, and the labels are legible. Any consistent line style and any legible letter style are accepted. If your root spread is narrower than the canopy, note it as a deliberate variation and explain it in your label or margin note.
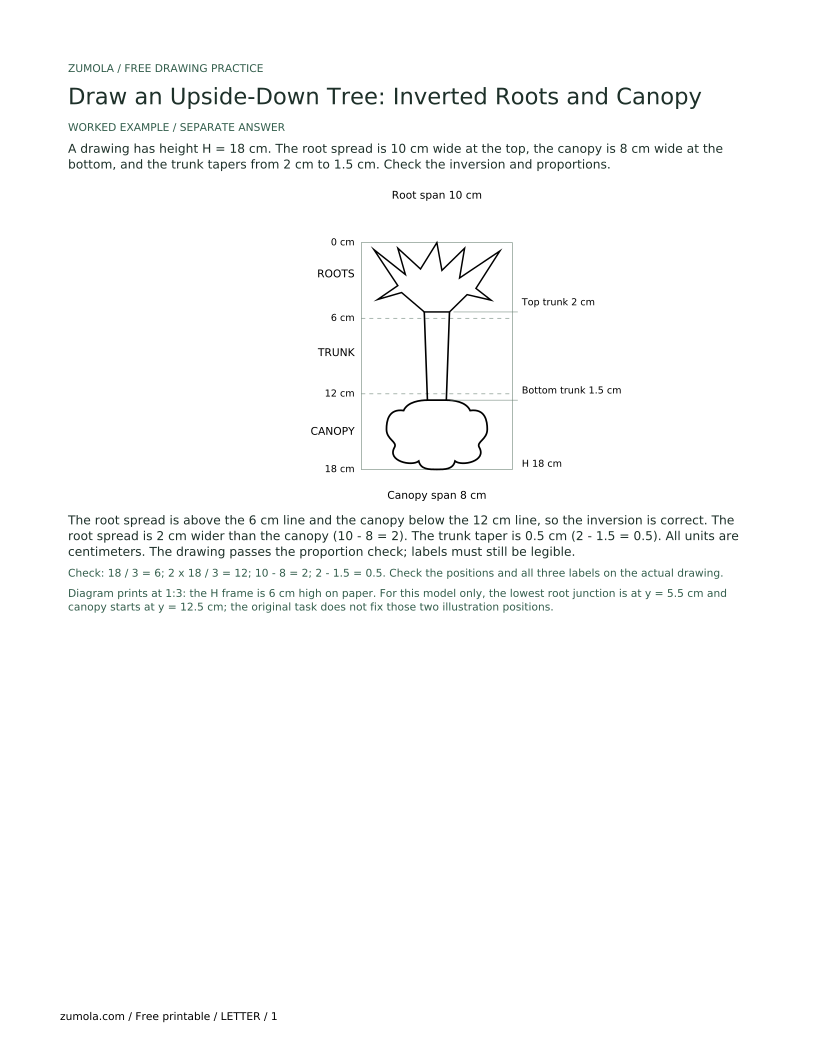
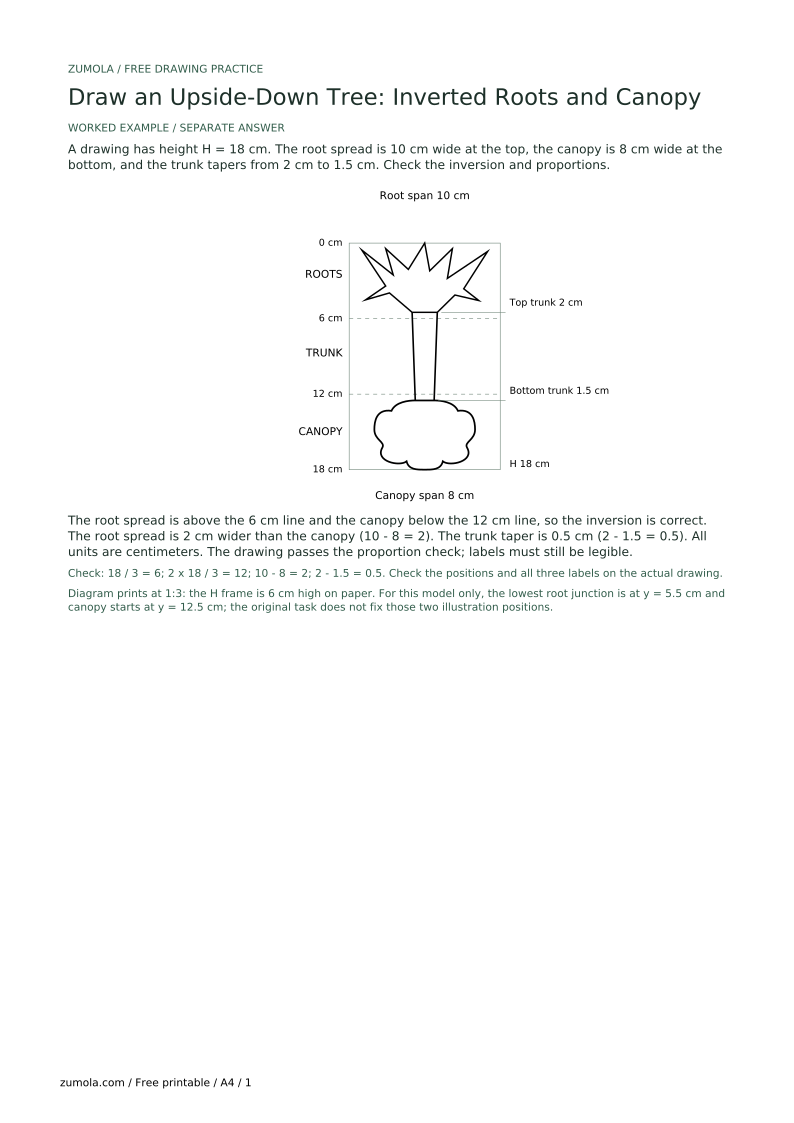
A drawing has height H = 18 cm. The root spread is 10 cm wide at the top, the canopy is 8 cm wide at the bottom, and the trunk tapers from 2 cm to 1.5 cm. Check the inversion and proportions.
The root spread is above the 6 cm line and the canopy below the 12 cm line, so the inversion is correct. The root spread is 2 cm wider than the canopy (10 - 8 = 2). The trunk taper is 0.5 cm (2 - 1.5 = 0.5). All units are centimeters. The drawing passes the proportion check; labels must still be legible.
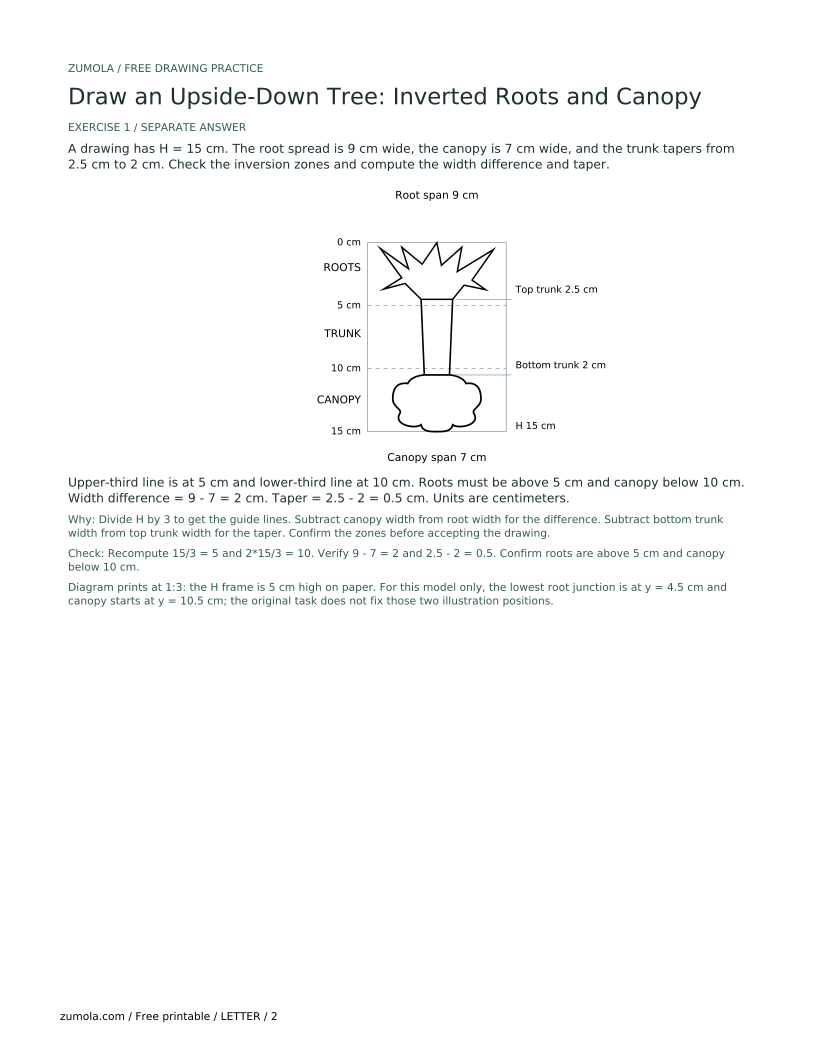
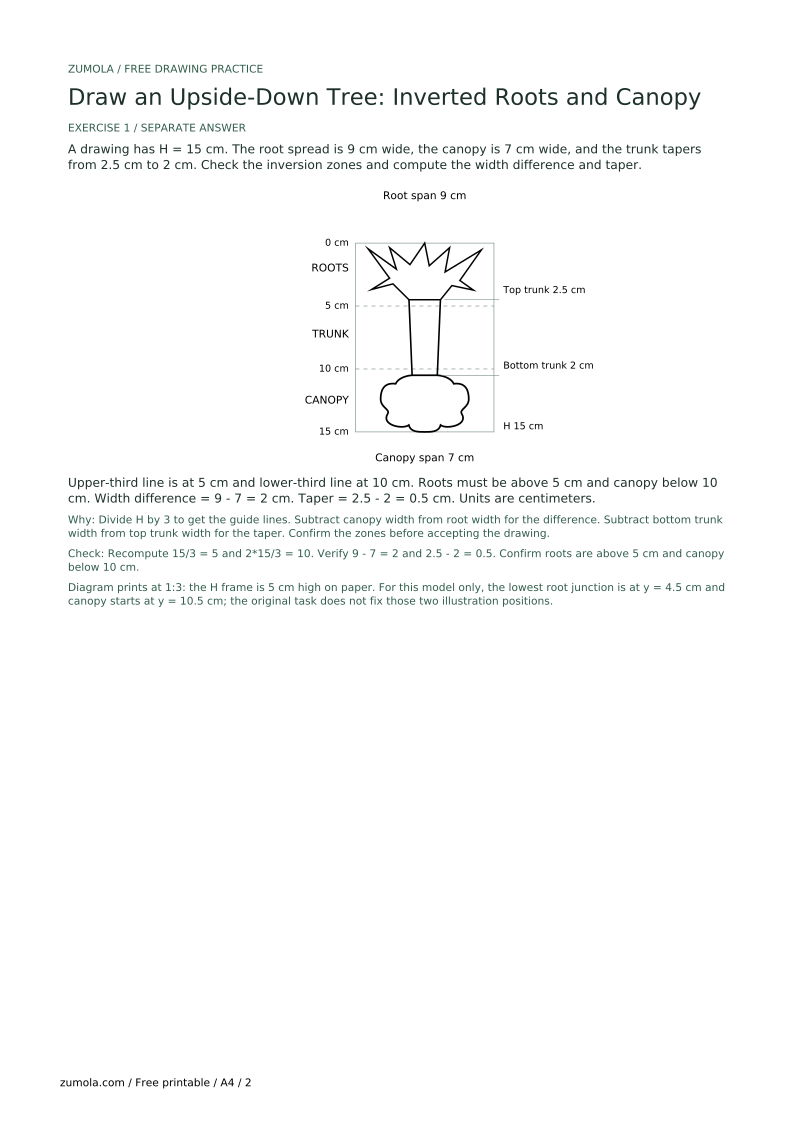
A drawing has H = 15 cm. The root spread is 9 cm wide, the canopy is 7 cm wide, and the trunk tapers from 2.5 cm to 2 cm. Check the inversion zones and compute the width difference and taper.
Upper-third line is at 5 cm and lower-third line at 10 cm. Roots must be above 5 cm and canopy below 10 cm. Width difference = 9 - 7 = 2 cm. Taper = 2.5 - 2 = 0.5 cm. Units are centimeters.
Divide H by 3 to get the guide lines. Subtract canopy width from root width for the difference. Subtract bottom trunk width from top trunk width for the taper. Confirm the zones before accepting the drawing.
Check: Recompute 15/3 = 5 and 2*15/3 = 10. Verify 9 - 7 = 2 and 2.5 - 2 = 0.5. Confirm roots are above 5 cm and canopy below 10 cm.
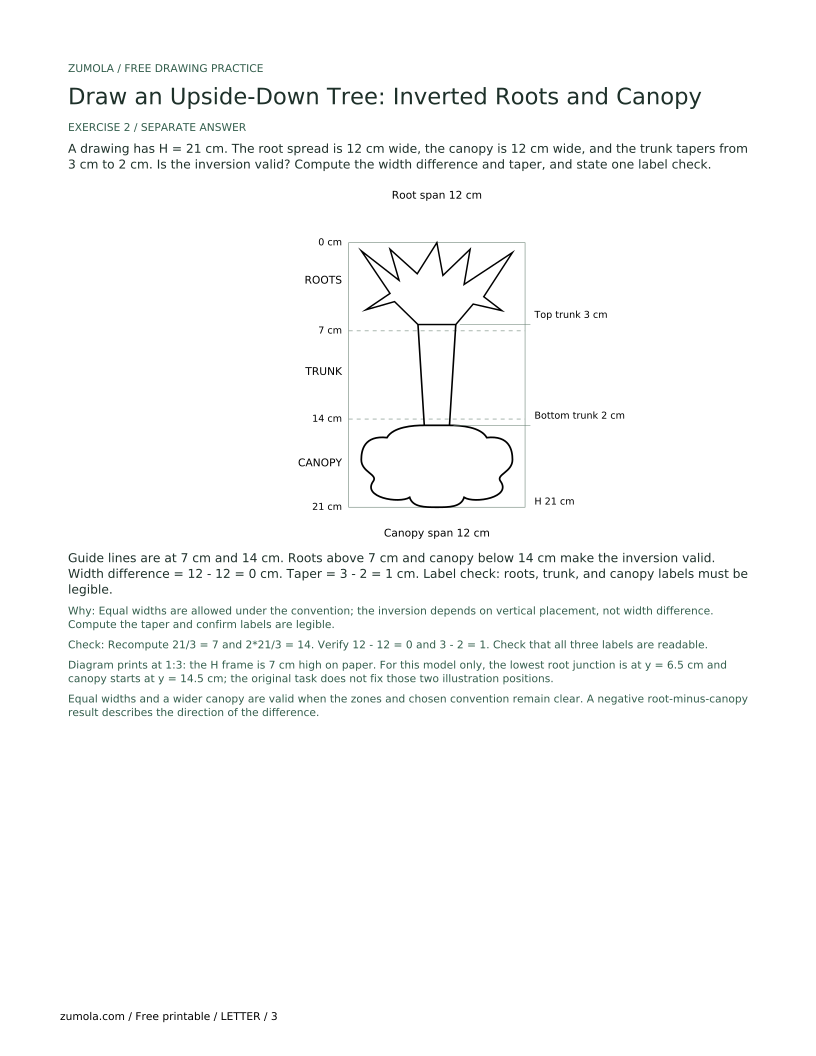
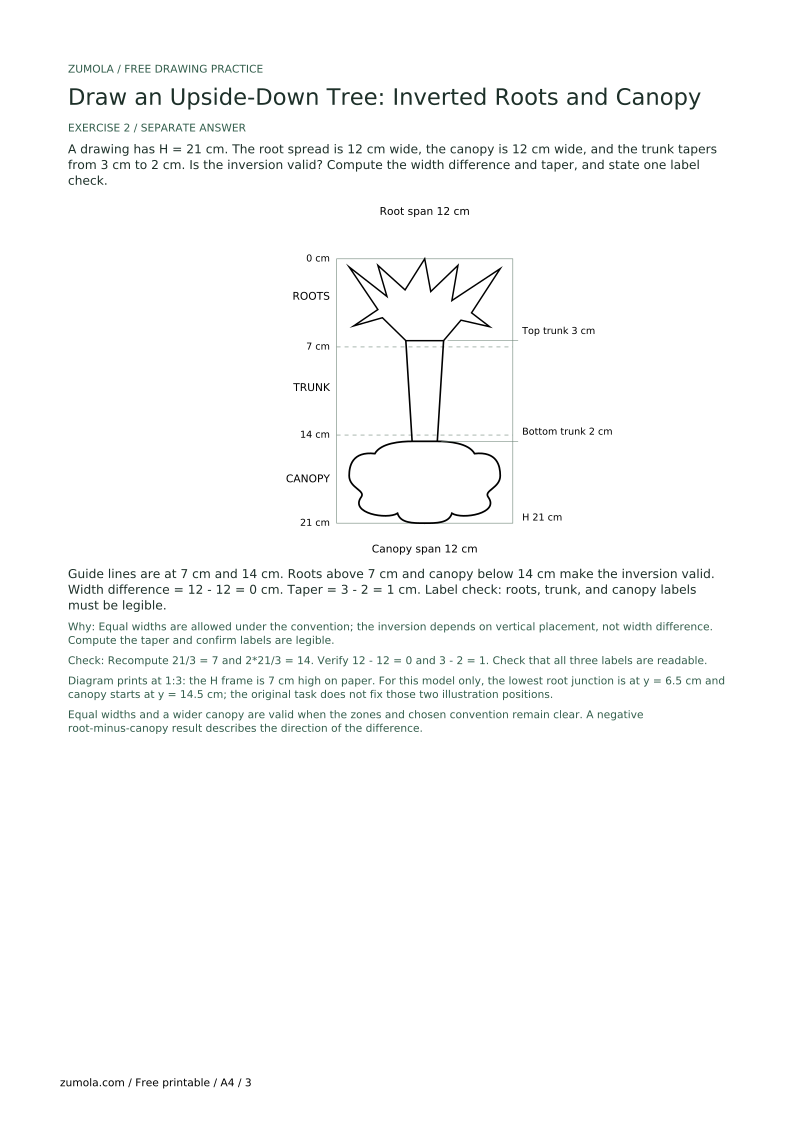
A drawing has H = 21 cm. The root spread is 12 cm wide, the canopy is 12 cm wide, and the trunk tapers from 3 cm to 2 cm. Is the inversion valid? Compute the width difference and taper, and state one label check.
Guide lines are at 7 cm and 14 cm. Roots above 7 cm and canopy below 14 cm make the inversion valid. Width difference = 12 - 12 = 0 cm. Taper = 3 - 2 = 1 cm. Label check: roots, trunk, and canopy labels must be legible.
Equal widths are allowed under the convention; the inversion depends on vertical placement, not width difference. Compute the taper and confirm labels are legible.
Check: Recompute 21/3 = 7 and 2*21/3 = 14. Verify 12 - 12 = 0 and 3 - 2 = 1. Check that all three labels are readable.
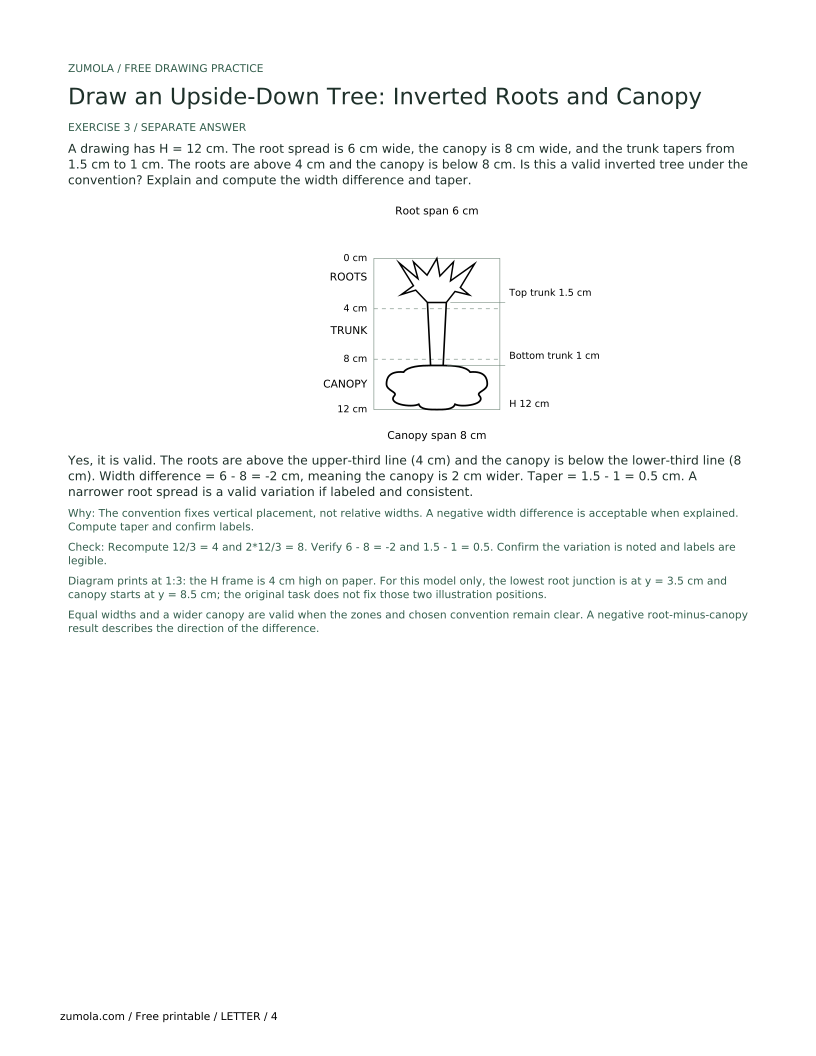
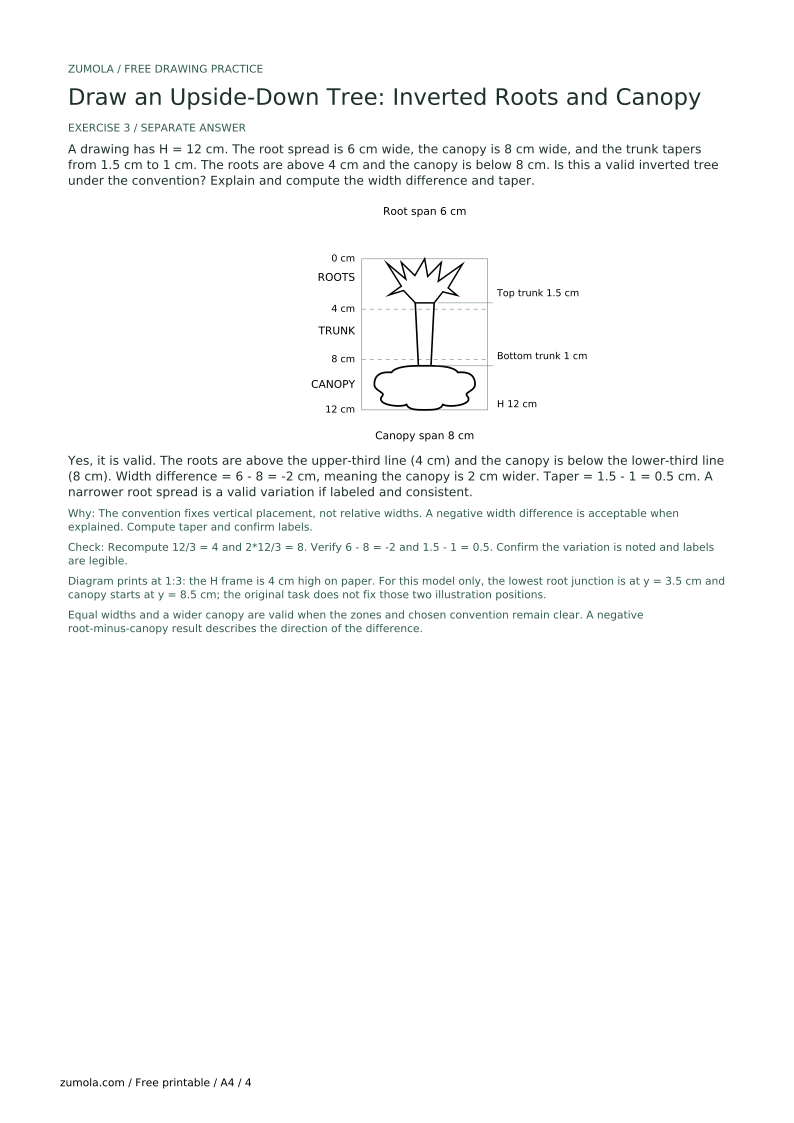
A drawing has H = 12 cm. The root spread is 6 cm wide, the canopy is 8 cm wide, and the trunk tapers from 1.5 cm to 1 cm. The roots are above 4 cm and the canopy is below 8 cm. Is this a valid inverted tree under the convention? Explain and compute the width difference and taper.
Yes, it is valid. The roots are above the upper-third line (4 cm) and the canopy is below the lower-third line (8 cm). Width difference = 6 - 8 = -2 cm, meaning the canopy is 2 cm wider. Taper = 1.5 - 1 = 0.5 cm. A narrower root spread is a valid variation if labeled and consistent.
The convention fixes vertical placement, not relative widths. A negative width difference is acceptable when explained. Compute taper and confirm labels.
Check: Recompute 12/3 = 4 and 2*12/3 = 8. Verify 6 - 8 = -2 and 1.5 - 1 = 0.5. Confirm the variation is noted and labels are legible.
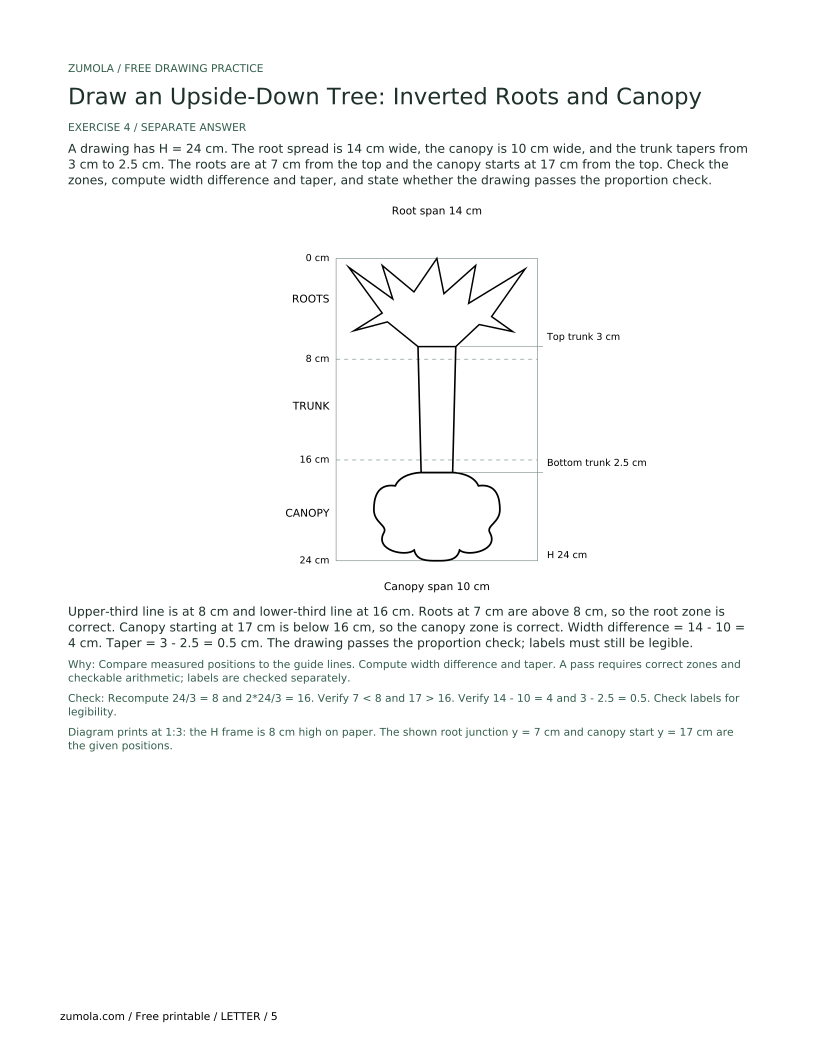
A drawing has H = 24 cm. The root spread is 14 cm wide, the canopy is 10 cm wide, and the trunk tapers from 3 cm to 2.5 cm. The roots are at 7 cm from the top and the canopy starts at 17 cm from the top. Check the zones, compute width difference and taper, and state whether the drawing passes the proportion check.
Upper-third line is at 8 cm and lower-third line at 16 cm. Roots at 7 cm are above 8 cm, so the root zone is correct. Canopy starting at 17 cm is below 16 cm, so the canopy zone is correct. Width difference = 14 - 10 = 4 cm. Taper = 3 - 2.5 = 0.5 cm. The drawing passes the proportion check; labels must still be legible.
Compare measured positions to the guide lines. Compute width difference and taper. A pass requires correct zones and checkable arithmetic; labels are checked separately.
Check: Recompute 24/3 = 8 and 2*24/3 = 16. Verify 7 < 8 and 17 > 16. Verify 14 - 10 = 4 and 3 - 2.5 = 0.5. Check labels for legibility.
Re-check the guide lines: roots must be above the upper-third line and canopy below the lower-third line.
For these numerical examples, top and bottom mean page positions: subtract the bottom width from the top width. This downward narrowing is a classroom drawing choice, not a universal rule about real trees.
Choose one convention for each part and apply it throughout; legibility matters more than a particular style.
Use clear labels and short leader lines; any legible letter style is acceptable.
Not universally. The convention here places roots at the top and canopy at the bottom; widths may vary. A common choice is a wider root spread, but a narrower root spread is valid if labeled and consistent.
Yes. Any consistent line style is acceptable as long as roots, trunk, and canopy remain distinguishable and the inversion is clear.
Check that the root spread is above the upper-third guide line and the canopy is below the lower-third guide line. The trunk should connect them through the middle band.
No. The arithmetic checks are simple and checkable; use your own measurements and keep units consistent. The numbers in this lesson are hypothetical examples.