Reference diagram
LETTER · Download PDF (2 pages)
Free original resources
Plan a contour-line face as wall art: choose a frame, place the profile, control line spacing, and check balance with a simple rubric.
Original reference diagrams, four practice exercises and separate worked answers. All files are free. No signup required.
LETTER · Download PDF (2 pages)
LETTER · Download PDF (2 pages)
LETTER · Download PDF (5 pages)
Choose A4 or US Letter for your printer. The reference and answer illustrations are not physical rulers; follow the scale instruction printed on the practice worksheet.
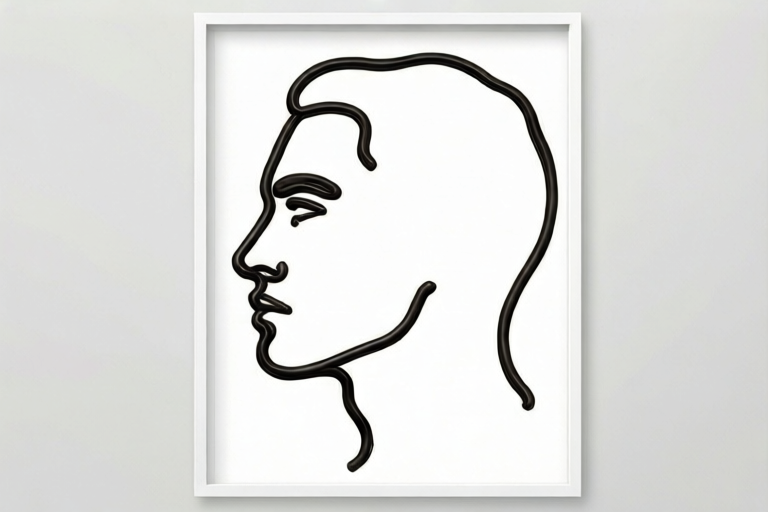
Contour-line wall art uses one continuous or minimally lifted line to describe a face. The goal is not realistic shading but a clear, balanced composition that reads well at a distance. This lesson teaches line layout: where the profile sits inside the frame, how much negative space surrounds it, and how line weight and spacing create rhythm. You will work on paper with a defined frame, use a single dark line, and judge success by readability and balance rather than by likeness alone. All measurements are hypothetical examples; measure your own paper and tools before drawing.
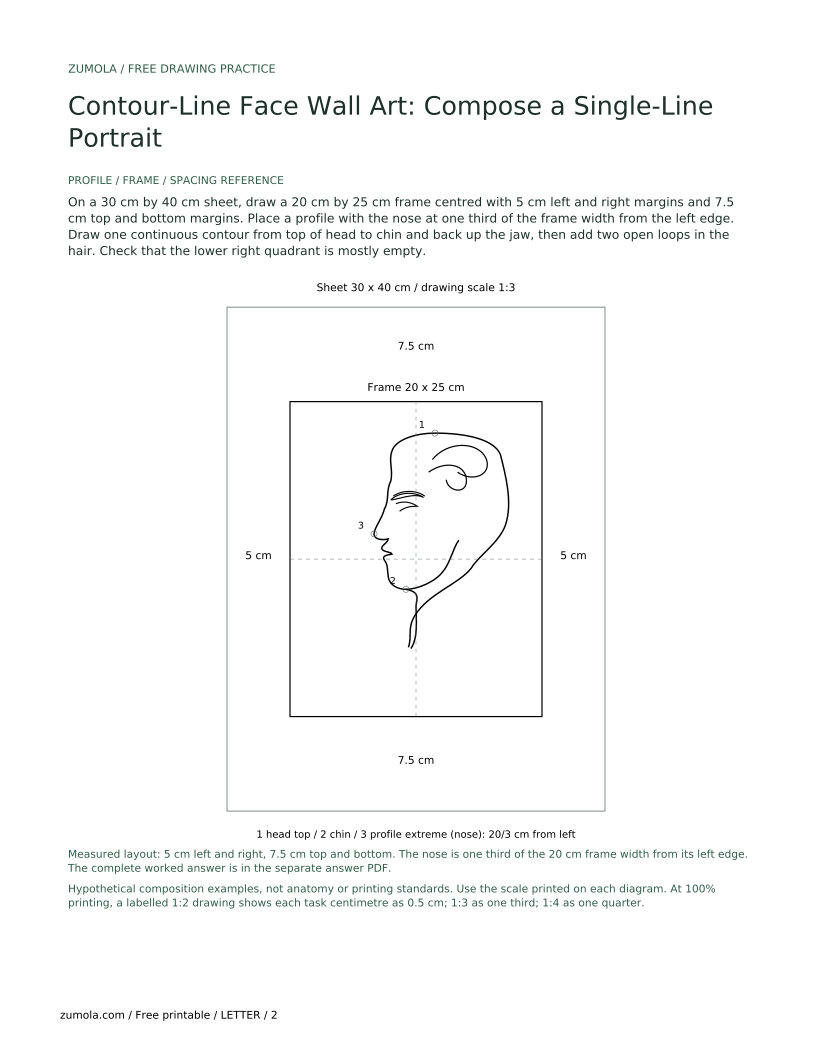
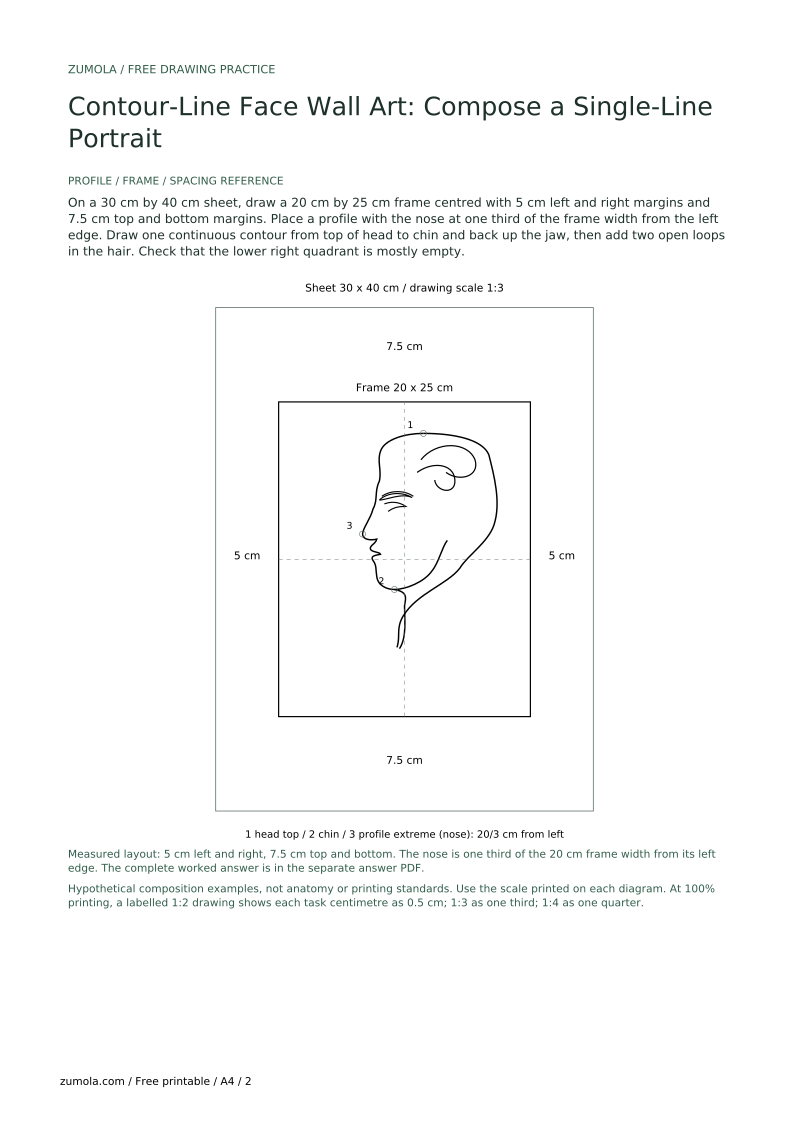
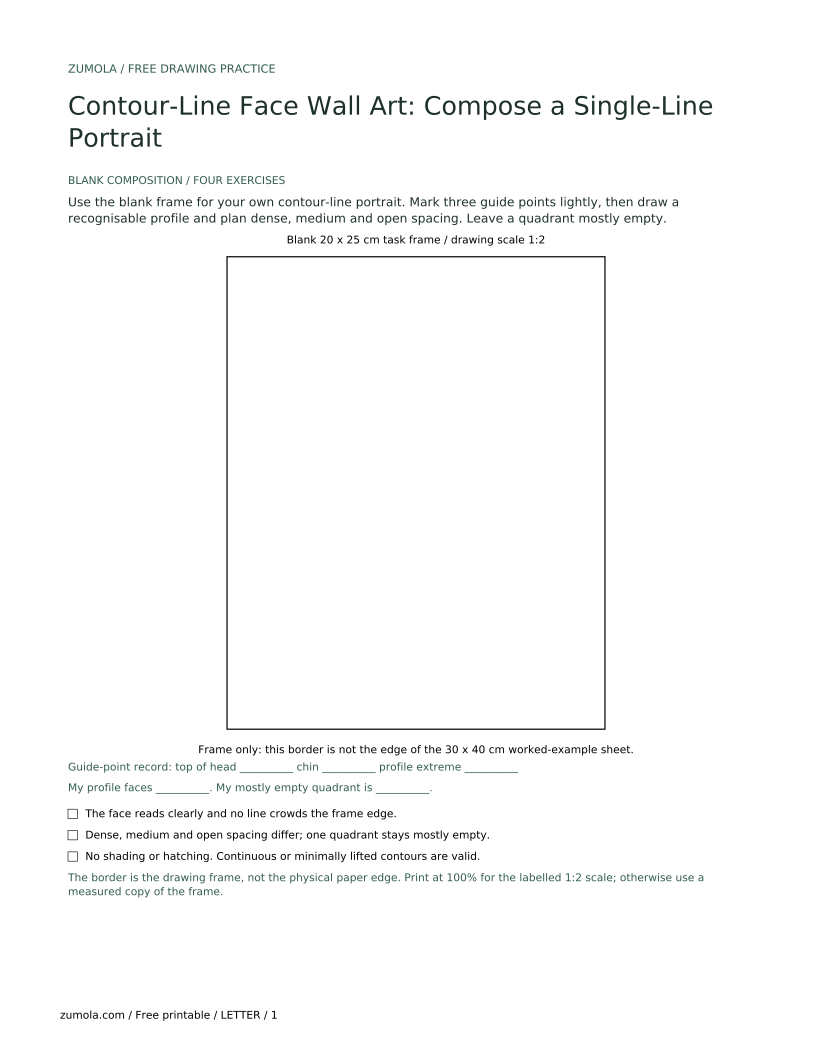
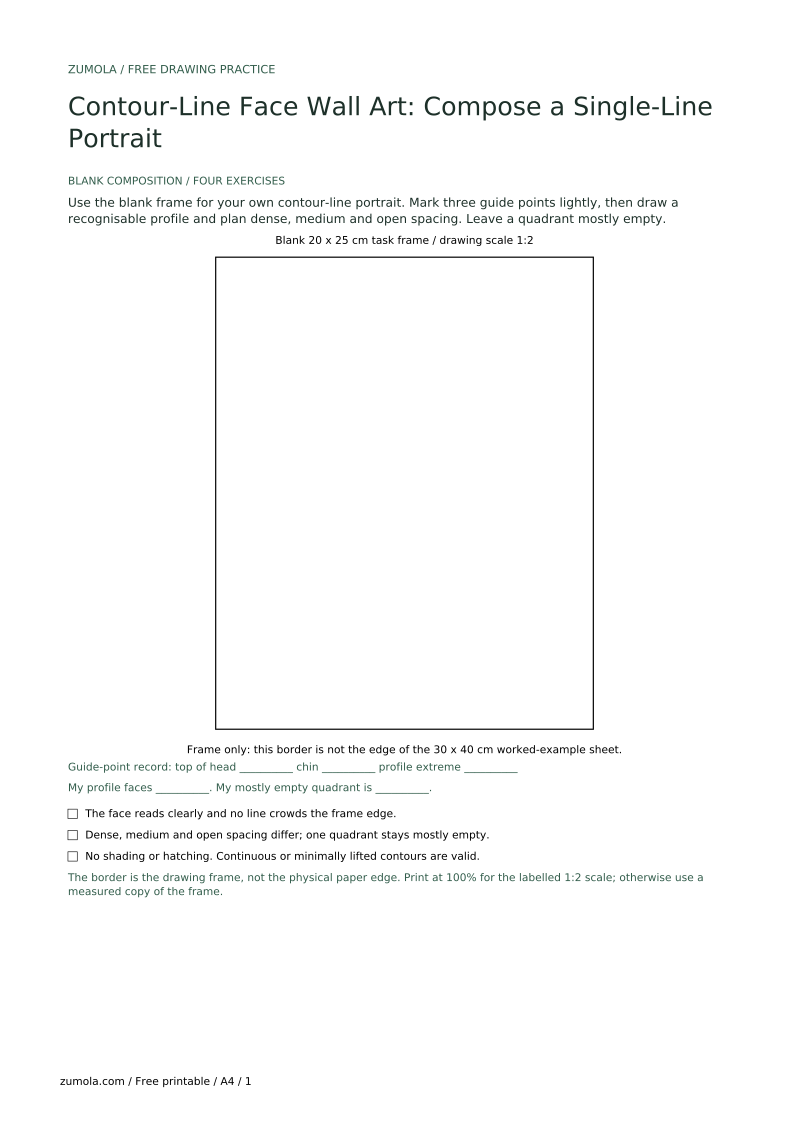
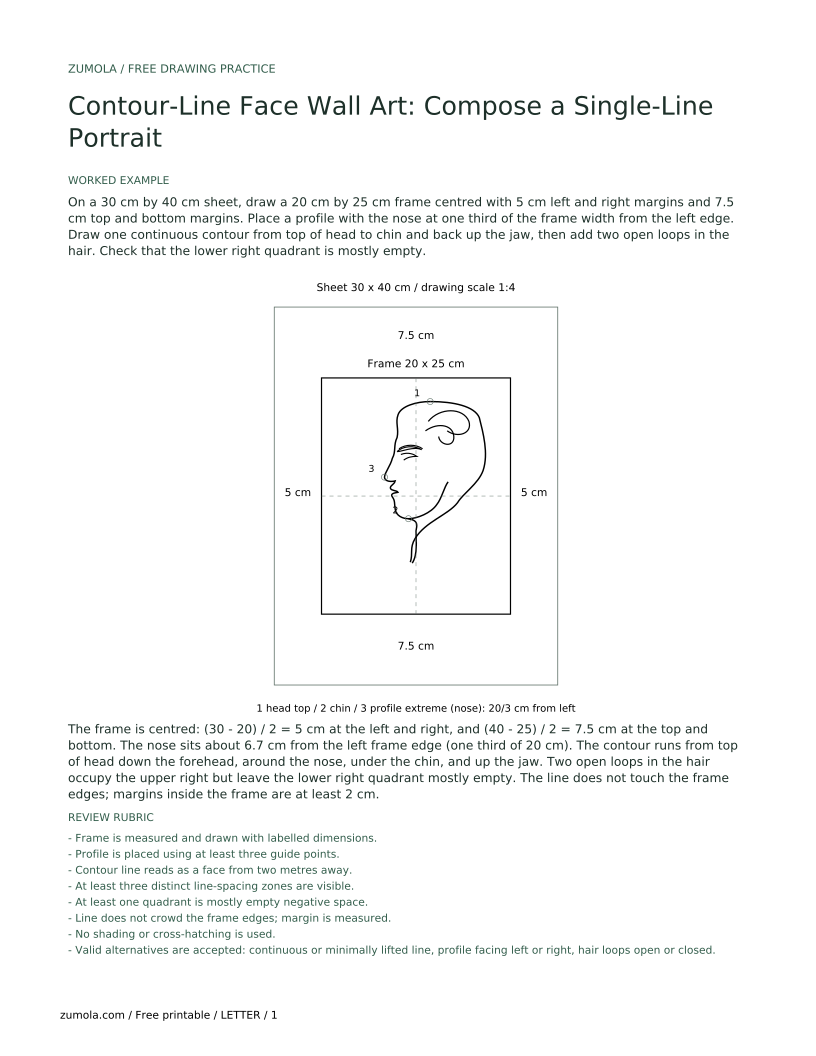
Begin by drawing a rectangular frame on your paper. A hypothetical example is a 20 cm by 25 cm frame centered on a 30 cm by 40 cm sheet, leaving 5 cm at the left and right and 7.5 cm at the top and bottom. Measure your actual sheet and adjust these numbers; they are examples, not standards.
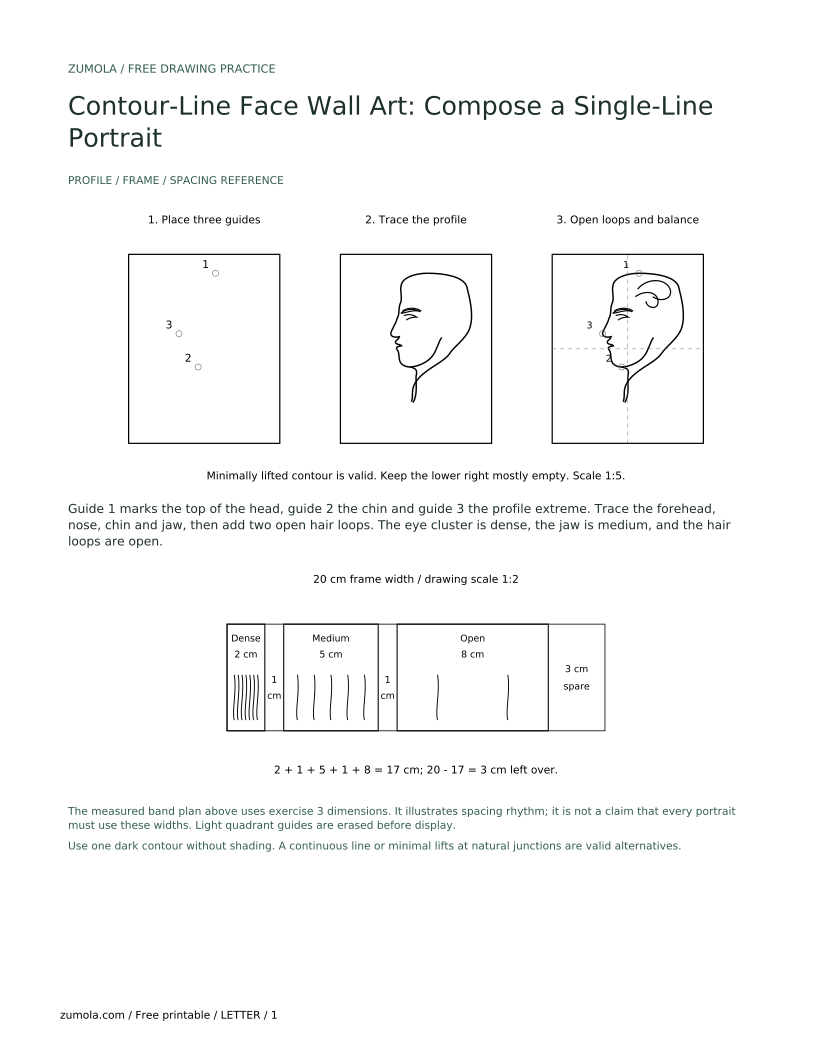
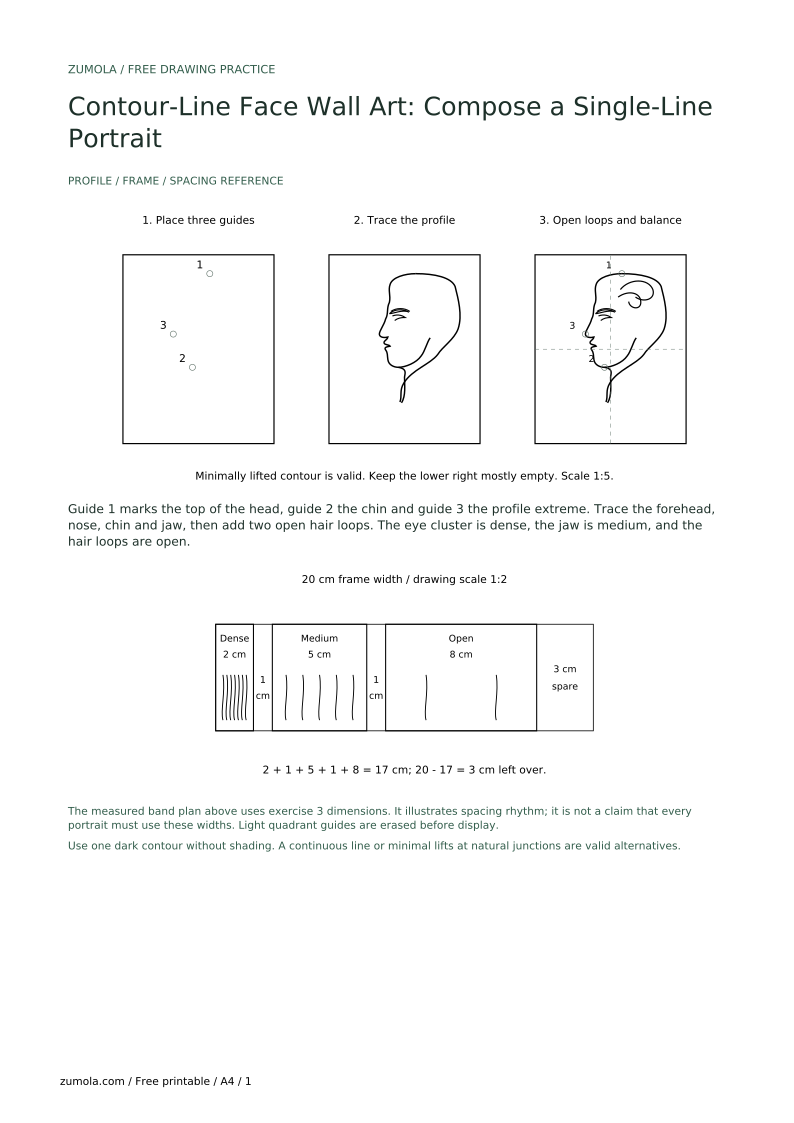
Place the face so the profile line crosses the frame with intention. A common layout puts the nose or chin near one third of the frame width from an edge, leaving generous negative space on the opposite side. Mark three guide points lightly: top of head, chin, and the outermost point of the profile. These points anchor the line before you commit.
A contour face reads best when the line changes direction smoothly. Start at the top of the head, travel down the forehead, around the nose, under the chin, and back up the jaw. If you must lift the pen, keep the break at a natural junction such as the ear or hairline.
Spacing controls rhythm. Tight clusters of line near the eye or mouth draw attention; wide loops in the hair or neck calm the composition. Aim for at least three distinct spacing zones: dense, medium, and open. This variation prevents the drawing from looking like a uniform tangle.
Use one dark pen or marker for the main contour. If you vary weight, do so deliberately: slightly heavier where the profile turns sharply, lighter in open hair loops. A hypothetical example is a 0.5 mm tip for the main line and a 0.3 mm tip for secondary loops; measure your own tools and label any chosen values as examples.
Contrast comes from the paper and the line, not from shading. Keep the background plain. If the line becomes too busy, simplify by removing a secondary loop rather than adding more.
Balance is about visual weight, not symmetry. A profile placed left of centre can be balanced by a few open loops on the right. Negative space should feel intentional: neither cramped nor empty. A simple check is to divide the frame into four quadrants and confirm that at least one quadrant is mostly empty.
Avoid crowding the frame edges. Leave a margin of at least 2 cm inside the frame on all sides in a hypothetical 20 by 25 cm frame; measure your own frame and adjust.
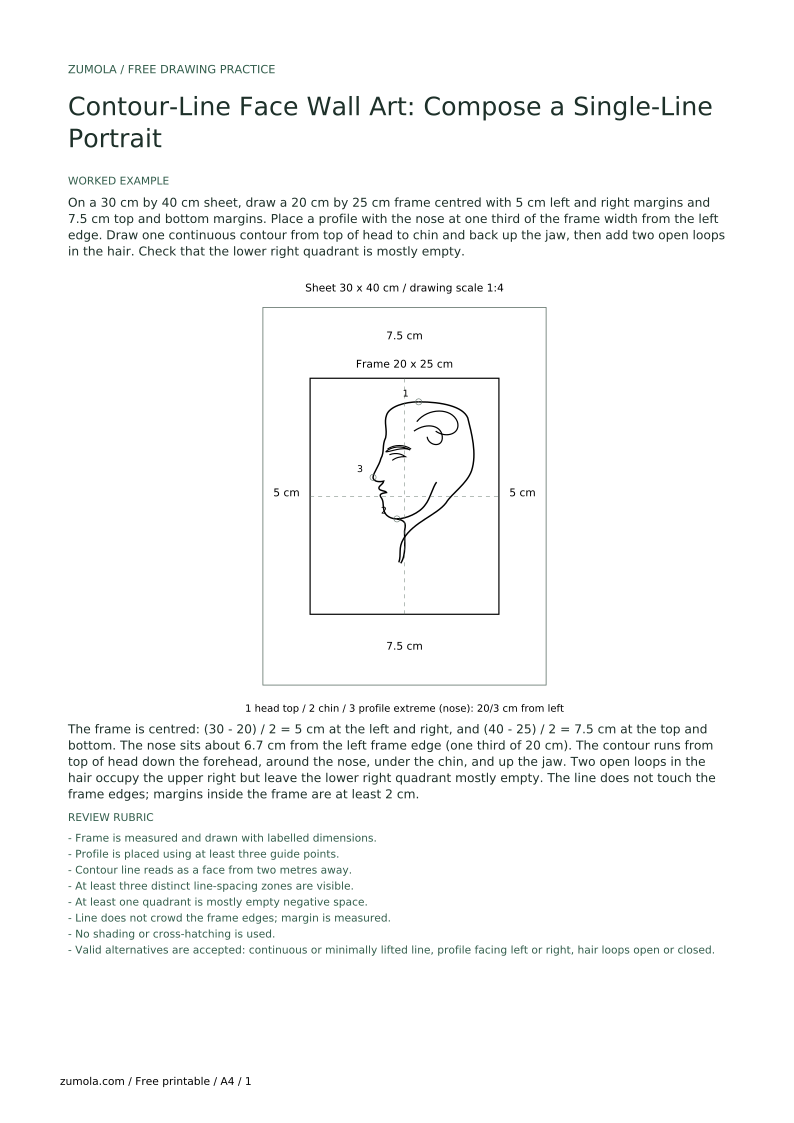
On a 30 cm by 40 cm sheet, draw a 20 cm by 25 cm frame centred with 5 cm left and right margins and 7.5 cm top and bottom margins. Place a profile with the nose at one third of the frame width from the left edge. Draw one continuous contour from top of head to chin and back up the jaw, then add two open loops in the hair. Check that the lower right quadrant is mostly empty.
The frame is centred: (30 - 20) / 2 = 5 cm at the left and right, and (40 - 25) / 2 = 7.5 cm at the top and bottom. The nose sits about 6.7 cm from the left frame edge (one third of 20 cm). The contour runs from top of head down the forehead, around the nose, under the chin, and up the jaw. Two open loops in the hair occupy the upper right but leave the lower right quadrant mostly empty. The line does not touch the frame edges; margins inside the frame are at least 2 cm.
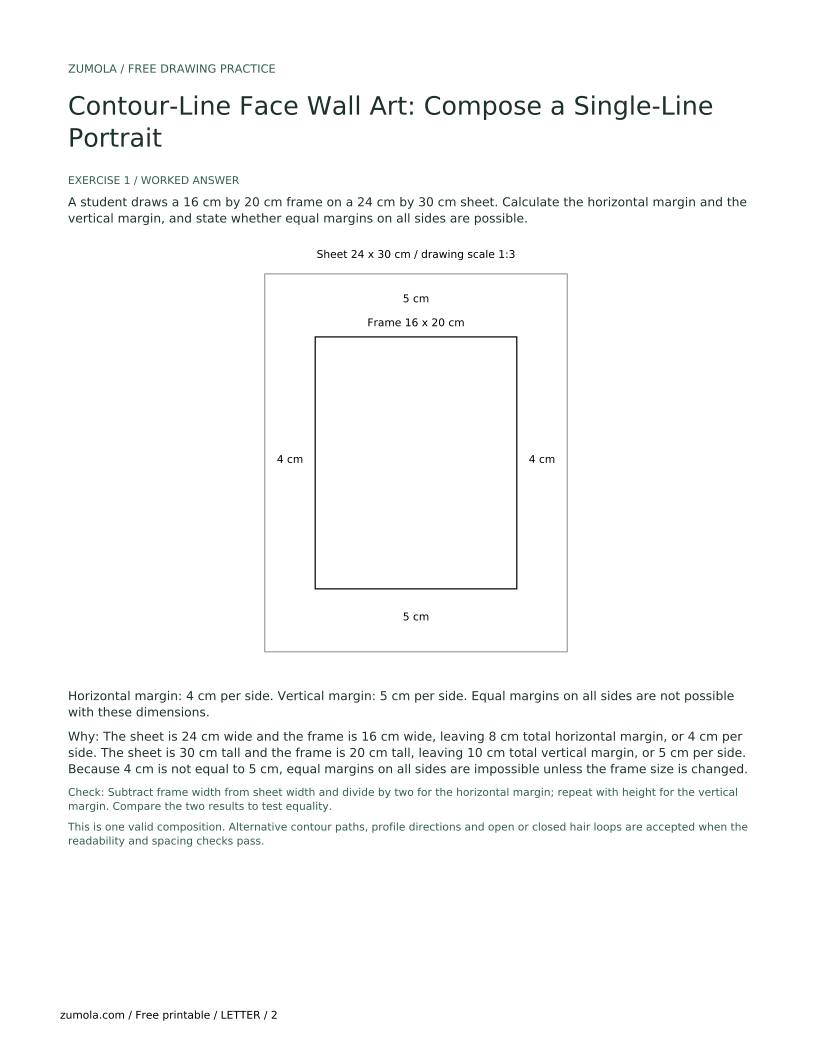
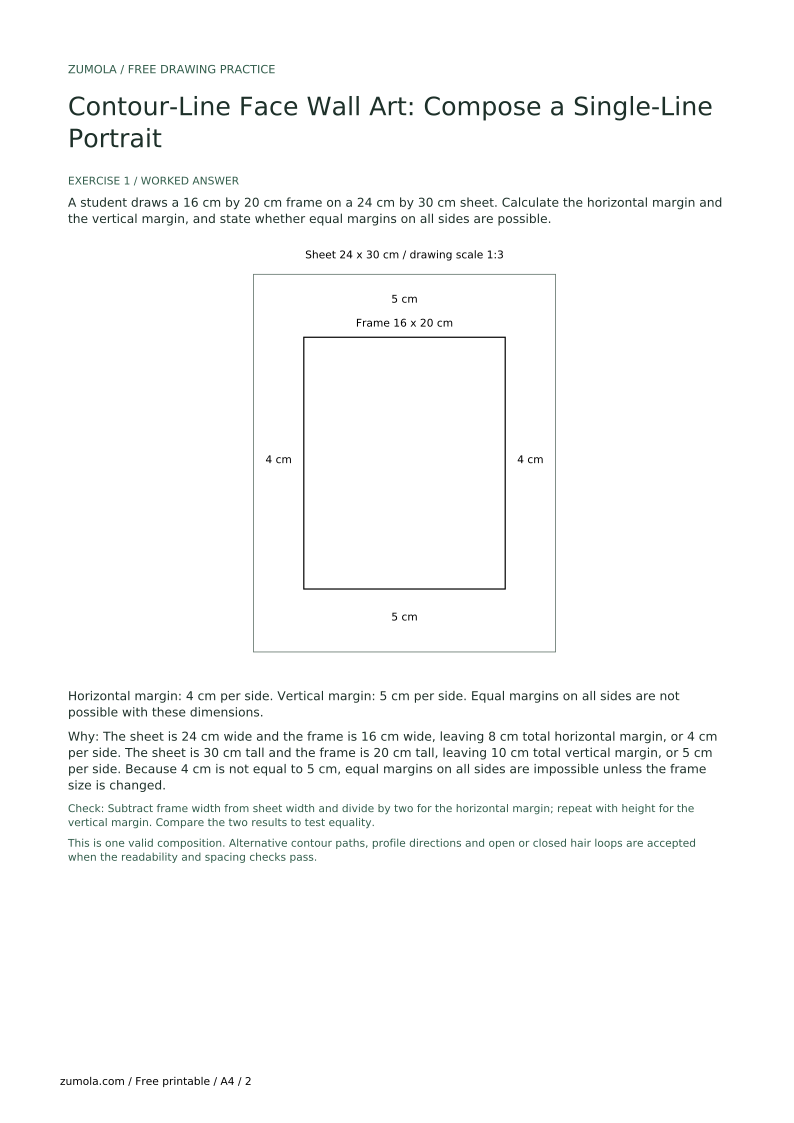
A student draws a 16 cm by 20 cm frame on a 24 cm by 30 cm sheet. Calculate the horizontal margin and the vertical margin, and state whether equal margins on all sides are possible.
Horizontal margin: 4 cm per side. Vertical margin: 5 cm per side. Equal margins on all sides are not possible with these dimensions.
The sheet is 24 cm wide and the frame is 16 cm wide, leaving 8 cm total horizontal margin, or 4 cm per side. The sheet is 30 cm tall and the frame is 20 cm tall, leaving 10 cm total vertical margin, or 5 cm per side. Because 4 cm is not equal to 5 cm, equal margins on all sides are impossible unless the frame size is changed.
Check: Subtract frame width from sheet width and divide by two for the horizontal margin; repeat with height for the vertical margin. Compare the two results to test equality.
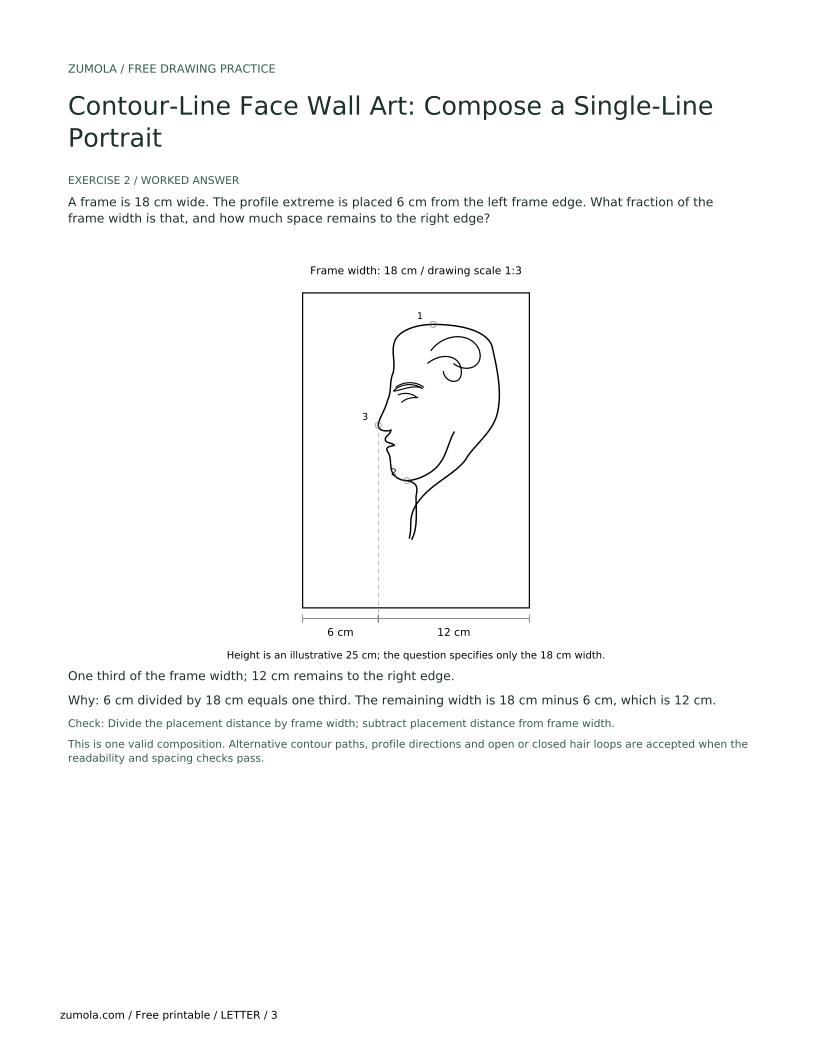
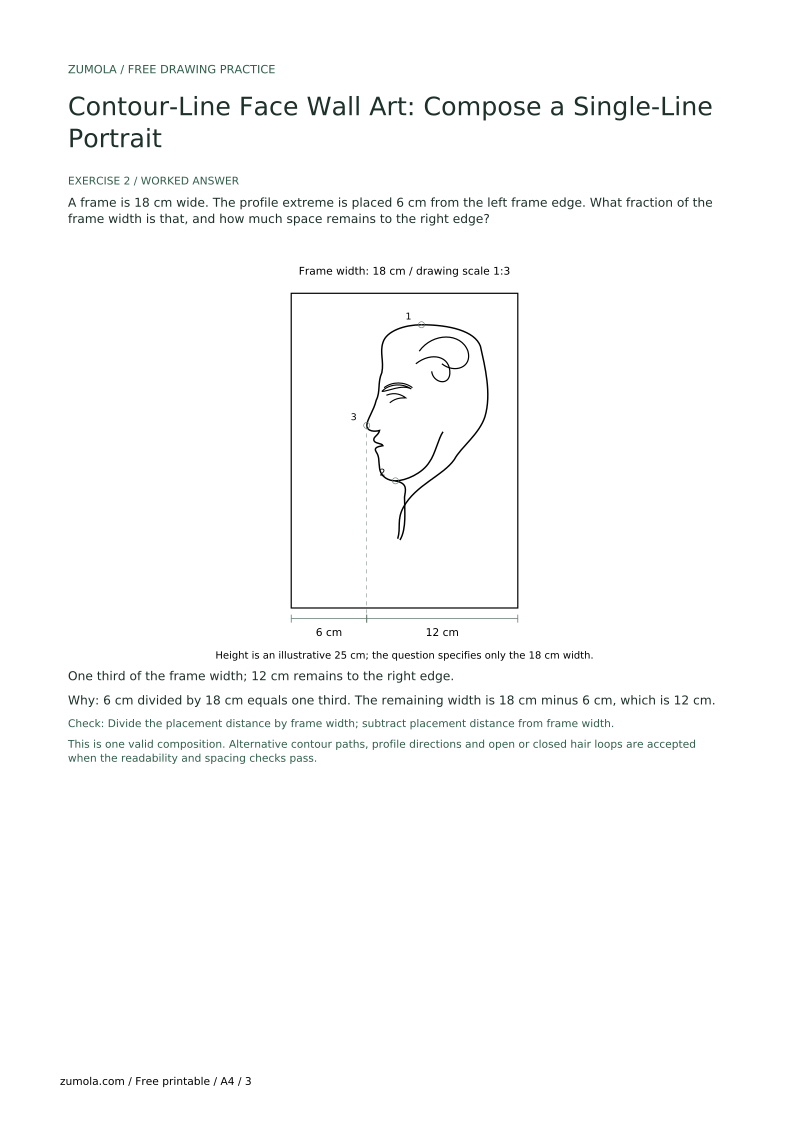
A frame is 18 cm wide. The profile extreme is placed 6 cm from the left frame edge. What fraction of the frame width is that, and how much space remains to the right edge?
One third of the frame width; 12 cm remains to the right edge.
6 cm divided by 18 cm equals one third. The remaining width is 18 cm minus 6 cm, which is 12 cm.
Check: Divide the placement distance by frame width; subtract placement distance from frame width.
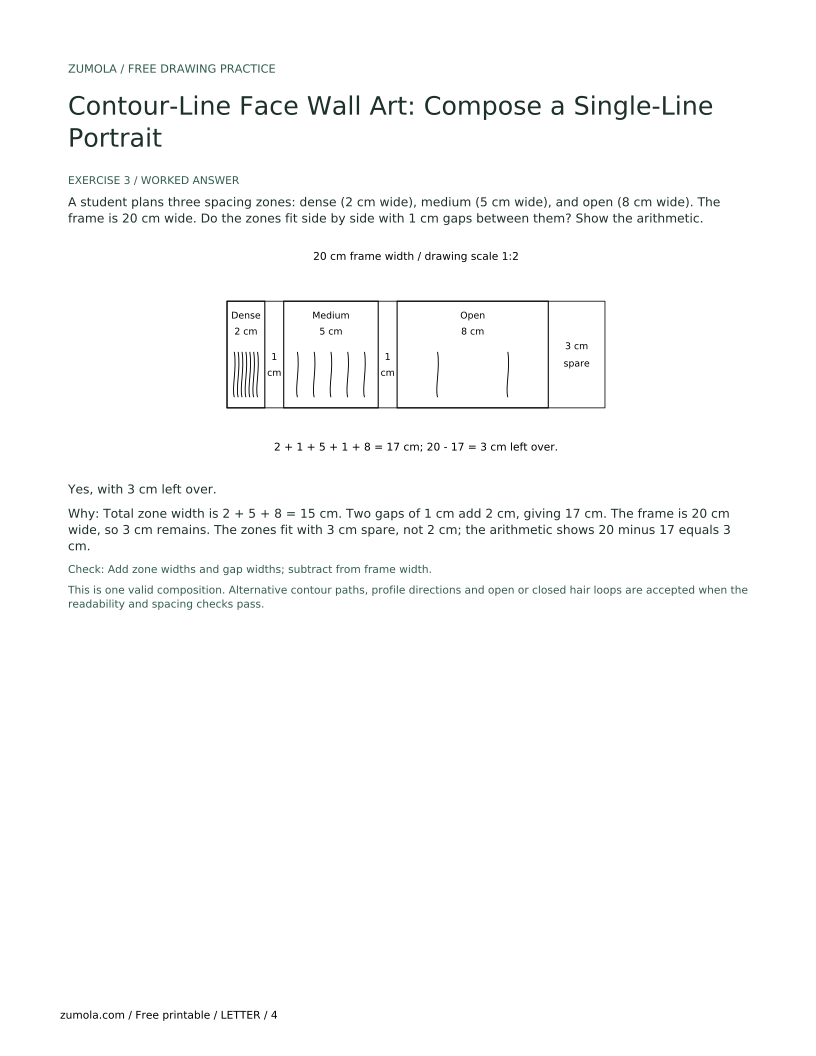
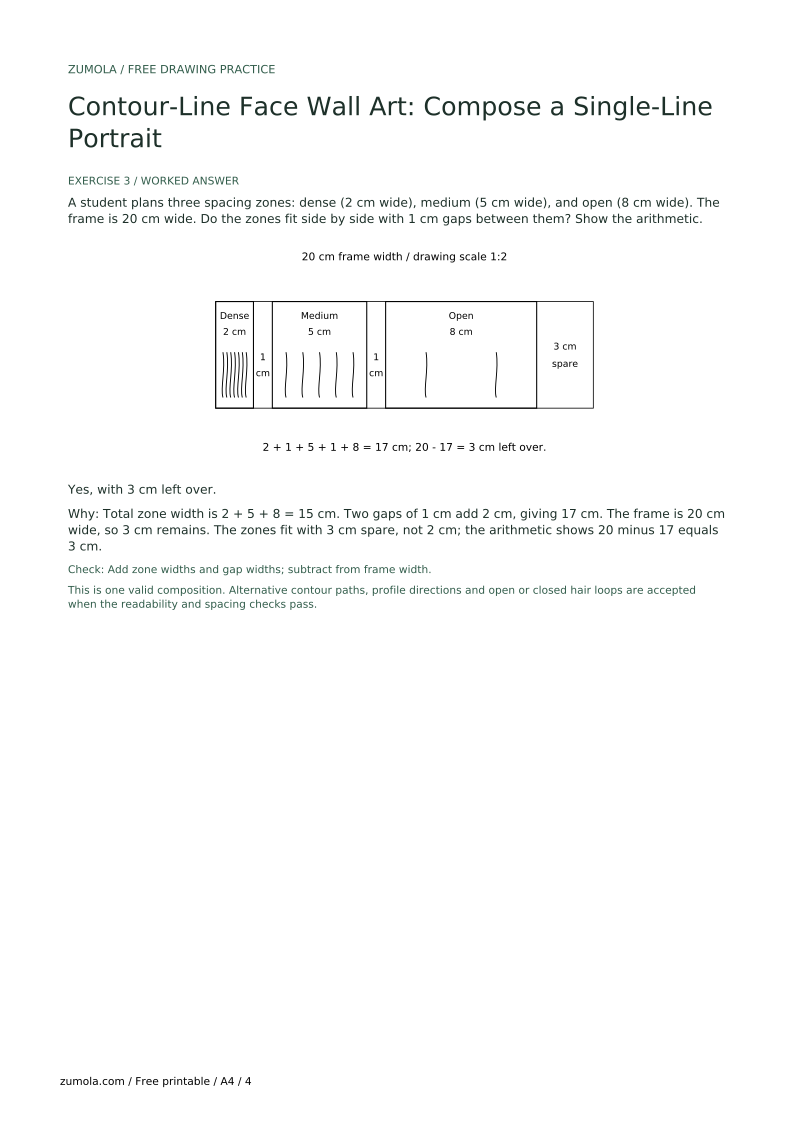
A student plans three spacing zones: dense (2 cm wide), medium (5 cm wide), and open (8 cm wide). The frame is 20 cm wide. Do the zones fit side by side with 1 cm gaps between them? Show the arithmetic.
Yes, with 3 cm left over.
Total zone width is 2 + 5 + 8 = 15 cm. Two gaps of 1 cm add 2 cm, giving 17 cm. The frame is 20 cm wide, so 3 cm remains. The zones fit with 3 cm spare, not 2 cm; the arithmetic shows 20 minus 17 equals 3 cm.
Check: Add zone widths and gap widths; subtract from frame width.
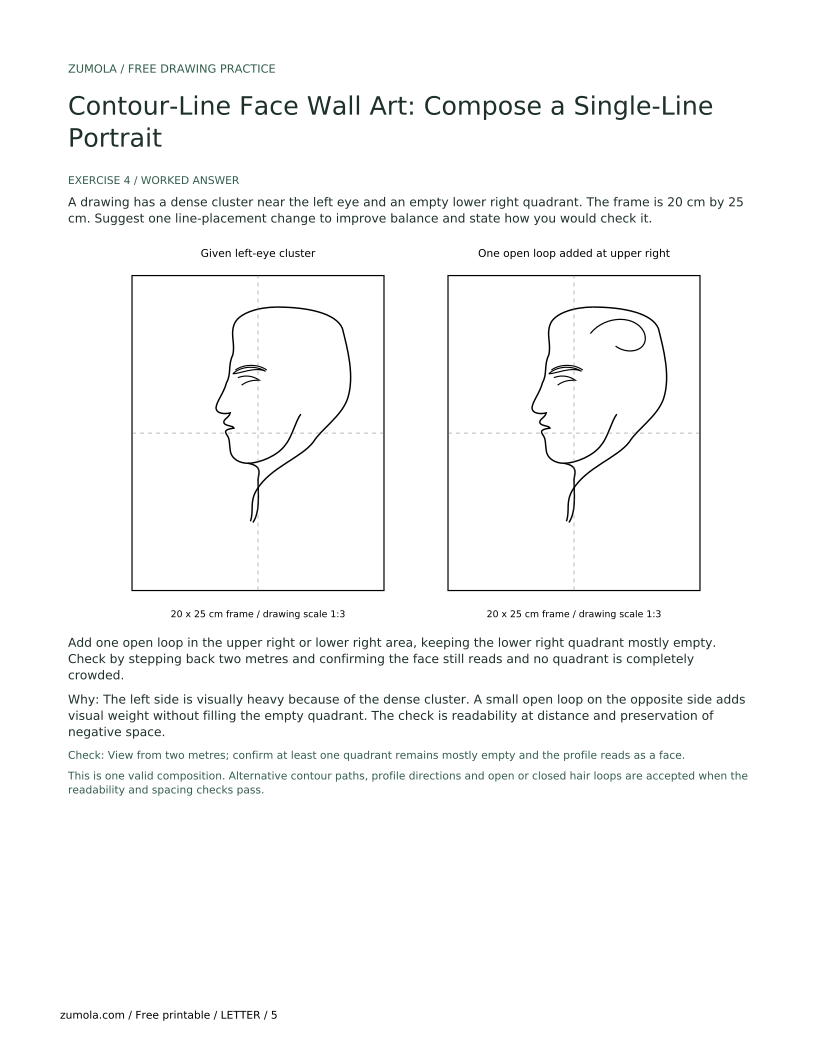
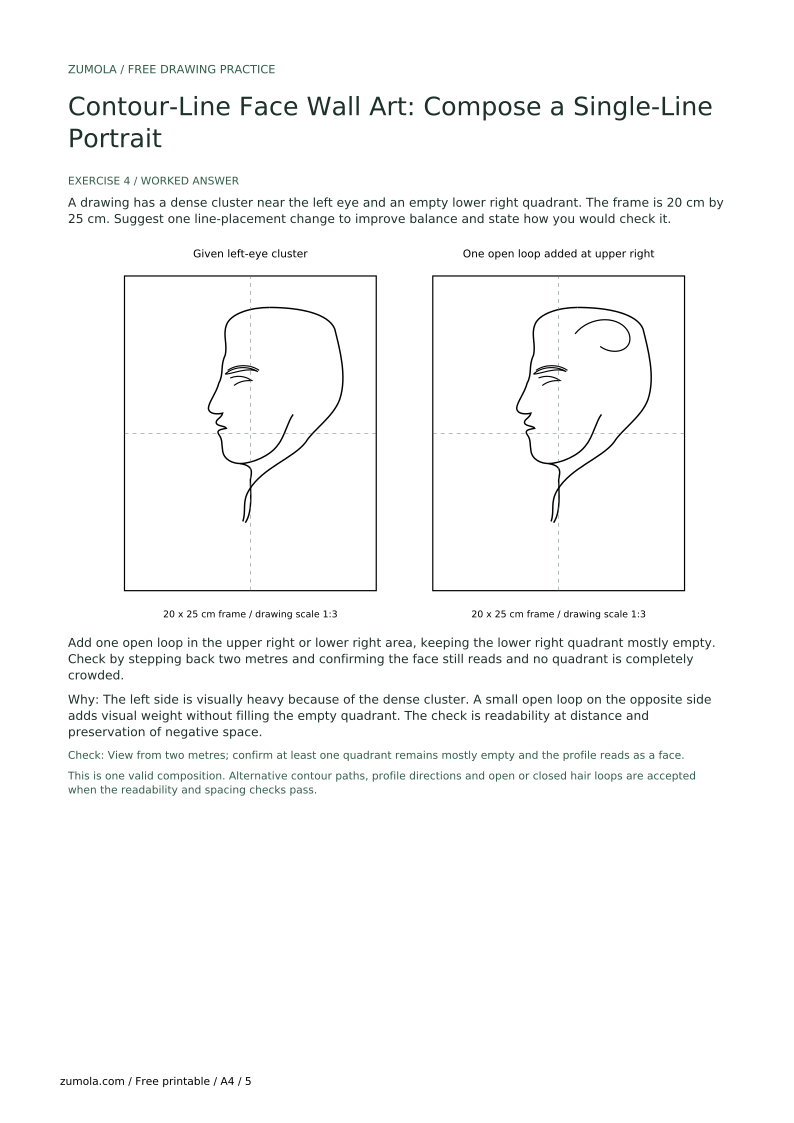
A drawing has a dense cluster near the left eye and an empty lower right quadrant. The frame is 20 cm by 25 cm. Suggest one line-placement change to improve balance and state how you would check it.
Add one open loop in the upper right or lower right area, keeping the lower right quadrant mostly empty. Check by stepping back two metres and confirming the face still reads and no quadrant is completely crowded.
The left side is visually heavy because of the dense cluster. A small open loop on the opposite side adds visual weight without filling the empty quadrant. The check is readability at distance and preservation of negative space.
Check: View from two metres; confirm at least one quadrant remains mostly empty and the profile reads as a face.
Mark top-of-head, chin, and profile-extreme points first, then draw toward them.
Plan three spacing zones: dense near the eye, medium at the jaw, open in the hair.
Keep at least one quadrant mostly empty and leave a measured margin inside the frame.
Use only line; create contrast with line weight and spacing, not tone.
No. A single continuous line is one valid convention, but lifting the pen at a natural junction such as the ear or hairline is acceptable if the contour still reads clearly.
Step back two metres. The profile should read as a face, at least one quadrant should be mostly empty, and the line should not crowd the frame edges.
The brief specifies contour-line wall art with a single dark line. Colour is outside this task; keep the line dark and the background plain.
Uneven spacing is acceptable if it creates rhythm. If it looks accidental, remove one secondary loop or add a small open loop to balance.