Free original lessons
Draw Dreadlocks: Strand Sectioning and Overlap
Learn to draw dreadlocks by planning strand sections, root placement, and overlap order with clear, checkable steps and practice tasks.
Free lesson
Four exercises
Worked answers
Object Drawing Lessons
Dreadlocks are drawn convincingly when you treat them as grouped strands with deliberate roots, section lines, and overlap order rather than as a mass of identical tubes. This lesson focuses on construction: deciding where each lock begins at the scalp, how its section is bounded, and which strand passes in front of another. You will use a simple convention for strand width and a consistent overlap rule so that your drawing reads clearly. The tasks use plain pencil and paper, and every measurement is either given or described so you can complete the work without any reference image. Numerical values are hypothetical examples; measure your own paper and adjust proportionally. The goal is a repeatable method you can apply to any head shape or lock length.
Practice materials: Printable downloads are not available for this lesson yet. Use the instructions and four exercises below.
Reference illustration
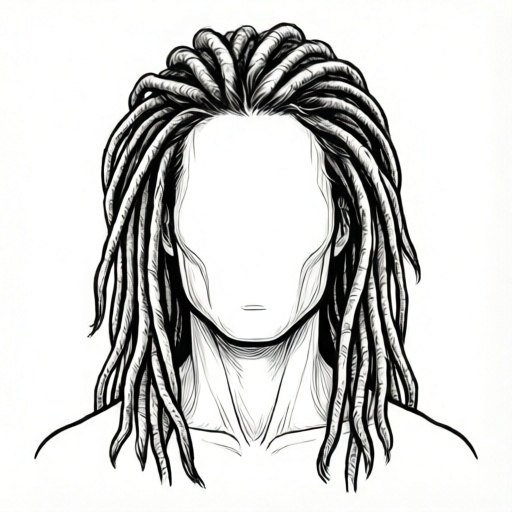
Use the stated measurements and conventions for each exercise.
Plan the scalp and root placement
Begin by drawing a light oval for the scalp area you will cover. Mark a center part line and two side boundaries. Roots should sit in staggered rows rather than a perfect grid, because real lock patterns vary. Choose a root spacing that fits your oval and state your counting convention. For example, if your oval is 12 cm wide and you start 1 cm from the left edge with a hypothetical spacing of 2 cm, roots at 1, 3, 5, 7, 9, and 11 cm give six roots across. Label each root with a small dot and a short line showing the direction the lock will fall.
Keep root dots slightly inside the scalp boundary so locks do not appear to grow from empty space. Vary the distance between rows by about one third of the spacing to avoid a mechanical look. This planning stage is the foundation for strand sectioning: each root will own one section of hair.
- Draw a light oval and a center part line.
- Mark root dots in staggered rows, spacing them evenly within each row.
- Add a short direction line from each root showing the fall of the lock.
- Check that no root sits on the scalp boundary.
Define strand sections and width convention
A strand section is the band of hair belonging to one lock. Use a convention: each lock is drawn as a narrow column whose width equals the distance between two adjacent section lines at the root. Draw section lines as faint parallel curves from the root downward, keeping the width roughly constant for the first third of the lock and then allowing slight taper. If your root spacing is 2 cm, make the section width about 1.5 cm at the root as a hypothetical example, leaving a small gap between locks.
Label each section with a letter so you can track overlap order later. Sections may cross other sections only at planned overlap points; otherwise keep them separate. This prevents the common error of merging two locks into one thick mass.
- Draw two faint boundary lines from each root to form a section.
- Keep section width consistent for the first third of the lock.
- Label each section with a letter or number.
- Mark planned overlap points where one section will cross another.
Build overlap order and strand texture
Overlap order tells the viewer which lock is in front. Choose a simple operational rule and state it: for example, the lock whose root is lower on the page passes in front at a crossing, or the lock whose root is marked with a filled dot passes in front. Apply the same rule at every crossing. At each planned overlap point, draw the front section continuously and break the back section with a small gap. Add texture by drawing short diagonal strokes inside each section, following the fall direction. Do not draw every hair; three to five strokes per section are enough to suggest texture.
Check overlap consistency by tracing each lock from root to tip. A lock should not switch from front to back without a visible crossing. If two locks cross twice, the same one should be in front both times unless you deliberately show a twist, which you should label.
- At each crossing, draw the front section first and unbroken.
- Draw the back section up to the front section, leave a small gap, then continue.
- Add three to five diagonal texture strokes per section.
- Trace each lock to confirm overlap order is consistent.
Refine tips and final checks
Taper each lock near the tip by narrowing the section lines gradually. Tips may end at different lengths; vary them by about one section width to avoid a uniform edge. Erase construction lines lightly, but keep root dots visible until the final check. Confirm that every root has exactly one section, every section has a label, and every crossing has a clear front and back.
Use a simple rubric: roots staggered, sections labeled, overlap consistent, texture present, tips varied. If any item fails, adjust only that part rather than redrawing the whole plate.
- Narrow section lines gradually toward each tip.
- Vary tip lengths by about one section width.
- Erase construction lines but keep root dots for the check.
- Apply the rubric and fix one failing item at a time.
Worked example
On a 10 cm wide scalp oval, place roots in two staggered rows with a hypothetical spacing of 2 cm. Draw three locks falling downward, label them A, B, and C, and show one overlap where lock B passes in front of lock A.
Worked answer
Row one has roots at 2 cm, 4 cm, and 6 cm from the left edge; row two is offset by 1 cm, with roots at 3 cm and 5 cm. Locks A, B, and C start from the first three roots. Section width is about 1.5 cm at each root. At the planned crossing, lock B is drawn continuously and lock A is broken with a small gap, so B is in front. Each section has three light diagonal texture strokes, and tips taper slightly with varied lengths.
Four practice exercises
Exercise 1
Draw a scalp oval 8 cm wide. Place four roots in one row with hypothetical spacing of 2 cm, starting 1 cm from the left edge. Draw four locks with section width 1.5 cm at the root. Label them 1 to 4 and show no overlaps.
Show answer and check
Roots at 1 cm, 3 cm, 5 cm, and 7 cm from the left edge. Four separate sections, each about 1.5 cm wide at the root, taper slightly toward the tip. No section lines cross.
Why: Spacing 2 cm across 8 cm with a 1 cm start gives four roots that fit inside the oval. Keeping sections separate practices root-to-section ownership.
Check: Measure root distances from the left edge; confirm four labels and zero crossings.
Exercise 2
Using the same 8 cm oval, draw three locks in a staggered pattern: row one roots at 2 cm and 6 cm, row two root at 4 cm offset downward. Make lock 2 pass in front of lock 1 at one crossing. Label the front and back at the crossing.
Show answer and check
Row one roots at 2 cm and 6 cm; row two root at 4 cm, placed lower. Lock 2 is drawn continuously through the crossing; lock 1 is broken with a small gap. The crossing is labeled front: 2, back: 1.
Why: Staggering rows avoids a grid look, and the front-lock rule gives a clear overlap decision.
Check: Trace lock 1 and lock 2 from root to tip; confirm lock 2 is unbroken at the crossing and the label matches.
Exercise 3
Draw a 12 cm wide oval with six roots in two rows of three, hypothetical spacing 2 cm within each row and row offset 1 cm. Draw all six locks with one planned crossing where lock 5 passes behind lock 3. Add three texture strokes per section.
Show answer and check
Row one roots at 2 cm, 4 cm, and 6 cm; row two roots at 3 cm, 5 cm, and 7 cm, placed lower. Lock 3 is continuous at the crossing; lock 5 is broken with a gap. Each section has three light diagonal strokes. Check: six roots fit inside the 12 cm oval (row one spans 2–6 cm, row two spans 3–7 cm, all within 0–12 cm), and the 1 cm row offset keeps rows staggered rather than aligned.
Why: Six roots fit the 12 cm oval with 2 cm spacing and a 1 cm offset. The behind rule is the inverse of the front rule and must be labeled.
Check: Count six labeled sections and three strokes per section; confirm lock 3 is unbroken and lock 5 is broken at the crossing.
Exercise 4
Draw a 10 cm wide oval with five roots in three staggered rows. Row one: A at 2 cm and C at 6 cm from the left edge. Row two, placed lower: B at 4 cm and D at 8 cm. Row three, placed lower still: E at 5 cm. Use a hypothetical section width of 1.2 cm at the root. Show exactly two crossings: lock A crosses in front of lock B near the midpoint of both locks, and lock C crosses behind lock D near the tip of both locks. Lock E crosses no other lock. Vary tip lengths by about one section width and apply the rubric.
Show answer and check
Roots sit at 2 cm (A), 4 cm (B), 6 cm (C), 8 cm (D), and 5 cm (E), all inside the 10 cm oval. Sections are about 1.2 cm wide at the root and taper. At the midpoint crossing A is continuous and B is broken with a small gap; at the tip crossing C is broken with a small gap and D is continuous. Lock E runs from its root to its tip without crossing any other lock. Tips vary in length by about one section width (roughly 1.2 cm), so adjacent tips differ by up to about 1.2 cm.
Why: Two crossings test consistent application of both front and behind rules. Varying tips prevents a uniform edge.
Check: Trace each labeled lock through both crossings; confirm A is unbroken over B at the midpoint, D is unbroken over C near the tip, E has no crossing, and tip length variation is within one section width.
Common mistakes
- Drawing all locks as identical parallel tubes with no root planning. Place staggered root dots first and let each section follow its root direction.
- Merging two adjacent sections into one thick lock. Keep a small gap between section lines and label each section separately.
- Switching overlap order at a crossing without showing a twist. Apply the front-lock rule consistently and trace each lock from root to tip.
- Adding heavy texture that hides the section boundaries. Limit texture to three to five light strokes per section and keep boundaries visible.
Self-check rubric
- Roots are staggered and sit inside the scalp boundary.
- Each lock has one labeled section with a consistent width convention.
- Overlap order is stated and applied consistently at every crossing.
- Texture strokes are light and do not hide section boundaries.
- Tips taper and vary in length by about one section width.
- Valid alternative conventions are accepted if labeled and consistent.
Questions and answers
Do I need a reference photo to complete the tasks?
No. Every task describes the scalp shape, root spacing, and overlap points in text so you can draw from the instructions alone.
How wide should each lock be?
Use the section width convention: width equals the distance between two section lines at the root. Any consistent width works if you label it and keep it steady for the first third of the lock.
Can I use a different overlap rule?
Yes, as long as the rule is stated and applied consistently. The rubric checks consistency, not a single universal answer.
What if my paper is a different size?
Treat all numerical values as hypothetical examples and scale them proportionally to your paper. Measure your actual paper and adjust root spacing to fit.