Free original lessons
Drawing Eyebrows: Arch, Taper and Hair-Stroke Construction
Learn to draw believable eyebrows by planning arch shape, taper direction and individual hair strokes with a clear, repeatable method.
Free lesson
Four exercises
Worked answers
Object Drawing Lessons
Eyebrows read as a single shape at a glance, but they are built from direction changes and tapering strokes. This lesson separates the brow into three decisions: where the arch sits, which way the brow tapers, and how individual hairs are drawn. You will use a simple convention: the brow band runs between two guide lines, and hair strokes are short curved lines that start thicker and end thinner. Letter styles and brow shapes vary, so the rubric rewards consistent construction rather than one universal outline. Work on scrap paper first, then refine on a brow plate or blank outline. All measurements below are hypothetical examples chosen for practice; measure your own paper and tools if you adapt them.
Practice materials: Printable downloads are not available for this lesson yet. Use the instructions and four exercises below.
Reference illustration
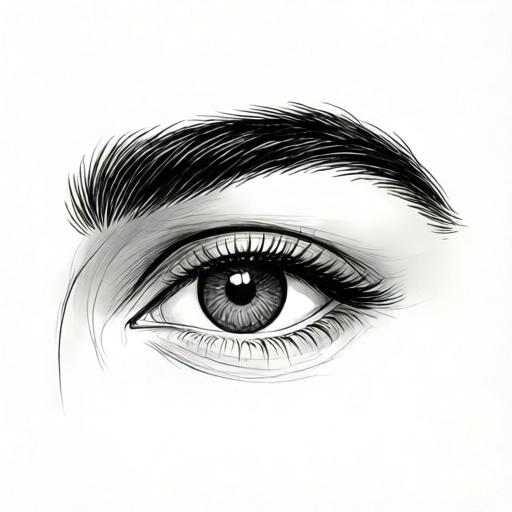
Use the stated measurements and conventions for each exercise.
Plan the brow band and arch position
Begin by drawing a light horizontal band for the brow area. A practical convention is to mark a lower guide line and an upper guide line about one centimeter apart on standard practice paper; treat this as a hypothetical example and adjust to your drawing size. The brow does not sit in the middle of the band. Most brows are fuller near the inner end and thinner toward the outer end, so the band is a boundary, not a filled rectangle.
Place the arch by dividing the brow length into three zones: inner, middle and outer. The highest point of the arch usually falls in the middle zone, closer to the outer third than the inner edge. Mark a small dot for the arch peak, then draw a smooth curve that rises from the inner end, passes through the peak, and descends toward the outer end. Keep the curve continuous; avoid sharp corners unless you deliberately want an angular style.
- Draw two light guide lines to define the brow band.
- Mark the inner end, the arch peak and the outer end.
- Connect the marks with one smooth upper curve and one lower curve.
- Check that the peak sits in the middle zone, not at the very end.
Set taper direction before adding hairs
Taper means the brow gets narrower toward one end. Decide the taper direction first: inner-to-outer taper is common, where the brow is thickest near the inner end and narrows outward. Some styles taper toward the inner end instead. Either is valid if it is consistent. Draw a few direction arrows inside the band to show which way the brow narrows. These arrows are planning marks, not final hairs.
The taper affects hair length and stroke angle. Where the brow is thick, strokes can be slightly longer and more upright. Where it narrows, strokes become shorter and lean toward the taper direction. Keep the lower edge of the brow relatively clean; stray strokes below the lower guide line make the brow look smudged rather than tapered.
- Choose one taper direction and state it in a note beside the drawing.
- Draw two or three arrows inside the band pointing toward the narrow end.
- Shorten hair strokes progressively toward the narrow end.
- Keep strokes inside the guide lines except for a few deliberate outliers.
Build hair strokes with a start-thick, end-thin convention
Use a simple hair-stroke convention: each stroke starts with slight pressure, curves in the direction of hair growth, and lifts to a thin end. On paper, this means the line is darker or wider at the start and fades at the tip. Do not draw every hair the same length or angle. Group strokes into small fans: inner hairs lean upward, middle hairs lean outward, and outer hairs lean down and out.
Work in layers. First lay a few long guide strokes to establish flow. Then add shorter strokes between them to build density. Leave small gaps so the brow does not become a solid block. If you are using pencil, a light base layer plus darker accent strokes near the lower edge gives depth without filling the whole band.
- Draw five to seven long guide strokes following the taper direction.
- Add shorter strokes between them, starting thick and ending thin.
- Vary angle slightly within each fan group.
- Leave gaps and avoid outlining the entire brow with one heavy line.
Review and correct the brow as a whole
Step back and check three things: arch position, taper consistency and stroke direction. If the arch looks flat, raise the peak slightly within the middle zone. If the taper reverses halfway, shorten strokes on the wrong side or redraw the arrows. If the brow looks like a solid shape, erase a few strokes to create gaps and re-add thinner ones.
Compare your brow to the convention you set, not to a single ideal image. A valid result has a clear arch, a consistent taper direction and hair strokes that start thicker and end thinner. Minor asymmetry is acceptable in practice; the goal is controlled construction.
- Check the peak is in the middle zone.
- Check all taper arrows point the same way.
- Check most strokes are thicker at the start and thinner at the end.
- Erase and redraw only the strokes that break the convention.
Worked example
A practice brow band is 6 cm long and 1 cm wide. The arch peak is marked 4 cm from the inner end. The brow tapers from inner to outer. Describe the first three planning marks and one hair-stroke check.
Worked answer
Mark the inner end at 0 cm, the peak at 4 cm, and the outer end at 6 cm along the lower guide line. Draw a smooth upper curve through the peak. Add taper arrows pointing from inner to outer. For the hair-stroke check, confirm that strokes near 1 cm are longer than strokes near 5 cm and that each stroke starts thicker and ends thinner.
Four practice exercises
Exercise 1
A brow band is 8 cm long. The inner end is at 0 cm and the outer end at 8 cm. Mark an arch peak at 5 cm. State whether this peak is in the middle zone and explain your reasoning.
Show answer and check
Yes, 5 cm is in the middle zone. The middle zone runs from about 2.7 cm to 5.3 cm if the band is divided into thirds, so 5 cm falls inside it.
Why: Divide 8 cm into three equal zones of about 2.7 cm each. The middle zone is roughly 2.7 to 5.3 cm. A peak at 5 cm is within that range and is closer to the outer third, which is a common arch position.
Check: Recompute one-third of 8 cm as 2.67 cm and confirm 5 cm lies between 2.67 cm and 5.33 cm.
Exercise 2
A brow tapers from outer to inner. The brow is 7 cm long. At 1 cm from the inner end, strokes are 4 mm long; at 6 cm from the inner end, strokes are 9 mm long. Does the stroke length match the stated taper direction? Explain.
Show answer and check
Yes. The brow narrows toward the inner end, so strokes should be shorter near the inner end. The 4 mm strokes at 1 cm are shorter than the 9 mm strokes at 6 cm, which matches outer-to-inner taper.
Why: Taper direction describes where the brow narrows. Shorter strokes belong at the narrow end. Since the inner end is the narrow end here, shorter strokes near 1 cm are consistent.
Check: Compare the two stroke lengths: 4 mm is less than 9 mm, and the shorter length is at the stated narrow end.
Exercise 3
You draw ten hair strokes. Six start thick and end thin; four start thin and end thick. Is the brow consistent with the start-thick, end-thin convention? What simple correction would improve it?
Show answer and check
No, it is not fully consistent. Six of ten strokes follow the convention, but four reverse it. Redraw the four reversed strokes so they start thicker and lift to a thin end.
Why: The convention applies to the majority of strokes to create a readable direction. Four reversed strokes break the pattern and can make the brow look tangled.
Check: Count strokes that start thick and end thin. If fewer than most follow the convention, redraw the exceptions.
Exercise 4
A brow band is 5 cm long and 1 cm wide. The arch peak is at 4.5 cm from the inner end. Identify the likely problem and give one correction using the zone method.
Show answer and check
The peak is too close to the outer end, so the arch will look lopsided. Move the peak to about 3 cm from the inner end, inside the middle zone, and redraw the upper curve through the new peak.
Why: One-third of 5 cm is about 1.67 cm. The middle zone runs from about 1.67 cm to 3.33 cm. A peak at 4.5 cm is in the outer zone, which breaks the arch plan.
Check: Calculate one-third of 5 cm as 1.67 cm and confirm the new peak lies between 1.67 cm and 3.33 cm.
Common mistakes
- Drawing the arch at the very outer end of the brow. Move the peak into the middle zone and redraw the upper curve so it rises and falls smoothly.
- Making every hair stroke the same length and angle. Group strokes into fans and shorten them progressively toward the tapered end.
- Filling the brow band solidly so no gaps remain. Erase a few strokes and rebuild with thinner, separated strokes that start thick and end thin.
- Reversing taper direction halfway across the brow. Choose one taper direction, mark it with arrows, and adjust stroke lengths to match.
Self-check rubric
- Arch peak is placed in the middle zone and the upper curve is continuous.
- Taper direction is stated and consistent across the brow.
- Most hair strokes follow the start-thick, end-thin convention.
- Stroke angles vary in small fan groups rather than repeating uniformly.
- Gaps are left so the brow does not read as a solid block.
- Valid alternative brow shapes and taper directions are accepted if construction is consistent.
Questions and answers
Do I need to draw every individual hair?
No. A few long guide strokes plus shorter accent strokes create the impression of hair. The convention is start-thick, end-thin, not one hair per line.
Can the brow taper toward the inner end instead of the outer end?
Yes. Either direction is valid if it is consistent and the strokes shorten toward the narrow end.
How wide should the brow band be?
There is no fixed width. The one-centimeter example is hypothetical; choose a width that suits your drawing size and measure it on your own paper.
What if my arch looks too sharp?
Soften the upper curve by redrawing it through three points: inner end, peak and outer end, keeping the line continuous.