Free original lessons
Graffiti on a Broken Brick Wall: Drawing Letters, Cracks, and Rubble
Learn to place graffiti lettering on a damaged brick wall, draw believable crack lines, and add rubble shapes with clear, checkable steps.
Free lesson
Four exercises
Worked answers
Object Drawing Lessons
This lesson teaches a focused drawing problem: putting graffiti lettering onto a broken brick wall so the letters, cracks, and rubble read as one surface. You will set up a brick-course grid, choose a simple lettering convention, draw crack lines that follow the wall, and add rubble shapes that sit at the base. The goal is clarity and structural logic, not color blending or a full street scene. All measurements are hypothetical examples; measure your own paper and tools. Letter styles vary, so the rubric rewards consistent, readable choices rather than one universal answer.
Practice materials: Printable downloads are not available for this lesson yet. Use the instructions and four exercises below.
Reference illustration
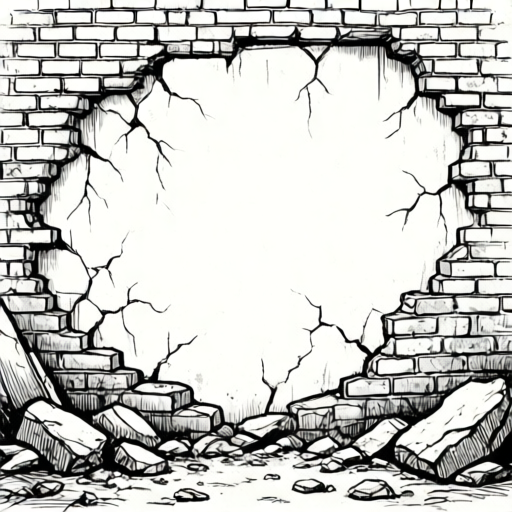
Use the stated measurements and conventions for each exercise.
Set up the brick-course grid and lettering box
Begin by drawing a rectangle for the wall area. A brick-course grid is a set of horizontal lines spaced evenly, with vertical joints offset on alternating rows. For a hypothetical example on A4 paper, use a wall rectangle 18 cm wide and 12 cm high, horizontal course lines every 2 cm, and vertical joints every 4 cm, offset by 2 cm on alternate rows. These numbers are examples only; measure your paper and choose values that fit.
Inside the wall, mark a lettering placement box. For a short tag of four letters, a box about 10 cm wide and 4 cm high centered slightly above the middle works as a hypothetical example. Lightly sketch the box so it can be erased. The box keeps the tag from drifting and helps you judge letter height against the brick courses.
- Draw the wall rectangle and label its width and height in centimetres.
- Add horizontal course lines at your chosen spacing; count them so the spacing is consistent.
- Add vertical joints on alternating rows with a consistent offset.
- Lightly draw the lettering placement box inside the wall and note its width and height.
Choose a lettering convention and place the tag
Use an explicitly defined convention so the work can be checked. For this lesson, define x-height as the distance from the baseline to the midline of each letter. Capitals may rise above the midline, and descenders may fall below the baseline. Letter styles vary: block letters, rounded letters, and slanted letters are all valid if the convention is stated and followed consistently.
Sketch the tag inside the placement box using light pencil. Keep the baseline parallel to a brick course line so the tag belongs to the wall. Check that each letter's x-height is consistent and that the tag fits the box without touching the edges. If a letter crosses a crack, decide whether the crack passes behind or through the letter and keep that choice consistent.
- State your convention in one sentence: baseline, midline, x-height, and whether letters are block, rounded, or slanted.
- Lightly mark the baseline on a brick course line and the midline at your chosen x-height.
- Sketch the letters in order, checking each letter's height against the midline.
- Erase construction lines only after the tag reads clearly at arm's length.
Draw crack lines that follow the wall
Cracks should respond to the brick grid. A simple crack line starts at an edge or a joint, changes direction at a joint, and tapers as it travels. Draw two or three short example cracks first, then choose one main crack for the composition. Keep the crack line thin at the tip and slightly wider near the origin. Avoid perfectly straight cracks; small changes in direction at brick joints look more believable.
If the crack crosses the lettering box, show whether it passes behind the letters or breaks through them. For a broken wall, a crack that interrupts one letter and continues below can suggest damage, but keep the tag readable. Use a light guide line first, then darken only the final crack path.
- Mark a start point at a wall edge or brick joint.
- Draw a light guide line that changes direction at two or three joints and tapers at the end.
- Decide the crack's relationship to the tag: behind the letters or through one letter.
- Darken the final crack path and erase the guide line.
Add rubble shapes at the base
Rubble should sit where the wall is broken, usually along the bottom edge. Use simple shape stamps: a triangle, a rounded lump, and an angular chunk. Draw each rubble piece with a flat base and a broken top, and vary size so the pile looks natural. For a hypothetical example, keep rubble pieces between 1 cm and 3 cm wide on A4 paper. These values are examples; measure your own drawing.
Place rubble so it overlaps the wall base and the lowest brick course. Add a few small fragments near the main crack. Keep the rubble outline simple and avoid shading; the lesson focuses on shape and placement, not color blending.
- Draw three rubble shape stamps on scrap paper: triangle, rounded lump, angular chunk.
- Place five to eight rubble pieces along the broken base, varying size and angle.
- Overlap at least two pieces with the wall base and one with the main crack.
- Add three small fragments near the crack tip and check that the pile reads as rubble at arm's length.
Worked example
On a wall rectangle 16 cm wide and 10 cm high, draw a four-letter tag in a placement box 8 cm wide and 3 cm high, add one main crack from the top edge to the base, and place five rubble pieces along the bottom.
Worked answer
The wall has horizontal course lines every 2 cm and vertical joints every 4 cm, offset by 2 cm on alternate rows. The tag sits in the box with its baseline on the second course line from the bottom. The main crack starts at the top edge, changes direction at two joints, passes behind the second letter, and tapers at the base. Five rubble pieces, each 1 to 2.5 cm wide, overlap the bottom course and one touches the crack tip. The tag reads clearly at arm's length.
Four practice exercises
Exercise 1
A wall rectangle is 20 cm wide and 12 cm high. Horizontal course lines are spaced every 3 cm. How many horizontal course lines fit inside the wall if the top and bottom edges count as lines?
Show answer and check
Five lines: at 0 cm, 3 cm, 6 cm, 9 cm, and 12 cm.
Why: Divide the height by the spacing: 12 divided by 3 equals 4 intervals, which gives 5 lines including both edges.
Check: Count the lines on your drawing and confirm the spacing between each pair is 3 cm.
Exercise 2
A placement box is 9 cm wide and 3.5 cm high. You state an x-height of 2 cm from baseline to midline. If the baseline sits on a course line and the midline is 2 cm above it, does the tag fit inside the box height?
Show answer and check
Yes, with 1.5 cm of space above the midline for capitals or ascenders.
Why: The box height is 3.5 cm; the x-height uses 2 cm, leaving 1.5 cm above the midline.
Check: Measure the baseline-to-midline distance and the remaining space to the top of the box.
Exercise 3
A main crack starts at the top edge and changes direction at two brick joints before tapering at the base. If the wall has four horizontal course lines between top and bottom, at which lines could the crack change direction?
Show answer and check
Any two of the interior course lines, for example the first and third interior lines.
Why: Cracks should respond to the grid; changing direction at joints or course lines is consistent with the wall structure.
Check: Trace the crack and confirm each direction change occurs at a drawn joint or course line.
Exercise 4
You place seven rubble pieces along the bottom edge. Three are 1 cm wide, two are 2 cm wide, and two are 3 cm wide. What is the total width if the pieces do not overlap?
Show answer and check
13 cm.
Why: Three times 1 cm is 3 cm; two times 2 cm is 4 cm; two times 3 cm is 6 cm; 3 plus 4 plus 6 equals 13 cm.
Check: Add the widths again and compare with the measured total along the base.
Common mistakes
- Drawing brick courses with uneven spacing or joints that do not offset. Measure the spacing once and repeat it; offset vertical joints by half the joint spacing on alternate rows.
- Letting the tag float without a baseline tied to a brick course. Place the baseline on a course line and state the x-height convention before sketching letters.
- Making cracks perfectly straight or too wide at the tip. Change direction at brick joints and taper the crack to a thin tip.
- Scattering rubble randomly instead of at the broken base. Cluster rubble along the bottom edge and near the main crack, with flat bases and broken tops.
Self-check rubric
- Brick-course grid: horizontal spacing is consistent and vertical joints offset on alternate rows.
- Lettering convention: baseline, midline, and x-height are stated and followed consistently.
- Tag placement: letters fit the placement box and the baseline aligns with a brick course.
- Crack logic: crack changes direction at joints, tapers, and has a consistent relationship to the tag.
- Rubble placement: pieces cluster at the broken base, have flat bases and broken tops, and vary in size.
- Readability: the tag is legible at arm's length and the wall reads as one surface.
Questions and answers
Do I need color blending for this task?
No. The brief excludes color blending. Focus on lettering placement, crack lines, and rubble shapes.
Can I use slanted letters instead of block letters?
Yes, if you state the convention and keep the x-height consistent. Letter styles vary, and the rubric allows valid alternatives.
How wide should the crack be?
There is no universal value. Start thin at the tip and slightly wider at the origin; measure your own drawing and label any chosen numbers as examples.
Should the crack go behind or through the letters?
Either can work if it is consistent and the tag stays readable. Decide before darkening the crack.