Free original lessons
Draw a Mermaid Scale Pattern: Pointed Rows and Pencil Shading
Learn to construct overlapping pointed-scale rows with a simple grid, then add layered pencil shading for depth. Includes a worked example, four practice tasks, and a marking rubric.
Free lesson
Four exercises
Worked answers
Object Drawing Lessons
This guide teaches a repeatable method for drawing a mermaid scale pattern made of overlapping pointed scales arranged in offset rows. You will set up a light construction grid, draw each scale with a pointed lower edge, stagger the rows so scales overlap, and apply layered pencil shading to suggest depth. The convention used here is that every scale is a rounded-top shape with a single downward point, and each row overlaps the row above by roughly one third of the scale height. Lettering and handwriting are not part of this task; where any label is written, use your normal handwriting and accept any legible style. All numerical values below are hypothetical examples chosen for clarity, not manufacturing standards. Measure your own paper and pencil before committing to a layout.
Practice materials: Printable downloads are not available for this lesson yet. Use the instructions and four exercises below.
Reference illustration
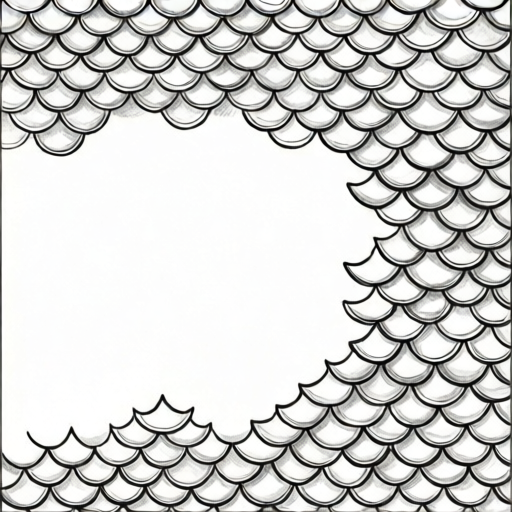
Use the stated measurements and conventions for each exercise.
Set up the construction grid
Begin by deciding the scale size. A practical hypothetical example is a scale width of 20 mm and a scale height of 25 mm on A4 paper. Mark a light horizontal baseline and a parallel midline above it at the scale height; the space between baseline and midline is the working band for one row.
Draw faint vertical guide marks at the scale width along the baseline. These marks are construction aids only and will be erased or left very light. Keep all guide lines lighter than the final scale outlines so the pattern reads clearly.
- Measure your paper and pencil, then write down your chosen scale width and height as hypothetical working values.
- Draw a light baseline across the page and a parallel midline one scale height above it.
- Mark vertical guide ticks at the scale width along the baseline.
- Label the first row lightly so you can track the offset for the next row.
Draw pointed scales in offset rows
Each scale starts at the baseline, rises to a rounded top near the midline, and returns to the baseline at a single downward point. Draw the rounded top as a smooth arc and the sides as gentle curves that meet at the point. Keep the point centered under the arc.
The second row is offset by half a scale width so its scales sit between the scales of the first row. Overlap the new row so its rounded tops cover roughly one third of the row above. Repeat the offset for each subsequent row, alternating the half-width shift.
- Draw one complete scale: arc top, curved sides, single centered point at the baseline.
- Repeat along the row at the scale width until the row is filled.
- Start the next row half a scale width to the right or left, whichever keeps the pattern balanced.
- Overlap the new row by about one third of the scale height and repeat the scale shape.
- Continue alternating offsets until the desired number of rows is complete.
Apply layered pencil shading
Shading gives the pattern depth. Use a light pencil layer first, then a medium layer, then a dark accent only where scales overlap. Keep the light source consistent: for this guide, assume light comes from the upper left, so the lower right of each scale receives more shading.
Shade the rounded top lightly, increase pressure along the lower right curve, and place the darkest accent just under the overlapping edge of the scale above. Leave a thin unshaded sliver along the upper left to suggest a highlight. Blend gently with a light touch rather than smudging heavily.
- Apply a light even layer over the whole scale except the upper-left highlight sliver.
- Add a medium layer along the lower right curve and near the point.
- Place a dark accent under the overlapping edge of the scale above.
- Repeat consistently across rows so the light direction stays the same.
- Check that guide lines remain lighter than the shaded outlines.
Check and refine the pattern
Step back and check that rows are evenly offset, points are centered, and overlaps are consistent. If a scale looks too wide or too narrow, adjust the next row rather than erasing heavily, which can damage the paper surface.
Confirm that shading follows one light direction and that the darkest accents sit at overlaps. Erase construction marks only after the outlines and shading are stable.
- Compare row offsets: each row should shift by half a scale width from the previous row.
- Check that every scale has one centered downward point.
- Verify overlap depth is roughly one third of the scale height.
- Confirm shading direction is consistent across the whole pattern.
- Erase or lighten construction guides last.
Worked example
On a hypothetical grid with scale width 20 mm and height 25 mm, describe how to place the first three scales of row one and the first two scales of row two, including the offset and overlap.
Worked answer
Row one: place scale centers at 10 mm, 30 mm, and 50 mm along the baseline, each rising 25 mm to the midline with a centered point at the baseline. Row two: offset by half a scale width, so place centers at 20 mm and 40 mm. Overlap row two so its rounded tops cover about one third of the row-one scale height, roughly 8 mm, leaving the pointed edges of row one visible below.
Four practice exercises
Exercise 1
Using a hypothetical scale width of 15 mm and height 20 mm, describe the placement of four scales in row one and three scales in row two, including the offset.
Show answer and check
Row one centers at 7.5 mm, 22.5 mm, 37.5 mm, and 52.5 mm. Row two is offset by half a width, 7.5 mm, so centers sit at 15 mm, 30 mm, and 45 mm.
Why: Half of 15 mm is 7.5 mm. Adding 7.5 mm to each row-one center gives the row-two centers, which places row-two scales between row-one scales.
Check: Confirm each row-two center is exactly 7.5 mm from the nearest row-one center and that spacing within each row is 15 mm.
Exercise 2
A scale is 24 mm tall. State the hypothetical overlap depth if rows overlap by one third of the scale height, and explain how much of the lower scale remains visible.
Show answer and check
One third of 24 mm is 8 mm. The overlap is 8 mm, so 16 mm of the lower scale remains visible.
Why: Divide 24 by 3 to get 8 mm overlap, then subtract 8 mm from 24 mm to find the visible portion.
Check: Verify that 8 mm plus 16 mm equals 24 mm and that the overlap is one third of the total height.
Exercise 3
Describe how to shade three overlapping scales when light comes from the upper left, naming where the light, medium, and dark layers go.
Show answer and check
Apply a light layer over each scale except a thin upper-left highlight sliver. Add a medium layer along the lower right curve and near the point. Place a dark accent under the overlapping edge of the scale above.
Why: A consistent upper-left light source means the lower right receives more shading and overlaps cast the darkest accent.
Check: Check that every scale has a highlight on the upper left and the darkest accent at the overlap, with no conflicting shading direction.
Exercise 4
A row contains scales at 10 mm, 30 mm, and 50 mm centers. State the centers of the next row if the offset is half a scale width of 20 mm, and explain the overlap if scale height is 30 mm.
Show answer and check
Half of 20 mm is 10 mm, so the next row centers are at 20 mm and 40 mm. One third of 30 mm is 10 mm, so the overlap is 10 mm.
Why: Offset by half the width places new scales between old ones. Overlap by one third of height is found by dividing 30 mm by 3.
Check: Confirm each new center is 10 mm from a previous center and that 10 mm overlap plus 20 mm visible equals 30 mm height.
Common mistakes
- Drawing scales with two points or a flat bottom. Redraw the lower edge as a single centered point; keep the arc top rounded and the sides curved.
- Aligning rows directly above one another instead of offsetting. Shift each new row by half a scale width so scales sit between the scales above.
- Overlapping too deeply, hiding the pointed edges. Reduce overlap to about one third of the scale height so points remain visible.
- Shading in conflicting directions. Choose one light direction and apply light, medium, and dark layers consistently.
Self-check rubric
- Scale shape: each scale has a rounded top, curved sides, and one centered downward point.
- Row offset: each row shifts by about half a scale width from the previous row.
- Overlap: rows overlap by roughly one third of the scale height, keeping points visible.
- Shading: light, medium, and dark layers follow one consistent light direction.
- Consistency: scale size and spacing remain reasonably even across the pattern.
- Presentation: construction guides are lighter than final outlines and shading.
Questions and answers
Do I need a ruler for the grid?
A ruler helps keep scale width and height consistent, but you can use any straight edge. Measure your own tools and record your chosen values.
How many rows should I draw?
Draw as many rows as fit your paper with the chosen scale height. Three to five rows is a practical starting range.
Can I use colored pencil instead of graphite?
Yes. Keep the same layering order: light layer, medium layer, dark accent at overlaps, with one consistent light direction.
What if my scales vary slightly in size?
Small variation is acceptable if rows remain offset and points stay centered. Use the rubric to judge consistency rather than exact uniformity.