Free original lessons
Sketch a Nail: Head, Shank, and Point Construction
Learn to draw a single nail fastener in side view using a clear proportion convention, labeled parts, and checkable steps for head, shank, and point.
Free lesson
Four exercises
Worked answers
Object Drawing Lessons
This lesson teaches a repeatable construction for sketching one nail fastener in side view. You will set a total length, divide it into head, shank, and point zones, and use a simple width convention so the drawing reads clearly at any size. The method is a convention, not a universal standard: real nails vary in head shape, shank taper, and point angle. Treat every numerical value here as a hypothetical example you can replace with measurements from the actual object in front of you. The goal is a clean, labeled side-view sketch whose parts are proportional and easy to check with a ruler.
Practice materials: Printable downloads are not available for this lesson yet. Use the instructions and four exercises below.
Reference illustration
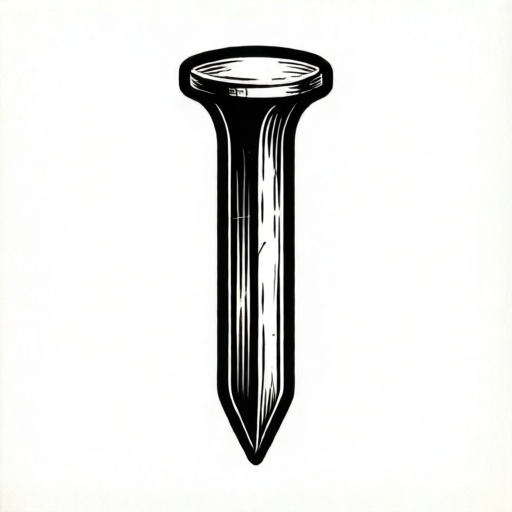
Use the stated measurements and conventions for each exercise.
Set the total length and three zones
Begin with a light horizontal baseline. Mark a start point for the top of the head and an end point for the tip. The distance between them is the total length L. For this lesson, use L = 60 mm as a hypothetical example. Draw a faint vertical line at each end so the sketch stays aligned.
Divide L into three zones using a simple convention: head zone 10 percent, shank zone 75 percent, point zone 15 percent. With L = 60 mm, that gives 6 mm, 45 mm, and 9 mm. Mark these boundaries on the baseline with small ticks. The zones are construction aids, not claims about real hardware.
Label the zones H, S, and P lightly. Keep all construction lines thin so they can be erased or left as guides. The side view means you draw the nail as seen from the side, so the head appears as a shape at the top and the point as a taper at the bottom.
- Draw a horizontal baseline and mark total length L = 60 mm.
- Mark zone boundaries at 6 mm, 51 mm, and 60 mm from the start.
- Label the zones H, S, and P in light pencil.
- Check that the three zone lengths add to L.
Draw the head as a flat-sided shape
In side view, a common convention is a flat head drawn as a short rectangle wider than the shank. Use a head width of 12 mm and a head height of 6 mm as hypothetical examples. Center the head on the vertical axis so equal amounts extend left and right of the shank centerline.
Draw the top edge of the head as a straight horizontal line 12 mm wide. Drop two vertical sides 6 mm down to the head-shank boundary. Close the bottom edge, leaving a gap where the shank meets it. The head should look like a small flat cap, not a dome, unless your reference object clearly shows a dome.
Valid alternatives: a slightly rounded top edge or a countersunk underside can be acceptable if the sketch remains readable and the head is clearly wider than the shank. State your chosen head style in a short note beside the drawing.
- Mark 6 mm left and right of the centerline at the top of the head zone.
- Draw the top edge horizontally across those marks.
- Draw two vertical sides 6 mm long down to the shank boundary.
- Close the bottom edge except where the shank continues.
Draw the shank and taper the point
The shank is the long middle zone. Use a shank width of 4 mm as a hypothetical example. Draw two parallel vertical lines 2 mm either side of the centerline from the head boundary down to the start of the point zone. Keep the lines straight and evenly spaced.
In the point zone, taper from the full shank width to a single tip. A simple convention is a symmetric taper ending at the centerline. Draw two short lines from the shank edges to the tip mark, forming a narrow triangle. The point zone is 9 mm long in this example, so the taper is gradual and readable.
Check symmetry by measuring from the centerline to each shank edge at two heights. If the distances differ by more than 1 mm, adjust the lines. Erase construction ticks only after the outline is consistent.
- Draw parallel shank lines 2 mm either side of the centerline.
- Mark the tip on the centerline at the end of the point zone.
- Connect each shank edge to the tip with a straight taper line.
- Measure symmetry at two heights and correct any difference over 1 mm.
Label, check, and present the sketch
Add short labels with leader lines: Head, Shank, Point, and Total length L. Write the zone lengths beside the drawing so a reader can verify the proportions. Keep labels horizontal and outside the outline where possible.
Run a final check: total length equals the sum of the three zones; head width is greater than shank width; shank lines are parallel; the point tapers to one tip on the centerline. Record any chosen values as hypothetical examples in a note.
Presentation convention: use a dark outline for the nail and light lines for construction. Do not shade heavily, because shading can hide the taper. A clean side view with clear labels is the target.
- Add labels for head, shank, point, and total length.
- Verify zone lengths sum to the total length.
- Confirm head width exceeds shank width.
- Confirm the point ends at one tip on the centerline.
Worked example
Construct a side-view nail sketch with total length 50 mm using the lesson convention: head 10 percent, shank 75 percent, point 15 percent, head width 10 mm, head height 5 mm, shank width 4 mm. Describe the construction and check the arithmetic.
Worked answer
Zones: head 5 mm, shank 37.5 mm, point 7.5 mm; sum 50 mm. Draw a baseline, mark boundaries at 5 mm, 42.5 mm, and 50 mm. Draw a flat head 10 mm wide and 5 mm high centered on the axis. Draw parallel shank lines 2 mm either side of the centerline for 37.5 mm. Taper from the shank edges to a tip on the centerline over 7.5 mm. Label head, shank, point, and total length. Check: 5 + 37.5 + 7.5 = 50; head width 10 mm is greater than shank width 4 mm; shank symmetry within 1 mm; one tip on the centerline.
Four practice exercises
Exercise 1
Using the lesson convention, plan a nail sketch with total length 40 mm. State the head, shank, and point zone lengths and the head and shank widths using the example proportions.
Show answer and check
Head 4 mm, shank 30 mm, point 6 mm; head width 8 mm, head height 4 mm, shank width 4 mm (hypothetical examples).
Why: Apply 10 percent, 75 percent, and 15 percent to 40 mm: 4, 30, and 6 mm. Scale the example widths down proportionally: head width 8 mm, head height 4 mm, shank width 4 mm.
Check: Add the zones: 4 + 30 + 6 = 40 mm. Confirm head width 8 mm is greater than shank width 4 mm.
Exercise 2
A sketch has total length 70 mm with zones of 7 mm, 52.5 mm, and 10.5 mm. Verify whether the zone percentages match the lesson convention and state the check arithmetic.
Show answer and check
Yes, the zones match 10 percent, 75 percent, and 15 percent of 70 mm.
Why: 10 percent of 70 is 7; 75 percent is 52.5; 15 percent is 10.5. The given zones equal these values.
Check: Sum the zones: 7 + 52.5 + 10.5 = 70 mm. Compare each zone with its percentage of the total.
Exercise 3
Describe how to correct a nail sketch whose shank lines measure 3 mm and 5 mm from the centerline at the top, and 4 mm and 4 mm at the bottom. State the target and the correction.
Show answer and check
The top is asymmetric; adjust the 3 mm side outward or the 5 mm side inward until both sides are equal, for example 4 mm and 4 mm, matching the bottom.
Why: Symmetry requires equal distances from the centerline at each height. The bottom is already symmetric at 4 mm and 4 mm, so the top should match within 1 mm.
Check: Re-measure both sides at the top and bottom; accept when each pair differs by no more than 1 mm.
Exercise 4
Plan a nail sketch with total length 90 mm using the lesson convention. Give the zone lengths, choose hypothetical head and shank widths, and list three final checks.
Show answer and check
Zones: head 9 mm, shank 67.5 mm, point 13.5 mm. Hypothetical widths: head width 18 mm, head height 9 mm, shank width 6 mm. Checks: zones sum to 90 mm; head wider than shank; point ends at one tip on the centerline.
Why: Apply 10 percent, 75 percent, and 15 percent to 90 mm. Scale widths upward from the lesson examples while keeping the head wider than the shank.
Check: Verify 9 + 67.5 + 13.5 = 90 mm; confirm 18 mm head width exceeds 6 mm shank width; confirm the taper ends at a single centerline tip.
Common mistakes
- Drawing the head narrower than the shank. Measure head width and shank width separately; the head must be wider so the nail reads correctly in side view.
- Making the point zone too short, so the taper looks blunt. Use the zone convention and mark the point boundary before drawing the taper; a longer point zone gives a clearer tip.
- Letting shank lines drift out of parallel. Measure from the centerline at the top and bottom of the shank; adjust until both distances match within 1 mm.
- Forgetting to label the parts, so the sketch cannot be checked. Add head, shank, point, and total length labels with leader lines before finishing.
Self-check rubric
- Total length is marked and the three zone lengths sum to it.
- Head is clearly wider than the shank and its style is stated.
- Shank lines are parallel and symmetric about the centerline within 1 mm.
- Point tapers from the shank edges to one tip on the centerline.
- Labels for head, shank, point, and total length are present and readable.
- Chosen numerical values are labeled as hypothetical examples or replaced with measured values.
- Valid alternative head styles are accepted if the sketch remains clear and labeled.
Questions and answers
Are the numbers in this lesson real nail dimensions?
No. They are hypothetical examples chosen for easy arithmetic. Measure the actual object or equipment you are drawing and label your own values.
Can I use a rounded head instead of a flat one?
Yes, if your reference shows a rounded head. State the style beside the sketch and keep the head clearly wider than the shank.
How do I check the point taper?
Confirm the taper starts at the shank edges and ends at one tip on the centerline. Measure the point zone length and compare it with your planned value.
What if my total length is different?
Keep the same zone percentages and recalculate. For example, L = 80 mm gives 8 mm head, 60 mm shank, and 12 mm point.