Free original lessons
Draw Tarpon Scale Pattern: Overlapping Shapes Step by Step
Learn to draw tarpon scale pattern with overlapping shapes. Step-by-step guide, overlap-order diagram plan, practice panel, and self-check rubric.
Free lesson
Four exercises
Worked answers
Object Drawing Lessons
Tarpon scales are large, rounded, and overlap in a distinctive staggered pattern. This guide teaches you to draw that pattern as a repeating shape study, not a fish anatomy lesson. You will define one scale shape, set a consistent overlap order, and build a clean panel of overlapping scales. The method uses simple geometry and checkable spacing so you can verify your work without a reference image. All measurements are hypothetical examples; measure your own paper and tools. The convention for scale shape is explicit: a rounded shield with a slightly flattened top edge and a gentle point at the bottom. Valid alternatives are allowed if they keep the same overlap logic and proportion. Work on plain paper with a pencil and eraser. The goal is a tidy, readable pattern that shows clear layering, not a finished artwork.
Practice materials: Printable downloads are not available for this lesson yet. Use the instructions and four exercises below.
Reference illustration
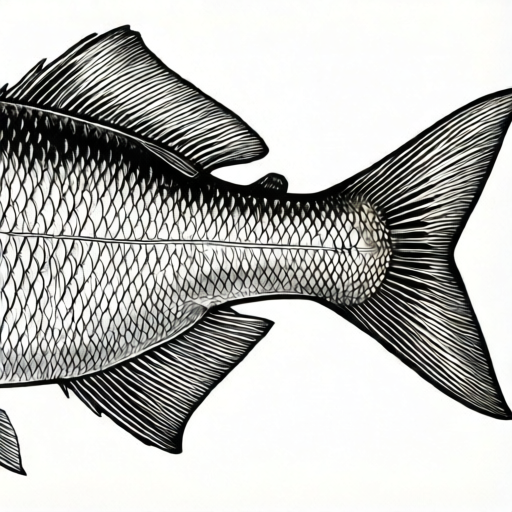
Use the stated measurements and conventions for each exercise.
Define the scale shape and overlap convention
A tarpon scale in this exercise is a rounded shield: wider at the top, narrowing to a soft point at the bottom. Draw it inside a light guide box. For example, use a 3 cm wide by 4 cm tall box on your paper. The top edge is slightly flattened, the sides curve outward, and the bottom tapers to a rounded point. This is a convention, not a claim about real fish anatomy.
Overlap order is fixed for the pattern: each new scale sits on top of the one above it, and scales in the same row overlap left to right. This means the bottom edge of an upper scale is hidden by the top edge of the scale below. Keep the overlap depth consistent, for example about 1 cm, so the pattern reads clearly.
- Draw a light 3 cm by 4 cm guide box for one scale.
- Sketch the rounded shield inside the box: flattened top, curved sides, soft bottom point.
- Mark the overlap depth with a light line 1 cm below the top edge of the guide box.
- Erase the guide box and keep the scale outline and overlap line.
Build the staggered rows
Tarpon scale patterns read as staggered rows. Place the first row of scales with their top edges aligned. The second row sits below, shifted sideways by half a scale width. Use a consistent horizontal spacing, for example 3.5 cm between scale centers, and a consistent vertical spacing, for example 3 cm between row centers. These numbers are hypothetical; adjust to your paper size.
Draw the upper row first, then the lower row. Each lower scale is drawn later and sits on top of the scale above, so its top edge covers the bottom point of the scale above. Keep the overlap depth the same as your marked line. Check that every scale in a row has the same width and height before adding the next row.
- Lightly mark row baselines 3 cm apart.
- On the first baseline, mark scale centers 3.5 cm apart.
- Draw the first row of scales using the defined shape.
- Shift the second row centers by half a scale width, about 1.75 cm.
- Draw the second row so each scale overlaps the bottom of the scale above by about 1 cm.
- Repeat for a third row if your panel allows, keeping the same spacing.
Refine edges and check the pattern
After the rows are drawn, darken only the visible edges. A visible edge is any part of a scale outline not covered by a scale drawn later. Leave the hidden overlap lines light or erase them. This makes the layering readable. Keep line weight consistent; do not outline every scale fully, because that would flatten the overlap.
Check the pattern with simple arithmetic. Count scales per row and compare to your planned spacing. For example, a 21 cm wide panel with 3.5 cm center spacing fits about six scales per row. Measure the overlap depth at three different places; they should match your chosen value within a small margin you decide, such as 2 mm. If a scale is too wide, erase and redraw it before darkening edges.
- Erase hidden overlap lines that are no longer needed.
- Darken visible scale edges with a consistent pencil pressure.
- Measure overlap depth at three locations and compare.
- Count scales per row and confirm the staggered shift.
- Label your panel with the scale dimensions and overlap depth used.
Worked example
On a 21 cm wide by 12 cm tall panel, plan three staggered rows of scales using a 3 cm wide by 4 cm tall scale, 3.5 cm horizontal center spacing with the first center 1.75 cm from the left edge, 3 cm vertical row spacing, and 1 cm overlap depth. How many scales fit per row, and what is the total planned scale count?
Worked answer
Six scales per row and eighteen scales total. Starting at 1.75 cm and adding 3.5 cm gives centers at 1.75, 5.25, 8.75, 12.25, 15.75, and 19.25 cm; the next center at 22.75 cm exceeds the 21 cm panel, so six scales fit. Three rows at 3 cm spacing fit within 12 cm. Total is 6 times 3 equals 18 scales.
Four practice exercises
Exercise 1
A practice panel is 14 cm wide. Scale centers are spaced 3.5 cm apart. How many scales fit in one row if the first center is 1.75 cm from the left edge?
Show answer and check
Four scales.
Why: Centers at 1.75, 5.25, 8.75, and 12.25 cm fit within 14 cm. The next center at 15.75 cm exceeds the panel width.
Check: Add 3.5 cm repeatedly from 1.75 cm and count how many centers remain less than or equal to 14 cm.
Exercise 2
Two rows use 3 cm vertical spacing and 1 cm overlap depth. The first row top edge is at 2 cm from the panel top. Where is the second row top edge, and how much of the first row scale bottom is covered?
Show answer and check
The second row top edge is at 5 cm from the panel top, and 1 cm of the first row scale bottom is covered.
Why: Add the 3 cm row spacing to the first row top edge: 2 plus 3 equals 5 cm. The overlap depth is given as 1 cm, so the lower scale covers 1 cm of the upper scale bottom.
Check: Measure from the panel top to each row top edge and confirm the difference is 3 cm. Measure the covered portion and confirm it is 1 cm.
Exercise 3
A scale guide box is 3 cm wide by 4 cm tall. You want a row of five scales with 0.5 cm gaps between guide boxes. What total row width do the five guide boxes and four gaps require?
Show answer and check
17 cm.
Why: Five guide boxes at 3 cm each equal 15 cm. Four gaps at 0.5 cm each equal 2 cm. The total is 15 plus 2 equals 17 cm.
Check: Multiply 5 by 3, multiply 4 by 0.5, and add the two results.
Exercise 4
A panel has three rows with six scales per row. You decide to increase horizontal spacing so only five scales fit per row, but keep three rows. What is the new total scale count, and how many fewer scales is that than the original plan?
Show answer and check
The new total is fifteen scales, which is three fewer than the original eighteen.
Why: Three rows times five scales per row equals fifteen. The original was three times six equals eighteen. The difference is eighteen minus fifteen equals three.
Check: Multiply rows by scales per row for both plans, then subtract the smaller total from the larger.
Common mistakes
- Drawing every scale fully outlined, including hidden parts. Erase or lighten lines that are covered by a later scale. Darken only visible edges.
- Using different scale sizes in the same row. Use one guide box size for all scales in a row, and check width and height before drawing.
- Forgetting the half-width shift between rows. Mark row centers with a half-scale offset, for example 1.75 cm when scale centers are 3.5 cm apart.
- Making overlap depth inconsistent. Mark a light overlap line on the first scale and measure the same depth at three places in the panel.
Self-check rubric
- Scale shape follows the defined rounded shield convention or a valid alternative with the same proportion.
- All scales in a row have consistent width and height within the chosen margin.
- Rows are staggered by half a scale width.
- Overlap order is consistent: lower scales cover the bottom of upper scales.
- Hidden overlap lines are lightened or erased; visible edges are darkened.
- Overlap depth is consistent at three measured locations.
- Panel includes a label with scale dimensions and overlap depth used.
Questions and answers
Do I need to draw a whole fish?
No. This task is only the overlapping scale pattern. Fish body anatomy and fin placement are outside the boundary.
Can I use a different scale shape?
Yes, if it keeps a rounded shield proportion with a flattened top and soft bottom point, and the overlap order stays the same.
What paper size should I use?
Any plain paper works. The 3 cm by 4 cm guide box and 3.5 cm spacing are hypothetical examples; adjust them to fit your paper.
How do I know the pattern is correct?
Check three things: consistent scale size, a half-width row shift, and a consistent overlap depth measured in at least three places.