Free original lessons
Manga Drawing Exercises: Timed Gesture and Line-Control Drills
Build speed and precision with timed gesture sketches and line-control drills for manga-style figures, using a clear convention and self-check rubric.
Free lesson
Four exercises
Worked answers
Object Drawing Lessons
This drill sheet targets two core manga drawing skills: quick gesture capture and deliberate line control. You will use a simple convention for judging proportions and line quality, then apply it to timed sketches and controlled mark-making. All exercises are self-contained; where a diagram is needed, it is described in words. Measure your own tools and paper, and treat any numbers here as hypothetical examples to adapt.
Practice materials: Printable downloads are not available for this lesson yet. Use the instructions and four exercises below.
Reference illustration
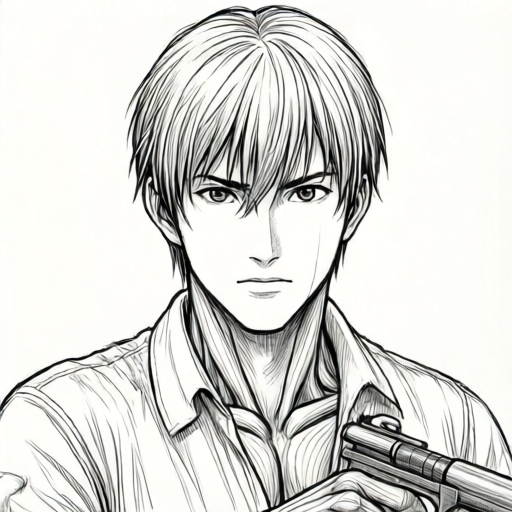
Use the stated measurements and conventions for each exercise.
Convention and setup
Use a pencil and paper. Define a baseline and a midline for each figure: the baseline is the lowest point of the pose, and the midline is a horizontal line through the figure's vertical center. X-height means the distance from baseline to midline; letter styles vary, so use your own consistent x-height for each drill. For line control, define a straight line as one that stays within a one-millimeter band when checked with a ruler; this is a hypothetical example, so measure your actual paper and pencil width and set a band you can verify.
Set a timer. Work on a flat surface. Keep your wrist relaxed and move from the shoulder for long lines. Label each attempt with the date and the time limit so you can compare later.
- Mark a baseline and midline on your paper.
- Choose a timer duration (for example, 30 seconds or 60 seconds; these are hypothetical examples).
- Draw the gesture or line drill without erasing.
- Check the result against the convention and record one improvement note.
Timed gesture drills
Gesture drills train you to capture the essential action of a manga-style pose before adding detail. Use a simple stick-and-oval skeleton: one oval for the head, a curved line for the spine, and straight lines for limbs. The goal is not a finished figure but a readable action line. Keep the head oval small relative to the body; a common manga proportion is about one head length for every four to five body lengths, but this is a style choice, not a rule.
For each drill, draw three poses in the time limit. After the timer stops, compare the three: which one has the clearest action line? Which one keeps the baseline and midline consistent? Write one sentence about what you would change next time.
- Set a 30-second timer (hypothetical example).
- Draw three gesture skeletons of a running figure, each with a different arm swing.
- Mark the baseline and midline on each.
- Circle the pose with the clearest action line and note why.
Line-control drills
Line control is about steadiness and intentional curvature. For straight lines, draw from point A to point B in one motion, then check with a ruler whether the line stays within your chosen band. For curves, draw a smooth arc that passes through three marked points; check that the curve does not wobble more than the width of your pencil line. For hatching, draw parallel lines at a consistent spacing; check that the gaps are within one pencil width of each other.
These drills are not about speed alone. Alternate slow, deliberate lines with quick lines to build control. Keep the same hand position and paper angle for each set so you can compare fairly.
- Mark two points 10 centimeters apart (hypothetical example; measure your own distance).
- Draw five straight lines between them in one motion each.
- Check each line against a ruler and mark any that leave your chosen band.
- Repeat with curves through three points and with a row of hatching.
Combining gesture and line control
Combine the two skills by drawing a timed gesture first, then refining only the outer contour with controlled lines. Do not erase the gesture; instead, draw the final contour over it. This shows whether your controlled lines follow the action you captured. Use the baseline and midline to check that the final contour keeps the same proportions as the gesture.
A useful self-check is to compare the gesture and the final contour side by side. If the final contour drifts away from the gesture's action line, note where and why. This is a practice drill, not a test of artistic talent.
- Draw a 45-second gesture of a seated figure (hypothetical example).
- Without erasing, draw the outer contour with slow, controlled lines.
- Check that the contour stays within one pencil width of the gesture's main shapes.
- Write one note about where control improved or slipped.
Worked example
Draw a 30-second gesture of a figure reaching upward, then refine the outer contour with controlled lines. Use a baseline and midline, and check the contour against a one-millimeter band (hypothetical example).
Worked answer
First, mark the baseline at the feet and the midline through the torso. Draw a small head oval, a curved spine line, and straight lines for the reaching arm and supporting leg. The action line runs from the supporting foot through the spine to the raised hand. After 30 seconds, stop. Without erasing, draw the outer contour slowly, keeping within one pencil width of the gesture shapes. Check with a ruler: if the contour stays within your chosen band, the control is consistent. Note one improvement, such as keeping the raised arm line straighter next time.
Four practice exercises
Exercise 1
Draw three 30-second gesture skeletons of a walking figure, each with a different stride length. Mark baseline and midline on each. Circle the pose with the clearest action line.
Show answer and check
A valid answer shows three distinct strides, each with a marked baseline and midline, and one circled pose with a brief reason such as 'clearest spine curve' or 'strongest arm swing'.
Why: The drill trains quick capture of action and consistent proportion markers. Different strides test whether the action line remains readable as the pose changes.
Check: Verify that each pose has a baseline and midline, that the three strides are visibly different, and that the circled pose has a written reason. No single pose is universally correct.
Exercise 2
Mark two points 10 centimeters apart (hypothetical example; measure your own distance). Draw five straight lines between them in one motion each. Check each line with a ruler against a one-millimeter band (hypothetical example). Record how many lines stay within the band.
Show answer and check
A valid answer records the number of lines within the band and notes any that left it. The count depends on your measured band and pencil width.
Why: This drill builds steady straight-line control and teaches self-checking with a measurable criterion.
Check: Use a ruler to confirm the distance between points and to check each line against your chosen band. The recorded count should match the visual check.
Exercise 3
Draw a row of hatching lines at a consistent spacing. Check that the gaps are within one pencil width of each other. Then draw a second row with gaps twice as wide and compare.
Show answer and check
A valid answer shows two rows with visibly different spacing and a note comparing consistency. The first row should have gaps within one pencil width; the second row should have wider gaps.
Why: Hatching control supports manga shading and texture. Comparing two spacings trains deliberate variation rather than accidental inconsistency.
Check: Measure several gaps in each row with a ruler. Confirm that the first row's gaps are within one pencil width and that the second row's gaps are consistently wider.
Exercise 4
Draw a 45-second gesture of a seated figure (hypothetical example). Without erasing, refine only the outer contour with slow, controlled lines. Check that the contour stays within one pencil width of the gesture's main shapes. Write one note about where control improved or slipped.
Show answer and check
A valid answer shows a visible gesture under a refined contour, a check against the pencil-width band, and a specific note such as 'the back curve stayed close to the gesture' or 'the arm line drifted outward'.
Why: Combining timed gesture with controlled contour tests whether speed and precision can work together. The note builds self-assessment.
Check: Confirm that the gesture is still visible, that the contour was checked against a measured band, and that the note refers to a specific part of the drawing.
Common mistakes
- Erasing the gesture before drawing the final contour. Keep the gesture visible and draw over it; this preserves the action line and lets you compare control.
- Using a different x-height for each pose in the same drill. Mark the baseline and midline first, then keep the same x-height for all poses in that set.
- Judging line quality by feel instead of a checkable band. Measure your pencil width and set a band you can verify with a ruler; label any numbers as hypothetical examples.
- Drawing long lines from the wrist only. Move from the shoulder for long lines and keep the wrist relaxed; check steadiness with the ruler band.
Self-check rubric
- Gesture captures a clear action line within the time limit.
- Baseline and midline are marked and consistent across poses in a set.
- Controlled lines stay within the chosen checkable band (measured on your own paper).
- Hatching spacing is consistent within one pencil width.
- Self-check note identifies one specific improvement.
Questions and answers
How long should each timed gesture be?
Start with 30 seconds per pose and adjust. Any duration is a hypothetical example; the key is to keep it consistent within a set so you can compare.
What if my lines are wobbly?
Slow down and draw from the shoulder. Check each line against a ruler band you have measured on your own paper. Wobble within the band is acceptable for practice.
Do I need special paper or tools?
No. Use any pencil and paper you have. Measure your actual pencil width and paper size to set your own checkable bands.
How do I know if my gesture is good?
A good gesture has a clear action line and consistent baseline and midline. Compare three poses and circle the clearest one; there is no single universal answer.