Free original lessons
Portrait Drawing from Photo References: A Structured Practice Guide
Learn to draw portraits from photo plates using proportion guides, measurement checks, and a clear convention for features. Includes practice tasks and rubric.
Free lesson
Four exercises
Worked answers
Object Drawing Lessons
Drawing portraits from photographs is a practical way to build observation and proportion skills without a live model. This guide provides a repeatable method: establish a convention for feature placement, measure key distances, and check your work against simple arithmetic. You will work from described photo plates and blank boxes with proportion guides. All resources are planned and free; none are currently built. The approach emphasizes checkable steps over innate talent, and it allows valid stylistic variation within a defined convention.
Practice materials: Printable downloads are not available for this lesson yet. Use the instructions and four exercises below.
Reference illustration
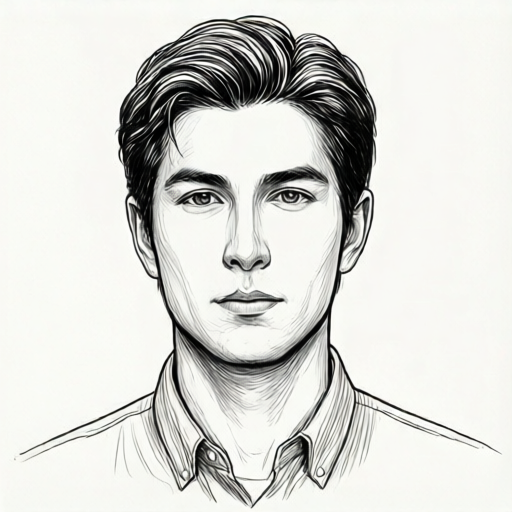
Use the stated measurements and conventions for each exercise.
Establishing a Workable Convention
Before drawing, define a convention for where features sit relative to the head. A simple convention: the eye line falls halfway between the top of the head and the chin; the nose base falls halfway between the eye line and the chin; the mouth line falls one-third of the way from the nose base to the chin. These are guidelines, not universal truths—real faces vary. State your convention explicitly so you can check consistency and allow deliberate deviations.
X-height is baseline to midline for lowercase letters; letter styles vary. For portraits, use a similar explicit convention for feature heights: measure from the baseline (chin) to the midline (eye line) and note the ratio. This makes your choices checkable and lets you compare across plates.
- Write your convention in one sentence: eye line at half head height, nose base at half of eye-to-chin, mouth at one-third nose-to-chin.
- Draw a light vertical midline and a horizontal eye line on the blank box.
- Mark the chin and crown; measure the distance and halve it for the eye line.
- Label your convention on the sheet so checks are transparent.
Measuring Proportions from a Photo Plate
Use a ruler or a strip of paper to measure distances on the photo plate. Record three ratios: head height to head width, eye line to chin, and interpupillary distance to head width. Convert to simple fractions where possible. For example, if head height is 12 cm and width is 9 cm, the ratio is 4:3. If the eye line is 6 cm from the chin, that is half the head height. Keep units consistent (centimeters or arbitrary units).
Transfer measurements to your drawing box by scaling. If your box is 15 cm tall and the photo head is 12 cm, the scale factor is 1.25. Multiply each measured distance by 1.25. Label any chosen numerical values as hypothetical examples; measure your actual equipment and plates.
- Measure head height and width on the plate; record the ratio.
- Measure from chin to eye line; divide by head height to get a fraction.
- Measure interpupillary distance; divide by head width.
- Choose a scale factor for your box and multiply all distances.
- Mark scaled positions lightly before drawing features.
Drawing and Checking Features
Draw features in order: head shape, eye line, nose base, mouth line, then eyes, nose, mouth, ears, and hair. Use the convention to place lines, then adjust based on the plate. Check each feature against your measured ratios. For example, if your convention says nose base is halfway from eye line to chin, verify that distance on your drawing with a ruler.
Allow valid alternatives: a face may have a higher eye line or a longer nose. Note deviations and adjust your convention for that plate. The goal is consistent, checkable placement, not a single universal answer.
- Draw the head outline using the scaled height and width.
- Place the eye line using the scaled half-height measurement.
- Place nose base and mouth line using your convention and plate measurements.
- Draw eyes at the scaled interpupillary distance.
- Check each placement with a ruler; note deviations and adjust.
Using the Rubric and Self-Check
The rubric lists observable criteria: convention stated, measurements recorded, scale factor applied, feature placement within tolerance, and deviations noted. Tolerance is your choice; label it as a hypothetical example, such as plus or minus 0.5 cm on a 15 cm drawing. Check arithmetic: if head height is 12 cm and scale is 1.25, drawn height should be 15 cm. Verify each multiplication.
Self-check by re-measuring your drawing and comparing to scaled targets. If a feature is off by more than your tolerance, adjust and note why. This builds a feedback loop without needing external testing.
- Re-measure drawn head height and width; compare to scaled targets.
- Check eye line distance from chin against scaled half-height.
- Check interpupillary distance against scaled measurement.
- Record any deviation and the reason.
- Adjust and re-check once.
Worked example
A photo plate shows a head 12 cm tall and 9 cm wide. The eye line is 6 cm from the chin. Your drawing box is 15 cm tall. State a convention, compute the scale factor, and give scaled positions for head height, head width, and eye line from chin.
Worked answer
Convention: eye line at half head height; nose base halfway from eye line to chin; mouth one-third from nose base to chin. Scale factor = 15/12 = 1.25. Scaled head height = 12 x 1.25 = 15 cm. Scaled head width = 9 x 1.25 = 11.25 cm. Scaled eye line from chin = 6 x 1.25 = 7.5 cm. Check: 7.5 is half of 15, consistent with convention.
Four practice exercises
Exercise 1
Plate A: head height 10 cm, width 8 cm, eye line 5 cm from chin. Box height 20 cm. State a convention, compute scale factor, and give scaled head height, width, and eye line from chin.
Show answer and check
Convention: eye line at half head height. Scale factor = 20/10 = 2. Scaled height = 20 cm; width = 16 cm; eye line from chin = 10 cm. Check: 10 is half of 20.
Why: Scale factor is box height divided by plate head height. Multiply each measurement by the factor. The eye line check confirms the convention.
Check: Re-multiply 10 x 2, 8 x 2, and 5 x 2; verify eye line is half of scaled height.
Exercise 2
Plate B: head height 14 cm, width 10 cm, nose base 4 cm above chin, eye line 7 cm above chin. Box height 21 cm. Compute scale factor and scaled nose base and eye line distances from chin. Does the nose base fall halfway from eye line to chin under the stated convention?
Show answer and check
Scale factor = 21/14 = 1.5. Scaled eye line = 7 x 1.5 = 10.5 cm. Scaled nose base = 4 x 1.5 = 6 cm. Halfway from eye line to chin would be 10.5/2 = 5.25 cm; the plate shows 6 cm, so it deviates by 0.75 cm. Note the deviation.
Why: Compute scale factor, multiply distances, then compare nose base to half the eye line distance. The deviation is valid and should be noted.
Check: Verify 14 x 1.5 = 21; 7 x 1.5 = 10.5; 4 x 1.5 = 6; 10.5/2 = 5.25; difference 0.75.
Exercise 3
Plate C: head height 9 cm, width 7 cm, interpupillary distance 3.5 cm. Box height 18 cm. Compute scale factor and scaled interpupillary distance. If your tolerance is plus or minus 0.5 cm on the drawing, is a drawn distance of 7.5 cm acceptable?
Show answer and check
Scale factor = 18/9 = 2. Scaled interpupillary distance = 3.5 x 2 = 7 cm. A drawn distance of 7.5 cm differs by 0.5 cm, which is at the tolerance boundary; acceptable if tolerance is inclusive.
Why: Scale factor is 2; multiply 3.5 by 2. Compare drawn distance to target and tolerance.
Check: Re-multiply 3.5 x 2 = 7; subtract 7.5 - 7 = 0.5; compare to tolerance.
Exercise 4
Plate D: head height 11 cm, width 8.5 cm, mouth line 2 cm above chin, nose base 5 cm above chin. Box height 16.5 cm. Compute scale factor and scaled mouth and nose base distances from chin. Under the convention mouth is one-third from nose base to chin; does the plate match?
Show answer and check
Scale factor = 16.5/11 = 1.5. Scaled nose base = 5 x 1.5 = 7.5 cm. Scaled mouth = 2 x 1.5 = 3 cm. One-third from nose base to chin would be 7.5/3 = 2.5 cm; plate shows 3 cm, deviation 0.5 cm. Note the deviation.
Why: Compute scale factor, multiply distances, then compare mouth to one-third of nose base distance. Deviation is valid.
Check: Verify 11 x 1.5 = 16.5; 5 x 1.5 = 7.5; 2 x 1.5 = 3; 7.5/3 = 2.5; difference 0.5.
Common mistakes
- Skipping the convention and placing features by feel. Write the convention first and mark guide lines before drawing features.
- Mixing units or forgetting the scale factor. Record all measurements in one unit and write the scale factor on the sheet.
- Treating the convention as universal and ignoring plate deviations. Measure each plate and note deviations; adjust the convention for that plate.
- Not checking arithmetic after scaling. Re-multiply each measurement and compare to the drawn distance.
Self-check rubric
- Convention stated in one sentence and labeled on the sheet.
- At least three measurements recorded with units.
- Scale factor computed and shown.
- Feature placements match scaled targets within chosen tolerance.
- Deviations from convention noted with measurements.
- Arithmetic checks shown for at least two scaled distances.
Questions and answers
Do I need a live model?
No. This guide uses photo reference plates and described examples; live-model work is outside this boundary.
Are the resources available now?
No. The practice sheet, plates, and answer key are planned and free but not yet built.
What if my face doesn't match the convention?
Note the deviation, measure it, and adjust your convention for that plate. Valid alternatives are allowed.
How precise should measurements be?
Choose a tolerance and label it as a hypothetical example, such as plus or minus 0.5 cm on a 15 cm drawing. Measure your actual equipment.