Reference diagram
LETTER · Download PDF (1 page)
Free original resources
Copy an inverted chair using leg and seat cues. Build orientation accuracy with tracing, guided drawing, and an independent upside-down chair sketch.
Original reference diagrams, four practice exercises and separate worked answers. All files are free. No signup required.
LETTER · Download PDF (1 page)
LETTER · Download PDF (2 pages)
LETTER · Download PDF (5 pages)
Choose A4 or US Letter for your printer. The reference and answer illustrations are not physical rulers; follow the scale instruction printed on the practice worksheet.
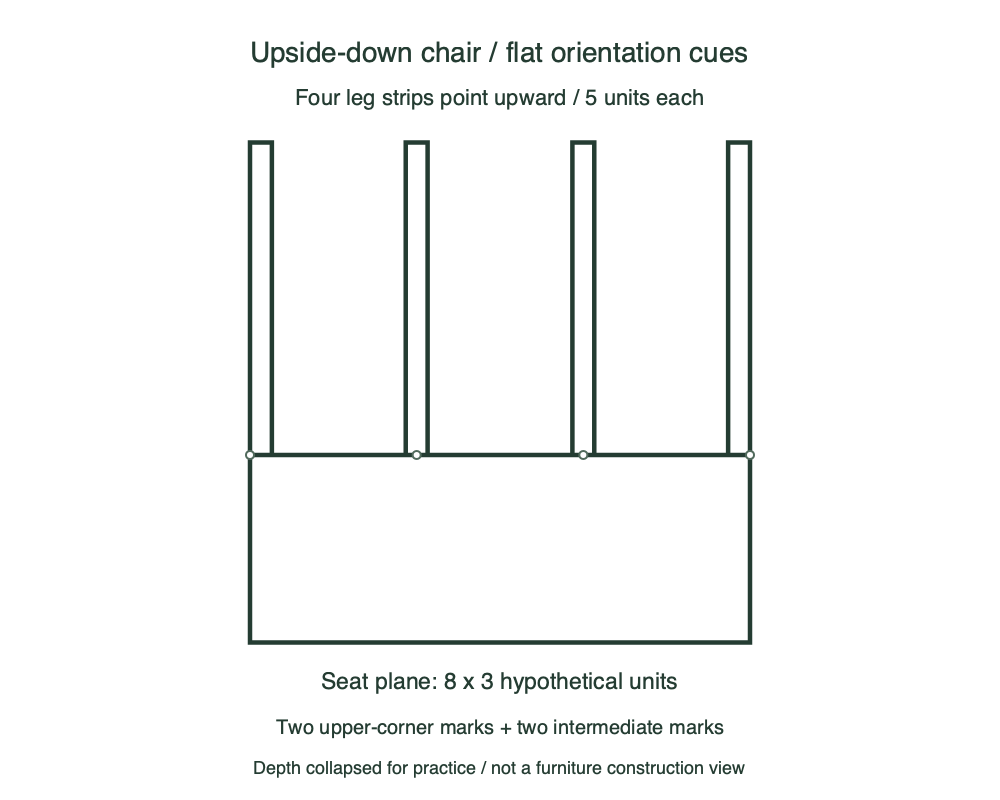
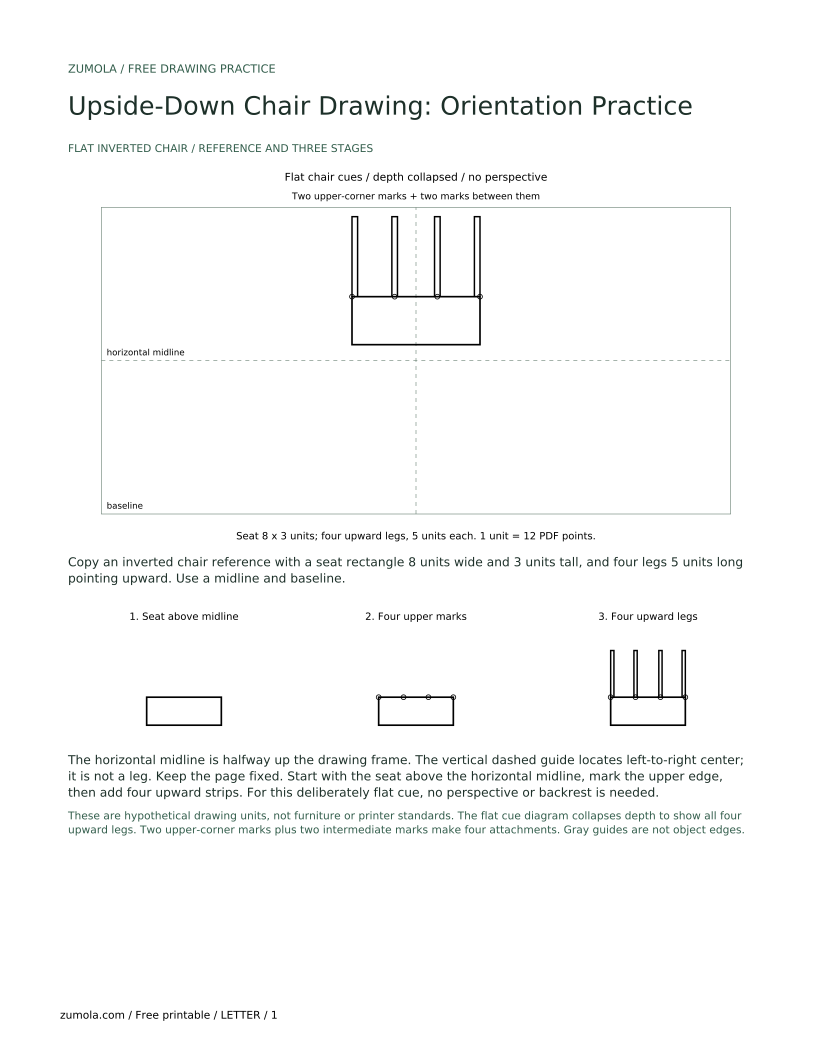
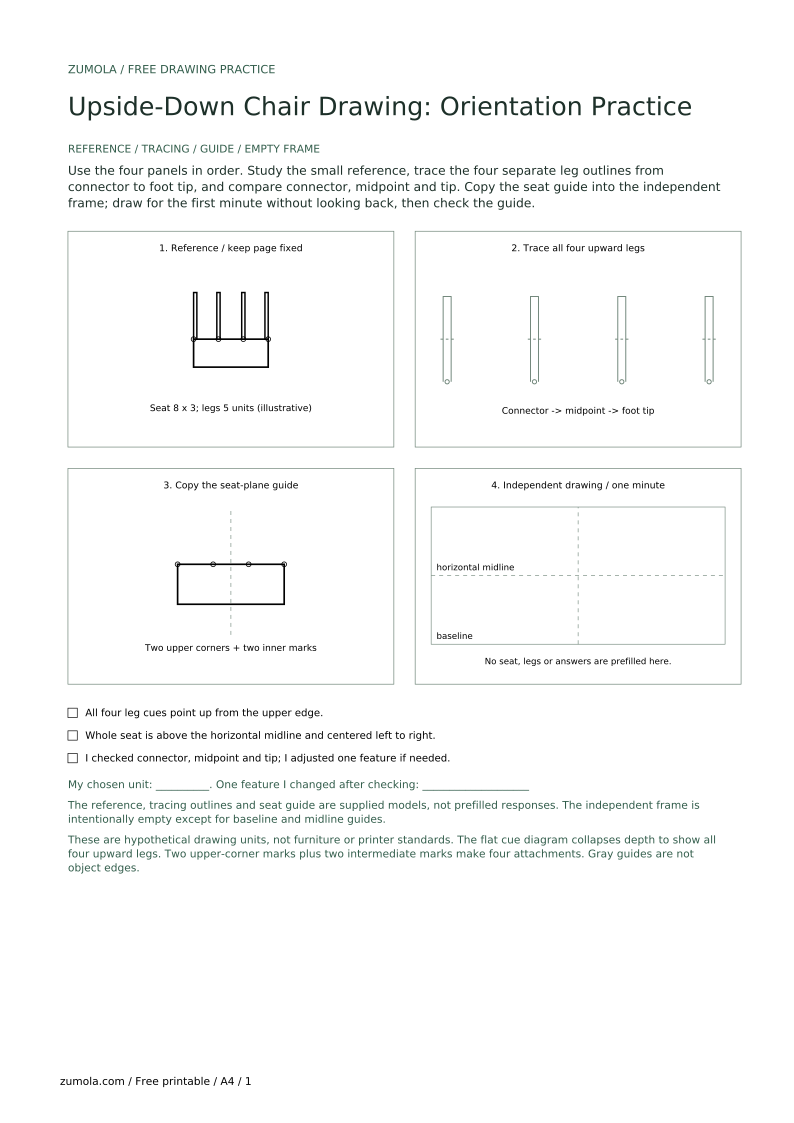
Drawing an upside-down chair trains your eye to copy shapes as they appear, not as you think a chair should look. This lesson uses a deliberately flat chair-cue diagram, not a realistic or perspective view: one seat rectangle and four separate leg strips pointing upward. Two attachment marks lie at the upper corners of the rectangle and two lie between them on its upper edge. The baseline is the bottom of the drawing area; the horizontal midline is halfway up. Center the seat left to right in that area and place its entire rectangle above the horizontal midline. All units and tolerances are hypothetical lesson choices, not furniture or printing standards. You will trace the legs, use a seat-plane guide, then draw independently. The free A4 and US Letter kit below includes the flat chair-cue reference, a tracing and guide workshop with an empty drawing frame, four practice questions, and separate worked answers.
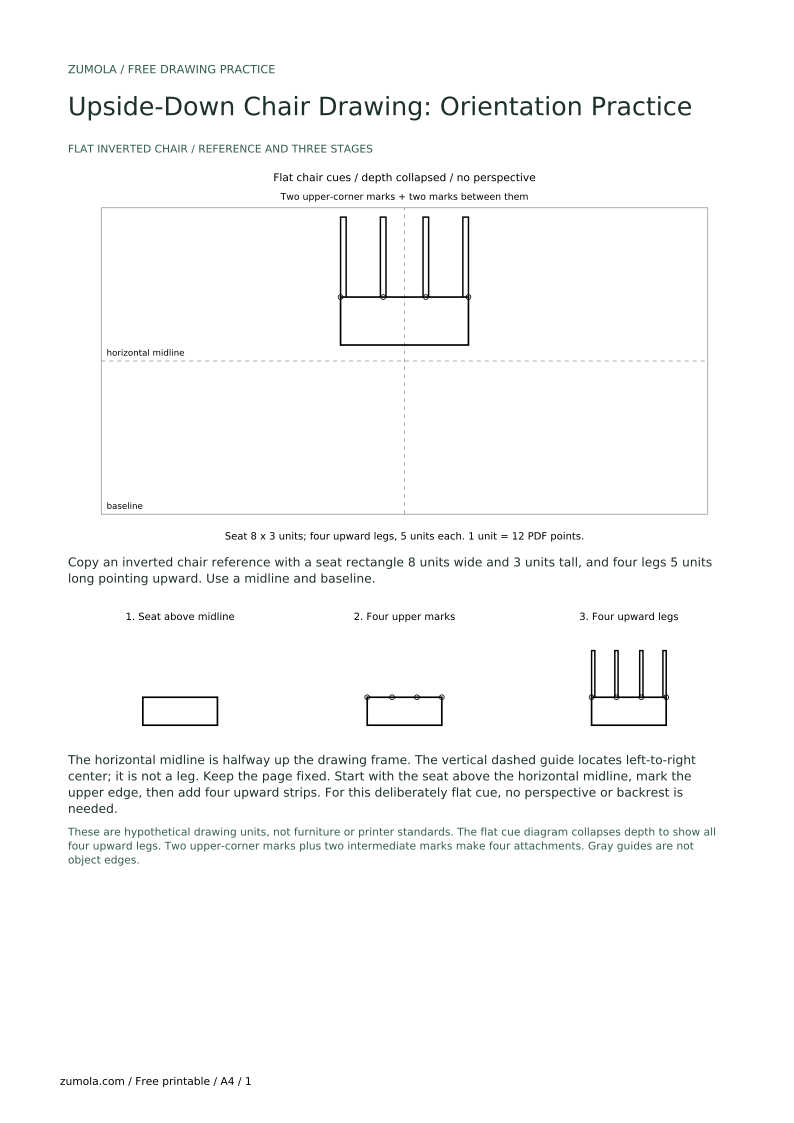
Use the flat cue diagram defined in this lesson. The seat is a wide rectangle, with four separate narrow leg strips rising from its upper edge. Two attachment marks are at the upper corners and two are between them. A rectangle has only two upper corners; four attachment marks do not mean four geometric corners on that edge. Depth is deliberately collapsed so all four leg cues can be seen without perspective. This is an orientation exercise, not a model of chair construction.
Use a consistent unit for checking. For example, measure the seat width as 8 units and each leg length as 5 units. These numbers are hypothetical examples, not standards. The horizontal midline is halfway between the bottom baseline and the top of the drawing area. Center the seat left to right in the area and keep the whole seat rectangle above that midline; it is not vertically centered on the line. The baseline-to-midline distance locates the midline and is not a seat measurement.
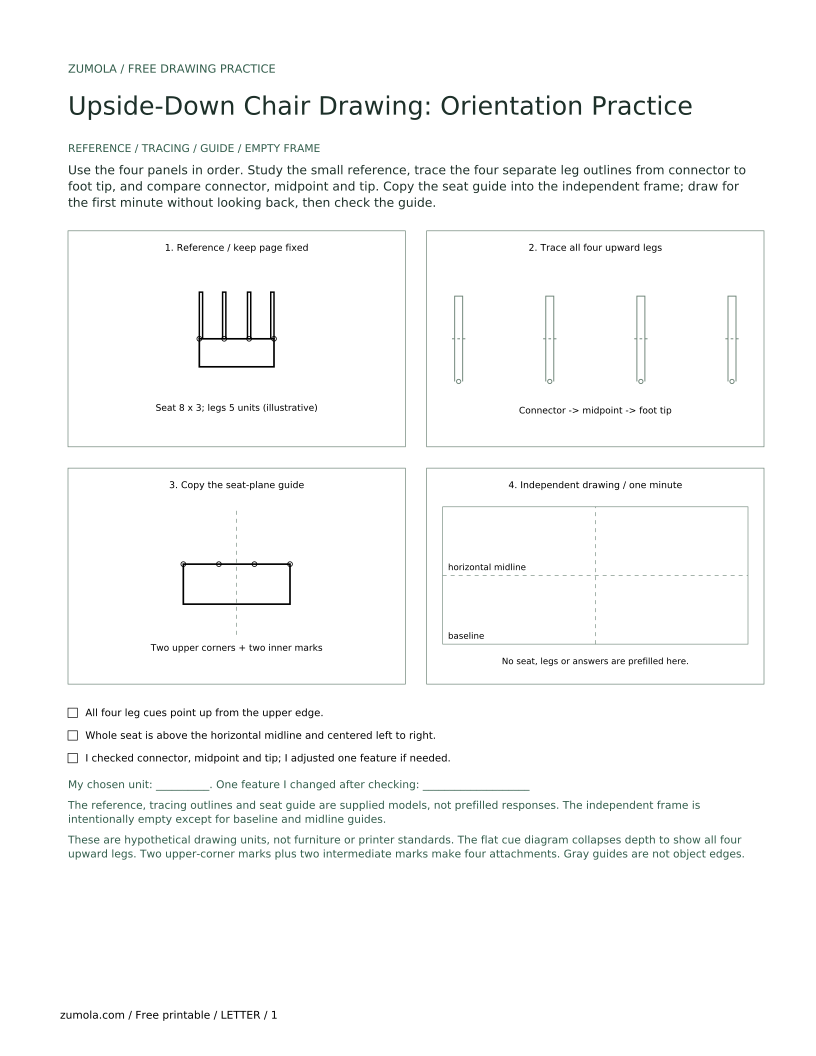
The downloadable student workshop includes a tracing box with four inverted leg outlines. Trace each leg from seat connector to foot tip without rotating the page. Keep your pencil moving in one direction per stroke. If a leg outline crosses the midline, note where it crosses and copy that crossing point.
After tracing, compare your line to the printed outline at three points: the connector, the midpoint, and the foot tip. A valid alternative is a slightly different line weight, a small gap at the connector, or a length difference of up to one unit, as long as the overall direction matches. Stroke styles vary, so do not force a single stroke style.
The seat-plane guide is a rectangle with four upper-edge attachment marks and a vertical center line for left-to-right alignment. Copy the rectangle as shown, then place four connectors along its upper edge: two at the upper corners and two between them. Keep this schematic convention separate from a realistic perspective view.
Check orientation by asking: do the legs point upward from the seat? If yes, the orientation is correct. Measure the seat width and height in your chosen units and compare with the guide. A difference of one unit in either direction is acceptable for this practice.
In the blank frame, draw an upside-down chair without looking at the reference for the first minute. Use the seat-plane guide only to check afterward. Keep the seat centered left to right in the drawing area and entirely above the horizontal midline, with legs pointing upward. Add a simple crossbar if your reference shows one, but do not add shading or perspective.
Finish with an orientation check: legs pointing up? seat centered left to right in the drawing area and entirely above the horizontal midline? If any answer is no, adjust only that feature. Valid alternatives include different leg spacing or a slightly wider seat, provided the inverted orientation is clear.
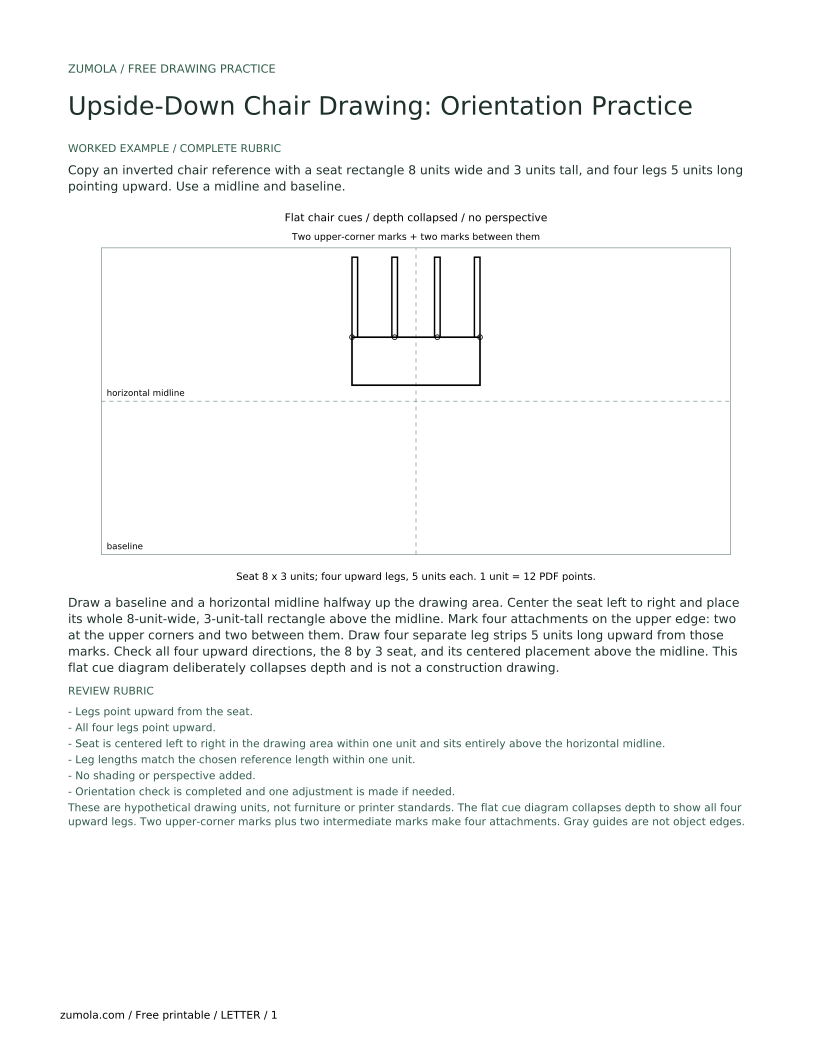
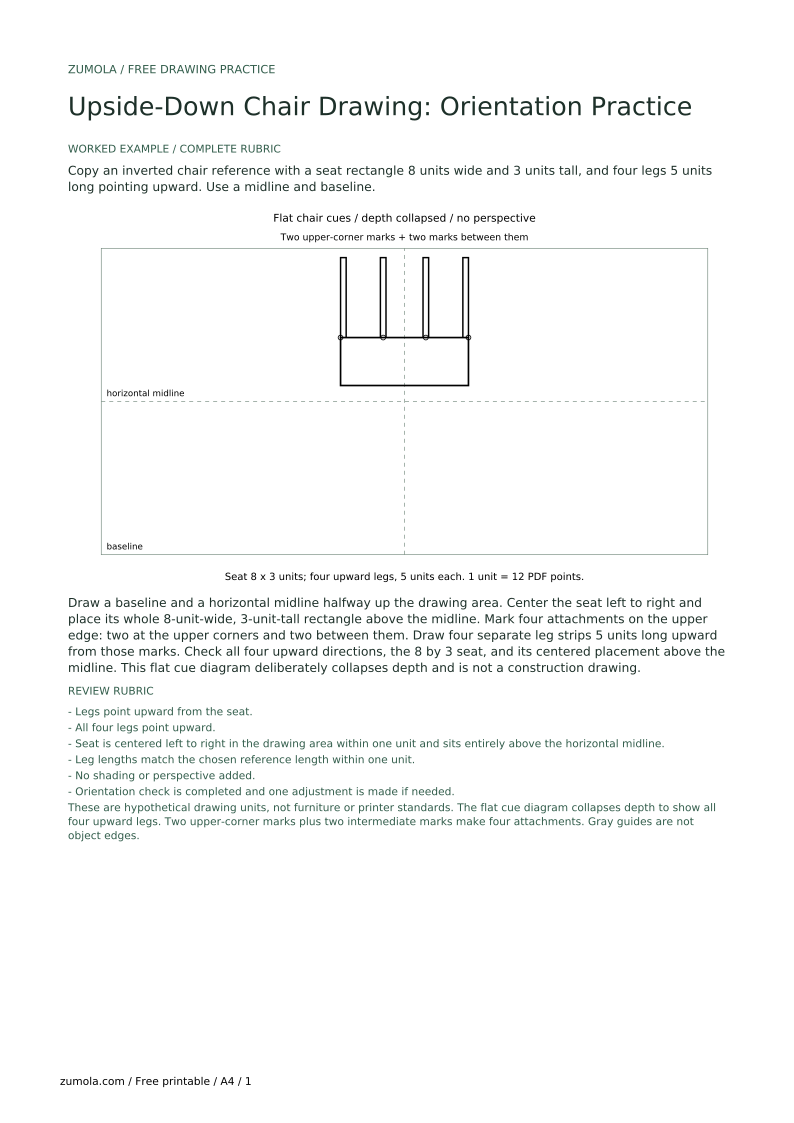
Copy an inverted chair reference with a seat rectangle 8 units wide and 3 units tall, and four legs 5 units long pointing upward. Use a midline and baseline.
Draw a baseline and a horizontal midline halfway up the drawing area. Center the seat left to right and place its whole 8-unit-wide, 3-unit-tall rectangle above the midline. Mark four attachments on the upper edge: two at the upper corners and two between them. Draw four separate leg strips 5 units long upward from those marks. Check all four upward directions, the 8 by 3 seat, and its centered placement above the midline. This flat cue diagram deliberately collapses depth and is not a construction drawing.
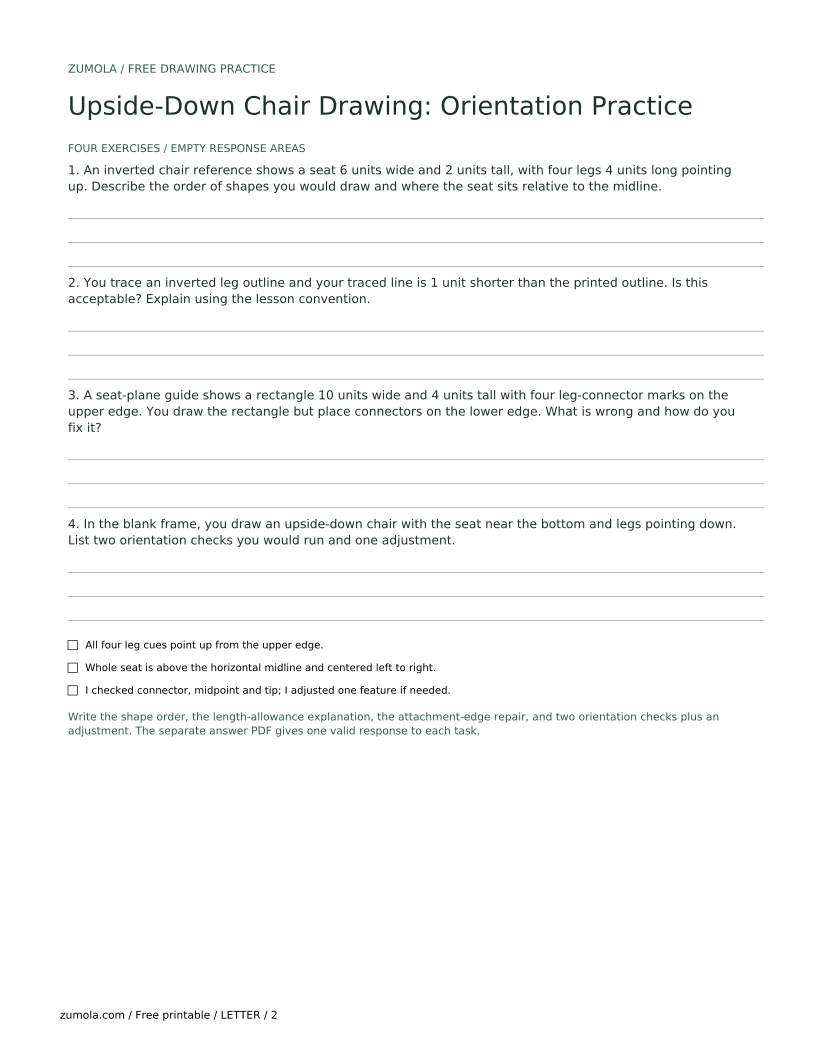
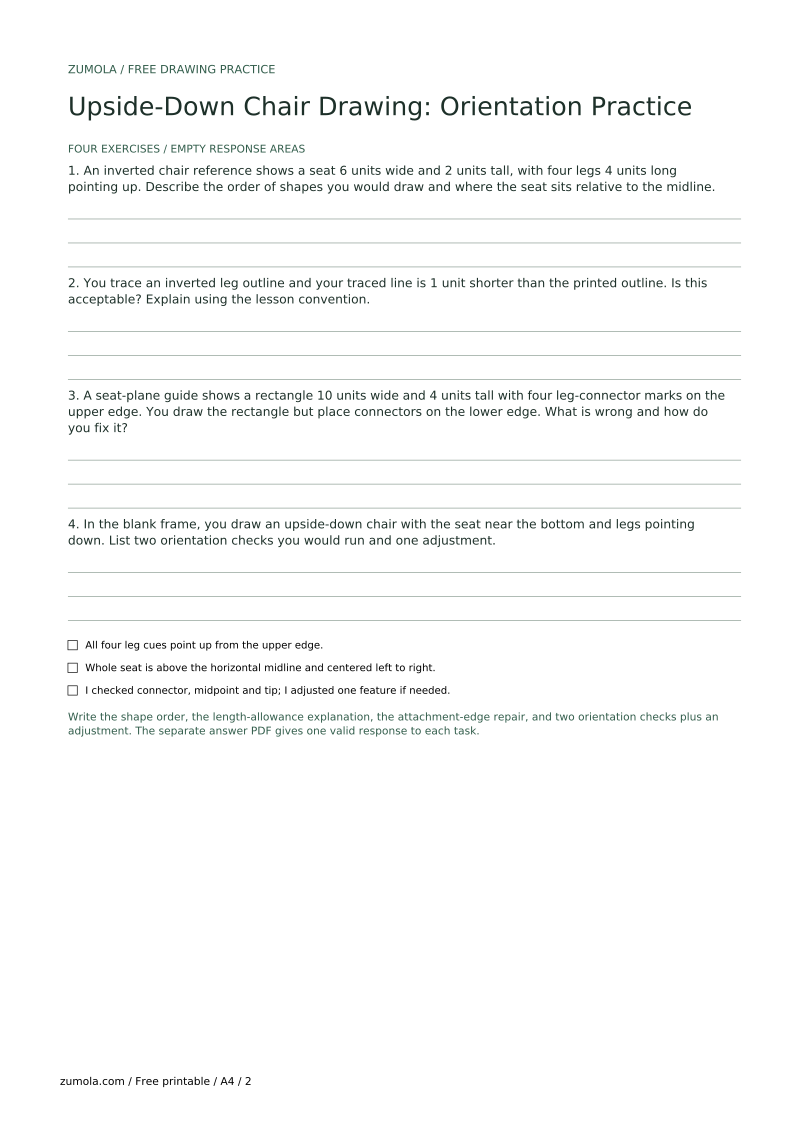
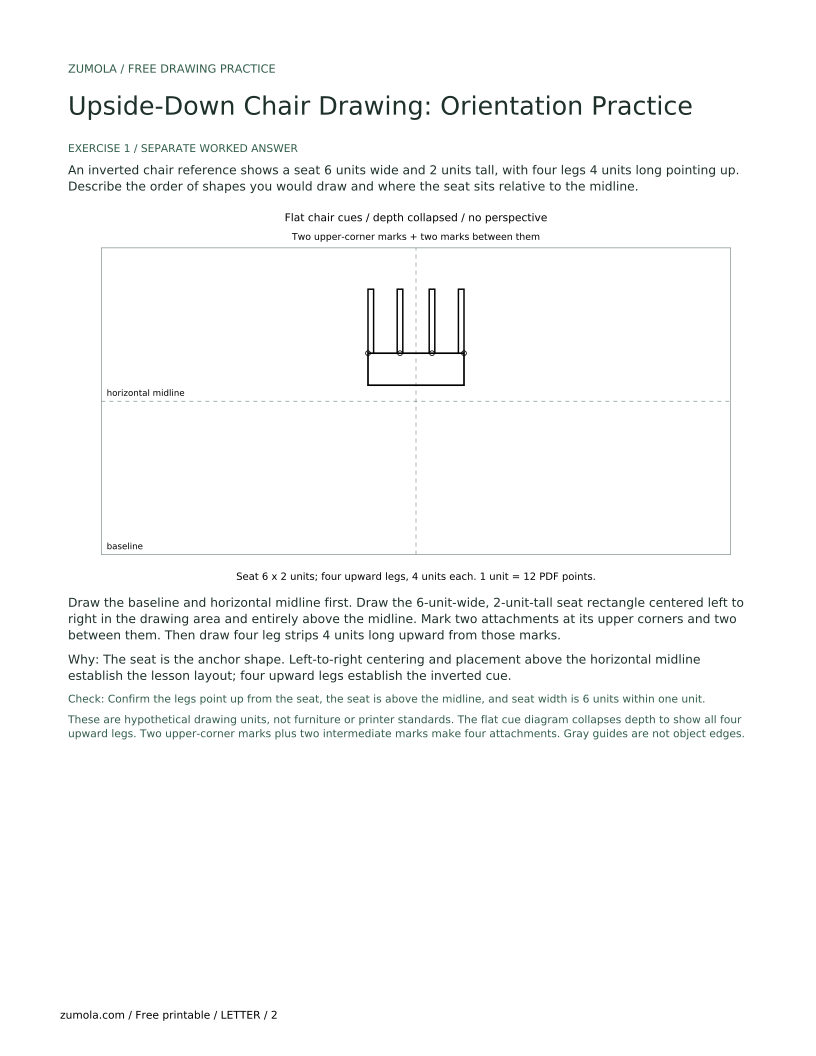
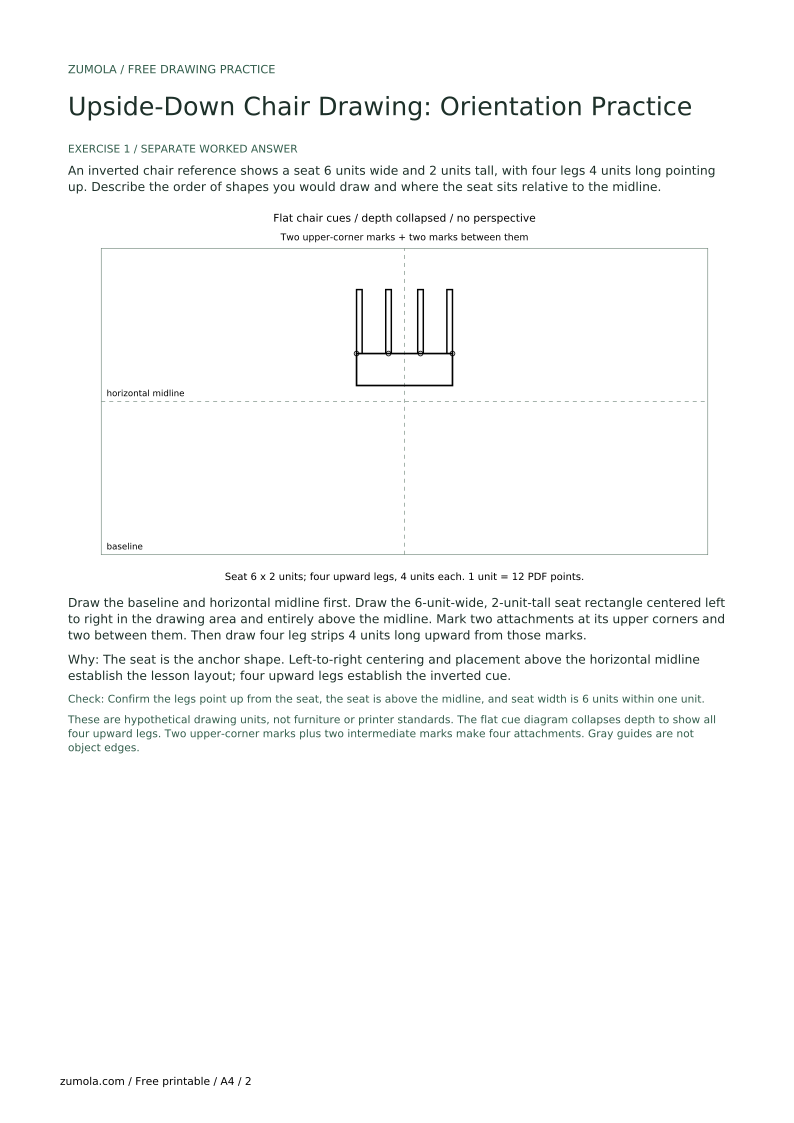
An inverted chair reference shows a seat 6 units wide and 2 units tall, with four legs 4 units long pointing up. Describe the order of shapes you would draw and where the seat sits relative to the midline.
Draw the baseline and horizontal midline first. Draw the 6-unit-wide, 2-unit-tall seat rectangle centered left to right in the drawing area and entirely above the midline. Mark two attachments at its upper corners and two between them. Then draw four leg strips 4 units long upward from those marks.
The seat is the anchor shape. Left-to-right centering and placement above the horizontal midline establish the lesson layout; four upward legs establish the inverted cue.
Check: Confirm the legs point up from the seat, the seat is above the midline, and seat width is 6 units within one unit.
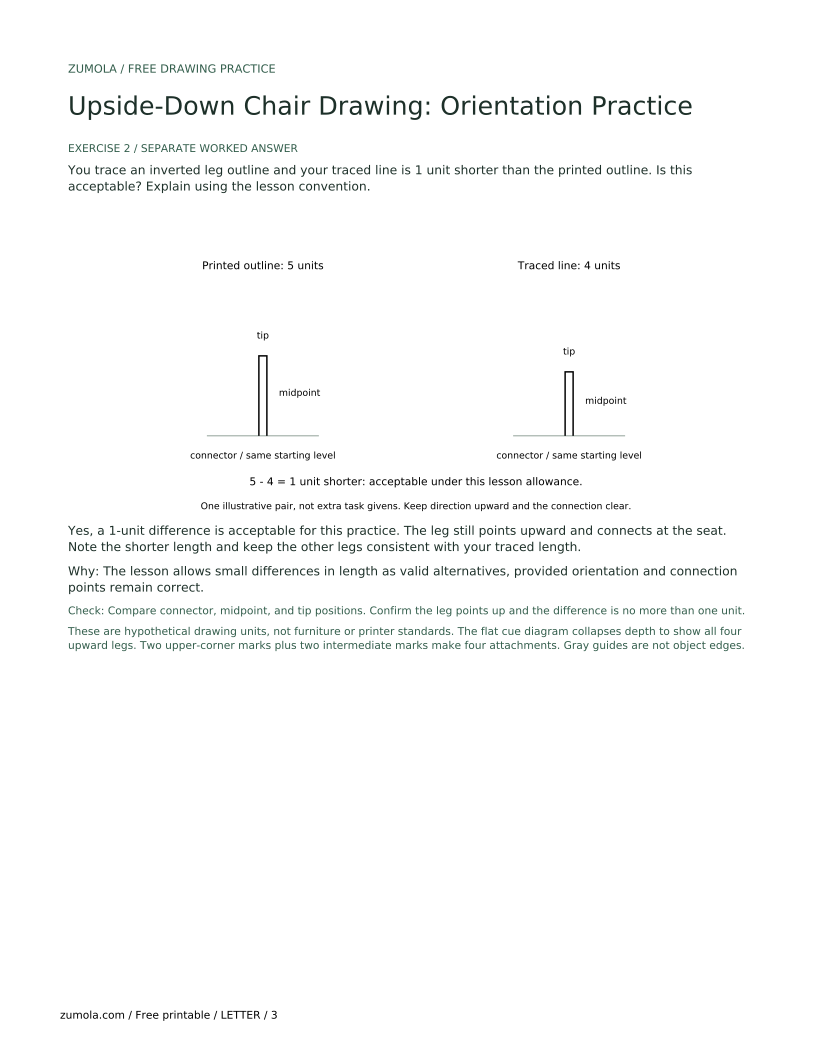
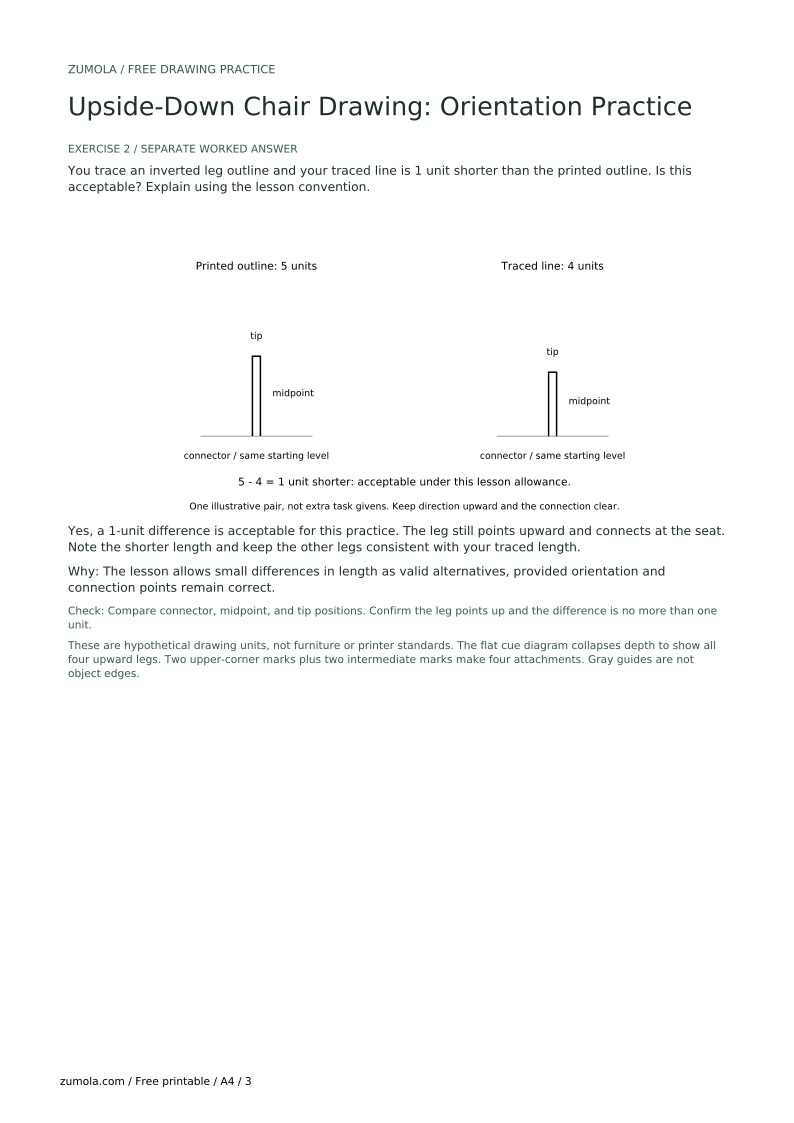
You trace an inverted leg outline and your traced line is 1 unit shorter than the printed outline. Is this acceptable? Explain using the lesson convention.
Yes, a 1-unit difference is acceptable for this practice. The leg still points upward and connects at the seat. Note the shorter length and keep the other legs consistent with your traced length.
The lesson allows small differences in length as valid alternatives, provided orientation and connection points remain correct.
Check: Compare connector, midpoint, and tip positions. Confirm the leg points up and the difference is no more than one unit.
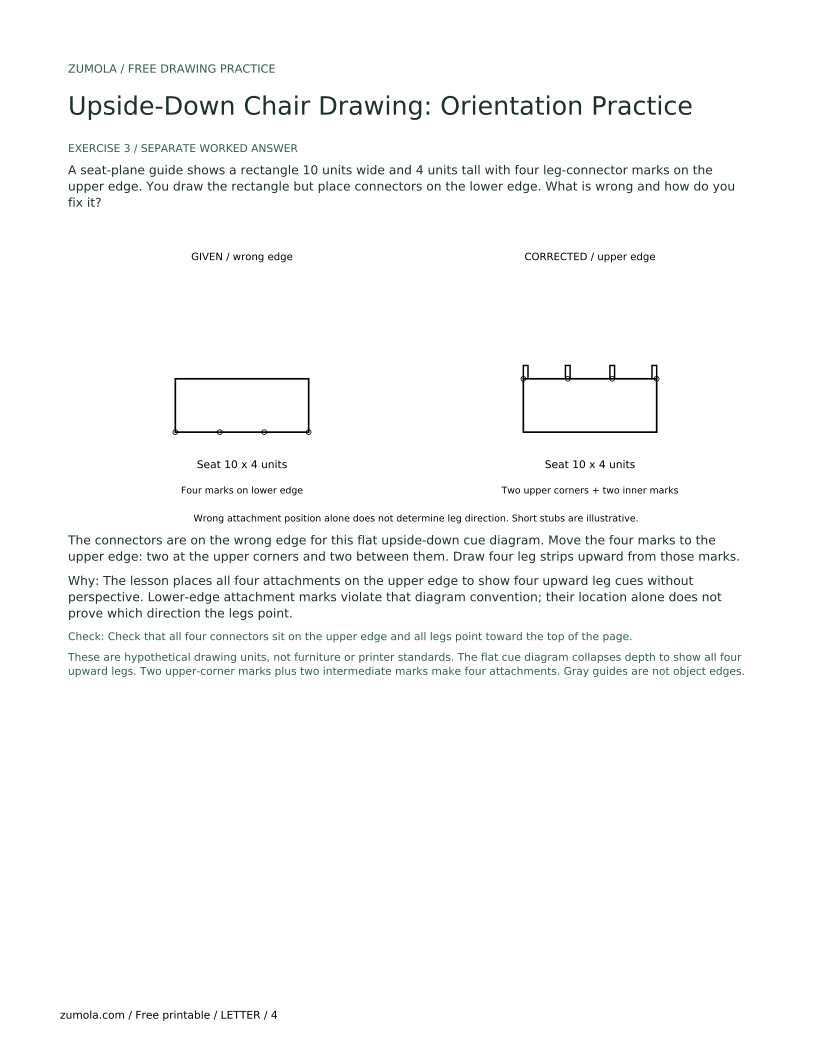
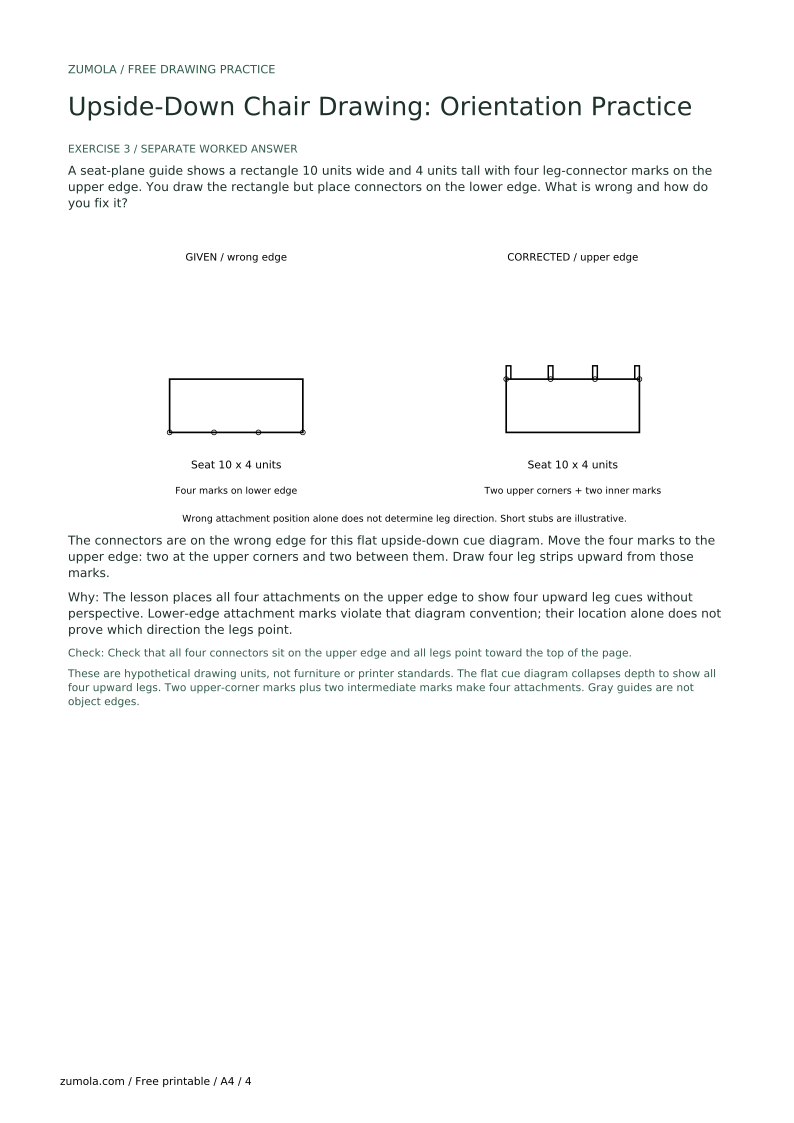
A seat-plane guide shows a rectangle 10 units wide and 4 units tall with four leg-connector marks on the upper edge. You draw the rectangle but place connectors on the lower edge. What is wrong and how do you fix it?
The connectors are on the wrong edge for this flat upside-down cue diagram. Move the four marks to the upper edge: two at the upper corners and two between them. Draw four leg strips upward from those marks.
The lesson places all four attachments on the upper edge to show four upward leg cues without perspective. Lower-edge attachment marks violate that diagram convention; their location alone does not prove which direction the legs point.
Check: Check that all four connectors sit on the upper edge and all legs point toward the top of the page.
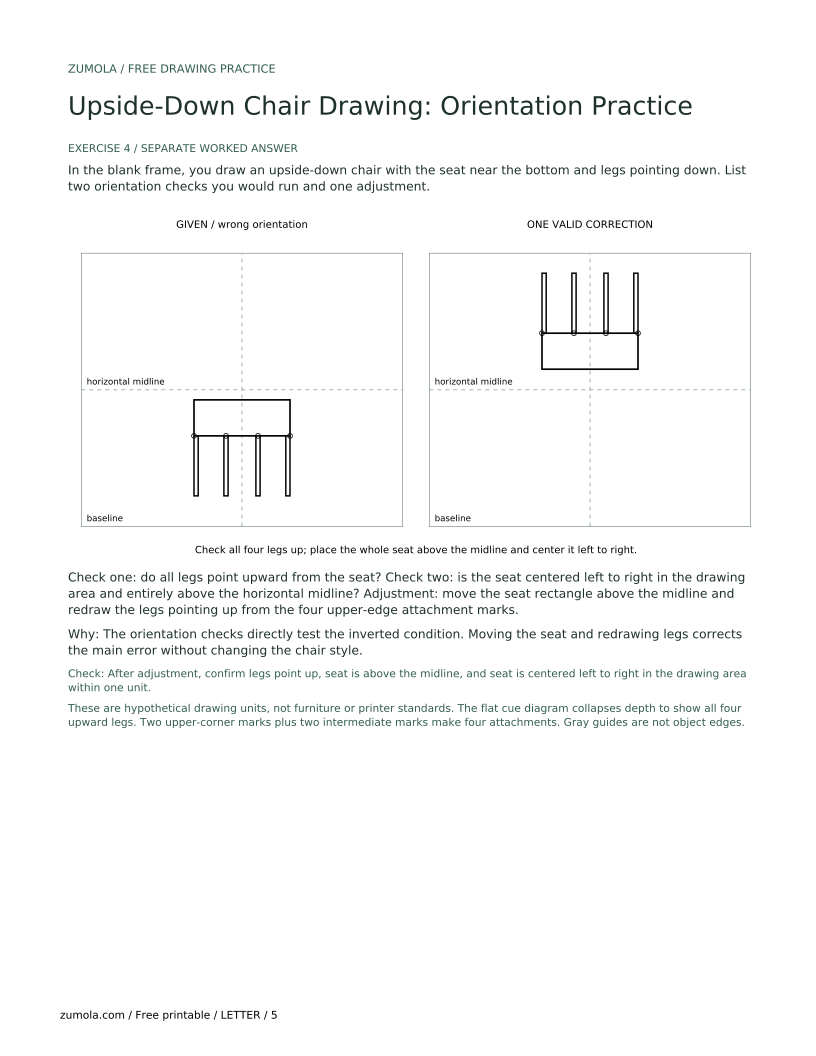
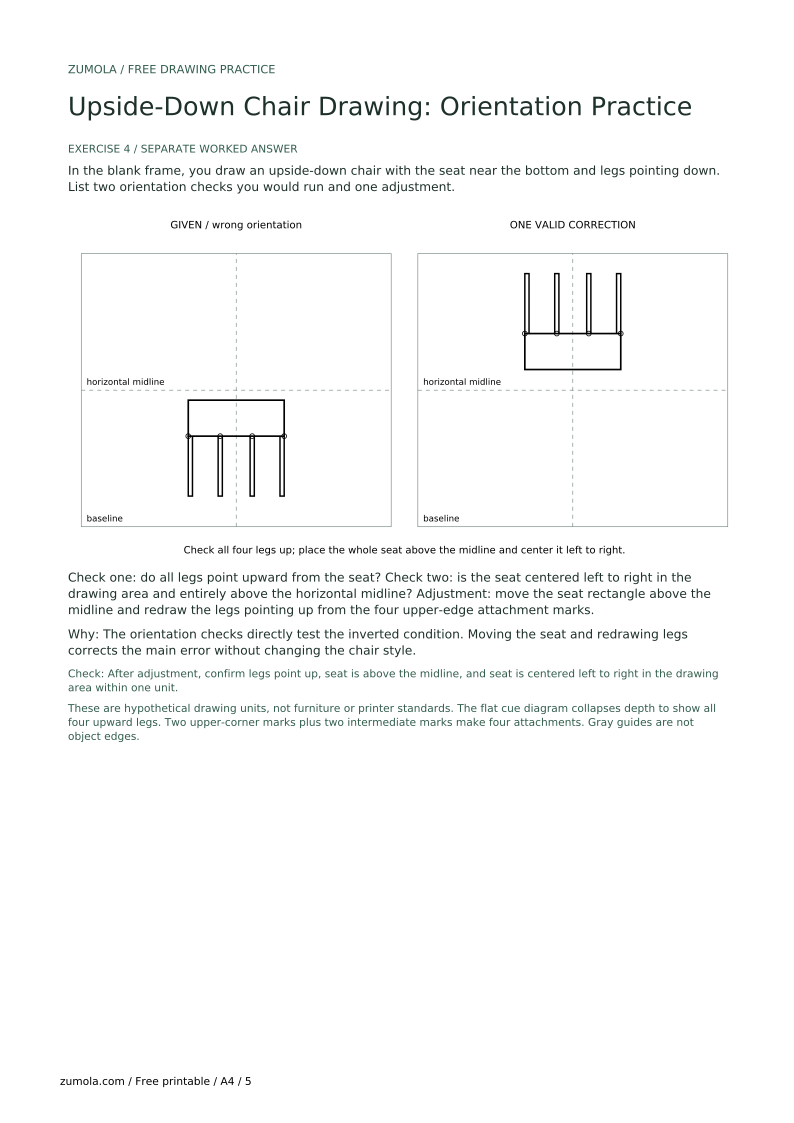
In the blank frame, you draw an upside-down chair with the seat near the bottom and legs pointing down. List two orientation checks you would run and one adjustment.
Check one: do all legs point upward from the seat? Check two: is the seat centered left to right in the drawing area and entirely above the horizontal midline? Adjustment: move the seat rectangle above the midline and redraw the legs pointing up from the four upper-edge attachment marks.
The orientation checks directly test the inverted condition. Moving the seat and redrawing legs corrects the main error without changing the chair style.
Check: After adjustment, confirm legs point up, seat is above the midline, and seat is centered left to right in the drawing area within one unit.
Cover the reference, say legs up, and redraw only the leg strips first.
Keep the page fixed and mark the midline before drawing.
Measure one leg in your chosen units and match the others to it.
Draw a light midline and keep the seat centered left to right in the drawing area and entirely above the horizontal midline.
No. This practice focuses on inverted orientation and simple leg and seat cues, not construction or shading.
Small differences are acceptable. Check that all legs point upward and are parallel to the page edge within your chosen tolerance.
Yes. A ruler helps with the seat rectangle and leg length checks. Label any measurements you choose as your own working examples.
The legs point toward the top of the page from the seat, and the seat is centered left to right in the drawing area and entirely above the horizontal midline. Use the orientation check after drawing.