Free original lessons
Anime Face Mapping Grid: Place Eyes, Nose, and Mouth with Alignment Lines
Learn to map anime facial features onto a proportion grid using horizontal and vertical alignment lines for eyes, nose, and mouth placement.
Free lesson
Four exercises
Worked answers
Object Drawing Lessons
This lesson teaches a repeatable method for placing anime eyes, nose, and mouth on a proportion grid. You will use horizontal and vertical alignment lines to anchor each feature, then check your placement with simple measurements. The focus is feature placement only; expression variation, hair construction, and body proportion are outside this lesson. All measurements use a single unit: the grid square. A blank anime head outline overlaid with a labeled grid is described in the resource plan as a planned printable, not a current download. Work through the sections, study the worked example, then complete the four practice exercises using the same grid convention.
Practice materials: Printable downloads are not available for this lesson yet. Use the instructions and four exercises below.
Reference illustration
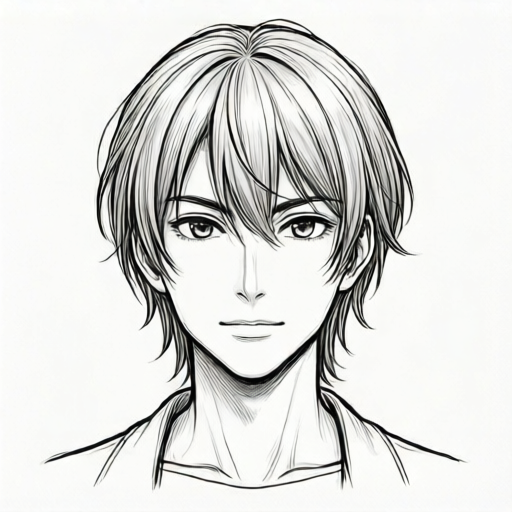
Use the stated measurements and conventions for each exercise.
Set Up the Proportion Grid
Draw a blank anime head outline inside a rectangular grid. Use square cells of equal size; the grid square is the only unit in this lesson. Label horizontal lines from top to bottom as H0, H1, H2, and so on, and vertical lines from left to right as V0, V1, V2, and so on. Place the head outline so the top of the skull touches H0 and the chin touches H8. The face midline is V4. This gives a consistent frame for every feature.
Mark three anchor rows before drawing any feature. The eye line sits at H4. The nose anchor sits at H6. The mouth anchor sits at H7. These are placement anchors, not universal anatomy rules; they are the convention for this grid. Keep the head outline symmetric about V4 so left and right placements can be checked by counting squares.
- Draw a grid with equal square cells and label rows H0 to H8 and columns V0 to V8.
- Place the head outline so the skull top touches H0 and the chin touches H8.
- Mark the face midline at V4 and confirm the outline is symmetric about it.
- Draw horizontal anchor lines at H4 for eyes, H6 for nose, and H7 for mouth.
Place the Eyes on the Eye Line
Anime eyes are often larger than realistic eyes, but their placement still follows the eye line. Put the center of each eye on H4. For a neutral front-facing face, place the left eye center two squares left of the midline and the right eye center two squares right of the midline. This gives an eye-center separation of four squares. The outer eye corners should not cross the head outline; count squares from V4 to check symmetry.
Eye shape and size vary by style, so the grid fixes centers and alignment, not a single outline. A valid alternative is to shift both eye centers together by one square while keeping them on H4, provided the shift is recorded; note that this makes the counts from V4 unequal (one square left, three squares right), so the placement is checkable but no longer symmetric about V4.
- Mark the left eye center at V2 on H4 and the right eye center at V6 on H4.
- Check that both centers lie exactly on the H4 line.
- Count squares from V4 to each center; both counts should be two.
- Draw the eye shapes around the centers without moving the centers off H4.
Place the Nose and Mouth Anchors
The nose anchor is a single point on the midline at H6. In anime style the nose is often a small mark or short line, so the anchor matters more than the drawn shape. Place the nose mark at V4 on H6. The mouth anchor is a point on the midline at H7. Center the mouth on V4 and align its top edge with H7 unless your chosen style uses a lower placement; if you shift it, keep the shift consistent and record it.
Check vertical spacing by counting rows: eyes at H4, nose at H6, mouth at H7. The eye-to-nose gap is two squares and the nose-to-mouth gap is one square. These are hypothetical example values chosen for this grid, not universal standards. Measure your actual drawn grid with a ruler if you need physical consistency, and label any ruler values as your own measurements.
- Mark the nose anchor at V4 on H6.
- Mark the mouth anchor at V4 on H7.
- Count rows between anchors: H4 to H6 is two squares; H6 to H7 is one square.
- Draw the nose mark and mouth shape centered on V4 without moving the anchors.
Check Symmetry and Alignment
After placing features, run a symmetry check. Measure from V4 to the left eye center and from V4 to the right eye center; the counts should match. Check that both eye centers sit on H4, the nose anchor on H6, and the mouth anchor on H7. If a feature is off by one square, move the anchor rather than stretching the feature, so the grid remains the reference.
A second check is the anchor sequence: eye line above nose anchor above mouth anchor. If the order is wrong, re-mark the rows before redrawing. Keep all counts in grid squares and write them beside the drawing so another person can verify the placement without guessing.
- Count squares from V4 to each eye center and compare the two counts.
- Confirm each feature anchor lies on its assigned row.
- Confirm the vertical order: H4 eyes, H6 nose, H7 mouth.
- Record the counts beside the drawing for independent checking.
Worked example
On a grid with rows H0 to H8 and columns V0 to V8, the head top touches H0, the chin touches H8, and the midline is V4. Place the left eye center, right eye center, nose anchor, and mouth anchor using the convention: eyes on H4 at two squares from V4, nose at V4 on H6, mouth at V4 on H7. State the coordinates and the square counts.
Worked answer
Left eye center: V2 on H4. Right eye center: V6 on H4. Nose anchor: V4 on H6. Mouth anchor: V4 on H7. Eye separation: four squares. Each eye center is two squares from V4. Eye-to-nose vertical gap: two squares. Nose-to-mouth vertical gap: one square. Symmetry check: two squares left and two squares right of V4, so the eye centers match.
Four practice exercises
Exercise 1
A grid has rows H0 to H8 and columns V0 to V8. The head top is at H0, the chin at H8, and the midline at V4. Using the convention eyes on H4 at two squares from V4, nose at V4 on H6, mouth at V4 on H7, give the coordinates of all four anchors and the eye separation in squares.
Show answer and check
Left eye center V2 on H4; right eye center V6 on H4; nose anchor V4 on H6; mouth anchor V4 on H7. Eye separation is four squares.
Why: Each eye center is two squares from V4 on the same row H4, so the separation is 2 + 2 = 4 squares. The nose and mouth anchors sit on the midline at their assigned rows.
Check: Count from V4 to each eye center: both counts should be two. Confirm both centers are on H4, then confirm the nose is on H6 and the mouth on H7.
Exercise 2
An artist places the left eye center at V2 on H4 and the right eye center at V6 on H5. Using the same grid and convention, identify the placement error and give the corrected right eye center.
Show answer and check
The right eye center is one row too low; it should be on H4. Corrected right eye center: V6 on H4.
Why: The convention requires both eye centers on the eye line H4. The horizontal position V6 is correct because it is two squares right of V4, matching the left eye's two squares left.
Check: Compare the row of each eye center to H4. Then count squares from V4 to each center; both should be two.
Exercise 3
On the same grid, an artist shifts both eye centers one square to the right, placing them at V3 and V7 on H4. Is this a valid alternative under the lesson convention? State the eye separation and the square counts from V4.
Show answer and check
Yes, it is a valid alternative if the shift is recorded and both centers stay on H4. Eye separation is four squares. Left center is one square left of V4; right center is three squares right of V4.
Why: The convention fixes the eye row and requires a recorded, checkable placement. A symmetric shift keeps the separation at four squares, but the counts from V4 are no longer equal, so the shift must be recorded as a deliberate alternative.
Check: Confirm both centers are on H4, subtract the column numbers to get separation 7 - 3 = 4 squares, and count from V4: one square left and three squares right.
Exercise 4
A grid drawing has the nose anchor at V4 on H6 and the mouth anchor at V4 on H8. Using the convention mouth at H7, state the vertical error and the corrected mouth anchor. Then give the eye-to-nose and nose-to-mouth gaps after correction.
Show answer and check
The mouth is one row too low. Corrected mouth anchor: V4 on H7. Eye-to-nose gap is two squares; nose-to-mouth gap is one square.
Why: The convention places the mouth on H7, so H8 is one row below the assigned anchor. With eyes on H4, the gap from H4 to H6 is two squares, and from H6 to H7 is one square.
Check: Count rows between anchors: H4 to H6 equals two, and H6 to H7 equals one. Confirm the mouth anchor is on V4 and H7.
Common mistakes
- Placing eye centers off the H4 line to make the face look more expressive. Keep centers on H4 for this placement lesson; expression variation is outside the brief. If you shift a center, record the row and keep left and right symmetric about V4.
- Measuring eye separation from the head outline instead of the midline. Count squares from V4 to each eye center. The midline is the fixed reference, so outline changes do not distort the check.
- Moving the nose or mouth anchor to fit a drawn shape. Place the anchor first at V4 on H6 or H7, then draw the shape around it. Move the anchor only if you deliberately change the convention, and record the new row.
- Mixing units, such as counting squares for one feature and ruler marks for another. Use grid squares for all placement counts. If you measure the physical grid with a ruler, label those values as your own measurements and keep them separate from square counts.
Self-check rubric
- Head outline is placed with skull top at H0 and chin at H8, and the midline is marked at V4.
- Eye centers lie on H4 and are symmetric about V4, with the square count from V4 recorded for each side.
- Nose anchor lies at V4 on H6 and mouth anchor lies at V4 on H7, or any deliberate shift is recorded with its new row.
- Vertical order is correct: eye line above nose anchor above mouth anchor.
- All placement counts use grid squares consistently, and any ruler measurements are labeled as the artist's own measurements.
- Valid alternatives are accepted when they keep the defined anchors, symmetry, and recorded counts checkable.
Questions and answers
Do all anime faces use the same eye, nose, and mouth rows?
No. This lesson defines a convention: eyes on H4, nose on H6, mouth on H7. Other styles may use different rows. The method still works if you define the rows first and check symmetry about the midline.
Can I change the eye separation?
Yes, as a valid alternative, provided both eye centers stay on H4 and remain symmetric about V4. Record the new square count so the placement can be checked.
Why is the nose a single anchor point?
Anime noses are often small marks or short lines. A single anchor at V4 on H6 fixes placement without forcing one nose shape, which keeps the grid check simple.
How do I check my drawing without the planned printable?
Draw your own grid with equal square cells, label rows and columns, and count squares from V4 and along the anchor rows. The four exercises include check methods you can apply directly.