Free original lessons
Pencil Scenery Drawing: Foreground, Midground, and Horizon Layers
Learn to compose pencil scenery using three depth layers: horizon, midground, and foreground. Includes step-by-step guidance, a worked example, and four practice tasks.
Free lesson
Four exercises
Worked answers
Object Drawing Lessons
Pencil scenery becomes convincing when depth is organized into layers. This lesson teaches a repeatable method: establish a horizon line, block the midground, then build foreground detail with controlled pencil pressure. You will use simple shapes, consistent units, and a clear convention for judging line weight and placement. The approach works for any generic scene because it focuses on structure rather than a specific landscape. All measurements are hypothetical examples; measure your own paper and tools before drawing.
Practice materials: Printable downloads are not available for this lesson yet. Use the instructions and four exercises below.
Reference illustration
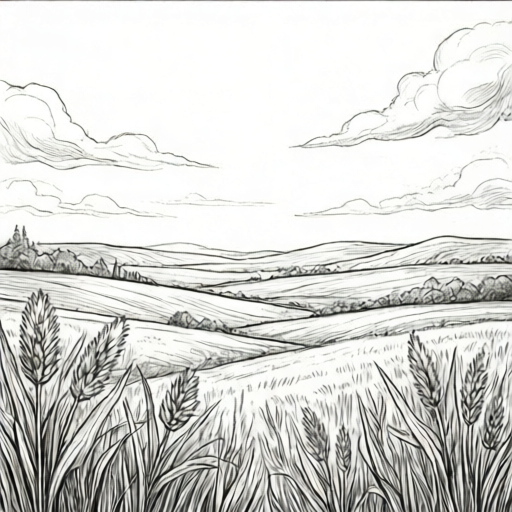
Use the stated measurements and conventions for each exercise.
Set the horizon and page zones
Begin by deciding where the horizon sits on your paper. A common choice is one-third from the top or bottom, but any position is valid if it supports your composition. Mark the horizon lightly with a graphite line you can adjust. This line separates sky from land or water and anchors every later decision.
Next, divide the area below the horizon into two bands: midground (closer to the horizon) and foreground (nearest the viewer). A simple ratio such as 40 percent midground and 60 percent foreground is a hypothetical starting point. Label the bands lightly in pencil so you can erase them later.
- Measure your paper height and record it in centimeters.
- Choose a horizon position, for example 12 cm from the top on a 30 cm sheet.
- Mark the horizon with a light line and label it H.
- Divide the space below H into midground and foreground bands using a chosen ratio.
- Label the bands M and F, then check that the labels are easy to erase.
Block the midground with simple shapes
The midground holds forms that sit between the horizon and the foreground. Use broad, simple shapes such as rectangles, ovals, or triangles to suggest trees, hills, or structures without committing to detail. Keep pencil pressure light so these shapes remain subordinate to foreground elements.
Vary the size and spacing of midground shapes to avoid a mechanical look. Overlap two or three shapes slightly to suggest depth. A hypothetical rule is to keep midground shapes no taller than one-third of the distance from the horizon to the bottom edge, but adjust based on your scene.
- Sketch three to five midground shapes using light pressure.
- Overlap at least two shapes to create depth cues.
- Check that no midground shape crosses the horizon line.
- Erase band labels only after the shapes are placed.
Build foreground detail with controlled pressure
Foreground elements are nearest the viewer, so they can carry darker lines and more detail. Use a pencil convention: define line weight by pressure, where light pressure equals a thin, pale line and firm pressure equals a dark, bold line. This convention is explicit and checkable, and it allows valid alternatives because any consistent pressure scale is acceptable.
Add foreground shapes such as large stones, grass clumps, or path edges. Keep their bases below the midground band and let some shapes extend toward the bottom edge. Use hatching or short strokes sparingly to suggest texture. Check that foreground lines are visibly darker than midground lines under the same lighting.
- Choose a pressure scale: light, medium, firm.
- Draw two or three foreground shapes with medium to firm pressure.
- Add texture strokes only where they support the form.
- Compare foreground and midground line darkness side by side.
- Adjust any foreground line that is not clearly darker than midground lines.
Unify the scene and check depth
Step back and view the drawing from a short distance. The horizon should read as the farthest zone, the midground as intermediate, and the foreground as nearest. If the layers blur together, increase contrast in the foreground or lighten the midground. Avoid adding detail to the horizon unless it supports the composition.
Use a simple checklist: horizon line visible, midground shapes contained below the horizon, foreground lines darker than midground lines, and no band labels remaining. These checks are arithmetic-free and rely on direct observation, so they work with any pencil and paper.
- View the drawing from about one meter away.
- Confirm the three zones read in order: horizon, midground, foreground.
- Erase any remaining labels or construction lines.
- Record one adjustment you made and why.
Worked example
On a 20 cm by 30 cm sheet, place the horizon 10 cm from the top. Divide the space below into a midground band of 8 cm and a foreground band of 12 cm. Sketch two overlapping midground ovals and one foreground rectangle with firm pressure. Describe the result and check the layer order.
Worked answer
The horizon sits at 10 cm from the top. The midground band runs from 10 cm to 18 cm from the top, and the foreground band runs from 18 cm to 30 cm. Two overlapping ovals sit within the midground band with light pressure. One rectangle sits in the foreground with firm pressure and extends toward the bottom edge. Viewed from one meter away, the horizon reads farthest, the ovals read intermediate, and the rectangle reads nearest. The foreground lines are visibly darker than the midground lines, and no labels remain.
Four practice exercises
Exercise 1
On a 15 cm by 25 cm sheet, place the horizon 8 cm from the top. Divide the space below into a midground band of 7 cm and a foreground band of 10 cm. Sketch one midground triangle and one foreground circle. State the band measurements and describe the pressure you used for each shape.
Show answer and check
Horizon at 8 cm from the top. Midground band from 8 cm to 15 cm from the top. Foreground band from 15 cm to 25 cm from the top. The triangle sits in the midground with light pressure. The circle sits in the foreground with firm pressure. The foreground circle reads darker and nearer than the midground triangle.
Why: The measurements sum to the sheet height: 8 + 7 + 10 = 25 cm. Placing each shape in its band and applying the pressure convention creates a readable layer order.
Check: Measure each band with a ruler and confirm the sums. View from one meter away and confirm the circle reads nearer than the triangle. Compare line darkness side by side.
Exercise 2
A learner draws a horizon at 6 cm from the top on a 20 cm sheet, then draws a midground oval that extends from 5 cm to 9 cm from the top. Identify the error and state a correction using the layer method.
Show answer and check
The midground oval crosses the horizon line because it extends above 6 cm. Correction: erase the part above the horizon or move the oval so it sits entirely below 6 cm, then recheck that the oval remains in the midground band.
Why: Midground shapes must stay below the horizon to preserve the layer order. An oval crossing the horizon blurs the boundary between sky and midground.
Check: Measure the oval's top edge against the horizon position. Confirm the oval's top edge is at or below 6 cm from the top.
Exercise 3
On a 30 cm sheet, the horizon is 12 cm from the top. The midground band is 9 cm tall and the foreground band is 9 cm tall. A learner claims the three zones sum to 30 cm. Check the arithmetic and state whether the claim is correct.
Show answer and check
The claim is correct: 12 + 9 + 9 = 30 cm. The horizon, midground, and foreground zones account for the full sheet height.
Why: Adding the three zone measurements gives the total sheet height, which confirms the zones are consistent with the paper size.
Check: Add the three measurements and compare the sum to the sheet height. Repeat the addition in a different order to confirm.
Exercise 4
Describe how to adjust a drawing where the foreground lines are not darker than the midground lines. Include one pressure change and one observation check.
Show answer and check
Increase pressure on the foreground lines to firm, or lighten the midground lines to light. Then view the drawing from one meter away and compare the two sets of lines under the same lighting. If the foreground still does not read darker, repeat the adjustment once and check again.
Why: The pressure convention defines line weight by pressure. Adjusting one layer relative to the other restores the intended contrast and layer order.
Check: Compare line darkness side by side at the same distance and lighting. Confirm the foreground lines are visibly darker before and after the adjustment.
Common mistakes
- Drawing foreground details before establishing the horizon. Mark the horizon first, then block midground shapes, and add foreground detail last.
- Using the same pencil pressure for all three layers. Apply the pressure convention: light for horizon, medium for midground, firm for foreground, and compare lines side by side.
- Letting midground shapes cross the horizon line. Check each midground shape against the horizon and erase any part that crosses it.
- Filling the foreground with too many small details. Limit foreground shapes to two or three main forms and add texture only where it clarifies form.
Self-check rubric
- Horizon line is present and clearly separates sky from land or water.
- Midground shapes are contained below the horizon and use lighter pressure than foreground lines.
- Foreground shapes use firmer pressure and read as nearest to the viewer.
- The three layers are distinguishable from one meter away.
- Construction labels and band marks are erased or absent in the final drawing.
- Valid alternatives are accepted if the pressure convention is consistent and the layer order is readable.
Questions and answers
Do I need a specific pencil grade?
No. Any graphite pencil works. The pressure convention matters more than the grade, and you should test your own pencil on scrap paper to see how light and firm pressure appear.
How do I decide where the horizon goes?
Choose a position that supports your composition. A hypothetical starting point is one-third from the top or bottom, but any position is valid if the three layers remain readable.
Can I use a ruler for the horizon line?
Yes. A ruler helps keep the horizon straight, but a freehand line is also acceptable if it is intentional and consistent.
What if my foreground does not look darker?
Compare lines under the same lighting. If foreground lines are not clearly darker, increase pressure on foreground lines or lighten midground lines, then check again.