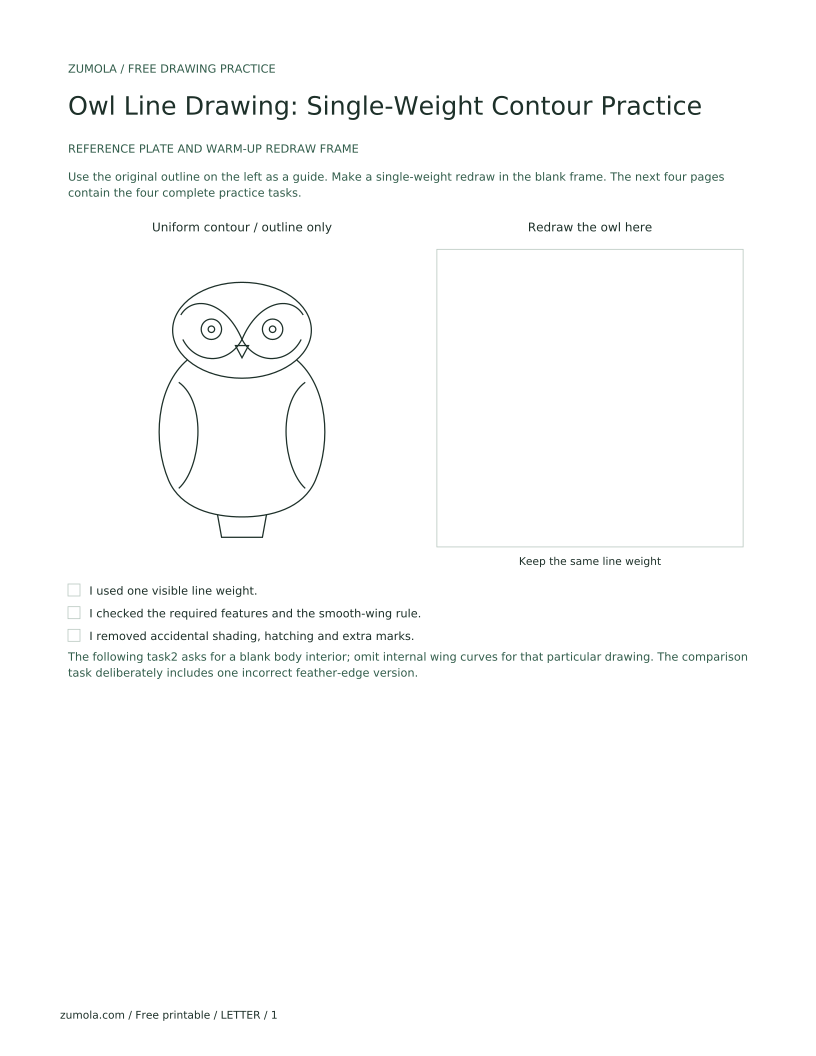
Reference diagram
LETTER · Download PDF (2 pages)
Free original resources
Learn to draw an owl using one uniform line weight, no shading or feather detail. Includes steps, common mistakes, rubric, and four practice tasks.
Original reference diagrams, four practice exercises and separate worked answers. All files are free. No signup required.
LETTER · Download PDF (2 pages)
LETTER · Download PDF (5 pages)
LETTER · Download PDF (4 pages)
Choose A4 or US Letter for your printer. The reference and answer illustrations are not physical rulers; follow the scale instruction printed on the practice worksheet.
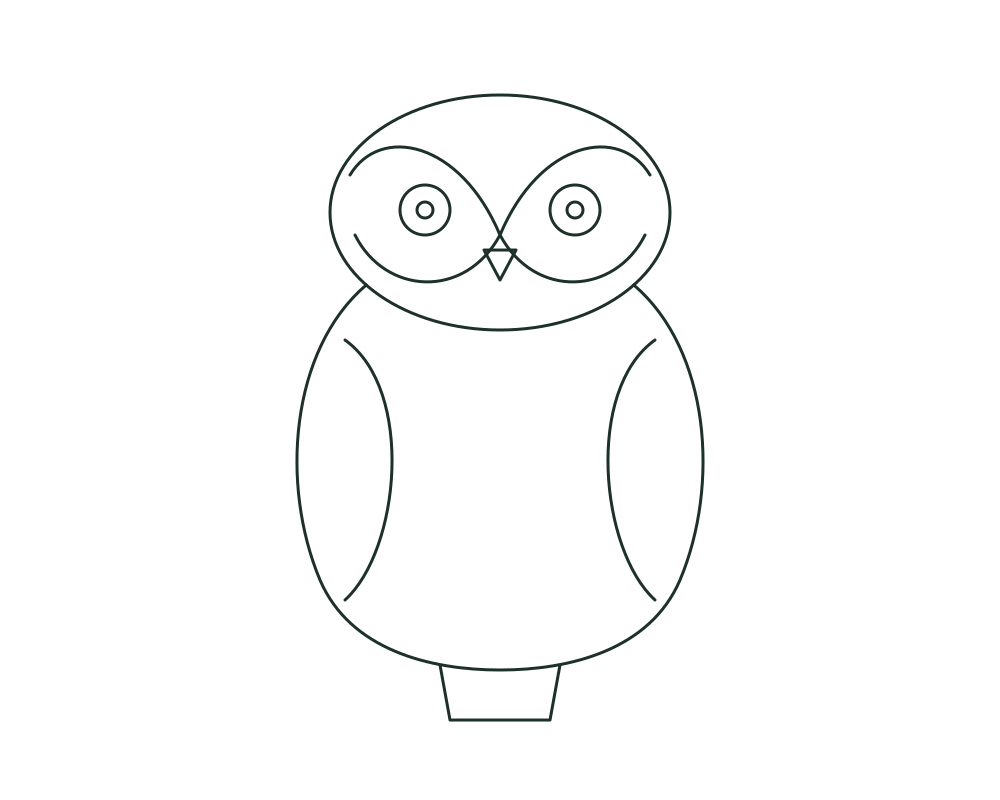
This lesson teaches a single-weight contour line drawing of an owl. Contour means the outline and essential shape boundaries only. Single-weight means every drawn line has the same visual thickness, so the owl reads as a flat graphic shape rather than a shaded or textured illustration. You will use one pencil or pen and keep pressure constant. Feather detail, tonal shading, and tattoo styling are outside this task. The goal is a clear, balanced owl silhouette with simple internal boundaries for the face disk, eyes, beak, and wing edge, all drawn at the same line weight. Work on plain paper and measure your actual tools if you compare line thickness. Any numerical values below are hypothetical examples, not standards.
Choose one drawing tool. A fine-tip pen or a medium pencil works; the key is that you do not switch tools midway. Test the tool on scrap paper to confirm you can produce a consistent line. If you measure line width, use a ruler on your actual test marks and record the value; for example, a hypothetical test might show a line about 0.5 mm wide. That number is only an example from your own measurement, not a universal standard.
Keep hand pressure even. Slow down on curves and lift the tool only between separate contours. Do not go back over a line to darken it, because that creates a heavier weight and breaks the single-weight rule.
Start with the largest shapes: head, body, and tail. The head is a rounded circle or slight oval. The body is a wider oval below it. The tail is a short wedge or rounded rectangle at the bottom. Keep these shapes simple and proportional. A common proportion is a head about one-third of the total height, but treat that as a hypothetical guide and adjust to your own drawing.
Next, add the face disk: two curved lines that frame the eyes and meet near the beak. Then draw the eyes as circles with a smaller inner circle for the pupil. Add a small triangular beak between the eyes. Finally, draw one curved line for the wing edge on each side of the body. Every line stays the same weight.
A clean contour has no sketchy overlaps. If you make a mistake, erase fully or start a new area rather than drawing over the old line. Avoid feather detail: no small scallops, no individual feather shapes, no hatching. The wing edge is one simple curve, not a row of feather tips. The face disk is two smooth curves, not a textured ring.
Check readability by viewing the drawing from a short distance. The owl should be recognizable from the outline alone. If the eyes are too small or the beak is lost, adjust the simple shapes rather than adding detail. Hand-drawn contour shapes vary; there is no single required curve shape, only a consistent single-weight outline that reads as an owl.
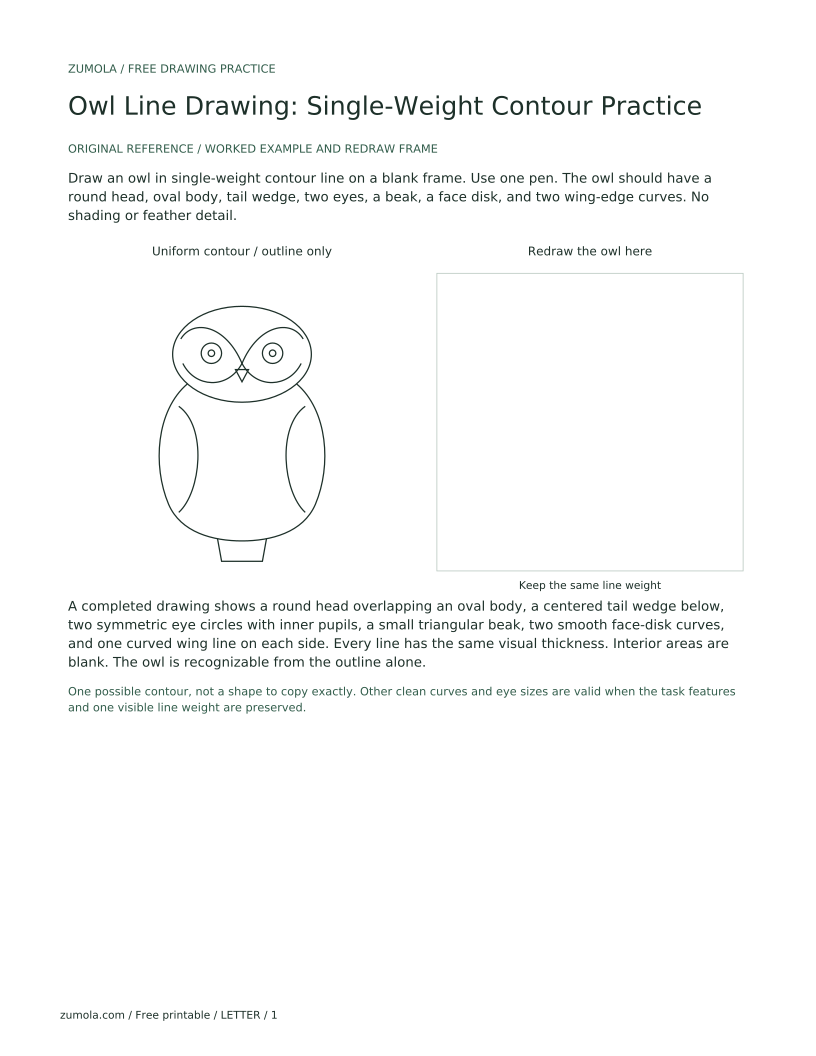
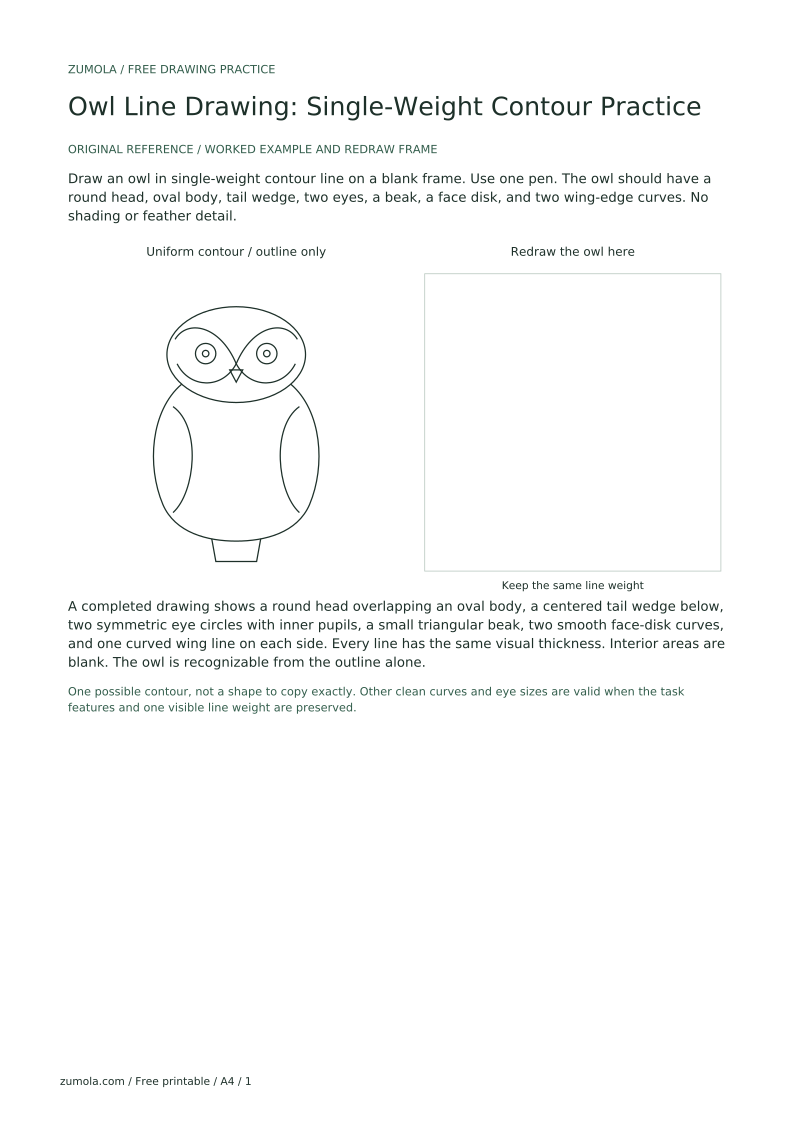
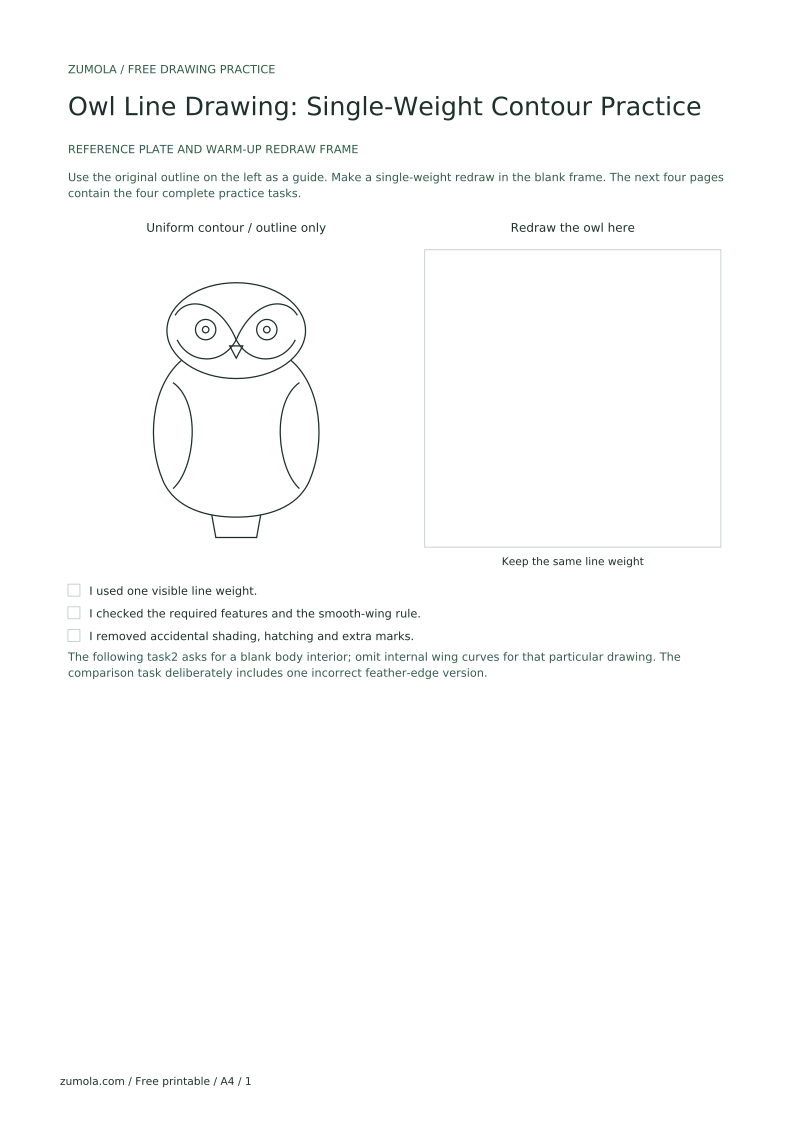
Draw an owl in single-weight contour line on a blank frame. Use one pen. The owl should have a round head, oval body, tail wedge, two eyes, a beak, a face disk, and two wing-edge curves. No shading or feather detail.
A completed drawing shows a round head overlapping an oval body, a centered tail wedge below, two symmetric eye circles with inner pupils, a small triangular beak, two smooth face-disk curves, and one curved wing line on each side. Every line has the same visual thickness. Interior areas are blank. The owl is recognizable from the outline alone.
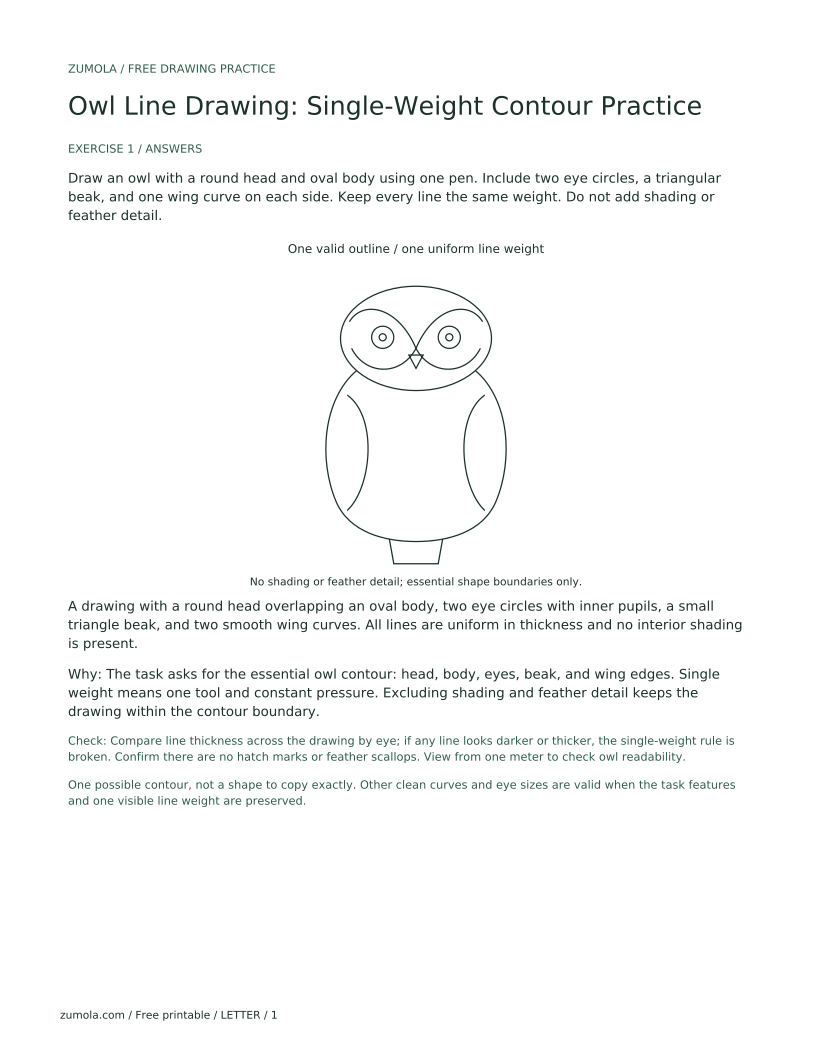
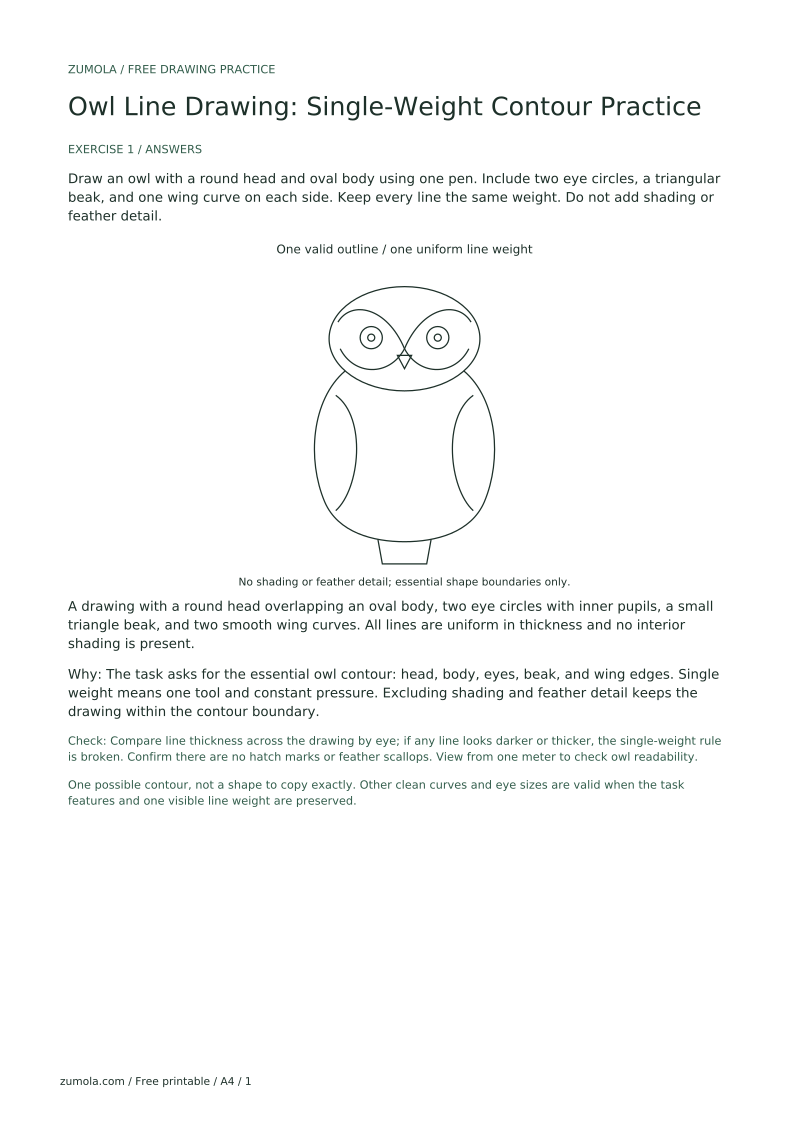
Draw an owl with a round head and oval body using one pen. Include two eye circles, a triangular beak, and one wing curve on each side. Keep every line the same weight. Do not add shading or feather detail.
A drawing with a round head overlapping an oval body, two eye circles with inner pupils, a small triangle beak, and two smooth wing curves. All lines are uniform in thickness and no interior shading is present.
The task asks for the essential owl contour: head, body, eyes, beak, and wing edges. Single weight means one tool and constant pressure. Excluding shading and feather detail keeps the drawing within the contour boundary.
Check: Compare line thickness across the drawing by eye; if any line looks darker or thicker, the single-weight rule is broken. Confirm there are no hatch marks or feather scallops. View from one meter to check owl readability.
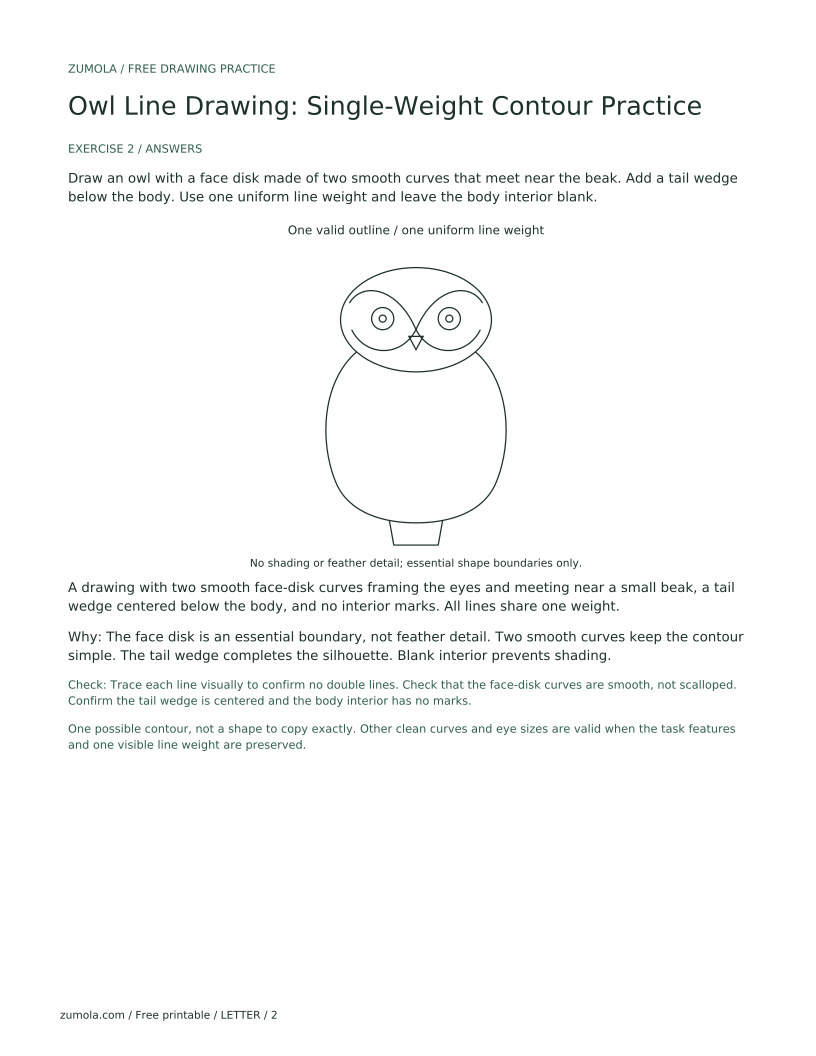
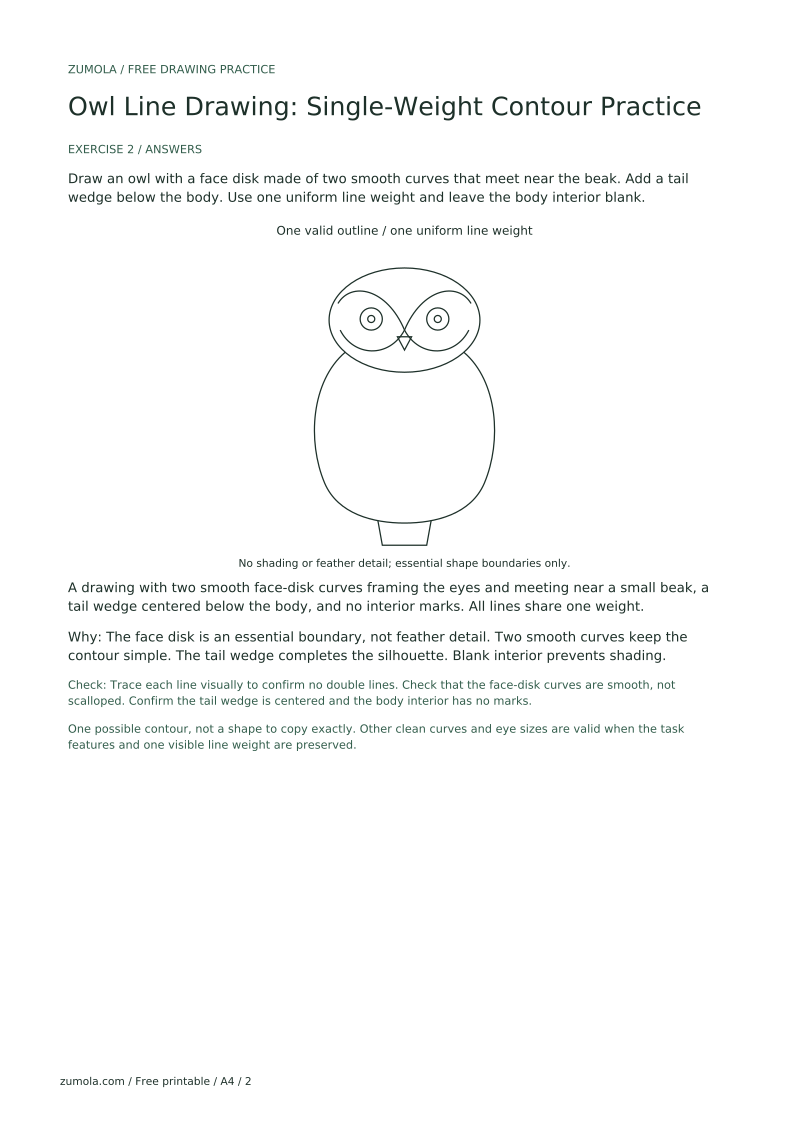
Draw an owl with a face disk made of two smooth curves that meet near the beak. Add a tail wedge below the body. Use one uniform line weight and leave the body interior blank.
A drawing with two smooth face-disk curves framing the eyes and meeting near a small beak, a tail wedge centered below the body, and no interior marks. All lines share one weight.
The face disk is an essential boundary, not feather detail. Two smooth curves keep the contour simple. The tail wedge completes the silhouette. Blank interior prevents shading.
Check: Trace each line visually to confirm no double lines. Check that the face-disk curves are smooth, not scalloped. Confirm the tail wedge is centered and the body interior has no marks.
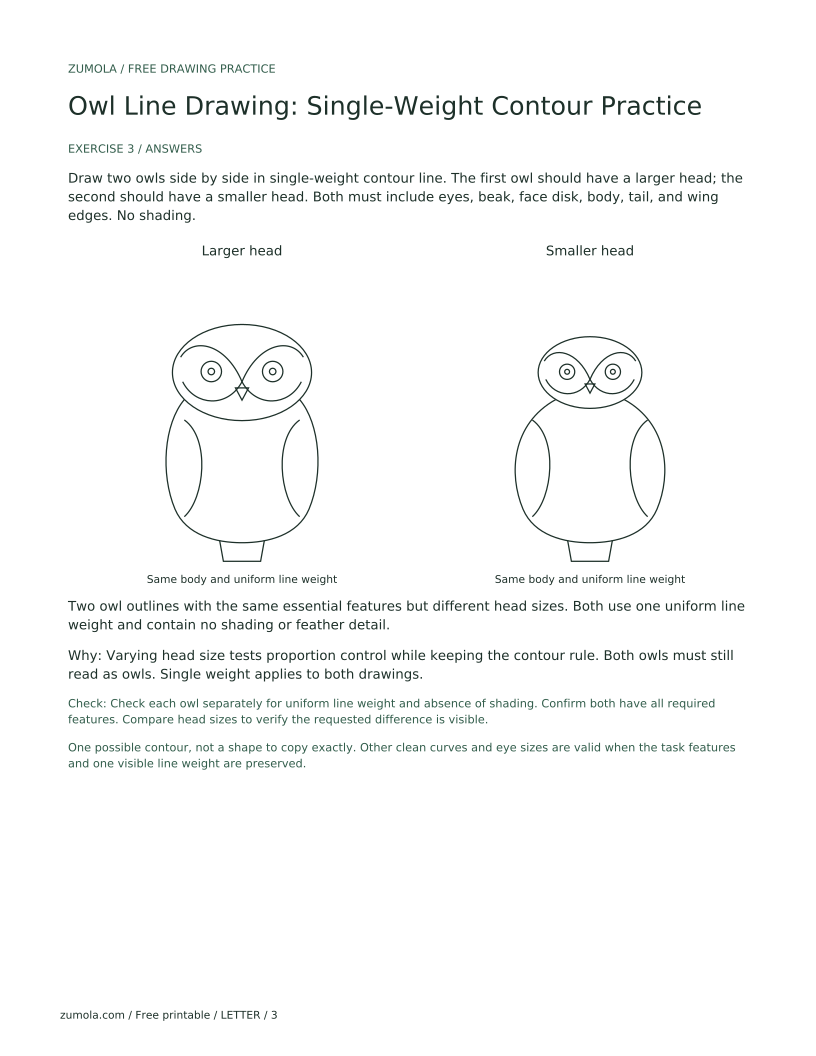
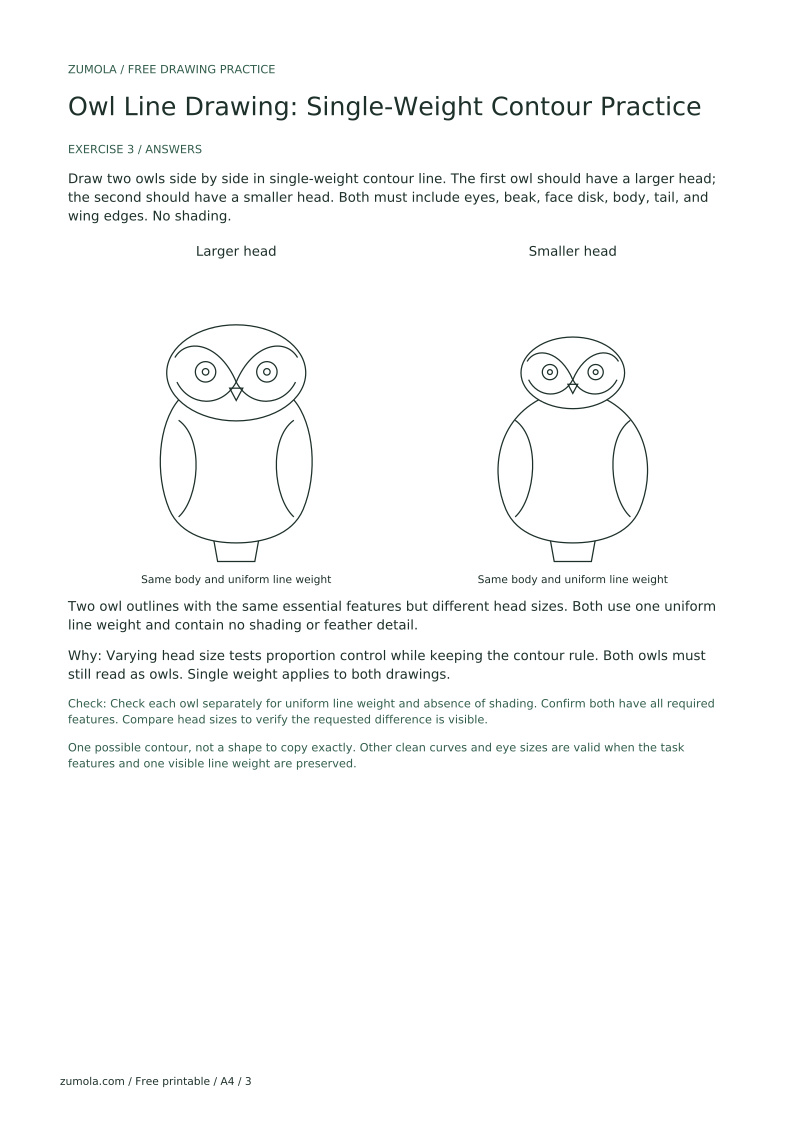
Draw two owls side by side in single-weight contour line. The first owl should have a larger head; the second should have a smaller head. Both must include eyes, beak, face disk, body, tail, and wing edges. No shading.
Two owl outlines with the same essential features but different head sizes. Both use one uniform line weight and contain no shading or feather detail.
Varying head size tests proportion control while keeping the contour rule. Both owls must still read as owls. Single weight applies to both drawings.
Check: Check each owl separately for uniform line weight and absence of shading. Confirm both have all required features. Compare head sizes to verify the requested difference is visible.
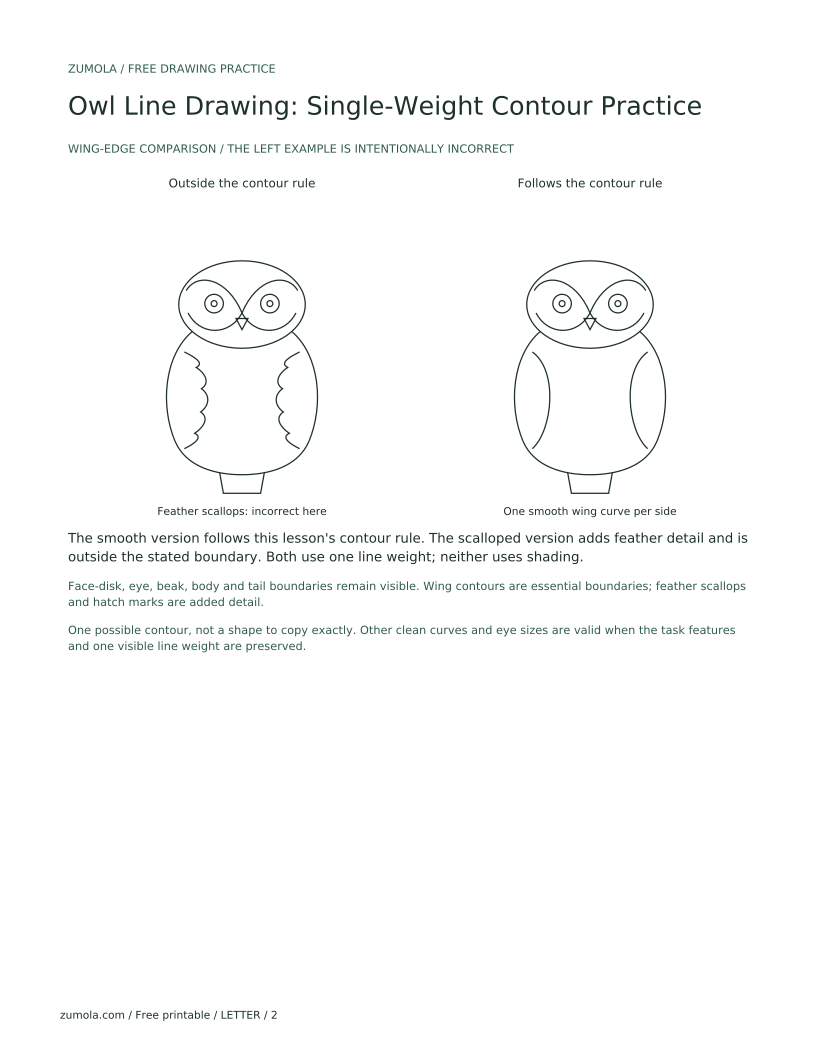
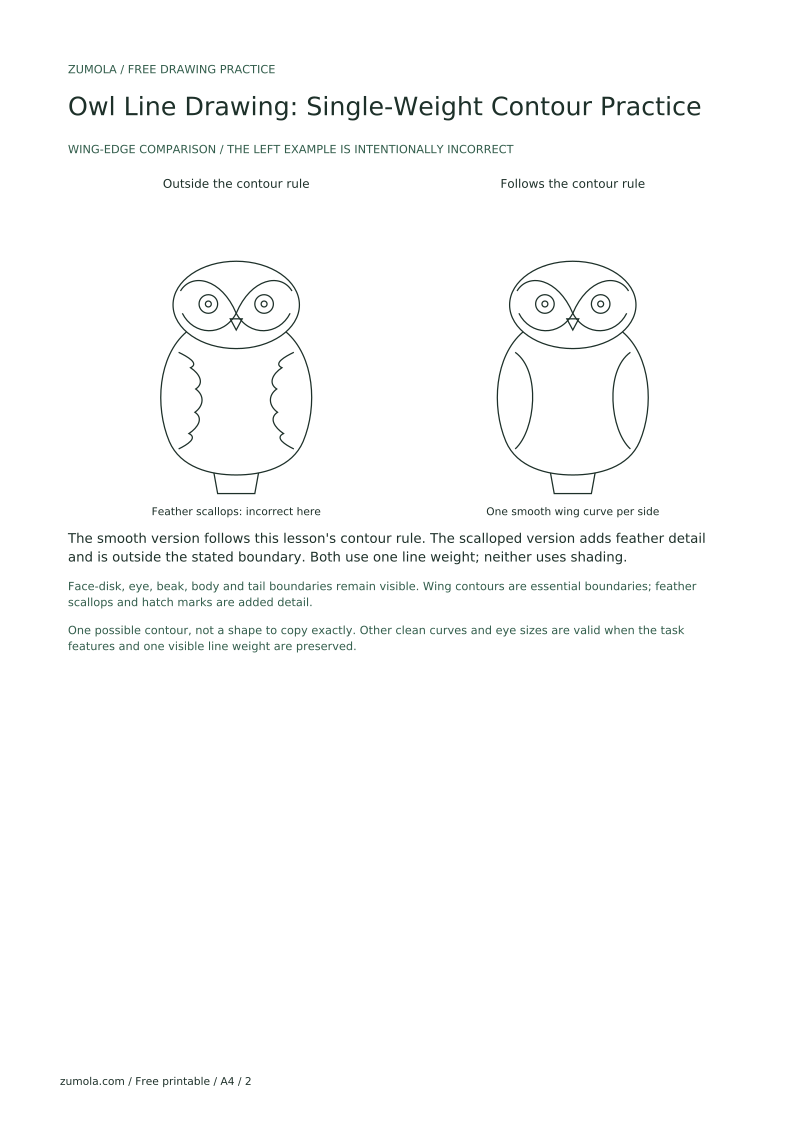
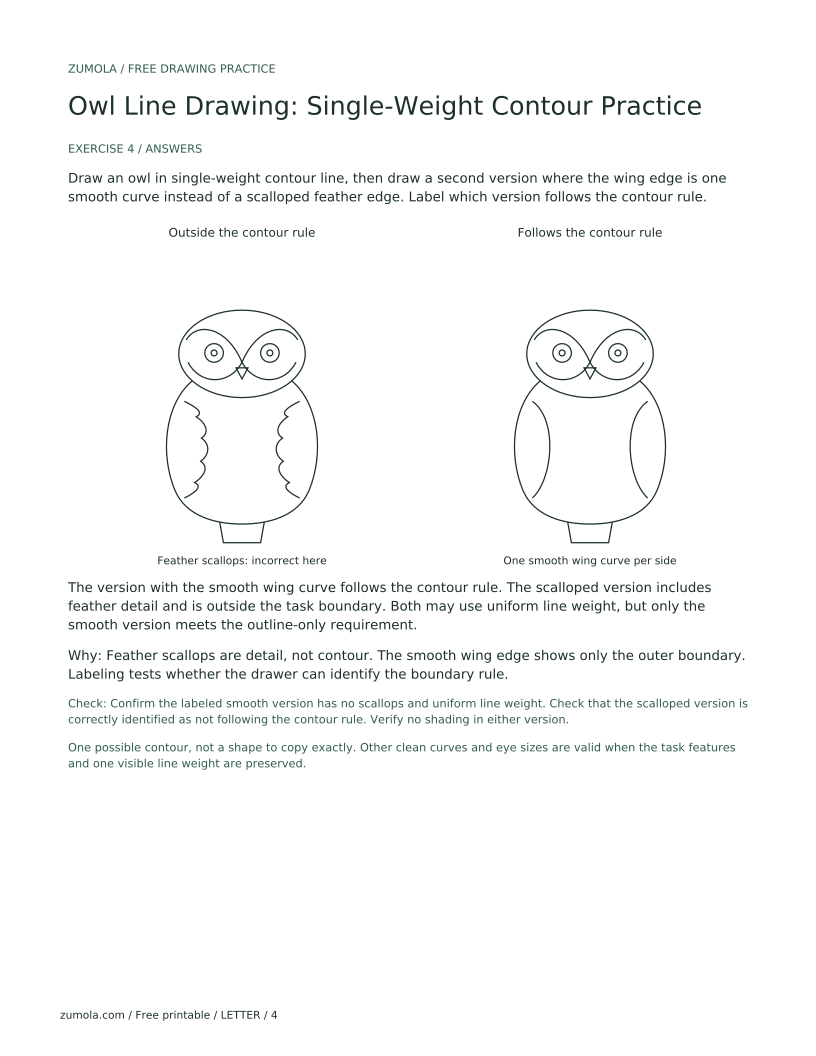
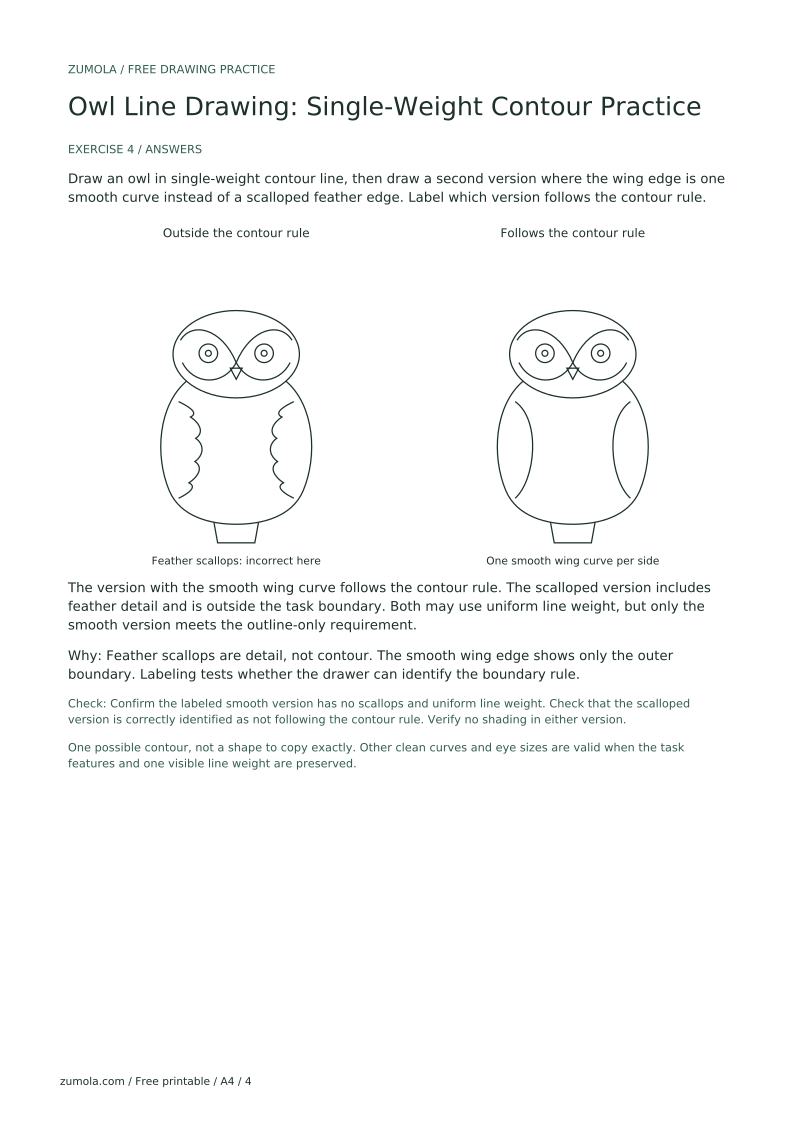
Draw an owl in single-weight contour line, then draw a second version where the wing edge is one smooth curve instead of a scalloped feather edge. Label which version follows the contour rule.
The version with the smooth wing curve follows the contour rule. The scalloped version includes feather detail and is outside the task boundary. Both may use uniform line weight, but only the smooth version meets the outline-only requirement.
Feather scallops are detail, not contour. The smooth wing edge shows only the outer boundary. Labeling tests whether the drawer can identify the boundary rule.
Check: Confirm the labeled smooth version has no scallops and uniform line weight. Check that the scalloped version is correctly identified as not following the contour rule. Verify no shading in either version.
Use one pass per line and keep pressure constant; if a line is too light, adjust tool pressure on a test sheet first.
Replace feather detail with one smooth wing-edge curve; the contour should show only the outer boundary.
Remove all tonal marks; the task is outline-only, so leave interior areas blank.
Resize the simple circles and triangle before adding any other lines; keep the face disk balanced.
You may use light pencil construction guides and then ink the final contour, provided the guides are erased or hidden so the finished drawing has one uniform visible line weight. Retained guides or repeated darkening can break that goal. Drawing directly with one tool is another option; judge the visible final contour rather than the mere use of two tools during preparation.
None. The boundary excludes feather detail. Show only the outer contour and essential boundaries such as the face disk, eyes, beak, and wing edge.
Yes, if you use one brush size and constant opacity. The same single-weight rule applies; do not vary line thickness or add shading.
That is acceptable. Hand-drawn contour shapes vary. The rubric checks single weight, outline-only content, and clear owl features, not an exact match.