Free original lessons
Contour Line Garden Flowers: Overlapping Blooms Practice
Learn continuous contour line drawing of overlapping garden flowers. Practice line control, overlap edges, and composition with clear steps and self-checks.
Free lesson
Four exercises
Worked answers
Object Drawing Lessons
Contour line drawing records the visible edges of a subject with a single, unbroken line. In a garden, flowers overlap: petals cross stems, leaves hide behind blooms, and one flower sits in front of another. This lesson teaches you to draw those overlapping garden flowers using continuous contour line only, without shading or color. You will practice line control, decide which edges to keep, and build a small garden arrangement. The convention for this lesson is simple: every visible edge is drawn as one continuous line that may loop back, but the pencil does not lift until the flower group is complete. Petal shapes can vary; your line quality is judged by continuity and clarity, not by matching a single model. All measurements are hypothetical examples; measure your own paper and tools before drawing.
Practice materials: Printable downloads are not available for this lesson yet. Use the instructions and four exercises below.
Reference illustration
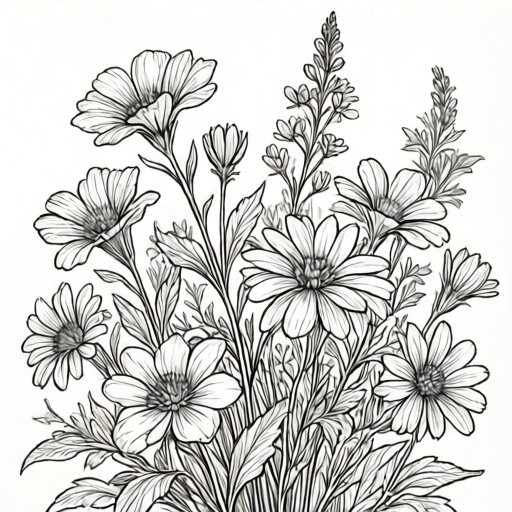
Use the stated measurements and conventions for each exercise.
Line Control and the Continuous Contour Convention
Continuous contour means the drawing line stays on the paper and moves from edge to edge without lifting. You may retrace a line to return to a junction, but you do not jump to a new disconnected mark. This convention forces you to plan the order of edges before drawing.
Start with three warm-up lines on scrap paper: a slow wavy line, a spiral, and a line that crosses itself twice. Keep your hand relaxed and move from the shoulder for long curves. The goal is an even line weight, not speed.
For flowers, the outer petal edge is usually the first contour. When a petal overlaps another, draw the front petal edge first, then continue the back petal edge up to the T-junction and stop. The back edge does not continue through the front petal.
- Draw a 10 cm wavy line without lifting the pencil; keep line weight even.
- Draw a spiral that crosses itself twice; note where lines meet.
- Draw one simple flower outline in one continuous line, lifting only at the end.
- Check that no edge is drawn twice unless you are retracing to a junction.
Reading Overlaps in a Garden Arrangement
An overlap happens when one shape hides part of another. In contour line, the hidden edge is not drawn. Instead, the front shape's edge continues until it meets the back shape's visible edge, and the line turns to follow the front shape.
Use a simple rule: front edge wins. If a petal sits in front of a leaf, draw the petal edge across the leaf and stop the leaf line at the petal boundary. This creates a clear T-junction.
Before drawing, trace the arrangement with your finger. Name the front flower, the middle flower, and the back flower. Mark three overlap points lightly with a dot, then erase the dots after the contour is complete.
- Choose three blooms: one front, one middle, one back.
- Mark three overlap points where edges cross.
- Draw the front bloom first in continuous line.
- Draw the middle bloom, stopping its edges at the front bloom boundary.
- Draw the back bloom last, stopping at both front and middle boundaries.
Building the Garden Composition
Place the largest bloom slightly off-center. Add a second bloom that overlaps the first by about one-third of its width. Add a third bloom behind, overlapping the second. Add two leaves and one stem that cross behind the blooms.
Draw an outer 15 cm by 20 cm box, then measure a 2 cm margin inside it on all four sides; keep the composition inside the inner 11 cm by 16 cm drawing area. These are hypothetical example measurements; measure your own paper and tools before drawing.
Vary petal shapes: rounded, pointed, and notched. The contour line should describe each petal's outer edge and the notch where petals meet. Do not shade or fill; the line alone carries the form.
- Draw an outer 15 cm by 20 cm box, then mark a 2 cm margin inside it on all four sides to define an 11 cm by 16 cm drawing area.
- Place the largest bloom off-center.
- Add the second bloom overlapping by one-third.
- Add the third bloom behind the second.
- Add two leaves and one stem with clear overlap points.
- Check that every visible edge is one continuous line.
Self-Check and Line Quality
After drawing, check three things: continuity, overlap clarity, and line weight. Continuity means the line does not lift except at the end. Overlap clarity means front edges meet back edges at T-junctions without the back edge continuing through. Line weight means the line is consistently visible, not too faint or too heavy.
Use a simple rubric: 1 point for continuous line, 1 point for three clear overlaps, 1 point for even line weight, 1 point for composition inside the box. A score of 3 or 4 is ready to refine.
If a line is too faint, redraw that section with the same continuous convention. Do not erase the whole drawing; repair the section and check the junction again.
- Trace the line with your finger to confirm no lifts.
- Check each overlap: front edge crosses, back edge stops.
- Compare line weight across the drawing.
- Score with the four-point rubric and note one repair.
Worked example
Draw a front daisy overlapping a back tulip in continuous contour line inside a 10 cm by 10 cm box. Include one leaf crossing behind both blooms. Use the front-edge-wins rule.
Worked answer
Start at the top of the daisy. Draw the daisy petal edges in one continuous line, moving clockwise. When you reach the tulip boundary, stop the tulip edge at the daisy edge and turn to follow the daisy. Continue around the daisy, then travel down the daisy stem to the leaf. Draw the leaf edge until it meets the tulip stem, stop, and return along the daisy stem to the tulip. Draw the tulip visible edges, stopping at the daisy boundary. Finish at the tulip base. The line is continuous, three overlap points are clear, and the drawing stays inside the box.
Four practice exercises
Exercise 1
Draw two overlapping blooms in a 10 cm by 10 cm box. The front bloom is a five-petal flower; the back bloom is a cup-shaped flower. Use continuous contour and show two overlap points.
Show answer and check
A continuous line starts at the front bloom, draws five petal edges, stops the back bloom edge at the front boundary, and finishes at the back bloom base. Two overlap points are visible where the front petal crosses the back cup.
Why: The front-edge-wins rule creates two clear crossings. The line stays on the paper and the box is measured before drawing.
Check: Trace the line with your finger: no lifts. Check that the back cup edge stops at the front petal edge. Confirm the drawing is inside the 10 cm by 10 cm box.
Exercise 2
Draw three blooms in a row where the middle bloom overlaps both neighbors. Use continuous contour and mark three overlap points with small dots before drawing. Erase the dots after.
Show answer and check
The line starts at the left bloom, crosses to the middle bloom at the first overlap, continues to the right bloom at the second overlap, and returns through the middle bloom at the third overlap. The dots are erased and the line is continuous.
Why: Marking overlap points first plans the line order. The middle bloom is front at two crossings and back at one, so the line must stop and turn at each boundary.
Check: Count three overlap points. Confirm each back edge stops at the front edge. Check that the line does not lift and the dots are erased.
Exercise 3
Draw one bloom with a leaf crossing in front of its stem and a second bloom behind the leaf. Use continuous contour in a 12 cm by 15 cm box. Show two overlap points.
Show answer and check
The line draws the front leaf edge across the stem, stops the stem edge at the leaf, continues the leaf to the second bloom boundary, stops the second bloom edge at the leaf, and finishes at the second bloom base.
Why: The leaf is front at the stem crossing and front at the second bloom crossing. The front-edge-wins rule keeps both back edges from continuing through the leaf.
Check: Check that the stem edge stops at the leaf and the second bloom edge stops at the leaf. Trace for continuity and confirm the box size.
Exercise 4
Draw a garden group of three blooms and two leaves inside an outer 15 cm by 20 cm box with a 2 cm margin inside it on all four sides, so the composition stays within the inner 11 cm by 16 cm drawing area. Use continuous contour. Score your drawing with the four-point rubric and note one repair.
Show answer and check
A continuous line connects three blooms and two leaves with at least three overlap points. The drawing stays inside the margin. The rubric score is 3 or 4, and one repair is noted, such as redrawing a faint section with even pressure.
Why: The composition uses offset blooms and clear overlaps. The rubric checks continuity, overlap clarity, line weight, and composition. A repair improves one criterion without erasing the whole drawing.
Check: Measure the outer box, then measure the 2 cm margin on all four sides to confirm the inner 11 cm by 16 cm drawing area. Trace the line for lifts. Check three overlaps. Compare line weight top and bottom. Score each rubric point and confirm the noted repair addresses the lowest score.
Common mistakes
- Lifting the pencil to start a new flower. Plan the order so the line travels from one flower to the next through a shared stem or leaf edge.
- Drawing the back edge through the front flower. Stop the back edge at the front boundary and turn the line to follow the front edge.
- Making the line too faint or too heavy in places. Use even pressure and check line weight every few centimeters.
- Placing all blooms in a straight row. Offset the largest bloom and overlap by about one-third of width.
Self-check rubric
- Continuous line: pencil does not lift until the group is complete (1 point).
- Overlap clarity: three front edges meet back edges at T-junctions and back edges stop (1 point).
- Line weight: even and visible across the drawing (1 point).
- Composition: blooms offset and inside the measured box (1 point).
- Valid alternatives: different petal shapes and bloom order are accepted if the four criteria are met.
Questions and answers
Can I lift the pencil to move to a new area?
No. The convention is continuous contour: the line stays on the paper until the flower group is complete. You may retrace to a junction, but do not jump to a disconnected mark.
What if two petals overlap in a complicated way?
Draw the front petal edge first. Stop the back petal edge at the T-junction. Then continue the front edge. Complicated overlaps are just several simple crossings in a row.
Do I need to draw every leaf and stem?
Draw only visible edges that support the overlap story. Two leaves and one stem are enough for this lesson. Extra edges can clutter the contour.
How do I know my line weight is even?
Compare a 5 cm section at the top with a 5 cm section at the bottom. If one is much darker, adjust pressure. Even weight is a rubric point, not a single correct look.