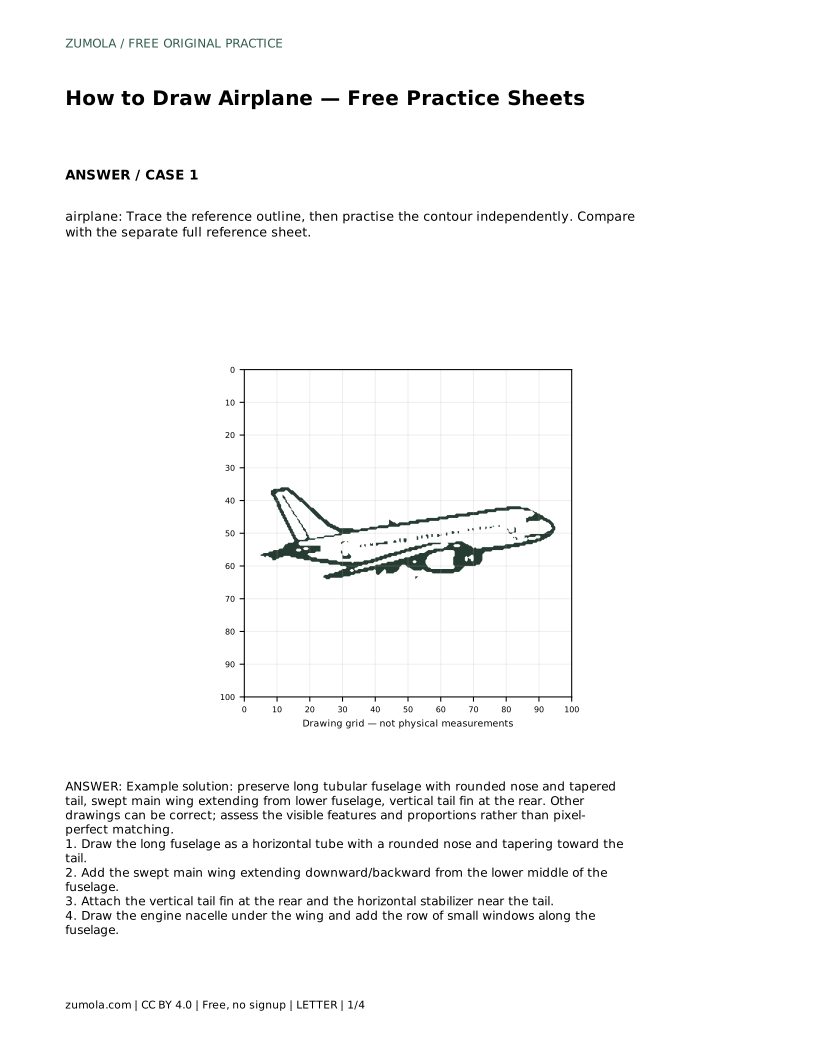
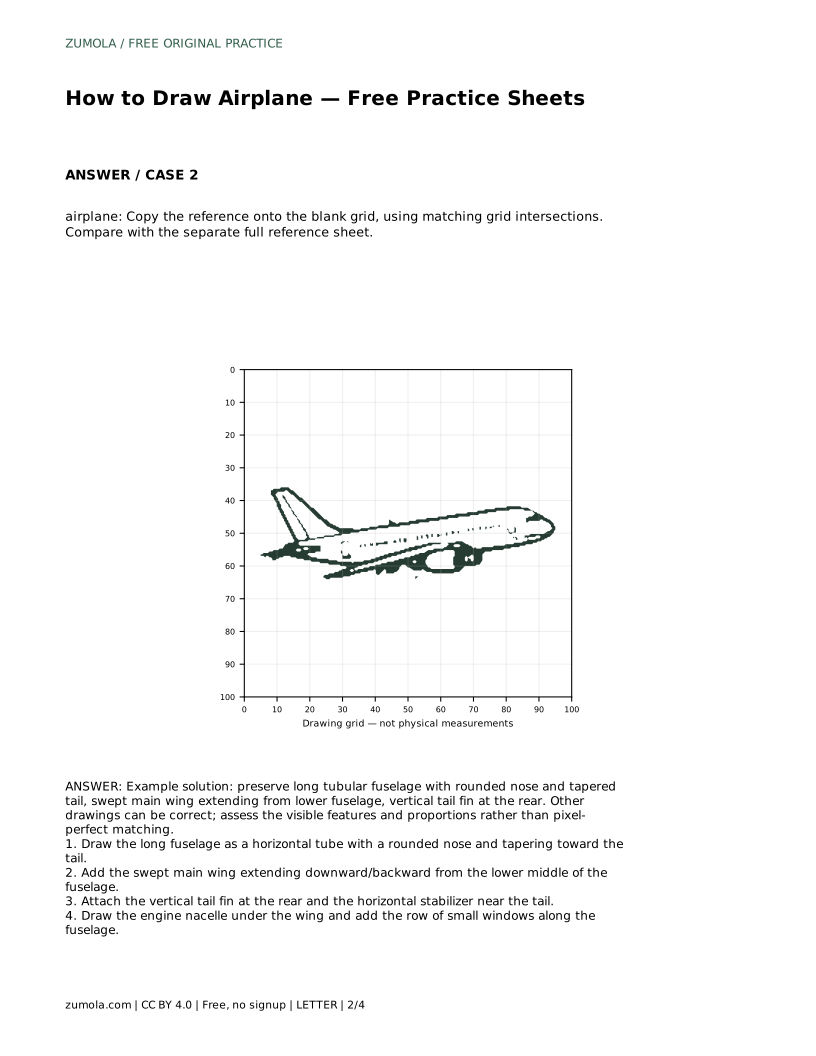
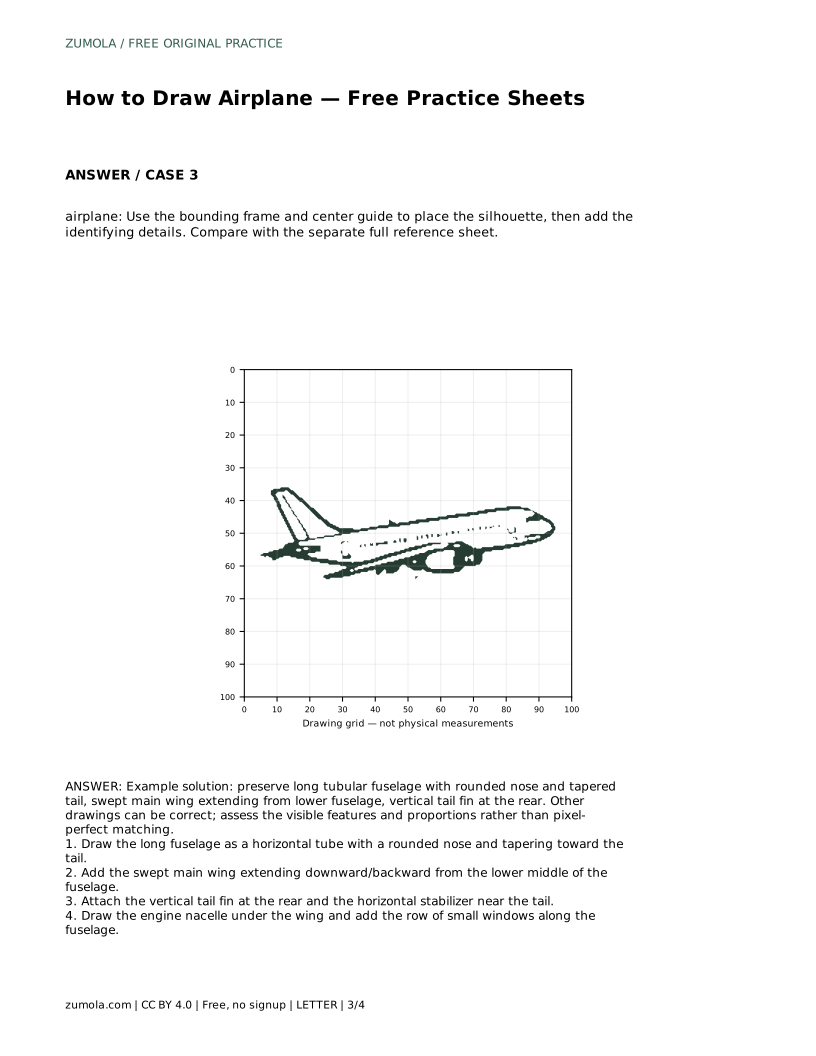
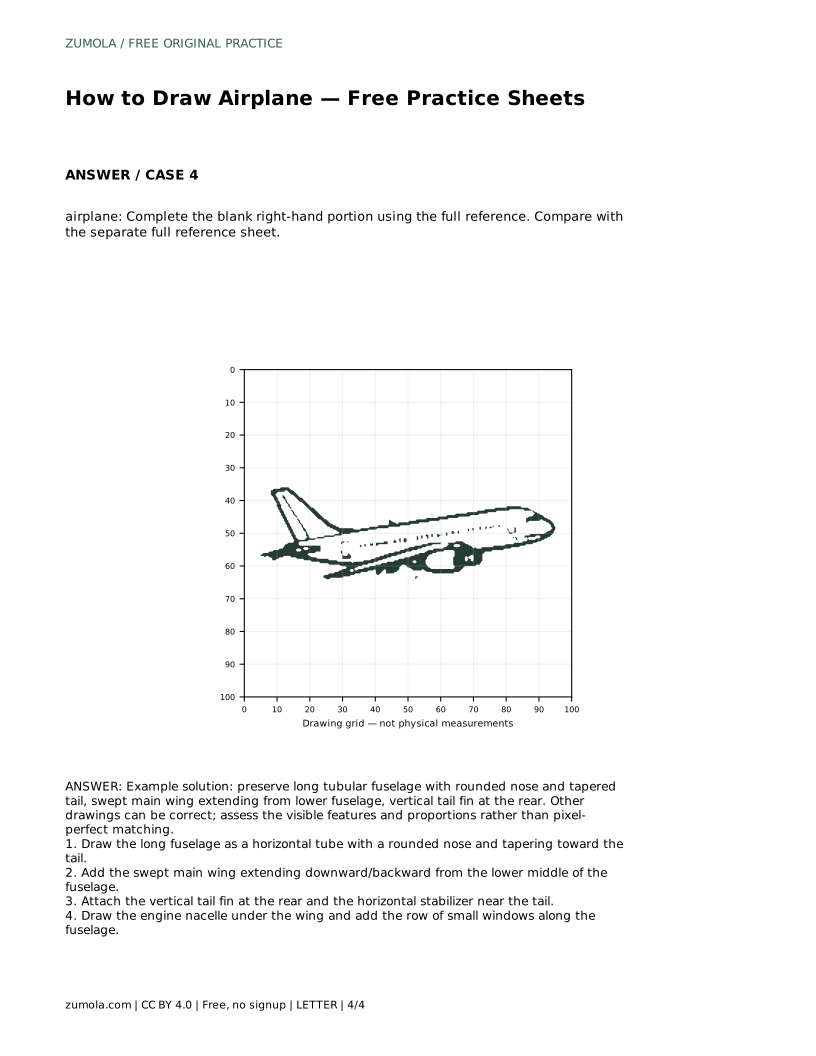
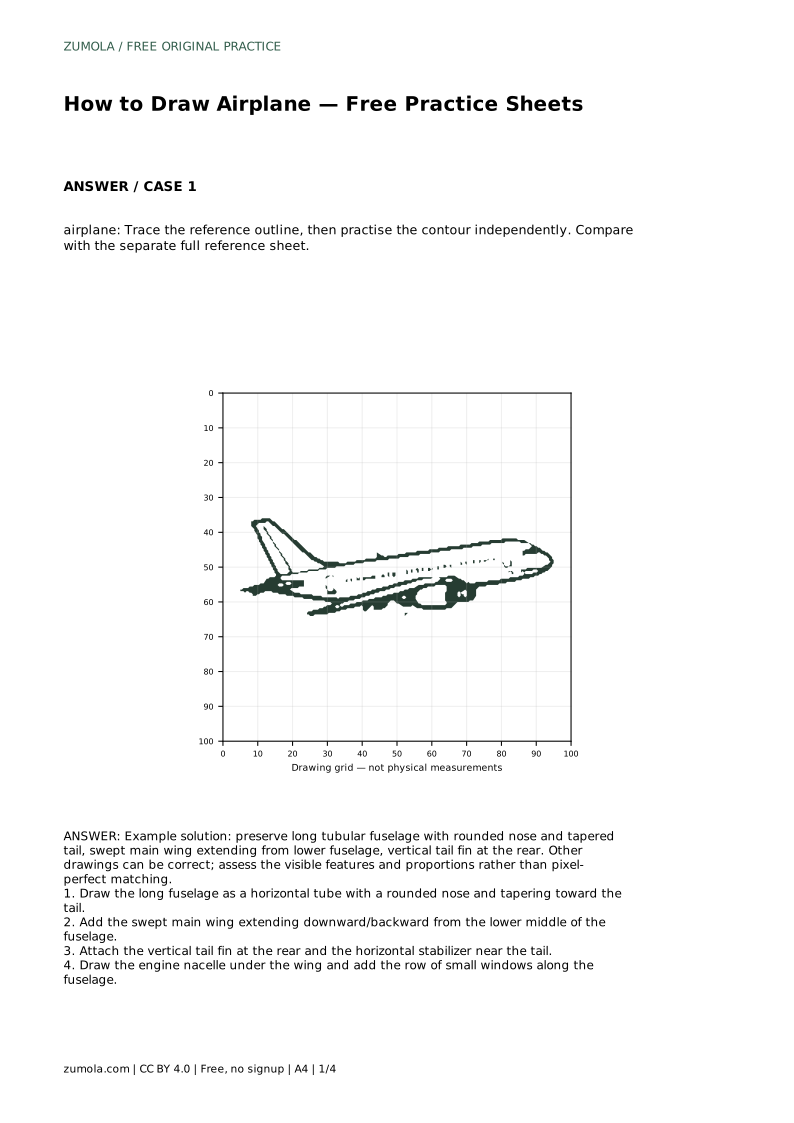
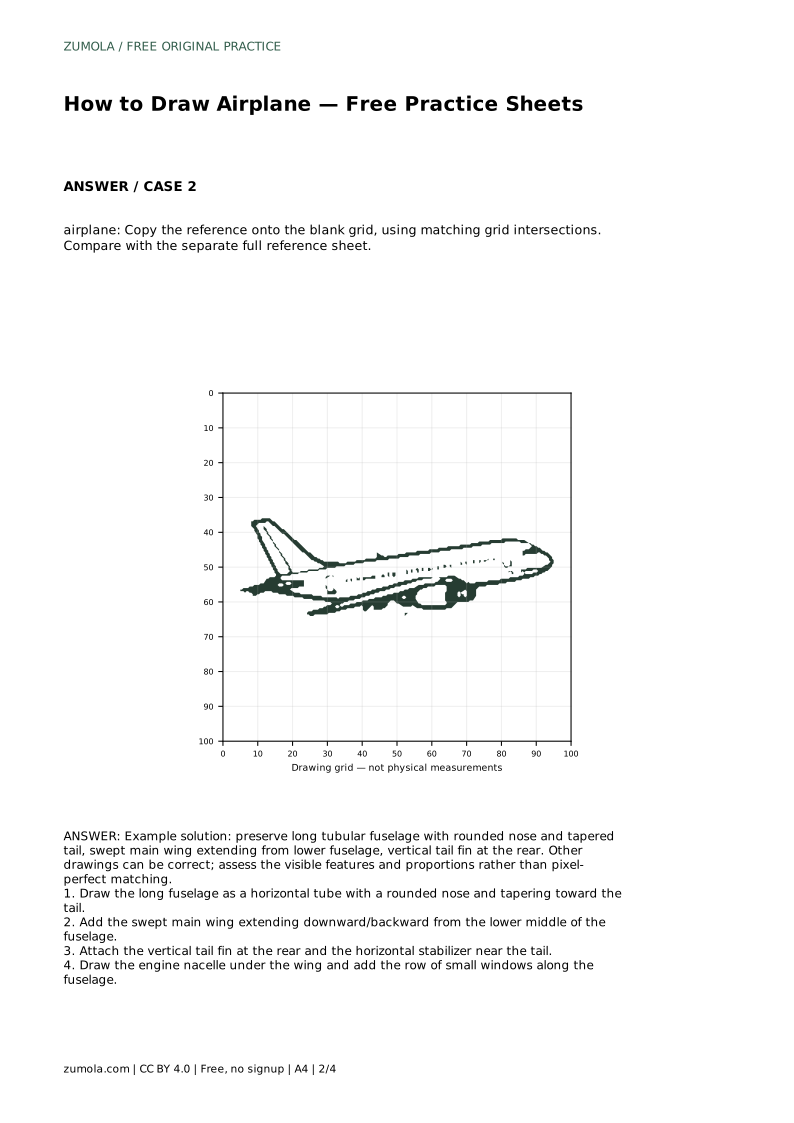
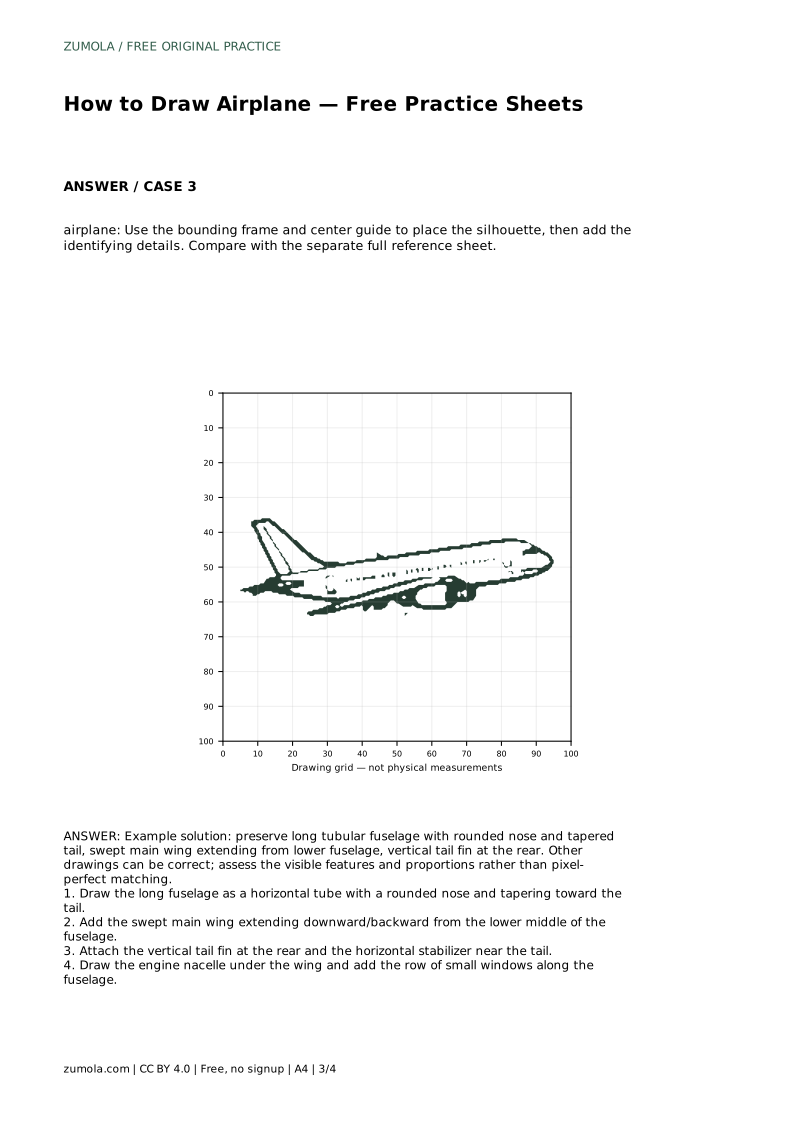
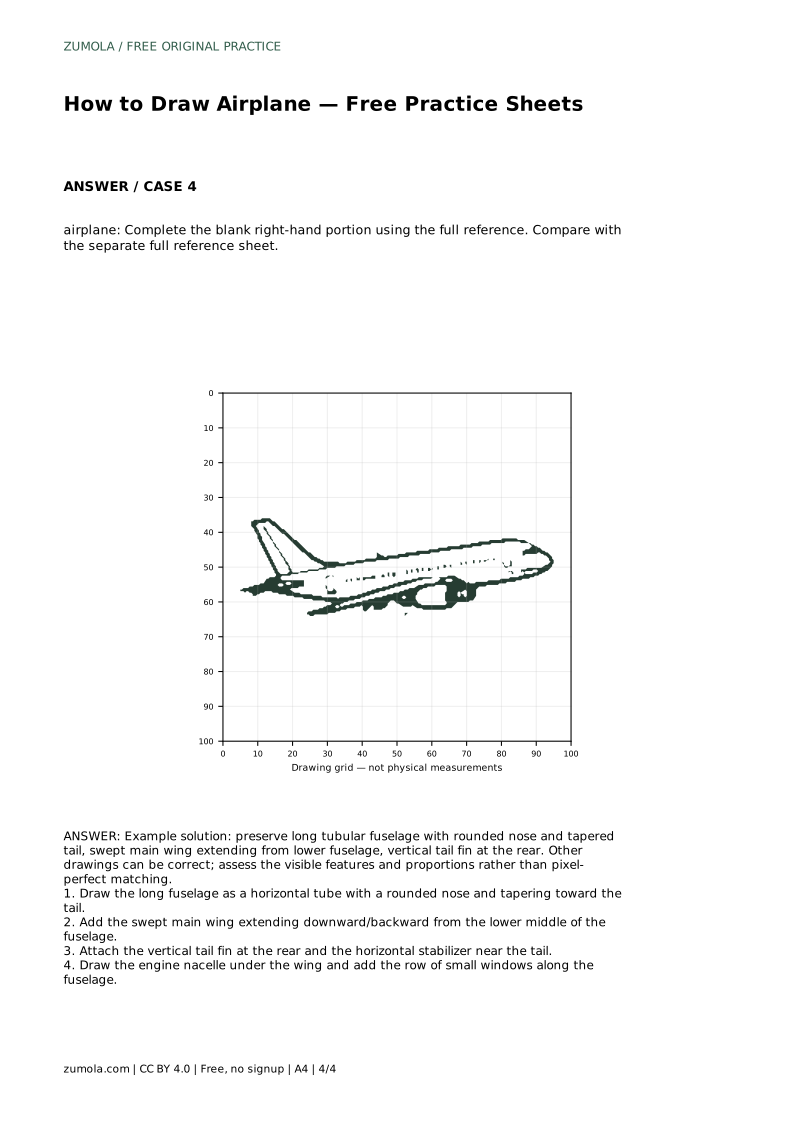
Reference diagrams
LETTER · Download PDF
A4 · Download PDF
Free original resources
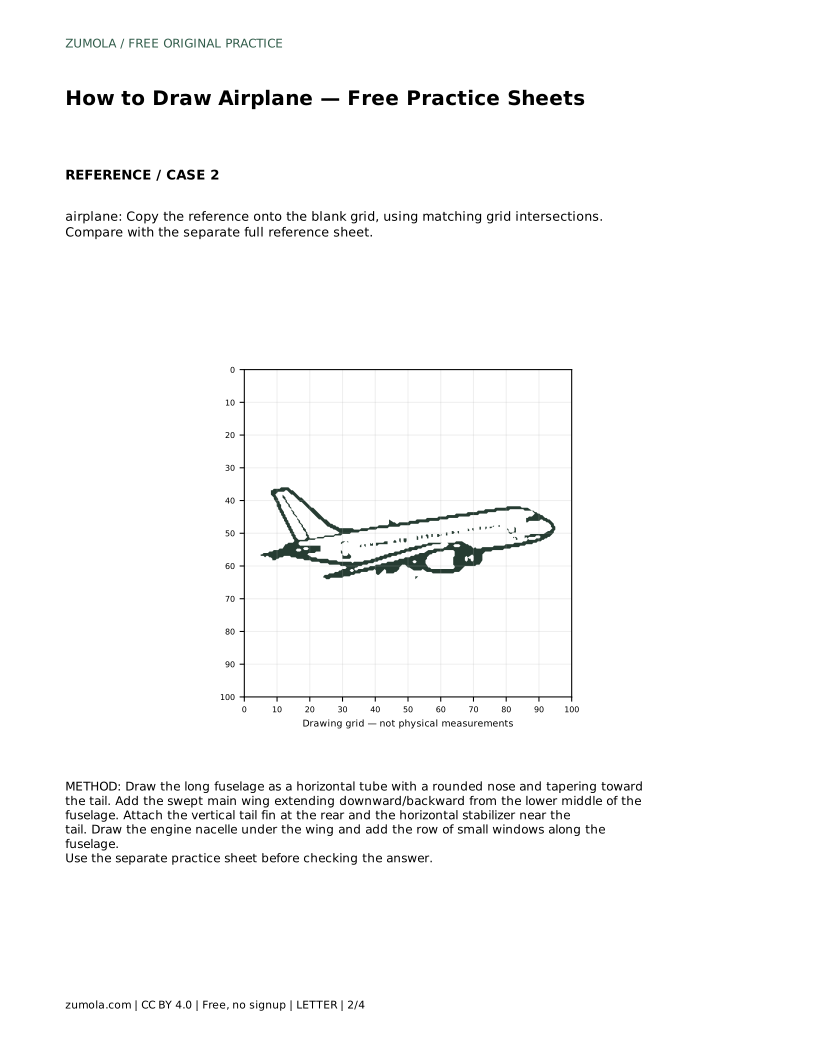
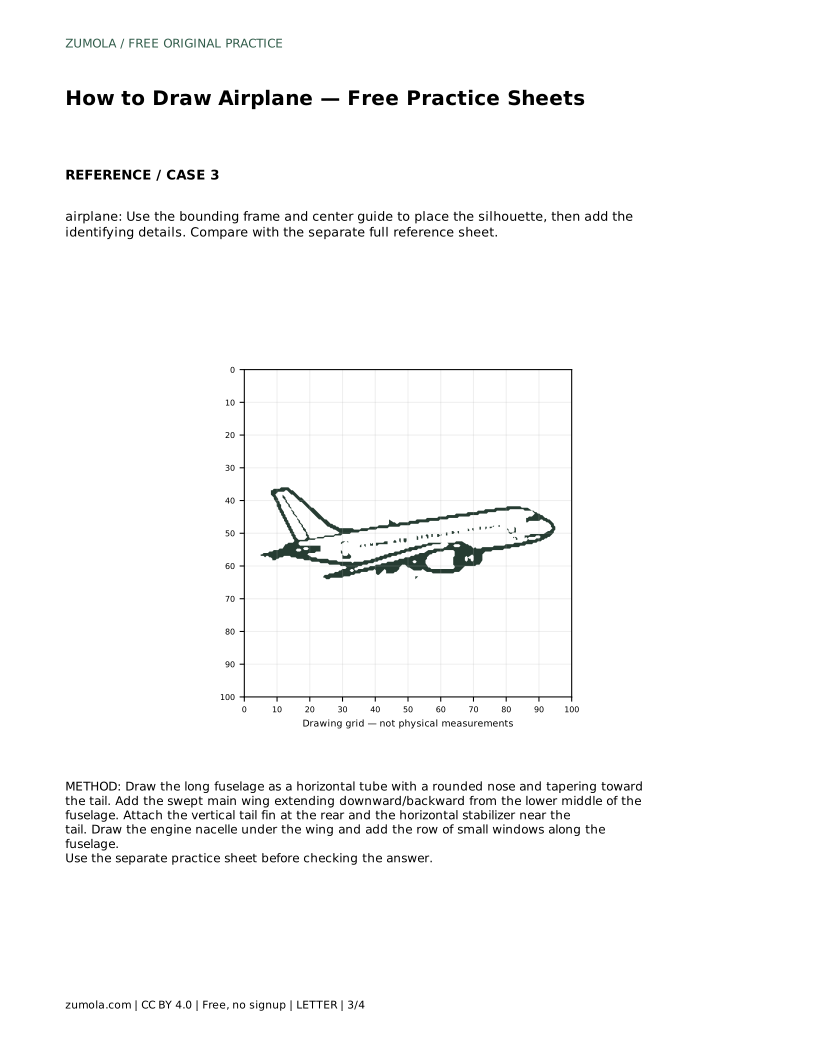
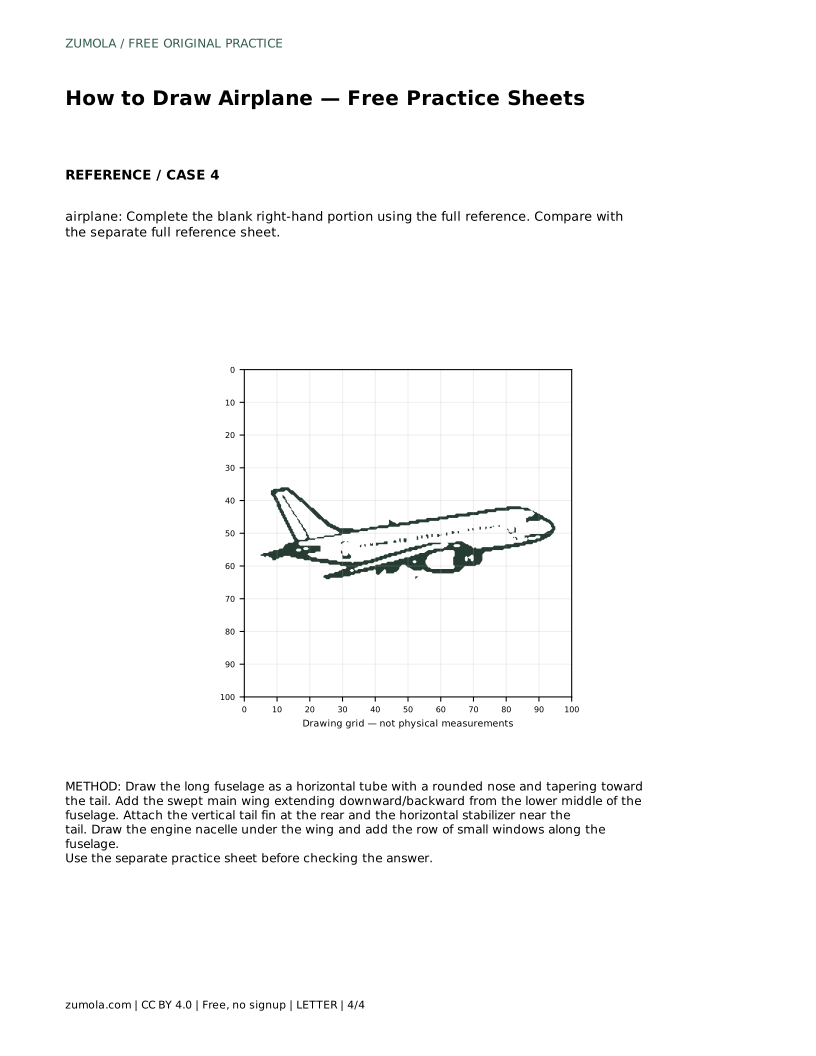
Learn to draw a flying airplane by tracing its outline, then working independently. Build the fuselage, swept wing, tail fin, stabilizer, engine nacelle, and windows.
Four original cases, with reference diagrams, practice sheets and worked answers. Everything is free; no signup required.
LETTER · Download PDF
A4 · Download PDF
LETTER · Download PDF
A4 · Download PDF
LETTER · Download PDF
A4 · Download PDF
Use A4 or US Letter to match your printer. Use the stated values and conditions to solve each exercise; diagrams are not physical measuring rulers.
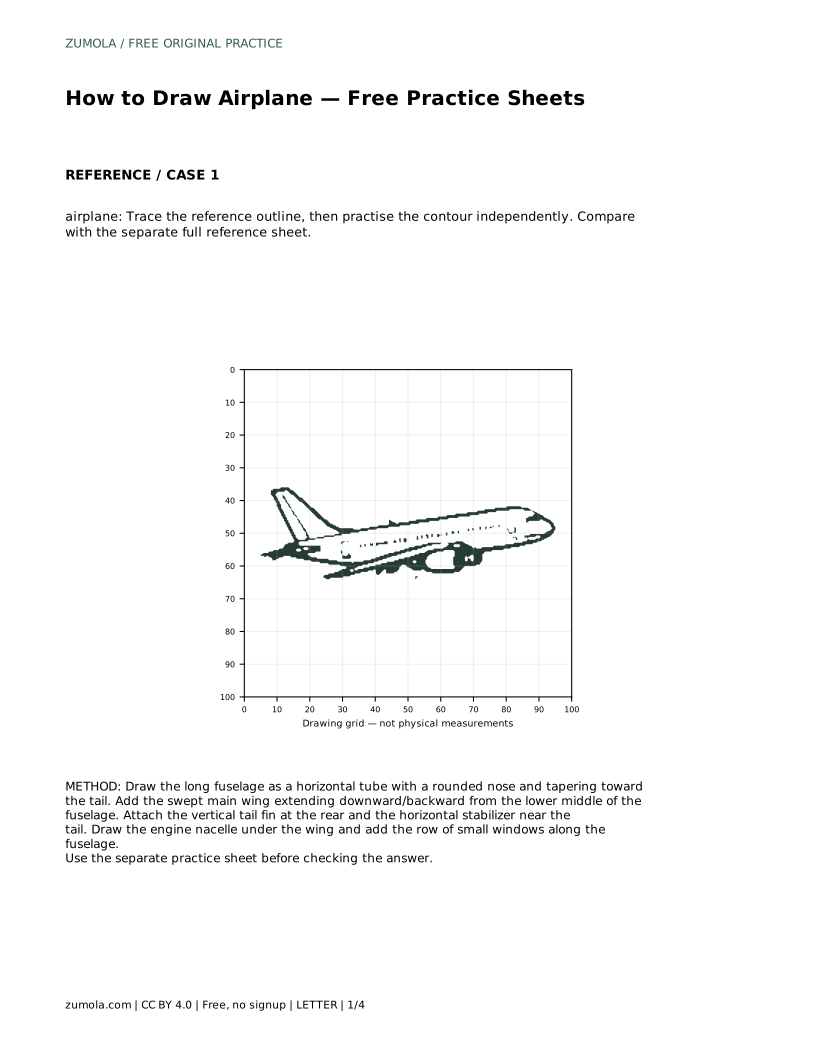
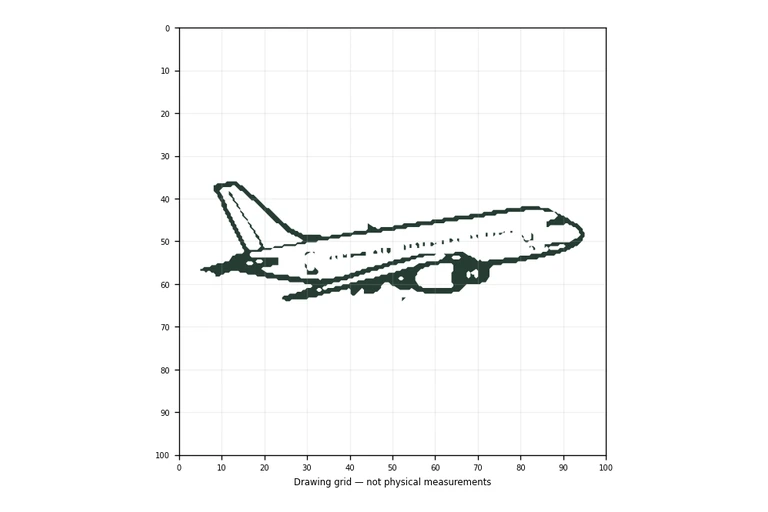
Drawing a flying airplane is mostly a matter of arranging a few clear shapes in the right order. Start with the long body, then attach the wing, tail parts, engine, and windows. The practice sheets let you trace a reference outline first, then try the same contour on your own before comparing with the full reference sheet. Focus on proportions and visible features rather than a pixel-perfect match.
Begin with the fuselage, the long central body. Treat it as a horizontal tube: rounded at the nose and gradually tapering toward the tail. Keep this shape long and slim, because a short, wide body will not read as an airplane. Lightly sketch the tube so you can adjust it before adding anything else.
Next, place the main wing. It extends from the lower middle of the fuselage and sweeps downward and backward. Sweep means the wing angles back rather than sitting straight across. Attach the vertical tail fin at the rear, then add the horizontal stabilizer near the tail. These rear parts are smaller than the main wing and help the silhouette look balanced.
Finish with the smaller identifying details: an engine nacelle under the wing and a row of small windows along the fuselage. The nacelle is the rounded housing that holds the engine. Keep windows evenly spaced and modest in size so they do not overpower the body.
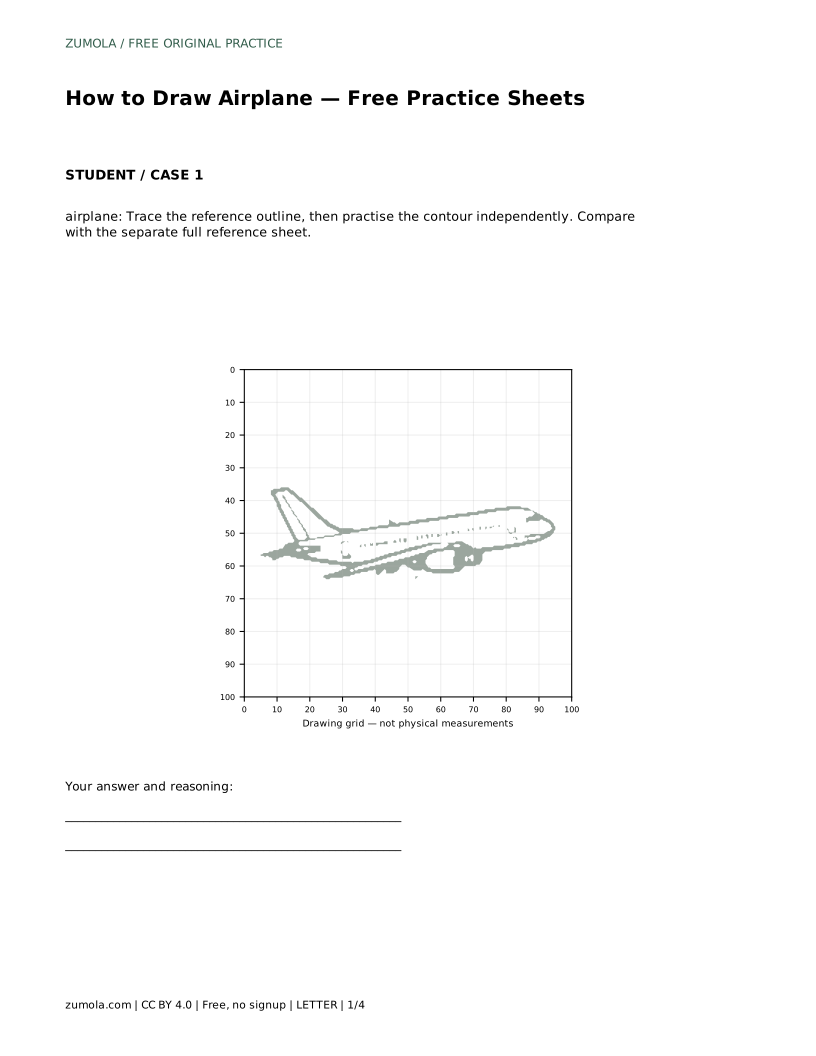
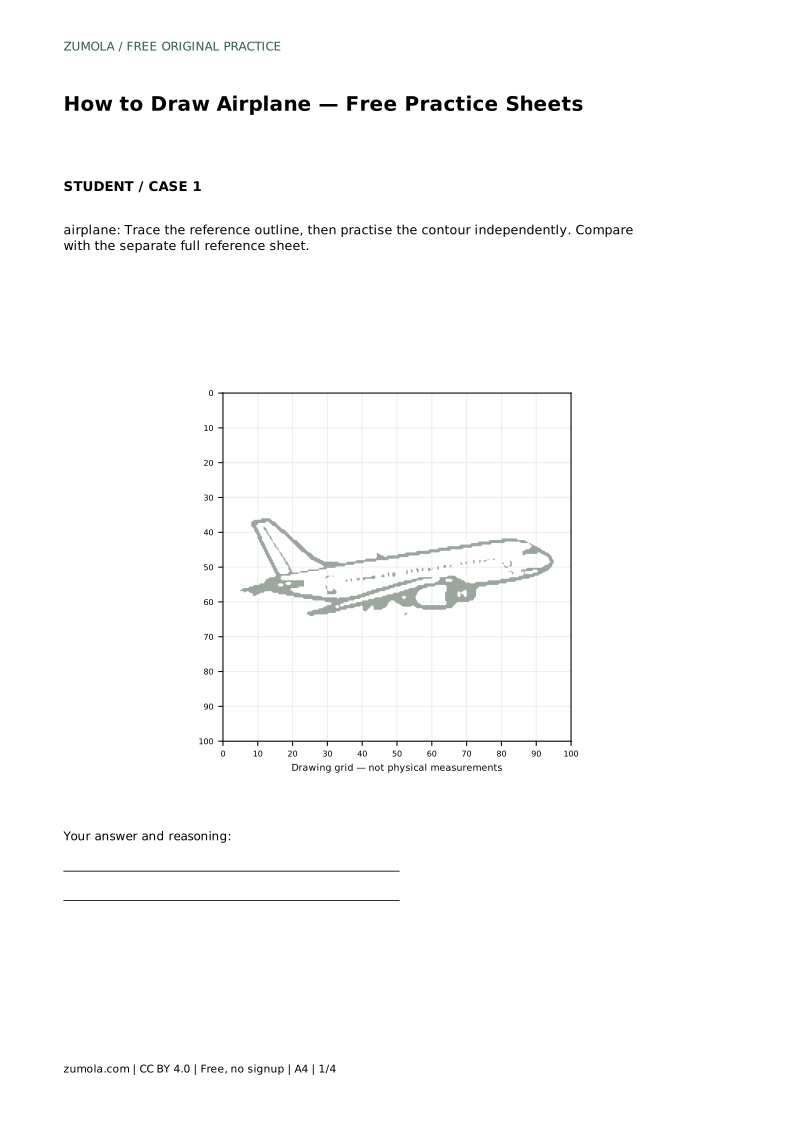
Tracing the reference outline helps your hand learn the contour: the curve of the nose, the taper toward the tail, and the angle of the swept wing. Trace slowly and follow the outline rather than filling it in. Pay attention to where the wing meets the body and how far the tail fin rises above the fuselage.
After tracing, cover the reference and draw the same contour on a blank area. Work through the same order: fuselage, wing, tail fin, stabilizer, nacelle, windows. When you finish, compare your drawing with the separate full reference sheet. Look for differences in proportion, such as a wing that is too short or a body that is too thick, and redraw those parts.
Remember that art has multiple valid outcomes. A correct airplane drawing shows the long tubular fuselage, rounded nose, tapered tail, swept main wing from the lower fuselage, vertical tail fin at the rear, and the smaller details. Slight differences in angle or size are acceptable if the visible features and proportions hold together.
Most beginner airplane drawings go wrong at the proportion stage, not the detail stage. Before drawing windows or the engine, step back and check that the fuselage is clearly longer than it is tall, that the main wing is larger than the tail parts, and that the nose is rounded rather than pointed.
The engine nacelle should sit under the wing, not float beside it. The horizontal stabilizer belongs near the tail, below or level with the fuselage line depending on your view. Keep these relationships consistent so the airplane reads as one connected object.
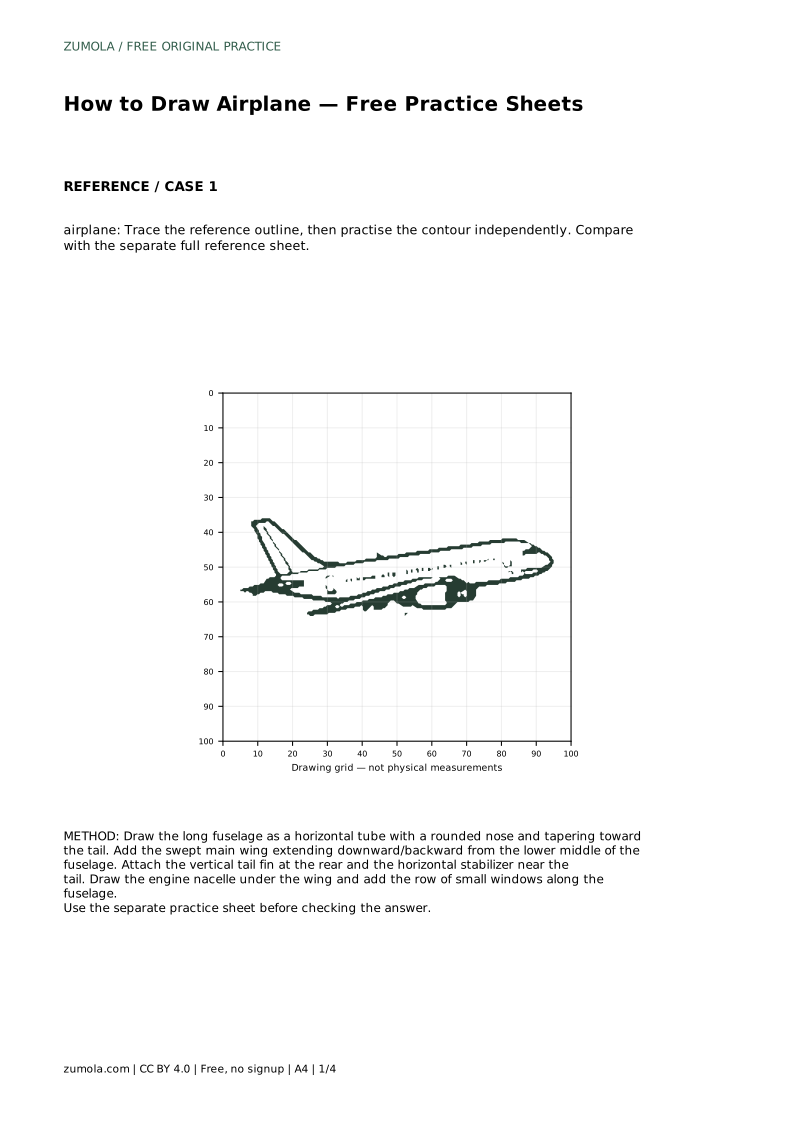
airplane: Trace the reference outline, then practise the contour independently. Compare with the separate full reference sheet.
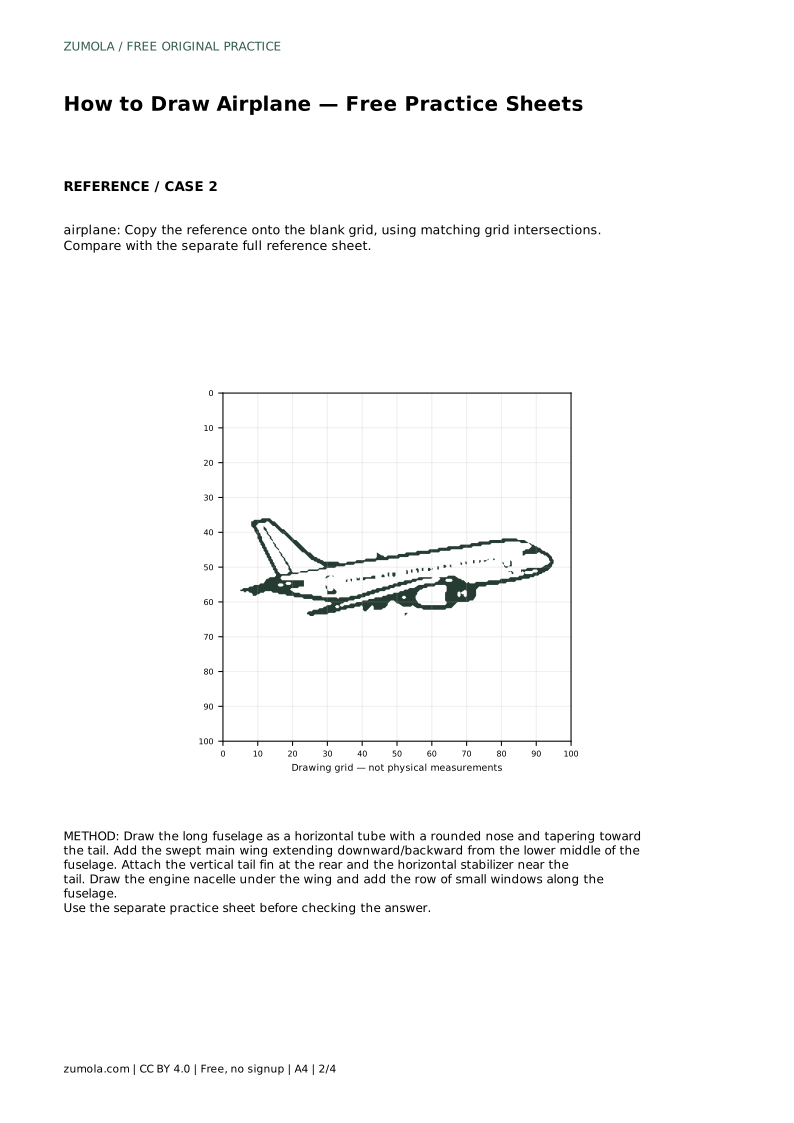
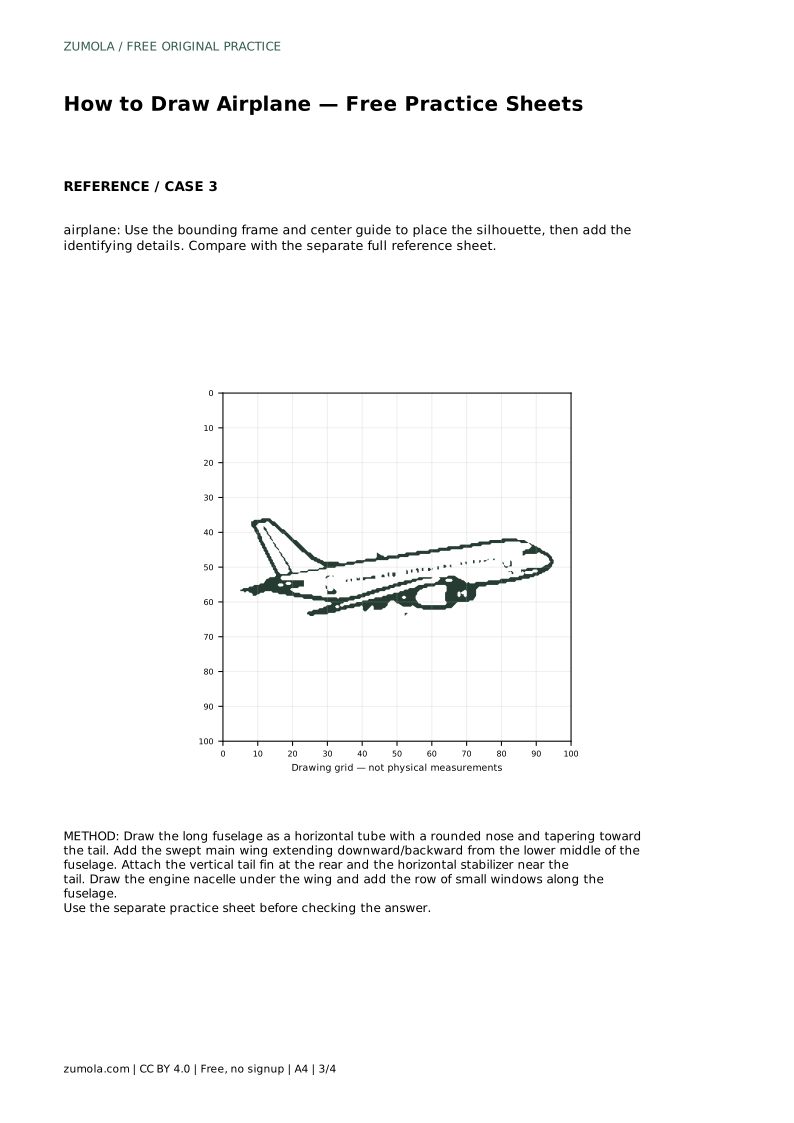
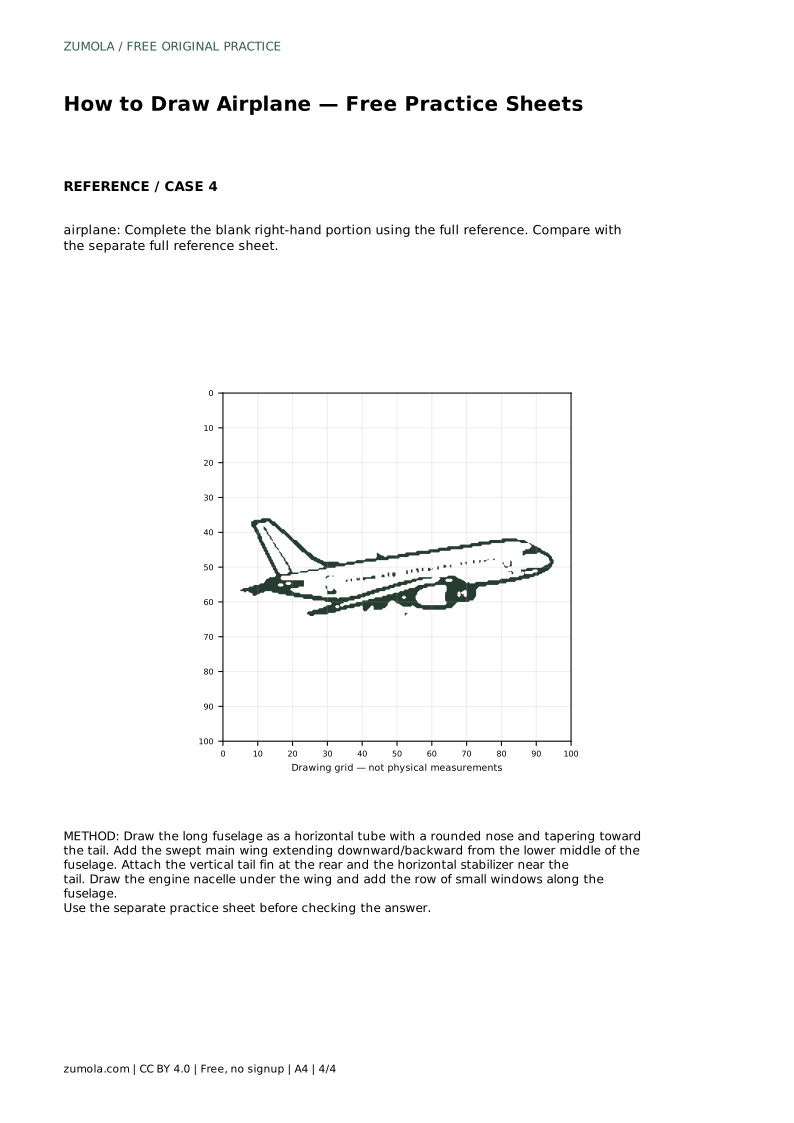
Example solution: preserve long tubular fuselage with rounded nose and tapered tail, swept main wing extending from lower fuselage, vertical tail fin at the rear. Other drawings can be correct; assess the visible features and proportions rather than pixel-perfect matching. Draw the long fuselage as a horizontal tube with a rounded nose and tapering toward the tail. Add the swept main wing extending downward/backward from the lower middle of the fuselage. Attach the vertical tail fin at the rear and the horizontal stabilizer near the tail. Draw the engine nacelle under the wing and add the row of small windows along the fuselage.
No. Art has multiple valid outcomes. Check that the long tubular fuselage, rounded nose, tapered tail, swept main wing, rear tail fin, stabilizer, nacelle, and windows are present and reasonably proportioned.
Draw the fuselage first, then the main wing, tail fin, horizontal stabilizer, engine nacelle, and finally the windows.
A fish shape usually means the body is too short and wide and the wing is missing or too small. Lengthen the fuselage, taper the tail, and add a clearly larger swept wing from the lower body.
All drawing practice · Free coordinate paper
Original resources · CC BY 4.0 · Free for personal and classroom use with attribution.