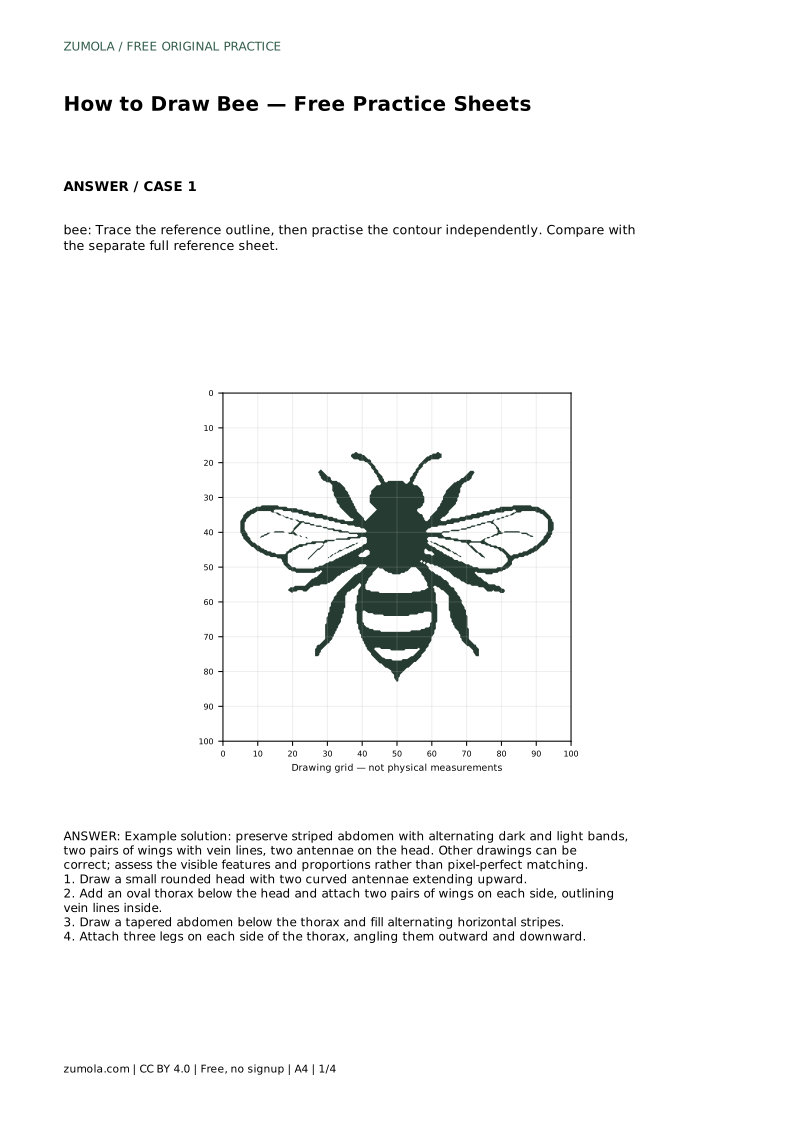
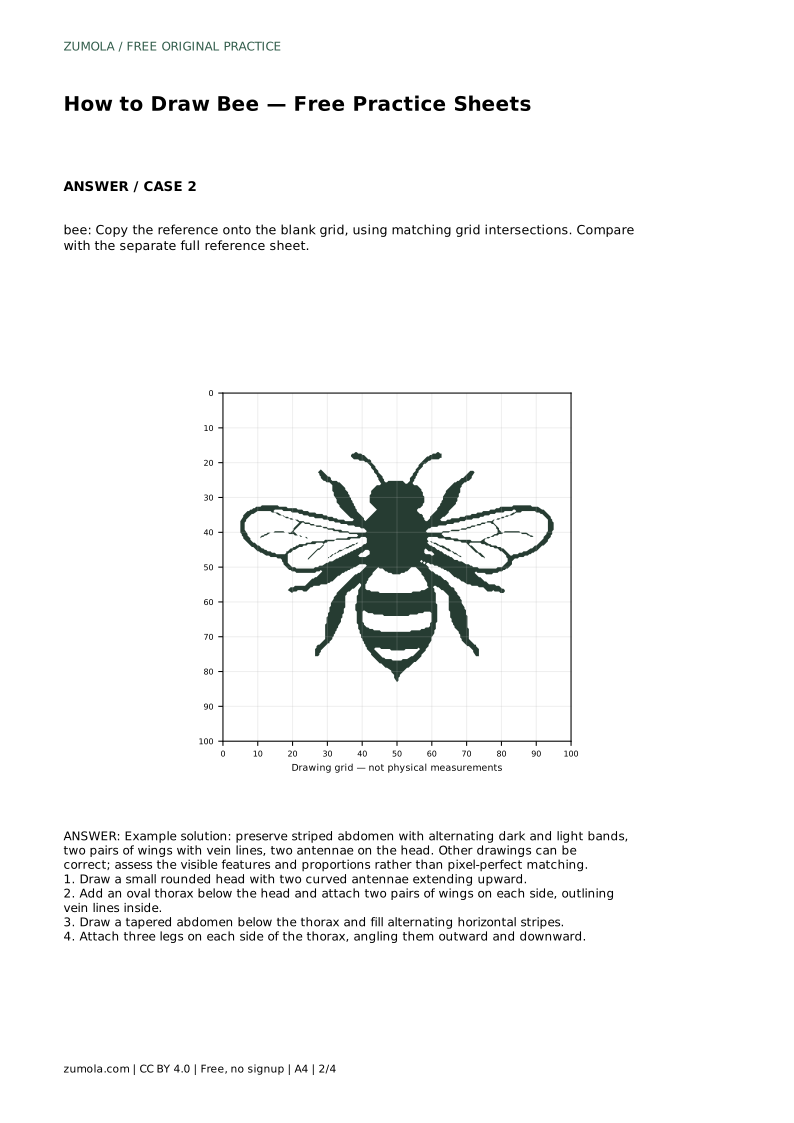
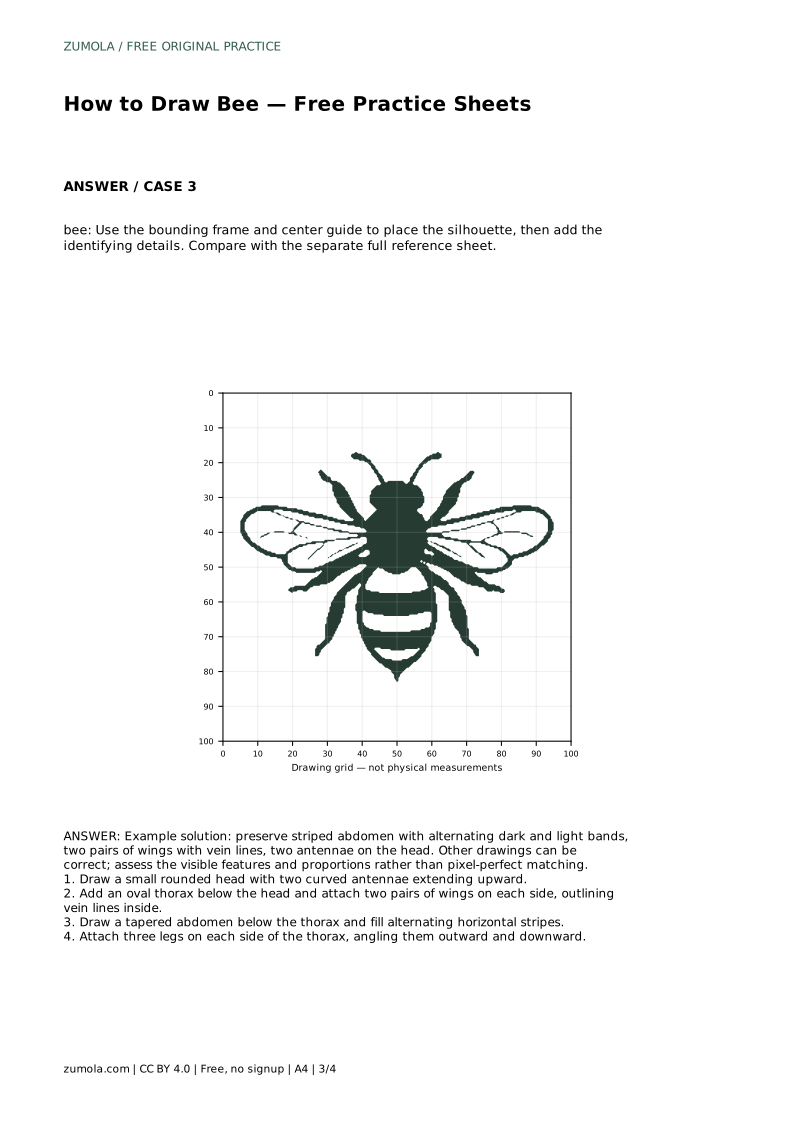
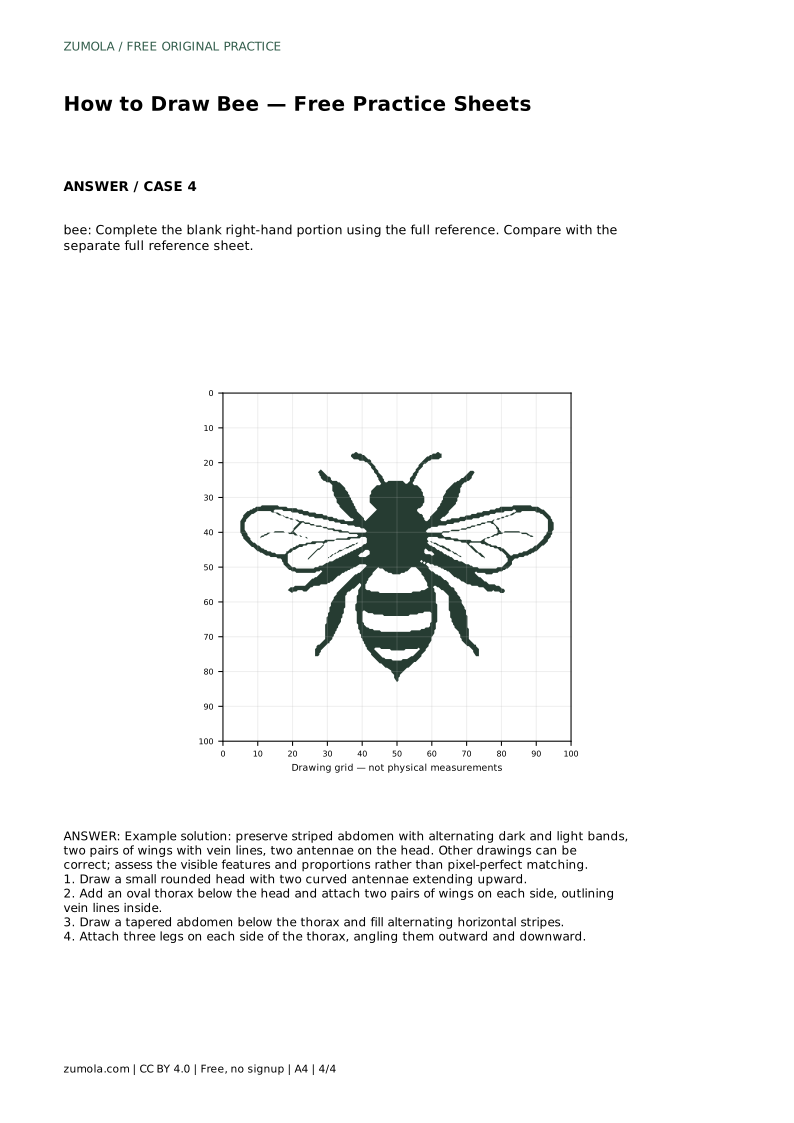
Reference diagrams
LETTER · Download PDF
A4 · Download PDF
Free original resources
Learn to draw a bee by tracing a reference outline, then working independently. Build the head, thorax, striped abdomen, wings, antennae, and legs in order.
Four original cases, with reference diagrams, practice sheets and worked answers. Everything is free; no signup required.
LETTER · Download PDF
A4 · Download PDF
LETTER · Download PDF
A4 · Download PDF
LETTER · Download PDF
A4 · Download PDF
Use A4 or US Letter to match your printer. Use the stated values and conditions to solve each exercise; diagrams are not physical measuring rulers.
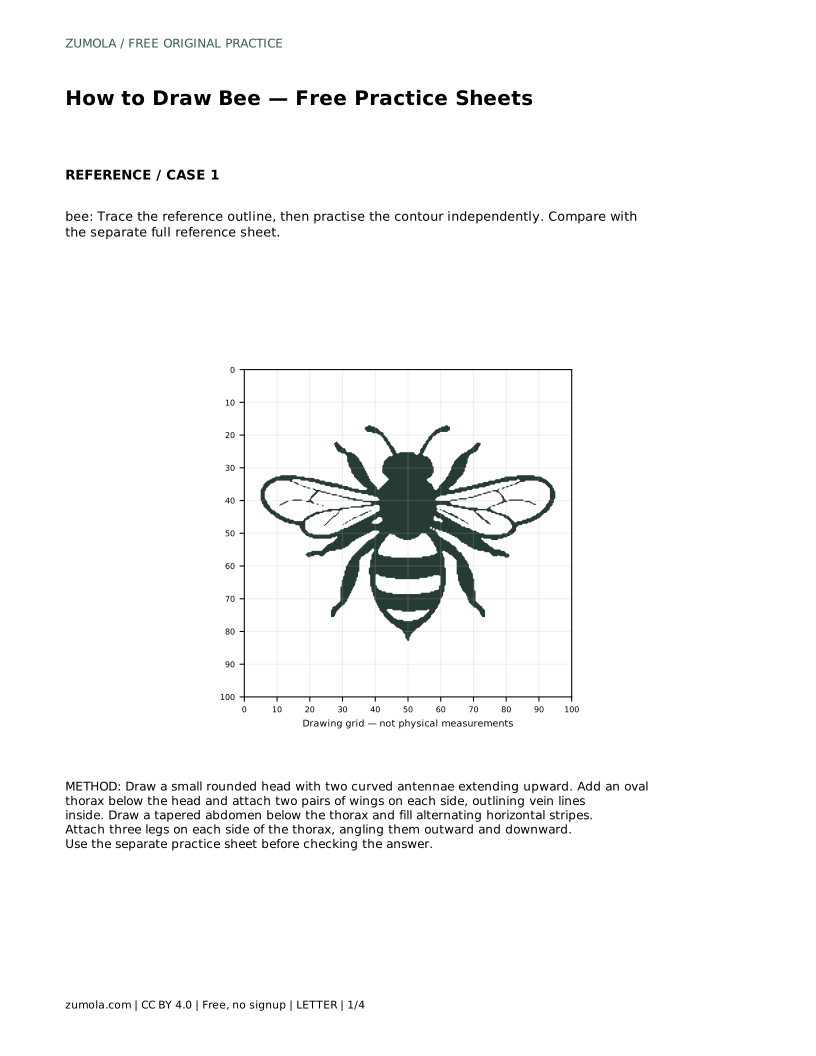
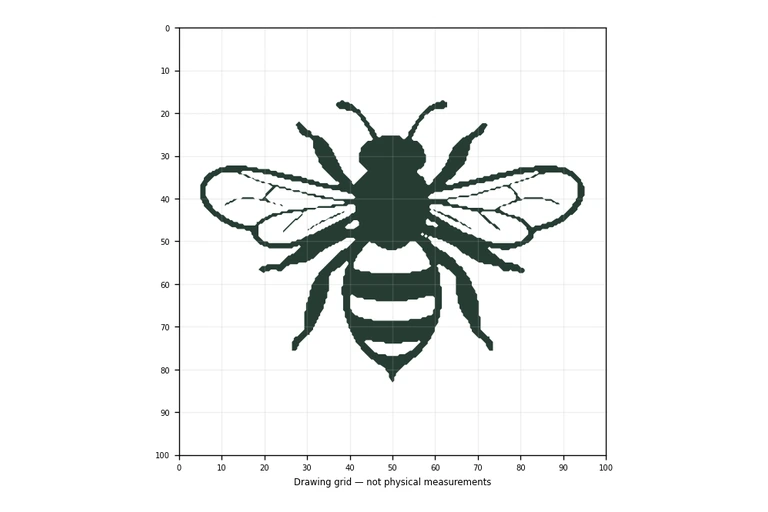
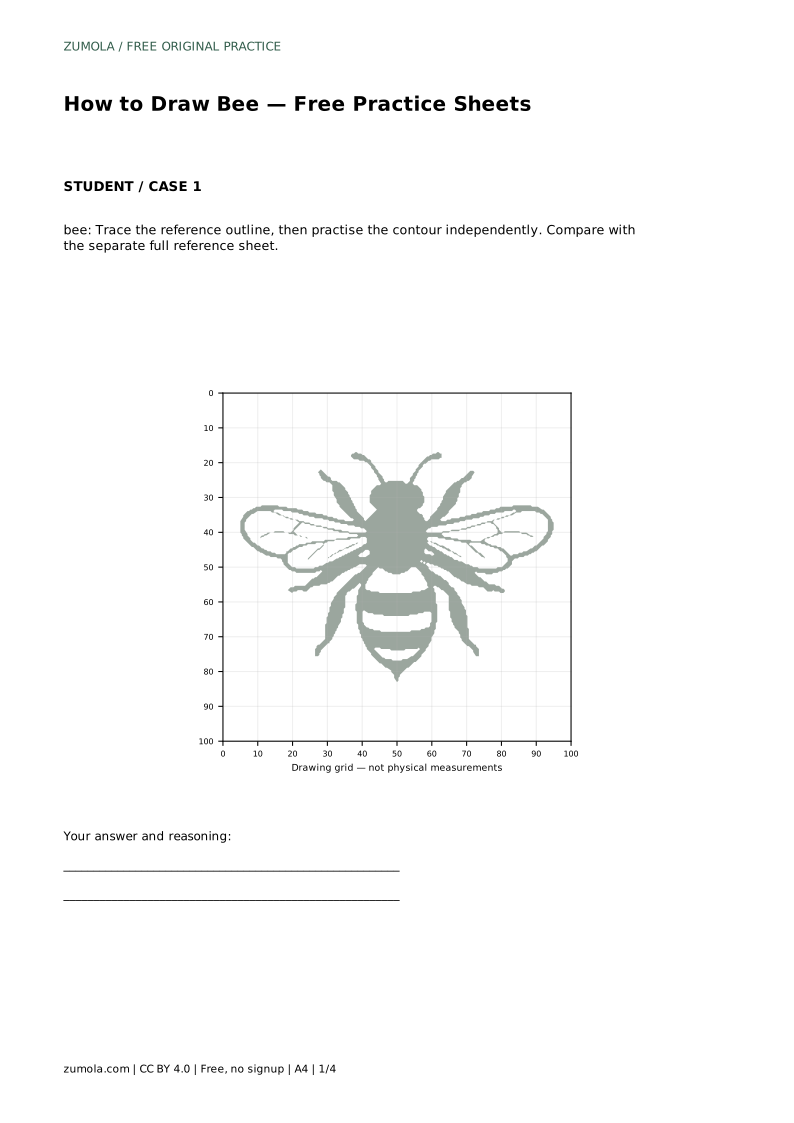
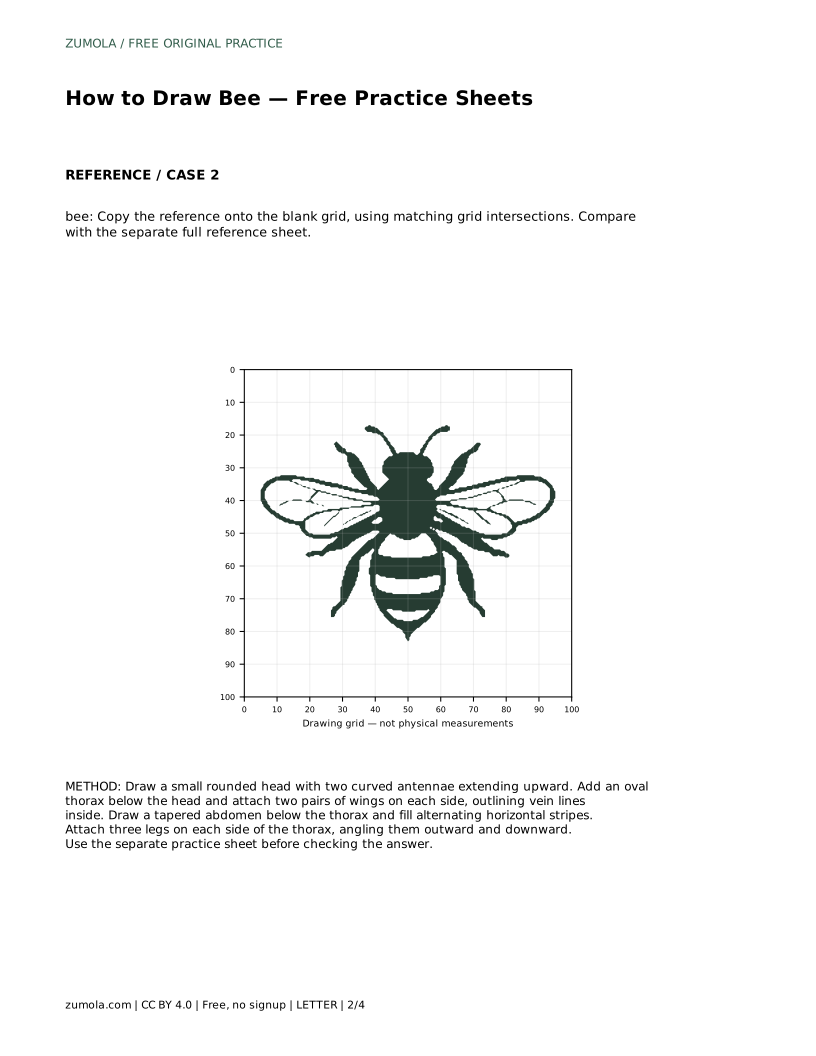
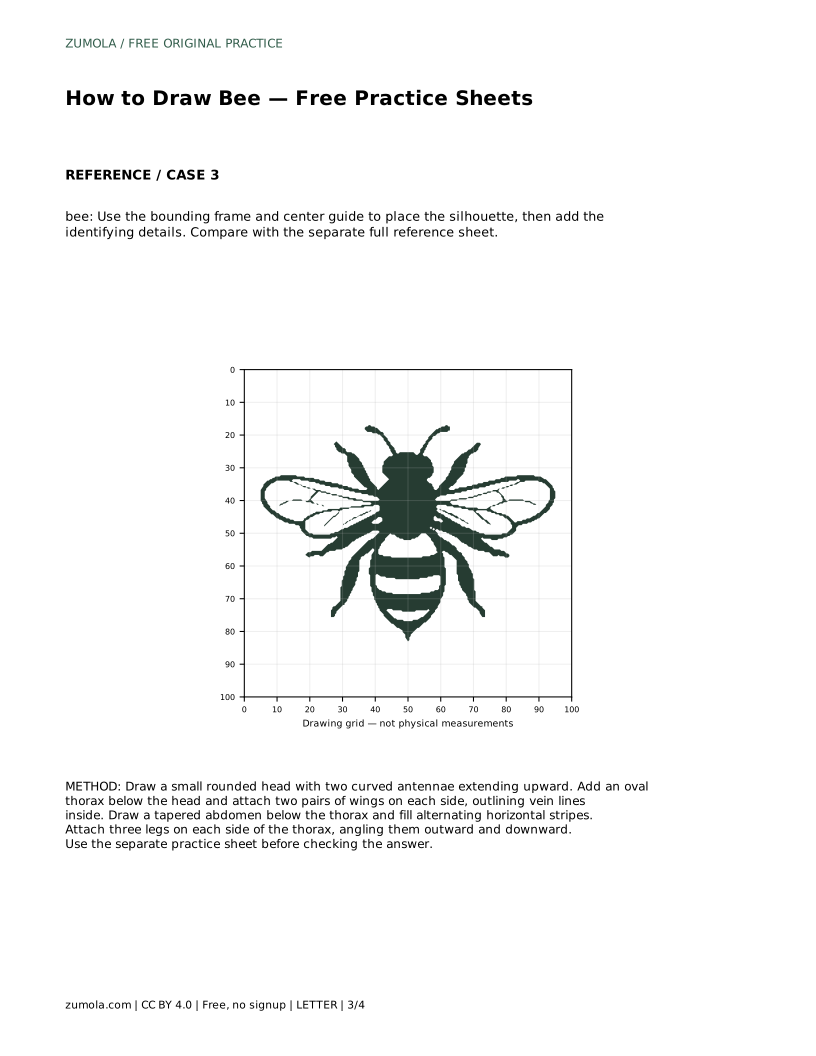
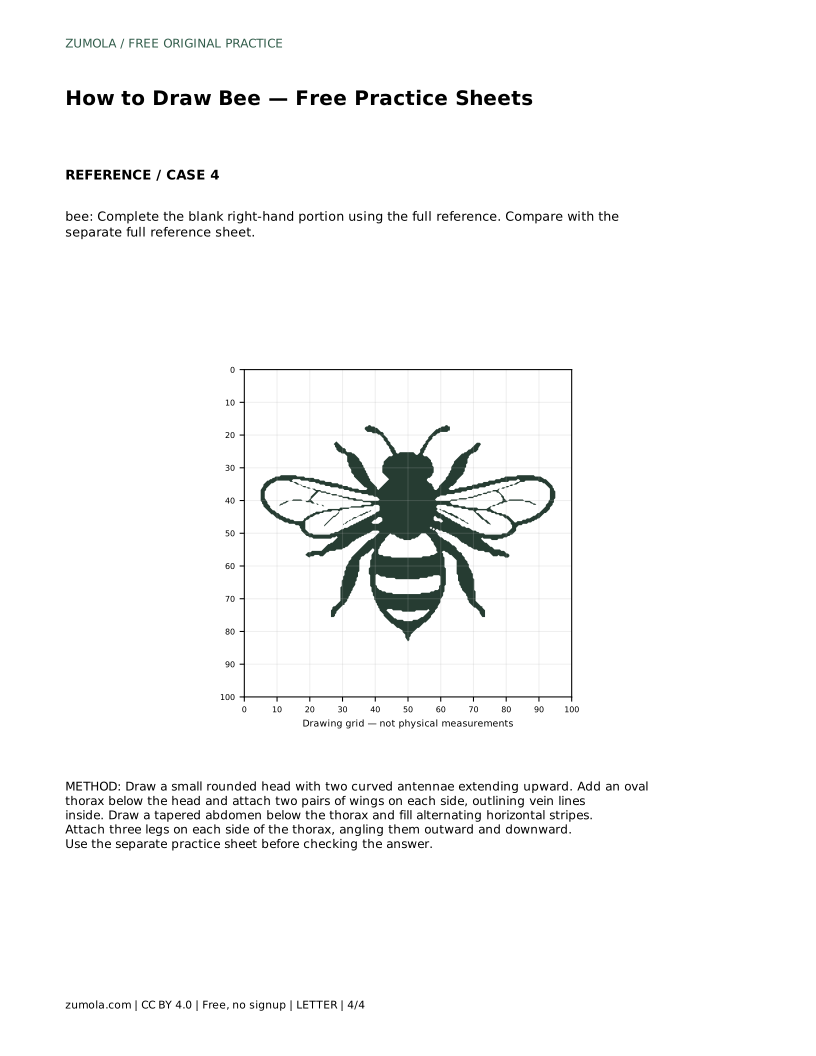
Drawing a bee is a manageable project when you break it into simple shapes and add the identifying details in a clear order. This page explains how to use the practice sheets: trace the reference outline first, then try the contour on your own and compare your drawing with the separate full reference sheet. The goal is not a pixel-perfect copy but a bee that clearly shows the right features and sensible proportions.
A bee has three visible body regions: a small rounded head, an oval thorax, and a tapered abdomen. Place the head at the top, the thorax directly below it, and the abdomen below the thorax, narrowing toward the rear. Keep the three parts connected rather than spaced apart, because the silhouette should read as one insect.
Before adding stripes or wings, check the overall proportions. The abdomen is usually the longest section, the thorax is compact, and the head is small. Lightly sketch these three shapes so you can adjust them before committing to darker lines.
Attach two pairs of wings on each side of the thorax, angling them outward and slightly back. Outline vein lines inside each wing so the wings read as thin and translucent rather than solid. Keep the wing shapes simple; a rounded oval with a few interior lines is enough.
Fill the abdomen with alternating horizontal stripes, switching between dark and light bands. Make the bands follow the curve of the abdomen so the stripes look wrapped around the body rather than flat. Then attach three legs on each side of the thorax, angling them outward and downward. Legs should be thin lines with a slight bend, not thick blocks.
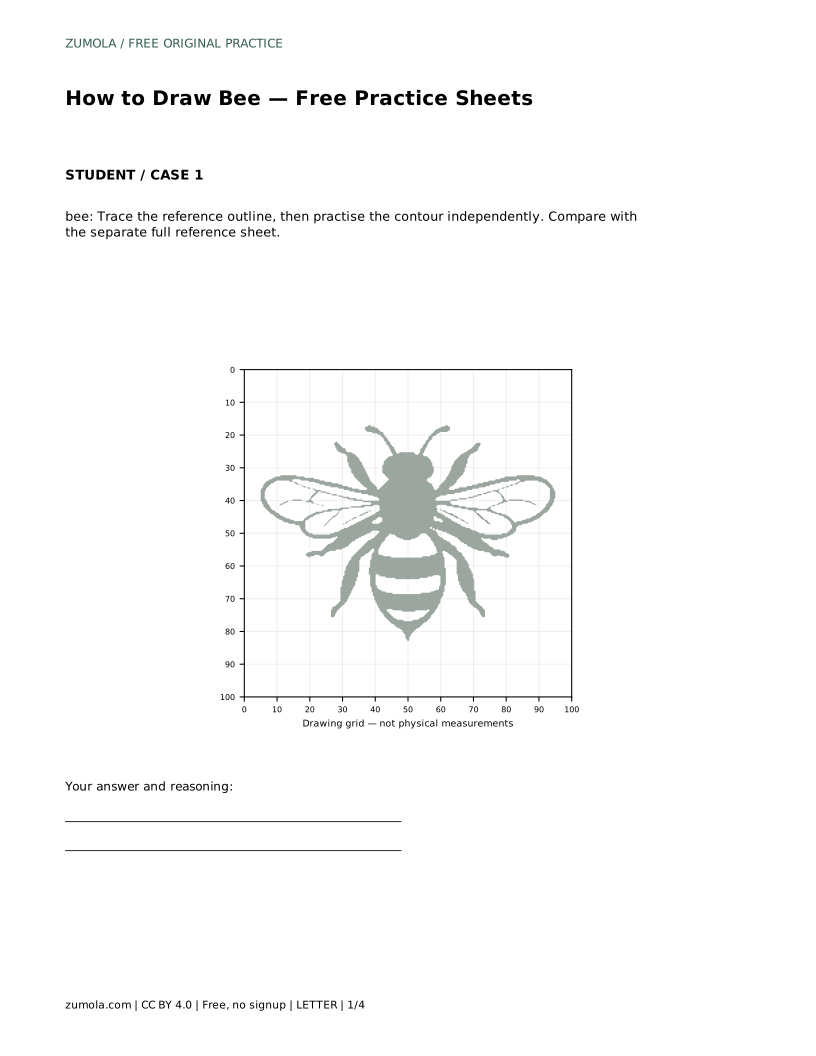
Use the trace sheet to follow the reference outline with a pencil. Focus on where each part begins and ends, and how the wings overlap the thorax. Tracing builds familiarity with the order of construction, not just the final look.
When you move to the independent contour, keep the same sequence: head, antennae, thorax, abdomen, wings, stripes, legs. Compare your finished drawing with the separate full reference sheet and note which features are present and which proportions drifted. Other drawings can be correct, so assess the visible features and proportions rather than pixel-perfect matching.
A successful bee drawing preserves the striped abdomen with alternating dark and light bands, two pairs of wings with vein lines, and two antennae on the head. These features make the drawing identifiable even if the outline differs from the reference.
Use the rubric below to review your work. It focuses on visible features and proportions, which is more useful than chasing an exact match to one reference image.
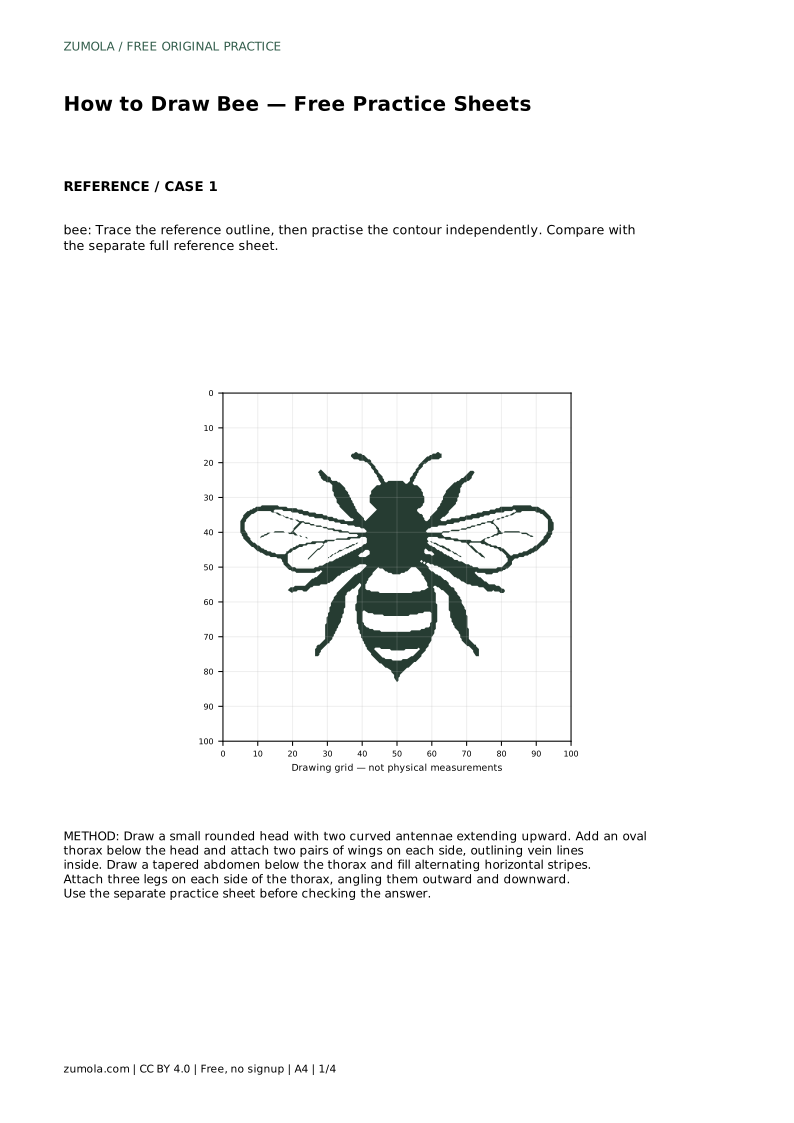
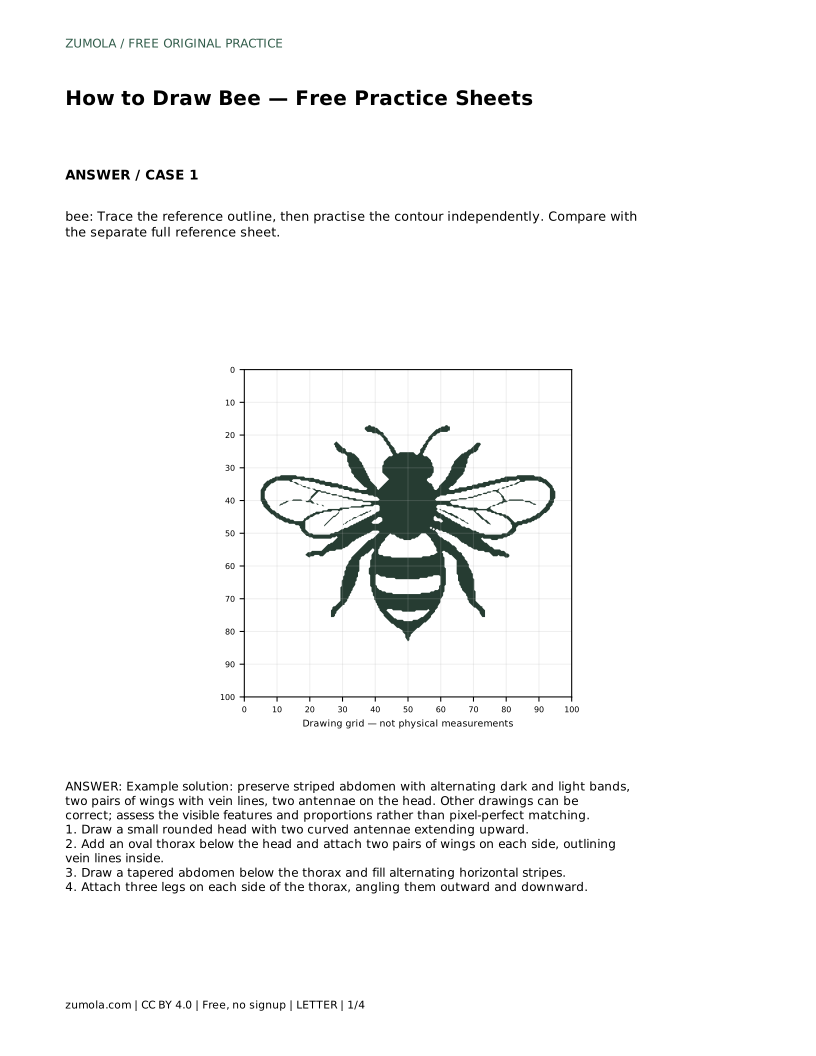
bee: Trace the reference outline, then practise the contour independently. Compare with the separate full reference sheet.
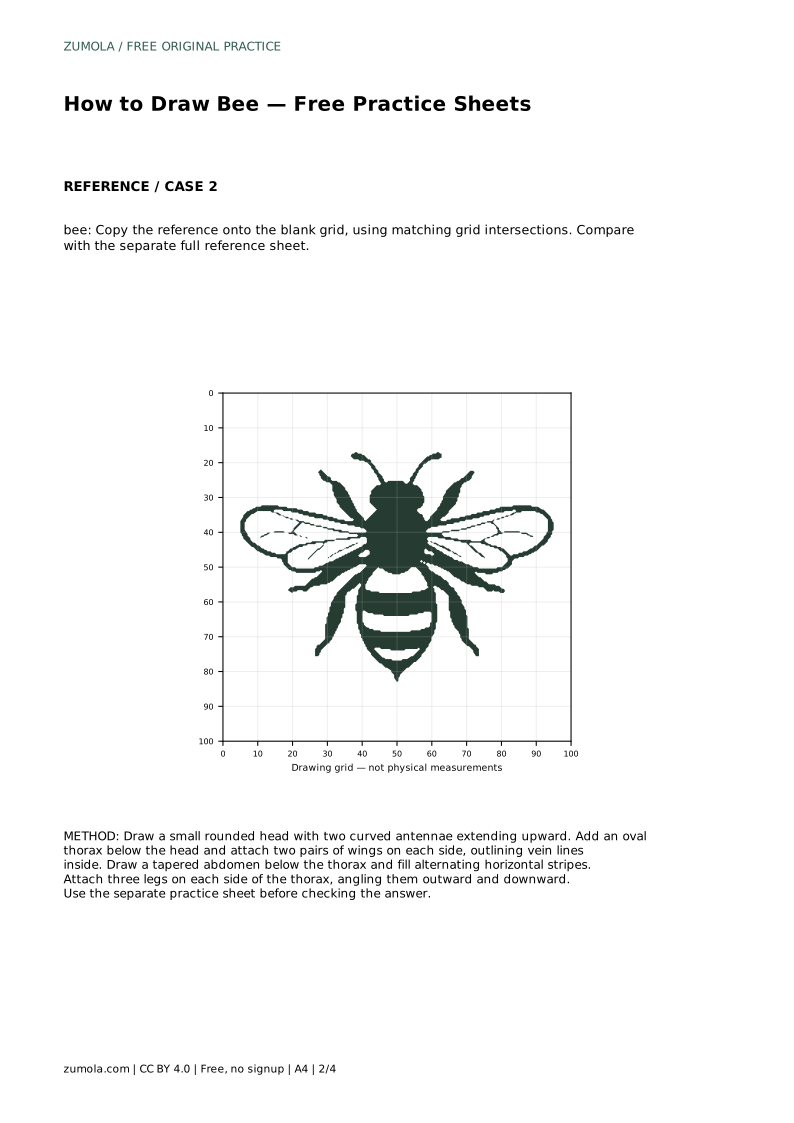
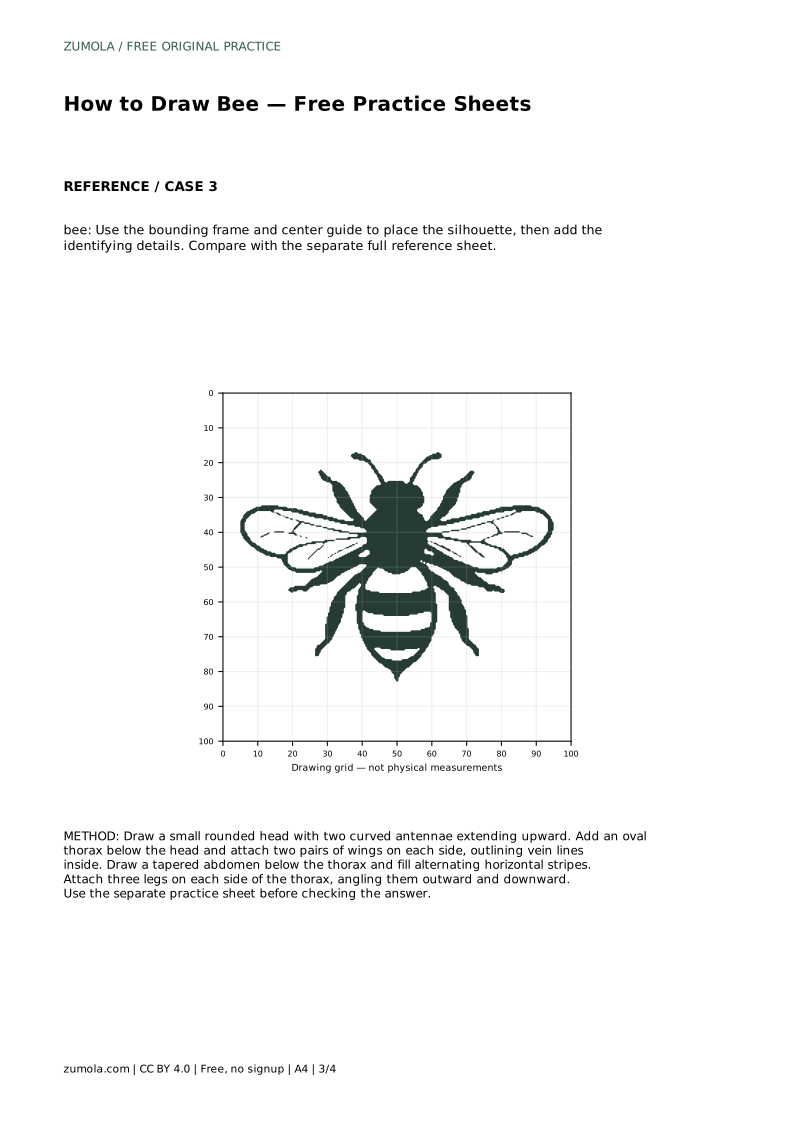
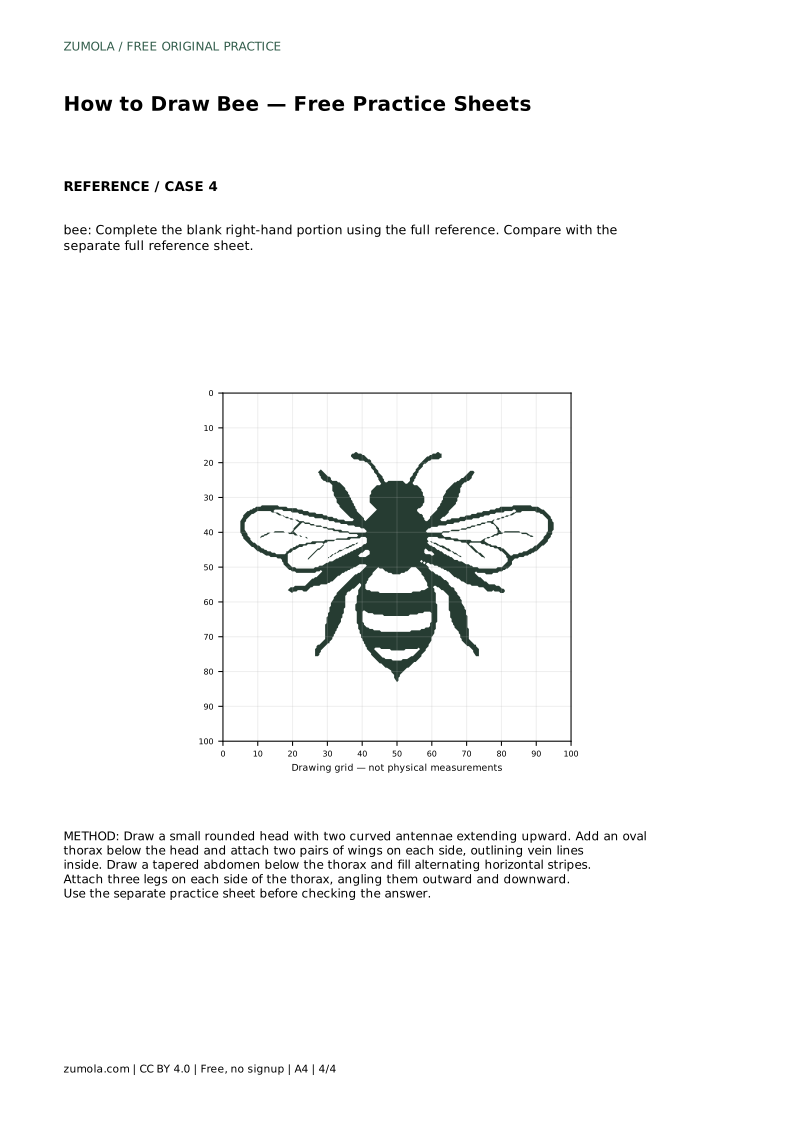
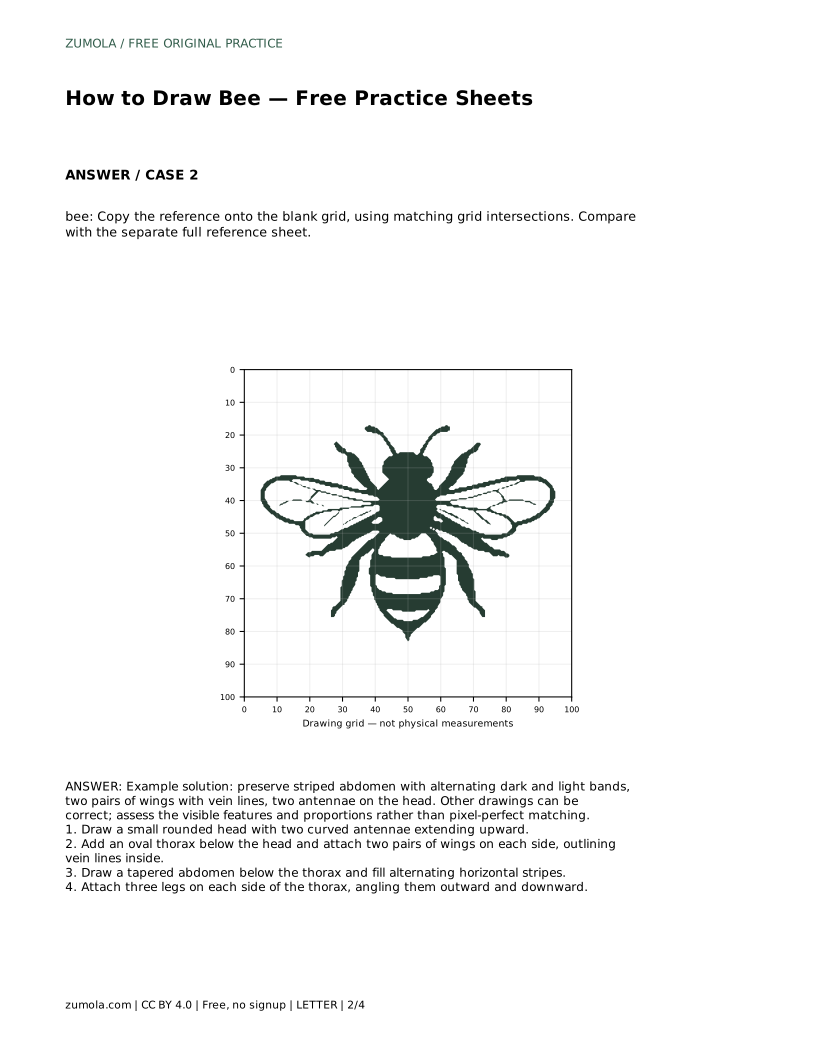
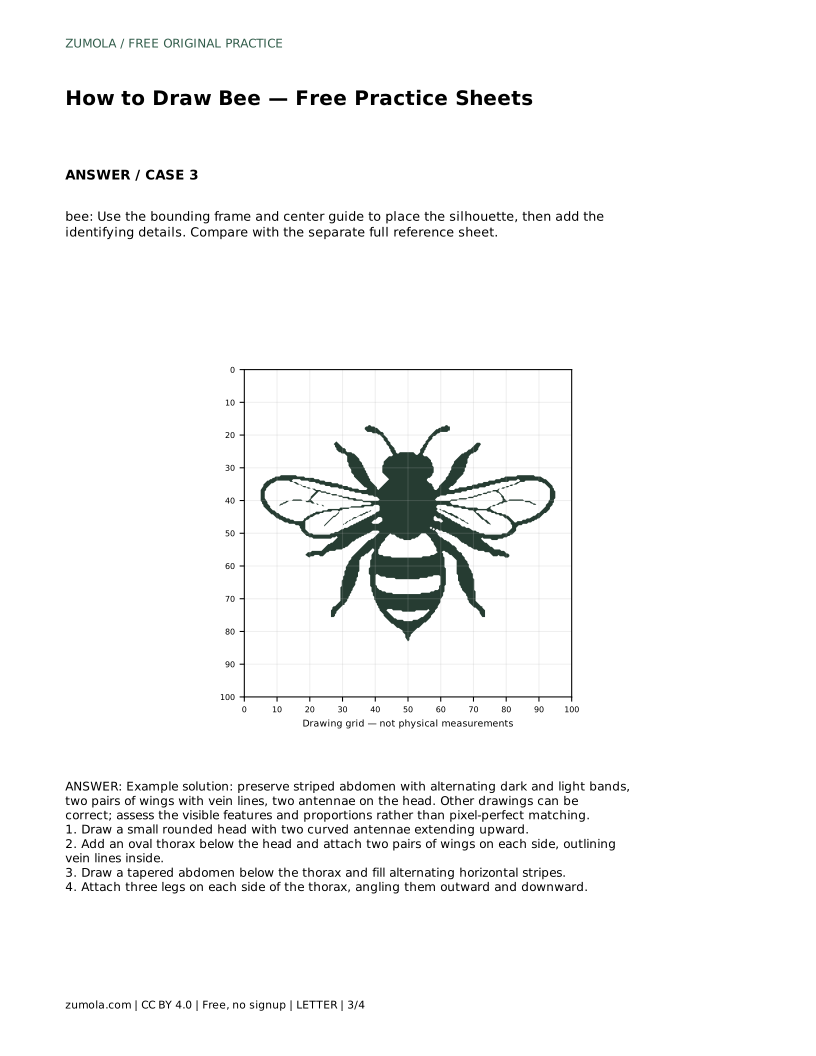
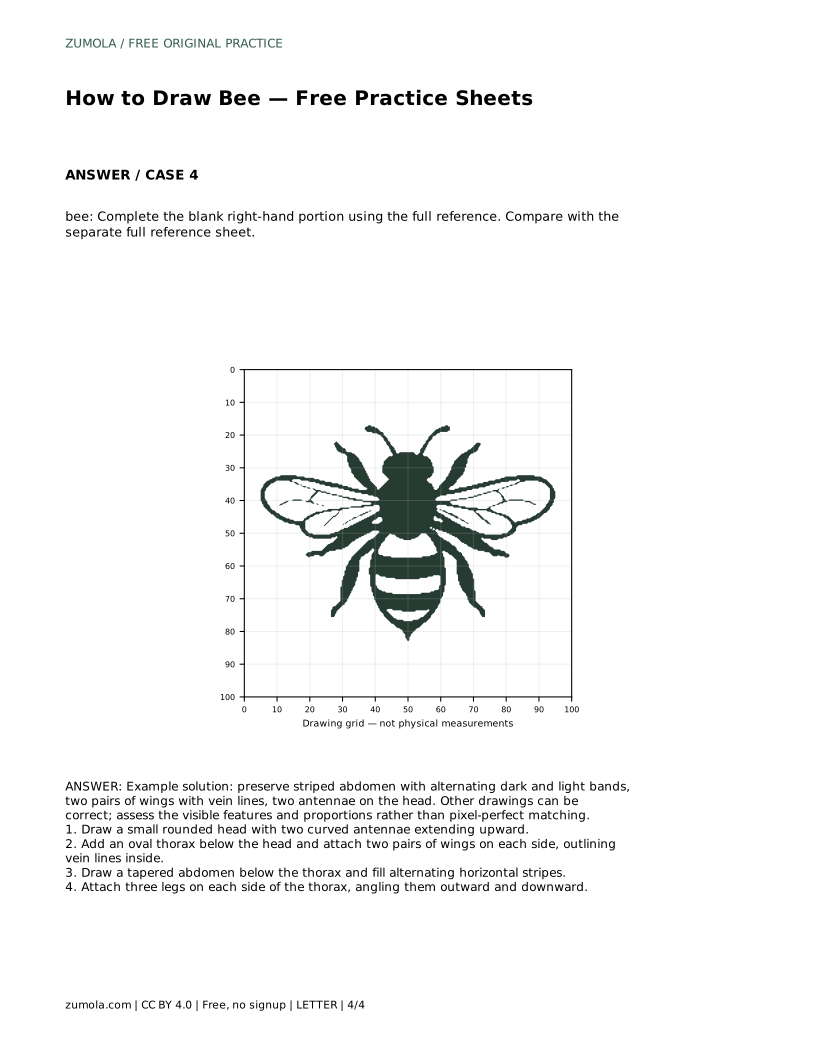
Example solution: preserve striped abdomen with alternating dark and light bands, two pairs of wings with vein lines, two antennae on the head. Other drawings can be correct; assess the visible features and proportions rather than pixel-perfect matching. Draw a small rounded head with two curved antennae extending upward. Add an oval thorax below the head and attach two pairs of wings on each side, outlining vein lines inside. Draw a tapered abdomen below the thorax and fill alternating horizontal stripes. Attach three legs on each side of the thorax, angling them outward and downward.
No. Other drawings can be correct. Assess the visible features and proportions rather than pixel-perfect matching.
Draw the head with antennae, then the thorax, then the tapered abdomen. Add wings with vein lines, fill the abdomen with alternating stripes, and finish with three legs on each side.
Show two pairs of wings and three legs on each side of the thorax, angling the legs outward and downward.
All drawing practice · Free coordinate paper
Original resources · CC BY 4.0 · Free for personal and classroom use with attribution.