Free original lessons
Draw Test Tubes with Rim Ellipses and Liquid Levels
Learn to sketch test tubes with correct rim ellipses, liquid levels, and rack placement using a simple convention and checkable steps.
Free lesson
Four exercises
Worked answers
Object Drawing Lessons
This lesson teaches a reliable method for drawing test tubes: a vertical cylinder with a rounded bottom, an elliptical rim, a liquid level line, and placement in a rack. You will use a defined convention for the rim ellipse and liquid surface, then check proportions with simple arithmetic. The focus is form and placement, not chemical labels or scene composition. All measurements are hypothetical examples; measure your own paper and tools. Practice tasks are self-contained and include reasoning and a check method.
Practice materials: Printable downloads are not available for this lesson yet. Use the instructions and four exercises below.
Reference illustration
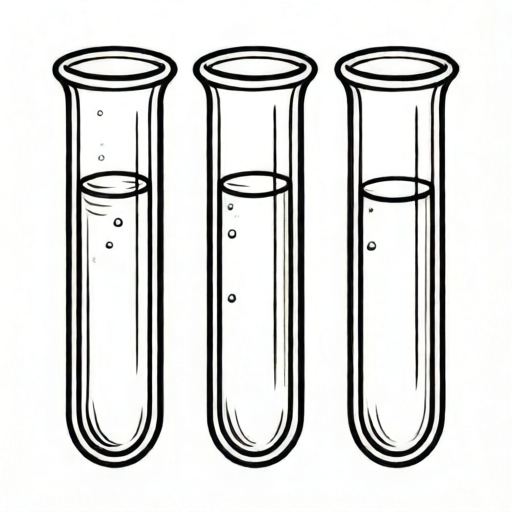
Use the stated measurements and conventions for each exercise.
Set the tube proportions and centerline
Begin with a light vertical centerline. Choose a tube height and width that fit your paper; for example, a hypothetical tube 12 cm tall and 2 cm wide. Mark the top rim line and the bottom curve. The tube body is a rectangle with a semicircular bottom: the bottom curve radius equals half the width, so a 2 cm wide tube has a 1 cm radius bottom curve.
Keep the sides parallel. The rim sits at the top; the liquid level is a horizontal line inside the tube. Use a pencil lightly so you can adjust. The centerline helps keep the rim ellipse and liquid level symmetric.
- Draw a vertical centerline about 12 cm long.
- Mark the top rim line and the bottom curve start.
- Draw two parallel side lines 2 cm apart, centered on the centerline.
- Add a semicircular bottom with radius 1 cm, meeting the sides smoothly.
Draw the rim ellipse with a defined convention
The rim is an ellipse seen at a slight angle. Convention: draw the rim ellipse with its major axis horizontal and its minor axis vertical. For a hypothetical tube width of 2 cm, make the major axis 2 cm and the minor axis 0.6 cm. This is a chosen convention, not a universal standard; letter styles and tube shapes vary. The ellipse should sit on the top rim line, with the front edge slightly lower than the back edge to suggest looking slightly down.
Draw the ellipse lightly, then darken the front half. The back half can remain lighter. Check symmetry: the left and right ends should align with the tube sides. If the ellipse looks too round, reduce the minor axis; if too flat, increase it slightly.
- Mark the major axis endpoints on the top rim line, 2 cm apart.
- Mark the minor axis endpoints 0.3 cm above and below the rim line center.
- Sketch the ellipse through these four points.
- Darken the front half and keep the back half light.
Place the liquid level and check with arithmetic
The liquid level is a horizontal line inside the tube, drawn as a slight ellipse to match the tube's curvature. Convention: the liquid surface ellipse uses the same major axis as the rim (2 cm) but a smaller minor axis, for example 0.3 cm. Place the liquid level at a chosen height, such as 7 cm from the bottom curve start. Measure from the bottom curve start to the liquid line along the centerline.
Check the liquid height with simple arithmetic: if the tube body is 12 cm tall and the liquid level is 7 cm from the bottom, the empty space above is 5 cm. The liquid surface ellipse should be centered on the centerline and its ends should touch the tube sides. Keep units consistent in centimeters.
- Measure 7 cm up from the bottom curve start along the centerline.
- Draw a light horizontal line at that height.
- Add a shallow ellipse with major axis 2 cm and minor axis 0.3 cm.
- Check that 12 cm total minus 7 cm liquid equals 5 cm empty space.
Place the tube in a rack
A simple rack is a horizontal bar with holes or slots. Draw the rack bar as a rectangle, for example 10 cm wide and 1 cm tall, placed below the tube's rim. The tube passes through a hole; show the hole as an ellipse on the bar. The tube's sides should align with the hole edges. The rack bar can be drawn at a slight angle to suggest perspective, but keep the tube vertical.
Check placement: the tube should not float above the rack. The hole ellipse should be centered on the tube centerline. If the rack bar is 1 cm tall, the tube's visible part below the bar should be consistent with the liquid level. Use light construction lines and erase them after checking.
- Draw a rack bar rectangle 10 cm by 1 cm below the rim.
- Mark a hole ellipse centered on the tube centerline.
- Align the tube sides with the hole edges.
- Check that the tube passes through the hole and sits at a believable height.
Worked example
Draw a test tube 10 cm tall and 2 cm wide with a liquid level 6 cm from the bottom curve start, placed in a rack bar 8 cm wide and 1 cm tall. Use the convention: rim ellipse major axis 2 cm, minor axis 0.6 cm; liquid surface ellipse major axis 2 cm, minor axis 0.3 cm.
Worked answer
Draw a centerline 10 cm long. Mark the top rim and bottom curve start. Draw parallel sides 2 cm apart and a semicircular bottom with radius 1 cm. Draw the rim ellipse with major axis 2 cm and minor axis 0.6 cm, darkening the front half. Measure 6 cm up from the bottom curve start and draw the liquid surface ellipse with major axis 2 cm and minor axis 0.3 cm. Check: 10 cm total minus 6 cm liquid equals 4 cm empty space. Draw the rack bar 8 cm by 1 cm below the rim, with a hole ellipse centered on the centerline and tube sides aligned to the hole edges.
Four practice exercises
Exercise 1
Draw a test tube 8 cm tall and 2 cm wide with a liquid level 5 cm from the bottom curve start. Use rim ellipse major axis 2 cm, minor axis 0.6 cm; liquid surface ellipse major axis 2 cm, minor axis 0.3 cm. No rack.
Show answer and check
A vertical tube with parallel sides 2 cm apart, semicircular bottom radius 1 cm, rim ellipse as specified, and liquid surface ellipse at 5 cm from the bottom curve start. Empty space above liquid is 3 cm.
Why: The tube height is 8 cm; liquid height is 5 cm; 8 minus 5 equals 3 cm empty space. The ellipses follow the convention and are centered on the centerline.
Check: Measure the liquid line from the bottom curve start; confirm 5 cm. Subtract from 8 cm to get 3 cm. Check that the rim ellipse minor axis is 0.6 cm and the liquid ellipse minor axis is 0.3 cm.
Exercise 2
Draw a test tube 12 cm tall and 3 cm wide with a liquid level 7 cm from the bottom curve start. Scale the rim ellipse to major axis 3 cm and minor axis 0.9 cm; liquid surface ellipse major axis 3 cm and minor axis 0.45 cm. Place it in a rack bar 10 cm wide and 1 cm tall.
Show answer and check
A tube with sides 3 cm apart, bottom radius 1.5 cm, rim ellipse 3 cm by 0.9 cm, liquid surface ellipse 3 cm by 0.45 cm at 7 cm from the bottom curve start, and a rack bar 10 cm by 1 cm with a centered hole ellipse. Empty space above liquid is 5 cm.
Why: The scaled ellipses keep the same proportion as the 2 cm example. The height check is 12 minus 7 equals 5 cm. The rack hole is centered on the tube centerline.
Check: Confirm the tube width is 3 cm and the bottom radius is 1.5 cm. Measure liquid height 7 cm and subtract from 12 cm to get 5 cm. Check that the hole ellipse is centered and the tube sides align with the hole edges.
Exercise 3
A test tube is 10 cm tall and 2 cm wide. The liquid level is 4 cm from the bottom curve start. Draw the tube and liquid level using the convention. Then state the empty space above the liquid.
Show answer and check
A tube with rim ellipse 2 cm by 0.6 cm, liquid surface ellipse 2 cm by 0.3 cm at 4 cm from the bottom curve start. Empty space is 6 cm.
Why: Total height 10 cm minus liquid height 4 cm equals 6 cm empty space. The liquid surface ellipse is shallower than the rim ellipse and centered on the centerline.
Check: Measure 4 cm up from the bottom curve start. Subtract from 10 cm to get 6 cm. Verify the liquid ellipse ends touch the tube sides.
Exercise 4
Draw two test tubes side by side in a rack bar 12 cm wide and 1 cm tall. Each tube is 9 cm tall and 2 cm wide, with liquid levels 6 cm from the bottom curve start. Use the convention for rim and liquid ellipses. Space the tubes 4 cm apart center to center.
Show answer and check
Two vertical tubes with parallel sides 2 cm apart, bottom radius 1 cm, rim ellipses 2 cm by 0.6 cm, and liquid surface ellipses 2 cm by 0.3 cm at 6 cm from the bottom curve start. The rack bar is 12 cm by 1 cm with two centered hole ellipses spaced 4 cm apart. Empty space above each liquid is 3 cm.
Why: Each tube height 9 cm minus liquid height 6 cm equals 3 cm empty space. The center-to-center spacing is 4 cm, so the tubes do not overlap. The rack holes are centered on each tube centerline.
Check: Measure each liquid height as 6 cm and subtract from 9 cm to get 3 cm. Check that the distance between tube centerlines is 4 cm and that each hole ellipse is centered on its tube.
Common mistakes
- Drawing the rim as a perfect circle instead of an ellipse. Use the convention: major axis horizontal, minor axis vertical. For a 2 cm wide tube, try a 0.6 cm minor axis and adjust slightly.
- Making the liquid level a straight line that does not match the tube curvature. Draw the liquid surface as a shallow ellipse with the same major axis as the rim but a smaller minor axis, such as 0.3 cm.
- Letting the tube float above the rack hole. Center the hole ellipse on the tube centerline and align the tube sides with the hole edges.
- Using inconsistent units when checking heights. Measure all heights in centimeters and subtract liquid height from total height to find empty space.
Self-check rubric
- Tube sides are parallel and the bottom curve meets them smoothly.
- Rim ellipse follows the convention: horizontal major axis, vertical minor axis, front half darker.
- Liquid level is a shallow ellipse centered on the centerline and touches the tube sides.
- Height check uses consistent units and simple subtraction.
- Rack hole ellipse is centered on the tube centerline and the tube passes through it.
- Valid alternatives are accepted if the convention is followed and proportions are consistent.
Questions and answers
Do I have to use the exact ellipse sizes given?
No. The sizes are hypothetical examples. The convention is what matters: horizontal major axis, vertical minor axis, and a liquid surface ellipse shallower than the rim ellipse. Adjust to your tube width.
How do I know the liquid level is correct?
Measure from the bottom curve start to the liquid line. Check that total tube height minus liquid height equals the empty space above. Keep units consistent.
Can the rack be drawn at an angle?
Yes, a slight angle can suggest perspective, but keep the tube vertical and the hole ellipse centered on the tube centerline.
What if my tube is wider or narrower?
Scale the ellipse axes with the tube width. For example, if the width is 3 cm, use a 3 cm major axis and a proportionally larger minor axis, such as 0.9 cm, as a starting point.