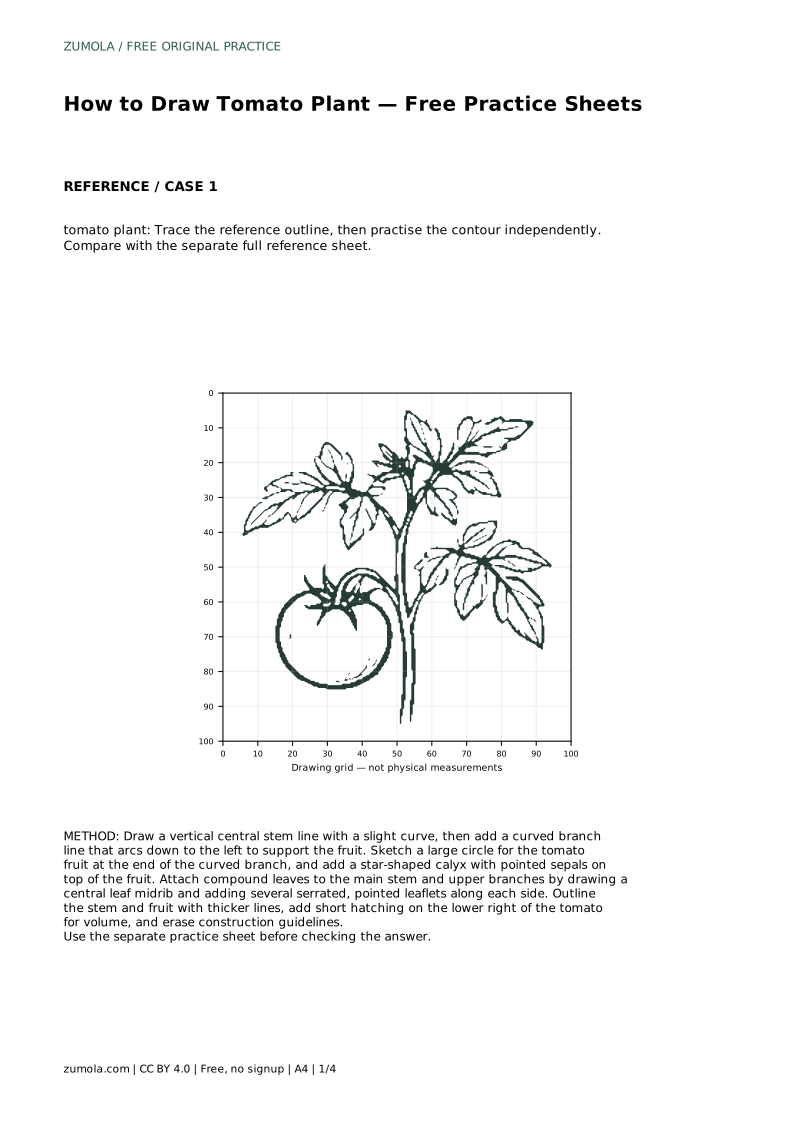
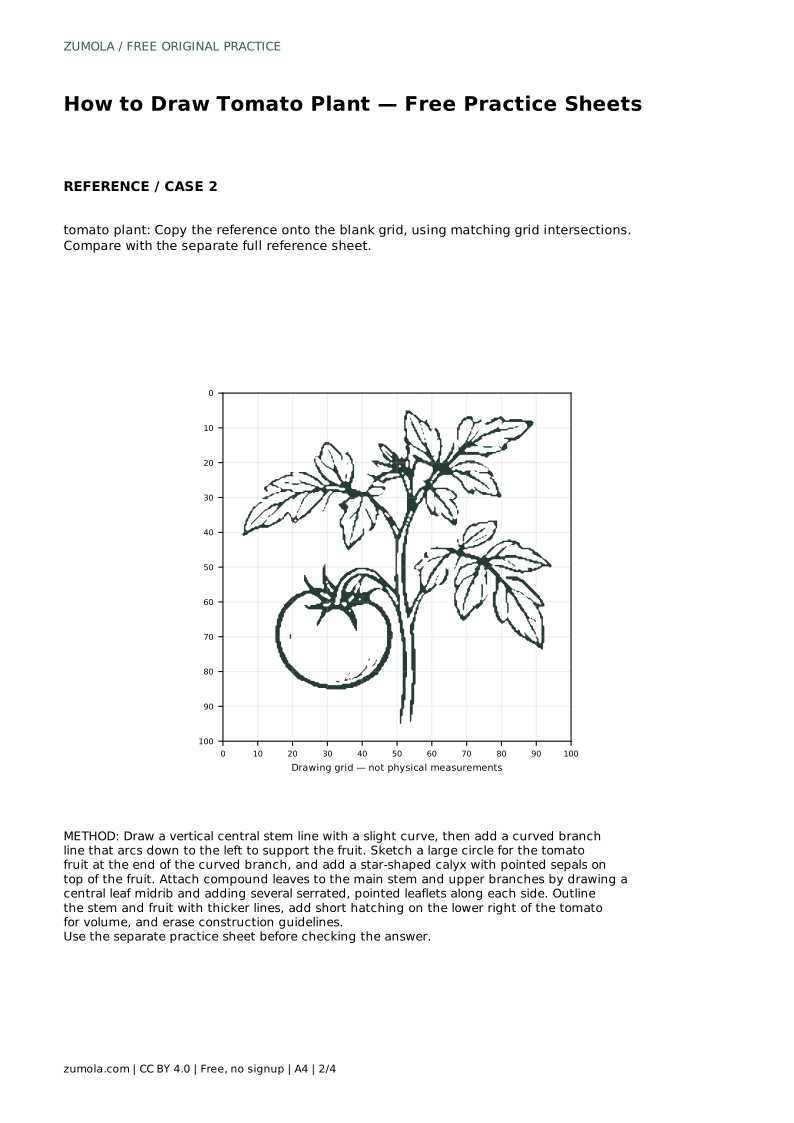
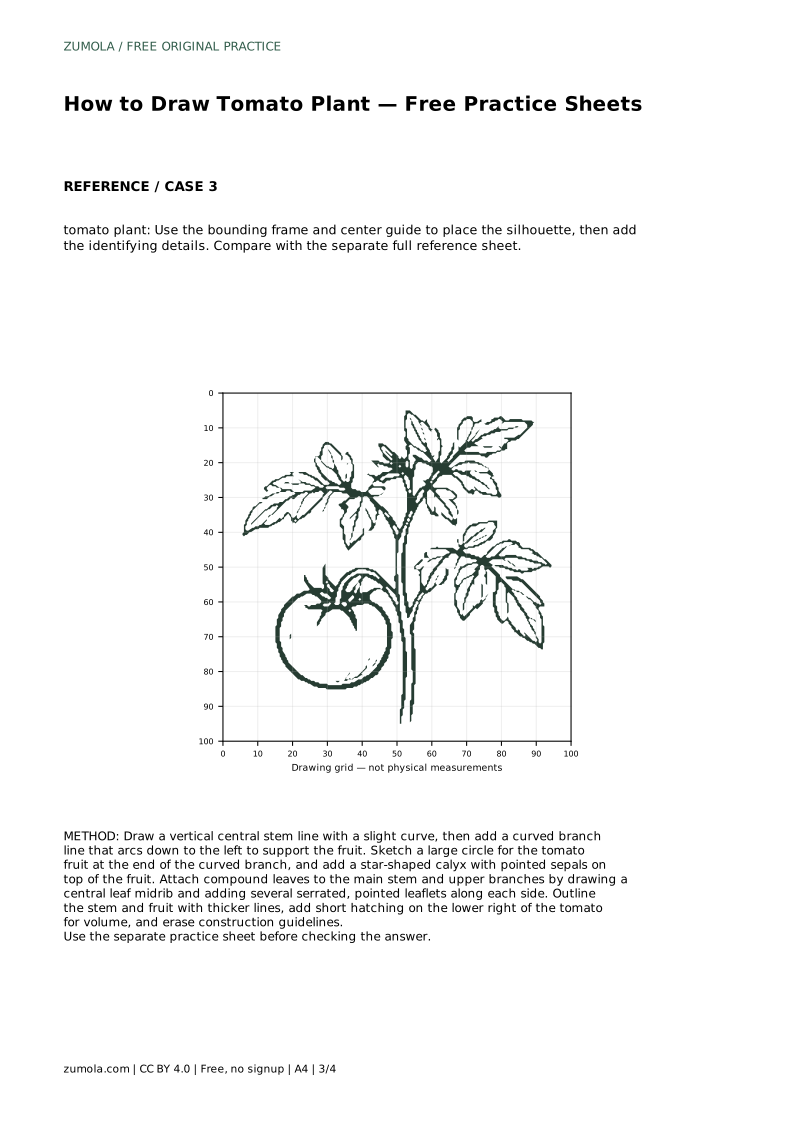
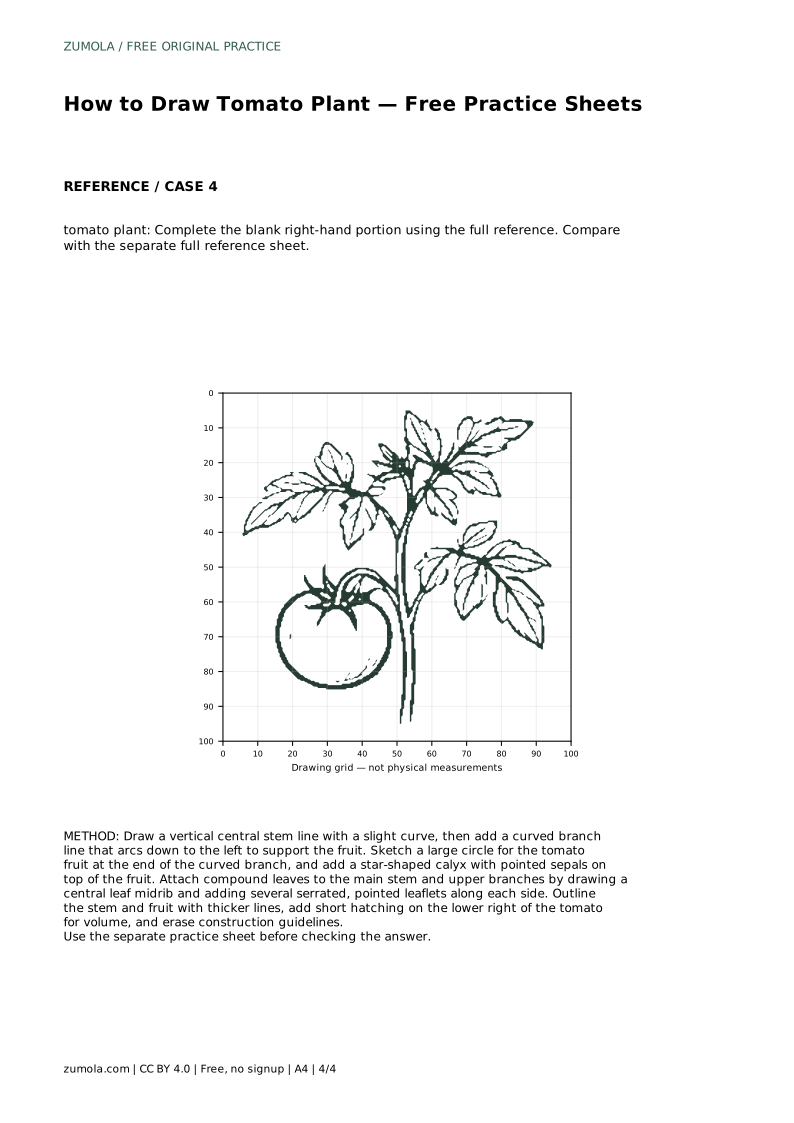
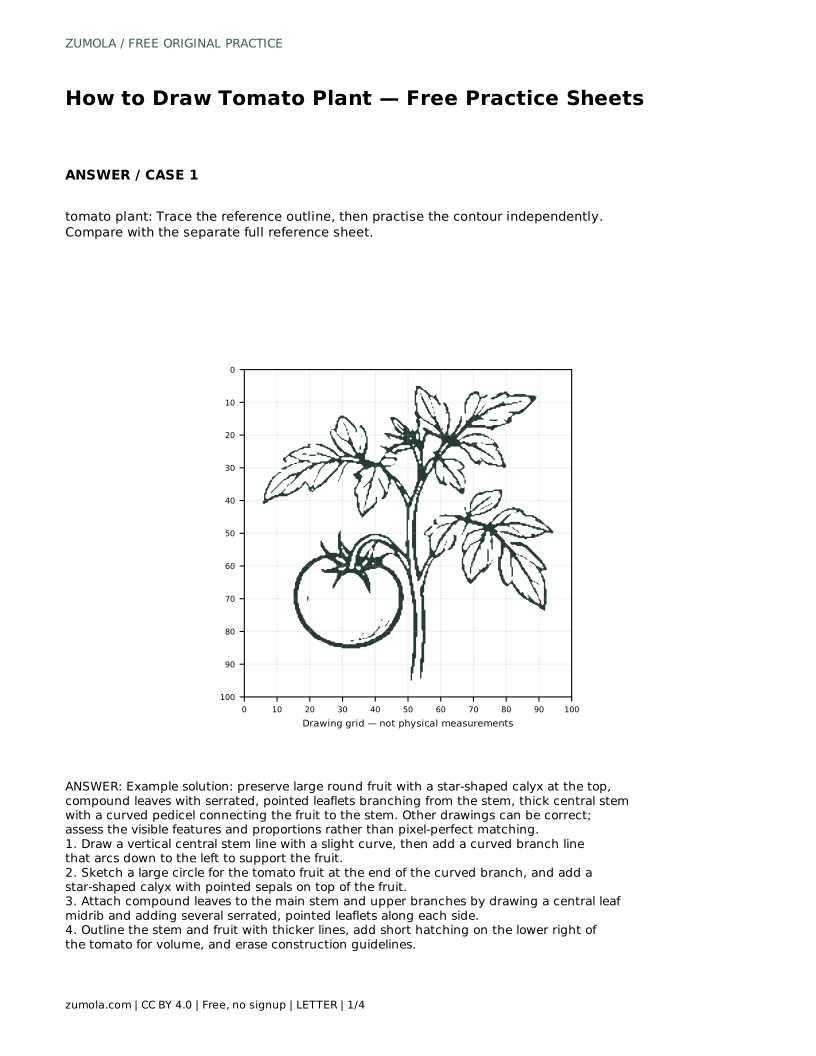
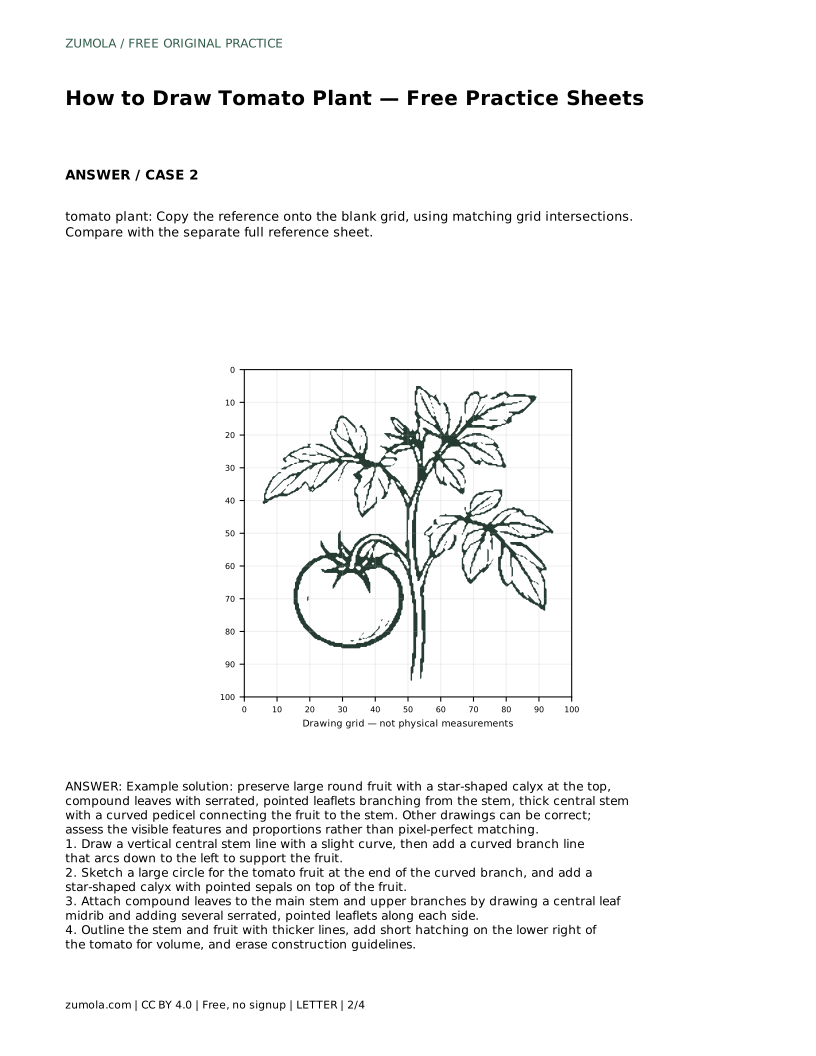
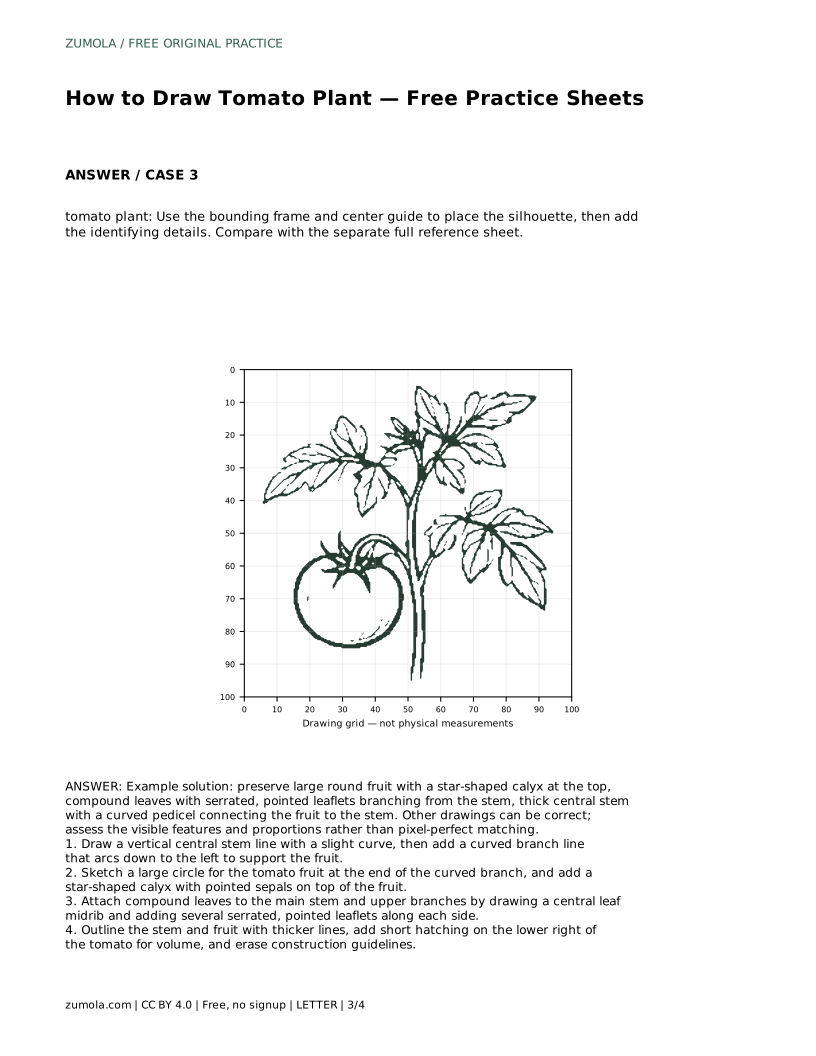
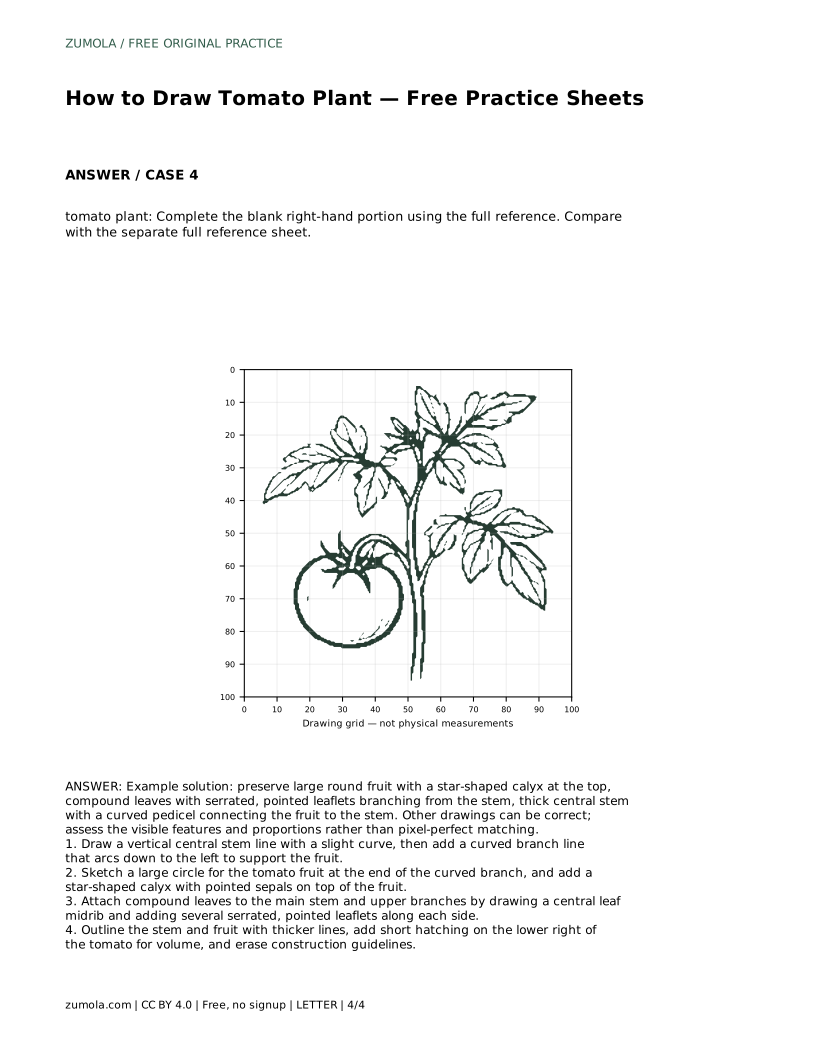
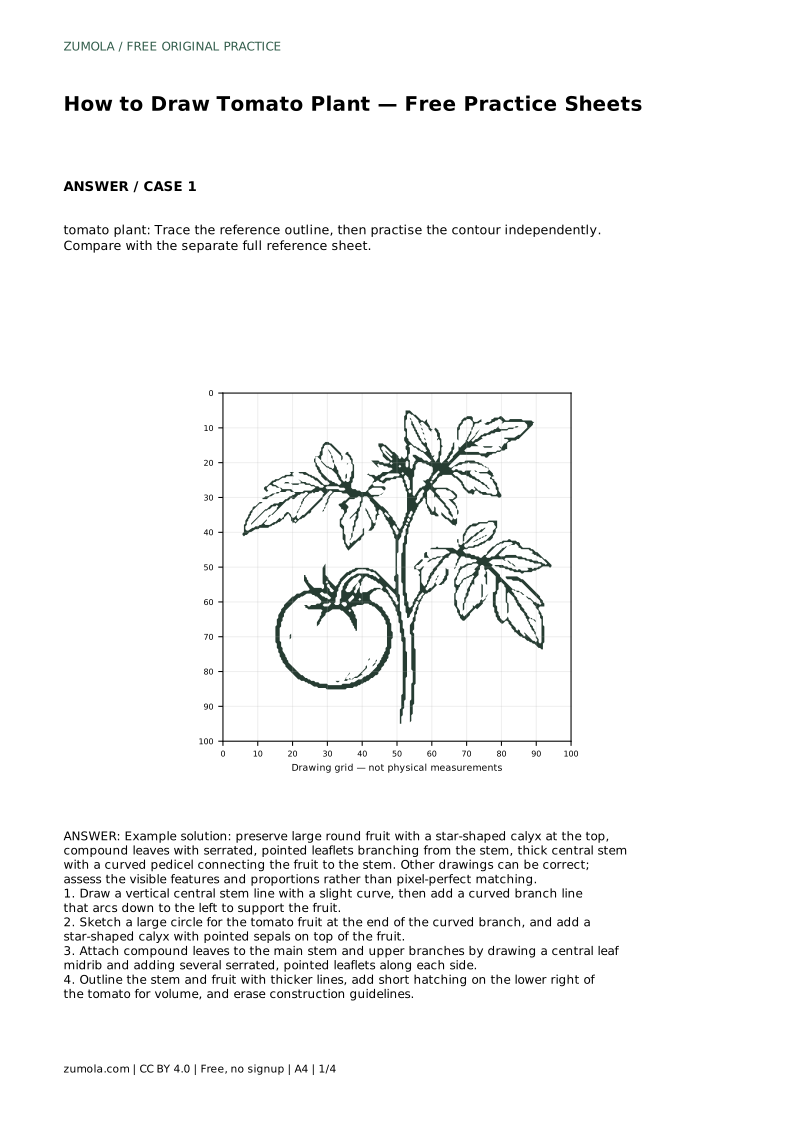
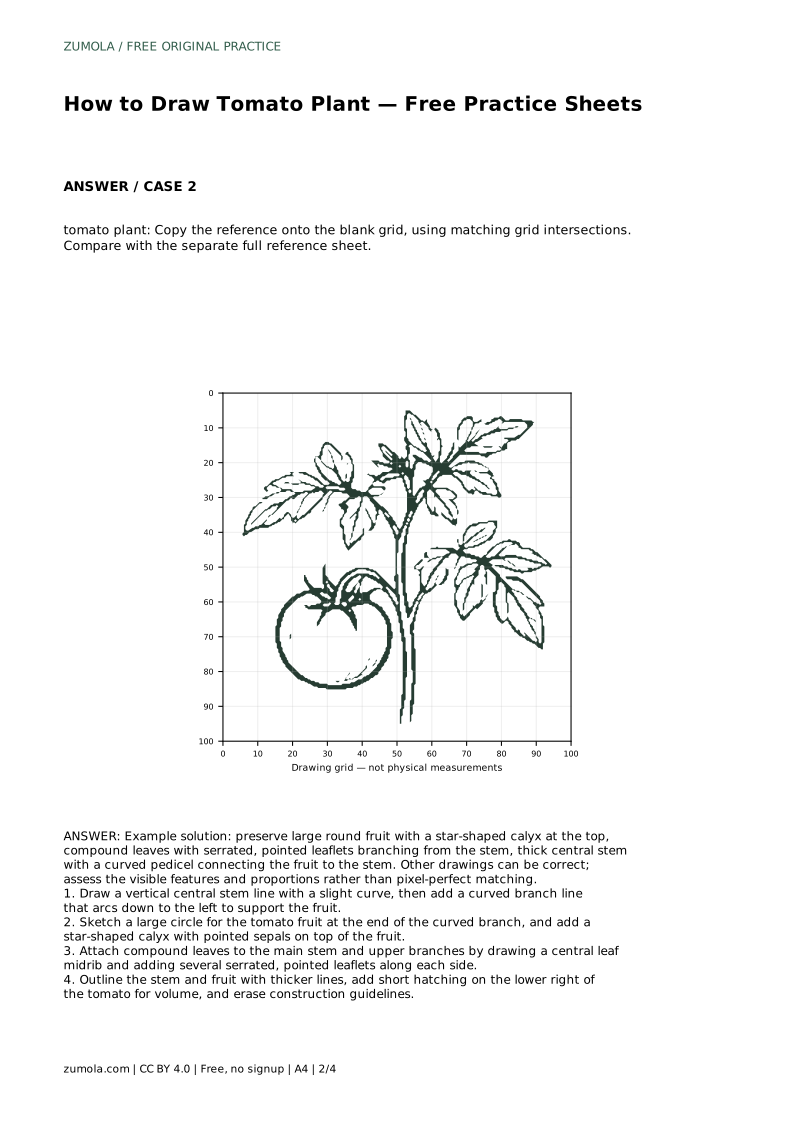
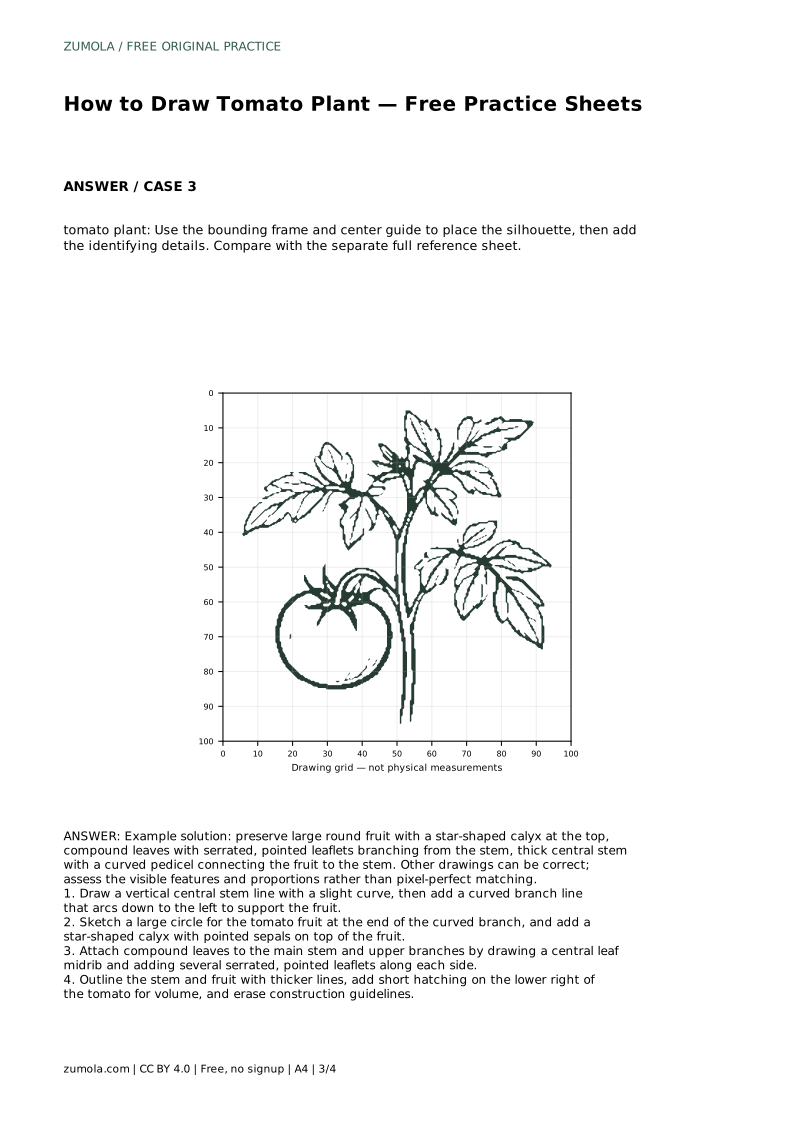
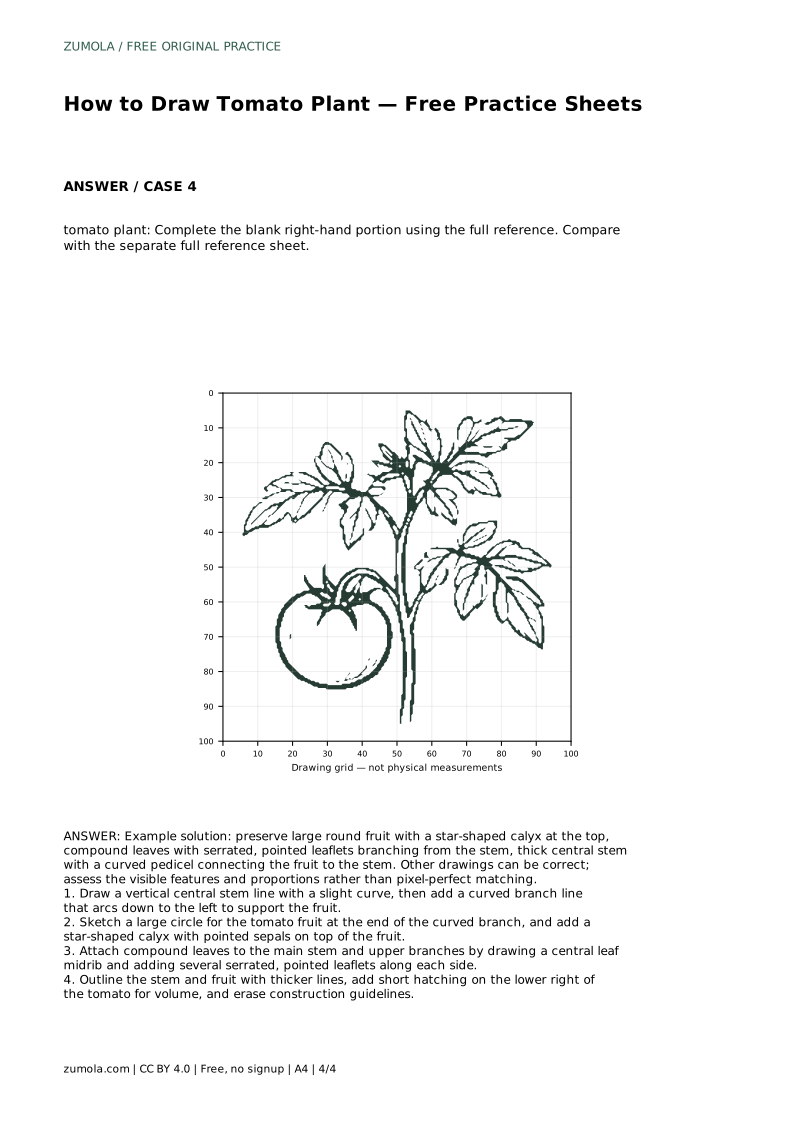
Reference diagrams
LETTER · Download PDF
A4 · Download PDF
Free original resources
Learn to draw a tomato plant with a round fruit, star-shaped calyx, serrated compound leaves, and a curved pedicel. Free printable practice sheets support each step.
Four original cases, with reference diagrams, practice sheets and worked answers. Everything is free; no signup required.
LETTER · Download PDF
A4 · Download PDF
LETTER · Download PDF
A4 · Download PDF
LETTER · Download PDF
A4 · Download PDF
Use A4 or US Letter to match your printer. Use the stated values and conditions to solve each exercise; diagrams are not physical measuring rulers.
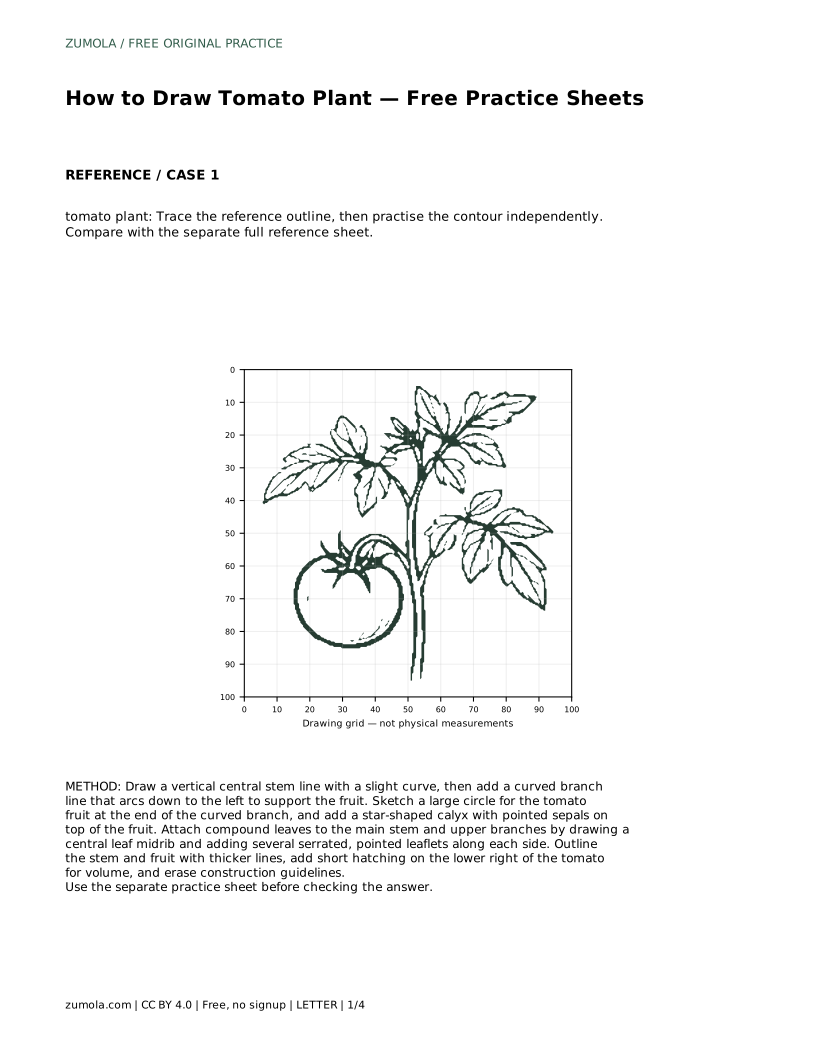
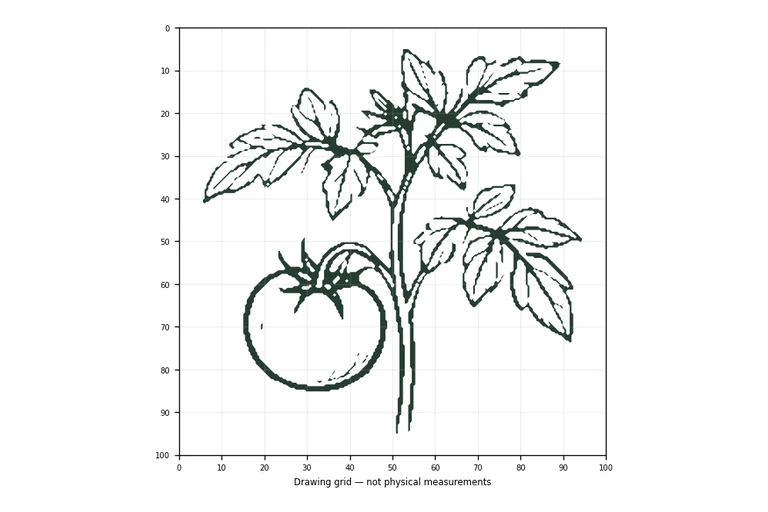
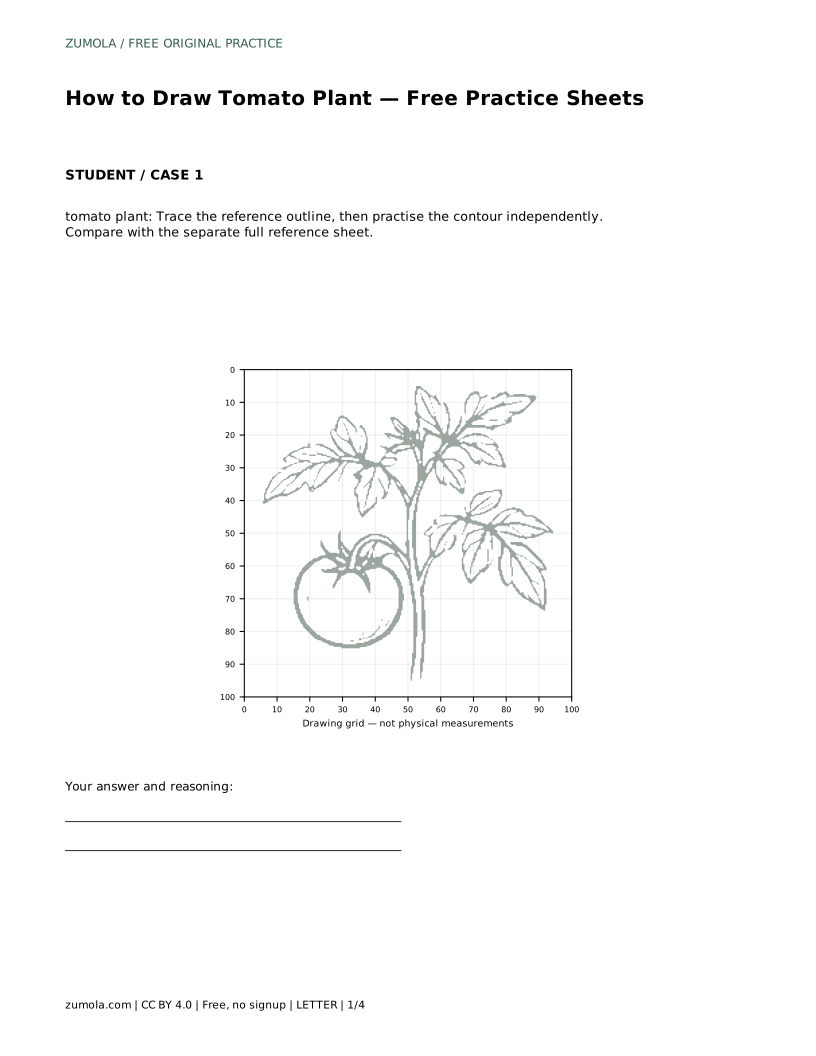
Drawing a tomato plant is mostly a matter of arranging a few clear shapes in a believable order. The fruit is a large round form with a star-shaped calyx on top. The leaves are compound, meaning each leaf has a central midrib with several pointed, serrated leaflets along its sides. A thick central stem holds the plant upright, and a curved pedicel connects the fruit to that stem. This guide walks through those features step by step so you can practise on the free sheets.
Begin by deciding where the plant sits on your page. Draw a vertical central stem line with a slight curve rather than a rigid straight line; a gentle bend makes the plant look alive. Next, add a curved branch line that arcs down to the left from the stem. This branch is the pedicel, the stalk that supports the fruit, so it should read as a continuous connection from stem to fruit rather than a floating line.
Place the fruit at the end of that curved branch. A large circle works well as a construction shape. Keep the circle generous: the tomato is the visual anchor of the drawing, and a small fruit will make the leaves feel oversized. Light construction lines are fine here because you will refine them later.
On top of the tomato circle, draw a star-shaped calyx with pointed sepals. The calyx sits where the fruit meets its stalk, so center it on the upper edge of the circle and let the points spread outward. This small star is one of the most recognizable features of a tomato and separates it from a plain round fruit.
Now attach compound leaves to the main stem and upper branches. For each leaf, draw a central midrib first, then add several serrated, pointed leaflets along each side. Serrated means the leaflet edges carry small jagged teeth rather than smooth curves. Vary leaflet size slightly along the midrib so the leaf tapers toward its tip. Space the leaves along the stem so the plant does not look crowded.
Once the construction shapes are in place, outline the stem and fruit with thicker, more confident lines. Strengthen the pedicel so the fruit clearly hangs from the stem. Clean up the leaflet edges so the serrations stay crisp and pointed rather than soft and rounded.
For volume, add short hatching on the lower right of the tomato. Grouping the marks on one side suggests a light source from the upper left and gives the round form weight. Keep hatching light on the leaves; a few short strokes along the lower edge of each leaflet are enough. Finally, erase construction guidelines so only the finished plant remains.
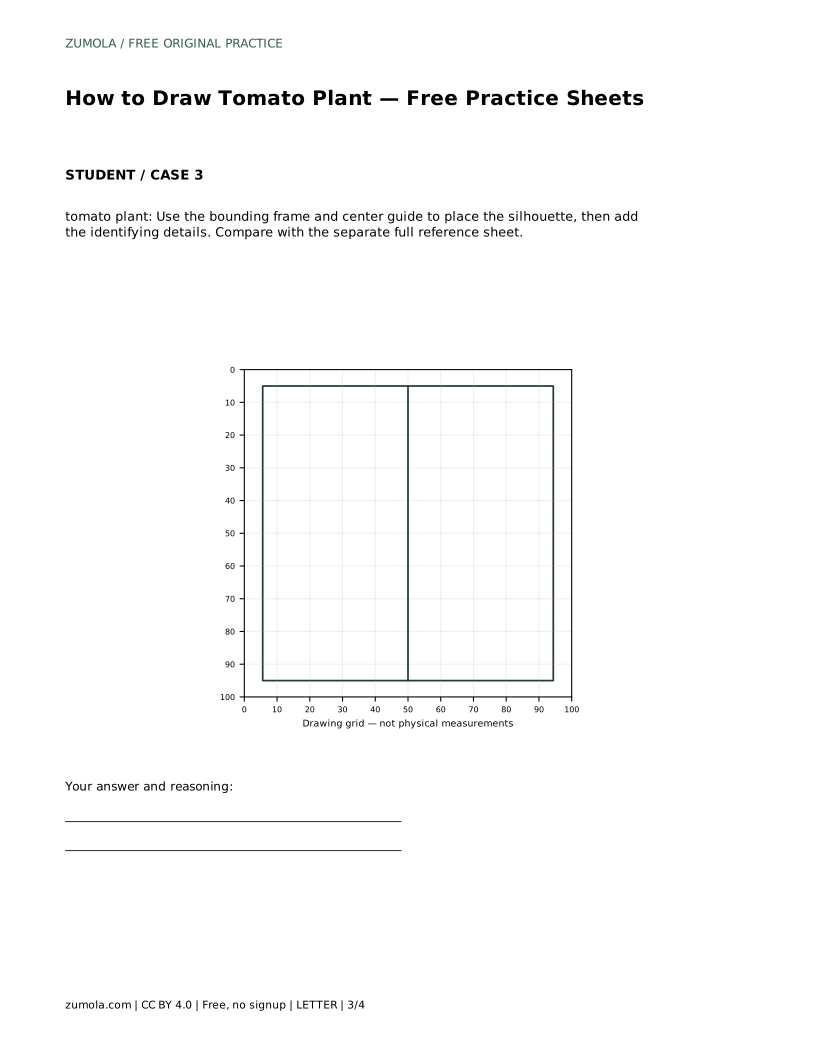
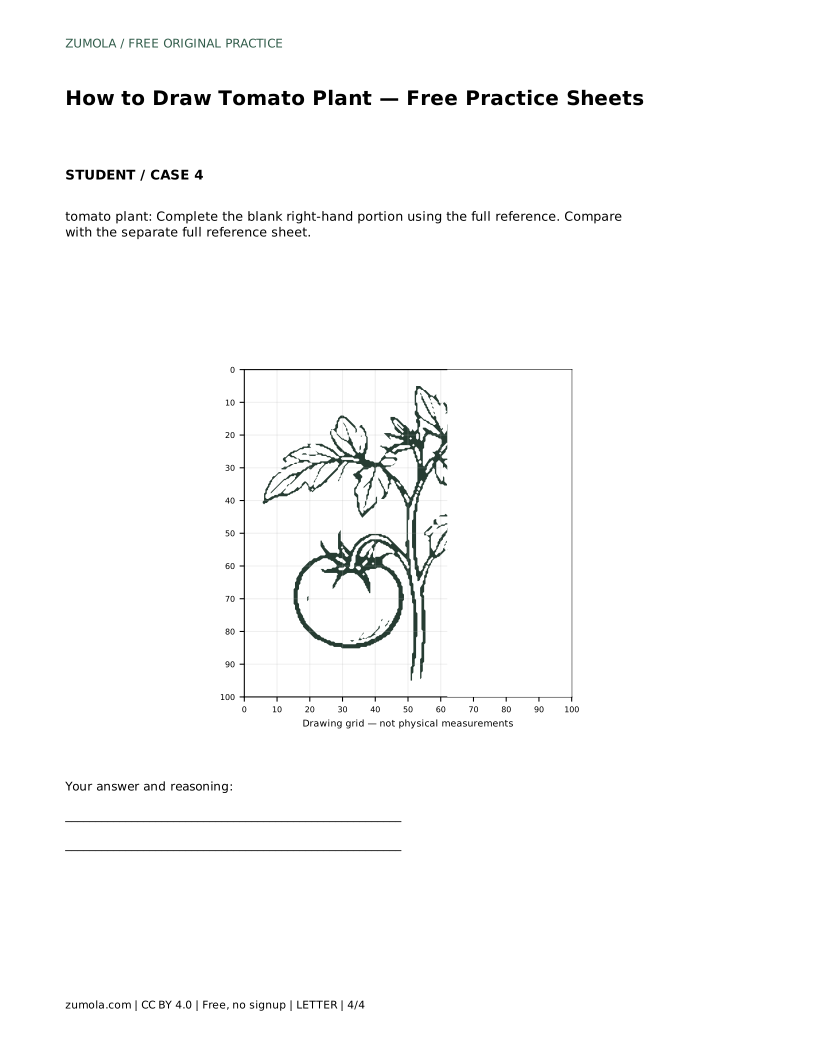
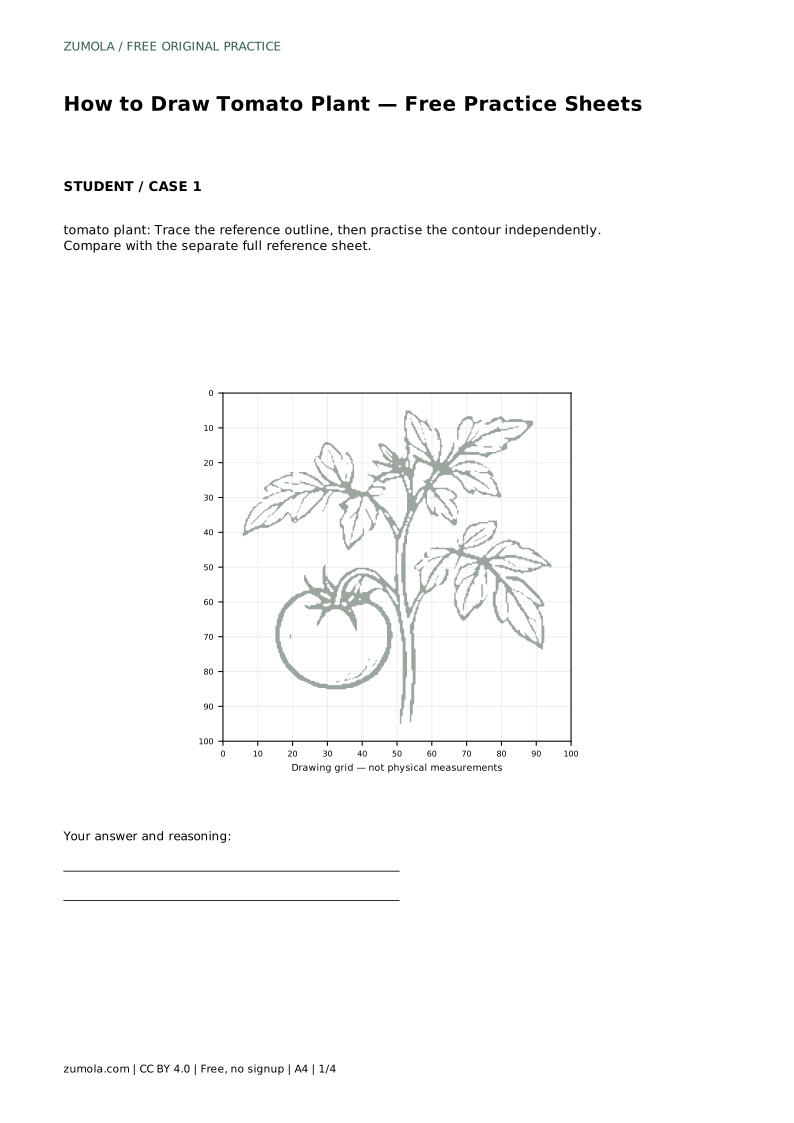
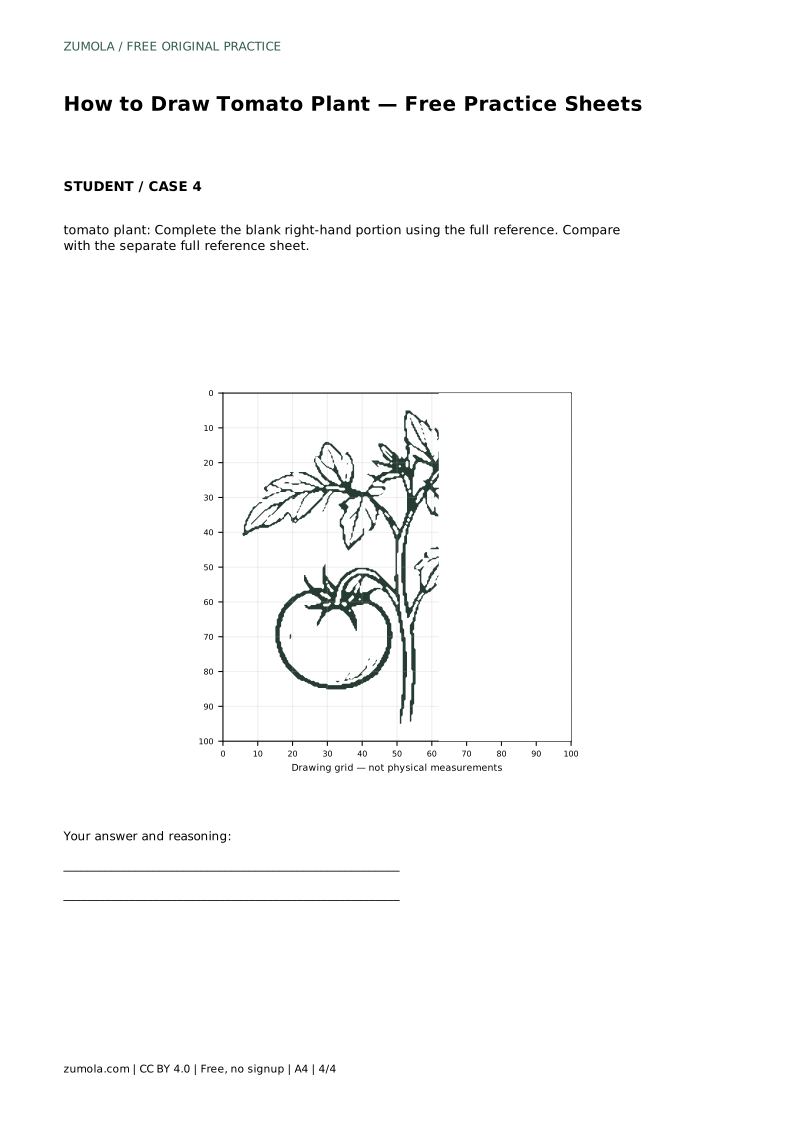
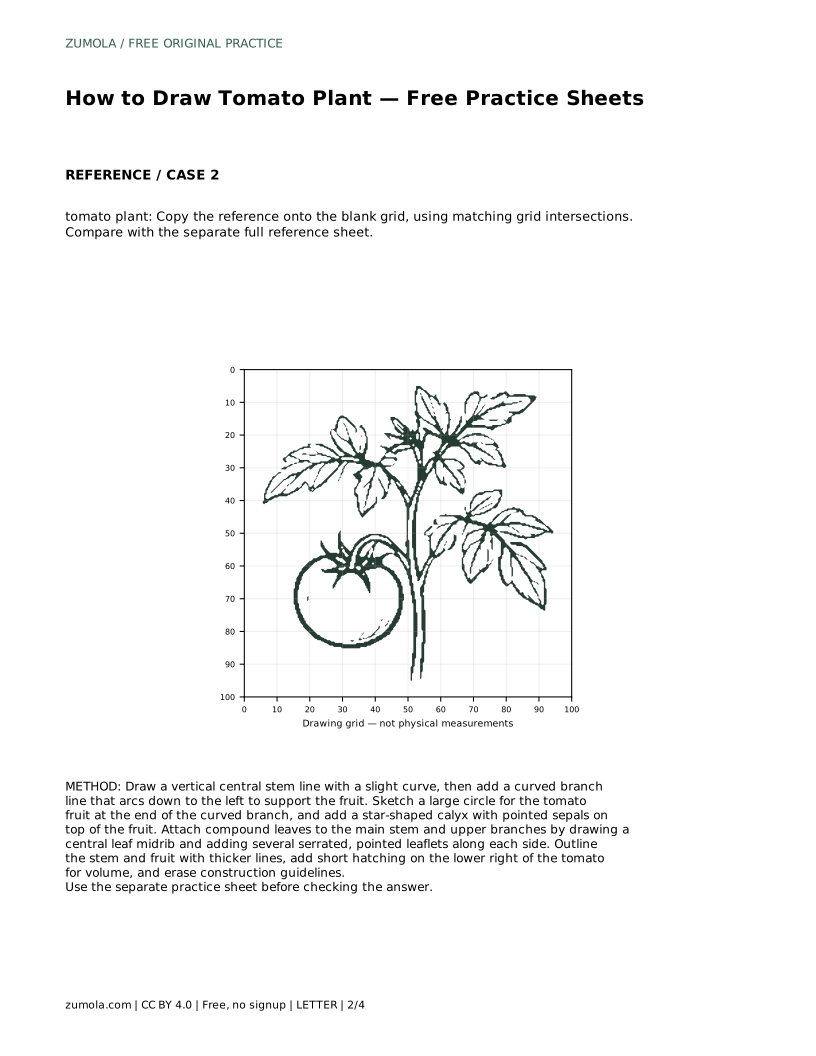
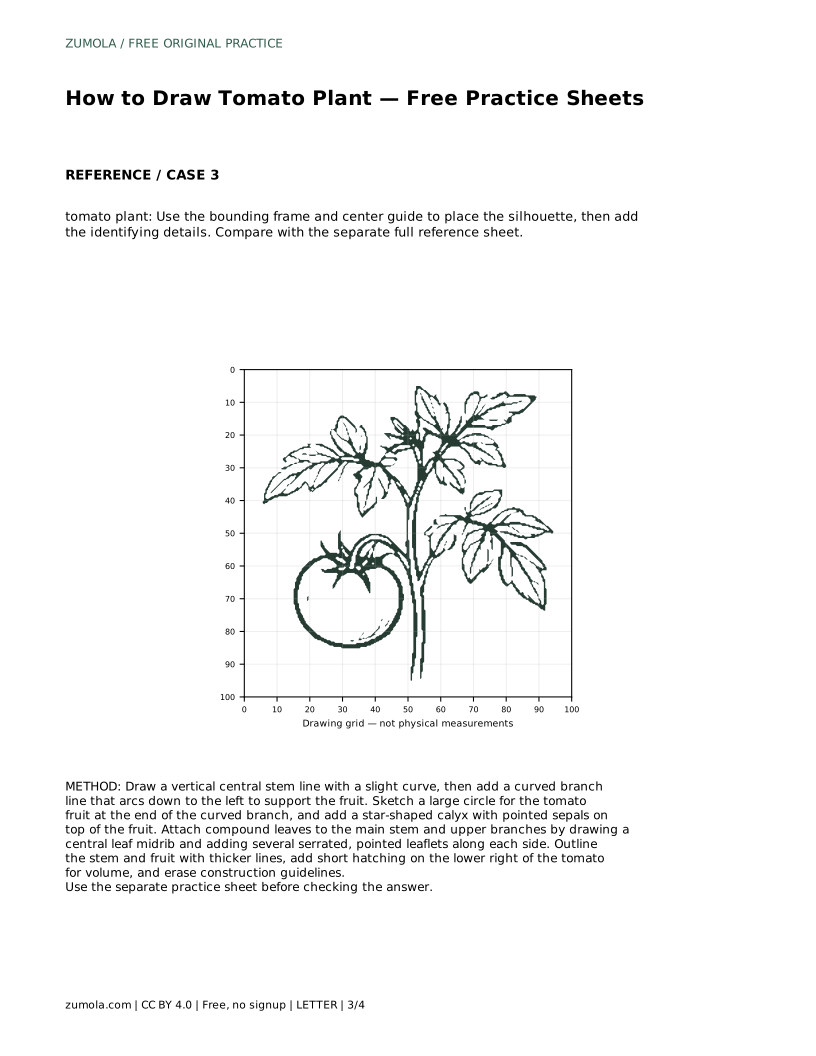
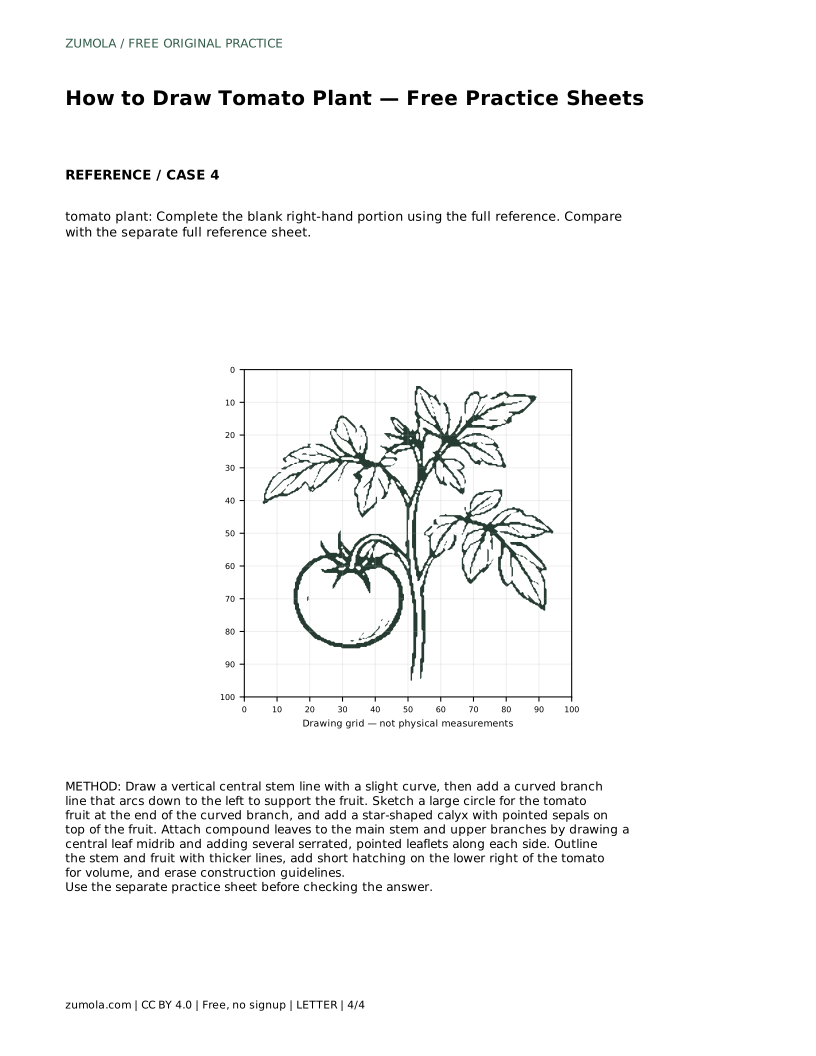
The practice sheets offer different levels of support. One asks you to trace the reference outline, then practise the contour independently. Another uses a grid: copy the reference onto the blank grid, matching grid intersections to keep proportions consistent. A third provides a bounding frame and center guide so you can place the silhouette before adding identifying details. A fourth leaves the right-hand portion blank for you to complete from the full reference.
Each format trains a slightly different skill, so treat them as separate exercises rather than repeats. After finishing, compare your drawing with the separate full reference sheet. Check the large round fruit, the star-shaped calyx, the compound leaves with serrated leaflets, the thick central stem, and the curved pedicel. Other drawings can be correct; assess the visible features and proportions rather than pixel-perfect matching.
A useful check is to name each feature aloud as you look at your page: fruit, calyx, pedicel, stem, midrib, leaflets. If any feature is missing or unclear, that is your next revision target. Proportion matters more than exact line placement, so compare the fruit size against the leaf spread and the stem length.
tomato plant: Trace the reference outline, then practise the contour independently. Compare with the separate full reference sheet.
Example solution: preserve large round fruit with a star-shaped calyx at the top, compound leaves with serrated, pointed leaflets branching from the stem, thick central stem with a curved pedicel connecting the fruit to the stem. Other drawings can be correct; assess the visible features and proportions rather than pixel-perfect matching. Draw a vertical central stem line with a slight curve, then add a curved branch line that arcs down to the left to support the fruit. Sketch a large circle for the tomato fruit at the end of the curved branch, and add a star-shaped calyx with pointed sepals on top of the fruit. Attach compound leaves to the main stem and upper branches by drawing a central leaf midrib and adding several serrated, pointed leaflets along each side. Outline the stem and fruit with thicker lines, add short hatching on the lower right of the tomato for volume, and erase construction guidelines.
The large round fruit with a star-shaped calyx on top, compound leaves with serrated pointed leaflets, a thick central stem, and a curved pedicel connecting fruit to stem.
No. Other drawings can be correct. Assess the visible features and proportions rather than pixel-perfect matching.
Place short hatching on the lower right of the fruit to suggest volume, keeping the marks grouped on one side.
All drawing practice · Free coordinate paper
Original resources · CC BY 4.0 · Free for personal and classroom use with attribution.