Free original resources
Face Drawing: Build a Head with Centre, Brow and Nose Guides
Learn a reliable face drawing method using an oval, centre line, brow and nose guides, then place simplified features and check overlaps step by step.
Free resources
Letter & A4
PDF & SVG
Letter & A4
PDF & SVG
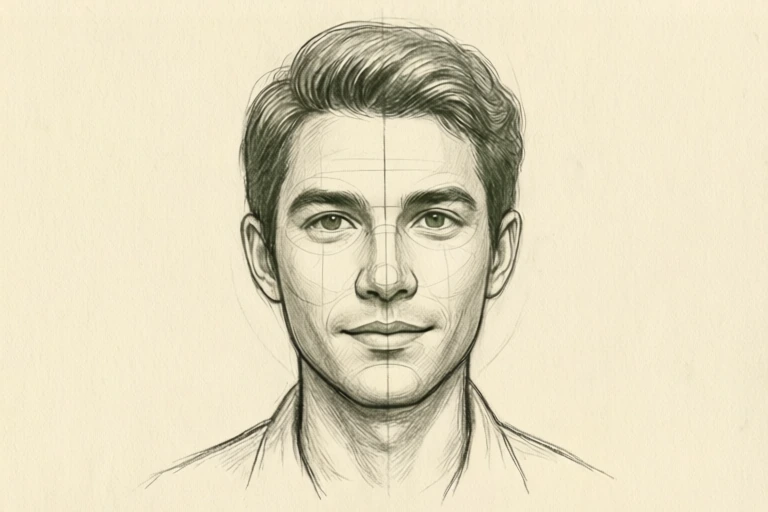
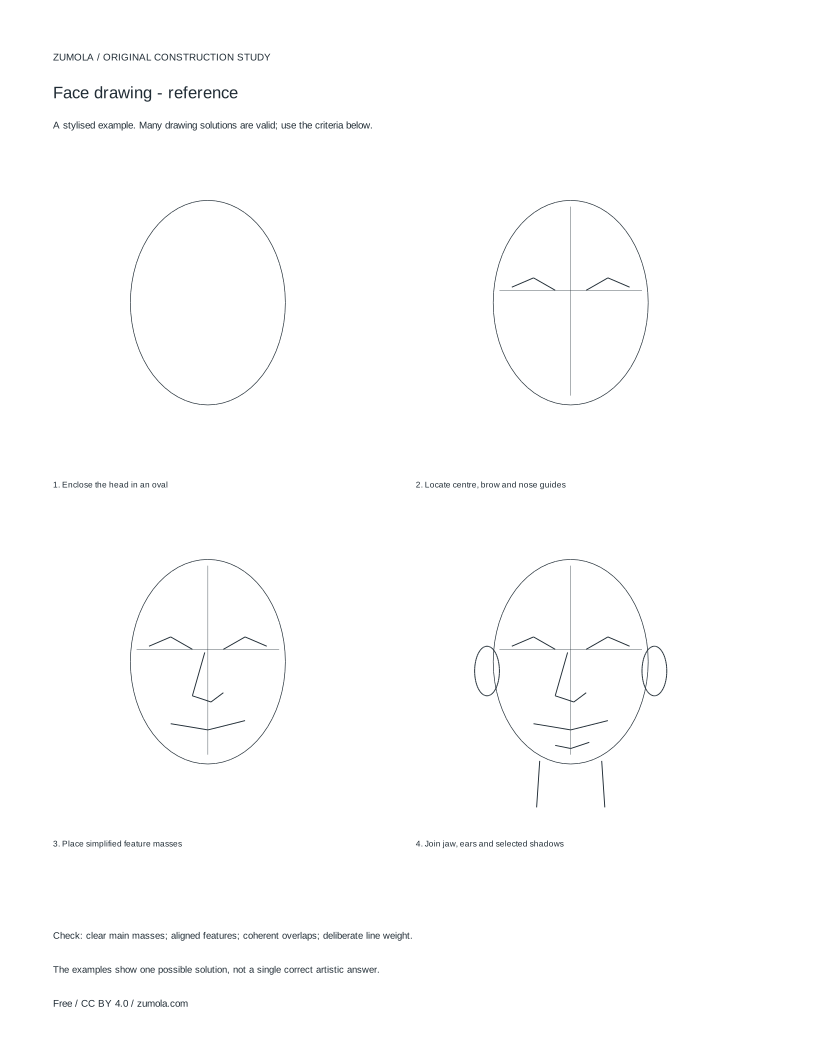
Build the drawing in four stages.
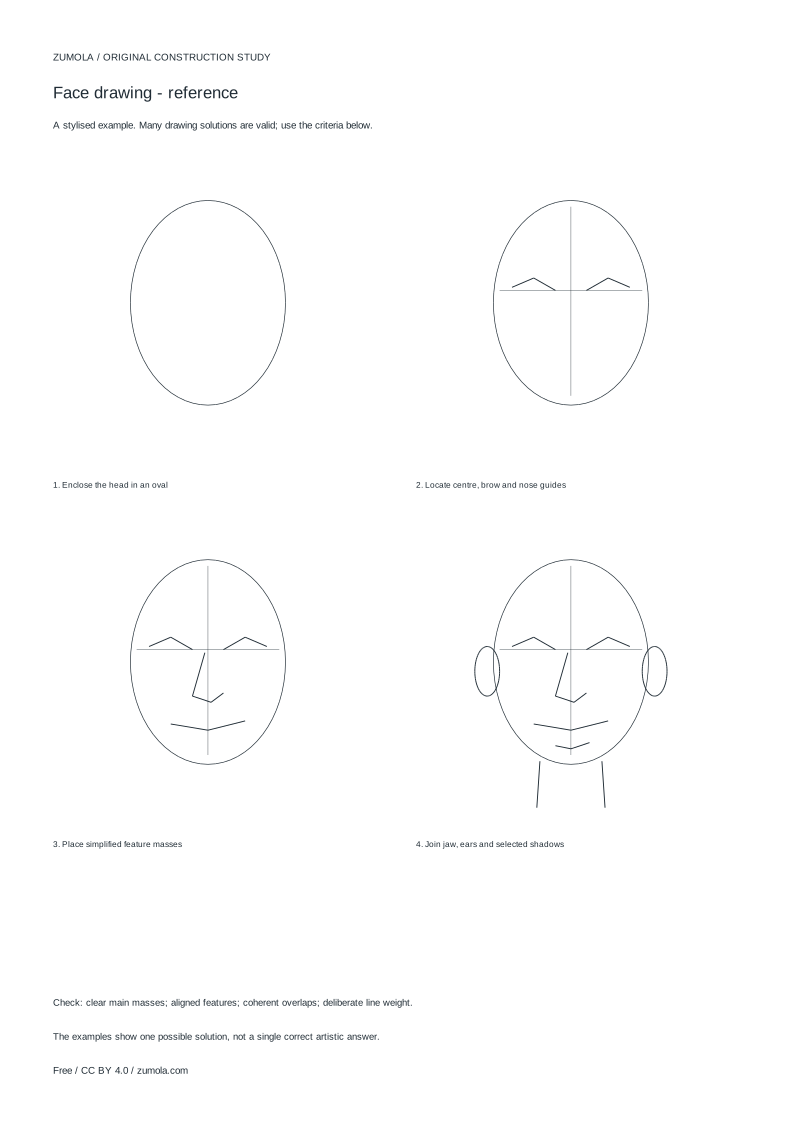
Your free printable kit.
Original reference, student practice and separate worked answers. No account or payment.
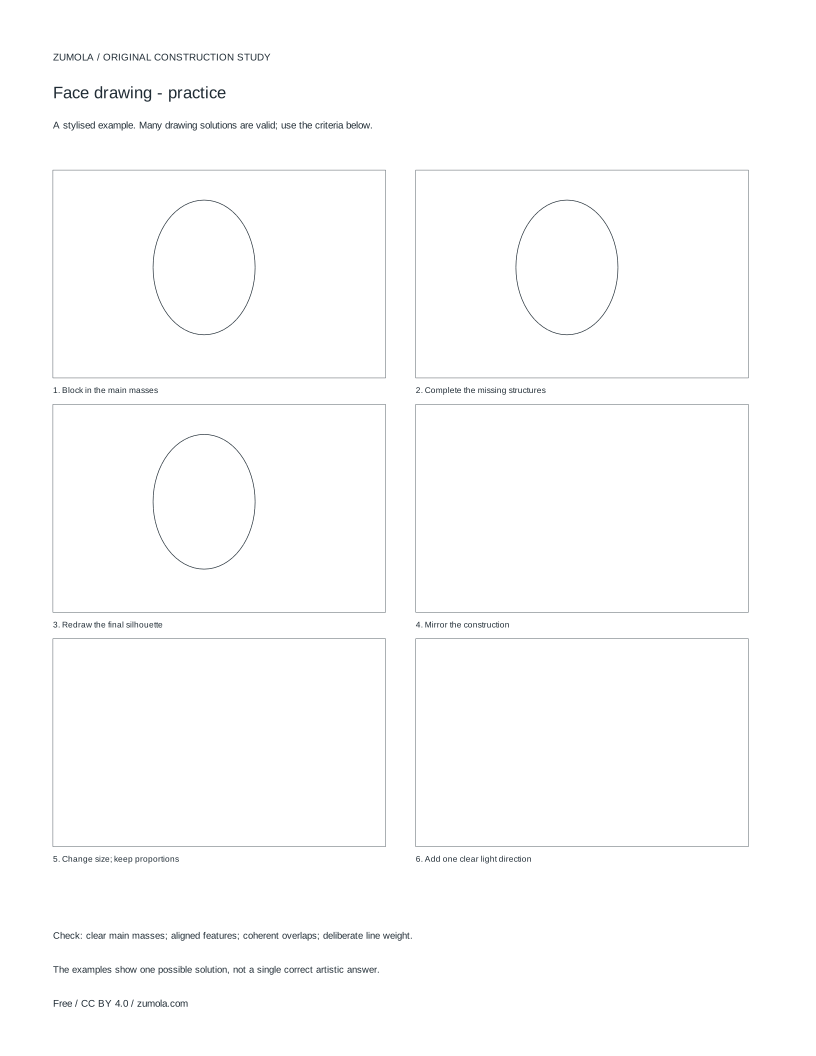
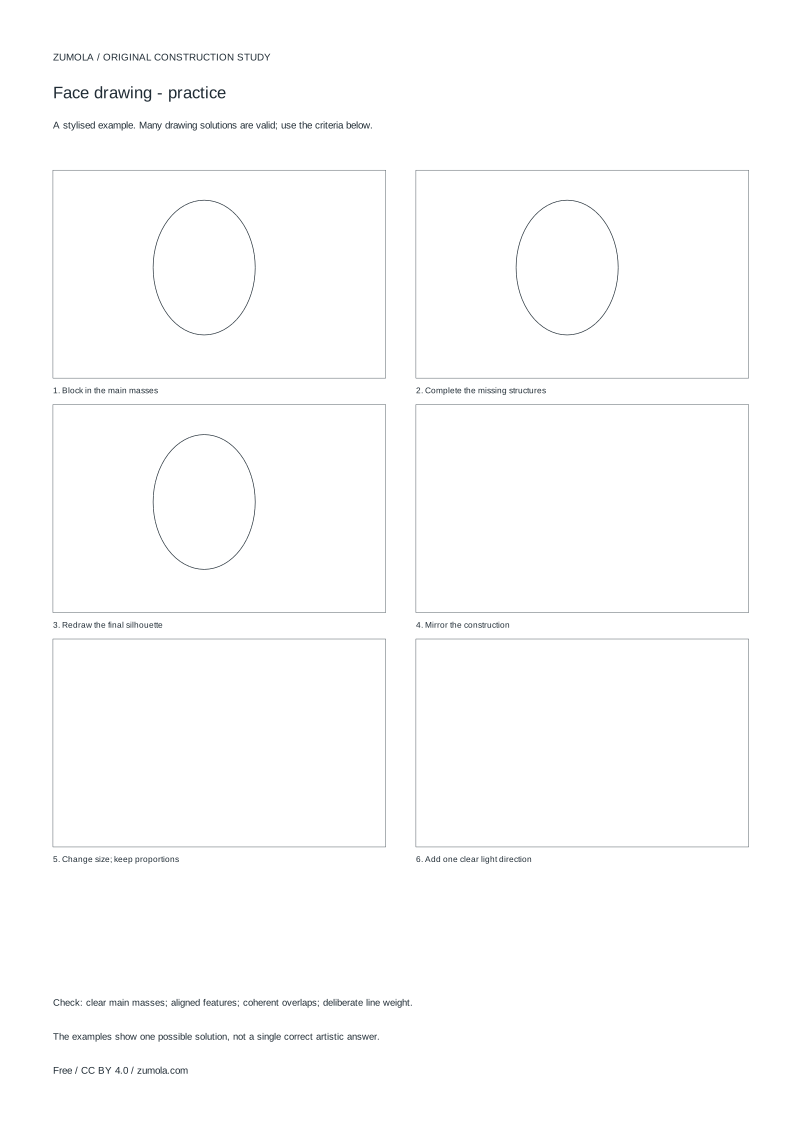
Practice worksheet
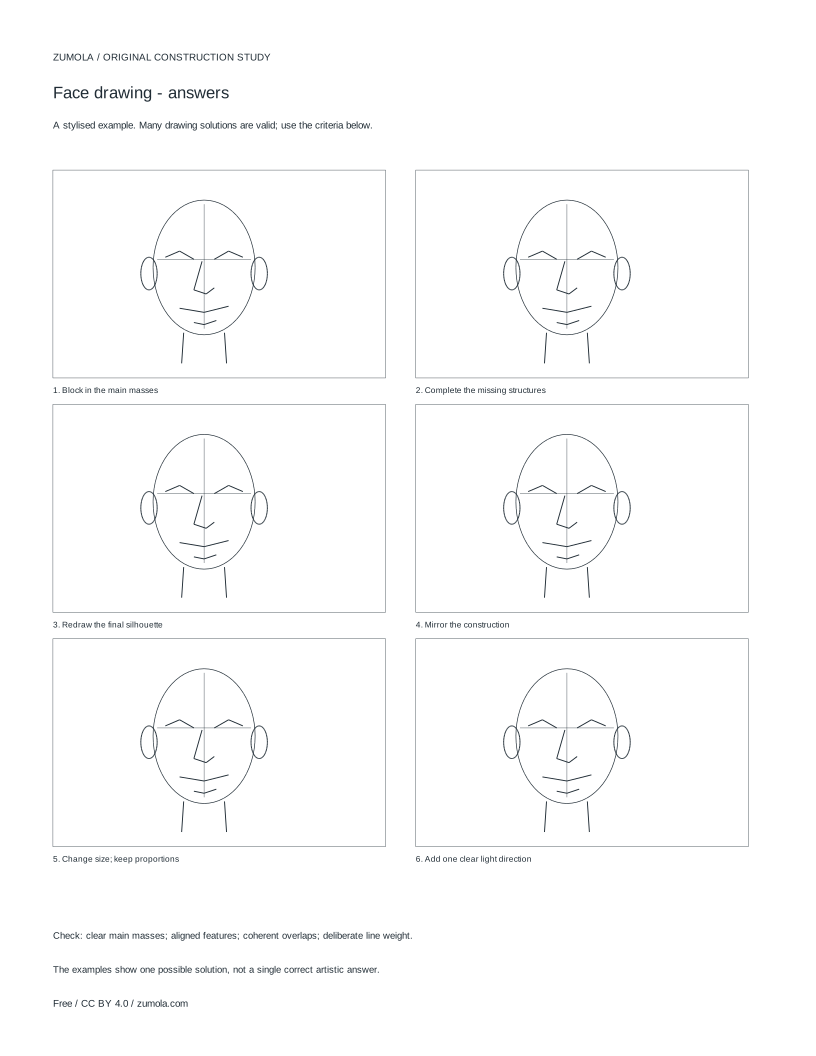
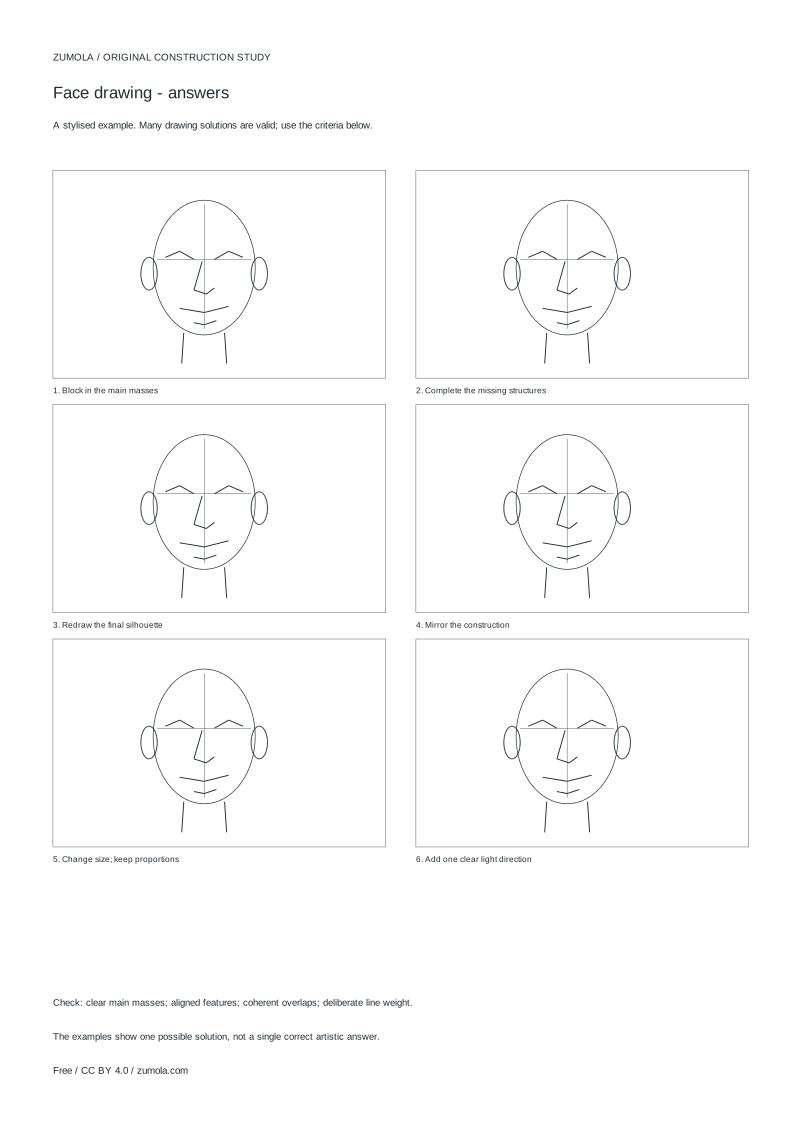
Worked answers / rubric
Print at Actual size / 100%. Check the calibration bar before using physical dimensions.
Face drawing becomes manageable when you stop treating the head as a collection of separate features and start treating it as one organised shape. This tutorial shows a construction method: enclose the head, set a centre line and horizontal guides for brow and nose, place simplified feature masses, then join the jaw, ears and selected shadows. The aim is a clear, stylised study, not anatomical or photorealistic instruction. Work lightly at first so you can adjust placement before committing to darker lines.
Start with the head shape and the centre line
Begin by enclosing the whole head in a single oval. Keep the oval slightly narrower at the top than at the jaw area, because the skull tapers toward the chin. Draw it lightly; this outline is a container, not a final contour.
Next, draw a vertical centre line from the top of the oval to the bottom. On a front-facing head this line runs through the middle of the forehead, between the eyes, down the nose and to the chin. For a slight turn, curve the line gently so it follows the direction the face is turning. The centre line is your anchor: every later feature is measured from it, so keep it visible and easy to correct.
- Draw a light oval that encloses the full head, top to chin.
- Add a vertical centre line from the crown to the chin, curving it slightly for a turned head.
- Check that the oval is not wider at the top than at the jaw.
Set brow and nose guides, then place feature masses
Divide the oval with two horizontal guides. The brow guide sits roughly halfway down the head; the nose guide sits roughly halfway between the brow guide and the chin. These are working proportions for a stylised head, not fixed rules, so adjust them if your oval is unusually long or short.
With the guides in place, place simplified masses rather than finished features. Treat each eye as a small oval or lens shape sitting either side of the centre line, with a gap of about one eye width between them. Mark the nose as a narrow wedge centred on the line, ending at the nose guide. Mark the mouth as a shallow curved band below the nose guide. Keep every mass light and blocky so you can move it without erasing.
- Draw a horizontal brow guide about halfway down the oval.
- Draw a nose guide about halfway between the brow guide and the chin.
- Place two eye masses either side of the centre line with a gap of roughly one eye width.
- Add a wedge for the nose ending at the nose guide and a curved band for the mouth below it.
Join the jaw, ears and selected shadows
Now connect the lower oval to the feature masses. Draw the jaw as a soft curve from each side of the oval toward the chin, letting the chin sit on the centre line. Add ears at the level between the brow guide and the nose guide, since ears generally span that band.
Finish with a few selected shadows rather than full shading. A small shadow under the nose, beneath the lower lip and along one side of the jaw is enough to suggest form. Check overlaps as you go: the nose should sit in front of the cheek, the ear behind the jaw line, and the brow mass above the eye. Compare the main masses, feature placement, overlaps and line weight before darkening any line.
- Curve the jaw from both sides of the oval to a chin on the centre line.
- Add ears between the brow and nose guide levels.
- Place small shadows under the nose, below the lower lip and along one jaw side.
- Check that the nose overlaps the cheek and the ear sits behind the jaw.
Working from a reference
When drawing from a reference, first identify the same four anchors on the reference: the outer head shape, the centre line, the brow level and the nose level. Compare their relative positions before drawing anything detailed. If the head is turned, note which side of the face is compressed and shift your feature masses accordingly.
Use the reference to check relationships, not to copy every contour. Ask whether the gap between the eyes looks wider or narrower than one eye, and whether the chin sits closer to the nose guide than expected. Small adjustments to the guides fix most placement problems before they become hard to correct.
- Mark the head outline, centre line, brow level and nose level on the reference.
- Note which side of a turned face is compressed.
- Adjust guide positions before adding detail.
Try this example
Draw a front-facing stylised head using an oval, a centre line, a brow guide halfway down, a nose guide halfway between brow and chin, two eye masses one eye width apart, a nose wedge and a mouth band.
Show the worked explanation
Draw the oval, then the vertical centre line from crown to chin. Add the brow guide at the midpoint and the nose guide halfway between brow and chin. Place two eye masses either side of the centre line with a gap of one eye width. Add the nose wedge ending at the nose guide and the mouth band below it. Join the jaw to a chin on the centre line, add ears between brow and nose levels, then check that the nose overlaps the cheek and the ear sits behind the jaw.
Common mistakes
- Drawing finished eyes and mouth before the head shape and guides are settled. Keep all early lines light and blocky; place masses first, then refine only after the guides look balanced.
- Treating the centre line as straight on a turned head. Curve the centre line gently to follow the direction of the turn, and shift feature masses toward the compressed side.
- Shading heavily to hide misplaced features. Use only a few selected shadows and check overlaps and feature placement first; correct the construction rather than covering it.
Check your work
- The oval encloses the full head and tapers toward the jaw.
- The centre line runs from crown to chin and curves appropriately for any turn.
- Brow and nose guides are placed and visibly used to position features.
- Eye masses sit either side of the centre line with a consistent gap.
- Nose and mouth masses align with the centre line and nose guide.
- Jaw joins the oval to a chin on the centre line.
- Ears sit between brow and nose guide levels.
- Overlaps are clear: nose in front of cheek, ear behind jaw.
- Line weight distinguishes construction lines from final contours.
- Selected shadows are limited and support form rather than hiding placement errors.
Questions before you start
How do I know where the eyes go?
Place them either side of the centre line at roughly the brow guide level, with a gap of about one eye width between them. Adjust if your oval is unusually wide or narrow.
Can I use this method for a slightly turned head?
Yes. Curve the centre line to follow the turn, compress the feature masses on the side turning away, and keep the brow and nose guides as your horizontal anchors.
Is this anatomical instruction?
No. It is a stylised construction study. The guides are working proportions for organising a drawing, not clinical anatomy.