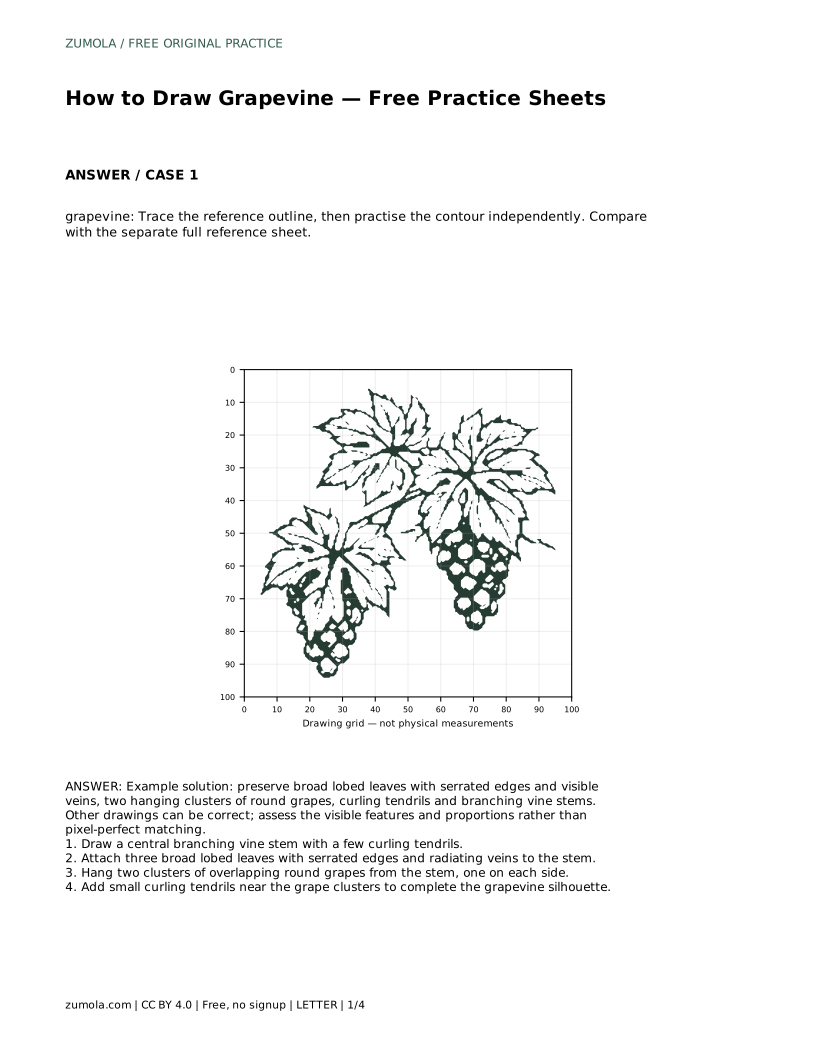
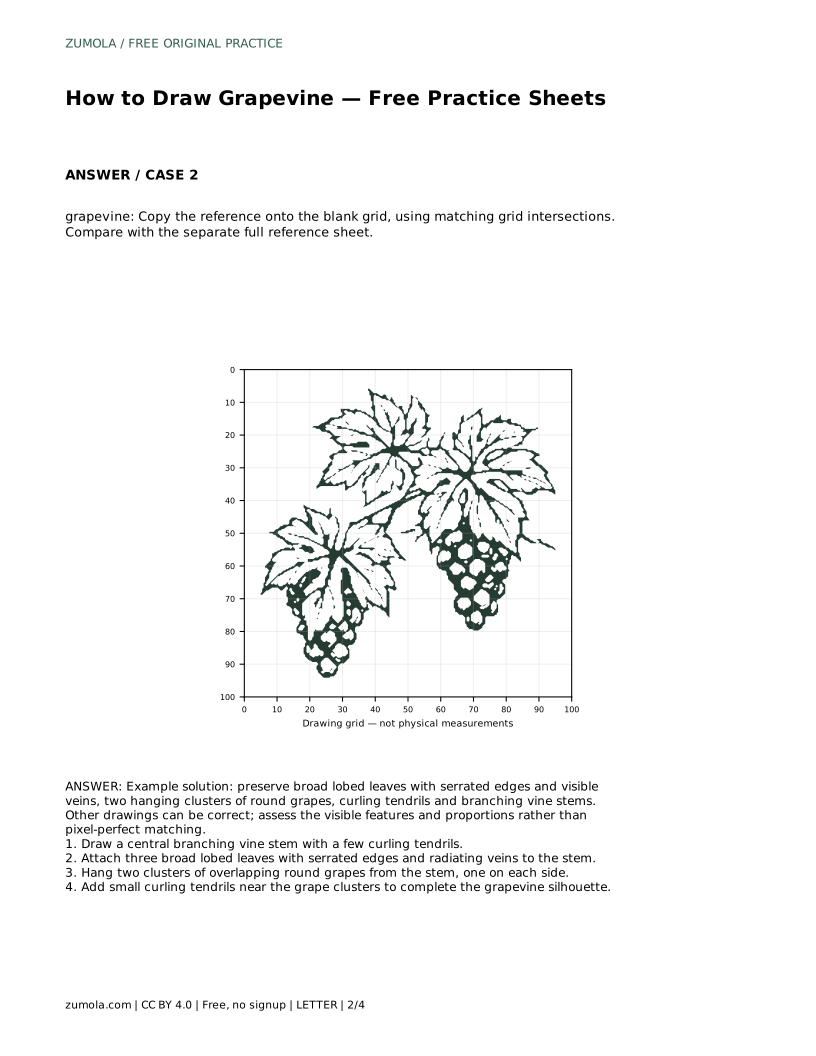
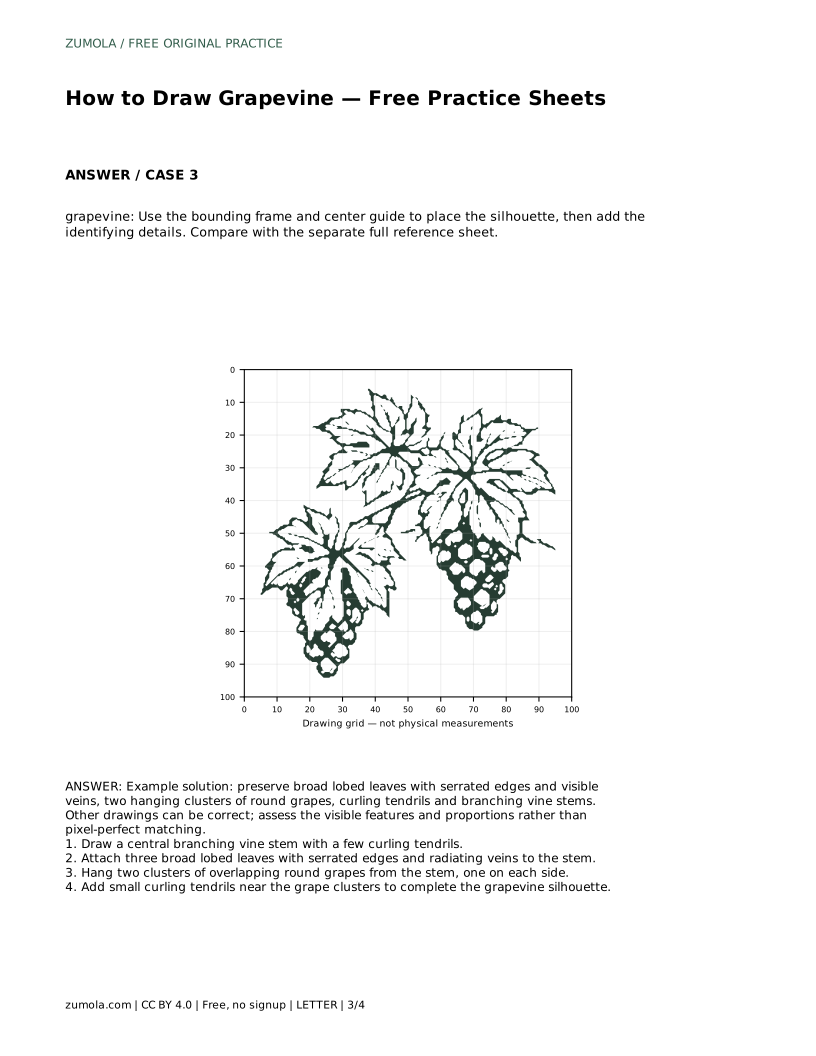
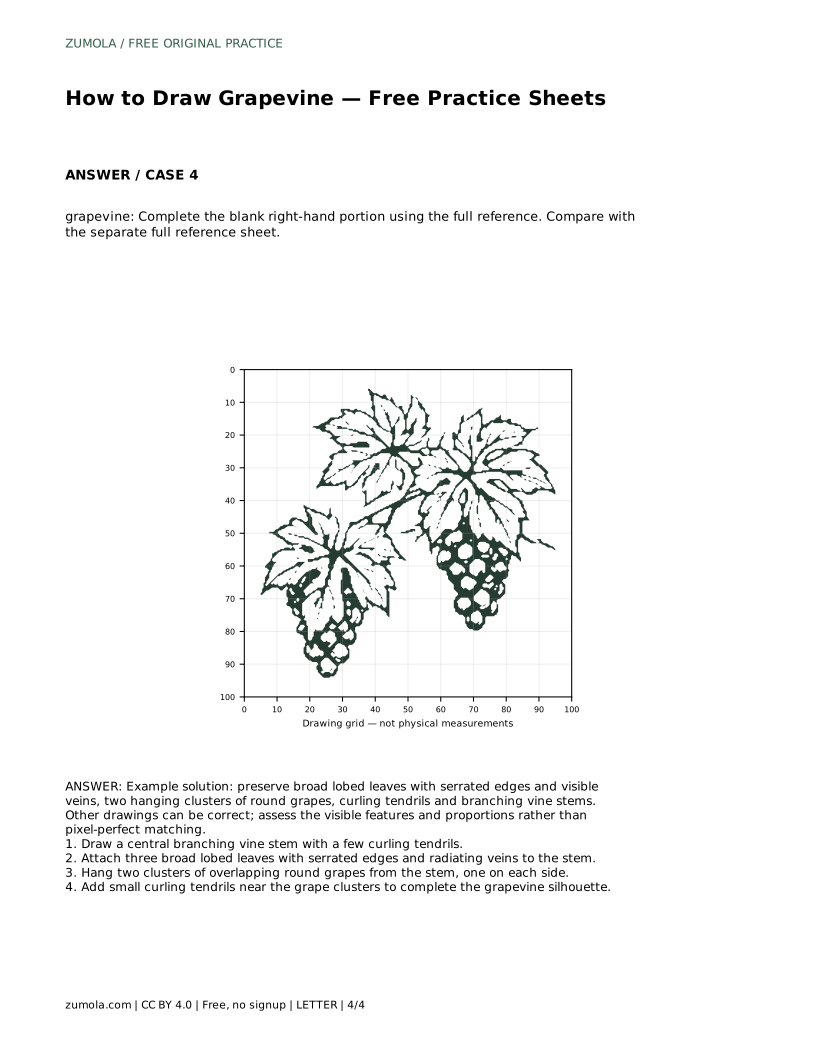
Reference diagrams
LETTER · Download PDF
A4 · Download PDF
Free original resources
Learn to draw a grapevine by building a branching stem, three lobed serrated leaves, two hanging grape clusters and curling tendrils, then check your own work.
Four original cases, with reference diagrams, practice sheets and worked answers. Everything is free; no signup required.
LETTER · Download PDF
A4 · Download PDF
LETTER · Download PDF
A4 · Download PDF
LETTER · Download PDF
A4 · Download PDF
Use A4 or US Letter to match your printer. Use the stated values and conditions to solve each exercise; diagrams are not physical measuring rulers.
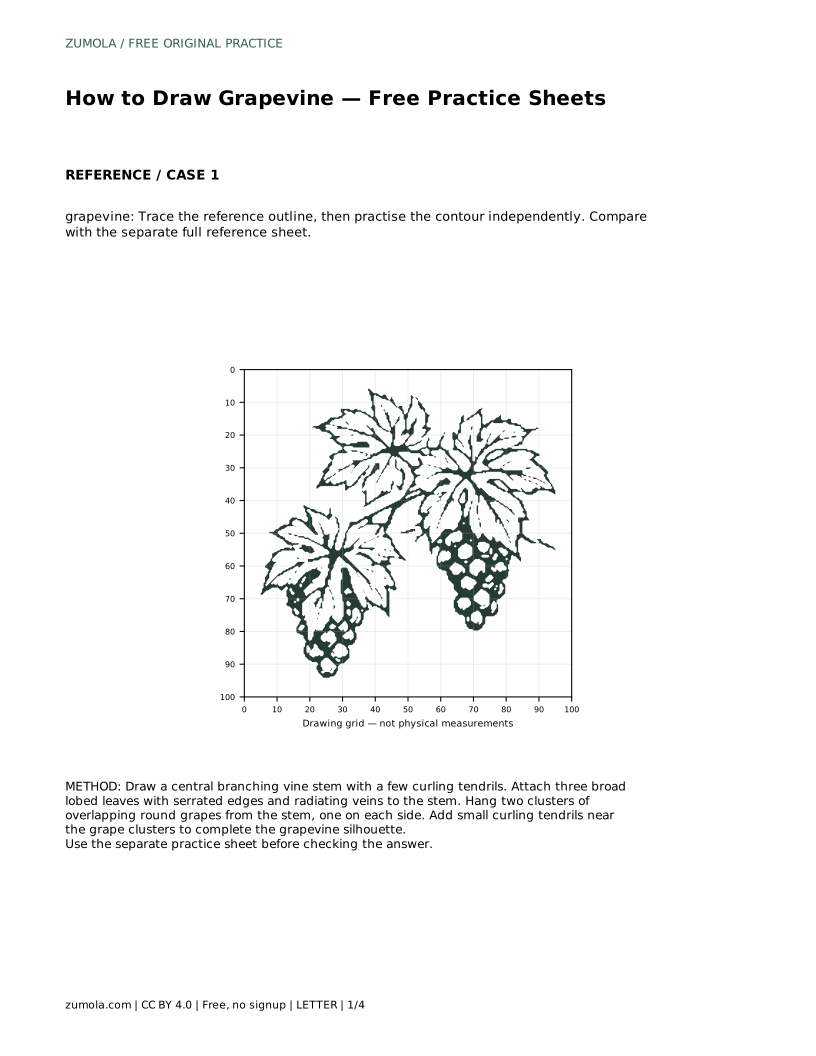
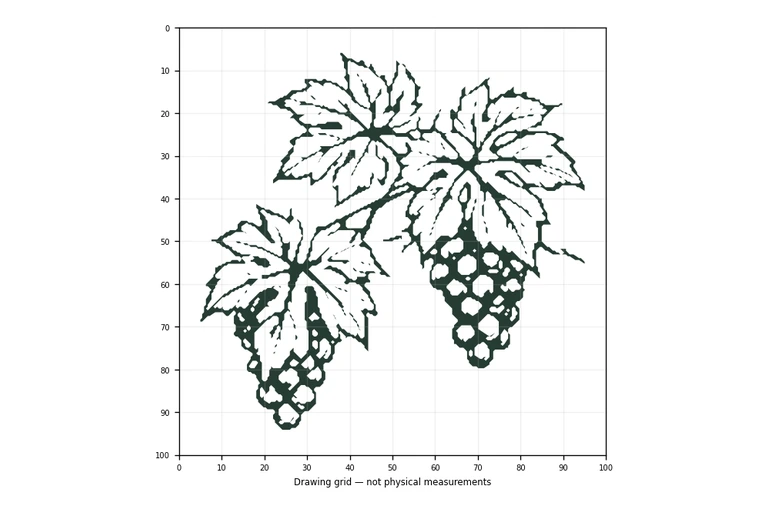
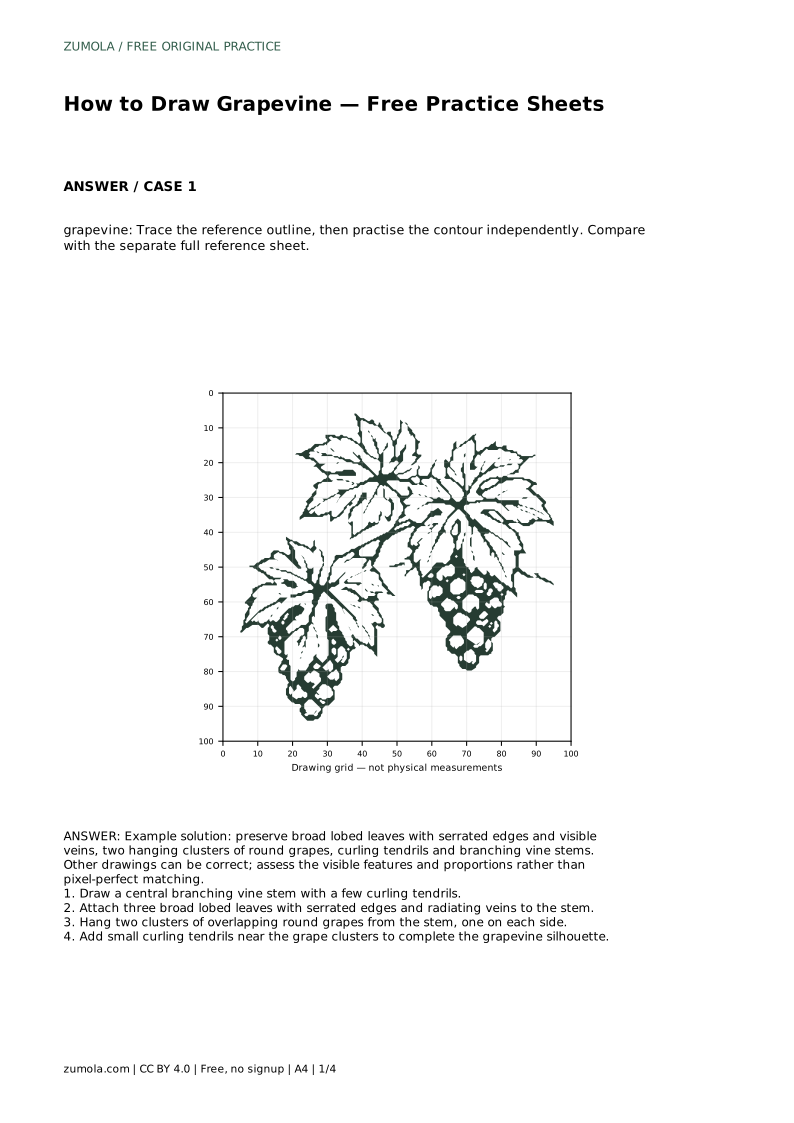
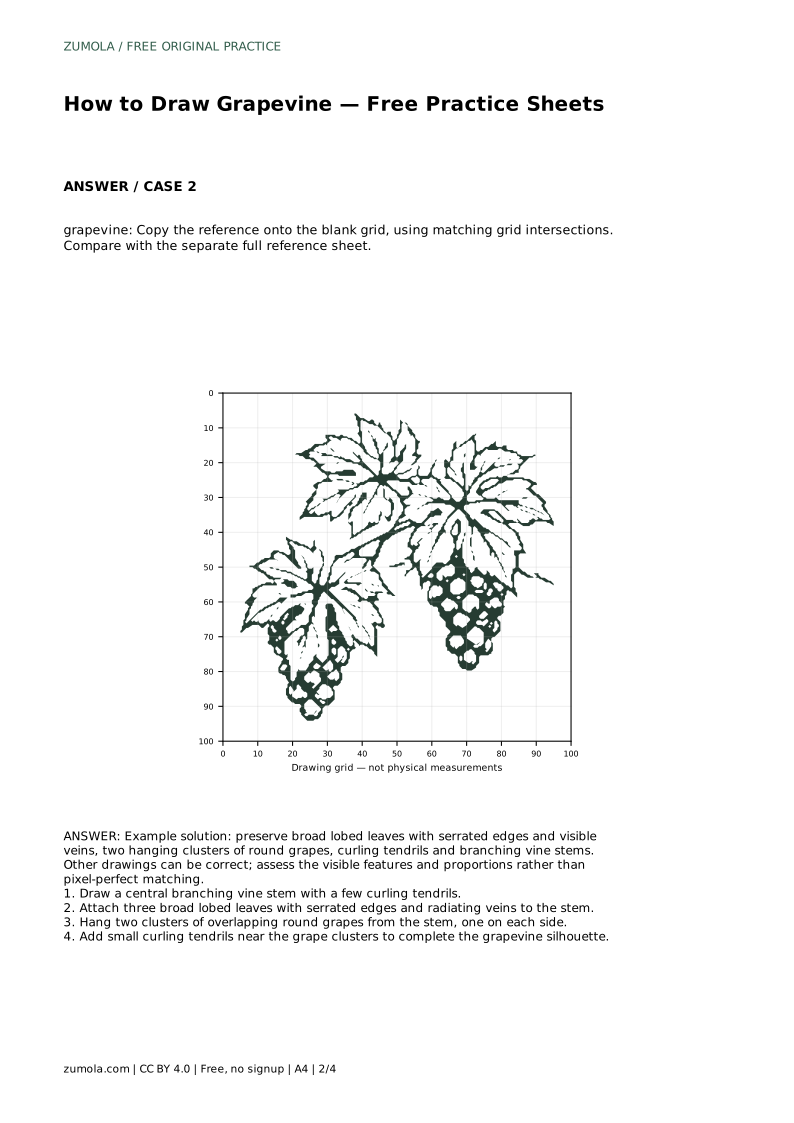
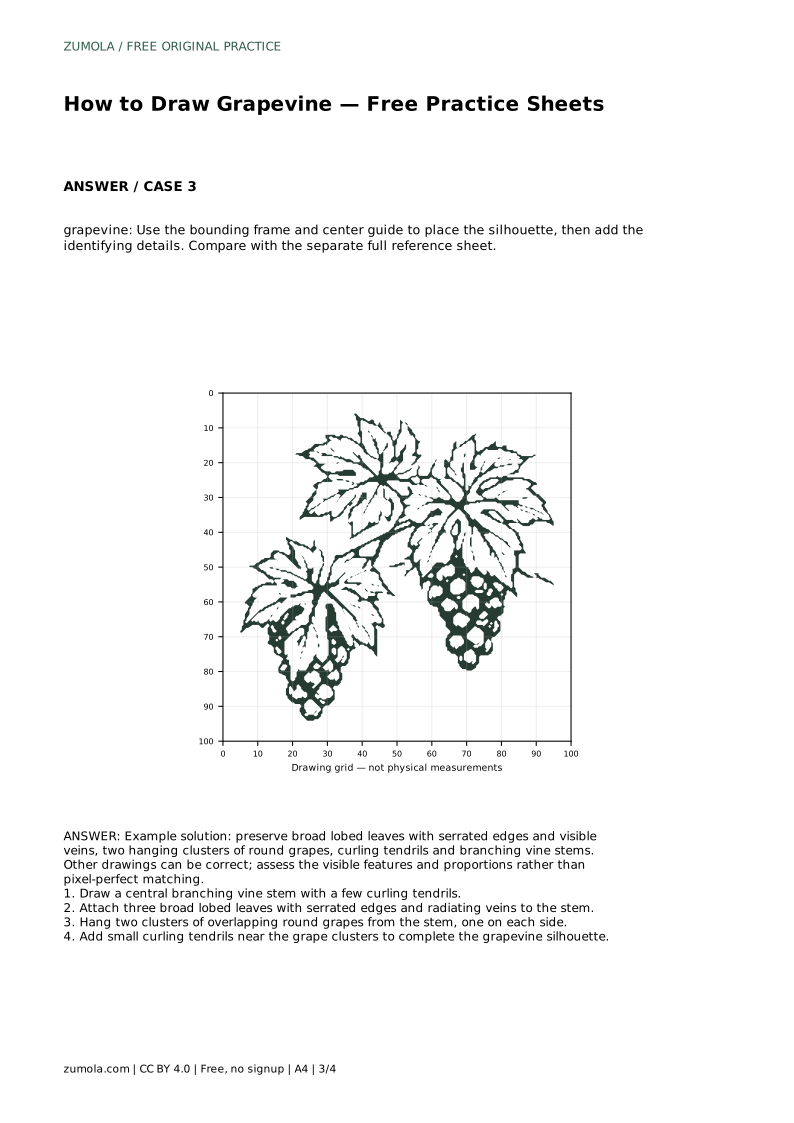
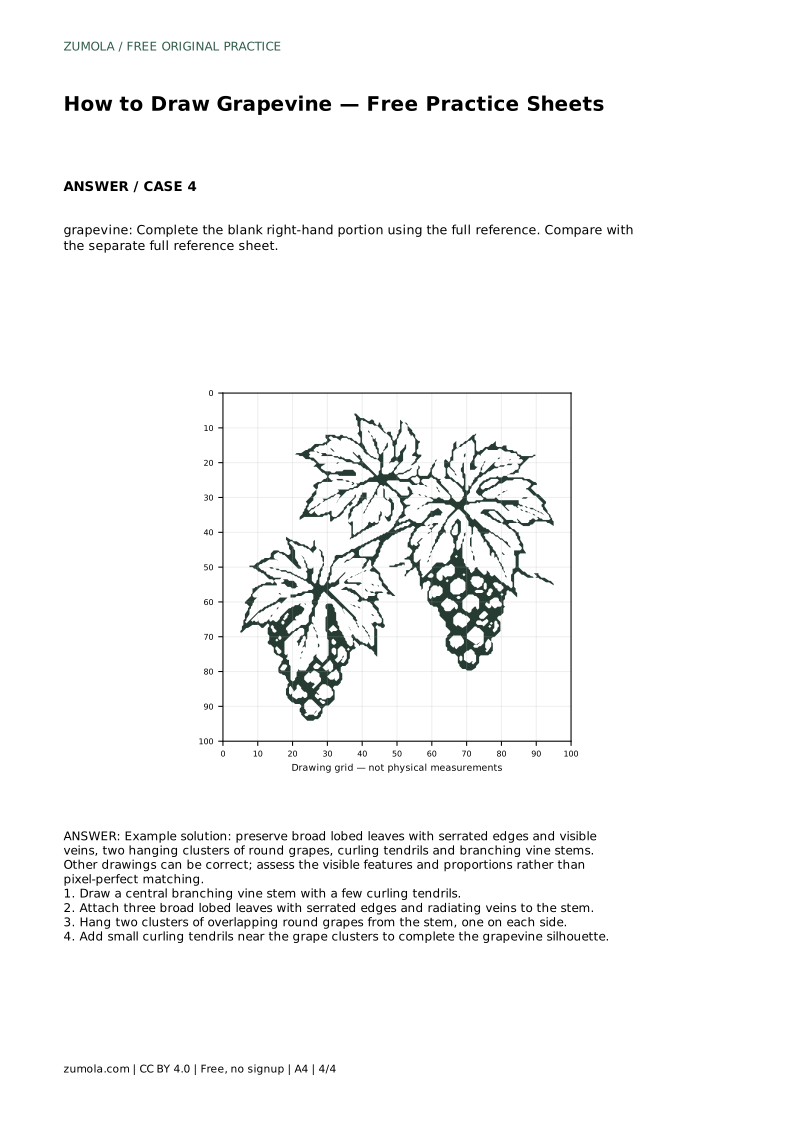
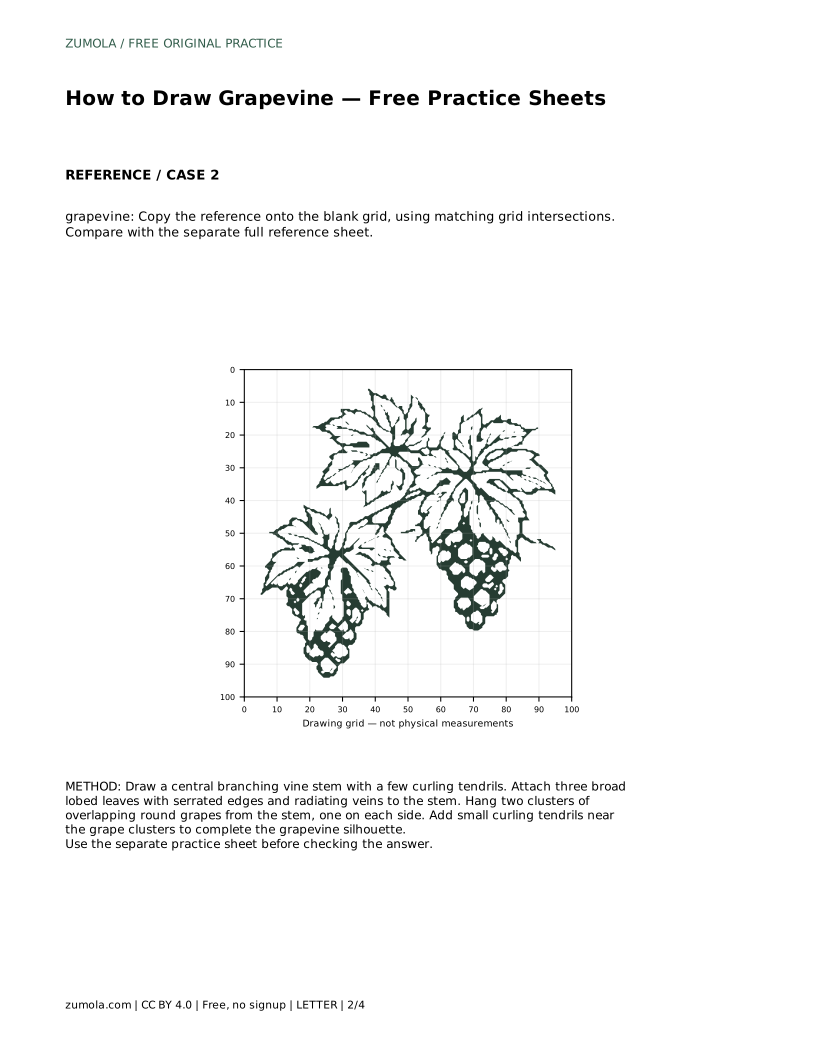
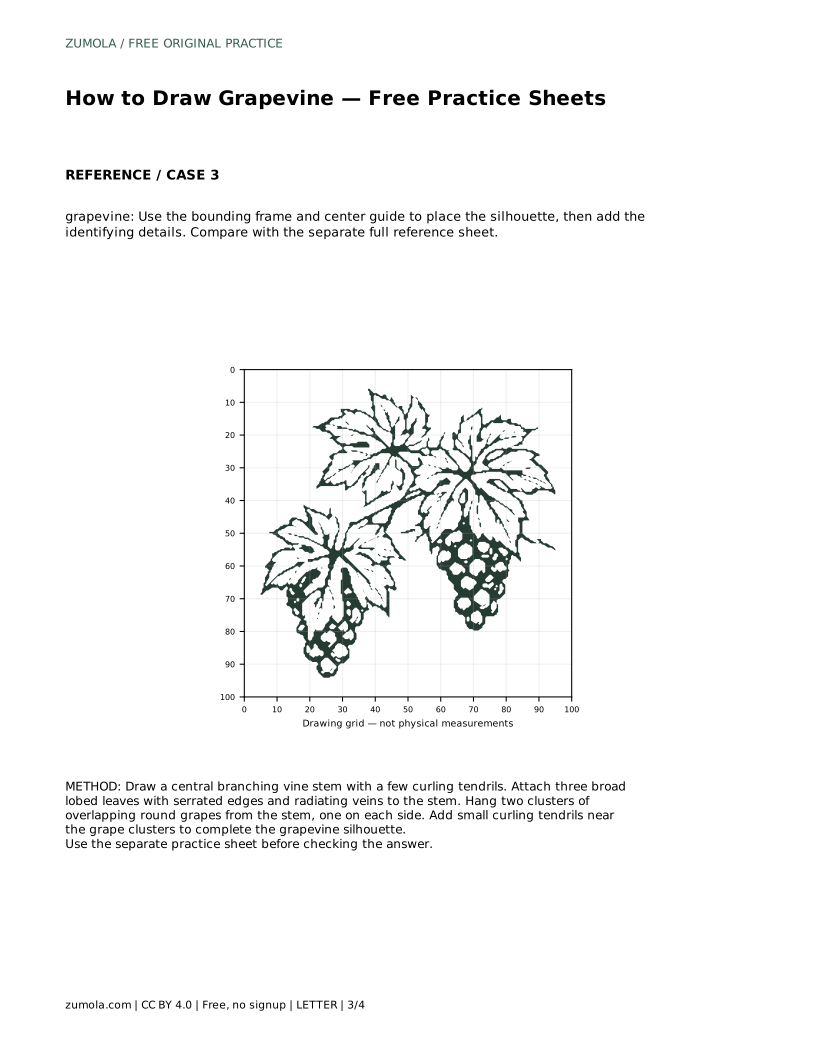
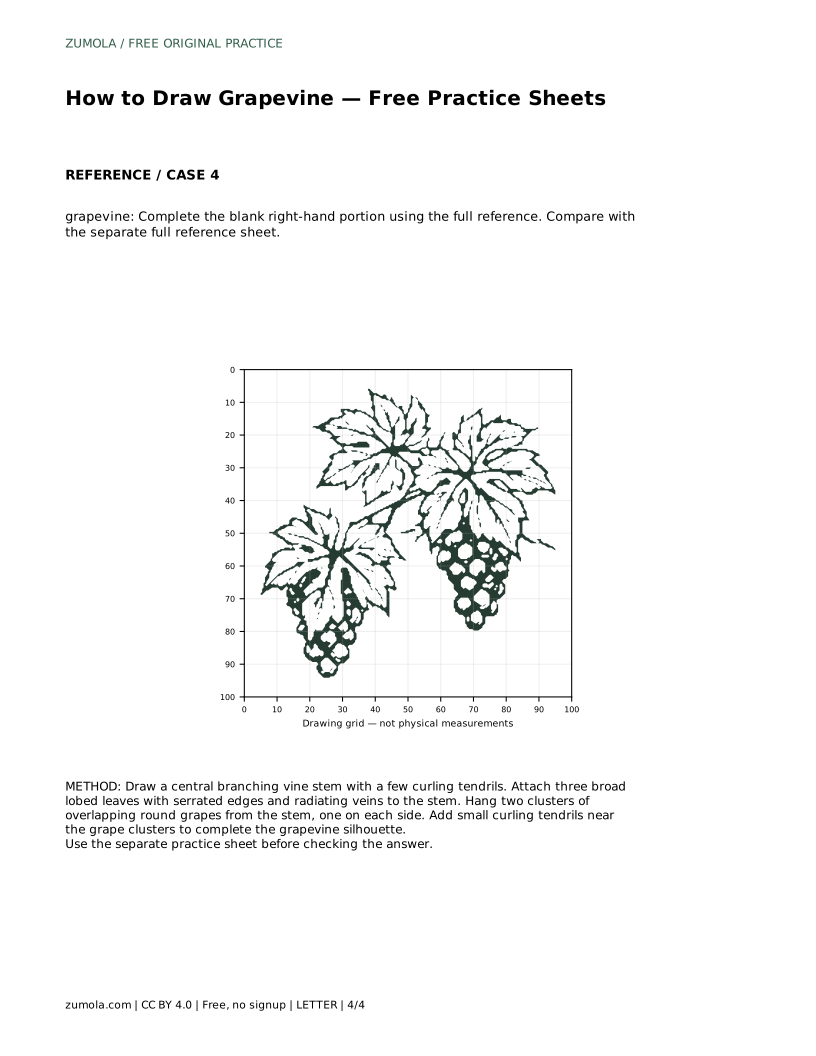
A grapevine drawing reads clearly when its parts are recognizable: a branching stem, broad lobed leaves with serrated edges and visible veins, hanging clusters of round grapes, and curling tendrils. This page walks through building that silhouette in a sensible order, then checking proportions and features against a reference. Because drawings can be correct in many ways, judge your work by visible features and relative placement rather than pixel-perfect matching.
Start with structure, not decoration. A grapevine is a branching stem that carries leaves, fruit clusters and tendrils. If the stem is placed first, every later part has somewhere logical to attach, and the drawing keeps a readable silhouette.
Draw one central branching stem with a few curling tendrils. Keep the main line confident and let branches split at clear points. Tendrils should curl away from the stem rather than cross it repeatedly, so the outline stays easy to read.
Grape leaves are broad and lobed, with serrated edges and veins that radiate from the base toward the tips. Draw the overall lobed shape first, then add the serrations along the edge, then the veins. Working in that order prevents the edge detail from swallowing the leaf's basic form.
Place three leaves along the stem at different heights and angles. Varying their size and tilt makes the vine look natural without changing the identifying features. Keep the veins visible; they are part of what makes the leaf read as a grape leaf rather than a generic blob.
Hang two clusters of overlapping round grapes from the stem, one on each side. Build each cluster from the top down, drawing circles that overlap slightly so the bunch looks full. Keep the circles round and similar in size; a cluster of mixed ovals reads as a different fruit.
Finish with small curling tendrils near the grape clusters. Tendrils are thin and spiral, so draw them lightly and keep them shorter than the leaves. They complete the grapevine silhouette without crowding the main features.
Compare your drawing with a separate full reference sheet. Check that the broad lobed leaves have serrated edges and visible veins, that two hanging clusters of round grapes appear, that curling tendrils are present, and that the vine stems branch clearly. Then compare proportions: are the leaves too large for the stem, or the clusters too small?
Other drawings can be correct. Assess the visible features and proportions rather than pixel-perfect matching. If a feature is missing or misplaced, redraw that part rather than starting over.
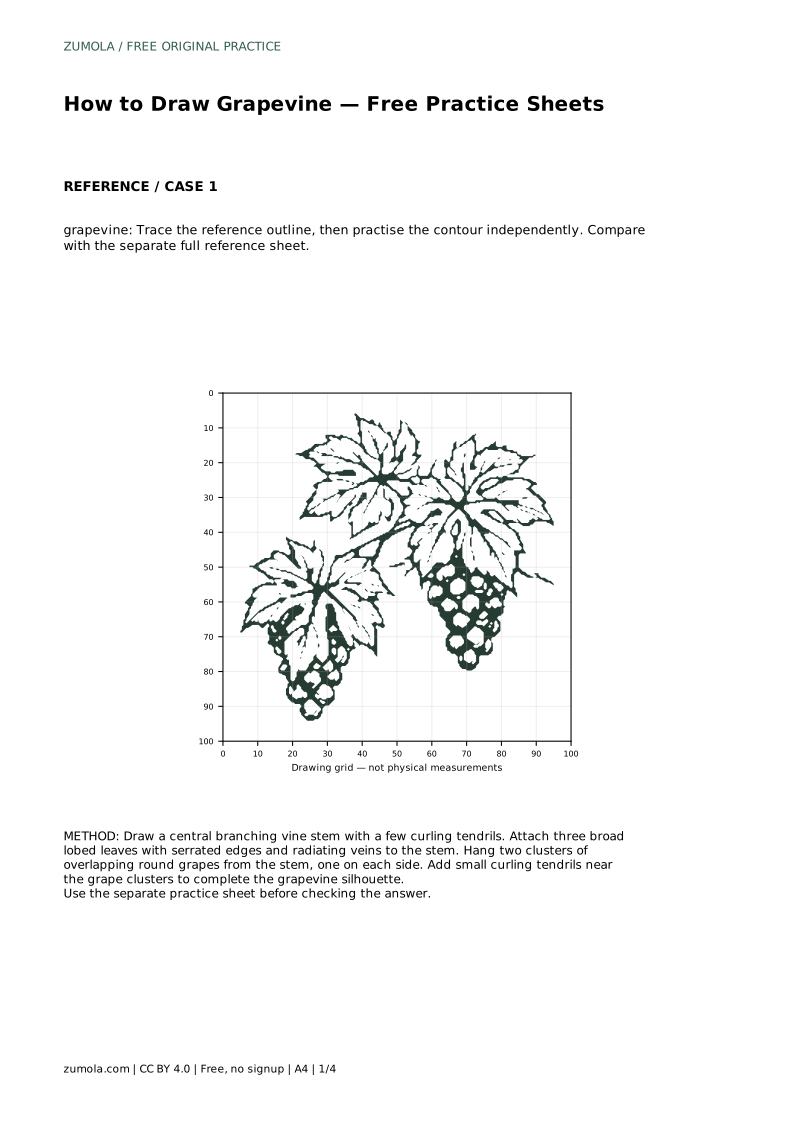
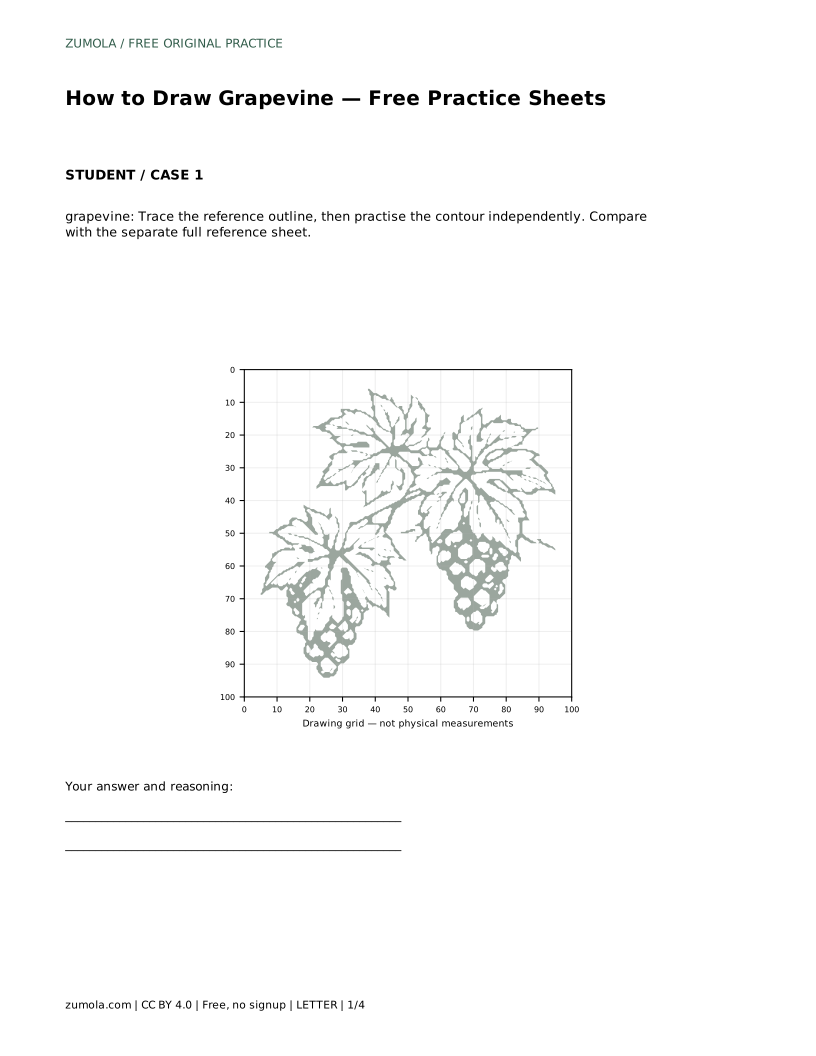
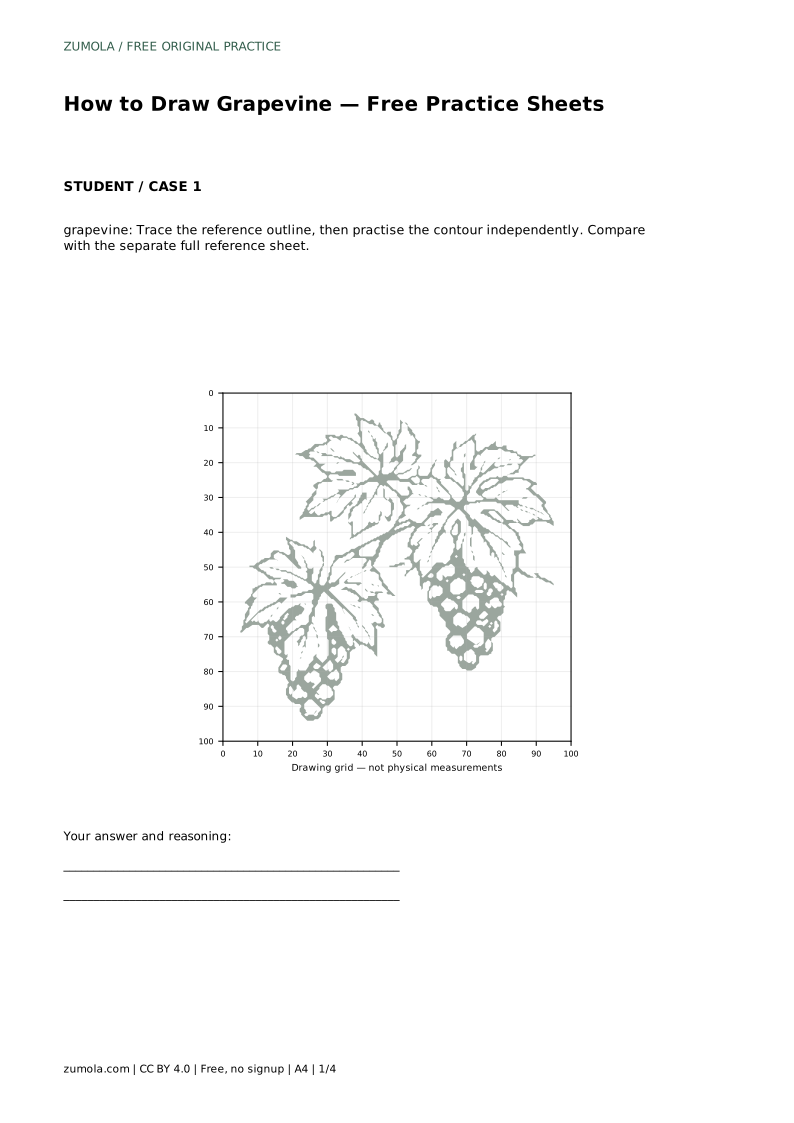
grapevine: Trace the reference outline, then practise the contour independently. Compare with the separate full reference sheet.
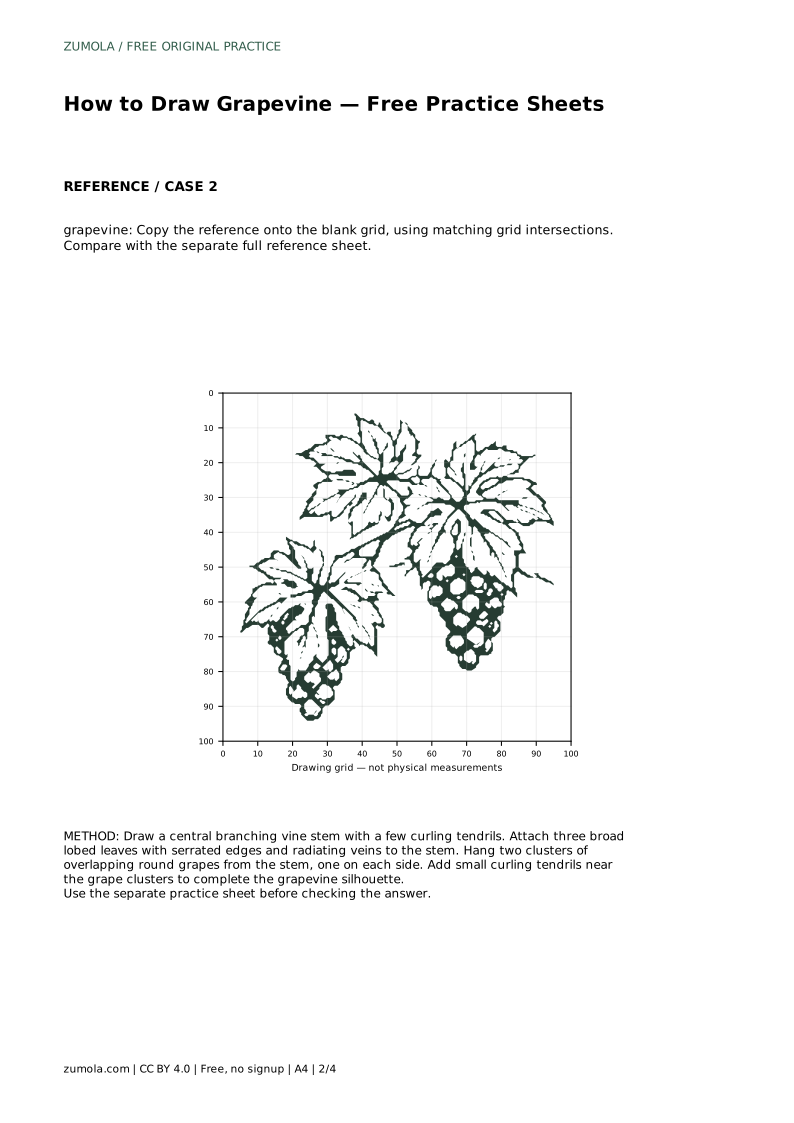
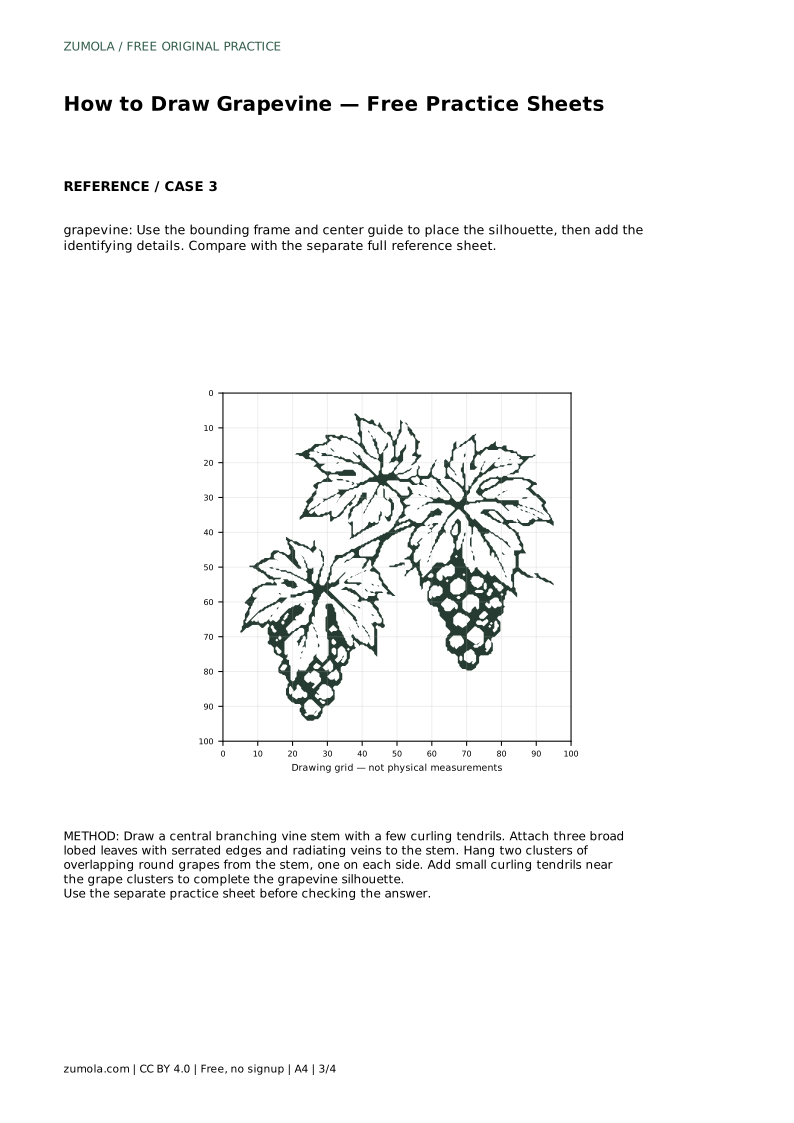
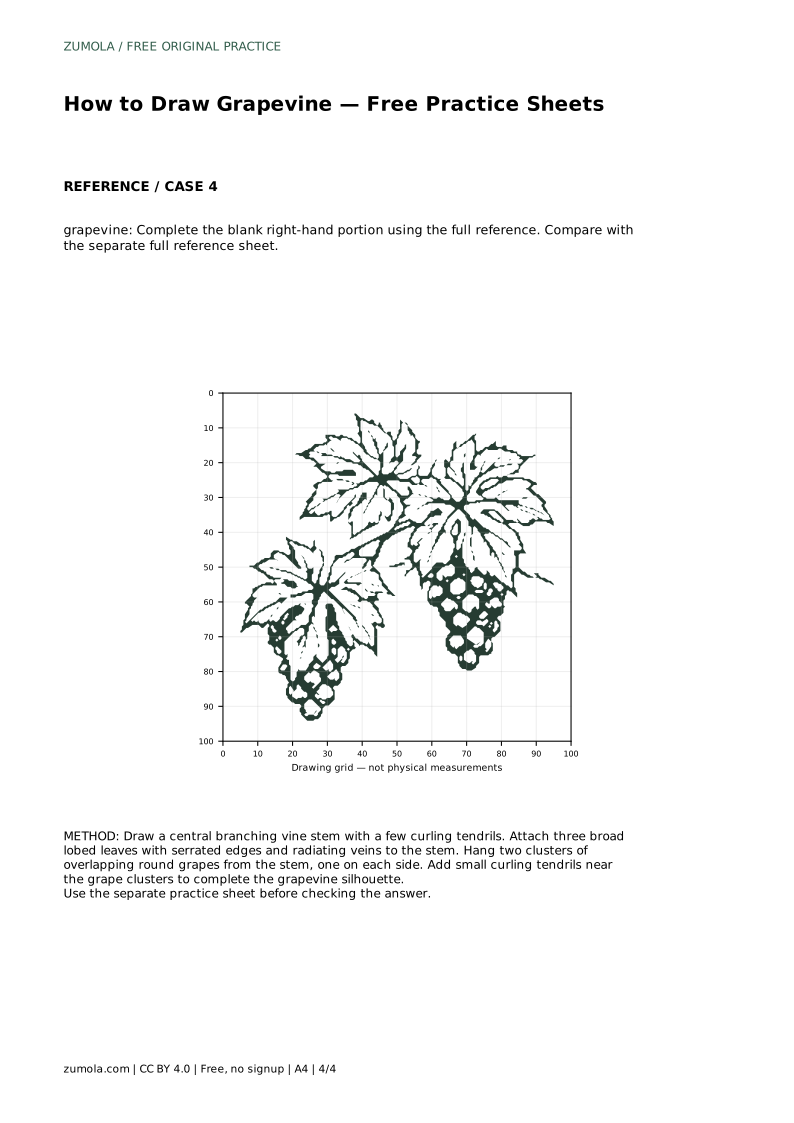
Example solution: preserve broad lobed leaves with serrated edges and visible veins, two hanging clusters of round grapes, curling tendrils and branching vine stems. Other drawings can be correct; assess the visible features and proportions rather than pixel-perfect matching. Draw a central branching vine stem with a few curling tendrils. Attach three broad lobed leaves with serrated edges and radiating veins to the stem. Hang two clusters of overlapping round grapes from the stem, one on each side. Add small curling tendrils near the grape clusters to complete the grapevine silhouette.
This practice uses three broad lobed leaves and two hanging clusters of round grapes, one on each side of the stem. That arrangement keeps the identifying features visible and easy to check.
No. Other drawings can be correct. Assess the visible features and proportions rather than pixel-perfect matching, then correct only the parts that are missing or out of scale.
Draw the branching stem and tendrils first, then the three lobed leaves with serrated edges and veins, then the two grape clusters, and finally small tendrils near the clusters.
All drawing practice · Free coordinate paper
Original resources · CC BY 4.0 · Free for personal and classroom use with attribution.