Reference diagrams
LETTER · Download PDF
A4 · Download PDF
Free original resources
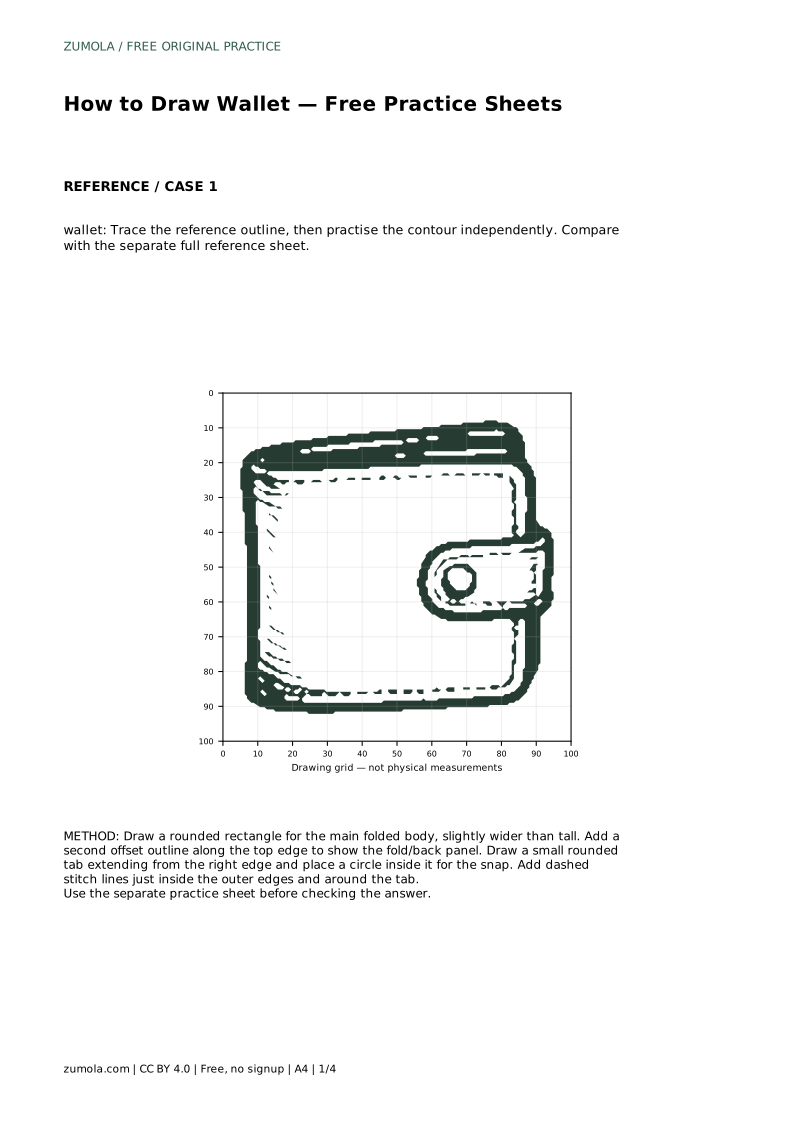
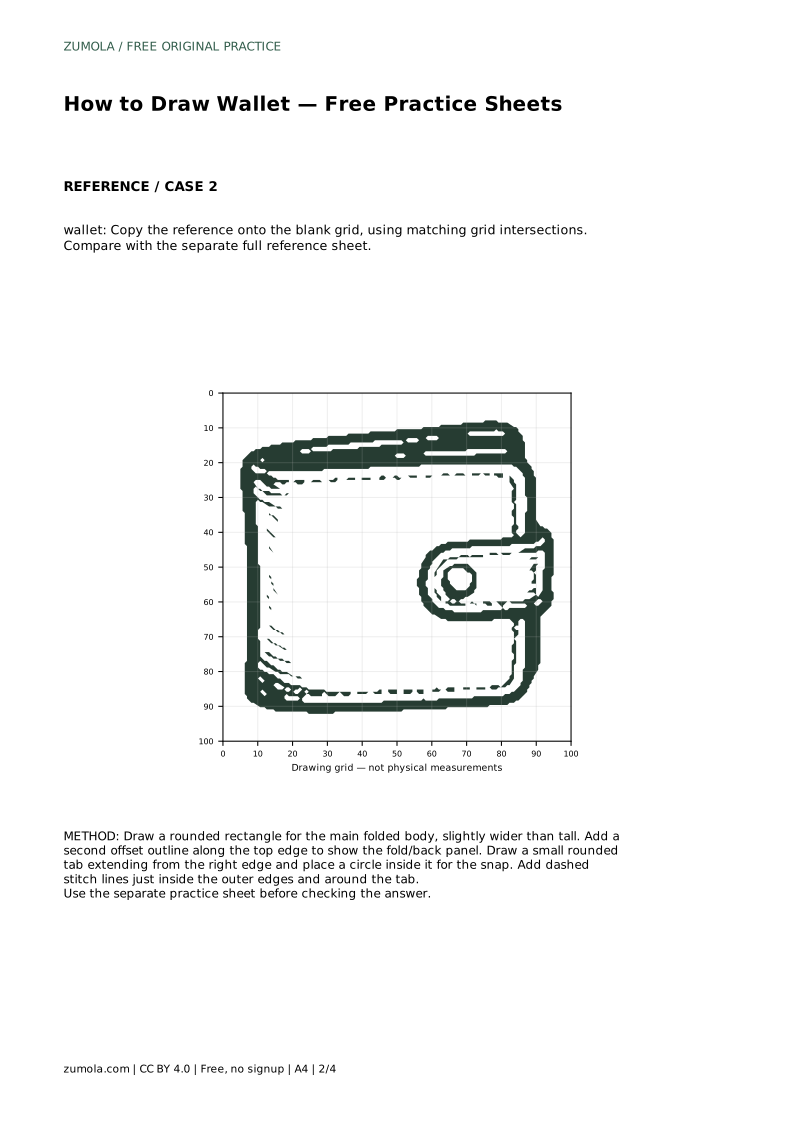
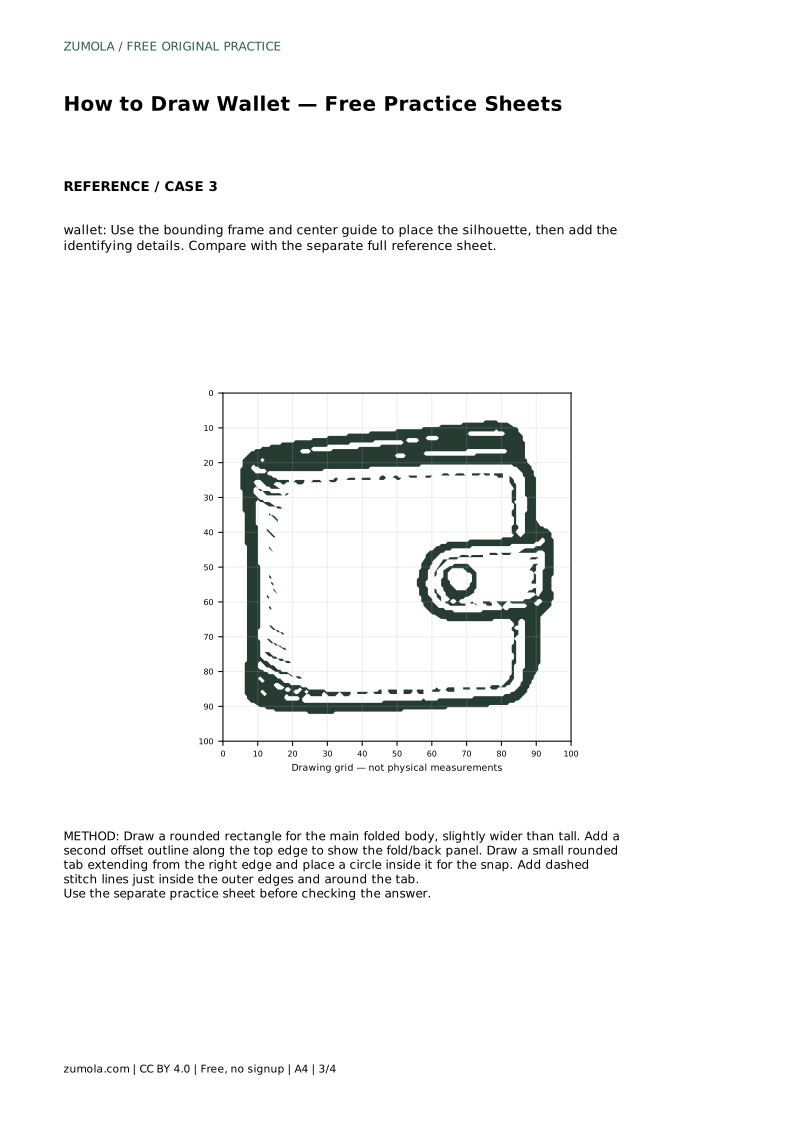
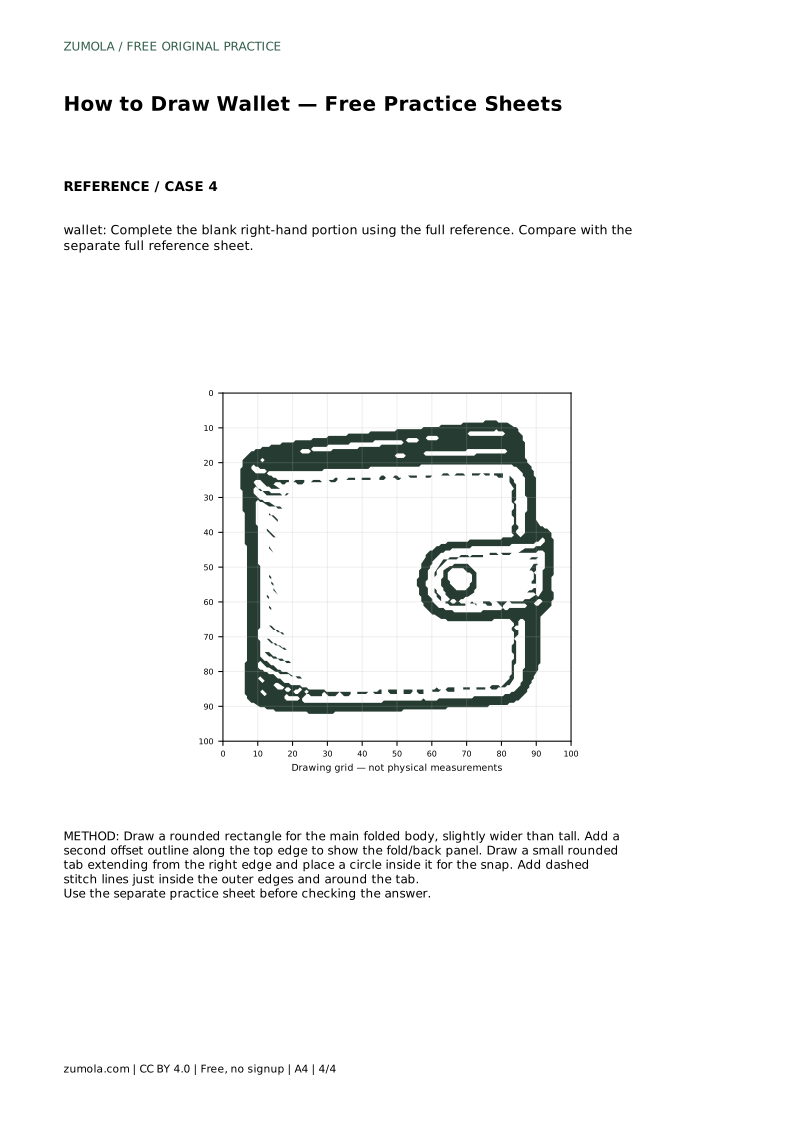
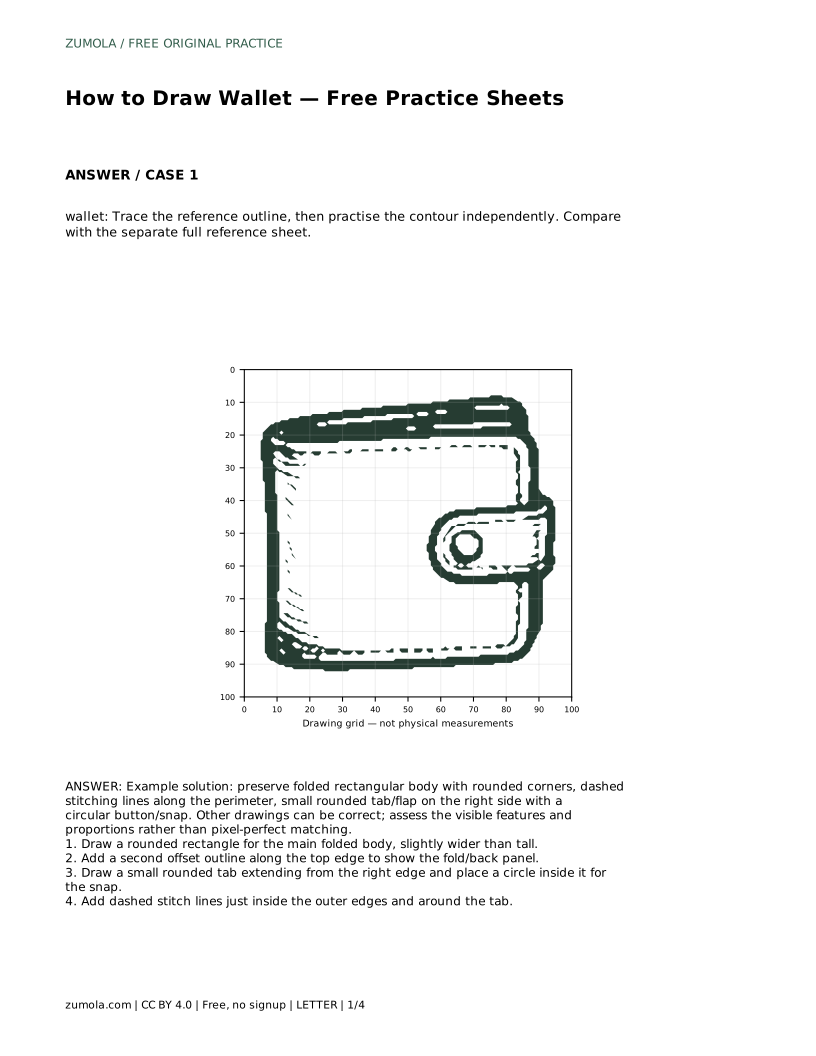
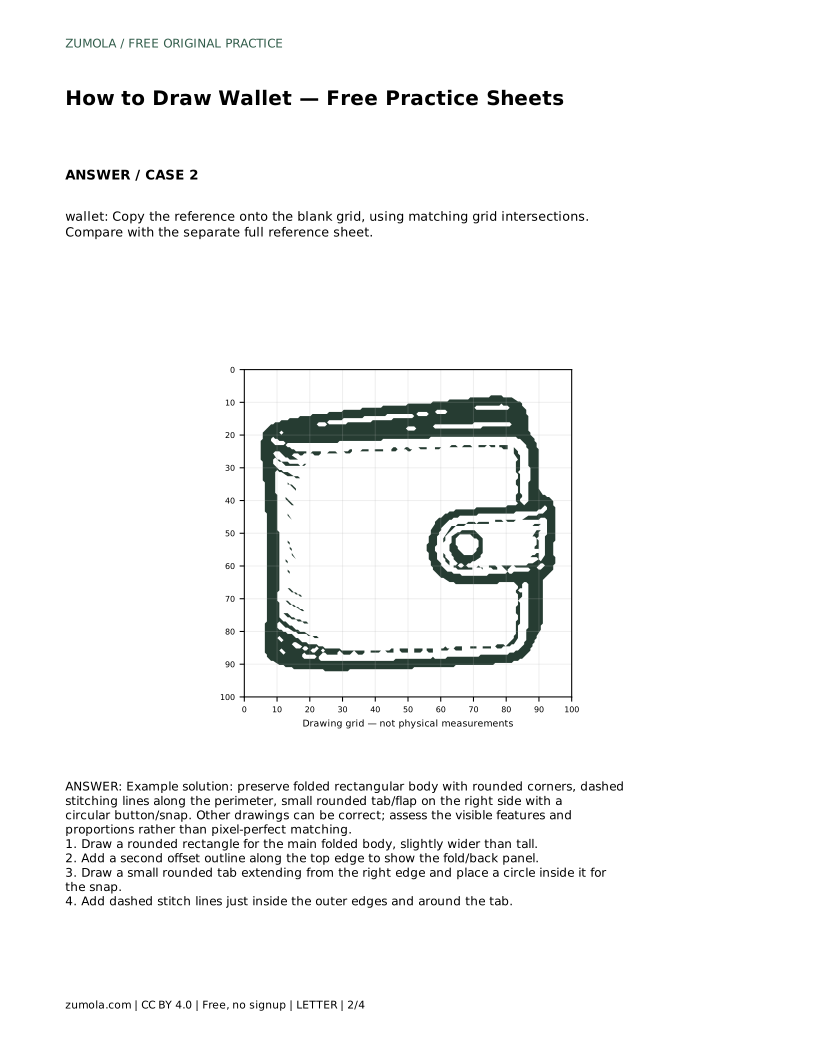
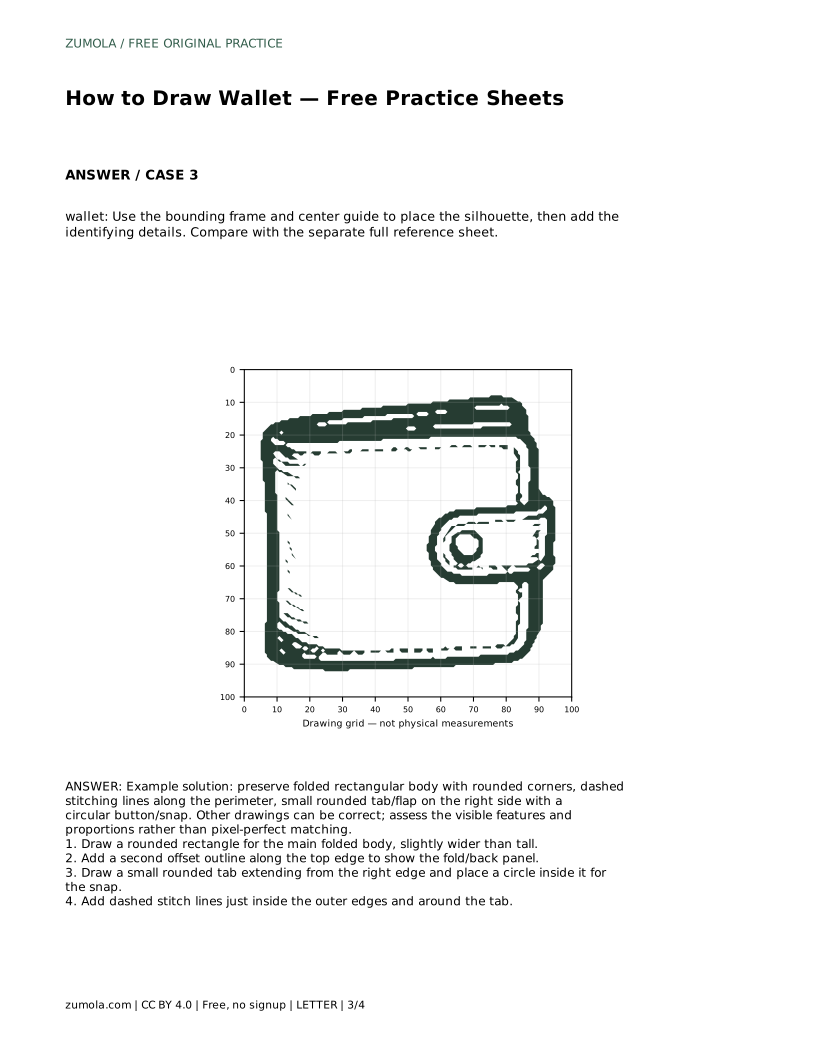
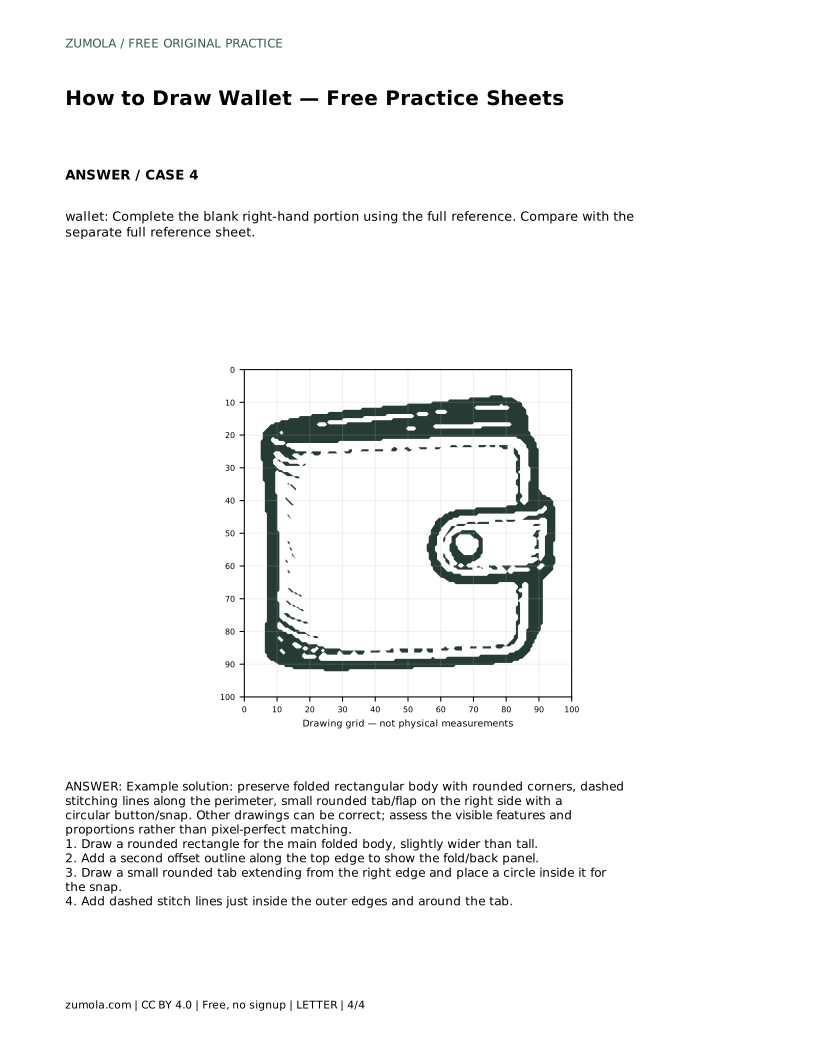
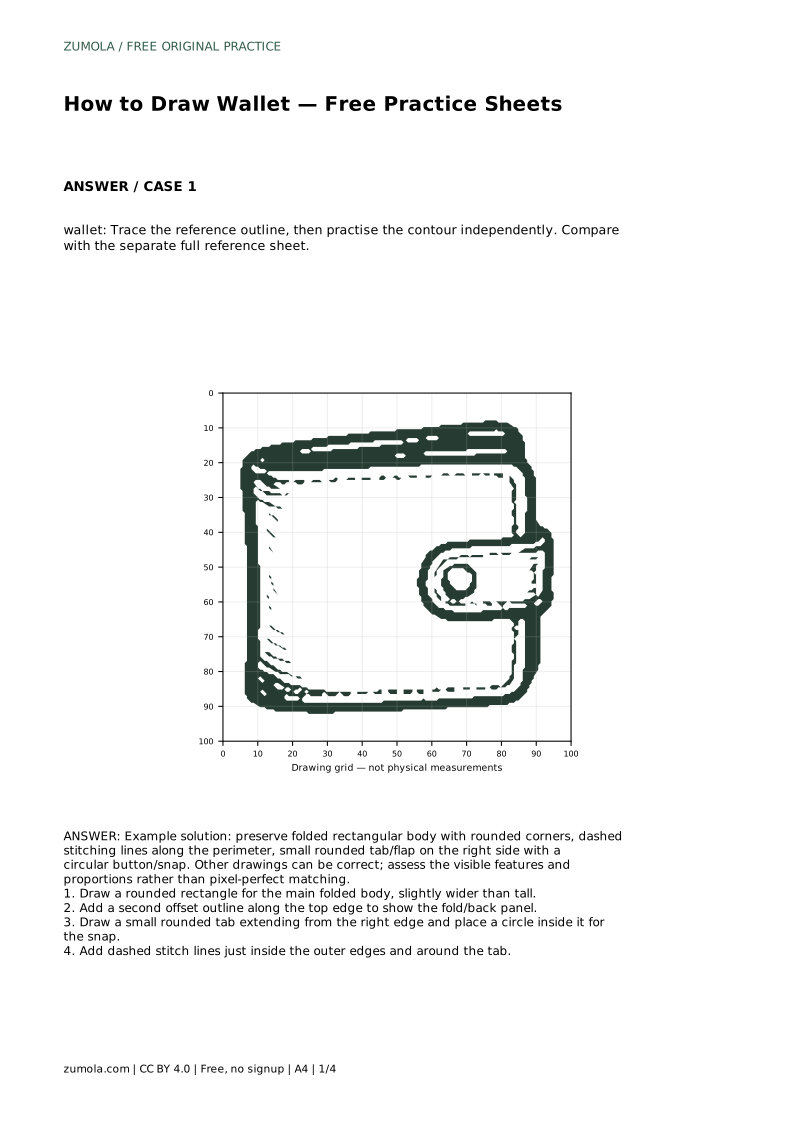
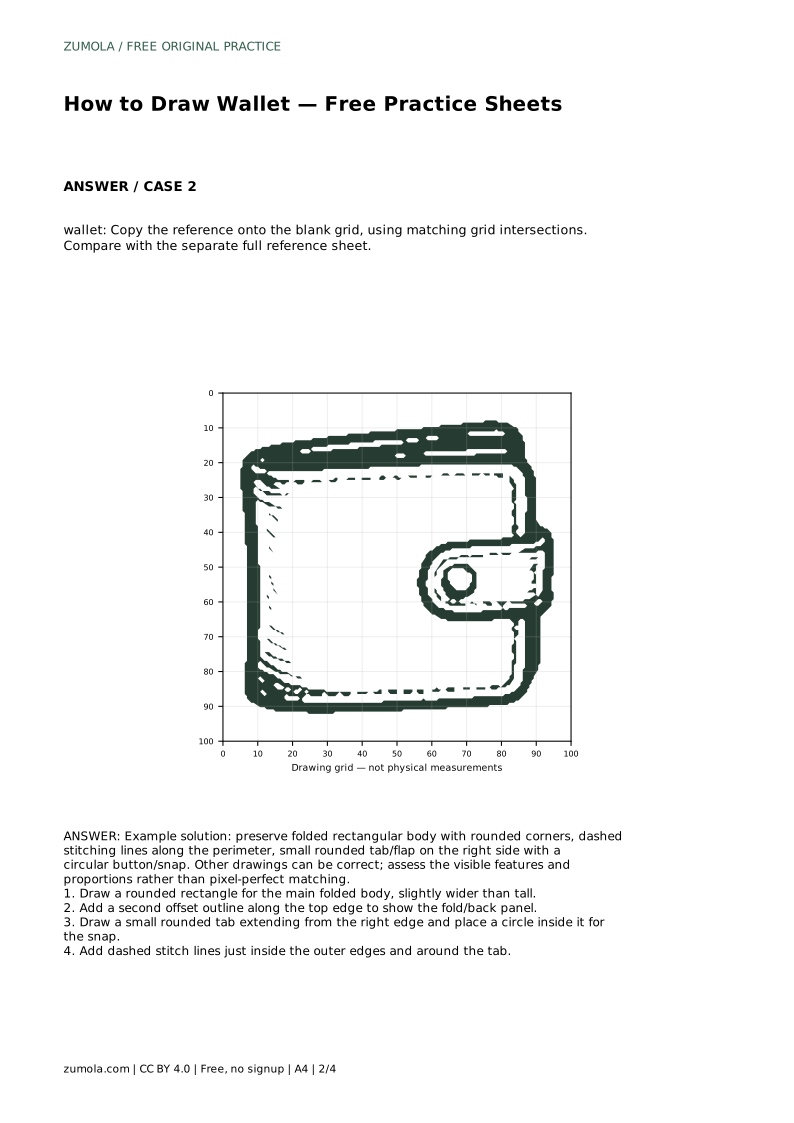
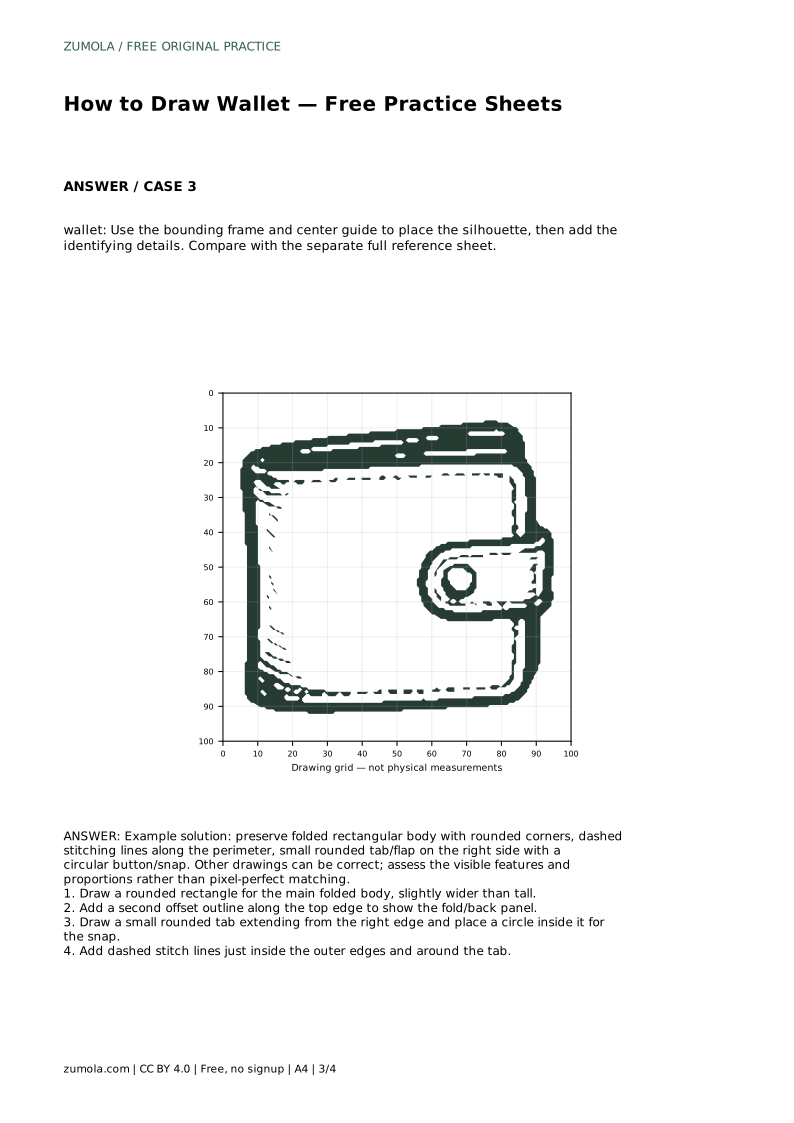
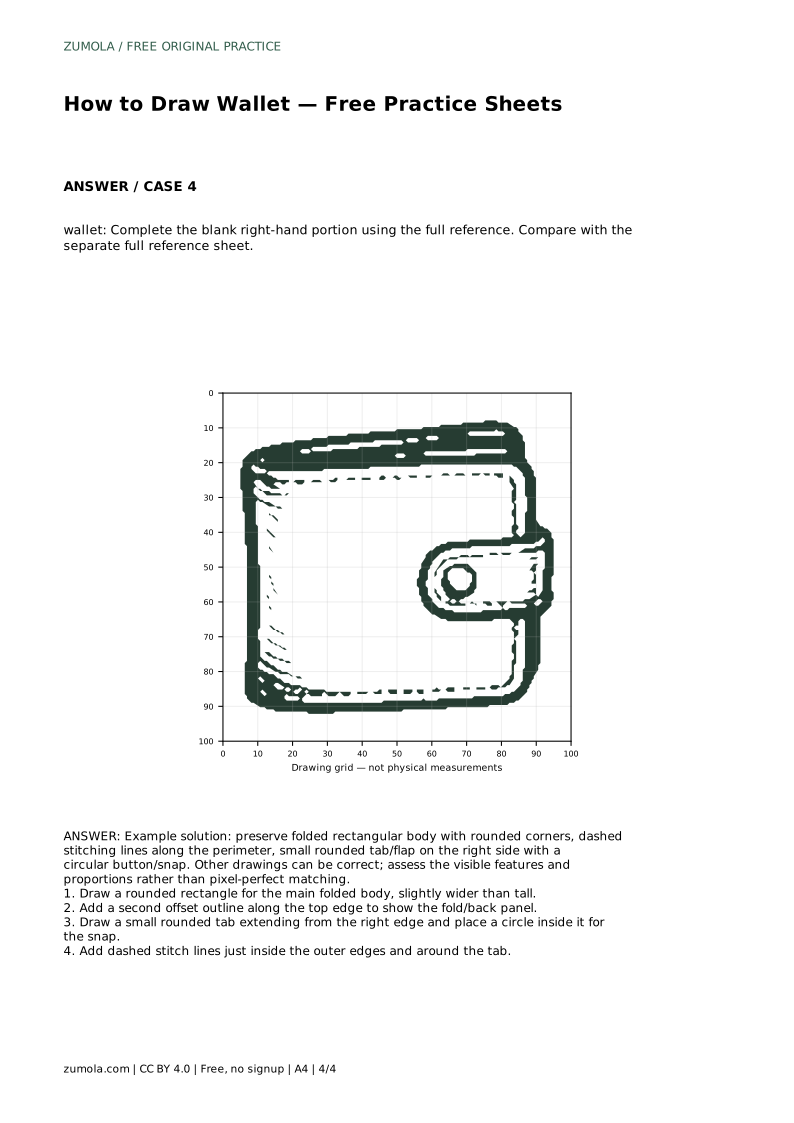
Learn to draw a wallet with a folded rounded body, offset back panel, side tab, snap, and dashed stitching. Use the practice sheets to compare proportions and features.
Four original cases, with reference diagrams, practice sheets and worked answers. Everything is free; no signup required.
LETTER · Download PDF
A4 · Download PDF
LETTER · Download PDF
A4 · Download PDF
LETTER · Download PDF
A4 · Download PDF
Use A4 or US Letter to match your printer. Use the stated values and conditions to solve each exercise; diagrams are not physical measuring rulers.
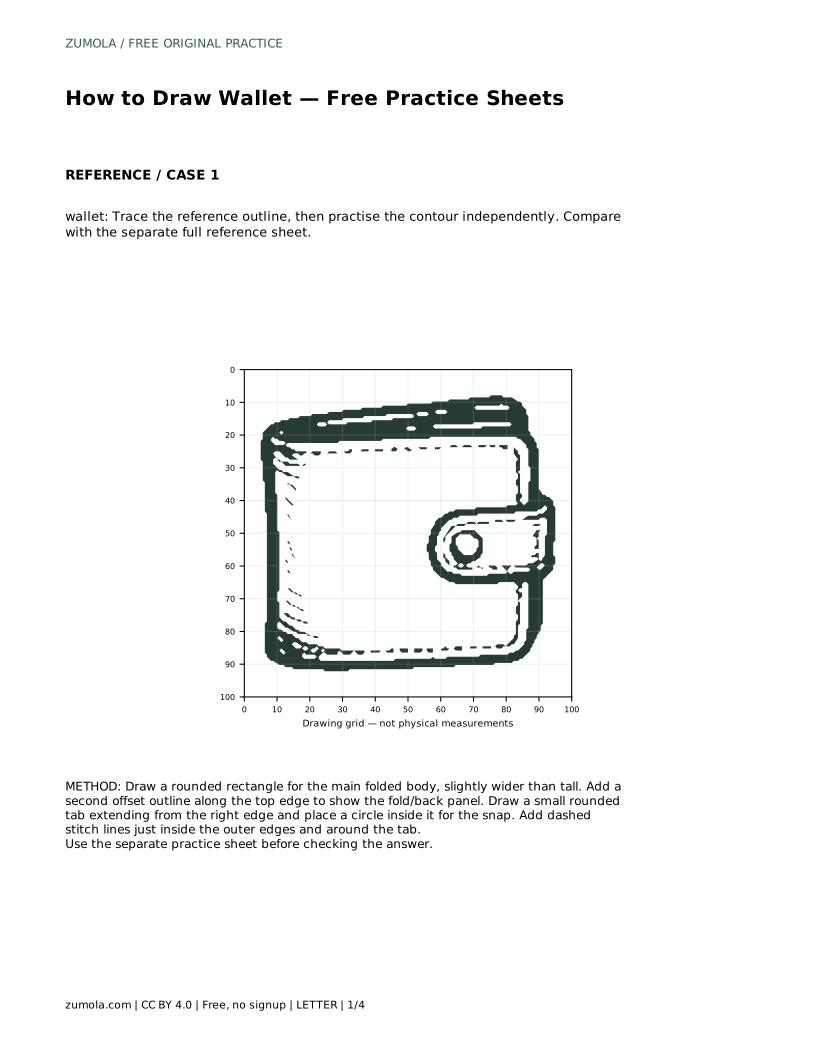
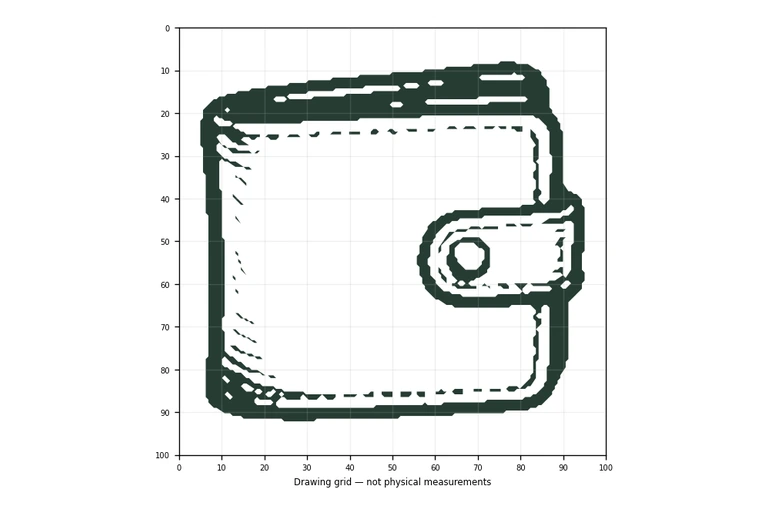
A wallet drawing is mostly a study in simple shapes and careful placement. The body is a rounded rectangle, slightly wider than tall, with a second outline near the top to suggest the fold or back panel. A small rounded tab on the right holds a circular snap, and dashed lines just inside the edges stand for stitching. This guide explains how to build those parts in order, then use the practice sheets to check your proportions and visible details.
Begin by deciding the overall size and position of the wallet on your page. The main body is a rounded rectangle that is slightly wider than tall. Keep the corners gently curved rather than sharp, because a folded wallet has soft edges where the material bends. Lightly sketch the rectangle first, then refine the corners so they match each other in size.
The body should read as a single folded object, not a flat card. Leave enough space above and below the rectangle so the tab and stitching will fit without crowding the edges.
A second outline along the top edge shows the fold or the back panel behind the front. Draw this line just inside or just above the top edge, following the same curve as the body. The offset should be small and even, so it reads as a layer rather than a separate object.
Keep this second outline parallel to the top edge. If the gap widens or narrows suddenly, the fold will look uneven. A consistent offset is what makes the wallet look folded rather than flat.
The tab is a small rounded shape extending from the right edge of the body. It should sit at a height that looks natural, usually near the middle or slightly above it. Draw the tab as a short rounded rectangle or a soft loop that connects smoothly to the body edge.
Inside the tab, place a circle for the snap or button. The circle should sit centered within the tab, with a small margin around it. Check that the tab is not wider than the body and that the circle is not so large that it touches the tab edges.
Dashed stitch lines run just inside the outer edges of the body and around the tab. Keep the dashes short and evenly spaced, and keep the line parallel to the edge it follows. Stitching is a detail that should support the shape, not overwhelm it.
When you finish, compare your drawing with the separate full reference sheet. Look at the overall proportions, the position of the tab, the size of the snap, and the spacing of the stitches. Other drawings can be correct, so assess the visible features and proportions rather than expecting a pixel-perfect match.
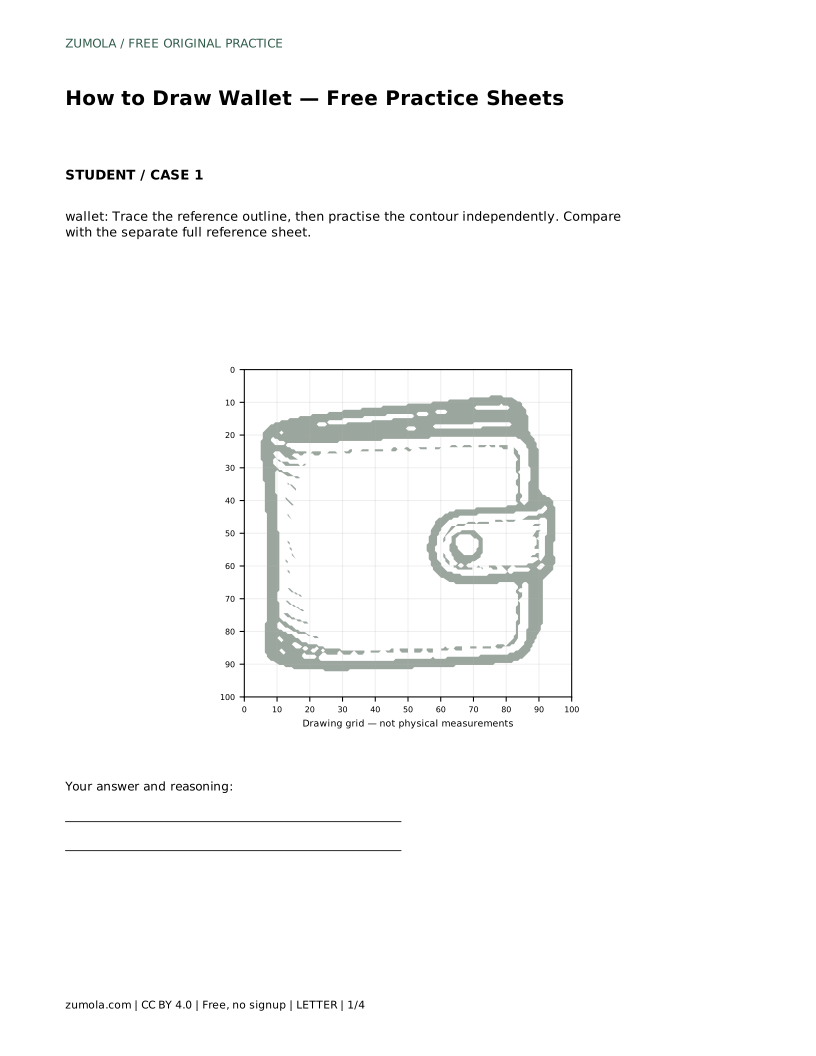
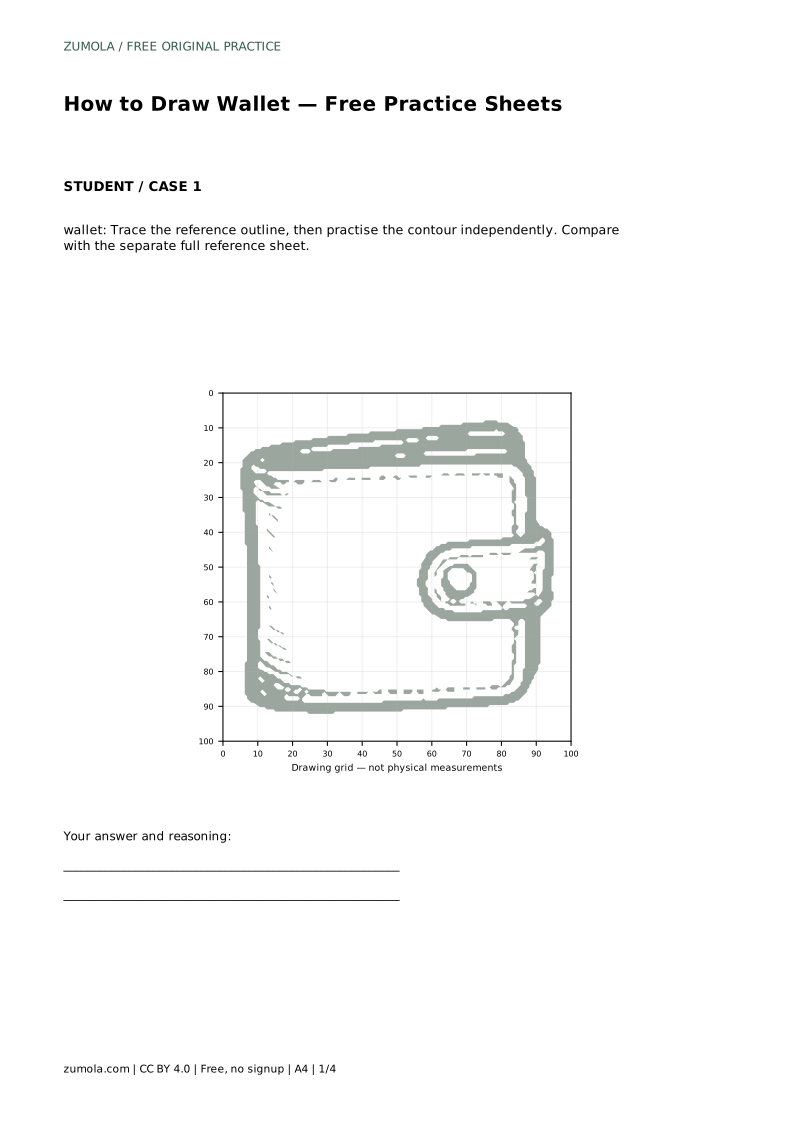
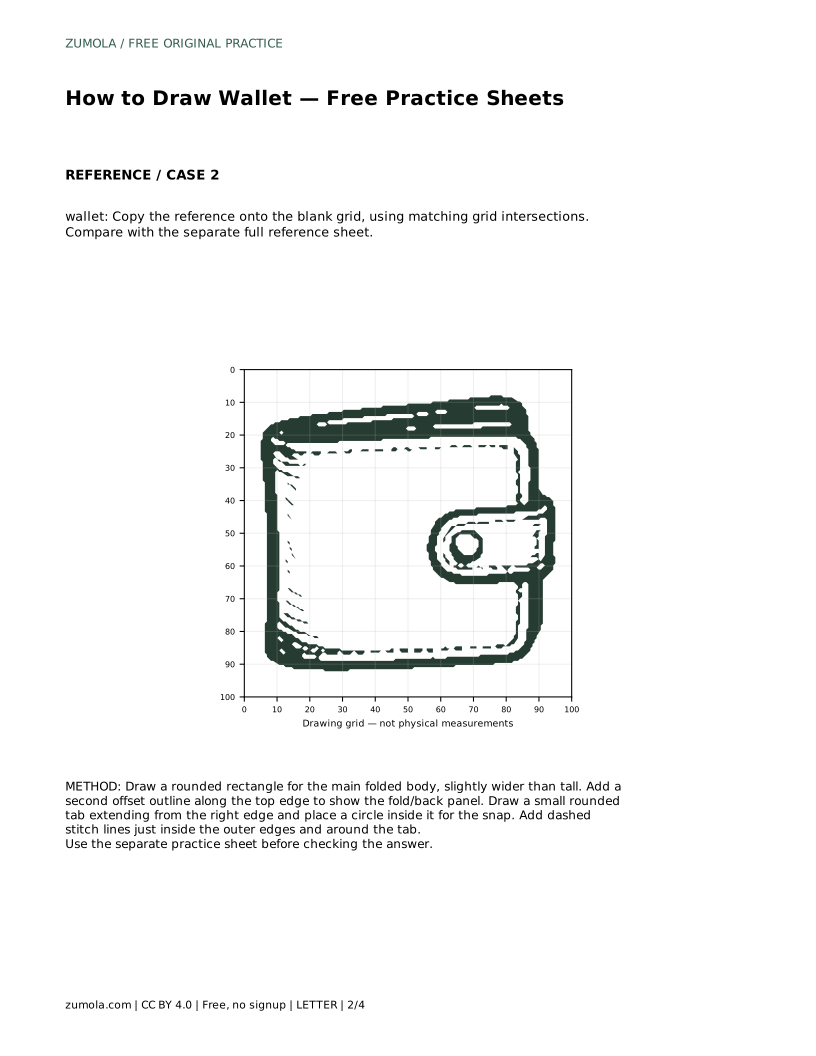
wallet: Trace the reference outline, then practise the contour independently. Compare with the separate full reference sheet.
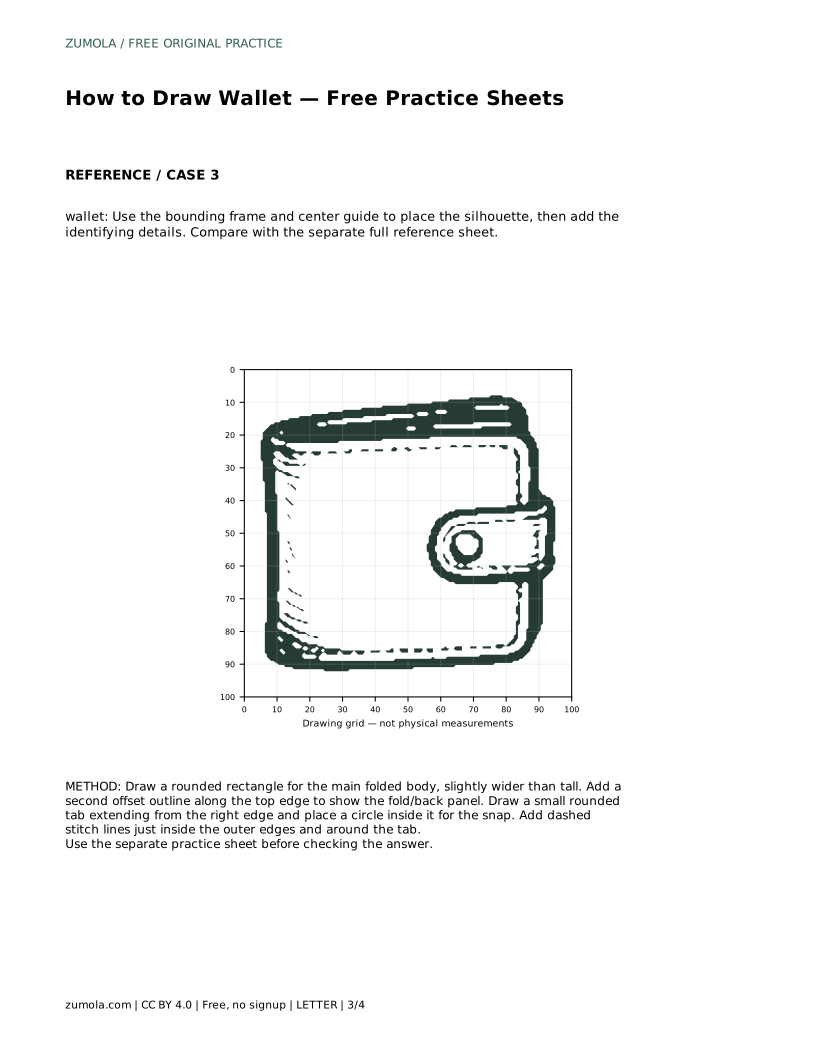
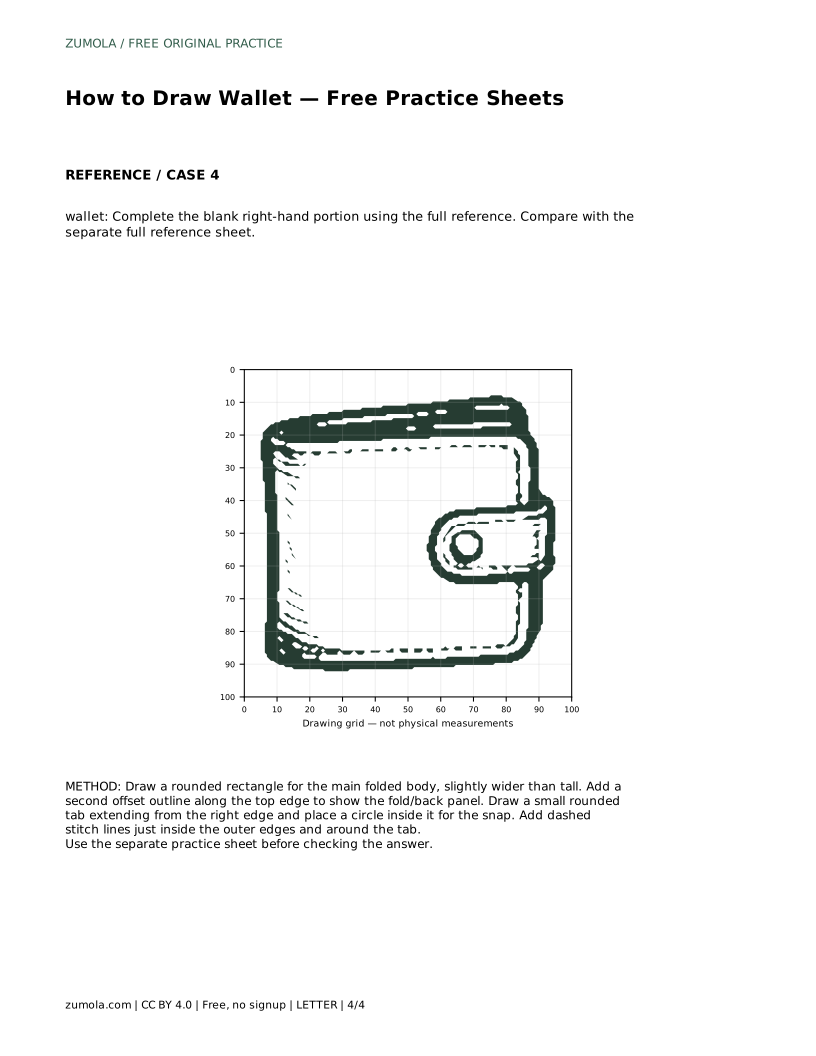
Example solution: preserve folded rectangular body with rounded corners, dashed stitching lines along the perimeter, small rounded tab/flap on the right side with a circular button/snap. Other drawings can be correct; assess the visible features and proportions rather than pixel-perfect matching. Draw a rounded rectangle for the main folded body, slightly wider than tall. Add a second offset outline along the top edge to show the fold/back panel. Draw a small rounded tab extending from the right edge and place a circle inside it for the snap. Add dashed stitch lines just inside the outer edges and around the tab.
No. Other drawings can be correct. Check the visible features and proportions, such as the rounded body, the offset top line, the side tab, the snap, and the stitching.
The tab extends from the right edge of the body. Place it at a height that looks natural, usually near the middle or slightly above, and keep it narrower than the body.
Use short, evenly spaced dashes just inside the outer edges and around the tab. Keep each dashed line parallel to the edge it follows.
All drawing practice · Free coordinate paper
Original resources · CC BY 4.0 · Free for personal and classroom use with attribution.