Free original resources
Horse Drawing: Build a Standing Pose From Body Masses
Learn horse drawing by placing ribcage and pelvis masses, connecting the neck, head and jointed legs, then adding mane, tail and facial details.
Free resources
Letter & A4
PDF & SVG
Letter & A4
PDF & SVG
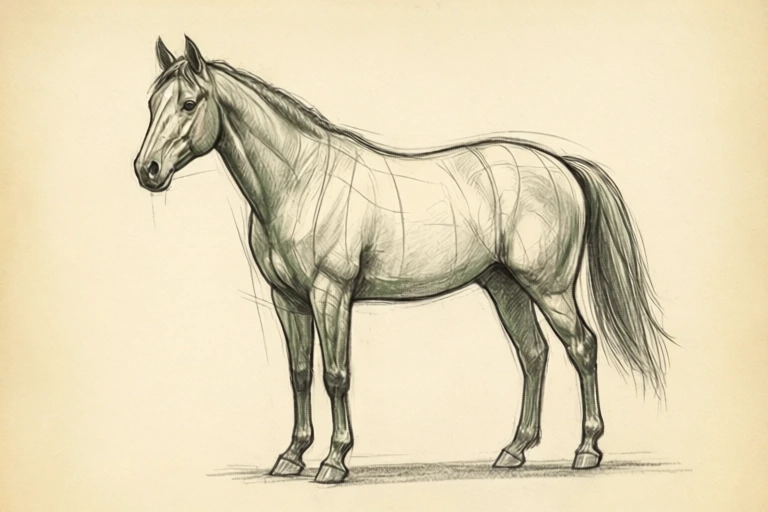
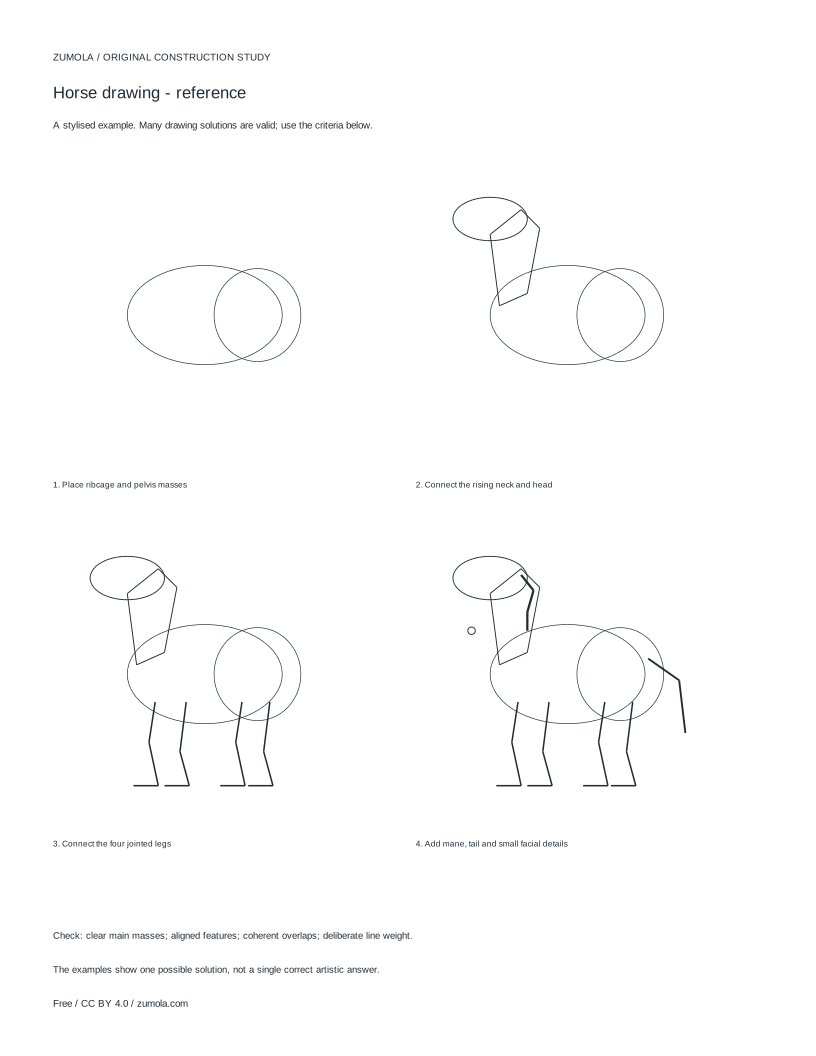
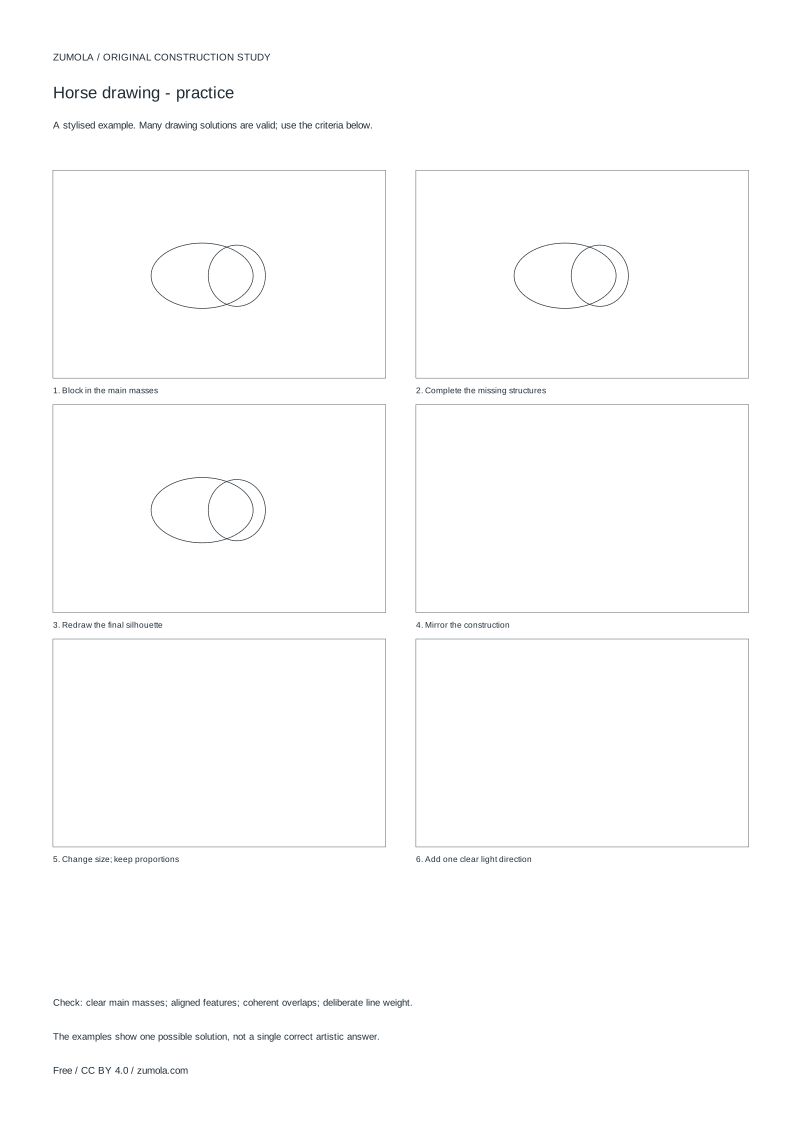
Build the drawing in four stages.
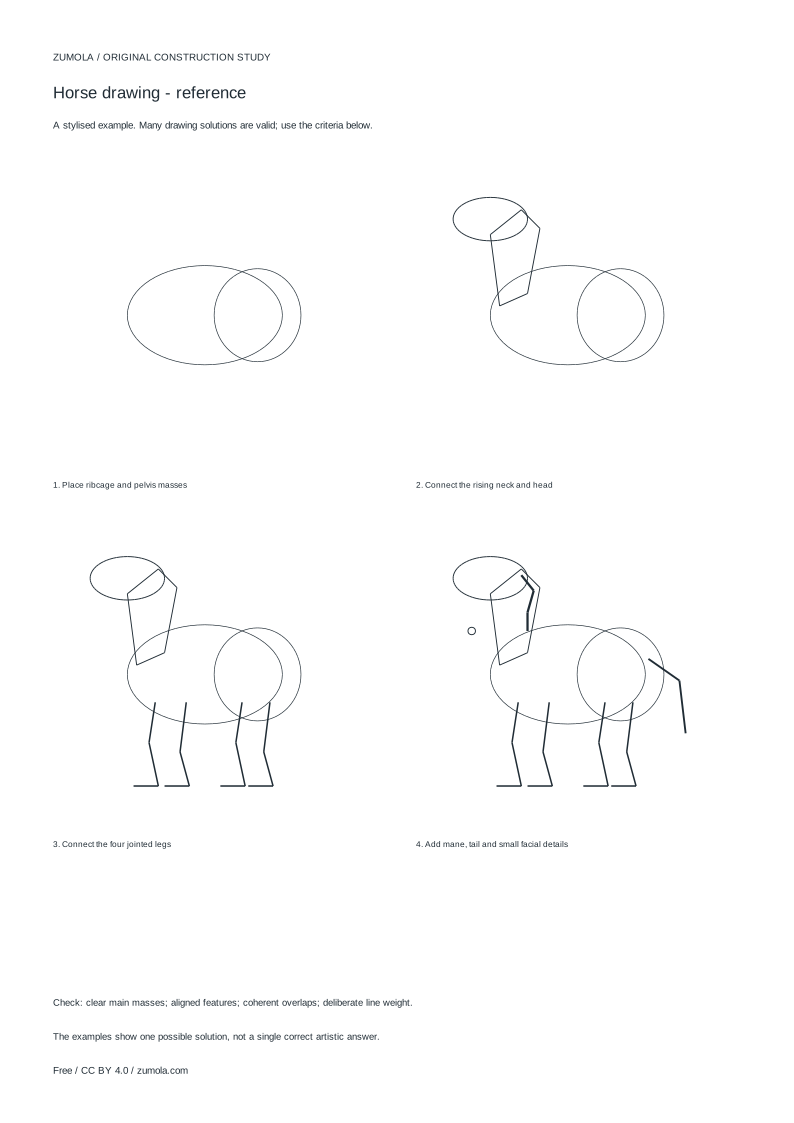
Your free printable kit.
Original reference, student practice and separate worked answers. No account or payment.
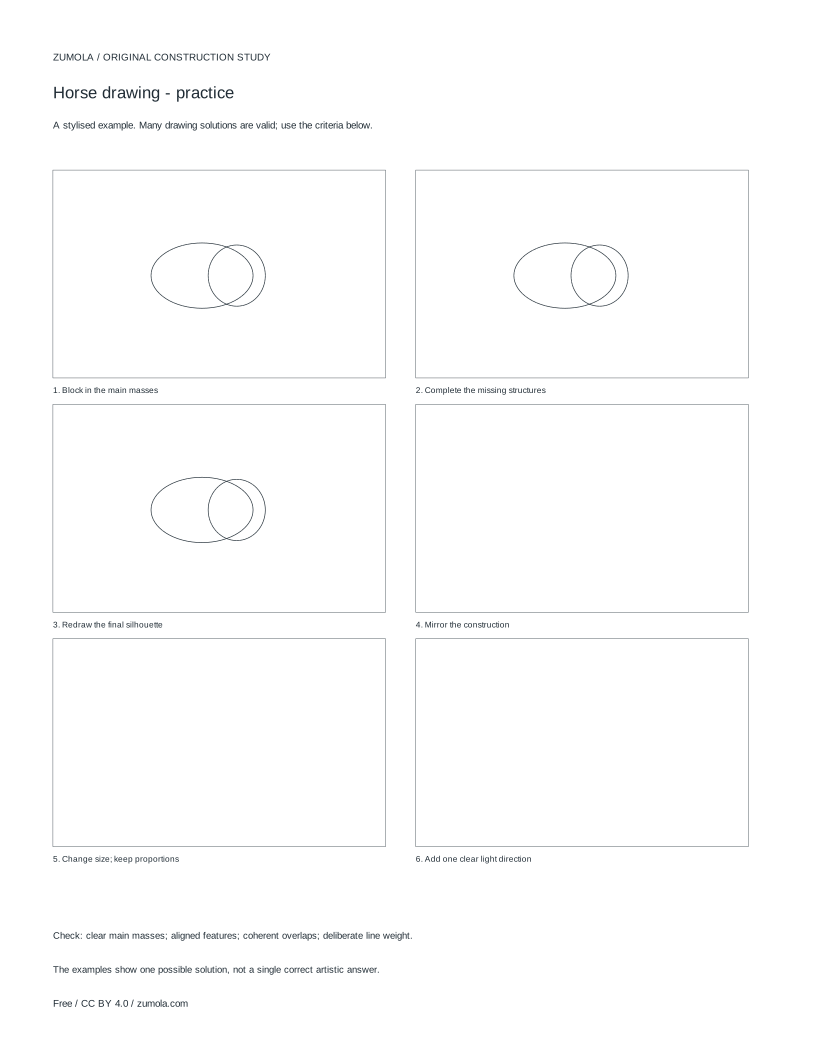
Practice worksheet
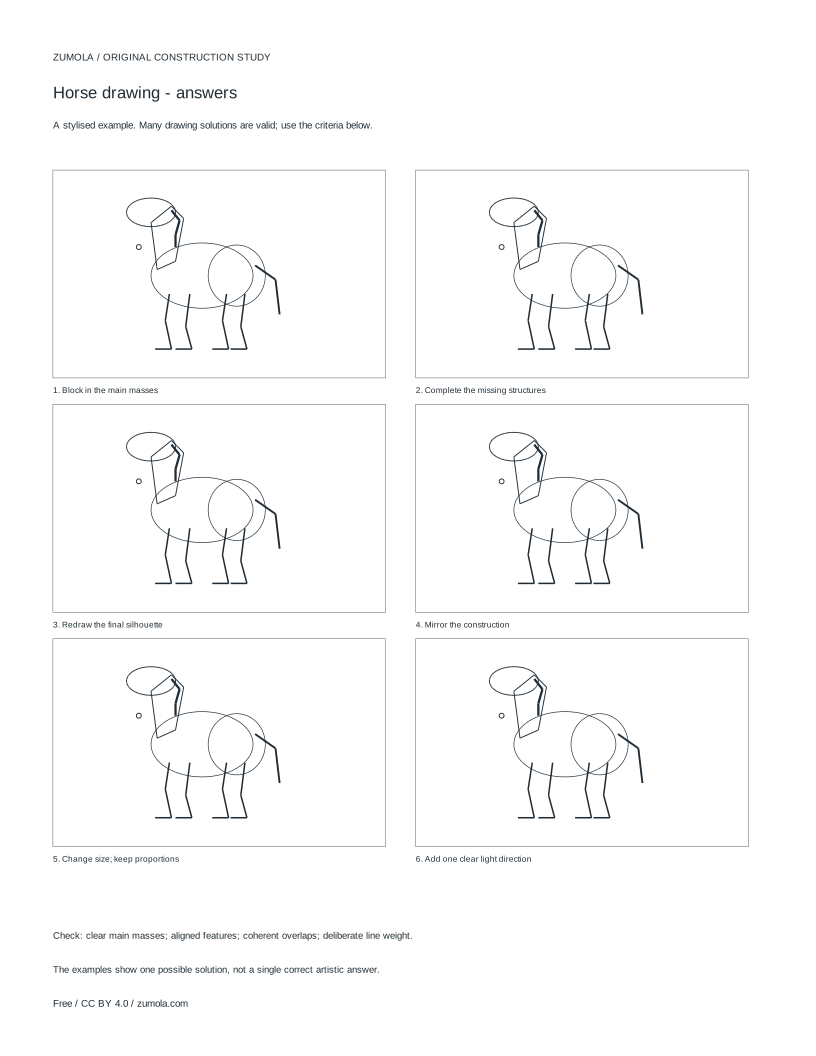
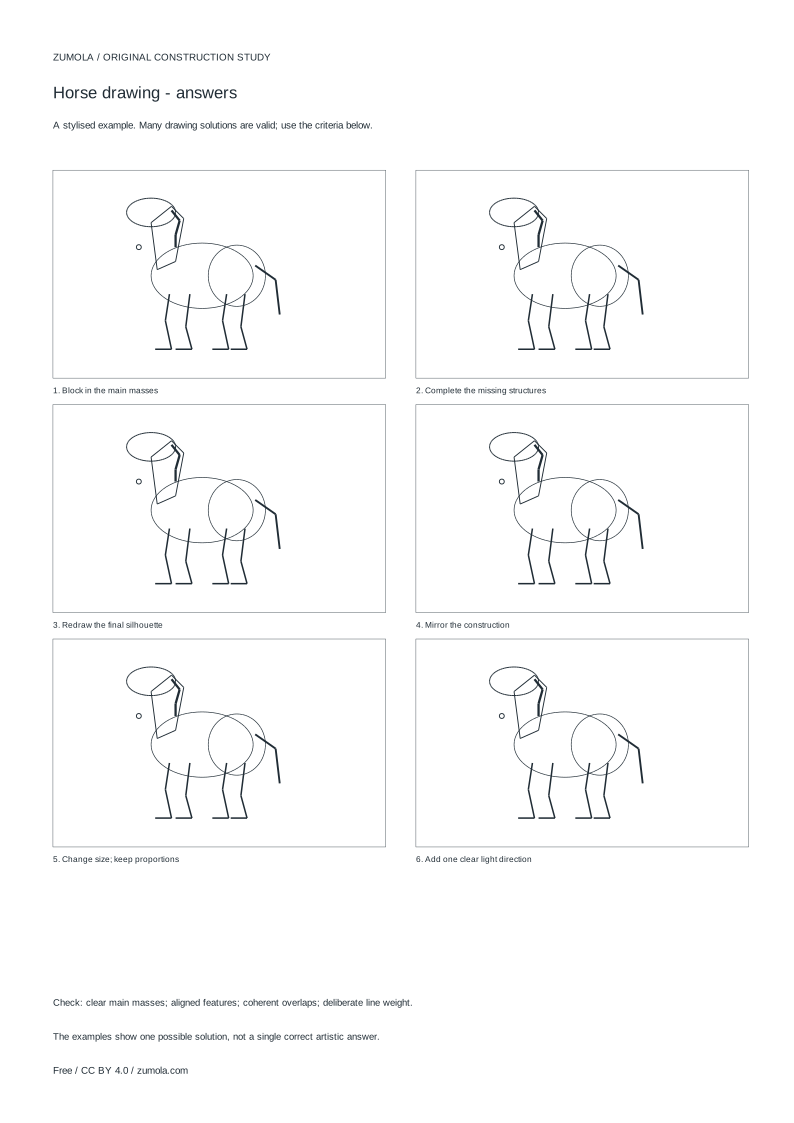
Worked answers / rubric
Print at Actual size / 100%. Check the calibration bar before using physical dimensions.
Horse drawing becomes manageable when you stop tracing the outline and start building the body. This guide uses a simple construction method: place two main masses for the ribcage and pelvis, connect them with a rising neck and head, then attach four jointed legs. The aim is a believable standing pose with clear proportions and overlaps, not a photorealistic or anatomical study. Work lightly at first so you can adjust the masses before committing to darker lines.
Start With Two Masses, Not an Outline
Begin by deciding the horse's overall length and height on the page. Mark a light horizontal line for the ground and a second line for the top of the back. The ribcage is the larger mass, roughly egg-shaped and tilted slightly down toward the front. The pelvis is smaller and rounder, sitting behind the ribcage with a short gap between them. That gap becomes the flexible middle of the body, so keep it visible rather than merging the two shapes.
Check the relationship before adding anything else. The ribcage should be clearly longer than the pelvis, and the top of the pelvis should sit close to the height of the ribcage's upper edge. If the pelvis looks too large, the horse will read as front-heavy; if it sits too low, the hindquarters will look weak. These are proportion decisions, not fixed rules, and different breeds and stylised approaches will vary.
- Draw a light ground line and a back-height line.
- Place a large tilted oval for the ribcage.
- Place a smaller rounded mass for the pelvis behind it, leaving a short gap.
- Compare the two masses for relative size and height before continuing.
Connect the Neck, Head and Legs
The neck rises from the front of the ribcage toward the head. Draw it as a tapering shape rather than a tube: wider where it meets the chest, narrower toward the poll. The head sits at the top, angled slightly forward, with the muzzle shorter than the skull. Keep the neck's front edge and back edge distinct so the head does not appear to float.
Legs attach at joints, not at random points. Front legs connect beneath the front of the ribcage; hind legs connect at the pelvis. For each leg, mark the shoulder or hip, then the knee or hock, then the hoof. A standing horse usually has near-vertical lower legs, with the hind leg showing a slight angle at the hock. Draw the far legs first and slightly shorter or partially hidden, then the near legs over them. This overlap is what makes the stance read as three-dimensional.
- Taper the neck from chest to poll and angle the head forward.
- Mark joint points for each leg before drawing leg outlines.
- Draw far legs first, then near legs overlapping them.
- Keep lower legs close to vertical for a standing pose.
Add Mane, Tail and Facial Details Last
Once the masses and joints look right, add the mane along the top of the neck and the tail from the rear of the pelvis. Treat both as flowing shapes with a direction, not as separate hairs. The mane can fall to one side, which helps show which way the neck is turned. The tail should hang or swing consistently with the body's balance.
Facial details are small: ears, eye, nostril and mouth line. Place the eye roughly halfway between the top of the skull and the muzzle, and keep the ears proportional to the head rather than oversized. Finally, vary line weight: heavier lines along the underside and where forms overlap, lighter lines for interior details. This is a stylised construction study, so exact anatomy is not the goal; clear masses, placement and overlaps are.
- Add mane and tail as directional flowing shapes.
- Place ears, eye, nostril and mouth line on the head.
- Strengthen lines at overlaps and undersides.
- Compare the finished drawing against the main masses before erasing guides.
Try this example
Build a standing horse on a page where the back-height line is 10 cm above the ground line. The ribcage oval is 6 cm long and 4 cm tall; the pelvis is 3 cm long and 3 cm tall.
Show the worked explanation
Place the ribcage oval with its top near the 10 cm back line, tilted slightly down at the front. Place the pelvis behind it with a 1 cm gap, its top also near the back line. The pelvis is half the ribcage length, which keeps the front half dominant. Mark the neck rising from the ribcage front to a head at about 12 cm, then mark shoulder and hip joints before drawing four legs down to the ground line, far legs first. Add mane, tail and facial details last, then check that the two masses still read clearly.
Common mistakes
- Drawing the outline first and fitting the body inside it. Place the ribcage and pelvis masses first, then build the outline around them.
- Making the pelvis the same size as the ribcage. Keep the pelvis clearly smaller and check its top edge against the ribcage height.
- Attaching legs at the body's outer edge instead of at joints. Mark shoulder, hip, knee and hock points before drawing leg outlines.
Check your work
- Ribcage and pelvis are distinct masses with the pelvis clearly smaller.
- Neck tapers from chest to poll and the head is angled consistently.
- Four legs attach at marked joints and far legs overlap near legs.
- Mane and tail have a clear direction rather than scattered hairs.
- Line weight distinguishes overlaps and undersides from interior details.
Questions before you start
How do I keep a standing horse from looking flat?
Draw the far legs first and let the near legs overlap them. Vary line weight where forms cross so the overlaps are visible.
Should I copy real horse anatomy exactly?
No. This method is a stylised construction study. Focus on believable masses, joint placement and overlaps rather than clinical anatomy.
When should I add the mane and tail?
Add them after the body masses and legs are settled. They are easier to place once the neck angle and hindquarters are clear.