Free original resources
Skull Drawing: Build a Stylised Head from Cranium, Face and Jaw
Learn a four-stage skull drawing method using a cranium oval, facial wedge and jaw block. Practise placement, overlap and grouped teeth with an artistic rubric.
Free resources
Letter & A4
PDF & SVG
Letter & A4
PDF & SVG
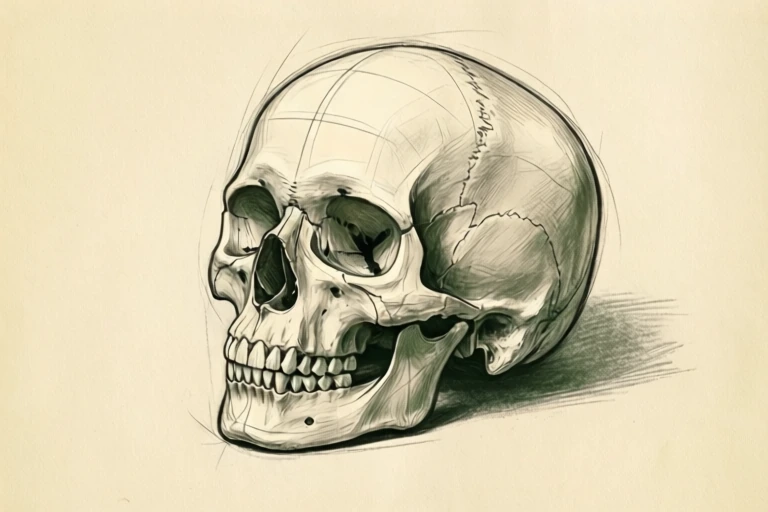
Build the drawing in four stages.
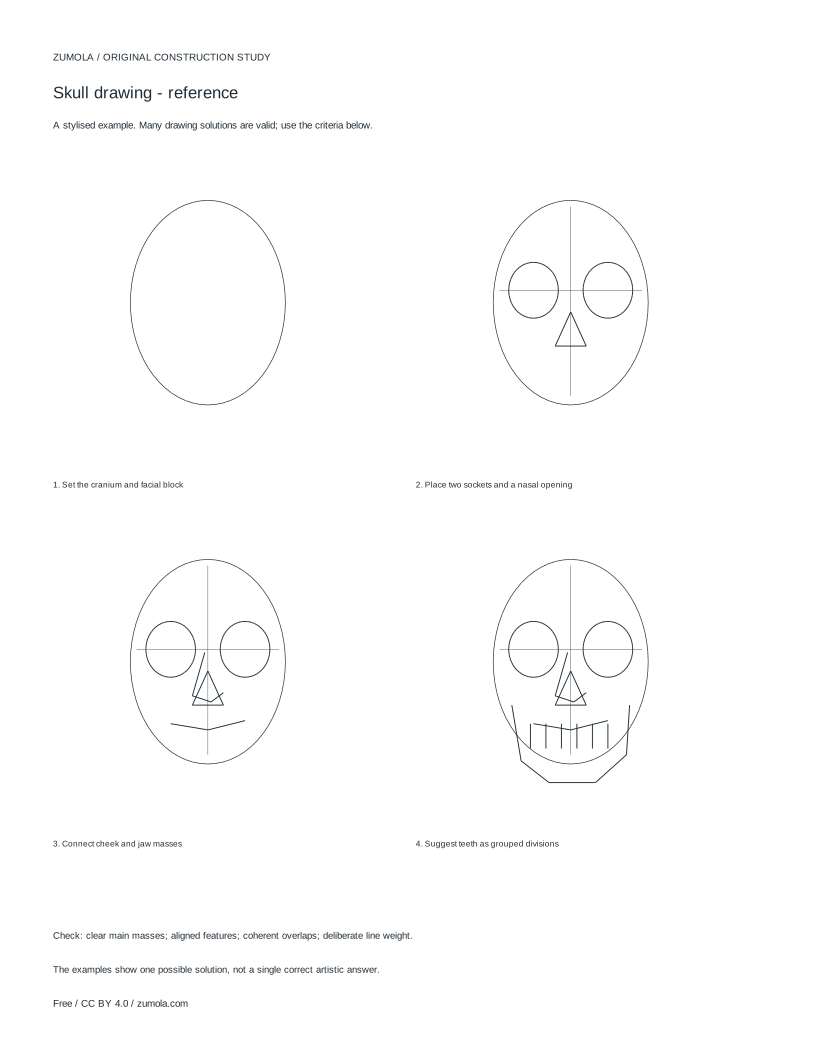
Your free printable kit.
Original reference, student practice and separate worked answers. No account or payment.
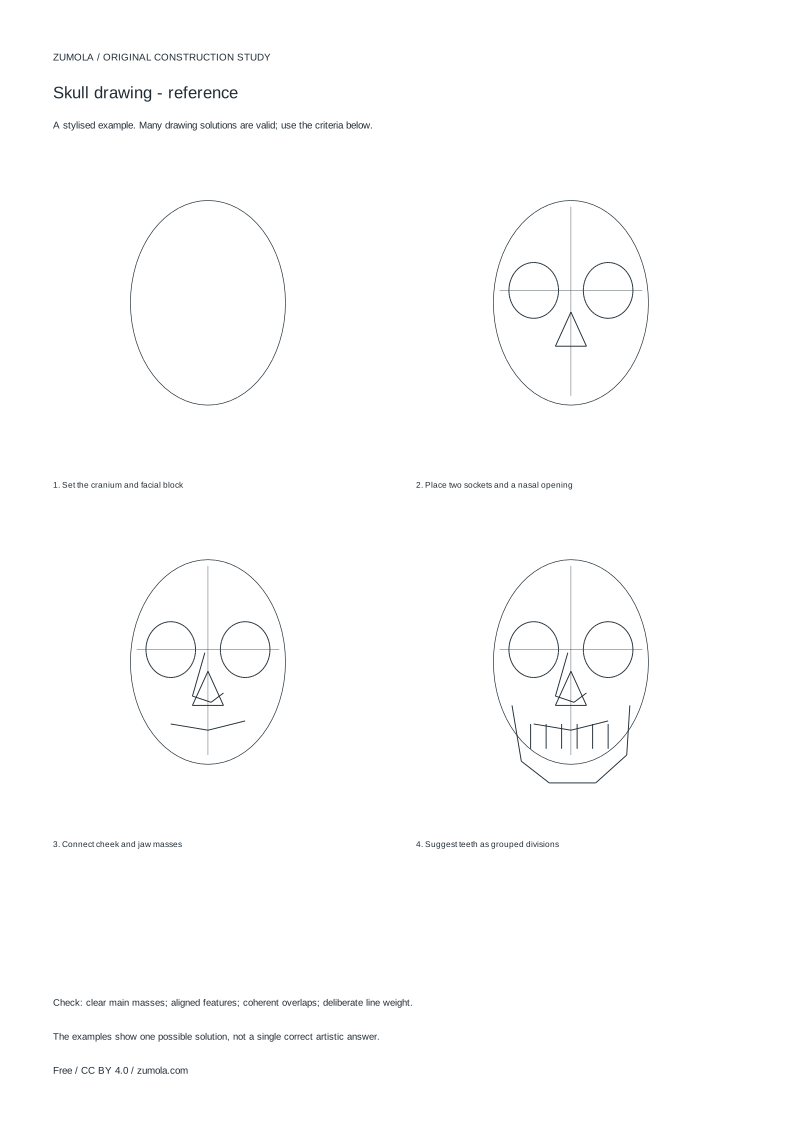
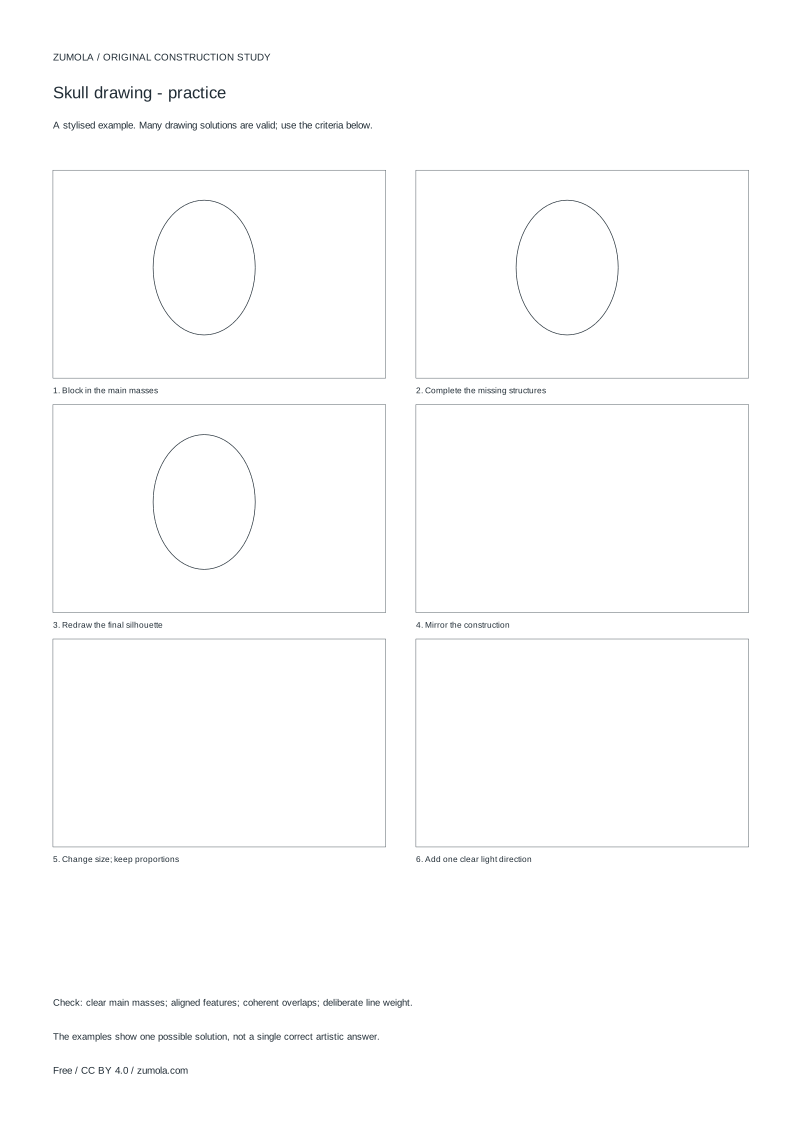
Practice worksheet
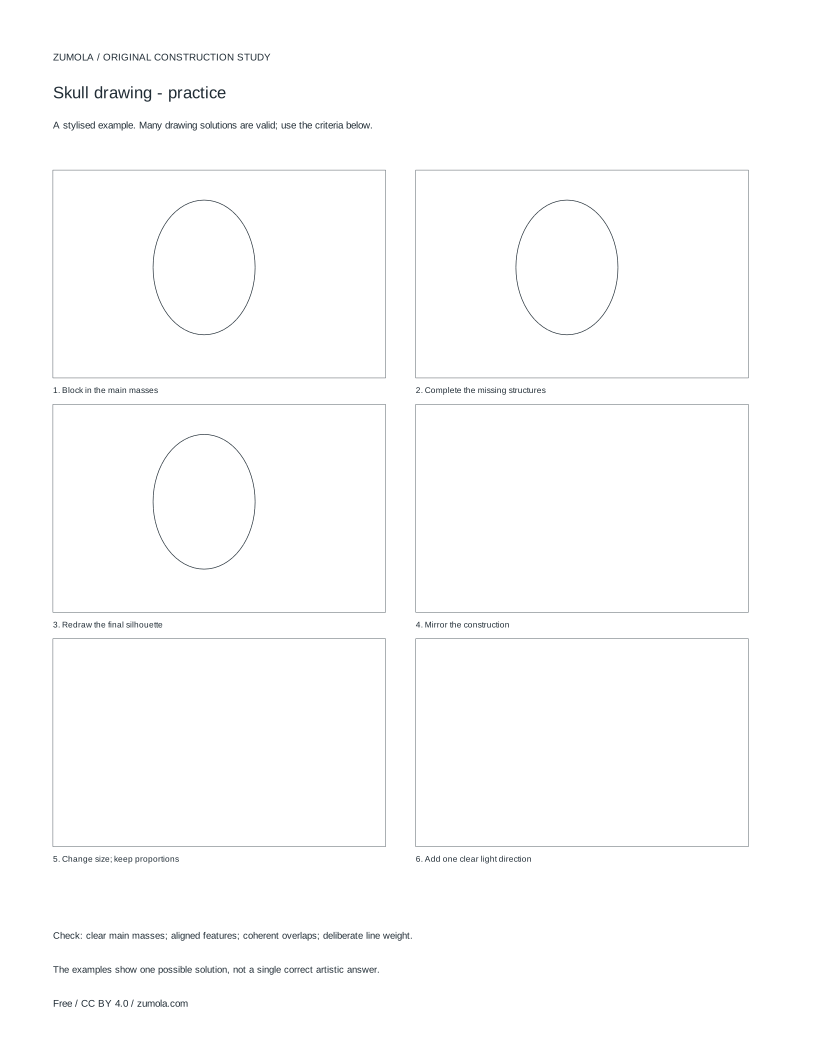
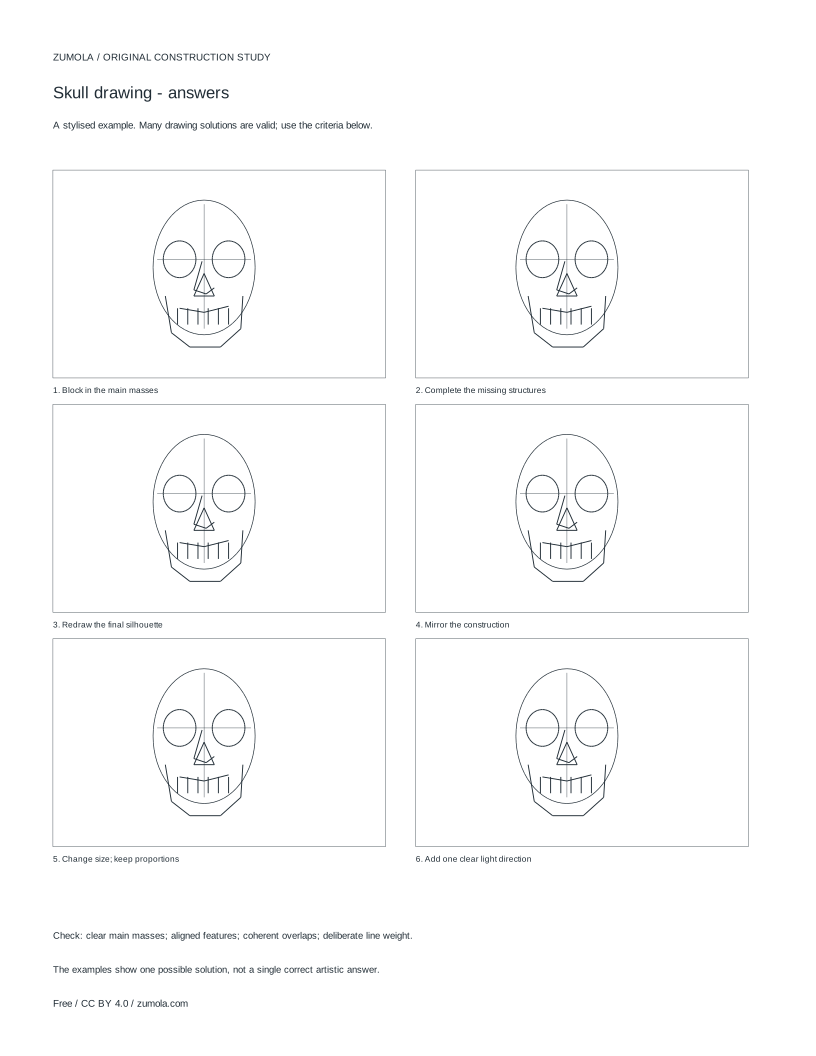
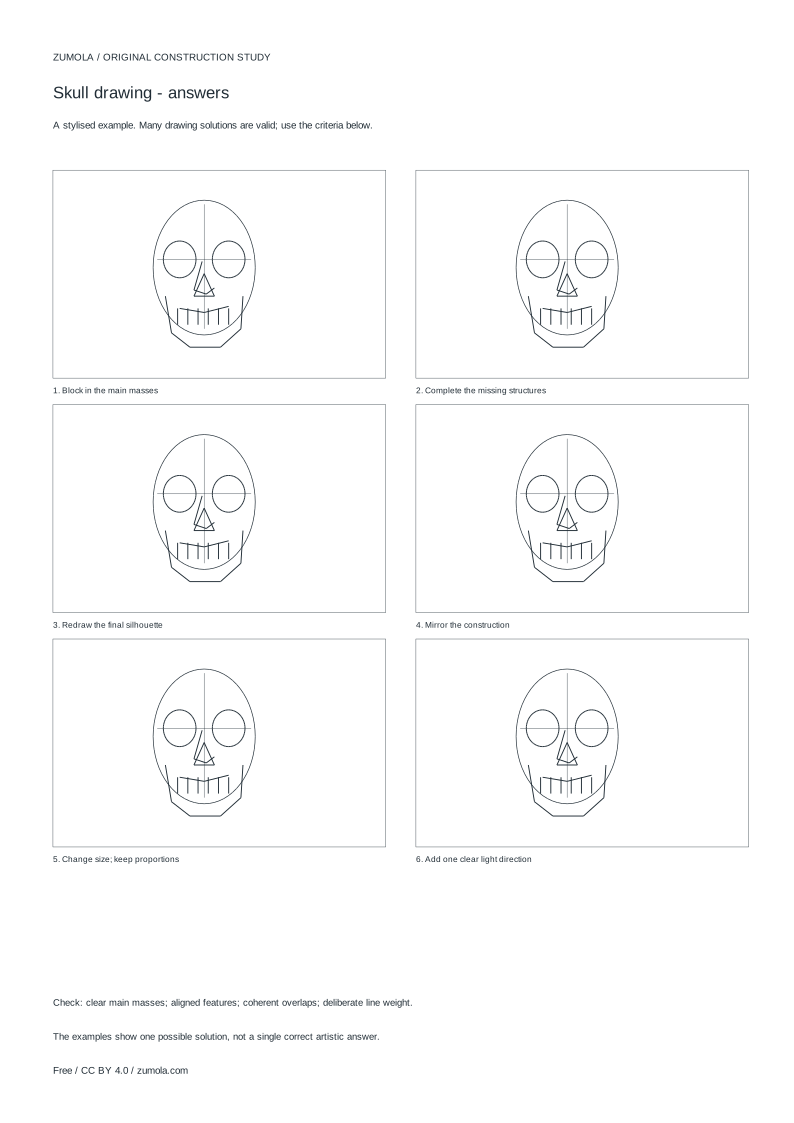
Worked answers / rubric
Print at Actual size / 100%. Check the calibration bar before using physical dimensions.
Skull drawing becomes manageable when you stop treating the head as one outline and start seeing three masses: the rounded cranium, the narrowing facial wedge and the jaw. This guide walks through a stylised construction study, not a clinical anatomy lesson or a photorealistic portrait method. Each stage adds a small number of lines you can check against the previous stage, so errors in proportion and overlap are caught early rather than hidden under detail.
Start with the cranium and facial block
Begin on plain paper with a light pencil. Draw a large oval for the cranium, tilted slightly if you want a three-quarter view. Keep it wider at the top and gently narrower toward the brow line. Below it, sketch a tapering wedge for the face: wide at the brow, narrowing toward where the teeth will sit. The wedge should overlap the lower part of the oval rather than float beneath it.
Check the relationship before adding features. The facial wedge is usually shorter than the cranium oval, and its centre line should run roughly through the middle of the oval. If the wedge looks too long, the skull will read as stretched; if too wide, the face loses its taper. Adjust with light erasing now, while only two shapes exist.
- Draw a light oval for the cranium, wider at the top.
- Sketch a tapering wedge below the brow area, overlapping the oval's lower edge.
- Mark a faint vertical centre line through both masses.
- Compare wedge length and width to the oval and correct before continuing.
Place sockets and the nasal opening
Two eye sockets sit within the upper half of the facial wedge, spaced so that roughly one socket width could fit between them. Draw them as rounded, slightly irregular shapes rather than perfect circles; a tilted view makes the far socket narrower. The nasal opening sits on the centre line below the sockets, shaped like a soft inverted triangle or keyhole.
This stage is about placement, not shading. Keep every line light so you can shift a socket without leaving a dark scar. Check that the sockets do not touch the wedge edges and that the nasal opening leaves room below for the teeth. Overlap matters here: the brow edge of the wedge should read as sitting in front of the upper socket rims.
- Mark two socket shapes in the upper facial wedge, leaving a gap between them.
- Narrow the far socket slightly for a turned view.
- Place the nasal opening on the centre line below the sockets.
- Confirm sockets stay inside the wedge and leave space for teeth below.
Connect cheek and jaw masses
Add a cheekbone line running from the outer socket edge toward the side of the facial wedge. Then build the jaw as a separate block: a curved lower edge joined to the wedge by short side lines. The jaw should feel like a hinged mass, not a continuation of the face. Where the jaw meets the cheek area, show a clear overlap so the viewer can tell which form sits in front.
Line weight helps separate masses. Use slightly firmer lines for the jaw and cheek edges, and keep internal construction lines faint. If the jaw looks disconnected, redraw its side joins so they tuck behind the cheek line rather than crossing it.
- Draw a cheekbone line from each outer socket toward the wedge side.
- Sketch the jaw as a curved block joined by short side lines.
- Show the jaw tucking behind the cheek line where they meet.
- Firm up jaw and cheek edges while keeping construction lines light.
Suggest teeth as grouped divisions
Rather than drawing every tooth, suggest teeth with a few grouped vertical divisions inside the mouth area. A common approach is to mark a horizontal line for the bite and then add three or four soft divisions above and below it. Groups read more clearly at small scale and keep the drawing stylised.
Finish by checking the whole construction: main masses, feature placement, overlaps and line weight. Because skull drawings have many valid artistic outcomes, judge your work against a rubric instead of expecting one exact answer. A convincing study keeps the cranium, wedge and jaw readable even when detail is minimal.
- Mark a light horizontal bite line in the mouth area.
- Add a few grouped vertical divisions above and below the bite line.
- Soften or erase stray construction lines.
- Review masses, placement, overlaps and line weight against the rubric.
Try this example
Draw a slightly turned skull using an oval cranium 8 cm tall and 6 cm wide, with a facial wedge about 5 cm tall.
Show the worked explanation
Draw the 8 by 6 cm oval first. Add a 5 cm tapering wedge below the brow, overlapping the oval's lower edge. Place two sockets in the upper wedge with a gap of about one socket width; make the far socket narrower. Put the nasal opening on the centre line below. Add cheek lines and a curved jaw block tucked behind them, then mark a bite line with three grouped divisions above and below. Check that the wedge is shorter than the oval and that all features sit inside their masses.
Common mistakes
- Drawing the face as a rectangle attached to the cranium. Taper the facial wedge from brow to teeth so it narrows downward, and overlap it with the oval.
- Placing eye sockets too close to the wedge edges or to each other. Leave roughly one socket width between them and keep a margin from the wedge sides.
- Treating the jaw as part of the face outline. Draw the jaw as a separate curved block and show it tucking behind the cheek line.
Check your work
- Cranium oval and facial wedge are distinct and overlap clearly.
- Facial wedge tapers from brow toward the teeth.
- Two sockets are spaced with a visible gap and stay inside the wedge.
- Nasal opening sits on the centre line below the sockets.
- Jaw reads as a separate block tucked behind the cheek line.
- Teeth are suggested as grouped divisions rather than individual teeth.
- Line weight separates main masses from faint construction lines.
Questions before you start
Is this a realistic skull drawing method?
It is a stylised construction study. The masses and placement logic help you organise a drawing, but the result is simplified rather than photorealistic or anatomically precise.
How do I make cool skull drawings without copying a reference?
Build the cranium, facial wedge and jaw first, then vary tilt, line weight and tooth grouping. Changing those structural choices creates original variations while keeping the skull readable.
Can I use this for tattoo designs?
Yes, as a starting structure. Simplify the masses further for small designs and keep grouped teeth rather than fine detail, since tiny lines blur at tattoo scale.