Cross stitch graph paper. Count cells, then fabric.
Design on readable square cells, then calculate stitched dimensions from fabric count. Keep paper spacing, chart size and occupied motif size separate.
4 mm + 5 mm chart grids. 2 original motifs + counting answers.
A reference, a task and a way to check it
Design on readable square cells, then calculate stitched dimensions from fabric count. Keep paper spacing, chart size and occupied motif size separate.
Choose US Letter or A4 for prepared downloads. Original PDF and SVG files, worksheets and reference answers are free without signup. Collection packs contain the same individual pages in order.
Choose your paper and download
Download paper size
Every worksheet and answer is free. No signup.
Free original resource
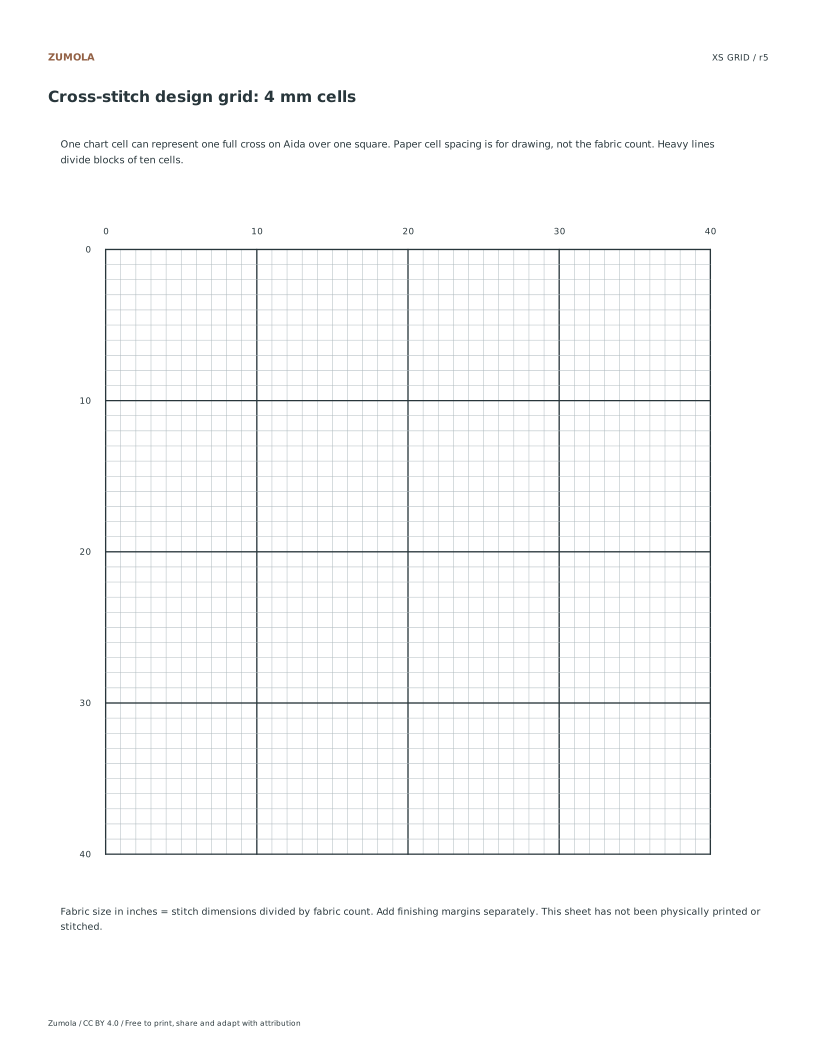
Cross-stitch 4 mm design grid
Original blank grid. Letter or A4. Free PDF and SVG.
Use the student pack first, then compare the reference or answer. Packs are PDFs; individual sheets below also include editable SVG files. The paper choice applies to every download.
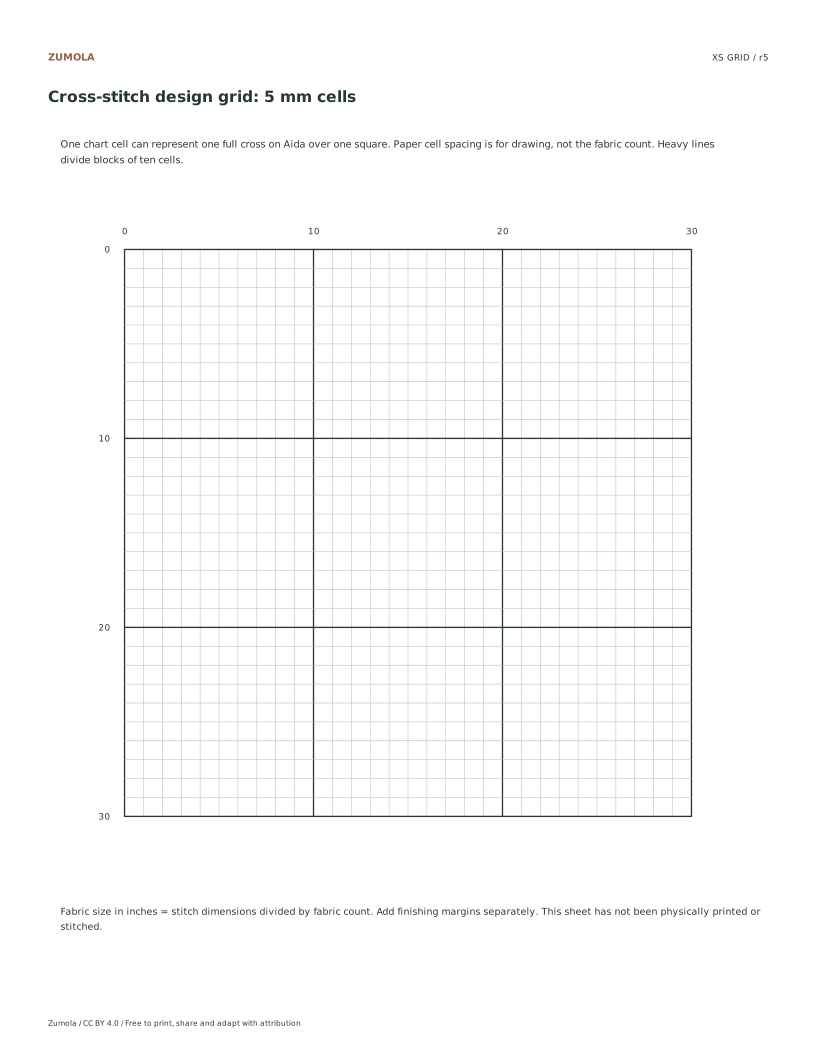
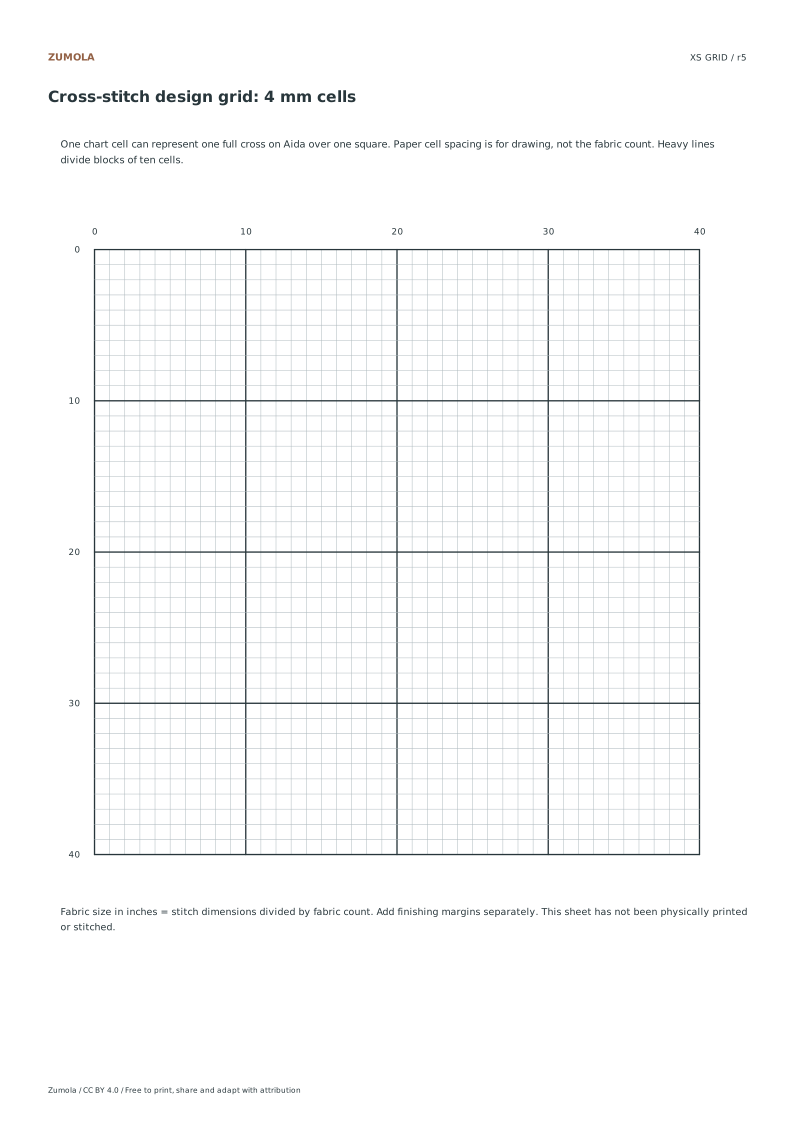
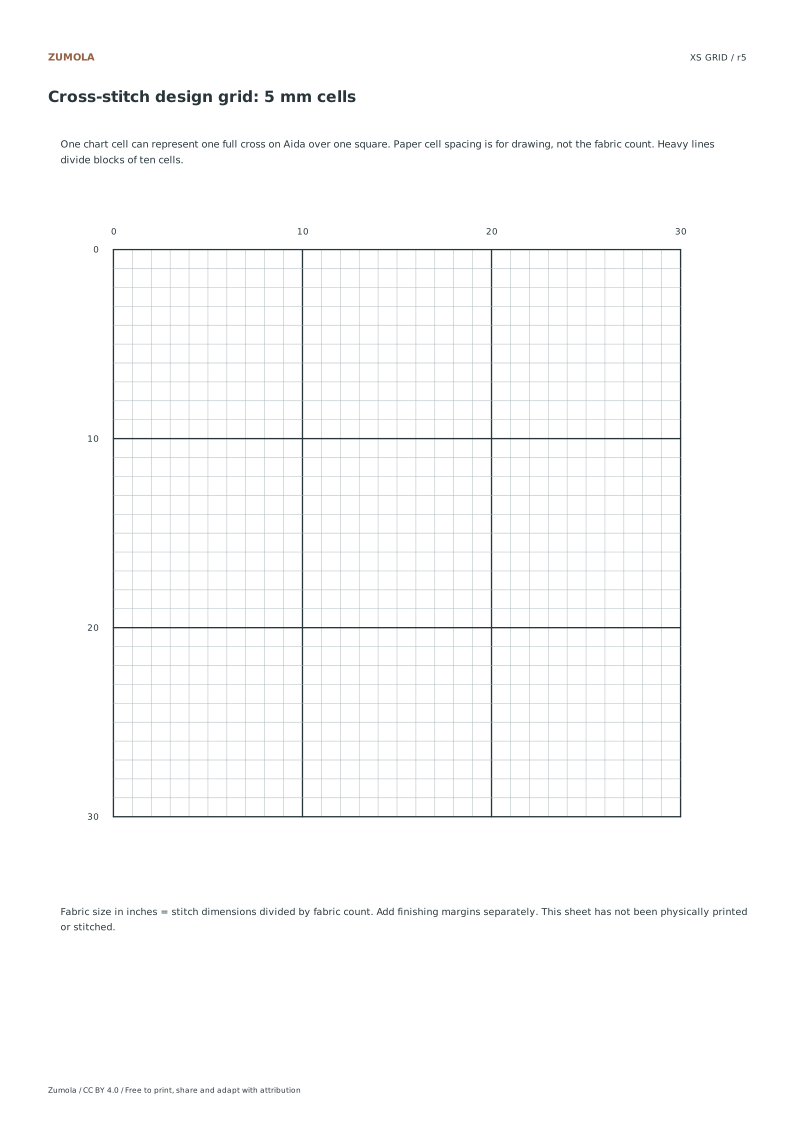
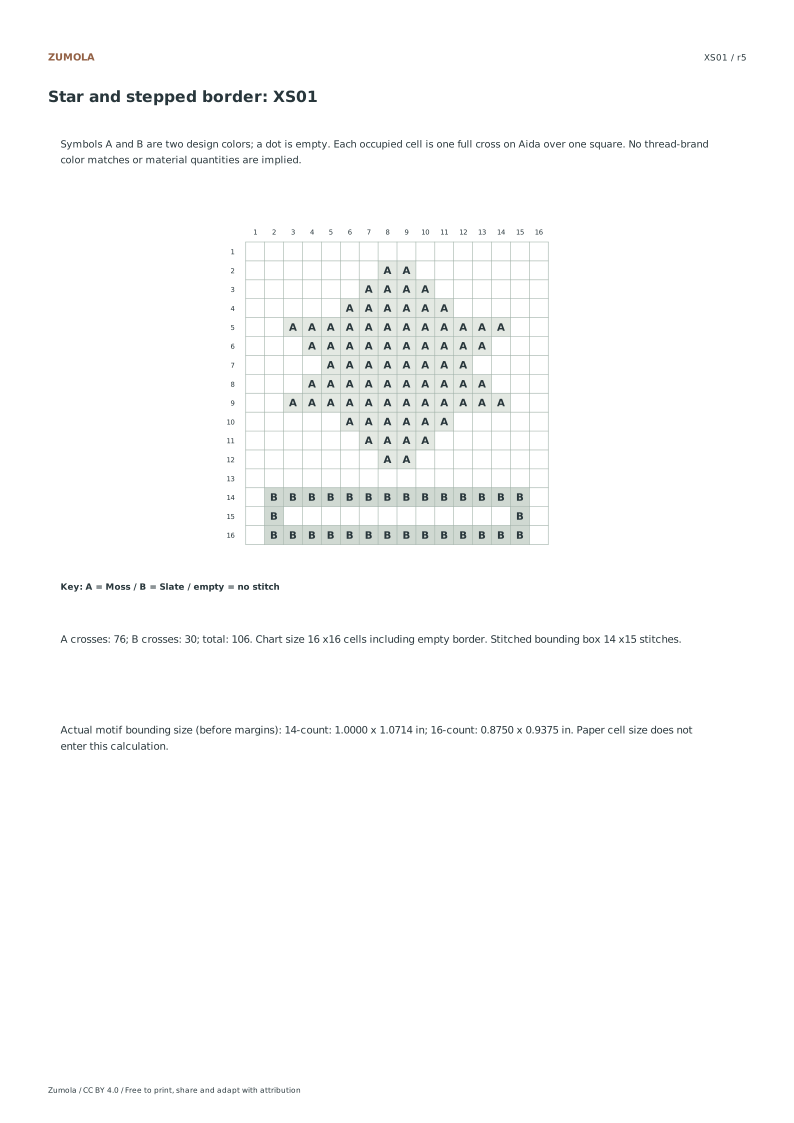
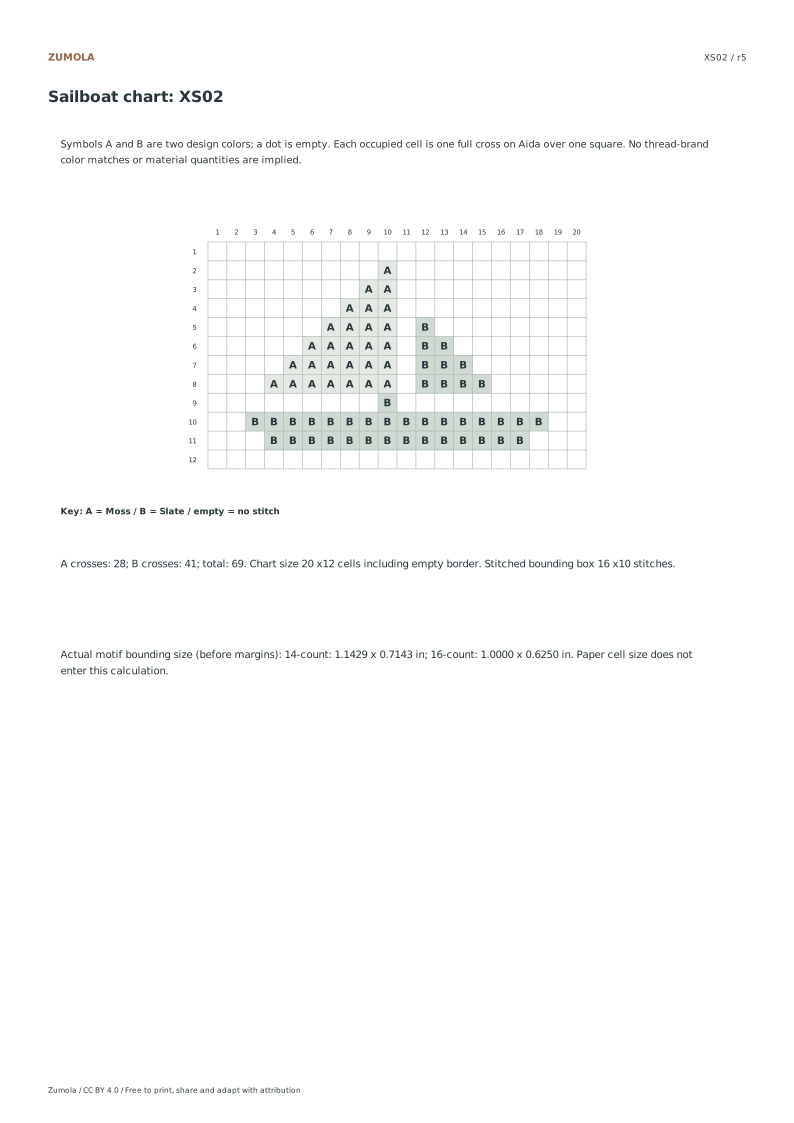
The 4 mm and 5 mm design grids emphasize every ten cells and number those divisions. Their paper spacing is convenient for drawing a symbol. It does not select the fabric count. For Aida over one square, divide the occupied motif width and height by crosses per inch. The answer calculates both 14-count and 16-count sizes before any finishing margin.
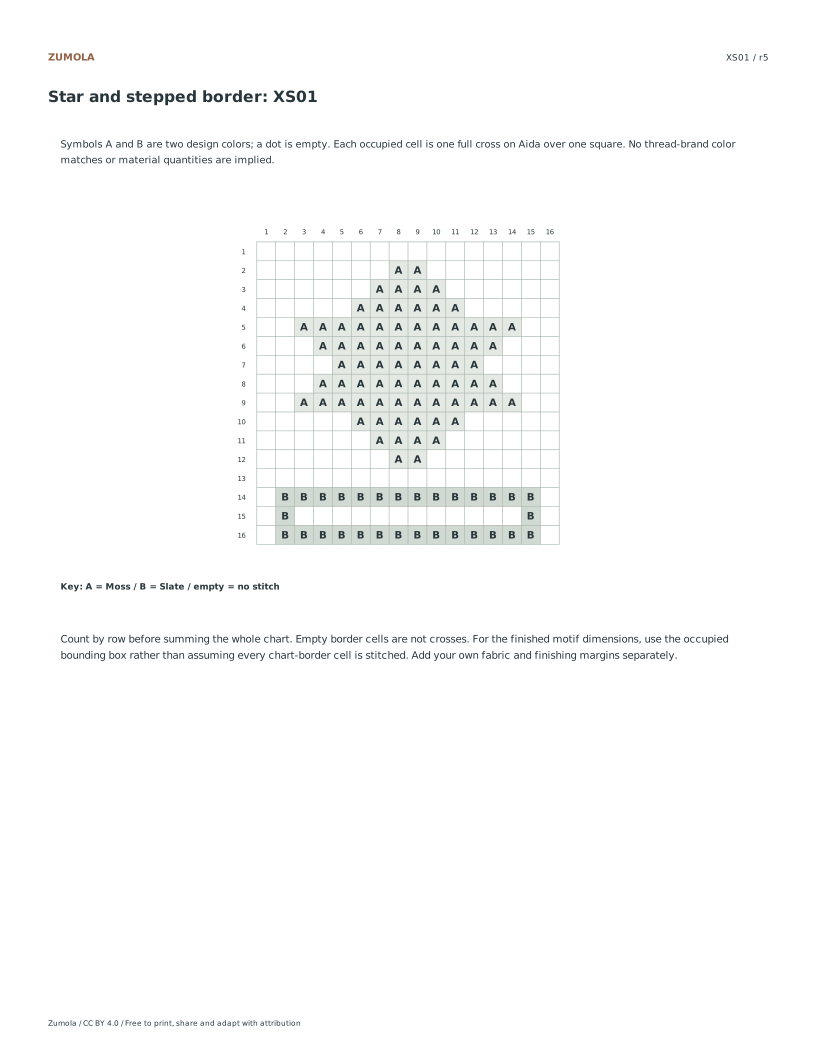
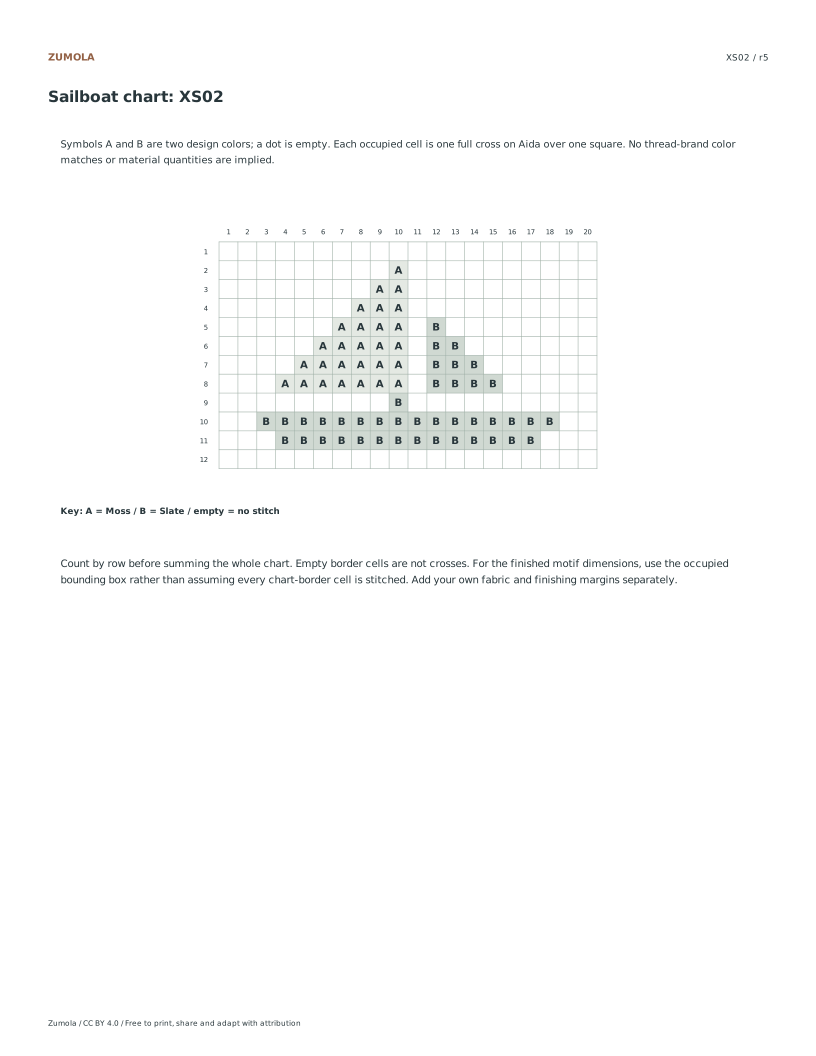
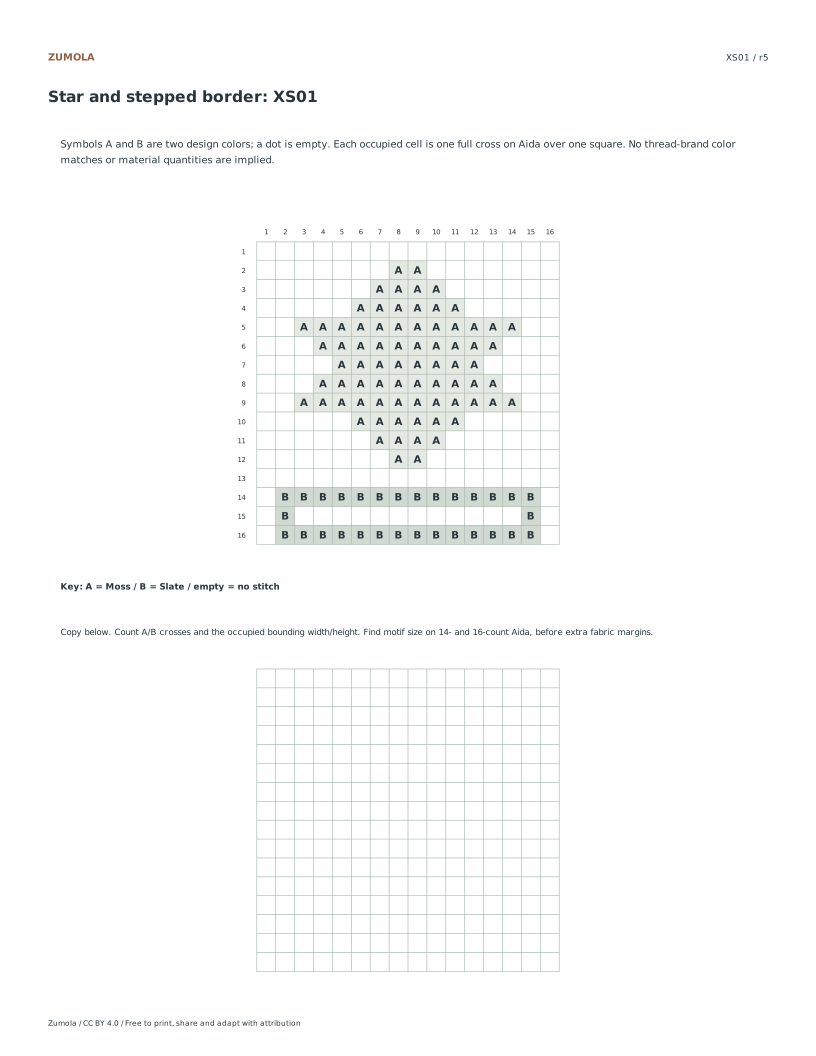
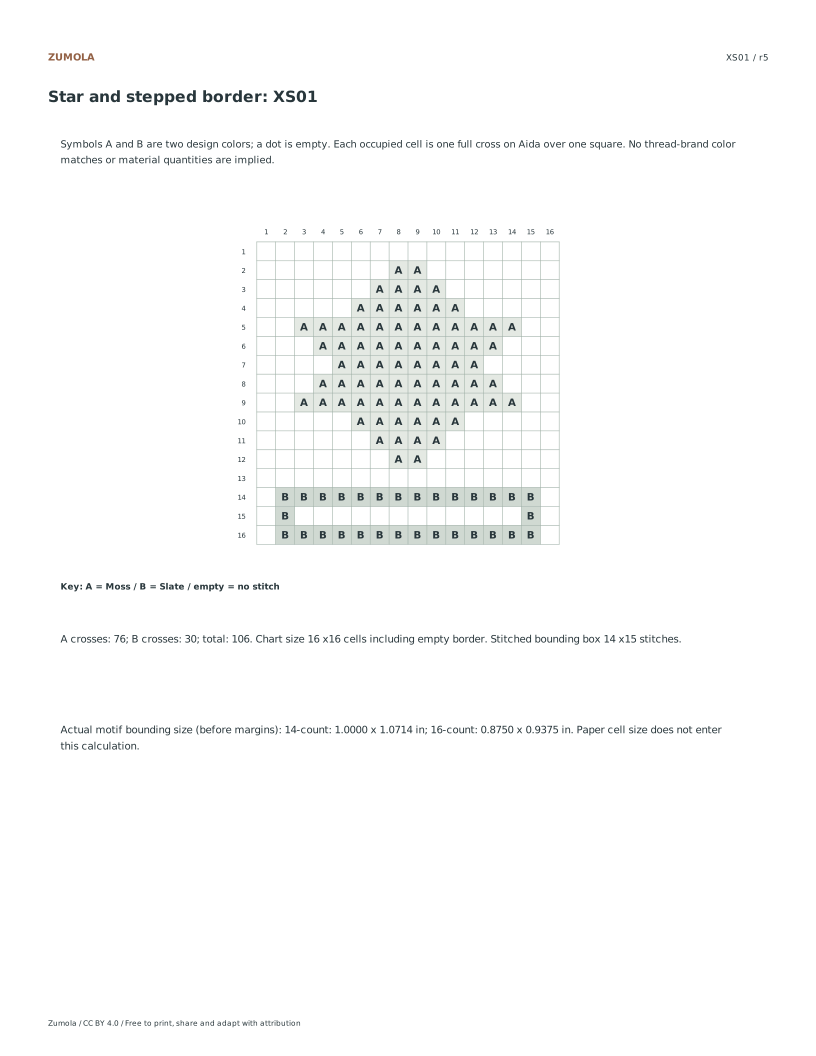
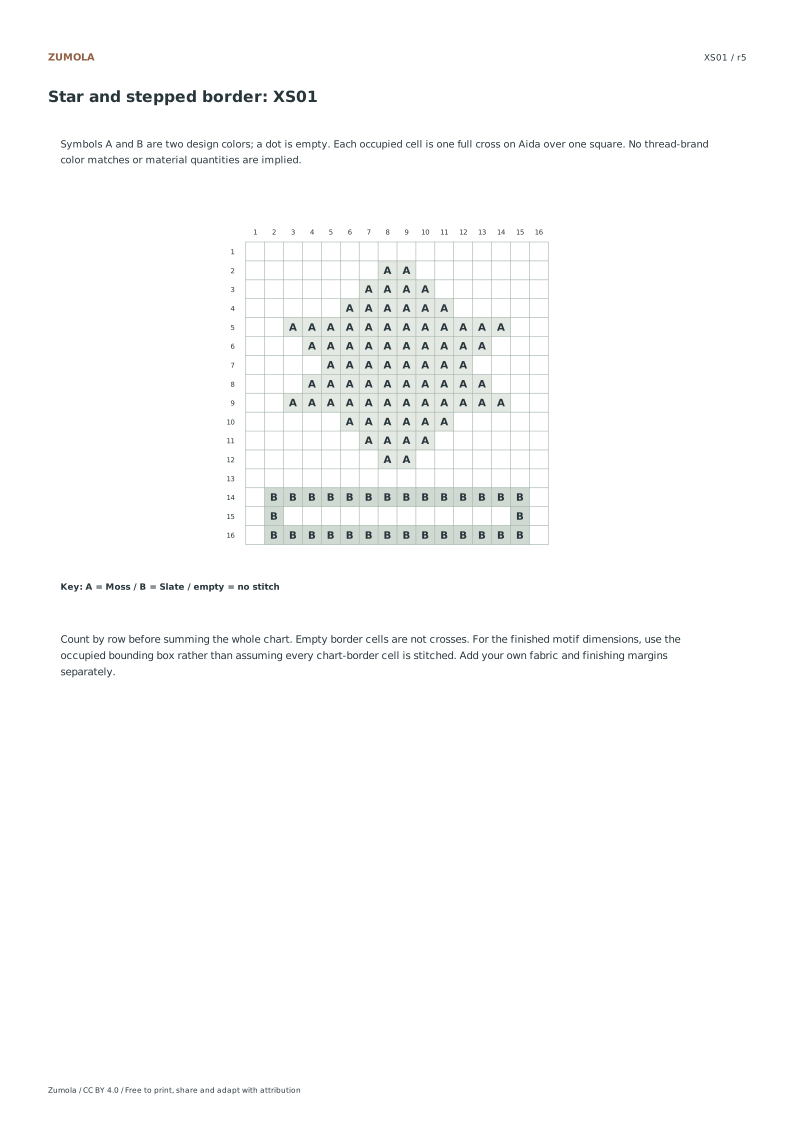
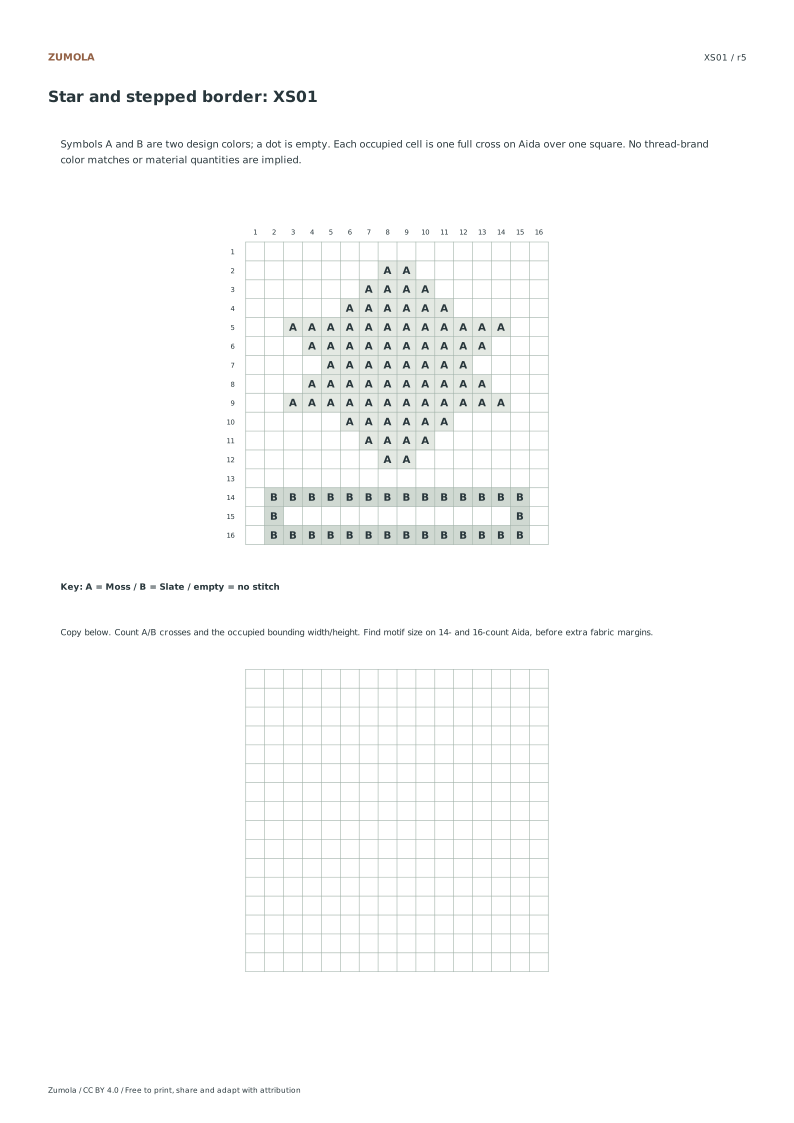
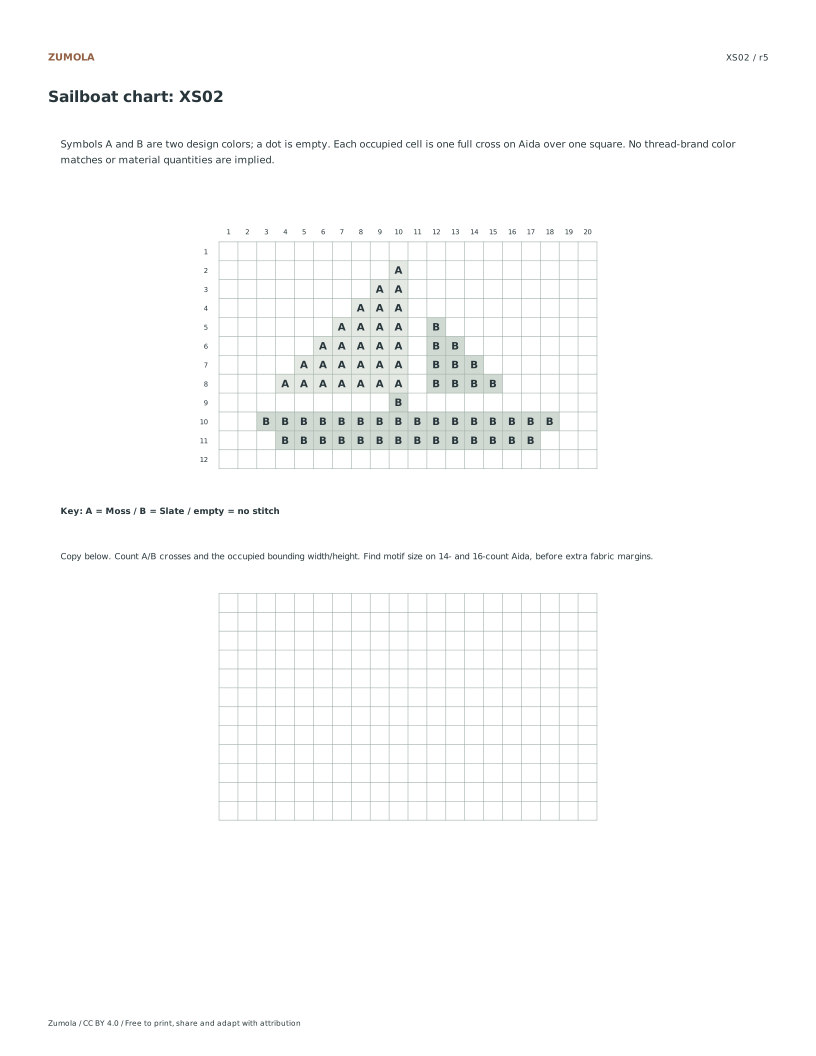
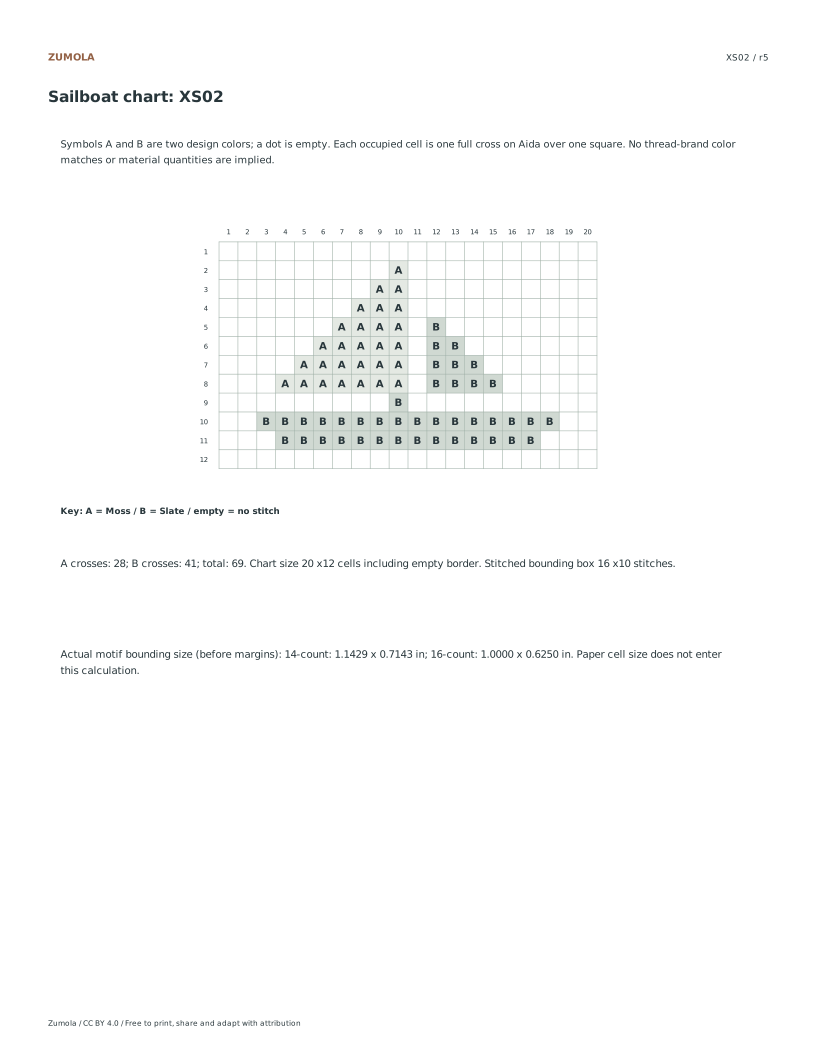
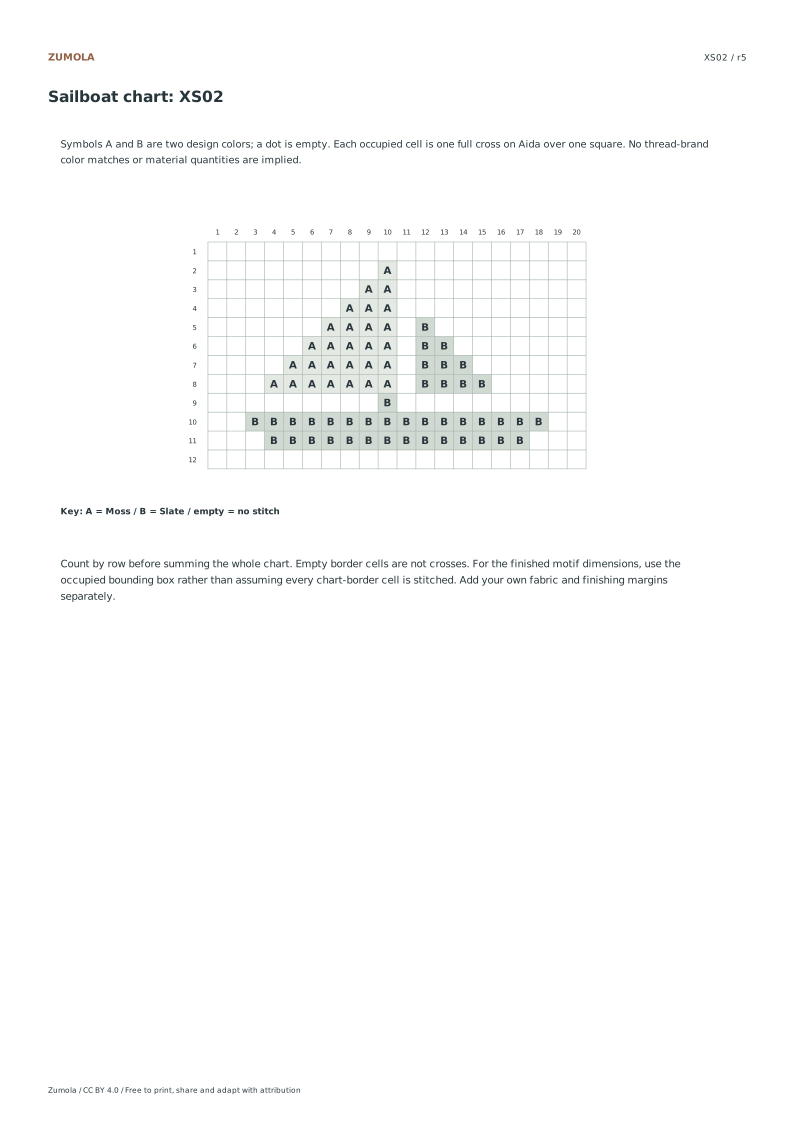
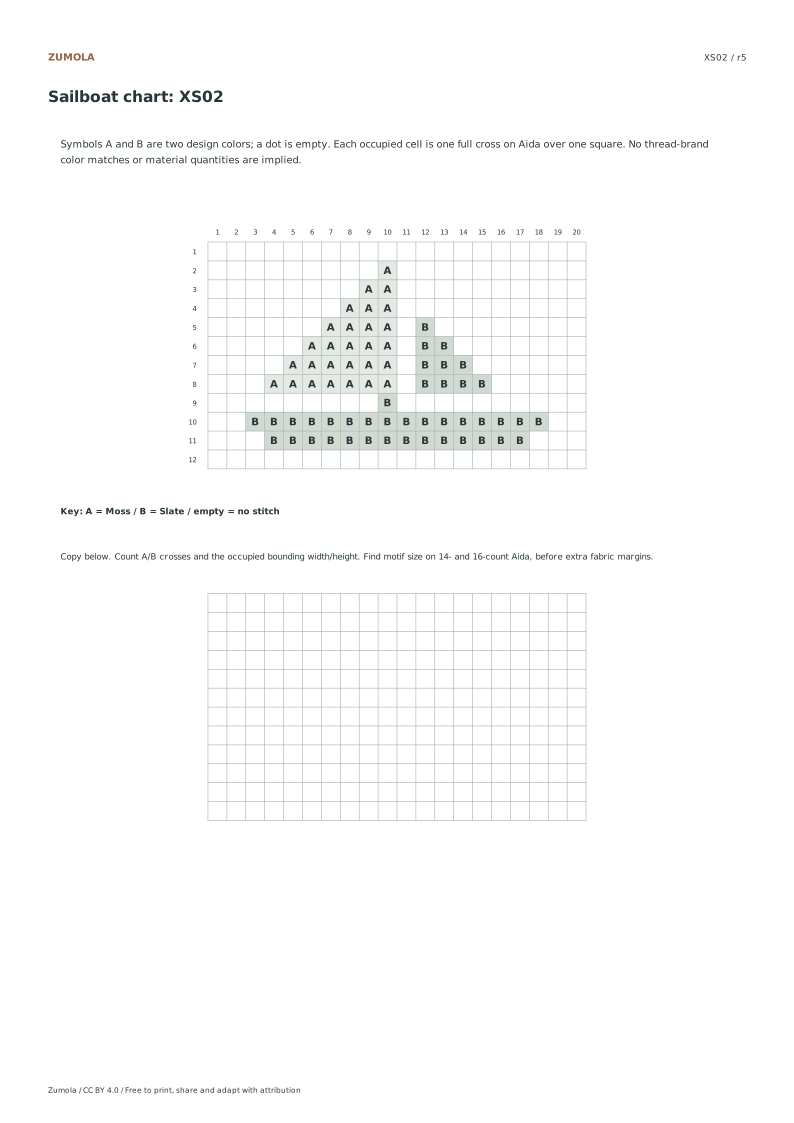
The two original motifs use the letters A and B as redundant symbols for two muted colors. A dot in the source matrix means no cross; the printed chart leaves those cells empty. Count by row, sum each symbol, and compare the total with the answer. The charts do not match commercial thread numbers, estimate skein use or prescribe a fabric-cut size. No stitched sample or external craft-user test is claimed.
Work through the page
Understanding Paper Grid Spacing The printable grids feature square cross-stitch designs with four millimeter and five millimeter paper spacing. Bold lines appear every ten cells to assist with visual tracking during the counting process. Numbered divisions further help locate specific coordinates within the chart. It is crucial to understand that the paper cell size serves only as a drawing convenience for the designer. It does not correspond directly to the fabric count used in stitching. The physical dimensions of the printed paper are independent of the final textile dimensions. Users should focus on the grid structure for planning rather than assuming the print size dictates the finished project size.
Calculating Stitched Dimensions Count occupied cells rather than measuring the chart with a ruler. On Aida worked over one square, a full cross occupies one chart cell, and fabric count gives crosses per inch. The finished motif width is its occupied stitch span divided by that count; height is calculated the same way. Empty chart borders increase the chart dimensions without increasing the occupied motif span. The answer identifies both sizes. Calculate the supplied examples at 14-count and 16-count before adding your own finishing margins. This model does not describe over-two stitching on linen, and it does not estimate thread length, shrinkage or the size of a frame.
Using Symbols and Legends The collection includes two original symbol motifs with specific row and column addresses. A colour and symbol legend accompanies the grid to clarify which symbol represents which thread colour. Exact symbol counts are provided to verify that all elements are accounted for during the stitching process. Blank copy practice sheets allow users to transcribe the design manually, reinforcing their understanding of the chart structure. Answer keys are available to check accuracy after the practice exercise. This system ensures that the digital chart and counting review process is thorough. Users can verify their interpretation of the symbols before beginning work on the actual fabric surface.
Checks that catch common errors
Watch for
Check instead
Assuming the four millimeter paper grid spacing corresponds to a specific fabric count.
Recognize that paper cell size is a drawing convenience only. Calculate final dimensions using the motif stitch count divided by the actual fabric count.
Expecting DMC colour numbers to be matched automatically in the legend.
Use the provided colour and symbol legend as written. The files contain original symbols and colours without external brand matching.
Believing the printed paper size determines the final stitched project size.
The final size depends on the fabric count. Use the formula stitched width equals motif width in stitches divided by fabric count.
Match the file before printing
Print the PDF matching the paper in your printer at Actual size / 100% if you want to retain the millimeter dimensions defined in the file. Turn off Fit and Shrink when those dimensions matter. Uniform resizing preserves relative image proportions and angles but changes physical lengths. Unequal resizing can distort both. SVG editors and browser print dialogs can also change scale, so measure a physical calibration span when the task relies on size.
These files have digital geometry and layout checks. Physical printer testing has not been completed. Complete a student page before comparing the worked answer or reference illustration. A geometric or counting result can be exact, while a hand drawing can vary in its marks and interpretation. The original resources use CC BY 4.0: credit Zumola, link the license and indicate changes.
Useful answers
Do the grids include commercial pattern references?
No. The files contain two original symbol motifs with row and column addresses. They are not copied from commercial patterns and do not include external brand references.
Are there guarantees about the final stitched appearance?
No. The resource provides digital charts and counting review tools. There are no claims regarding stitched samples or human craft-user testing results.
What is the licensing for these files?
All original pattern files are free under the Creative Commons Attribution 4.0 license. This allows for broad use provided attribution is given to the source.
Are the answers and editable files free too?
Yes. Every linked original worksheet, answer, PDF and SVG is free without signup. Individual SVG sheets stay editable; collection packs are PDF files. Analytics consent is not required to use the resources.
Fabric count is usually quoted per inch in one direction, but the two directions must be entered and checked independently. If a fabric is 14 stitches per inch across and 14 rows per inch down, one cell is one stitch in both directions and the grid stays square. If you enter 14 across but 18 down, the chart becomes taller than it is wide for the same number of cells, and every motif will look stretched when stitched.
Write both numbers down before drawing anything. Then confirm the grid aspect: a motif 20 cells wide and 10 cells tall on equal densities should measure twice as wide as tall in stitches. If your planned chart shows the opposite, the densities were swapped.
Record stitches per inch across and rows per inch down as two separate values.
Draw a test motif of 10 cells by 5 cells and confirm it reads as twice as wide as tall.
Convert cell counts to finished size: width = cells across ÷ stitches per inch; height = cells down ÷ rows per inch.
Reduce the picture to a limited symbol set
Choose a small palette first, then assign one symbol per colour. Fewer colours make the chart easier to follow and reduce the chance of misreading similar symbols. Simplify the picture by grouping nearby tones into the nearest chosen colour rather than trying to reproduce every shade.
Keep symbols visually distinct: a filled square, an open circle, a cross and a triangle are easier to tell apart than two similar dots. Place the symbol in the centre of each cell so the grid lines remain visible. Record the palette beside the chart with the symbol next to each colour.
Pick a palette of a few clearly different colours.
Assign one distinct symbol to each colour and write the key.
Fill cells with the nearest palette colour, not every original shade.
Check that no two symbols look alike at the size you will read them.
Estimate size from the occupied motif
The paper border is not part of the design. Count only the cells that contain a stitch, then add any deliberate empty margin you want around the motif. A motif occupying 42 cells across at 14 stitches per inch is 3 inches wide; 28 cells down at 14 rows per inch is 2 inches tall.
Add a seam or framing allowance separately if you need one, and state the assumption. Keep the chart's cell count, the fabric density and the finished size as three distinct figures so a mistake in one does not hide in another.
Count occupied cells across and down, ignoring blank border cells.
Divide each count by its matching density to get finished width and height.
Add any chosen margin as extra cells, then recalculate.
Try this example
A picture is charted on a 30 by 18 cell grid with 12 occupied cells across and 9 occupied cells down. Fabric is 14 stitches per inch across and 14 rows per inch down. What is the finished size of the motif?
Show the worked explanation
Width = 12 ÷ 14 ≈ 0.86 inches. Height = 9 ÷ 14 ≈ 0.64 inches. The equal densities keep the grid square, so the motif is wider than tall, matching its 12 by 9 cell shape. The 30 by 18 paper grid is not counted.
Common mistakes
Entering the same number for stitch and row density without checking the fabric. Measure or read both directions separately, then test with a 10 by 5 cell motif to confirm the aspect.
Counting the blank paper border as part of the design. Count only cells containing a stitch, then add margin deliberately as extra cells.
Using two symbols that look almost identical at reading size. Replace one with a clearly different shape and recheck the palette key.
Check your work
Stitch density and row density are recorded as separate values.
A test motif confirms the grid is not stretched or flipped.
Each colour has one clearly distinct symbol and a written key.
Finished size is calculated from occupied cells only.
Margin or seam allowance is stated as an explicit assumption.
Questions before you start
Why do stitch density and row density need separate entries?
Because a chart can be stretched or flipped if the two directions differ and are not checked. Entering them separately lets you confirm the grid aspect before stitching.
How do I estimate finished size?
Divide occupied cells across by stitches per inch for width, and occupied cells down by rows per inch for height. Count only stitched cells, not the paper border.
How many colours should a converted picture use?
There is no fixed number. Choose a small palette whose symbols stay clearly distinct at reading size, and group nearby tones into the nearest chosen colour.
Optional Google Analytics helps us understand which free resources are useful. It is off until you allow it. Drawing tools and downloads work with either choice. Privacy details