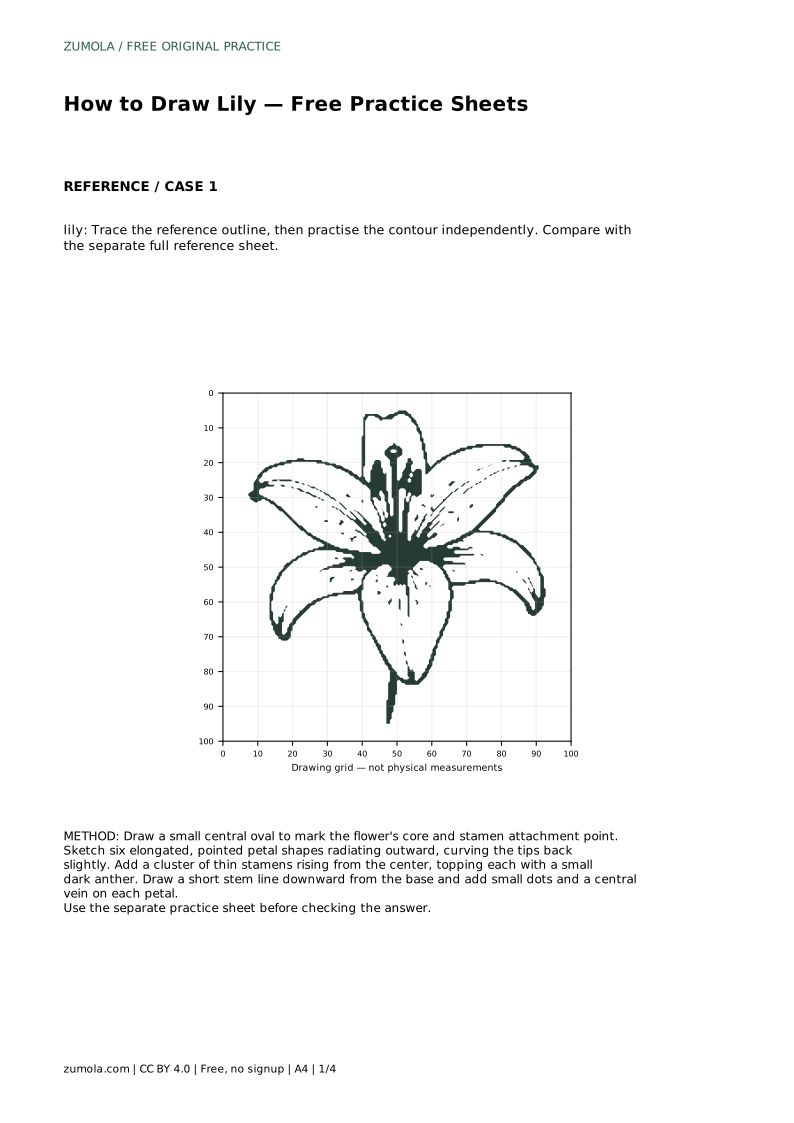
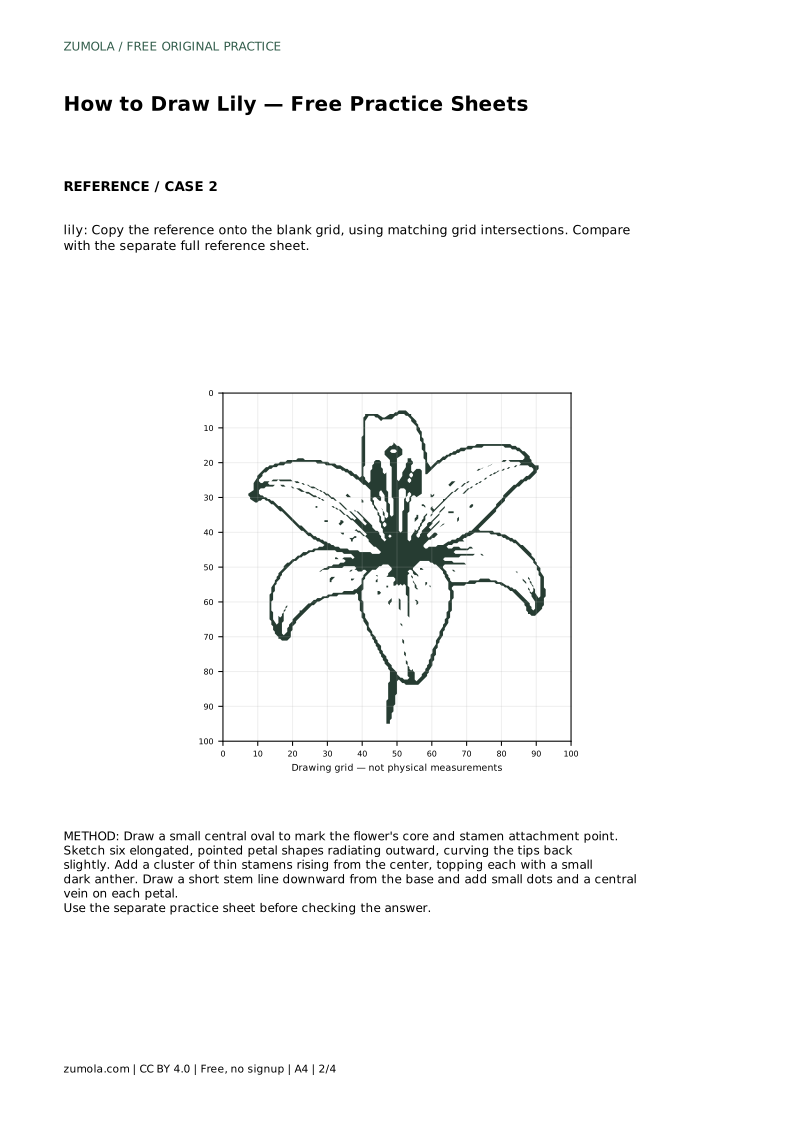
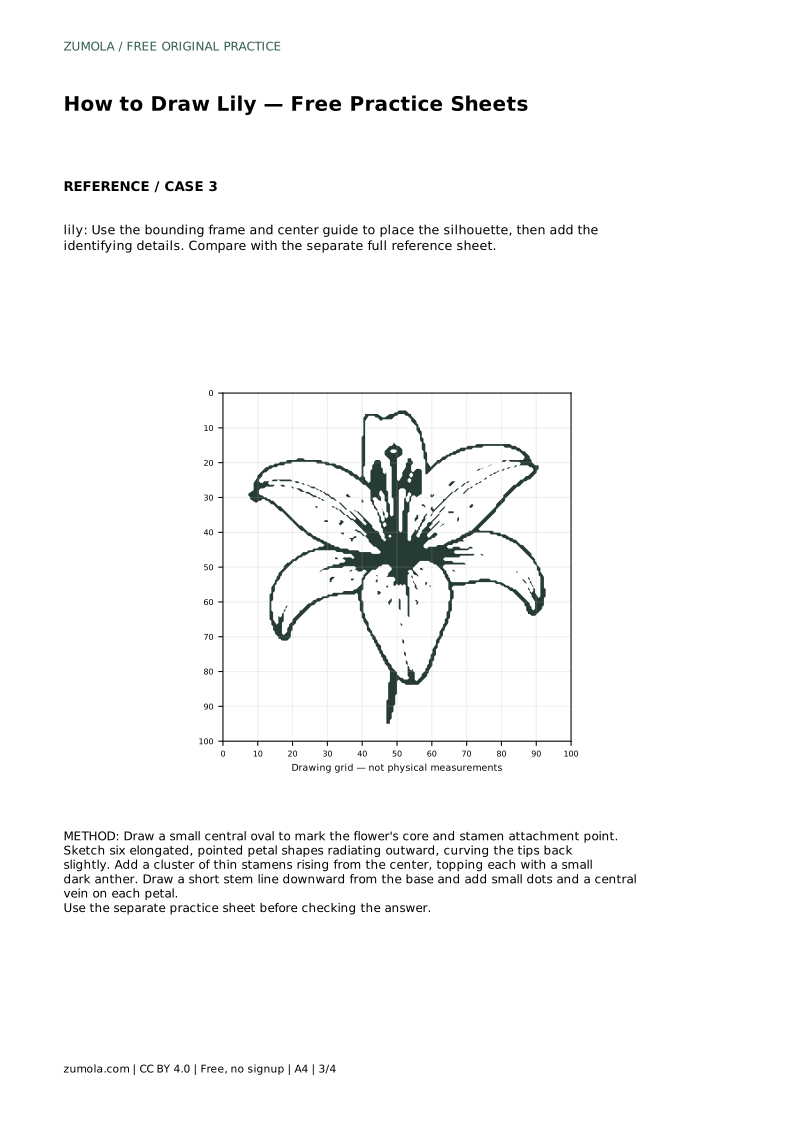
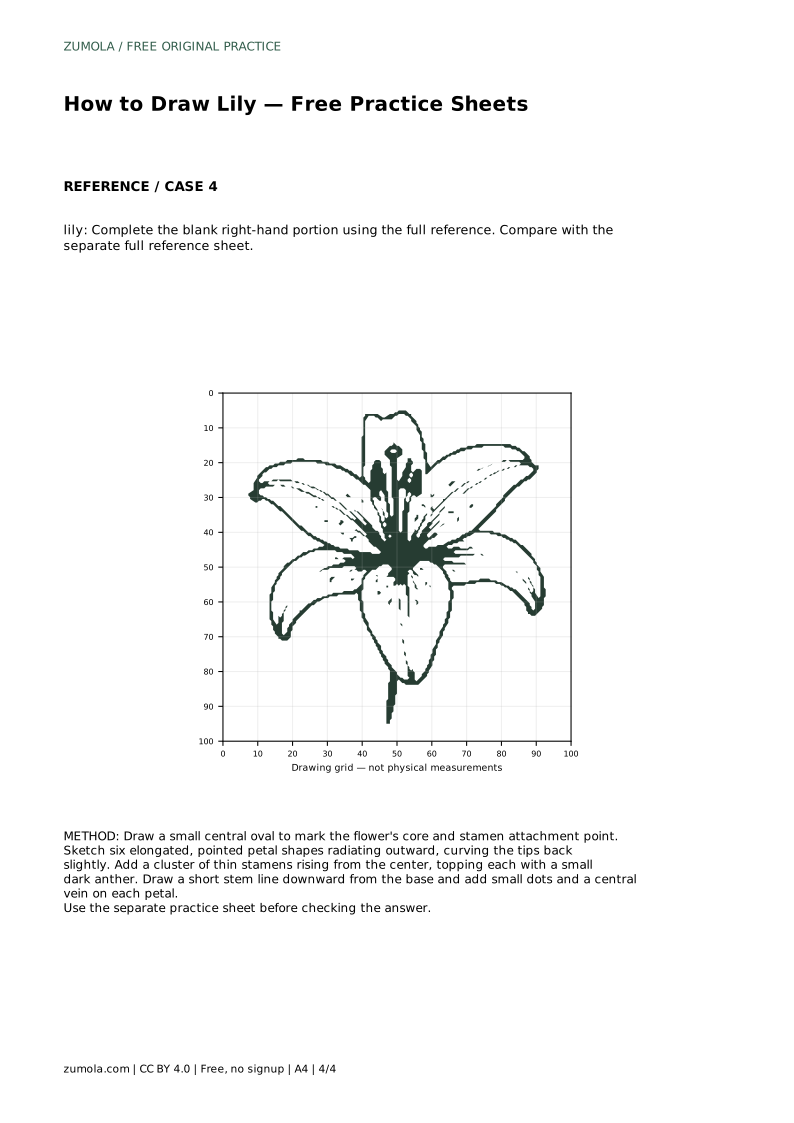
Reference diagrams
LETTER · Download PDF
A4 · Download PDF
Free original resources
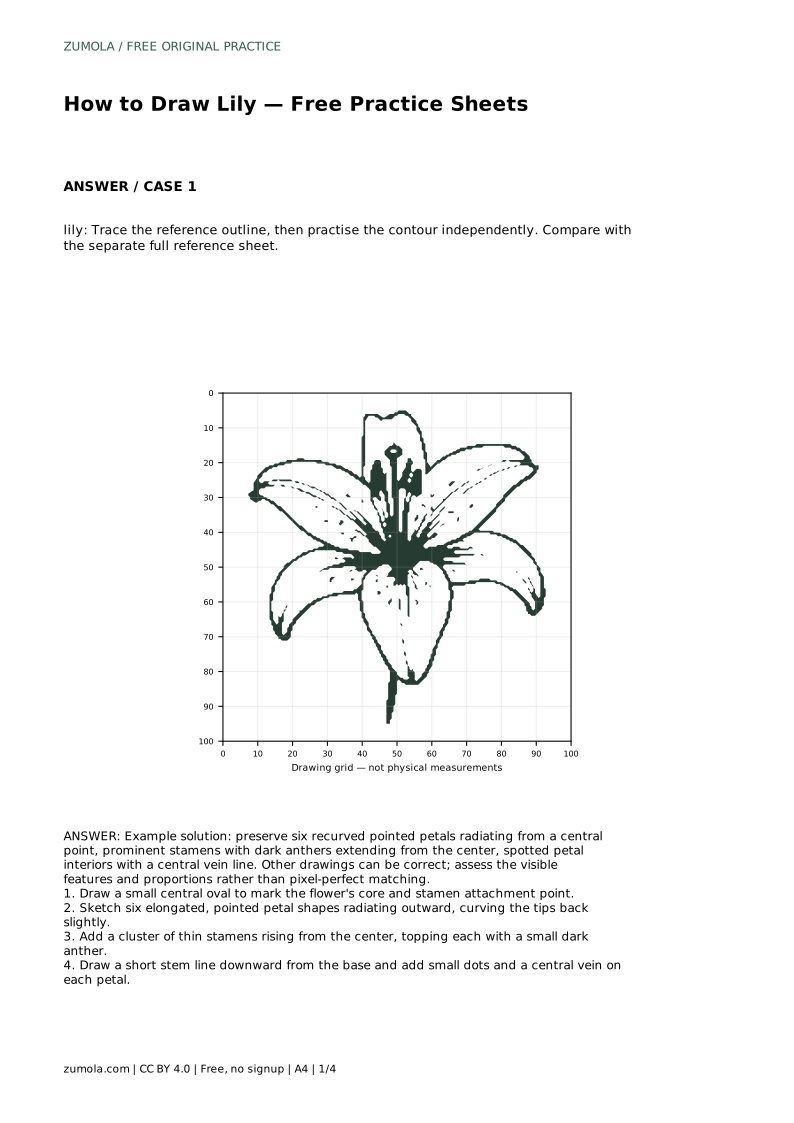
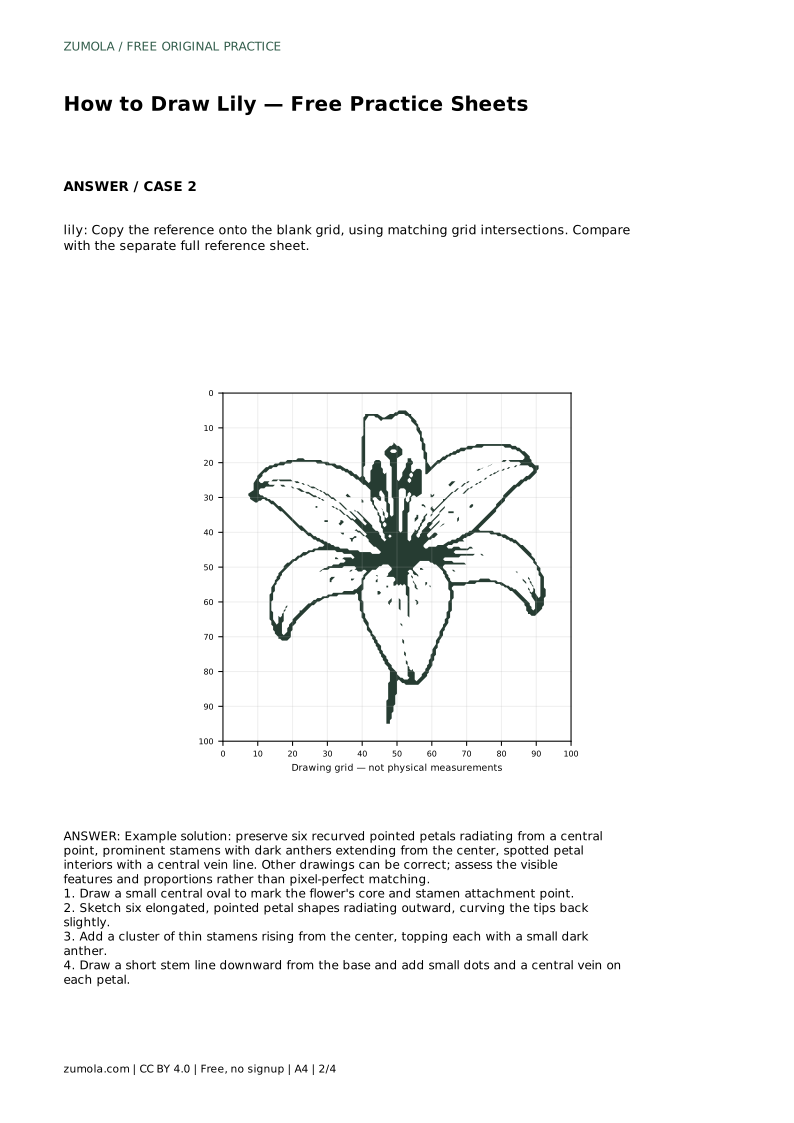
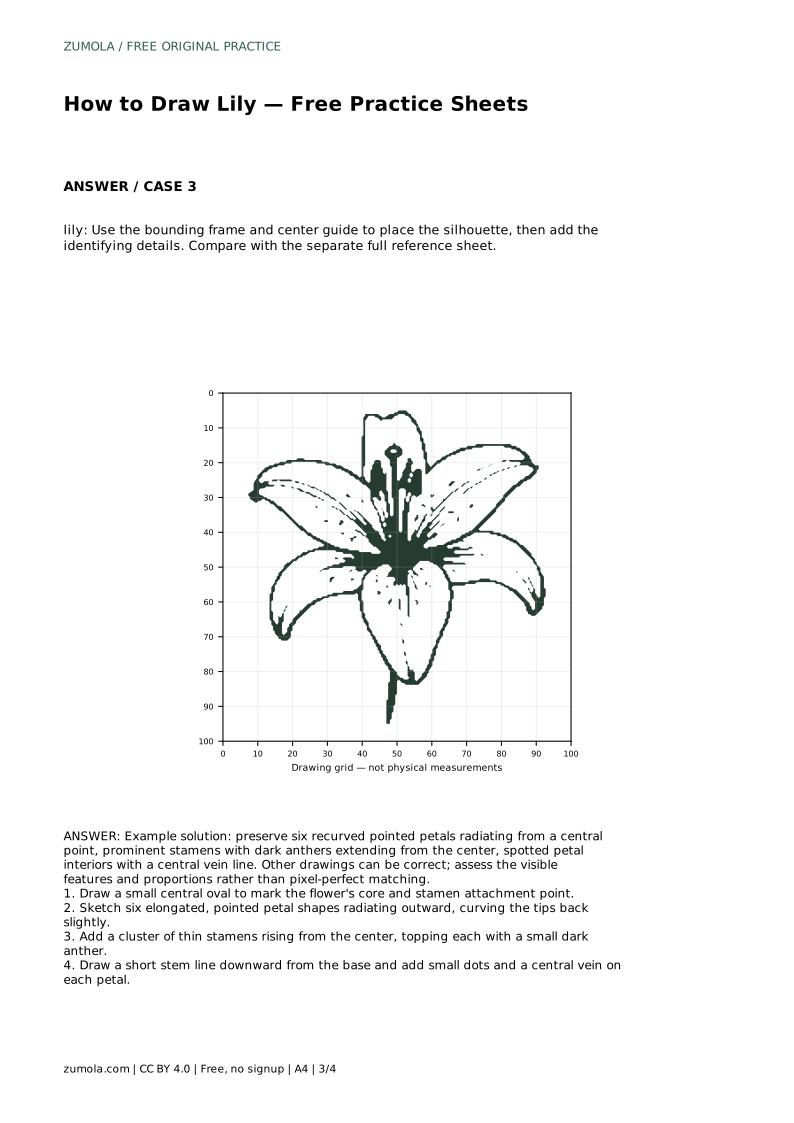
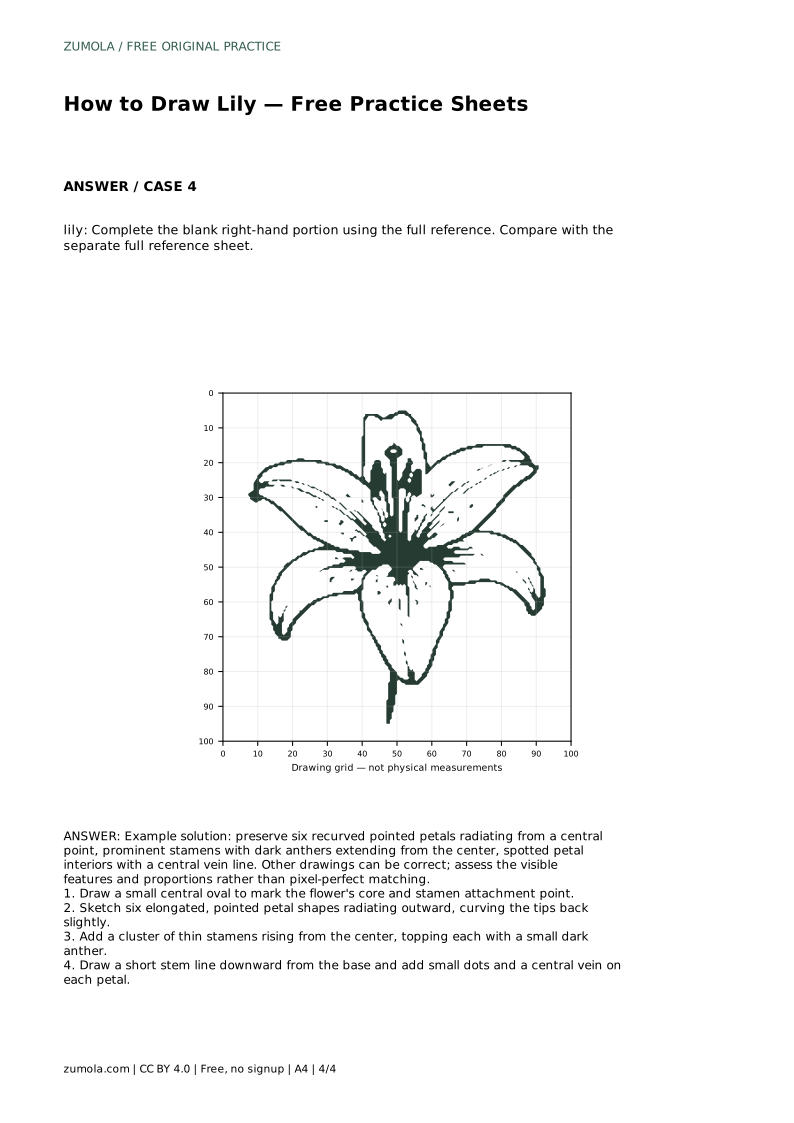
Learn to draw a lily in pencil by building six recurved petals, stamens with dark anthers, and spotted interiors. Includes practice-sheet guidance and a rubric.
Four original cases, with reference diagrams, practice sheets and worked answers. Everything is free; no signup required.
LETTER · Download PDF
A4 · Download PDF
LETTER · Download PDF
A4 · Download PDF
LETTER · Download PDF
A4 · Download PDF
Use A4 or US Letter to match your printer. Use the stated values and conditions to solve each exercise; diagrams are not physical measuring rulers.
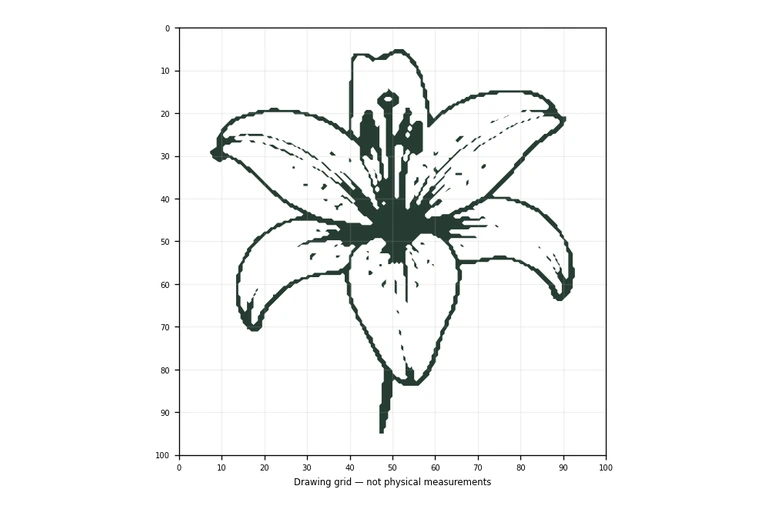
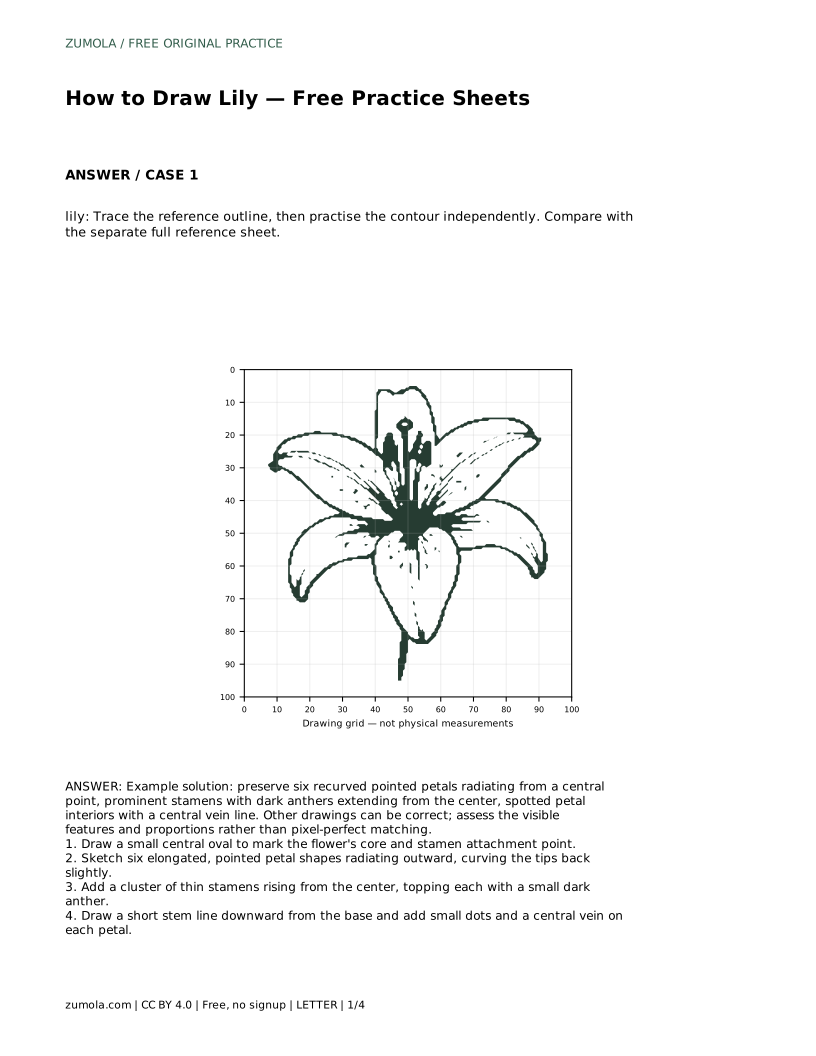
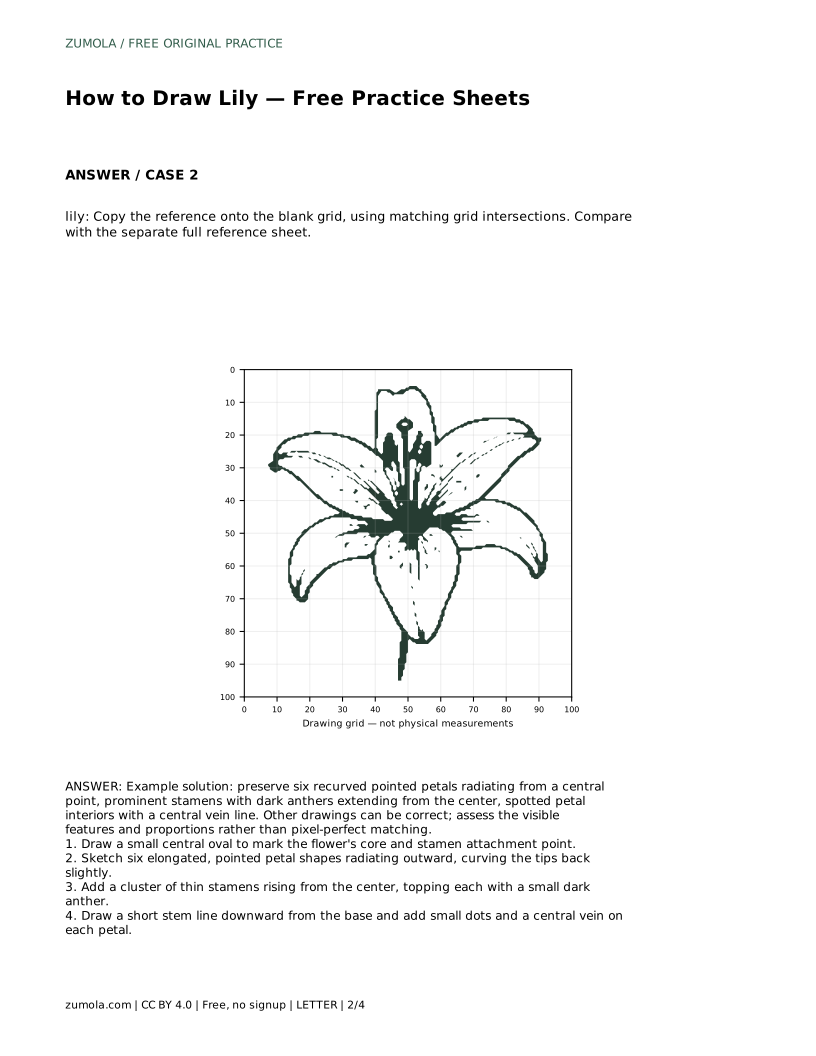
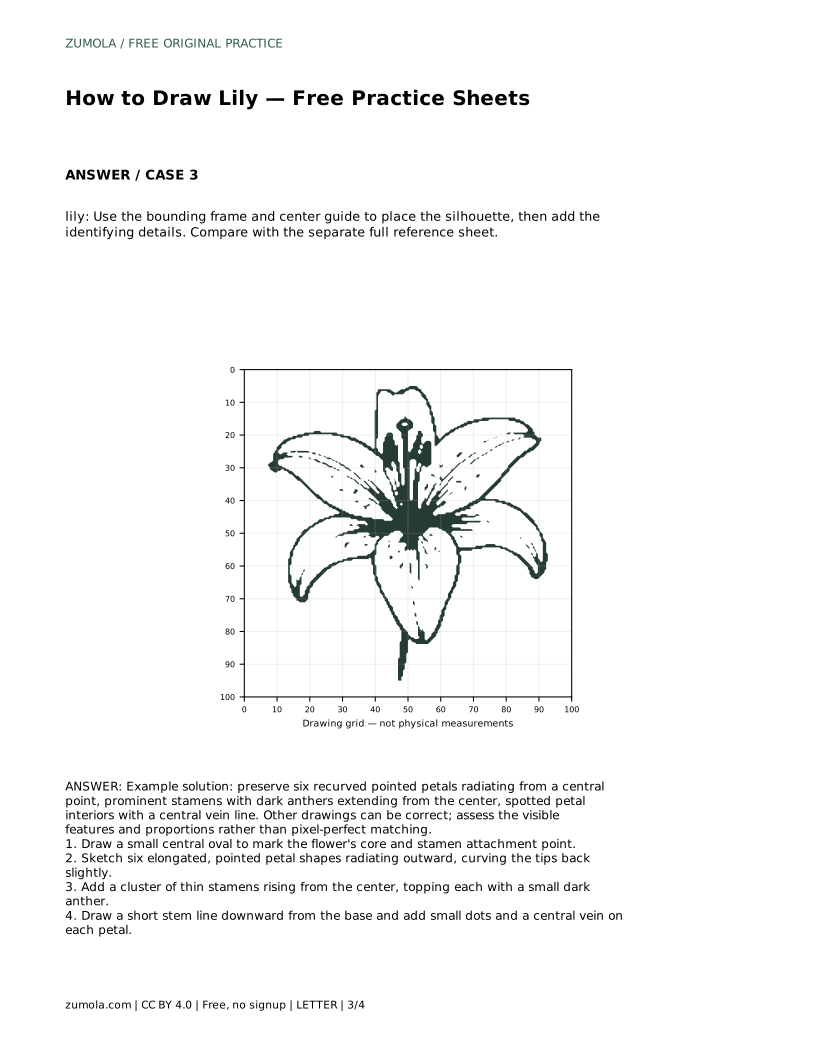
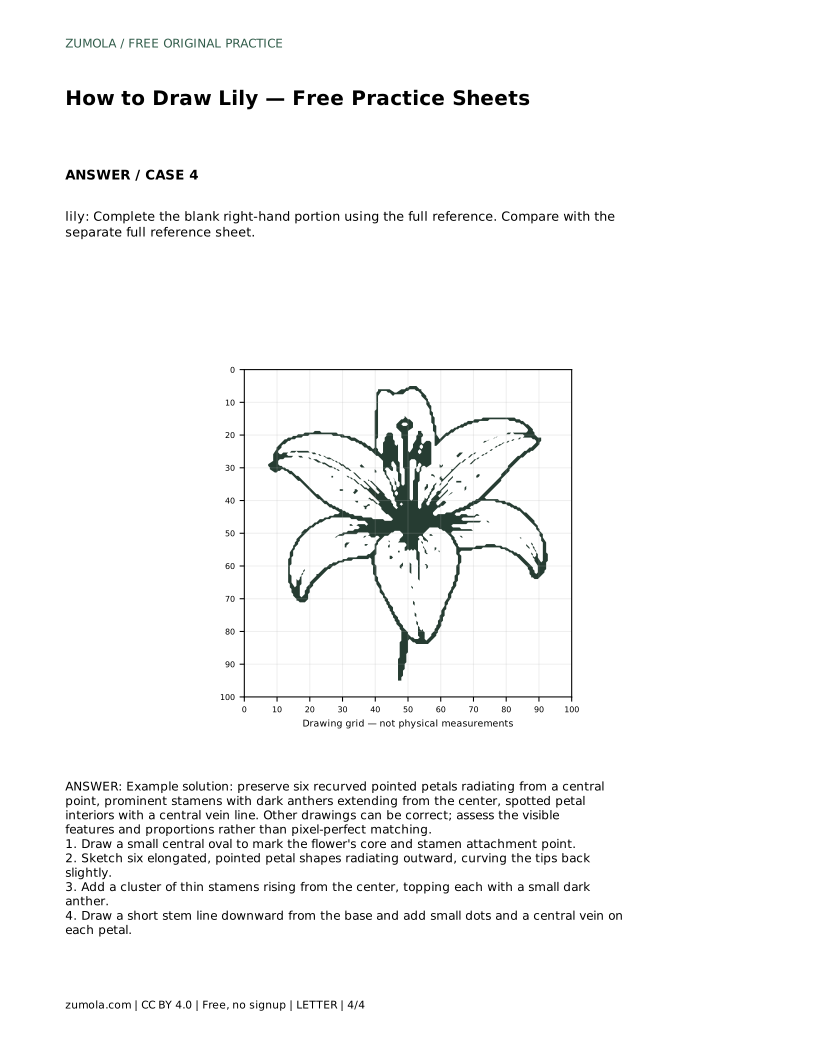
A lily is a forgiving flower to draw in pencil because its structure is clear: a small central core, six pointed petals that curve back at the tips, and a cluster of stamens rising from the middle. This page explains how to build that structure step by step, then how to use tracing, grid, frame, and partial-reference practice sheets to strengthen your control. The goal is not a pixel-perfect copy but a drawing that preserves the lily's visible features and believable proportions.
Begin with a small central oval. This marks where the petals meet and where the stamens attach, so it anchors everything else. From that oval, sketch six elongated petal shapes radiating outward. Keep the petals pointed and let each tip curve back slightly; that recurved shape is one of the lily's most recognizable traits. Work lightly at first so you can adjust spacing. Uneven gaps between petals are normal in real flowers, but the six-petal count and the radiating arrangement should stay readable.
Check the silhouette before adding detail. Step back and ask whether the petals look like they belong to one flower rather than a scatter of separate shapes. If one petal crowds its neighbor, thin it or shift its base slightly around the central oval.
The stamens give the lily its busy center. Draw several thin lines rising from the central oval, each ending in a small dark anther. Keep the anthers small and clustered rather than spread wide, so the center reads as one focal point. Next, add a central vein line along each petal, following the petal's curve rather than running straight. Finally, place small dots on the petal interiors. Vary their size slightly and keep them inside the petal edges. These marks are decorative detail, not anatomy, so treat them as pattern rather than a diagram.
Pencil control matters here. Use a sharp point for veins and anthers, and keep your hand relaxed so the lines stay light enough to erase.
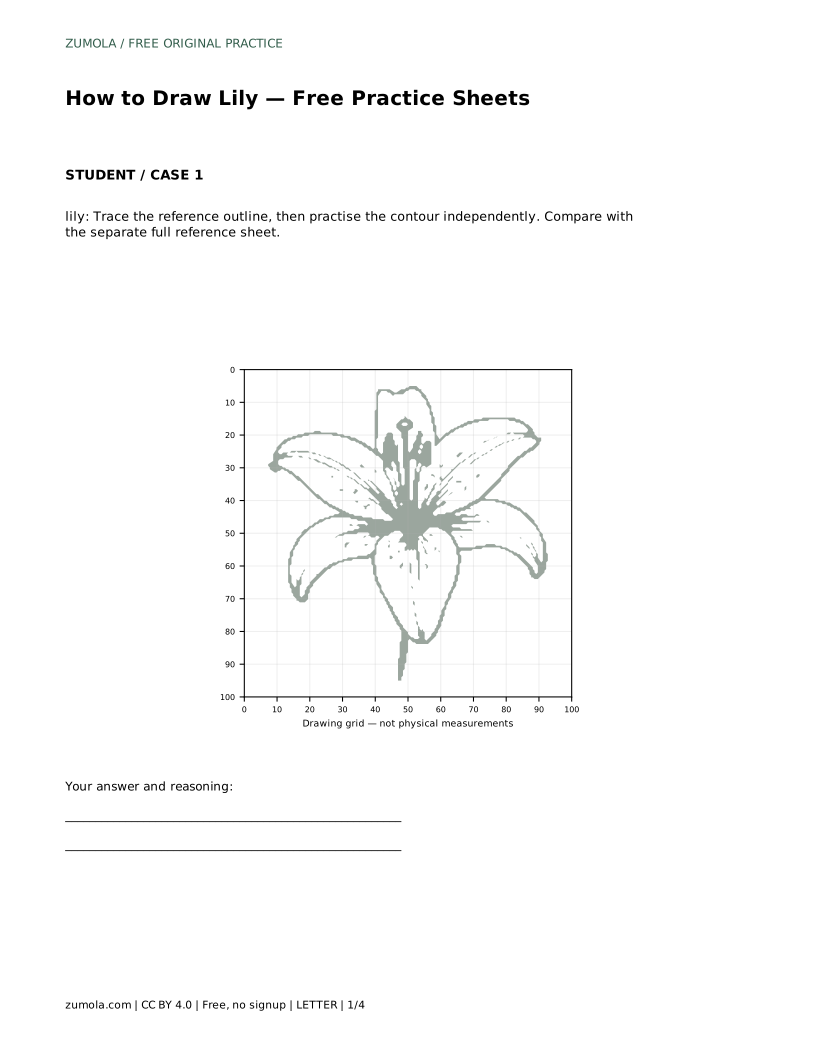
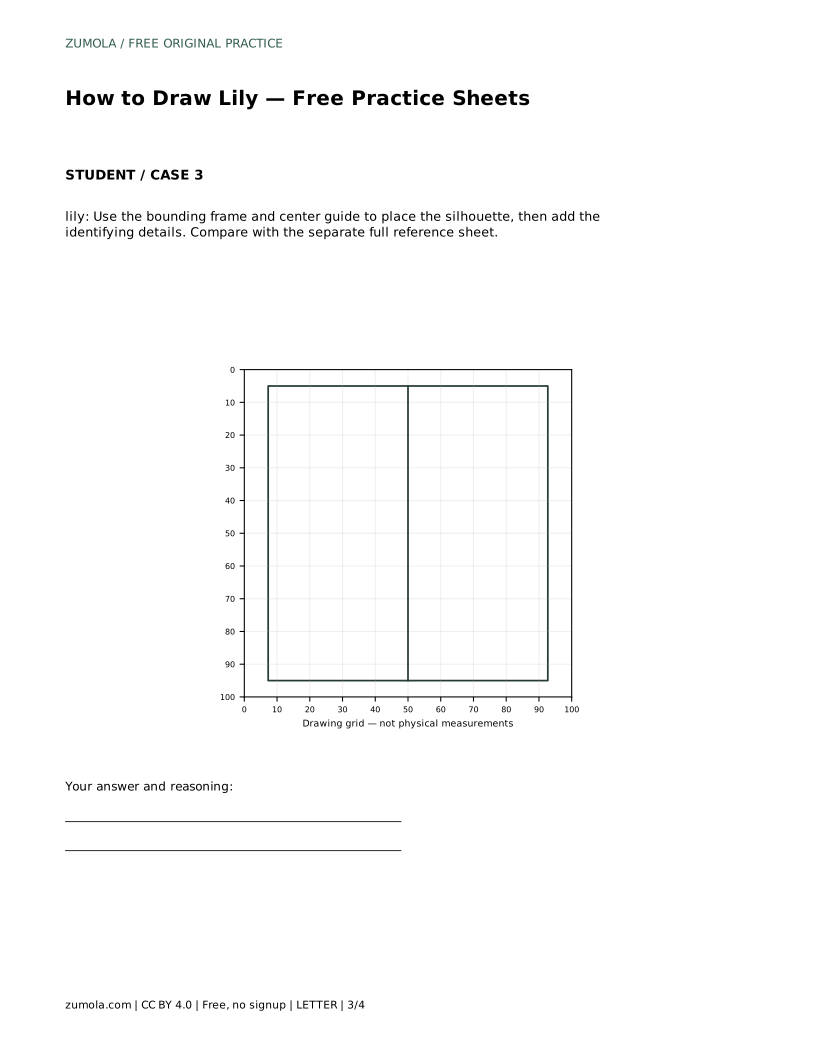
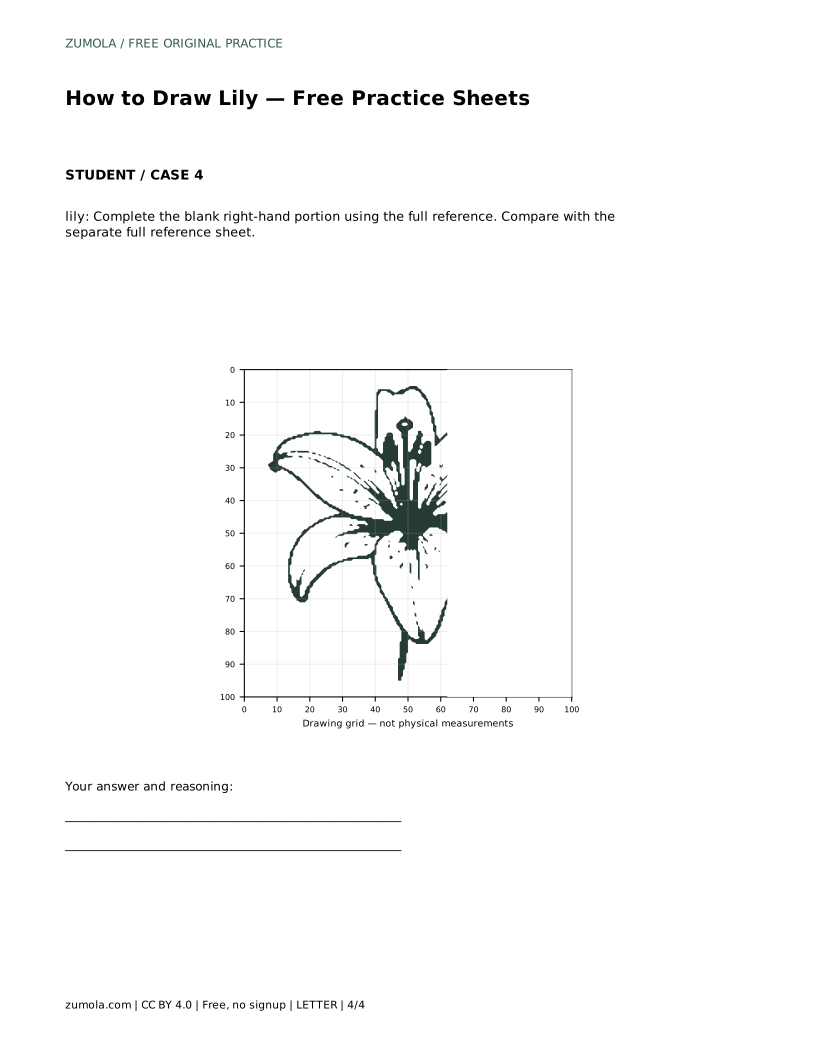
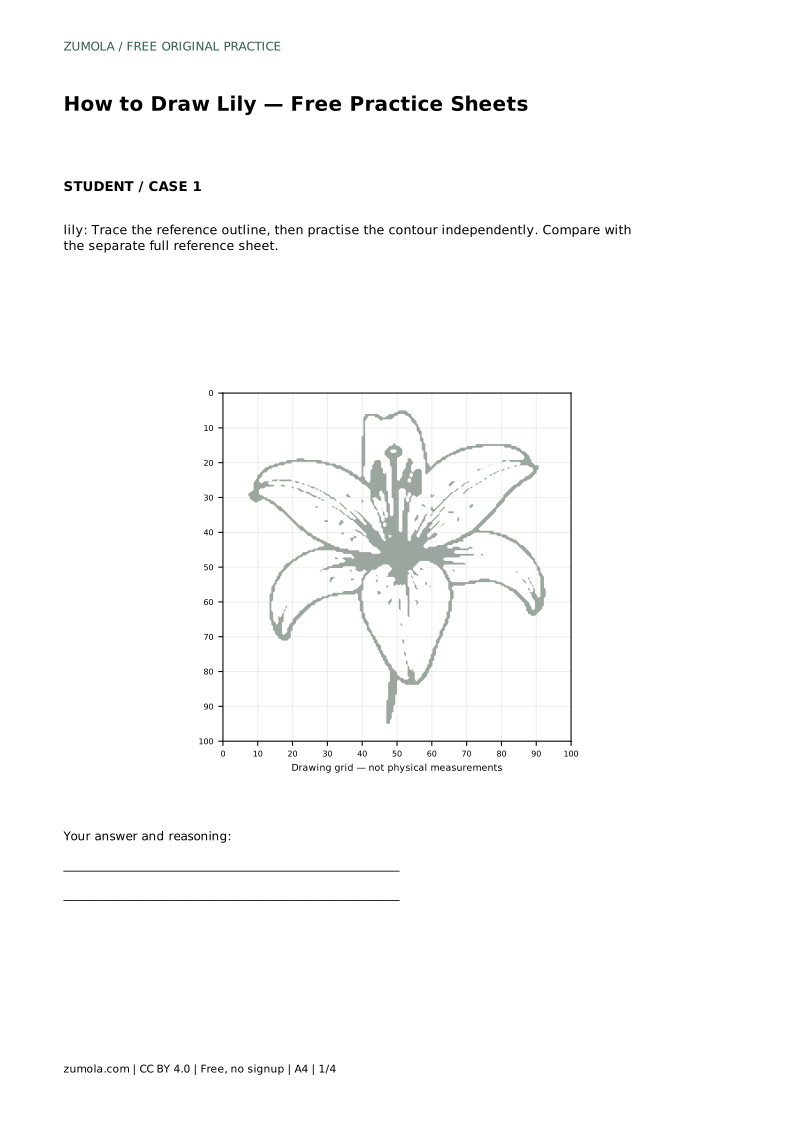
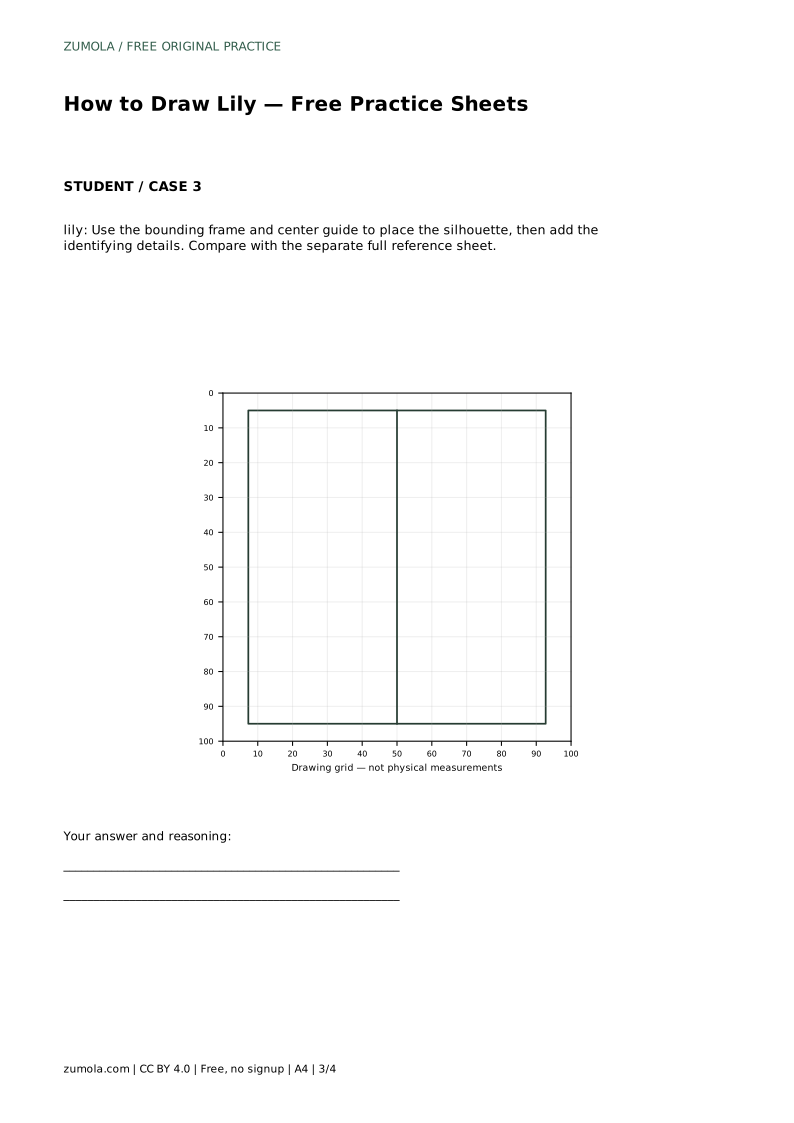
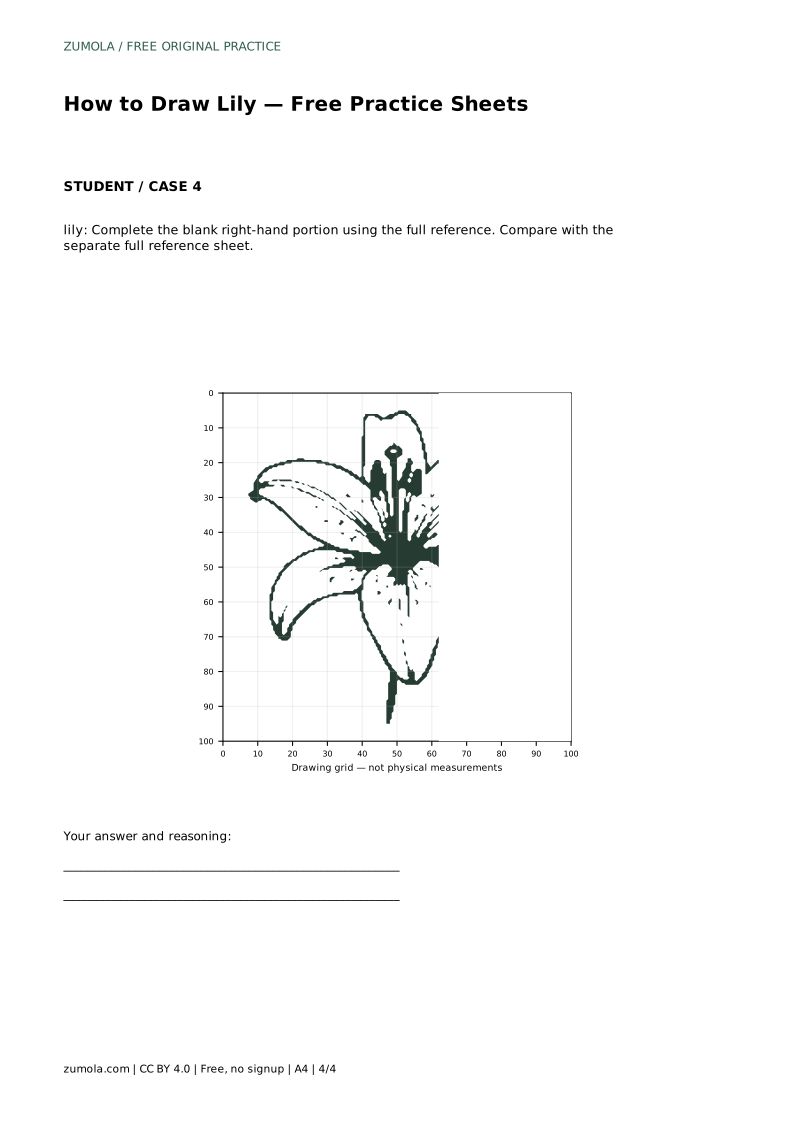
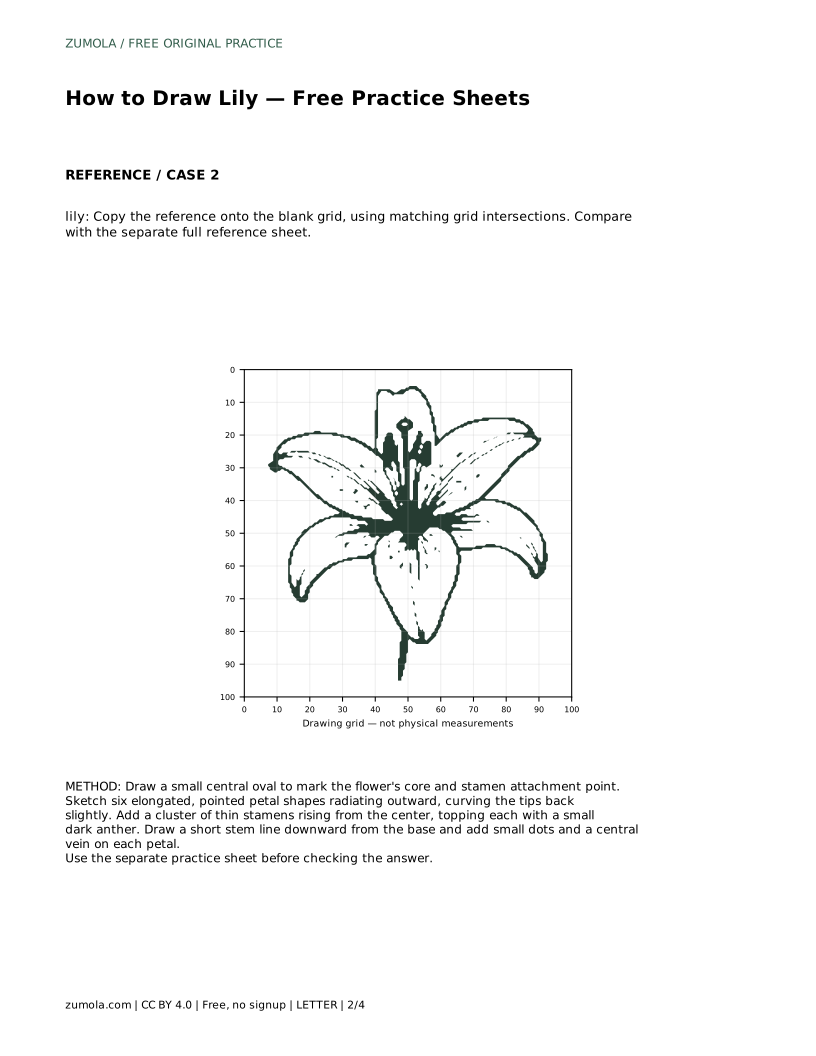
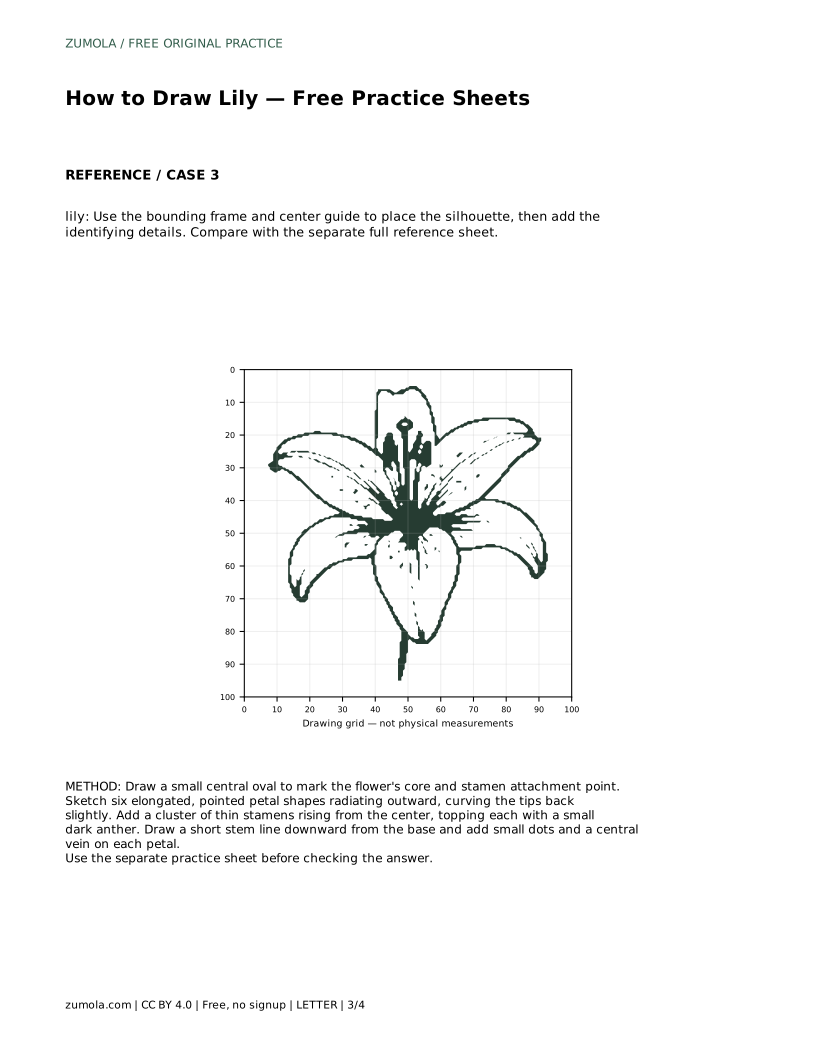
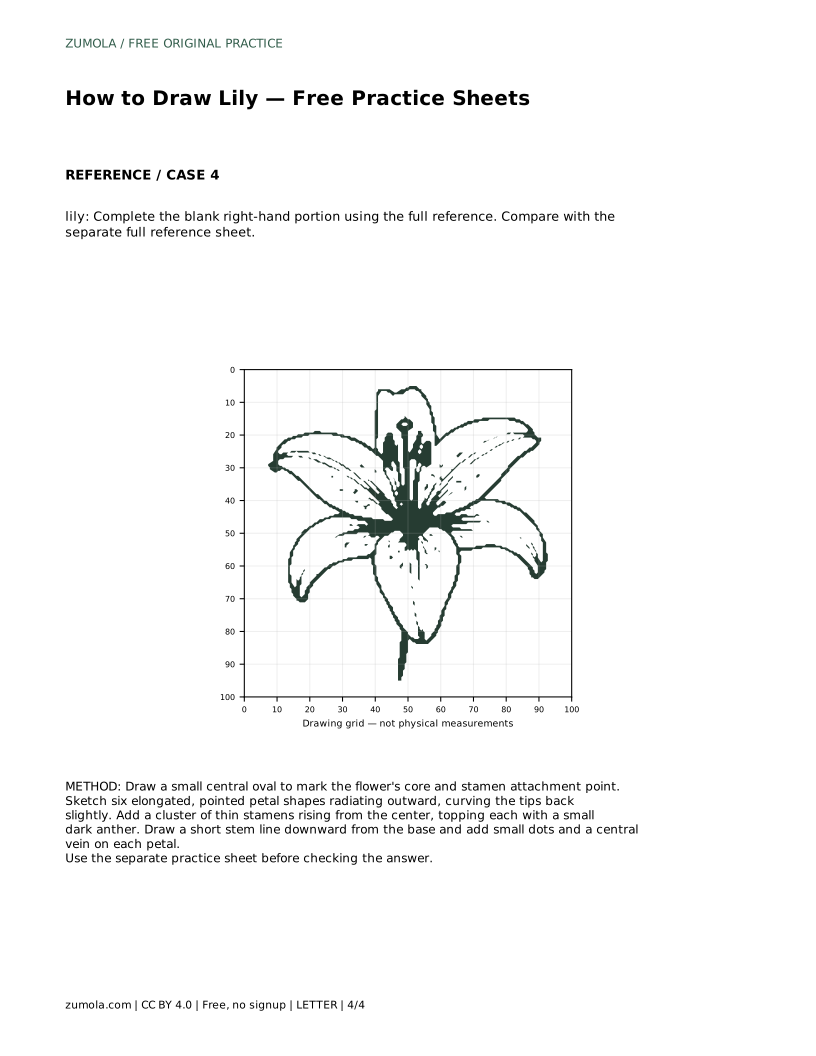
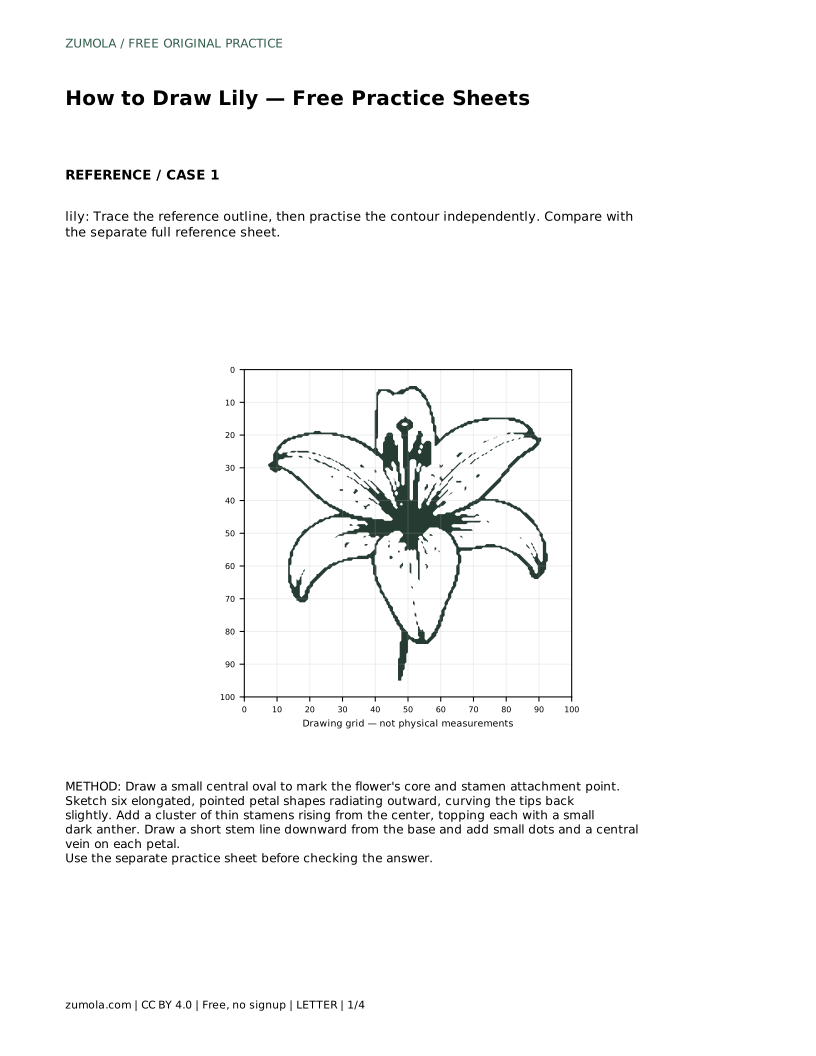
Each sheet type trains a different skill. Tracing the reference outline builds familiarity with the shape; then practise the contour independently and compare with the separate full reference sheet. The grid version asks you to copy the reference onto the blank grid using matching grid intersections, which trains proportion and placement. The bounding-frame version uses a frame and center guide to place the silhouette before adding identifying details. The partial-reference version asks you to complete the blank right-hand portion using the full reference.
Compare your result with the full reference sheet after each attempt. Look for the six petals, the recurved tips, the central stamen cluster, and the spotted interiors. Different drawings can all be correct; judge the visible features and proportions rather than exact matching.
Because art has multiple valid outcomes, use a rubric instead of hunting for one exact answer. A strong attempt keeps the six-petal radial structure, shows recurved tips, includes a visible stamen cluster with dark anthers, and places veins and spots consistently. Line quality and shading are separate skills; a clean structure with simple detail can be better than a busy drawing with a muddled center.
lily: Trace the reference outline, then practise the contour independently. Compare with the separate full reference sheet.
Example solution: preserve six recurved pointed petals radiating from a central point, prominent stamens with dark anthers extending from the center, spotted petal interiors with a central vein line. Other drawings can be correct; assess the visible features and proportions rather than pixel-perfect matching. Draw a small central oval to mark the flower's core and stamen attachment point. Sketch six elongated, pointed petal shapes radiating outward, curving the tips back slightly. Add a cluster of thin stamens rising from the center, topping each with a small dark anther. Draw a short stem line downward from the base and add small dots and a central vein on each petal.
Use six pointed petals radiating from a central point, with tips curving back slightly.
No. Other drawings can be correct; assess visible features and proportions instead.
Check the six-petal radial structure and the central stamen cluster before finer details.
All drawing practice · Free coordinate paper
Original resources · CC BY 4.0 · Free for personal and classroom use with attribution.