Reference diagrams
LETTER · Download PDF
A4 · Download PDF
Free original resources
Learn to draw a centipede by tracing, copying a grid, using a center guide, and completing a partial outline. Build observation skills with free practice sheets.
Four original cases, with reference diagrams, practice sheets and worked answers. Everything is free; no signup required.
LETTER · Download PDF
A4 · Download PDF
LETTER · Download PDF
A4 · Download PDF
LETTER · Download PDF
A4 · Download PDF
Use A4 or US Letter to match your printer. Use the stated values and conditions to solve each exercise; diagrams are not physical measuring rulers.
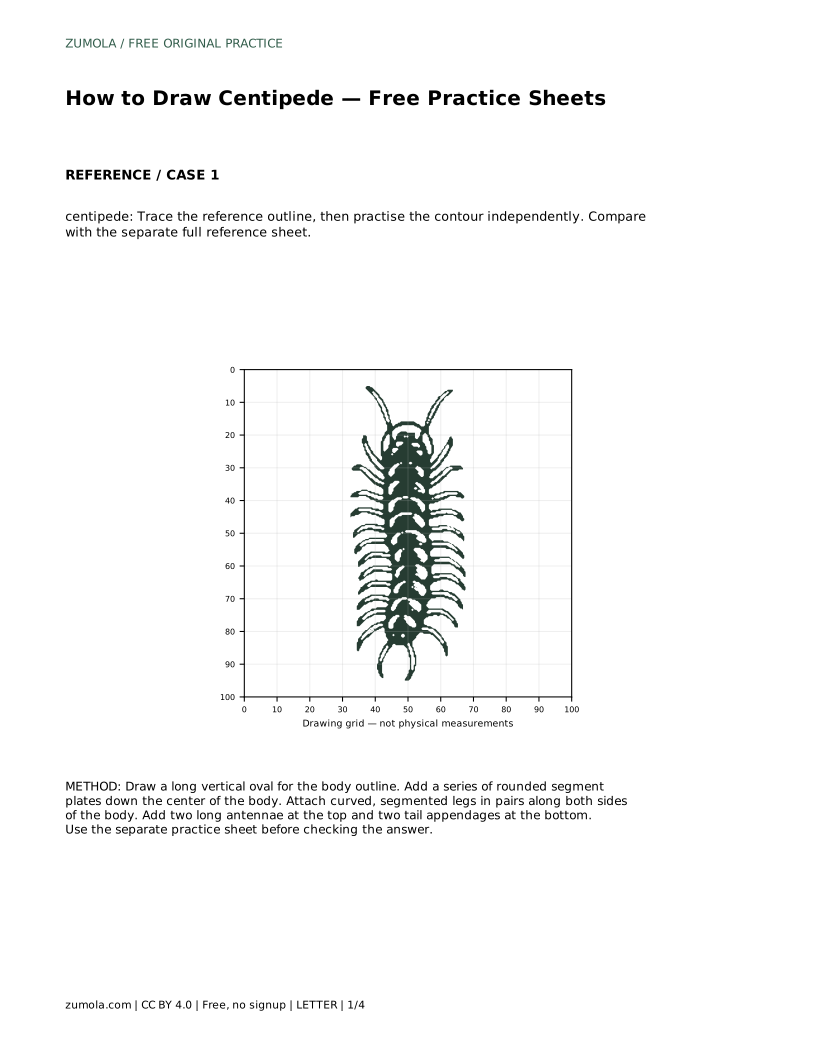
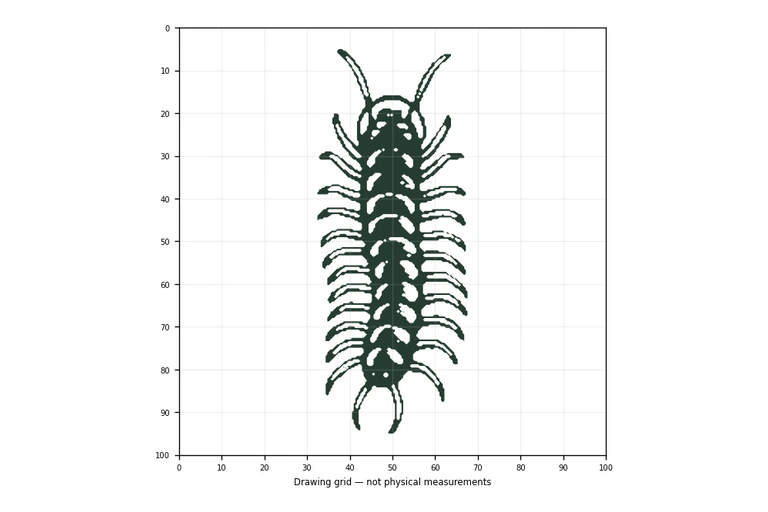
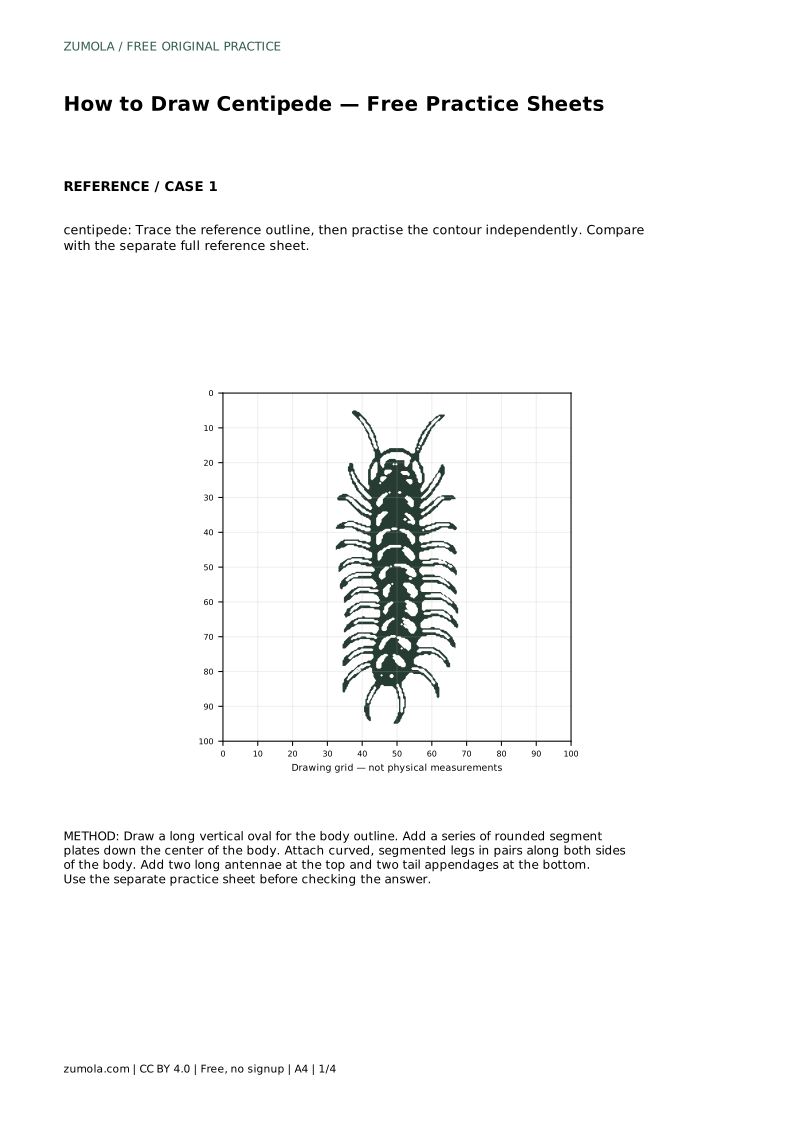
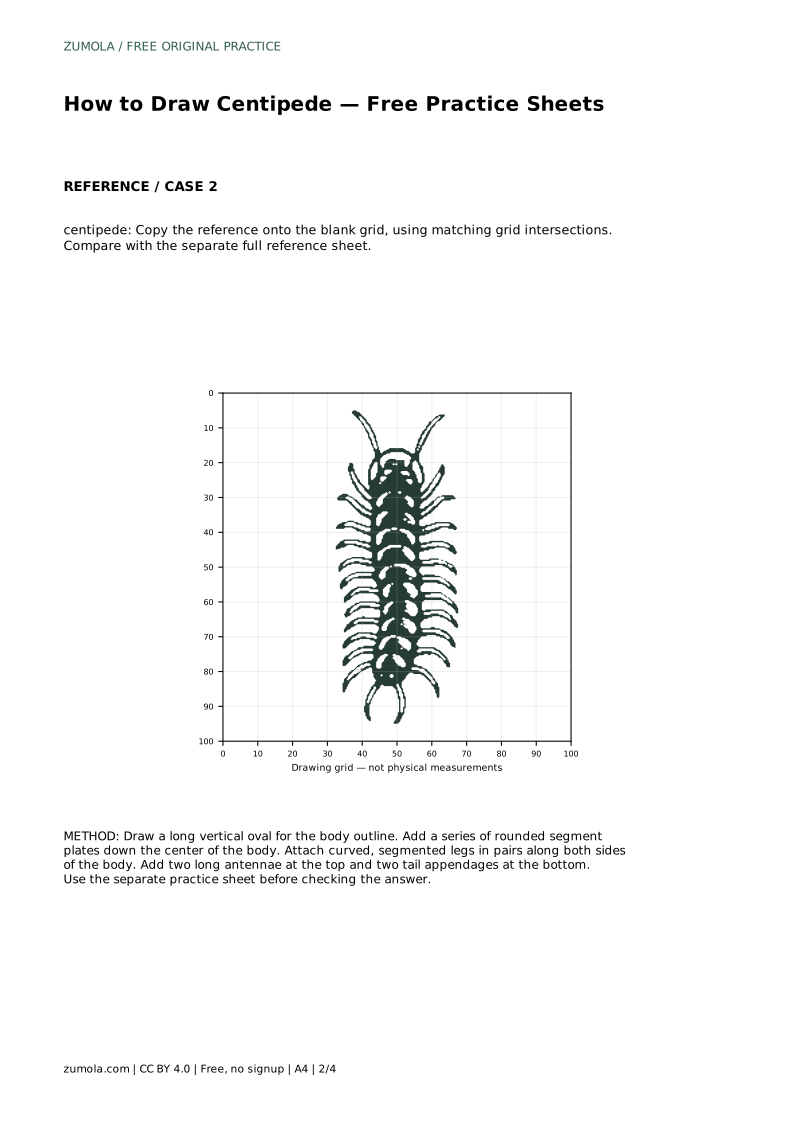
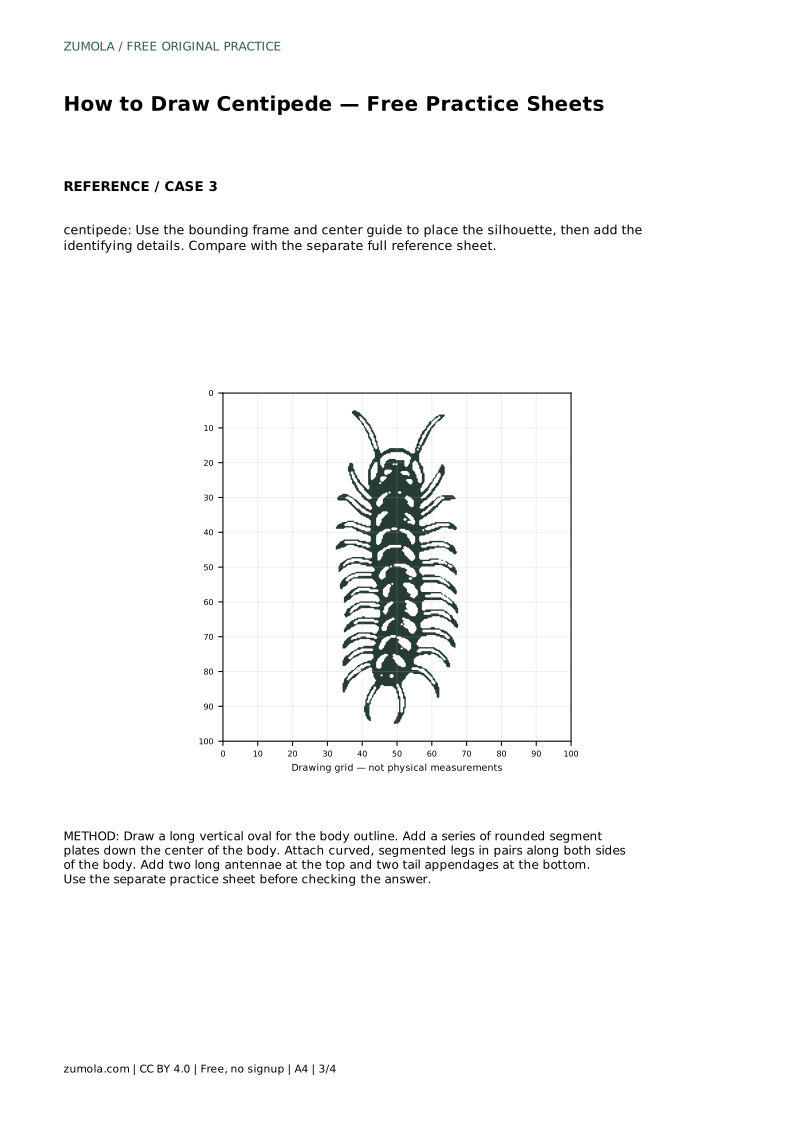
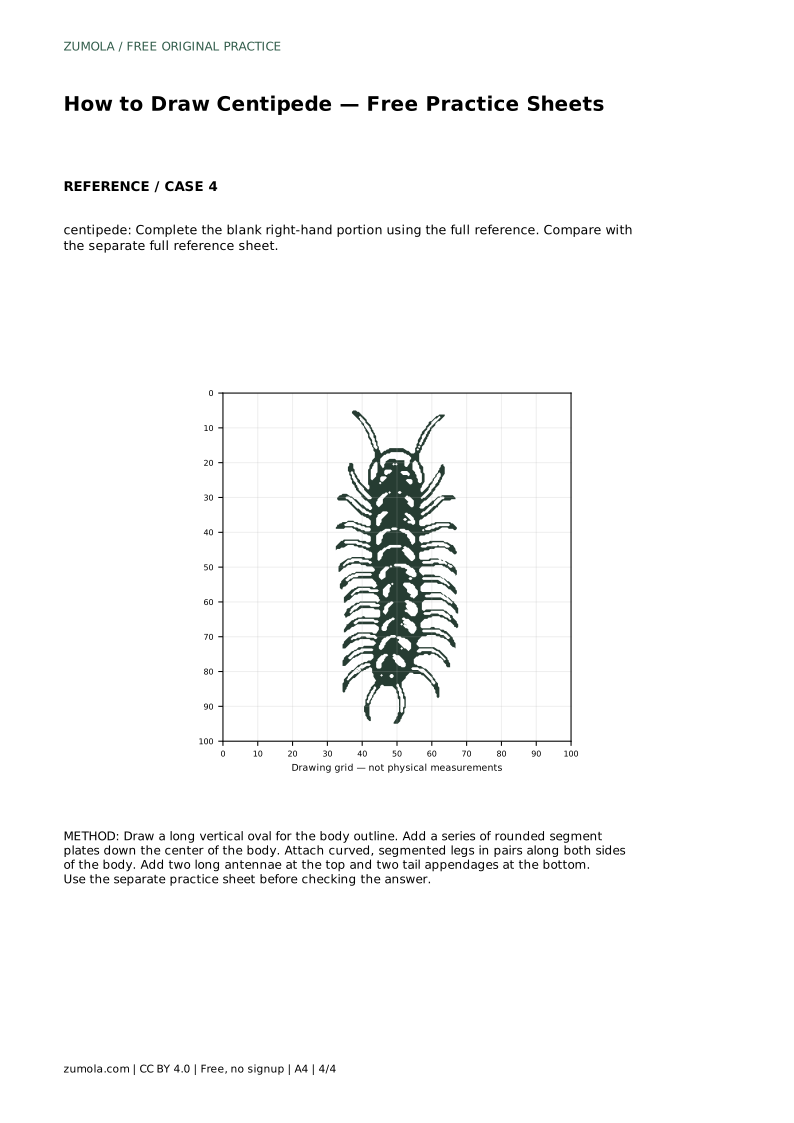
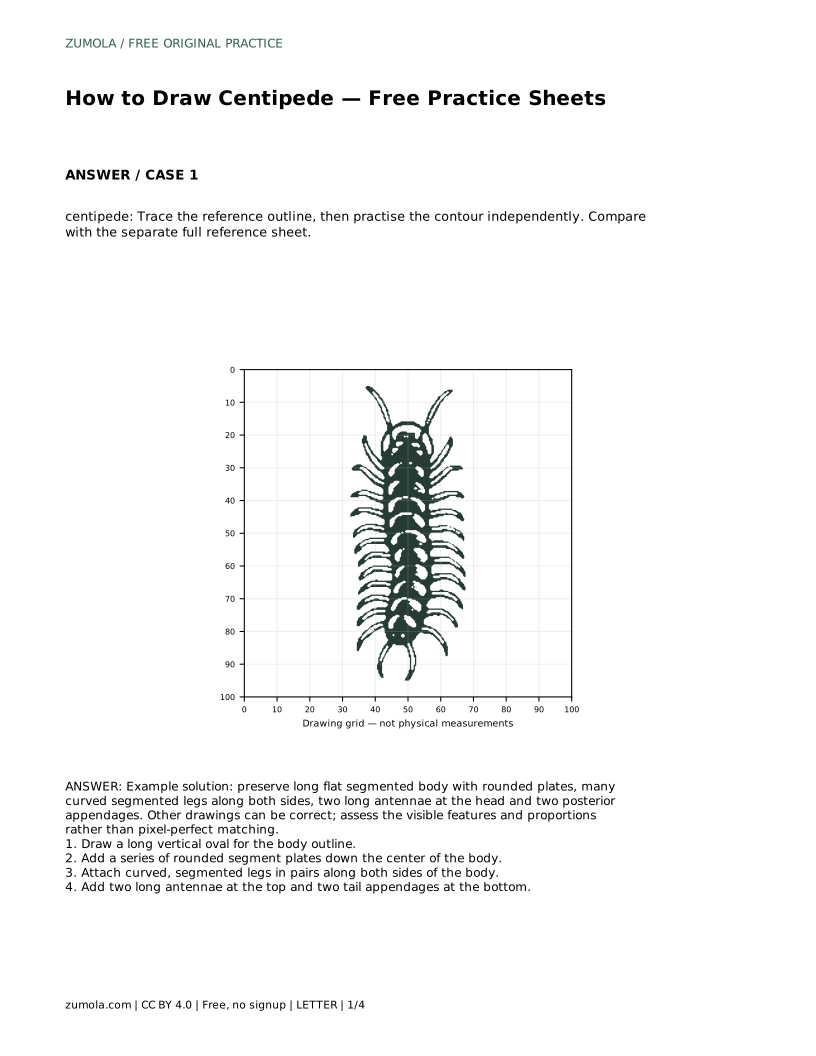
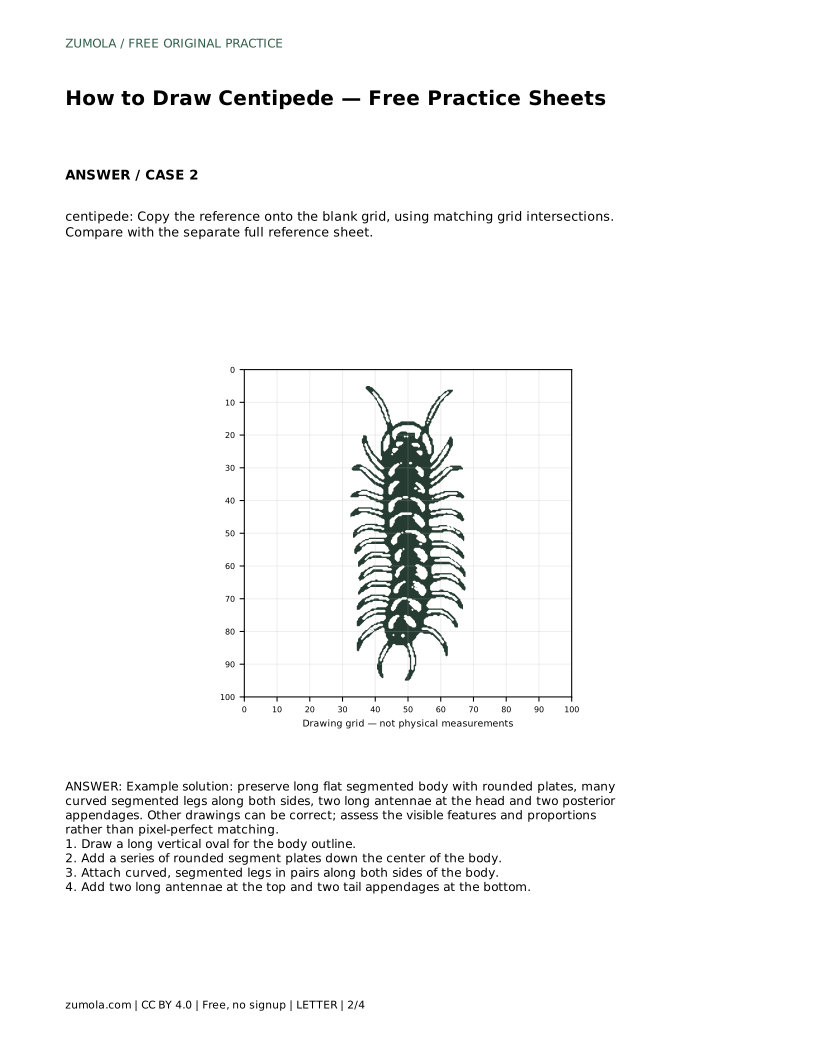
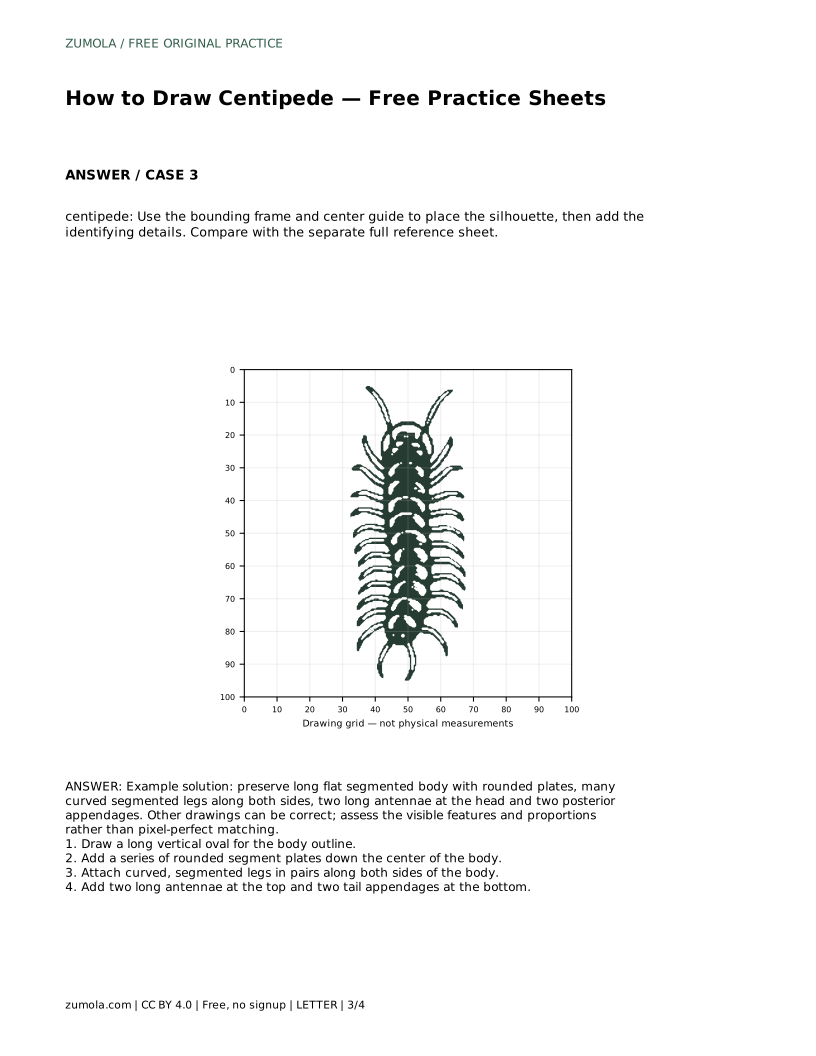
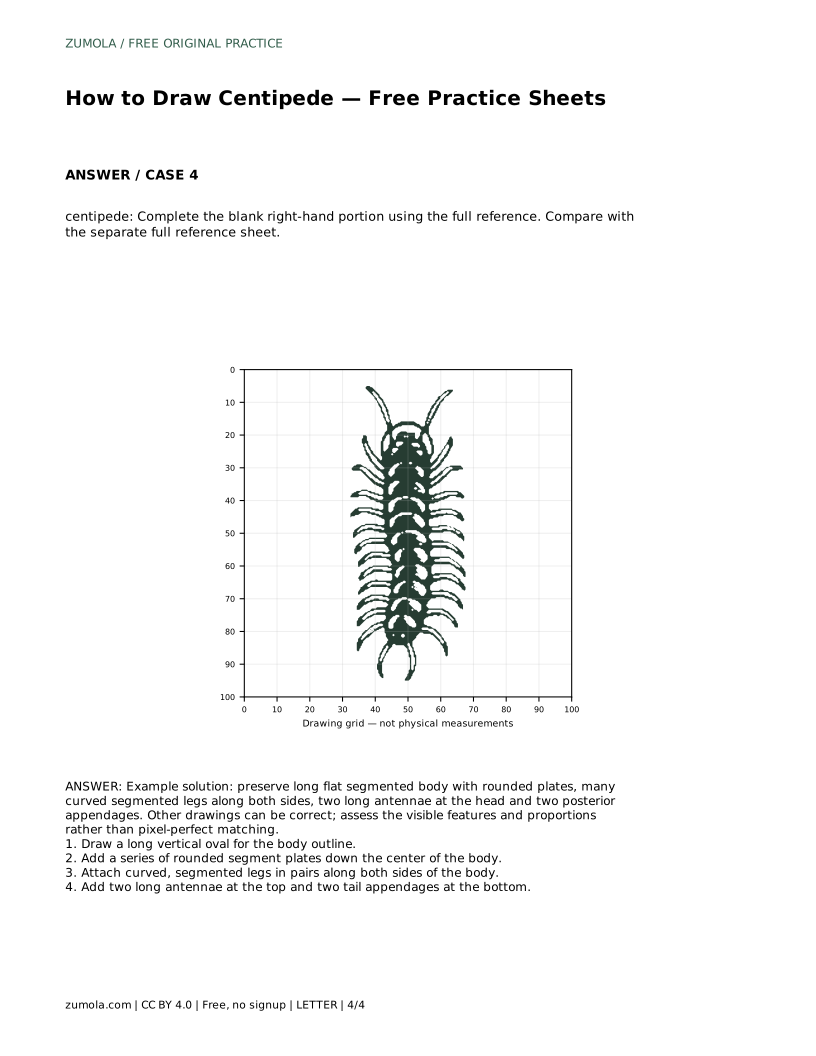
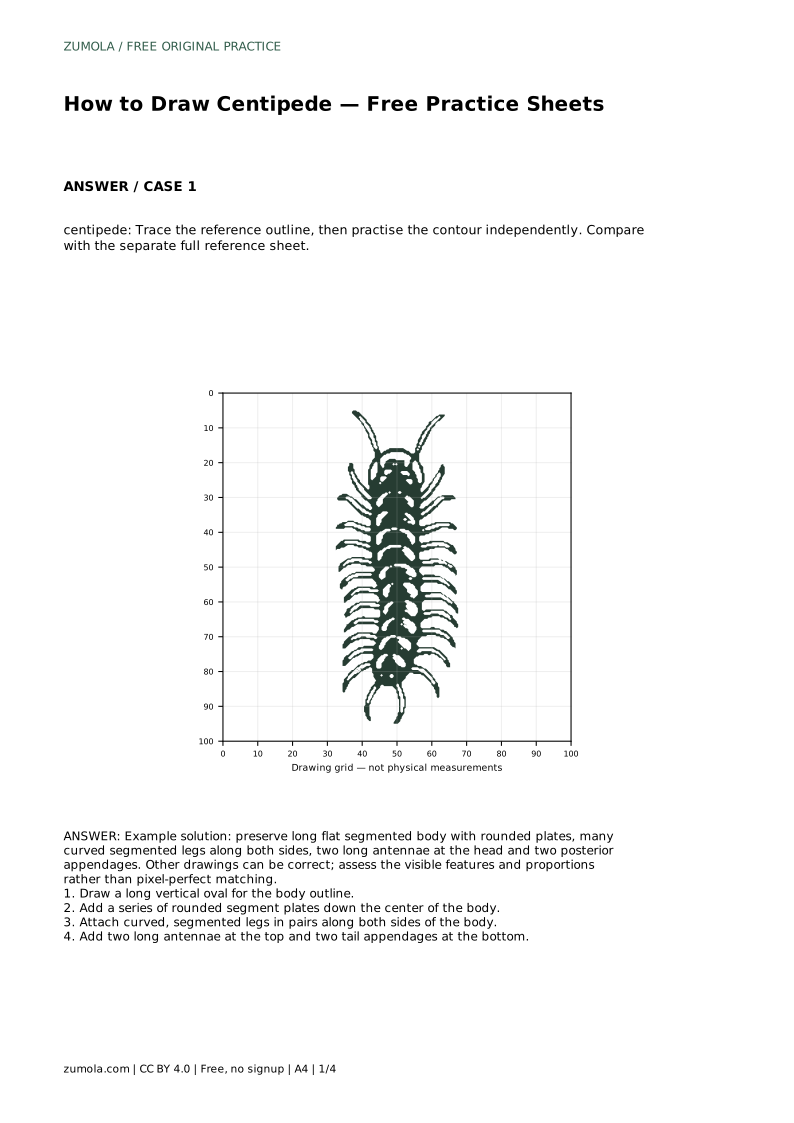
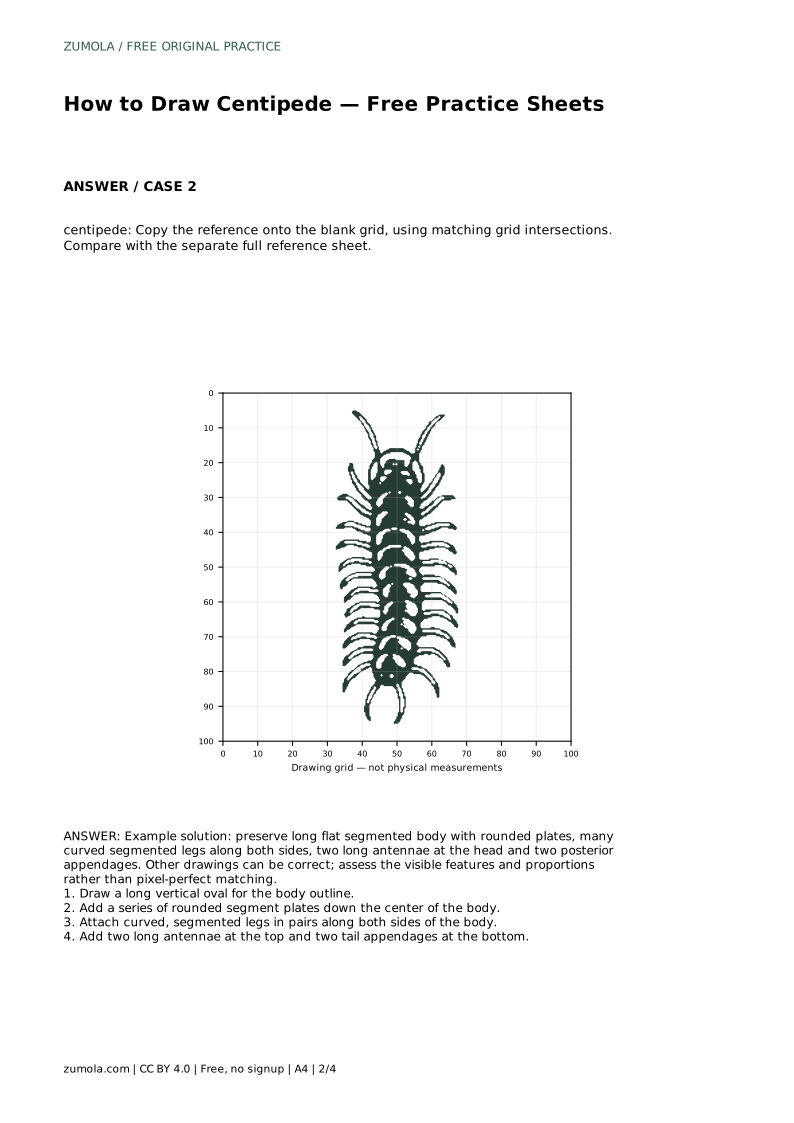
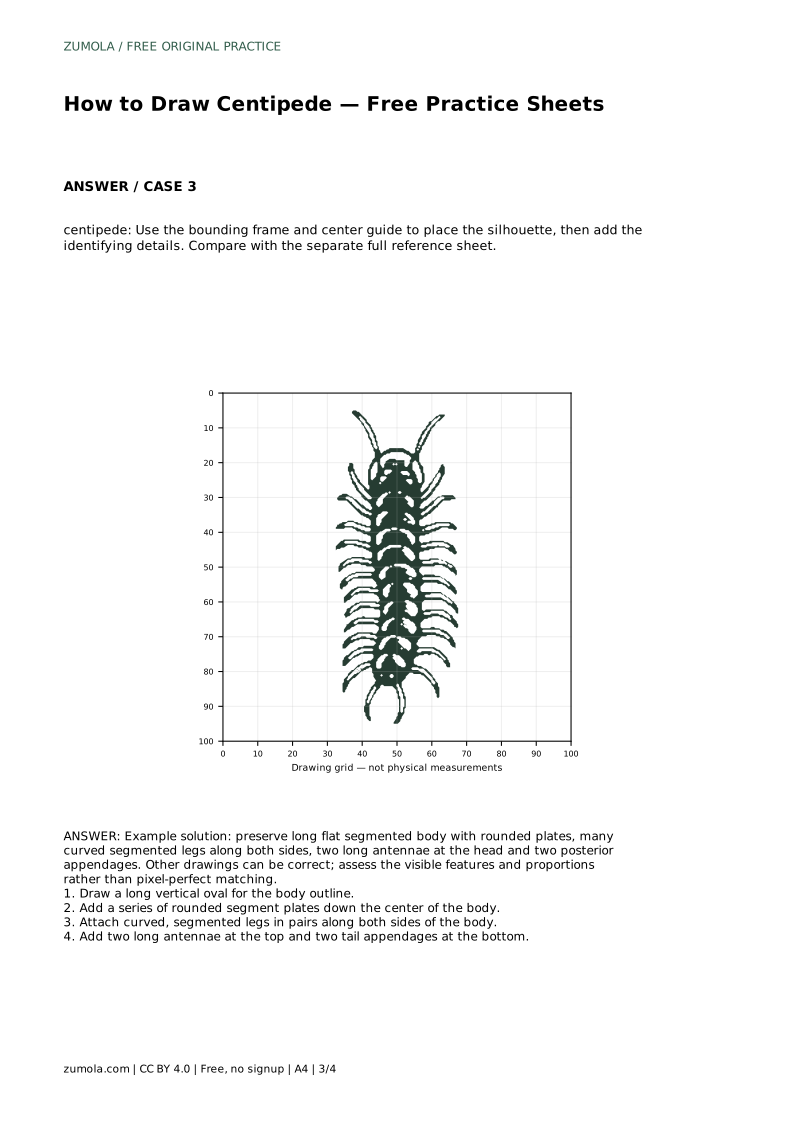
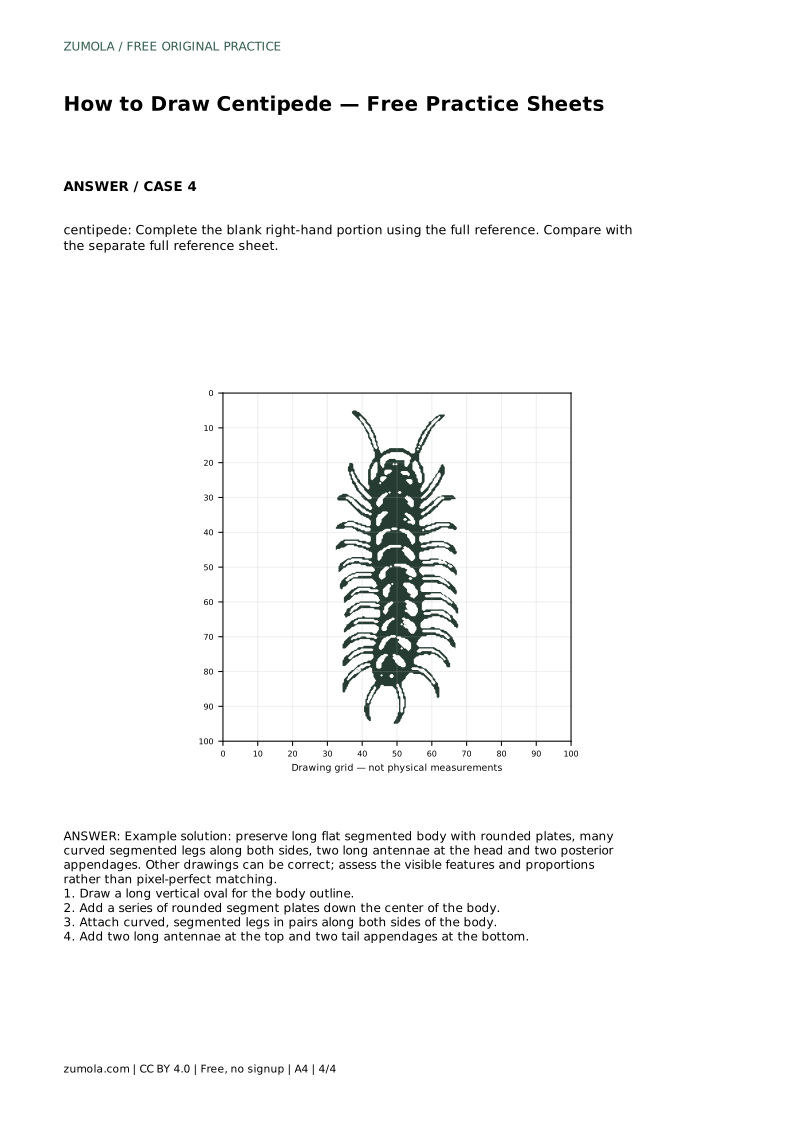
Drawing a centipede is a lesson in long, low proportions and repeated shapes. The body is a flat segmented chain, the legs curve outward in pairs, and the head carries two long antennae. This page explains how to study a reference, place the silhouette, add segment plates and legs, and check your work against visible features rather than exact matching. Each practice sheet asks you to observe carefully and draw deliberately.
Before drawing legs, establish the centipede's overall silhouette. A centipede reads as a long, narrow form, much longer than it is wide. Draw a long vertical oval as the body outline, keeping the width modest so the finished animal does not look like a beetle or a worm. The oval gives you a boundary for the segmented plates and a center line for placing legs evenly on both sides.
Proportion matters more than detail at this stage. Compare the length of the body to its width in the reference, and compare the head end to the tail end. The head is slightly broader and carries antennae; the rear tapers and carries two posterior appendages. Keep those endpoint conditions clear before adding small features.
A centipede's back is divided into repeated plates. Draw a series of rounded segment plates down the center of the body, working from head to tail. Keep the plates similar in size along the middle and slightly smaller near the ends. Overlap them gently so the body reads as a continuous chain rather than separate circles.
The plates are the visual rhythm of the drawing. If one plate is much wider than its neighbors, the body looks lumpy. If the plates stop before the tail, the silhouette looks unfinished. Compare your spacing with the reference and adjust before moving to the legs.
Legs make the centipede recognizable. Attach curved, segmented legs in pairs along both sides of the body. Each leg should bend outward and then slightly downward, with a small joint marking the segment. Place pairs at regular intervals so the two sides stay balanced.
Legs are where drawings most often go wrong. Uneven counts, legs that point straight out like spokes, or legs that cross the body all weaken the shape. Work down one side, then the other, matching each pair to the same plate. Keep the curves gentle and the joints visible.
Add two long antennae at the top of the head, angling outward and forward. At the bottom, add two posterior appendages that extend beyond the last segment. These endpoint features separate a centipede from similar long-bodied animals and should be clearly visible in the finished drawing.
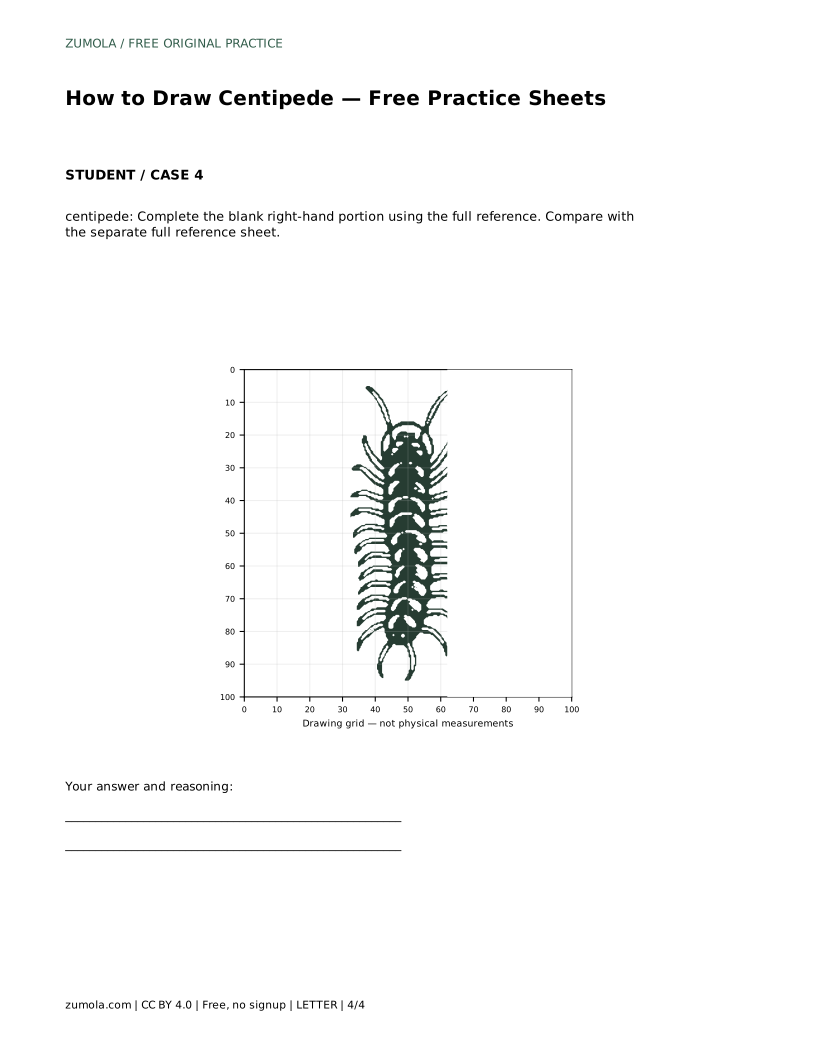
This is also the moment to compare your drawing with the reference. Check the long flat segmented body, the rounded plates, the paired curved legs, the two antennae, and the two tail appendages. Other drawings can be correct, so assess the visible features and proportions rather than pixel-perfect matching.
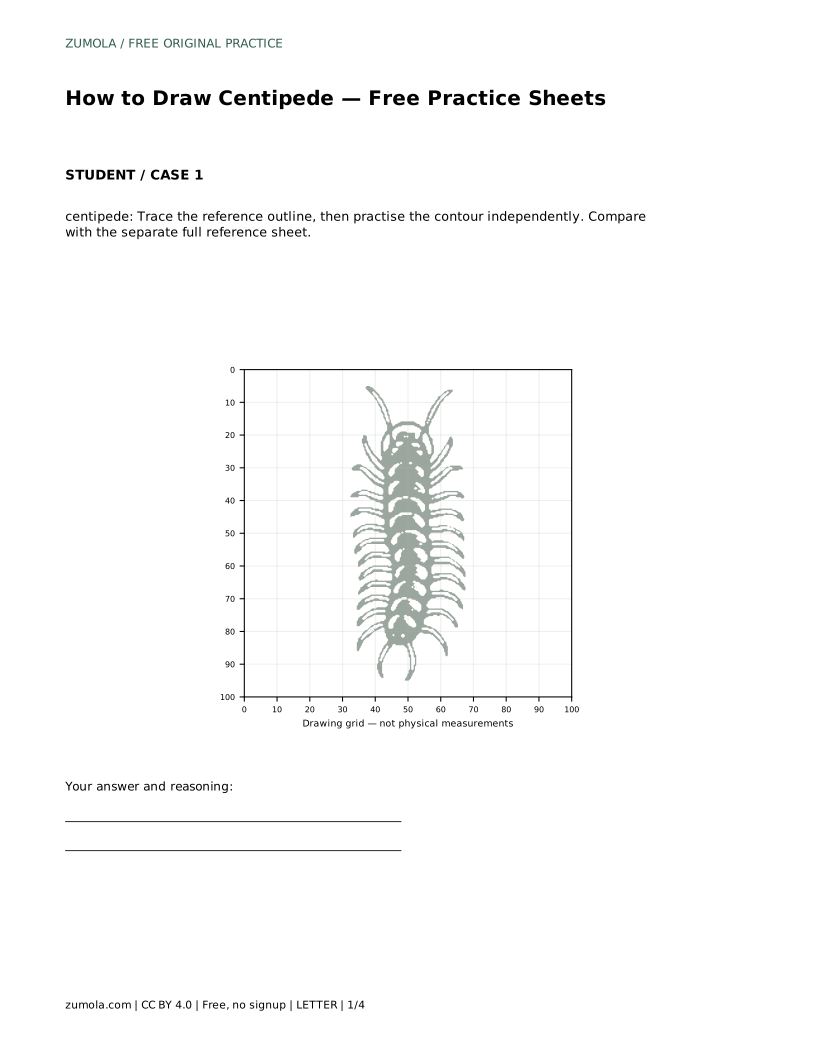
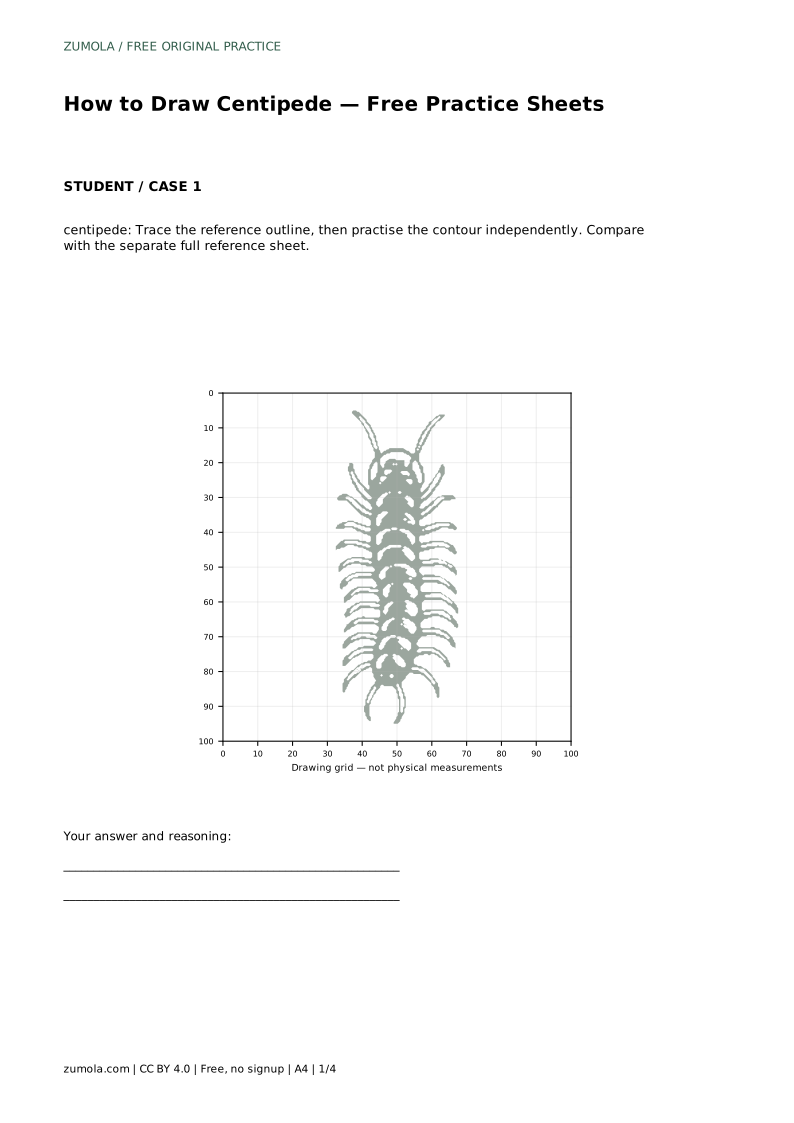
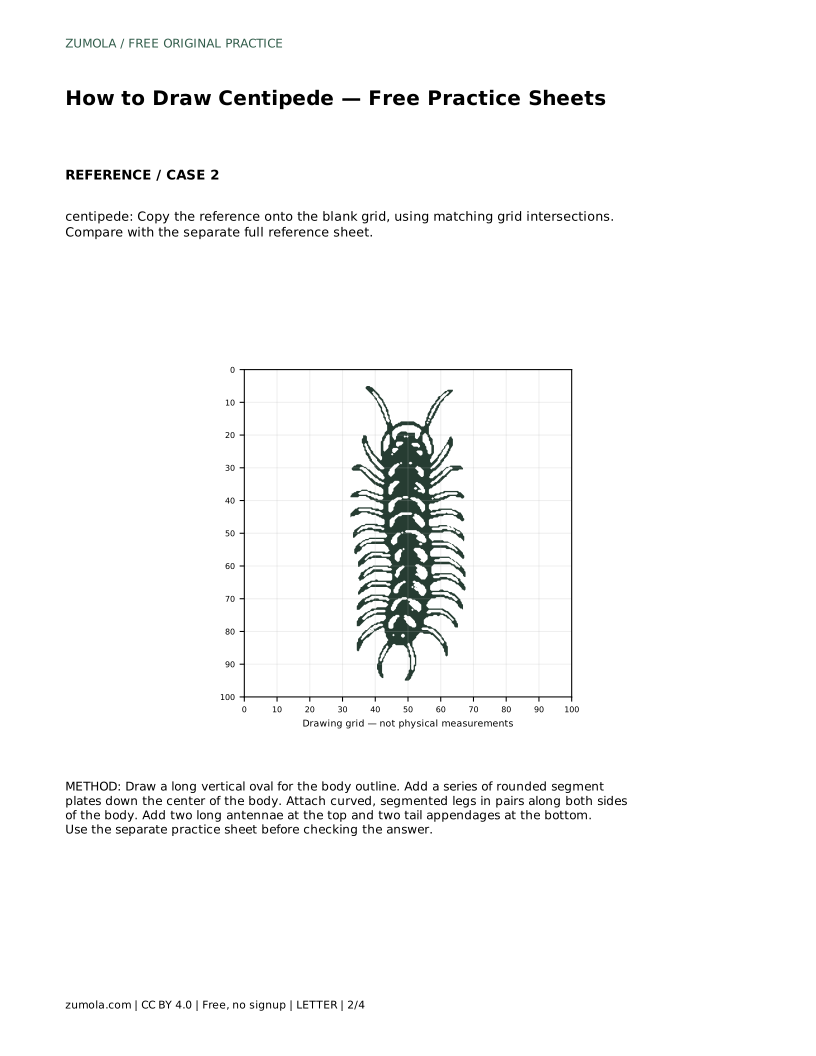
centipede: Trace the reference outline, then practise the contour independently. Compare with the separate full reference sheet.
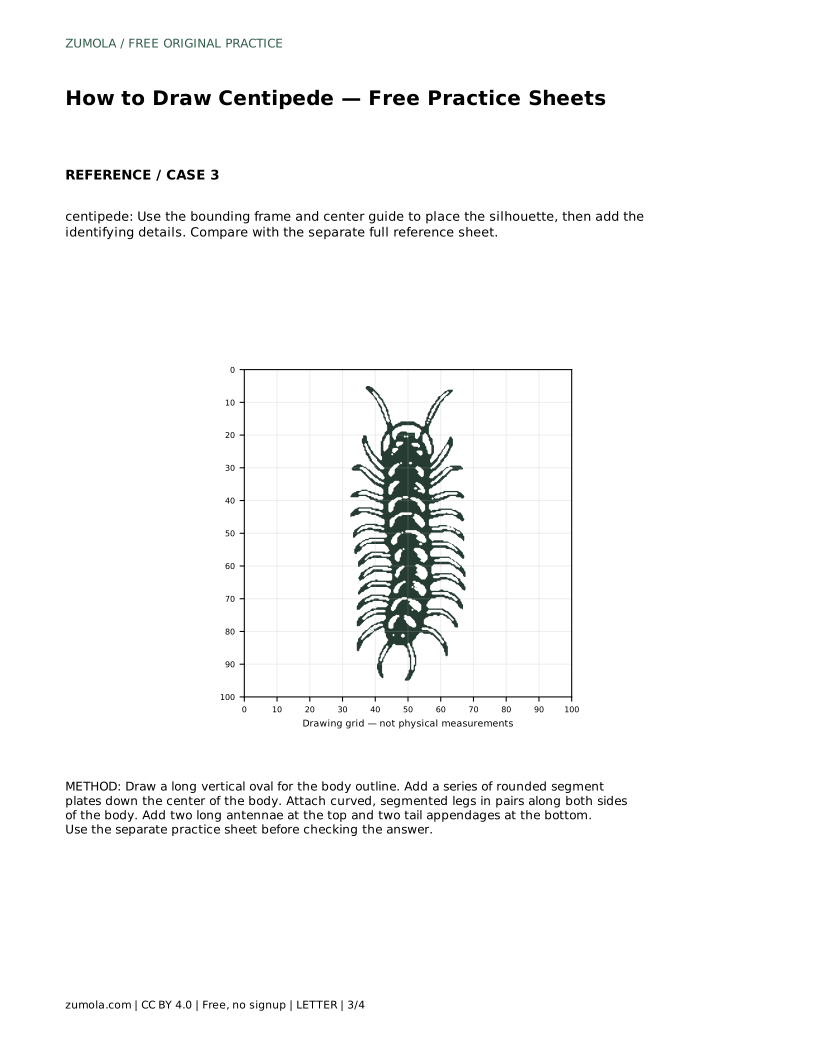
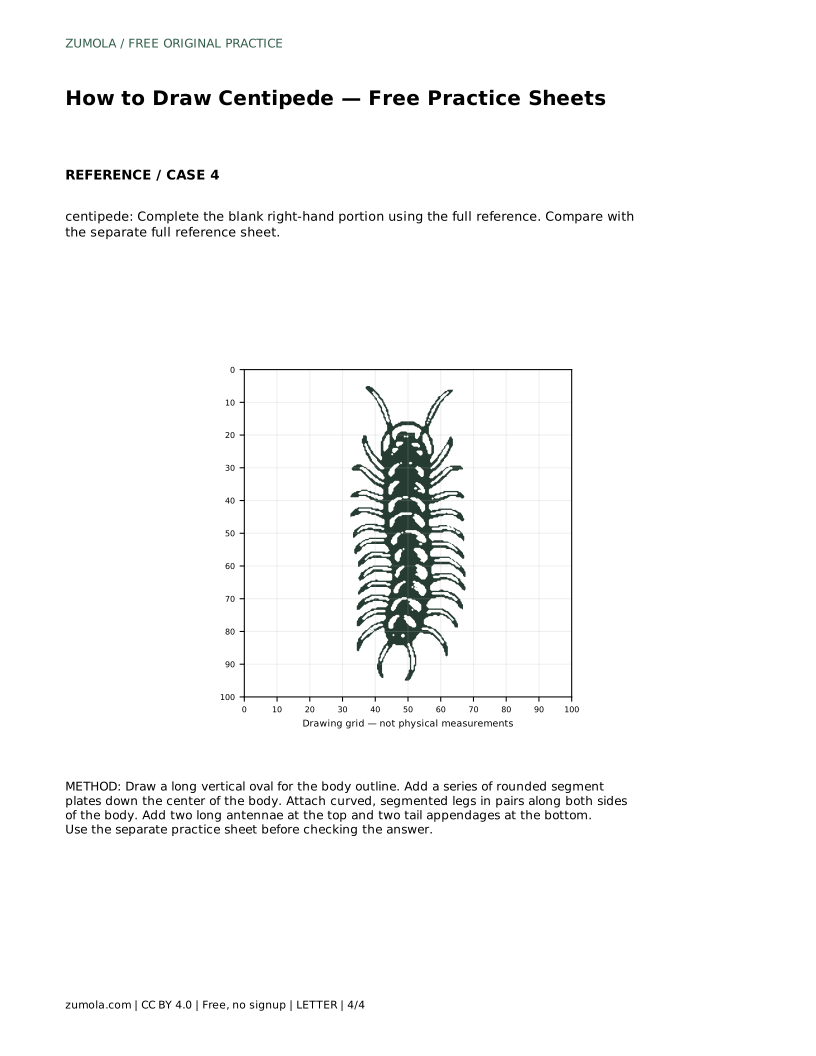
Example solution: preserve long flat segmented body with rounded plates, many curved segmented legs along both sides, two long antennae at the head and two posterior appendages. Other drawings can be correct; assess the visible features and proportions rather than pixel-perfect matching. Draw a long vertical oval for the body outline. Add a series of rounded segment plates down the center of the body. Attach curved, segmented legs in pairs along both sides of the body. Add two long antennae at the top and two tail appendages at the bottom.
No. Preserve the long flat segmented body, rounded plates, paired curved legs, two antennae, and two posterior appendages. Other drawings can be correct, so judge visible features and proportions rather than pixel-perfect matching.
Follow the reference and keep legs in pairs along both sides. Consistency and balance matter more than a specific count, so match each pair to a plate and keep spacing even.
Check the body proportion first. If the oval is too wide or too short, the plates and legs will not sit correctly, so correct the silhouette before adjusting details.
All drawing practice · Free coordinate paper
Original resources · CC BY 4.0 · Free for personal and classroom use with attribution.