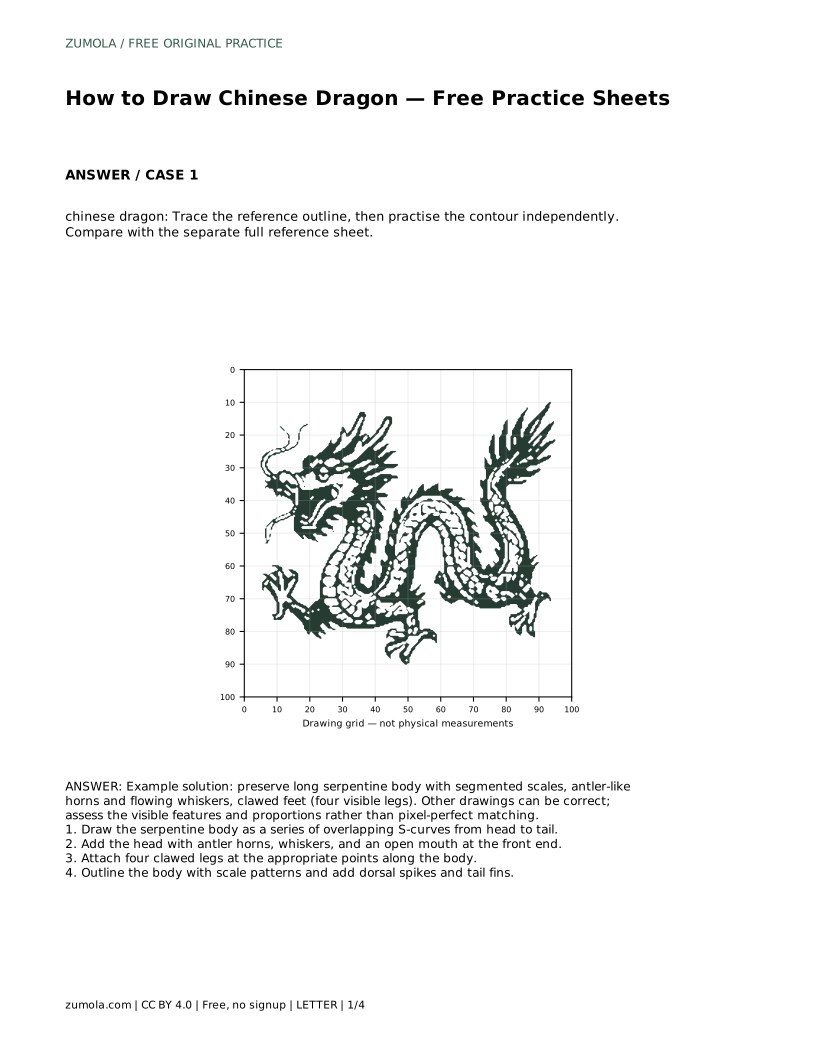
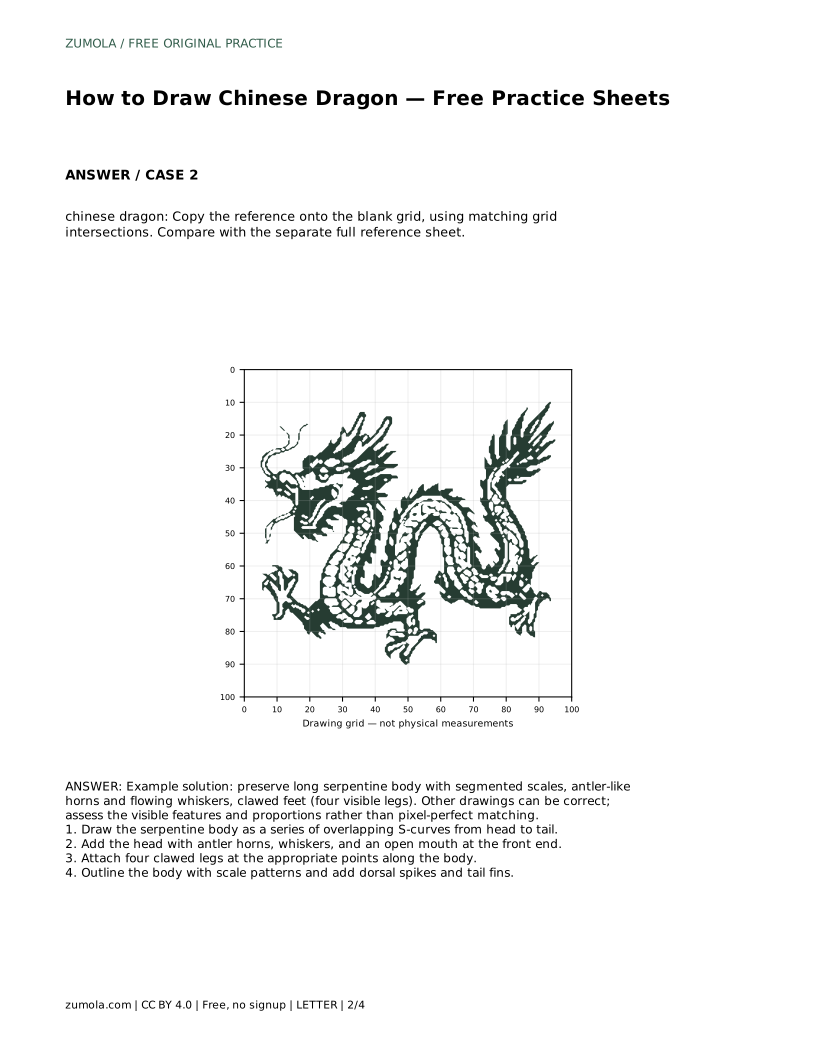
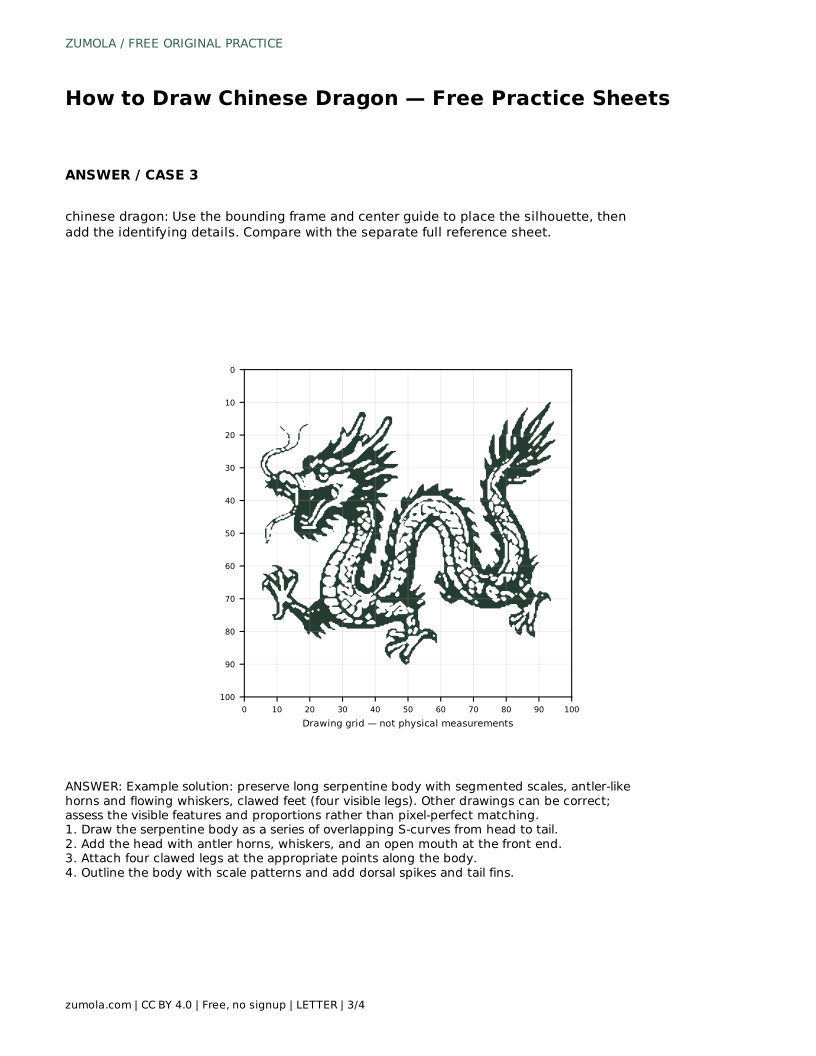
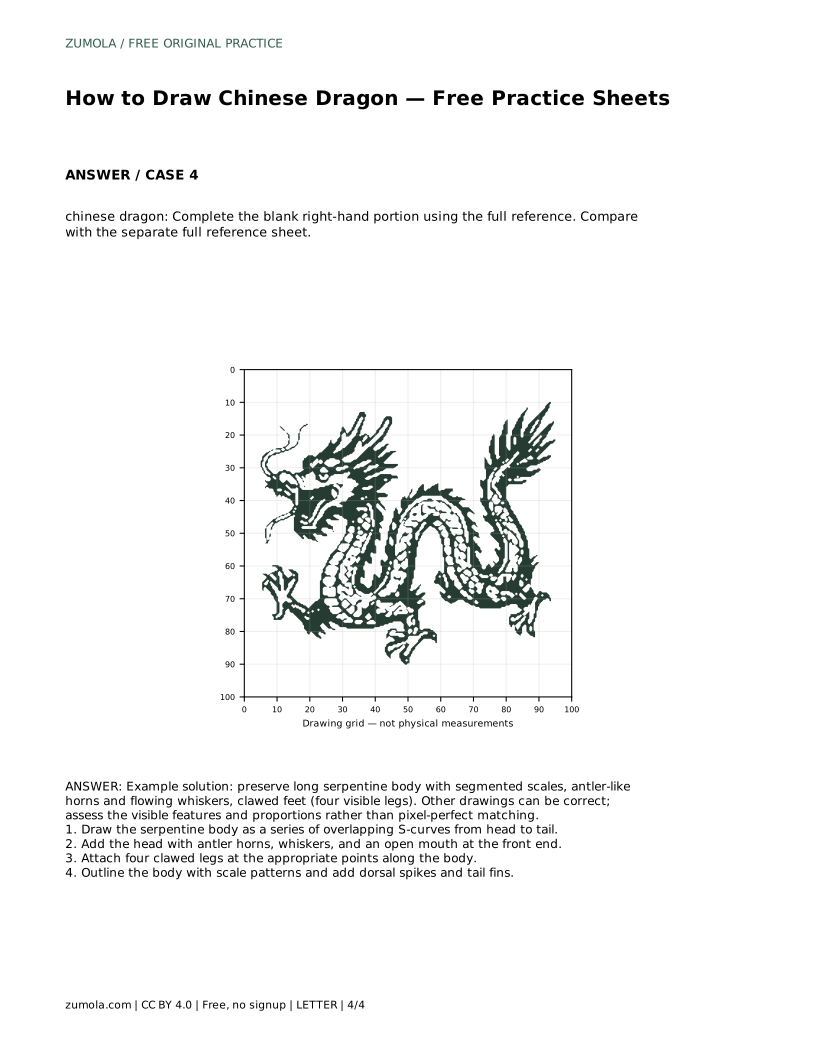
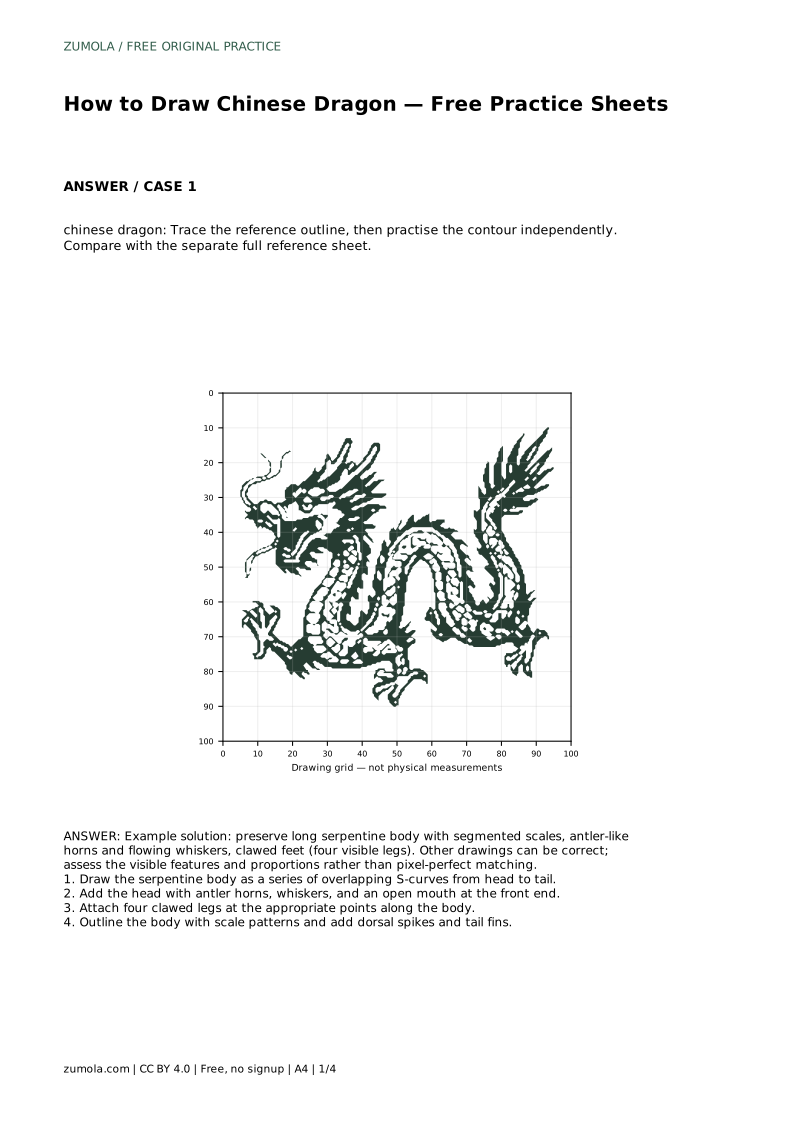
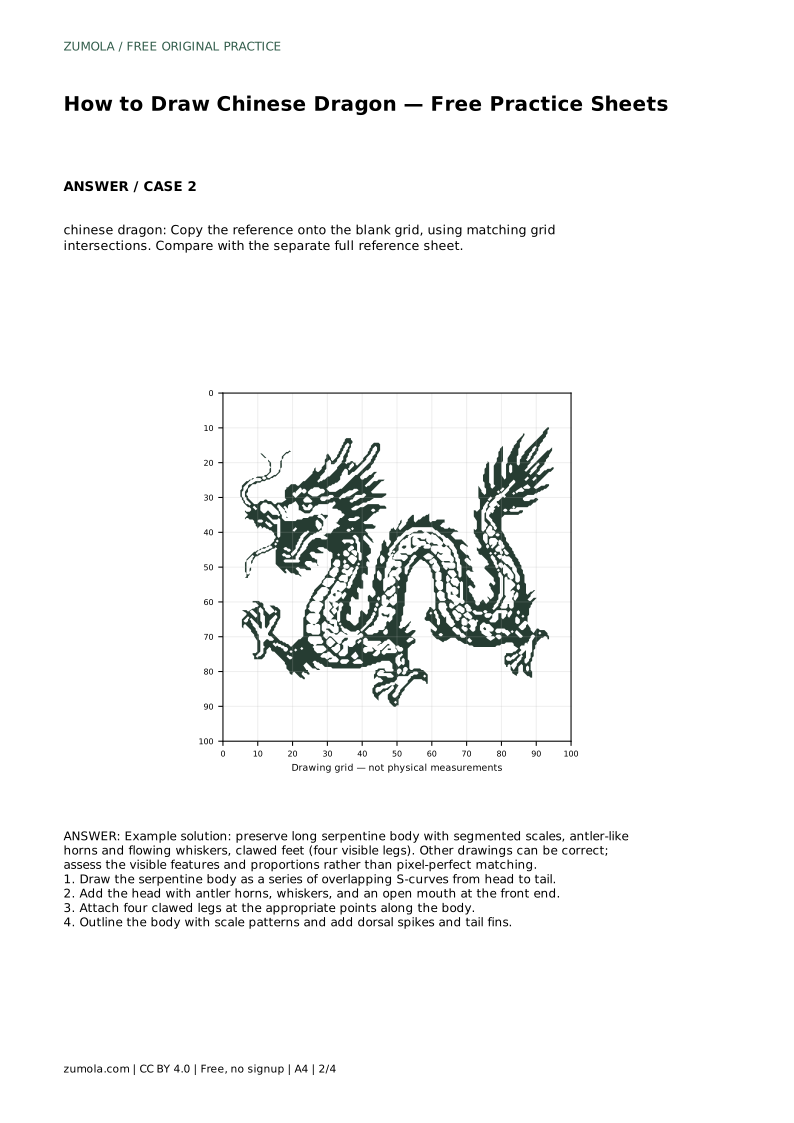
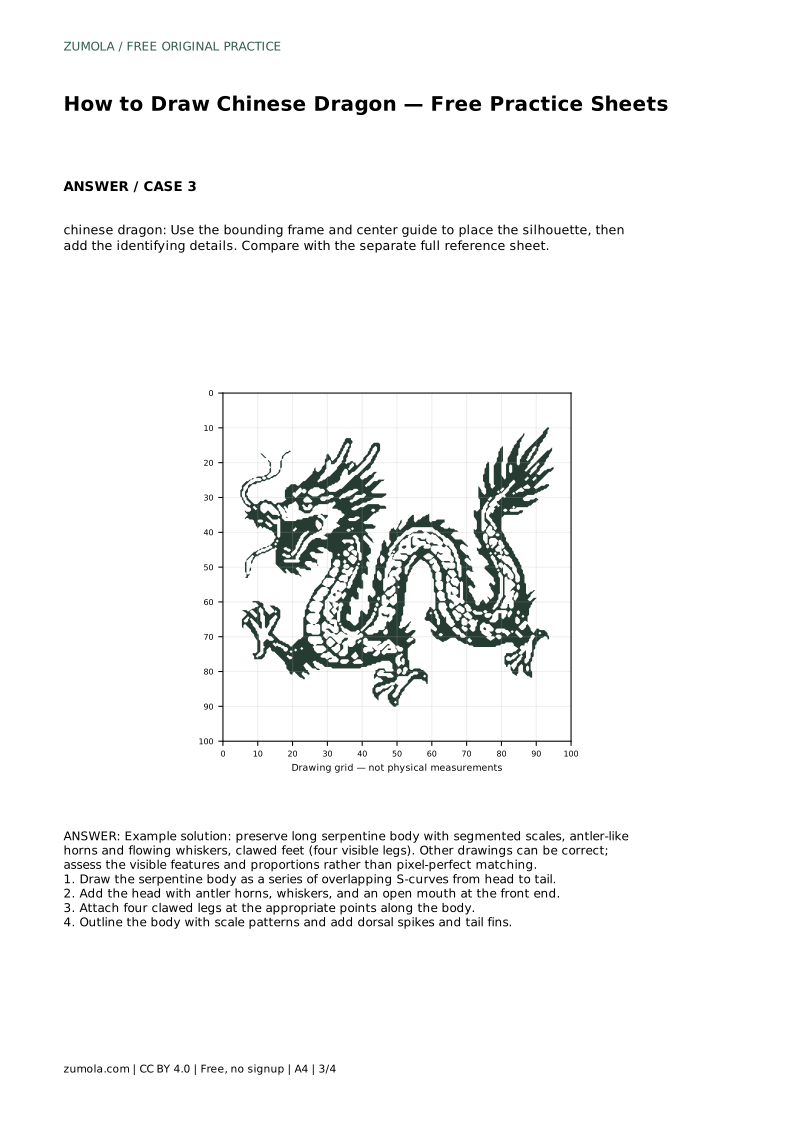
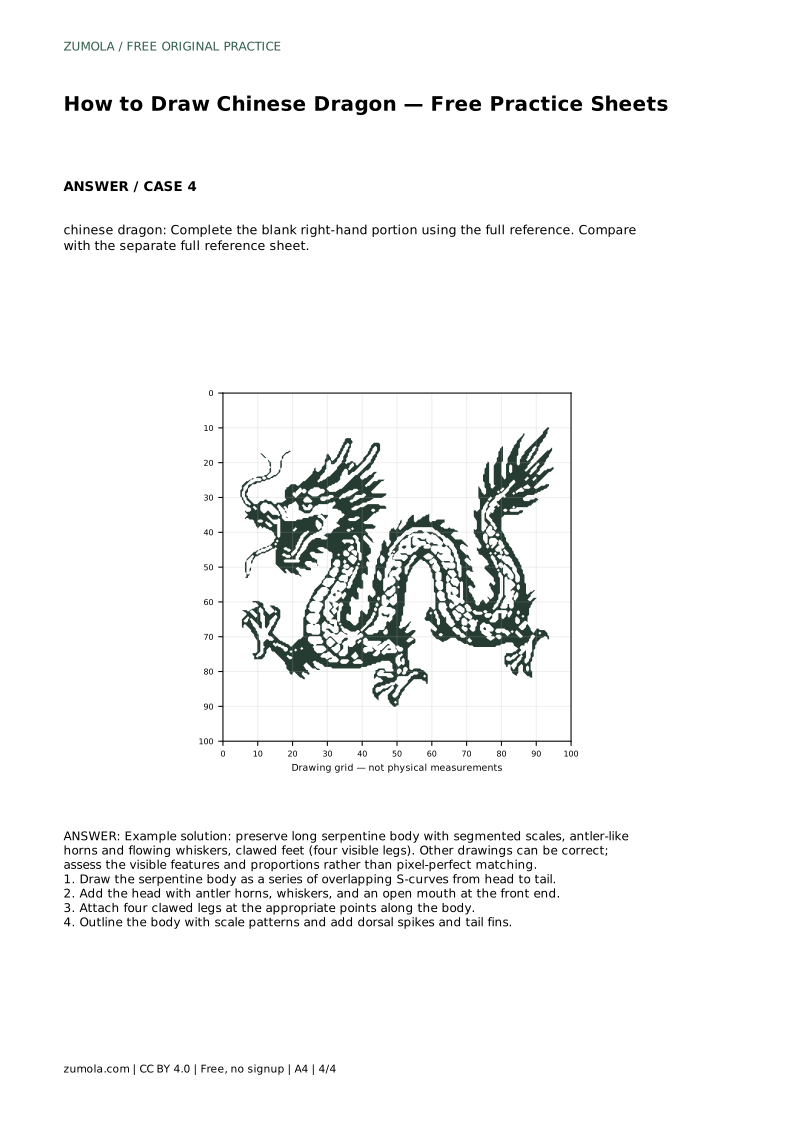
Reference diagrams
LETTER · Download PDF
A4 · Download PDF
Free original resources
Learn to draw a Chinese dragon by building a serpentine body from overlapping S-curves, then adding antler horns, whiskers, four clawed legs and scales.
Four original cases, with reference diagrams, practice sheets and worked answers. Everything is free; no signup required.
LETTER · Download PDF
A4 · Download PDF
LETTER · Download PDF
A4 · Download PDF
LETTER · Download PDF
A4 · Download PDF
Use A4 or US Letter to match your printer. Use the stated values and conditions to solve each exercise; diagrams are not physical measuring rulers.
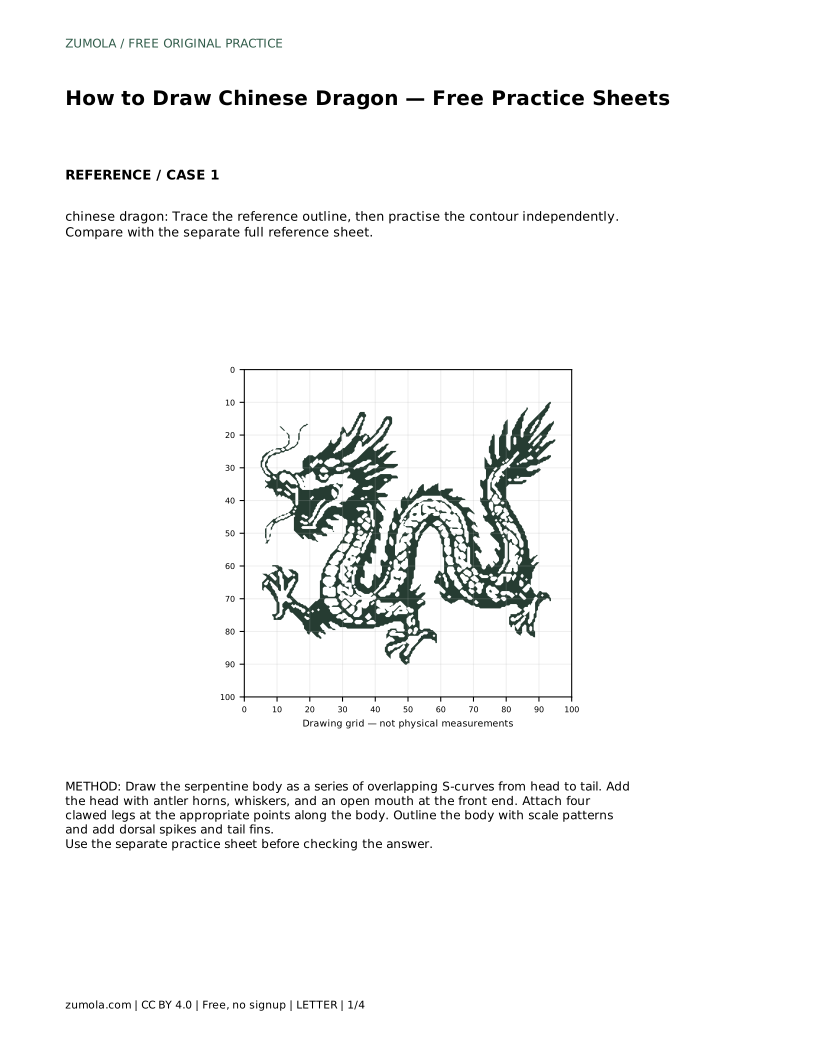
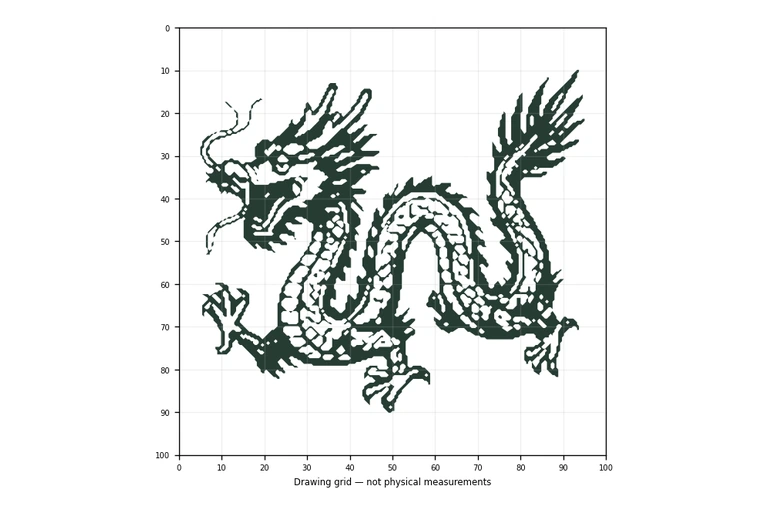
A Chinese dragon is not a lizard with wings. Its silhouette is a long, flowing serpentine body, and its identity comes from a small set of features: antler-like horns, whiskers, an open mouth, four clawed legs, segmented scales, dorsal spikes and tail fins. This page teaches a reliable order for drawing those parts, then explains how to use trace, grid, frame and partial-reference practice sheets to check your proportions without expecting a pixel-perfect copy.
Start with the body, because every other feature is placed relative to it. Think of the dragon as a ribbon that loops through the page. Draw a series of overlapping S-curves from the head end to the tail end, keeping the width fairly even along the length. Overlapping curves matter: each new curve should pass behind or in front of the previous one so the body reads as one continuous form rather than a stack of separate tubes.
Decide the head position first, then let the body travel away from it. A common arrangement is a head near one side, a loop through the middle, and a tail curling back toward the opposite corner. Keep the loops large enough that the body does not tangle into a knot. Light pencil lines are easier to adjust than dark ones, so sketch the whole path before committing.
The head carries most of the dragon's character. Place it at the front end of the body and give it an open mouth, then add antler-like horns branching upward and backward. Whiskers flow from the muzzle, usually curving outward and back. These are stylised features, not a clinical anatomy study; the goal is a readable, balanced design rather than a biologically accurate animal.
Keep the horns and whiskers proportional to the head. Very long whiskers can overwhelm a small head, and short horns can make the head look plain. Sketch them lightly, compare the head to the rest of the body, and adjust before adding line weight.
Attach four clawed legs at sensible points along the body: typically two toward the front and two toward the rear, spaced so the dragon looks balanced. Each leg should meet the body cleanly and end in visible claws. Then outline the body with scale patterns, add dorsal spikes along the back, and finish the tail with fins.
Scales can be simple repeated arcs rather than dense detail. Dorsal spikes should follow the body's curve, and tail fins should extend the flow of the final loop. Work from large shapes to small marks so the overall silhouette stays clear.
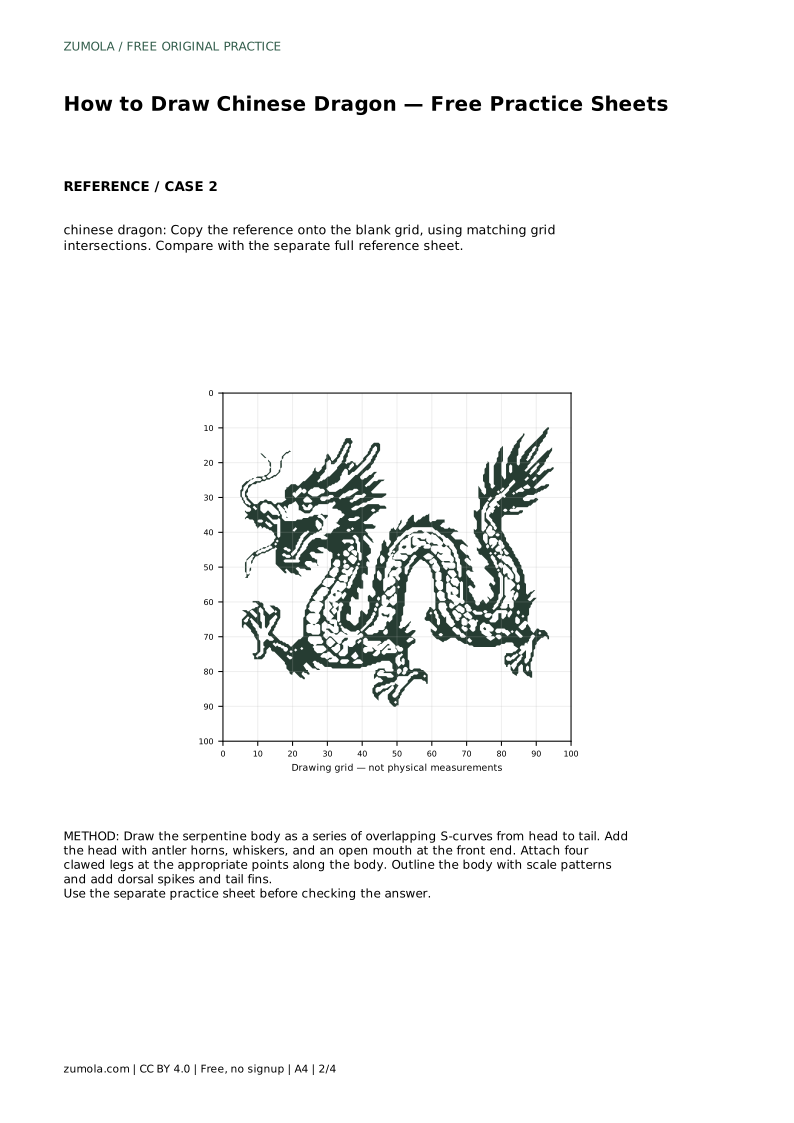
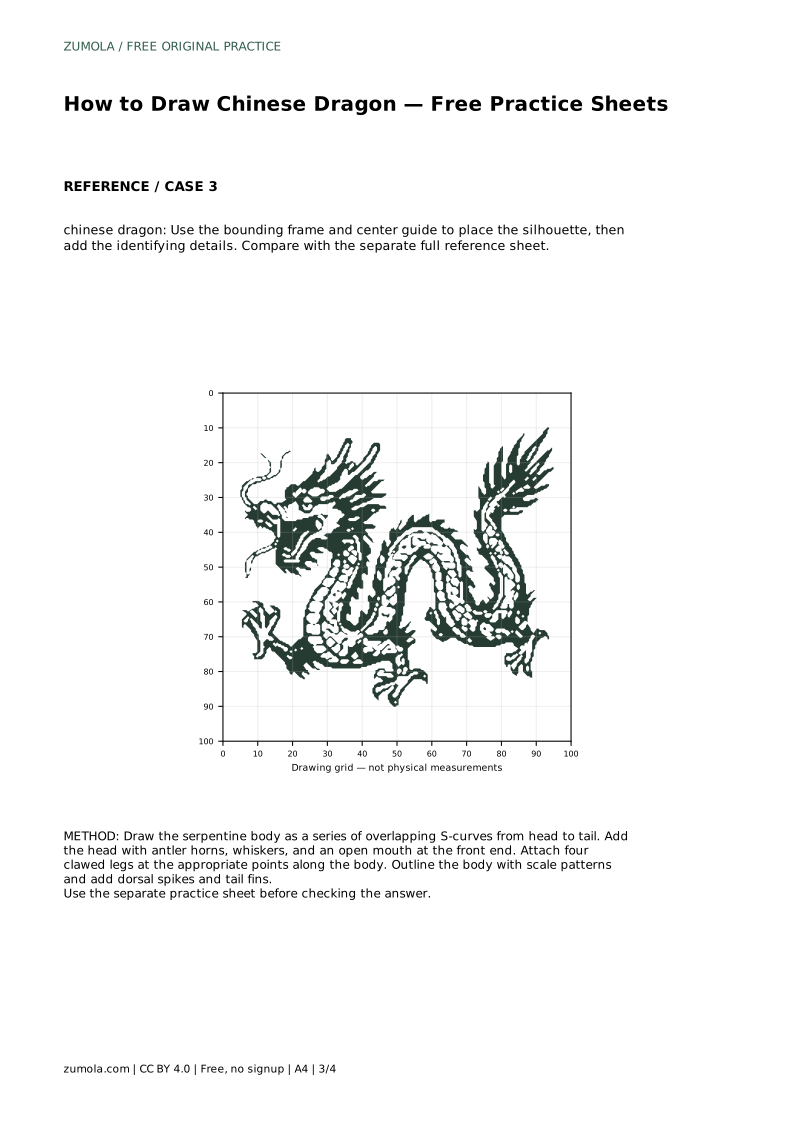
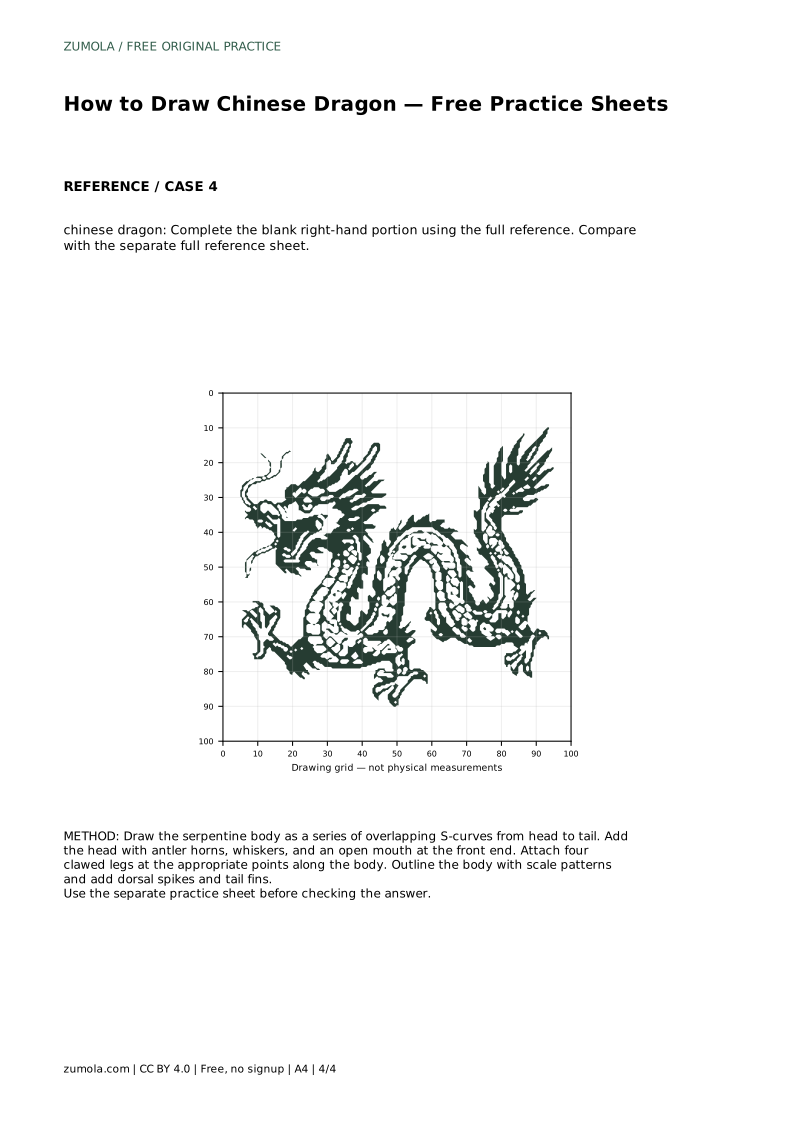
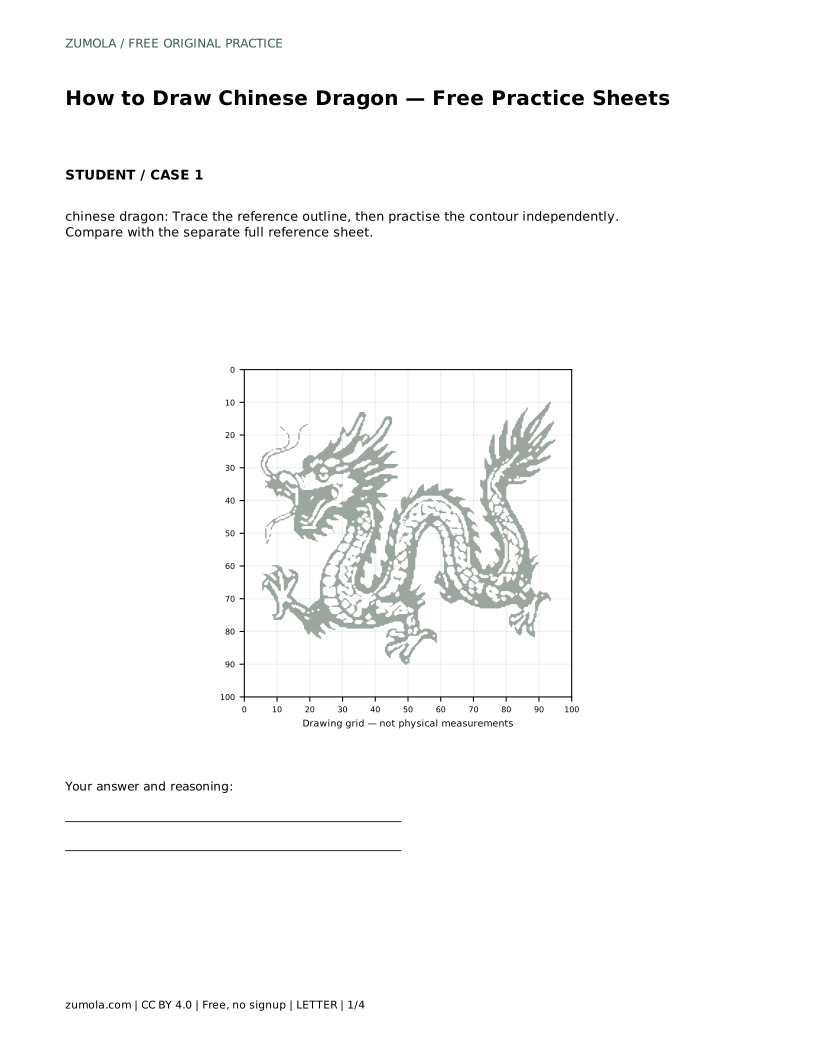
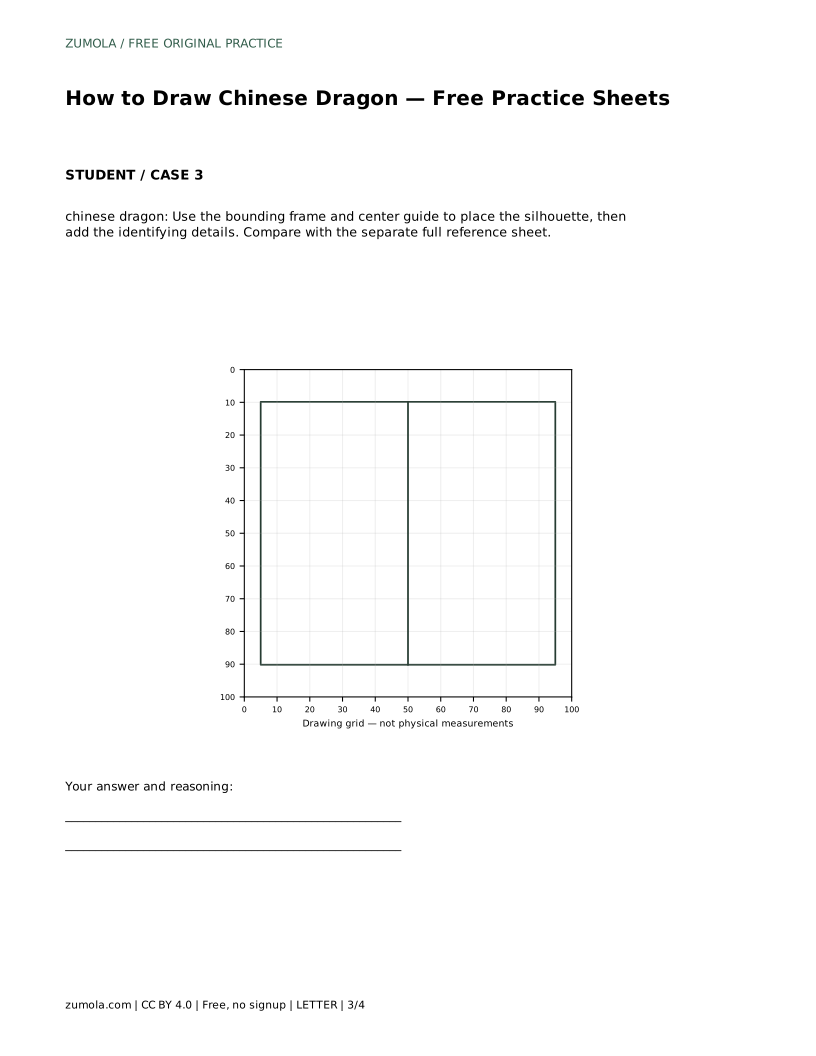
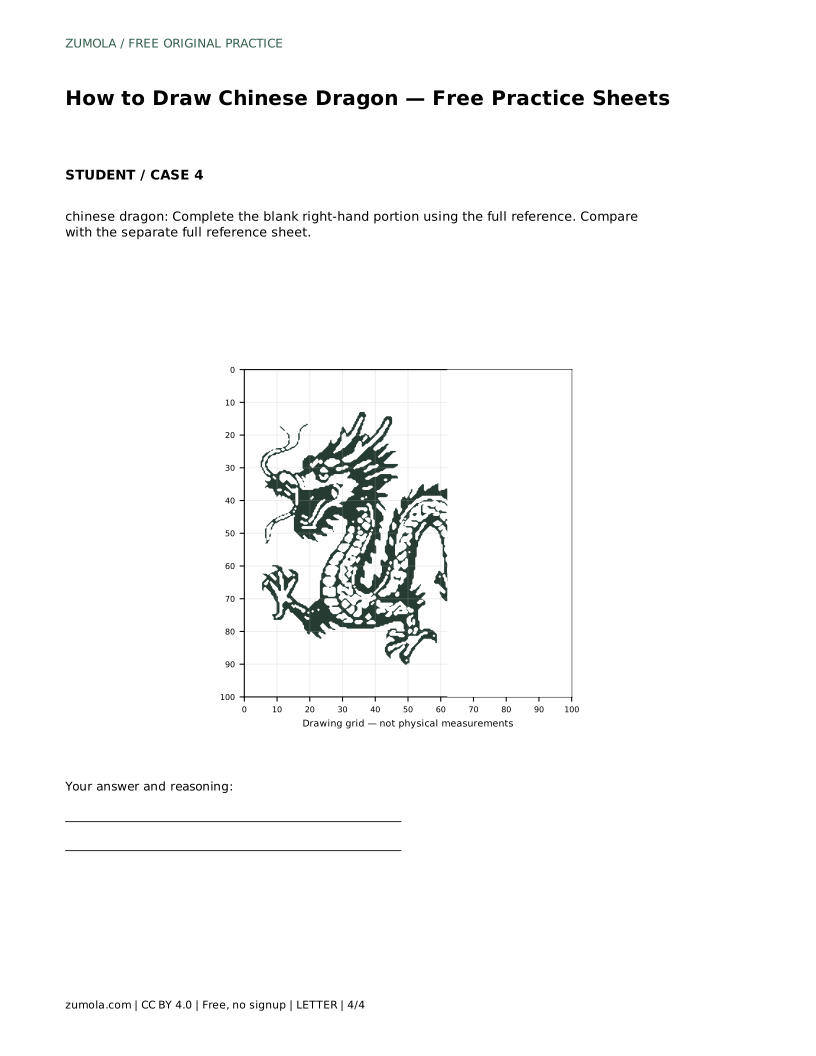
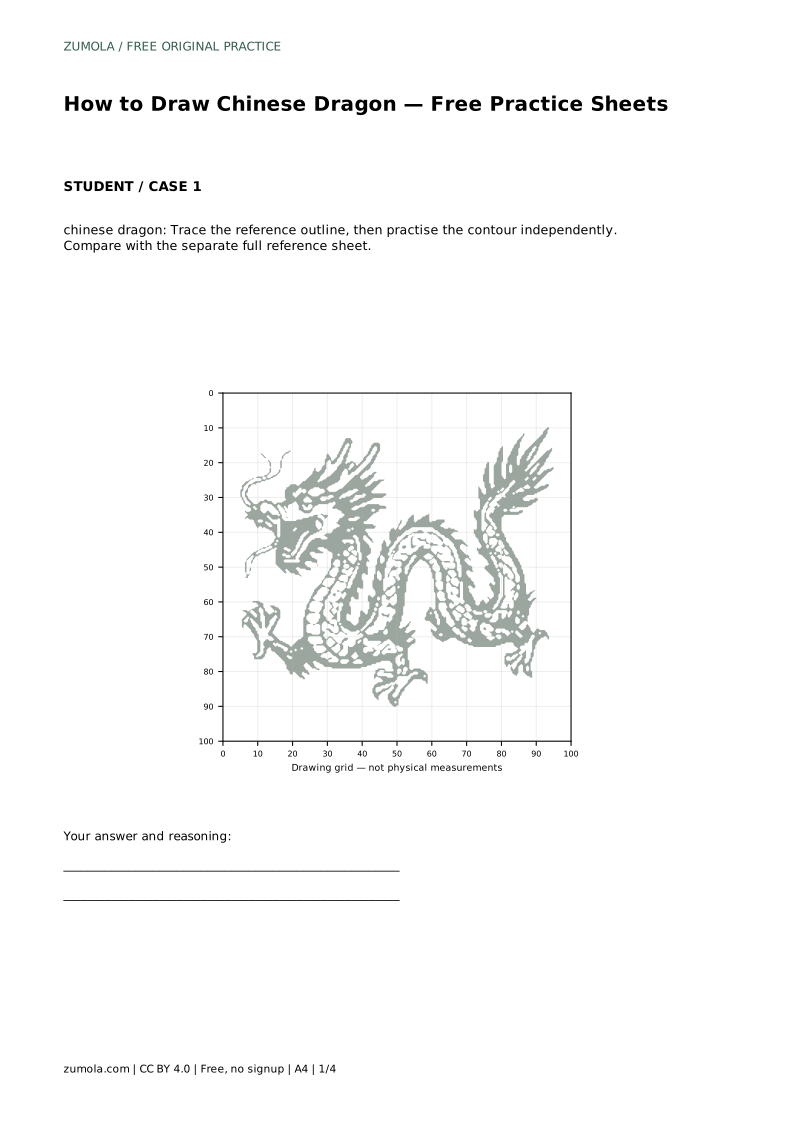
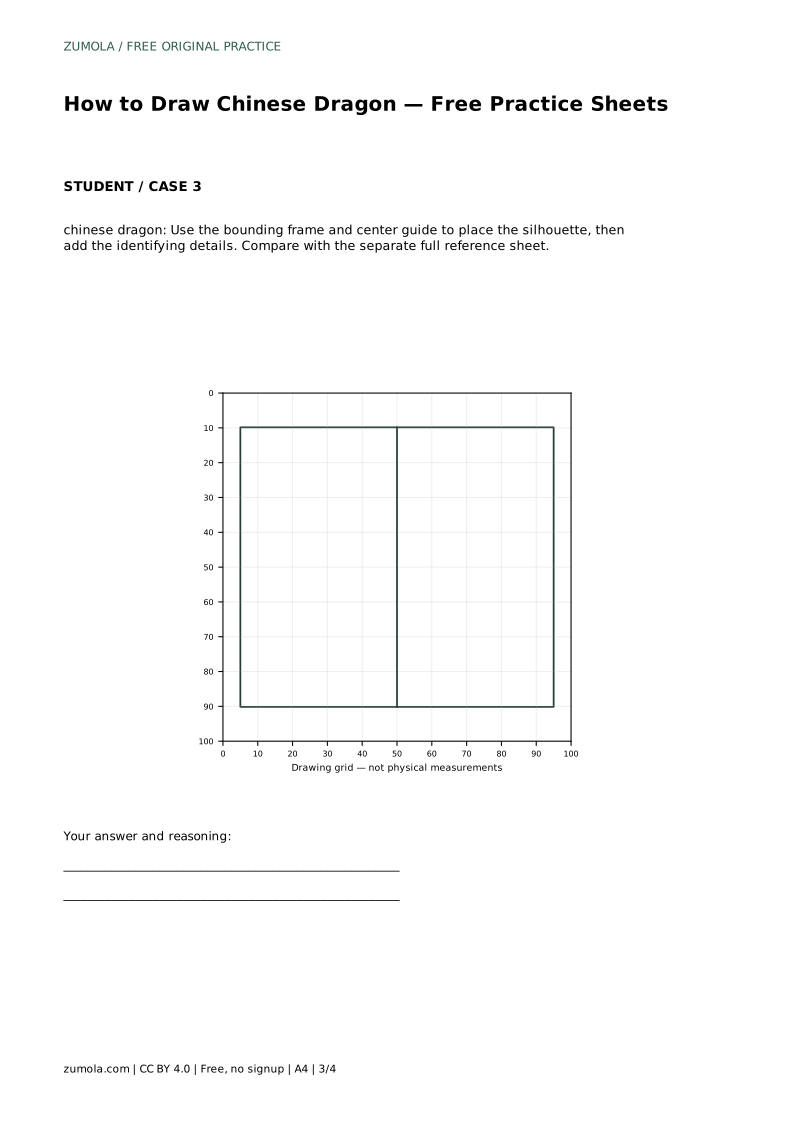
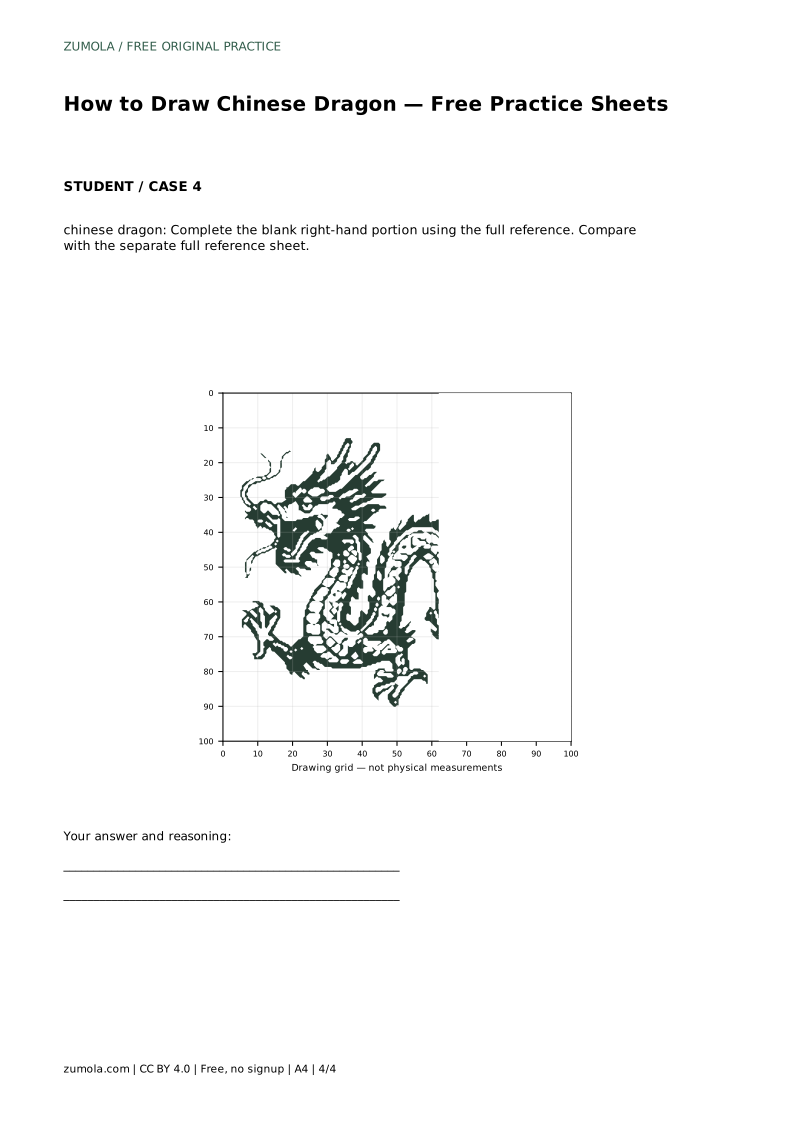
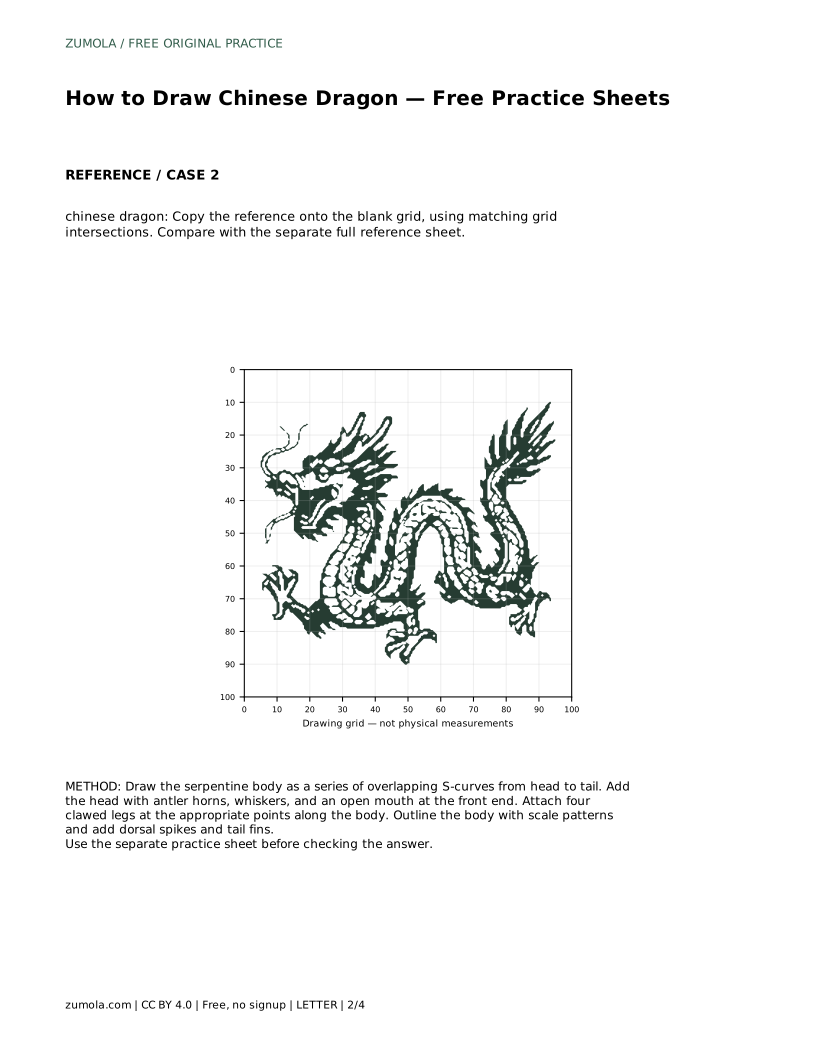
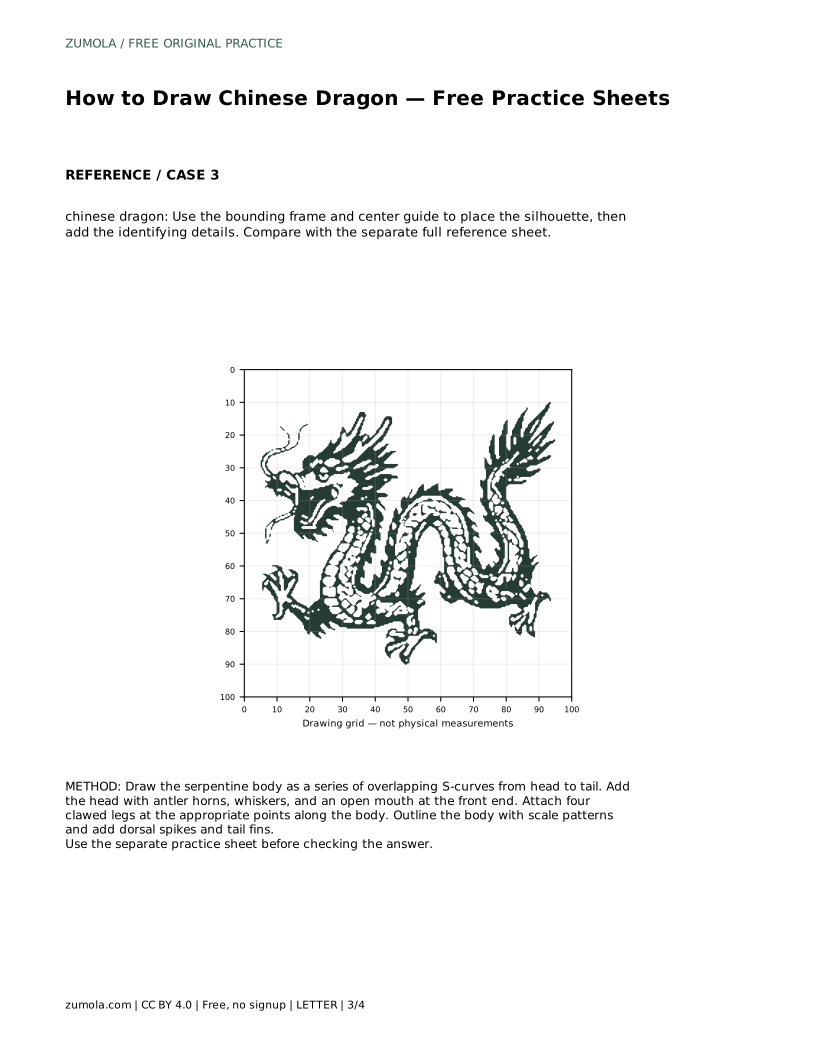
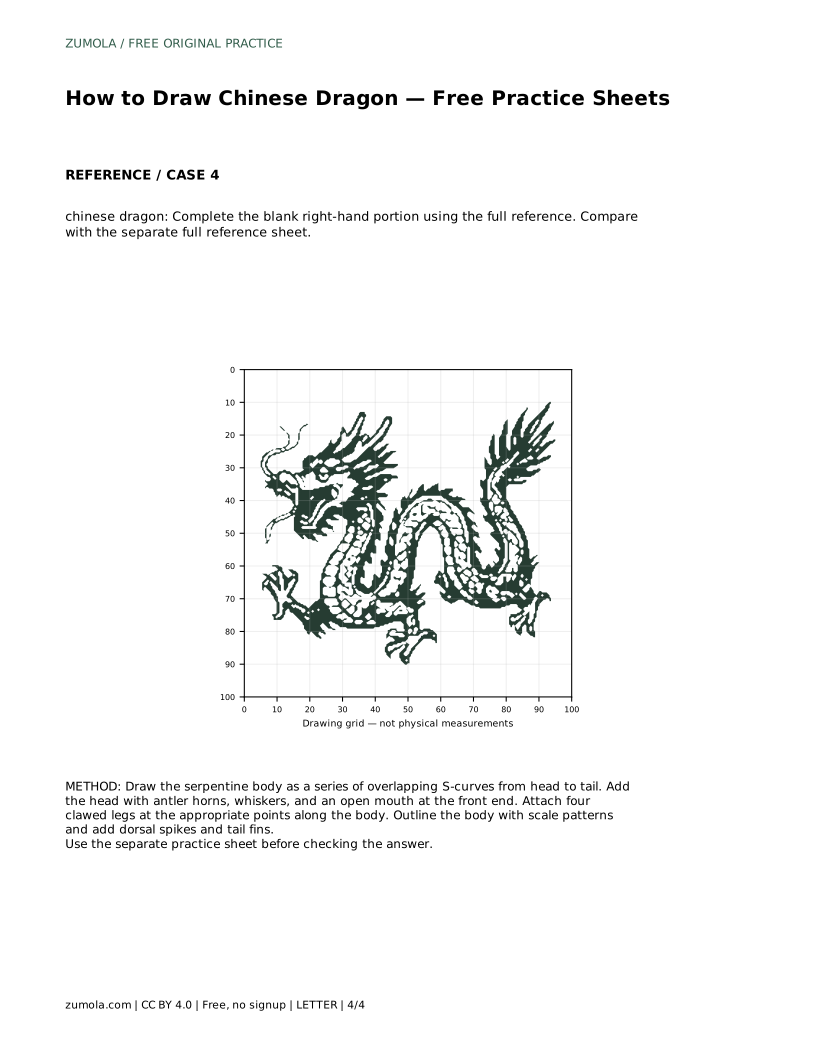
The trace sheet asks you to follow the reference outline, then practise the contour independently and compare with the separate full reference sheet. The grid sheet asks you to copy the reference onto the blank grid using matching grid intersections. The frame sheet gives a bounding frame and centre guide for placing the silhouette before adding details. The partial sheet gives a blank right-hand portion to complete from the full reference.
In every case, compare features and proportions rather than matching pixels. Different drawings can be correct.
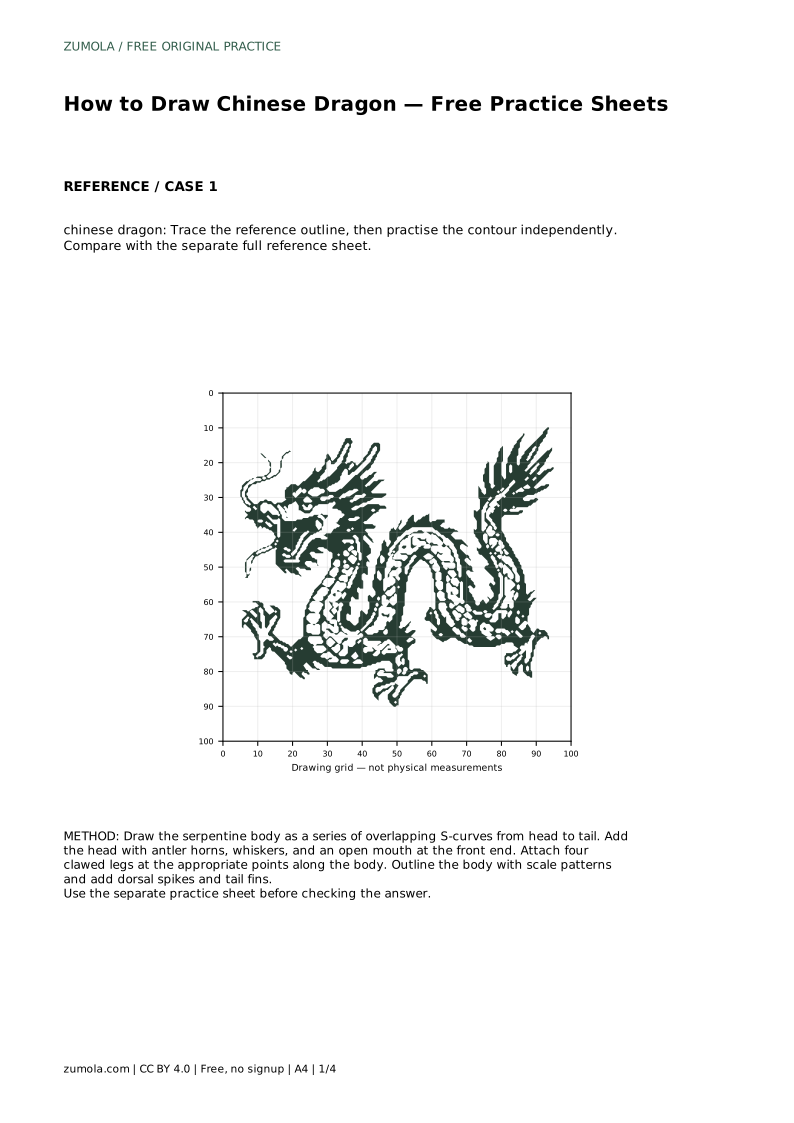
chinese dragon: Trace the reference outline, then practise the contour independently. Compare with the separate full reference sheet.
Example solution: preserve long serpentine body with segmented scales, antler-like horns and flowing whiskers, clawed feet (four visible legs). Other drawings can be correct; assess the visible features and proportions rather than pixel-perfect matching. Draw the serpentine body as a series of overlapping S-curves from head to tail. Add the head with antler horns, whiskers, and an open mouth at the front end. Attach four clawed legs at the appropriate points along the body. Outline the body with scale patterns and add dorsal spikes and tail fins.
Draw four visible clawed legs, spaced along the body.
No. Preserve the serpentine body, horns, whiskers, four clawed legs, scales, spikes and tail fins, and judge proportions rather than pixel matching.
Body path first, then head features, then legs, scales, spikes and tail fins.
All drawing practice · Free coordinate paper
Original resources · CC BY 4.0 · Free for personal and classroom use with attribution.