Reference diagrams
LETTER · Download PDF
A4 · Download PDF
Free original resources
Learn to draw a manta ray by building its flat diamond body, wing-like fins, head projections, and long thin tail, then check your work with a feature rubric.
Four original cases, with reference diagrams, practice sheets and worked answers. Everything is free; no signup required.
LETTER · Download PDF
A4 · Download PDF
LETTER · Download PDF
A4 · Download PDF
LETTER · Download PDF
A4 · Download PDF
Use A4 or US Letter to match your printer. Use the stated values and conditions to solve each exercise; diagrams are not physical measuring rulers.
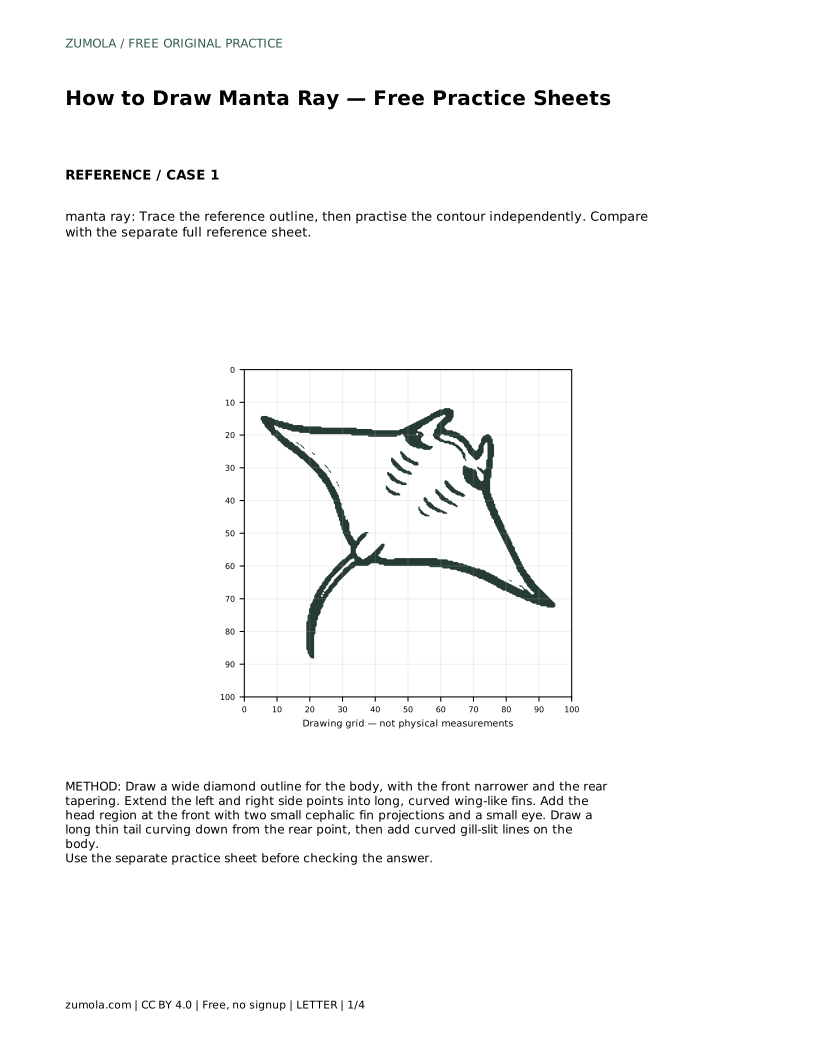
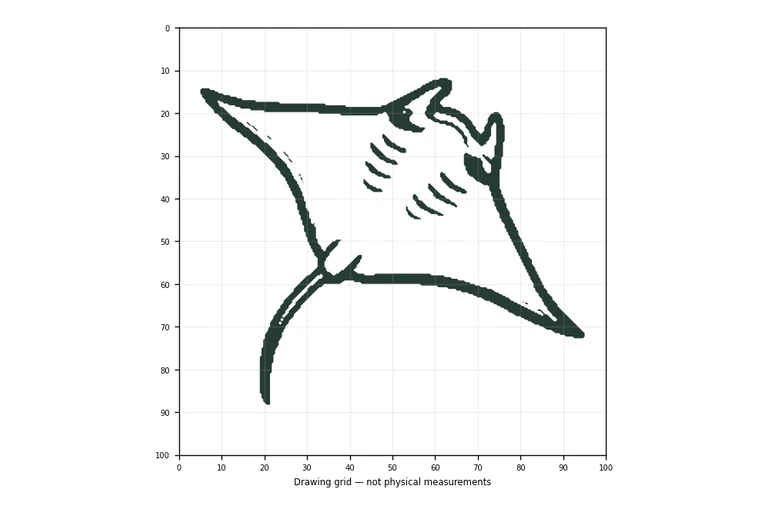
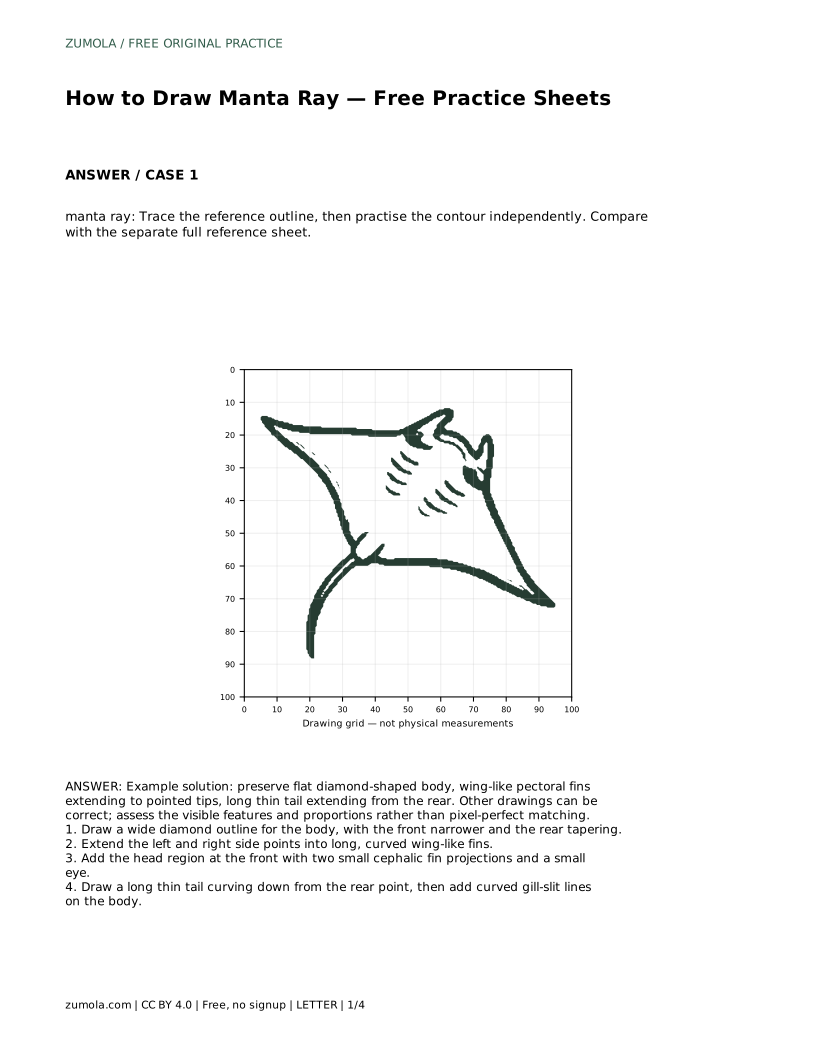
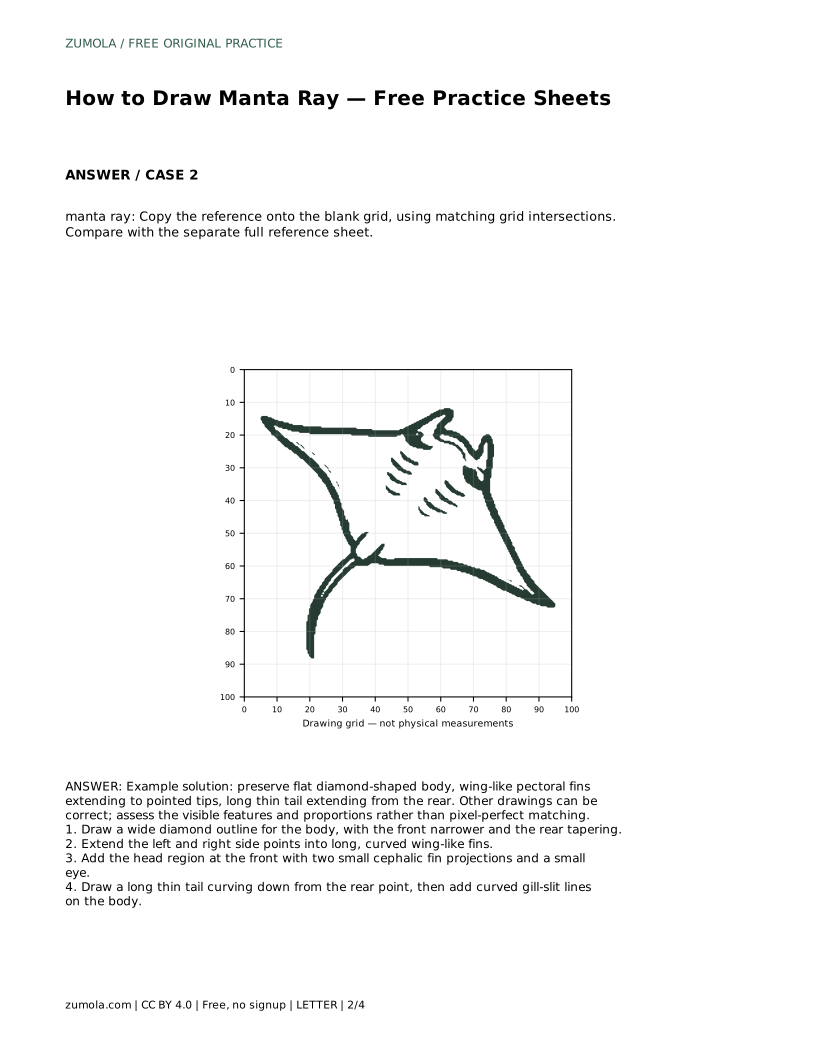
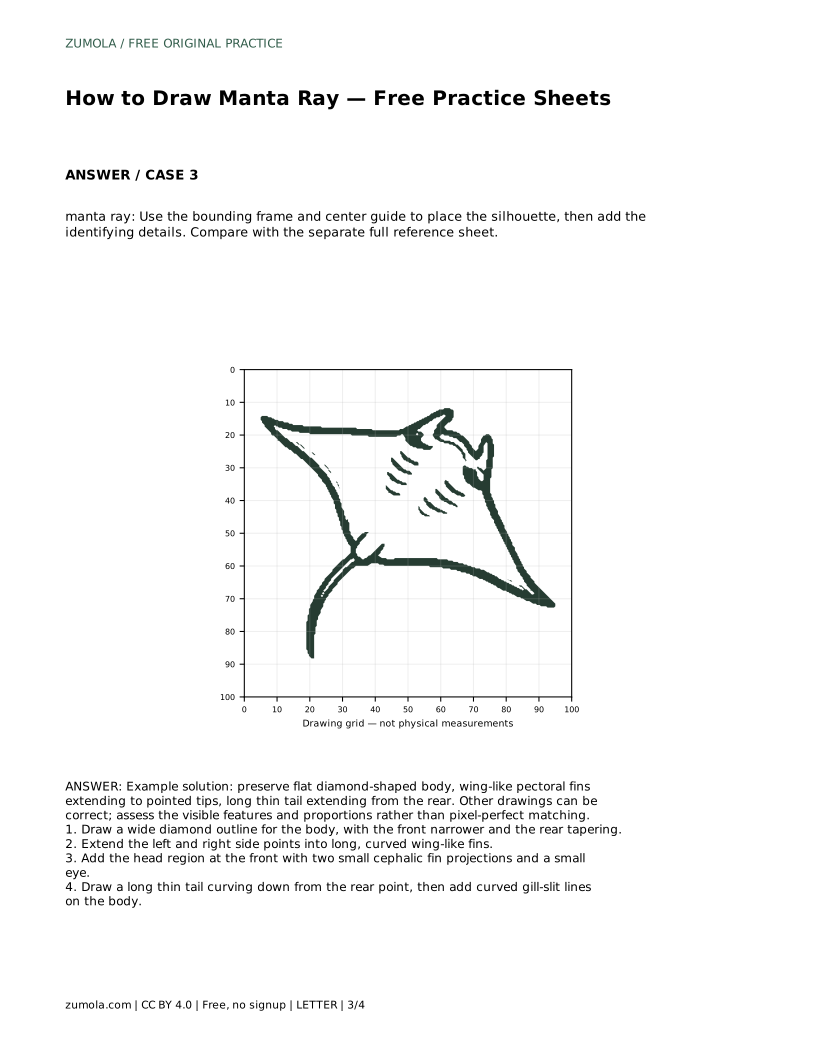
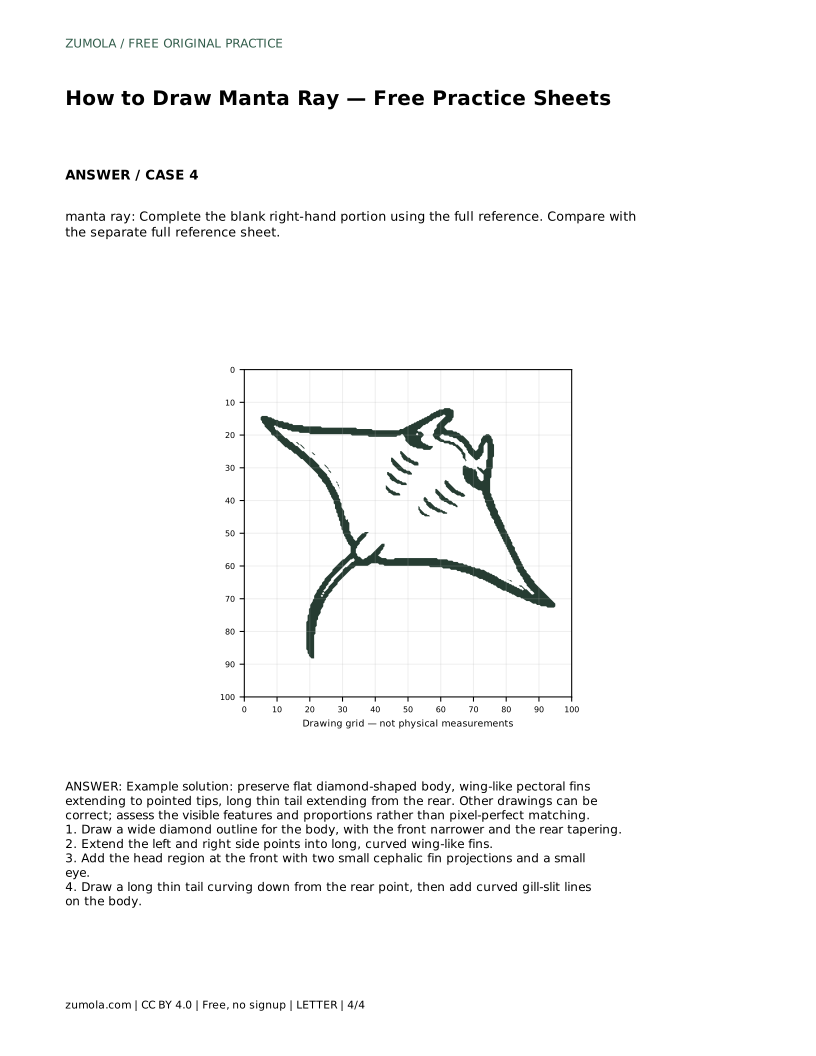
A manta ray is easy to recognise but surprisingly easy to draw out of proportion. The trick is to build the silhouette first: a wide, flat diamond body, two long wing-like pectoral fins that end in points, and a thin tail trailing from the rear. This guide walks through that order step by step, explains what each part does visually, and gives you a rubric so you can judge your own drawing by its visible features rather than by exact matching.
Begin with the overall shape before adding anything small. Picture the body as a wide diamond seen from above: the front is narrower where the head sits, the sides bulge outward, and the rear tapers toward a point. Keep this outline light so you can adjust it. The diamond is the anchor for everything else, so spend time getting its width and taper right before moving on.
A common trap is drawing the body too round or too long. A manta ray reads as flat and broad, wider than it is long in the central body. If your diamond looks like an oval, flatten the sides and sharpen the front and rear points.
The pectoral fins are the manta ray's most distinctive feature. They grow out of the left and right side points of the diamond and sweep into long, curved wings that end in pointed tips. Draw them as extensions of the body outline rather than separate shapes stuck on, so the transition from body to fin stays smooth.
Curve matters here. The leading edge of each fin usually arcs gently forward, while the trailing edge sweeps back. Keep the two fins roughly balanced in length and angle; small differences are fine and natural, but one fin much larger than the other will make the drawing look lopsided.
At the front of the body, mark the head region. Manta rays have two small cephalic fin projections pointing forward from the head, plus a small eye on each side. Keep these modest in size; they are identifying details, not the main event.
From the rear point, draw a long thin tail curving downward. It should be noticeably thinner than the fins and clearly separate from the body. Finally, add curved gill-slit lines on the underside or body area, spaced evenly and following the body's curve. These lines suggest structure without turning the drawing into an anatomy diagram.
Because art has many valid outcomes, judge your manta ray by whether the key features are present and proportioned sensibly, not by whether it matches a reference pixel for pixel. A drawing with a flatter body or a differently curved tail can still be correct. Use the rubric below as a checklist and revise the weakest feature first.
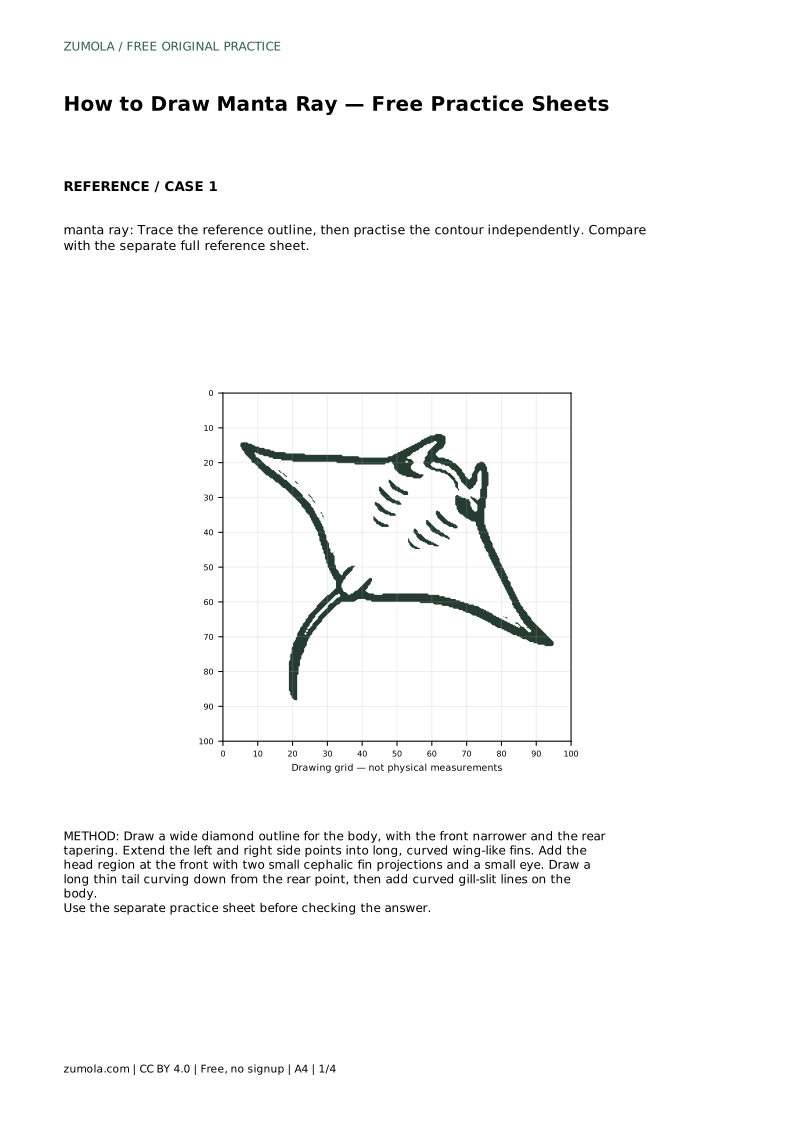
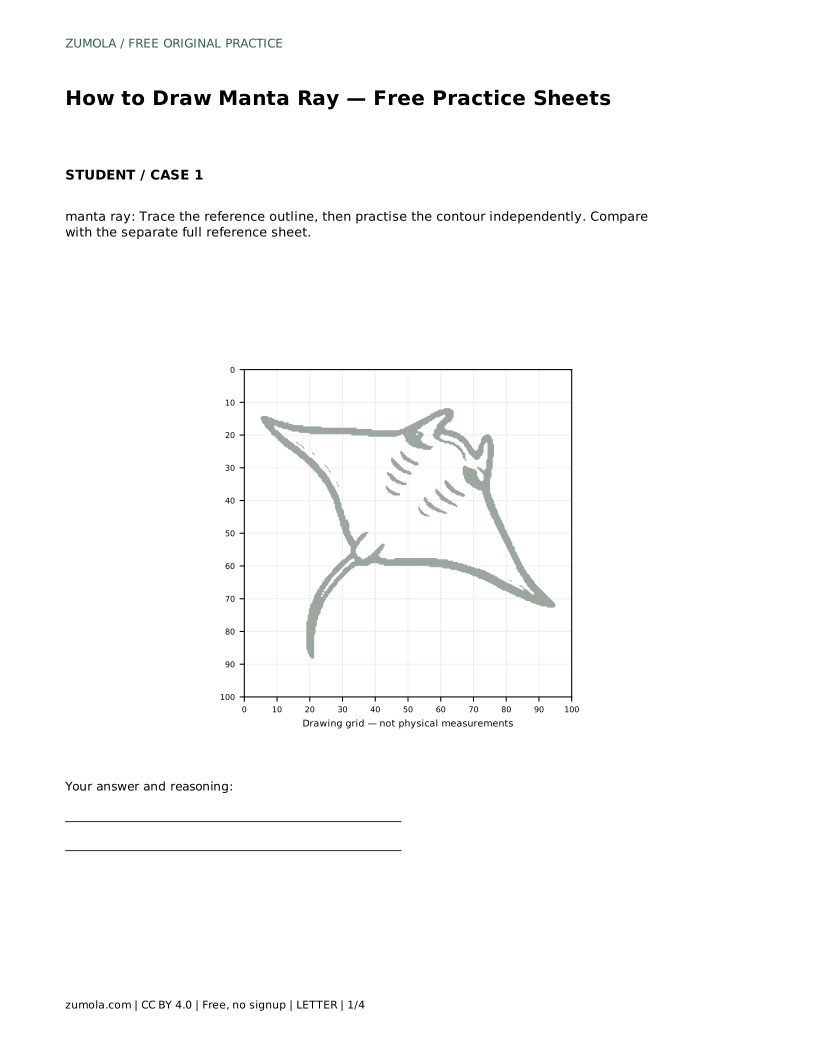
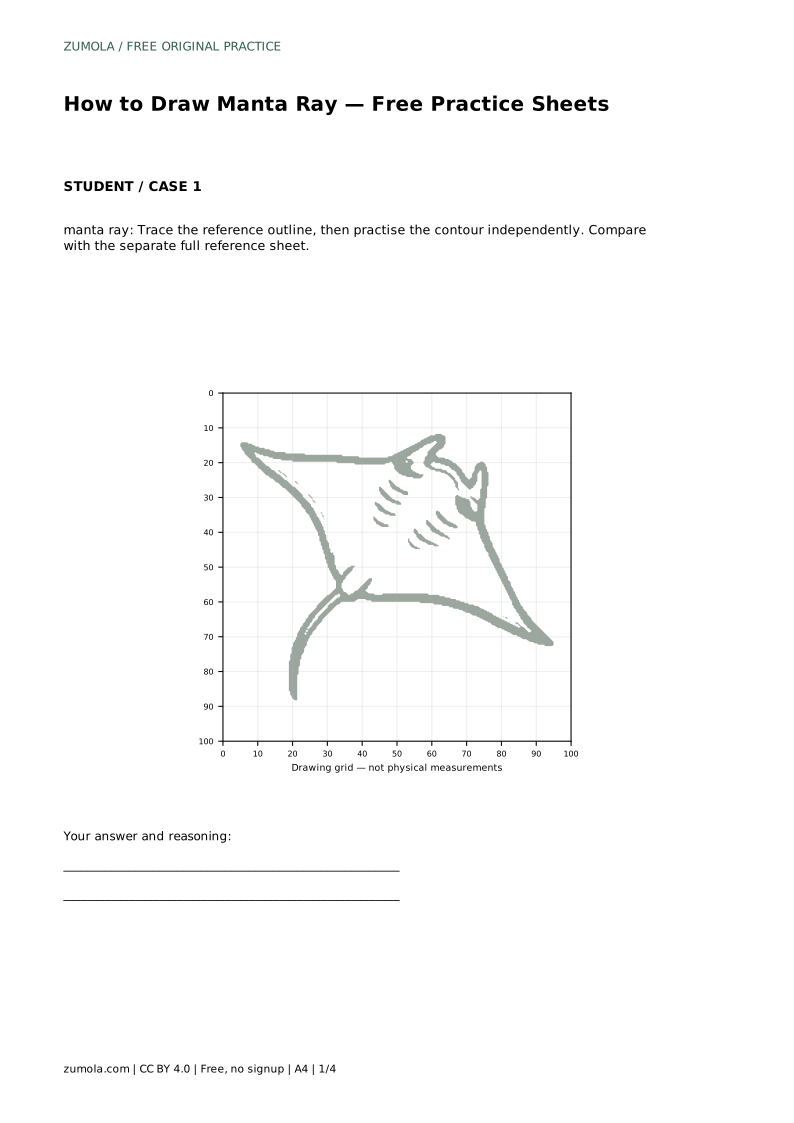
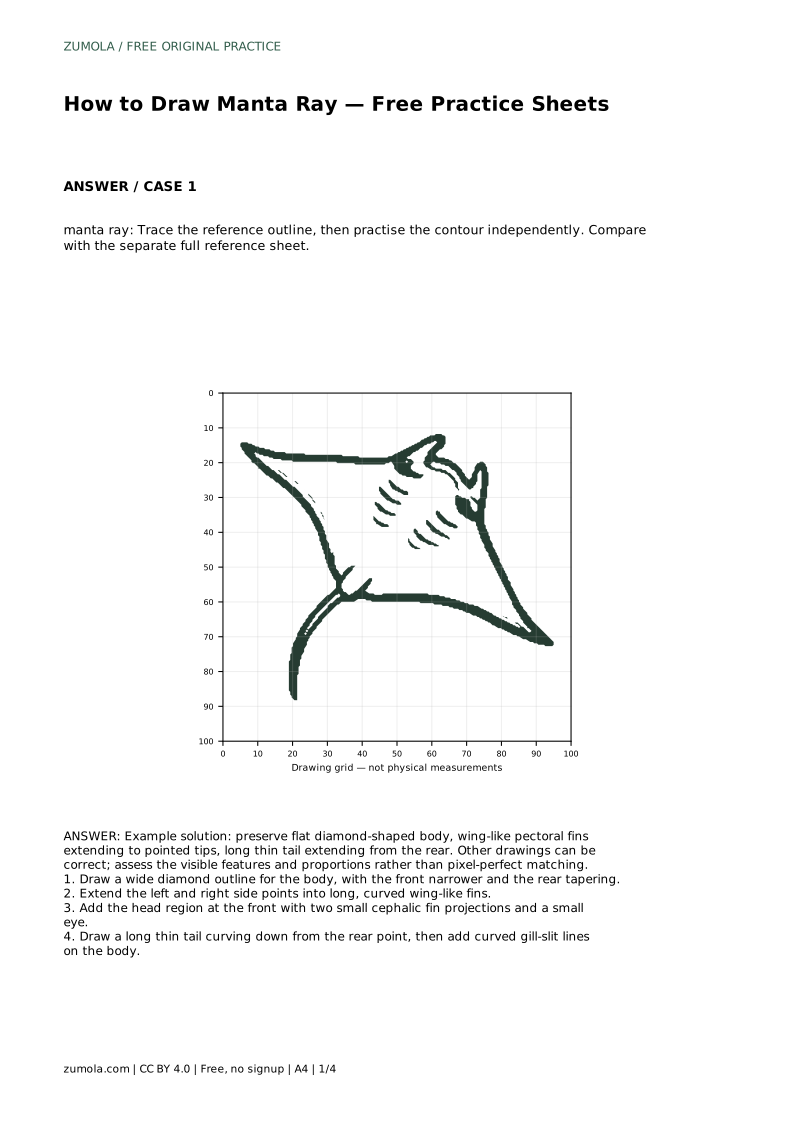
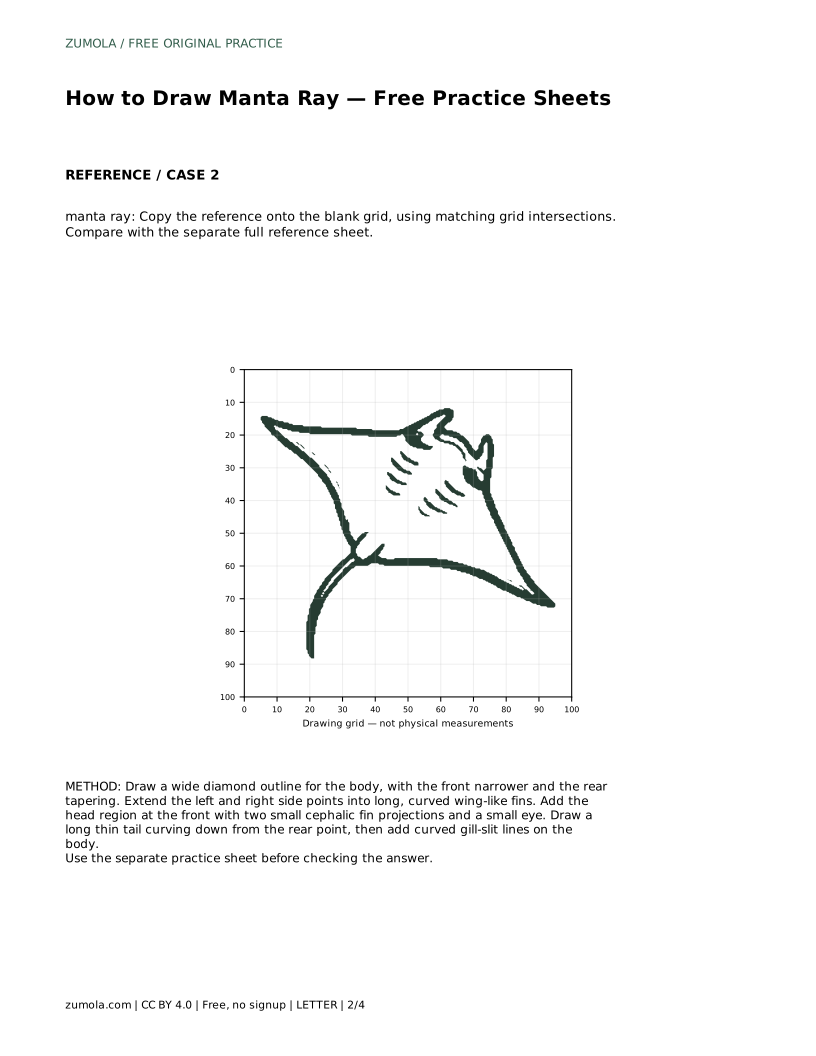
manta ray: Trace the reference outline, then practise the contour independently. Compare with the separate full reference sheet.
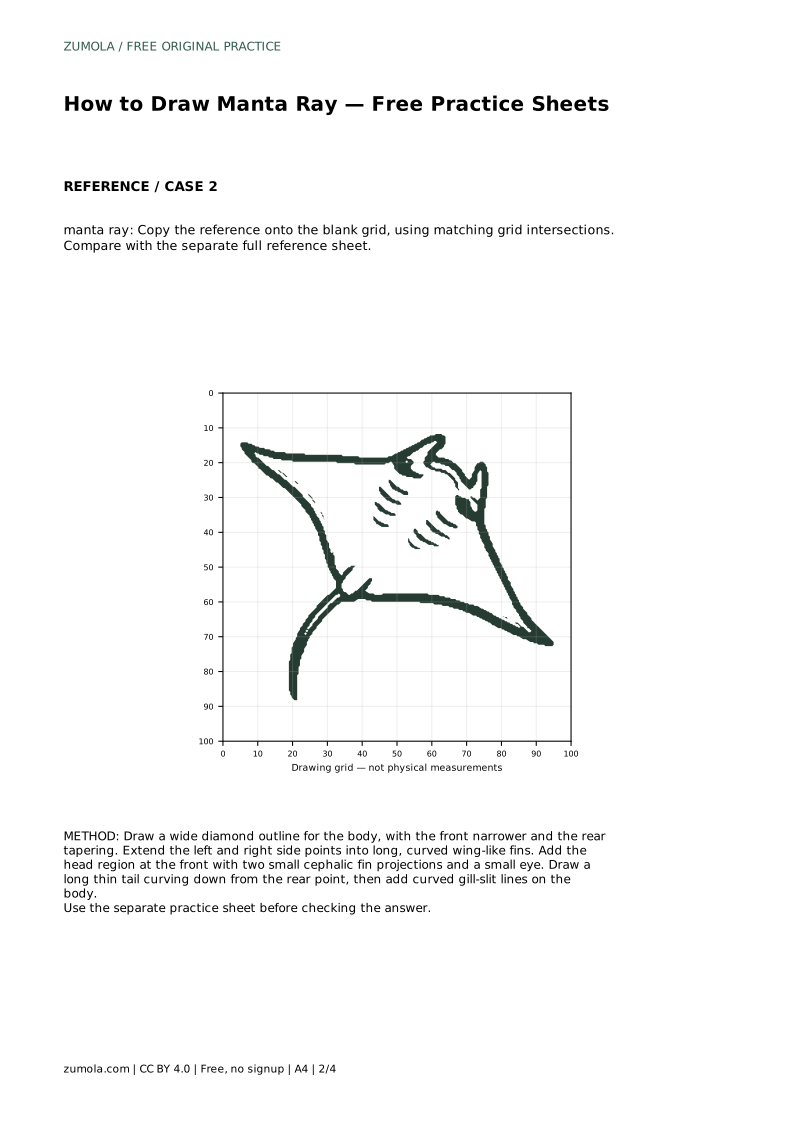
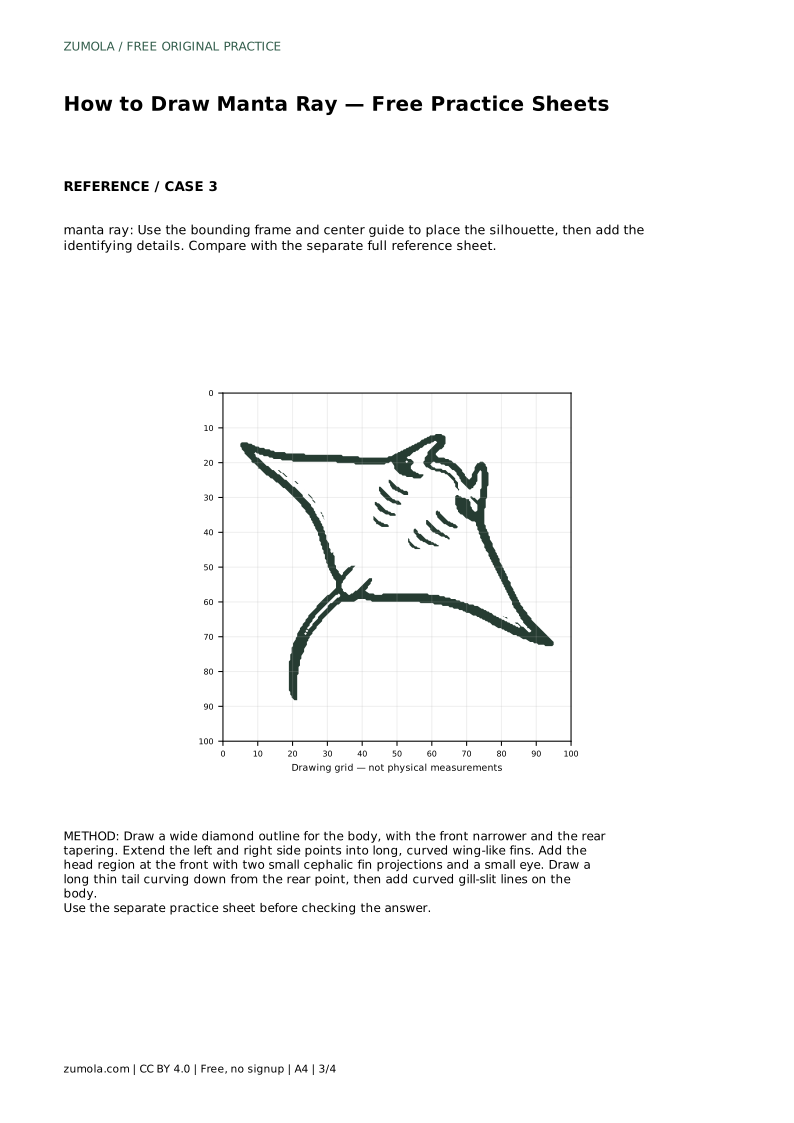
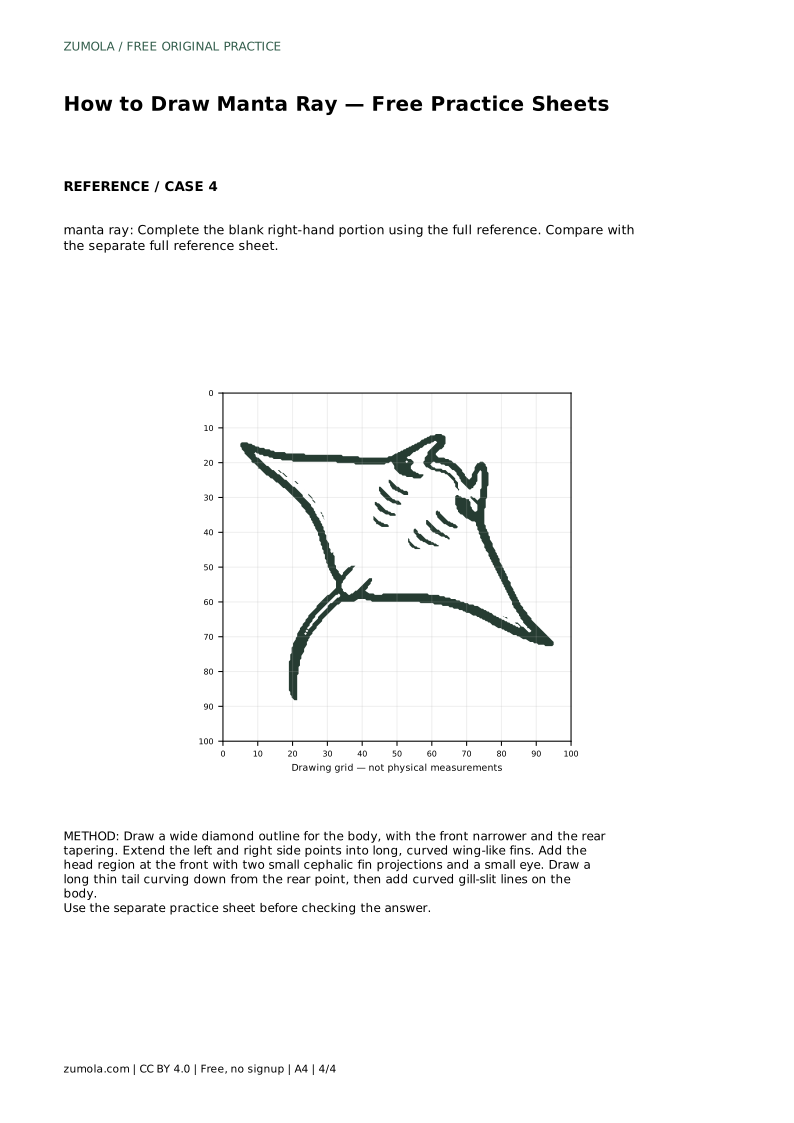
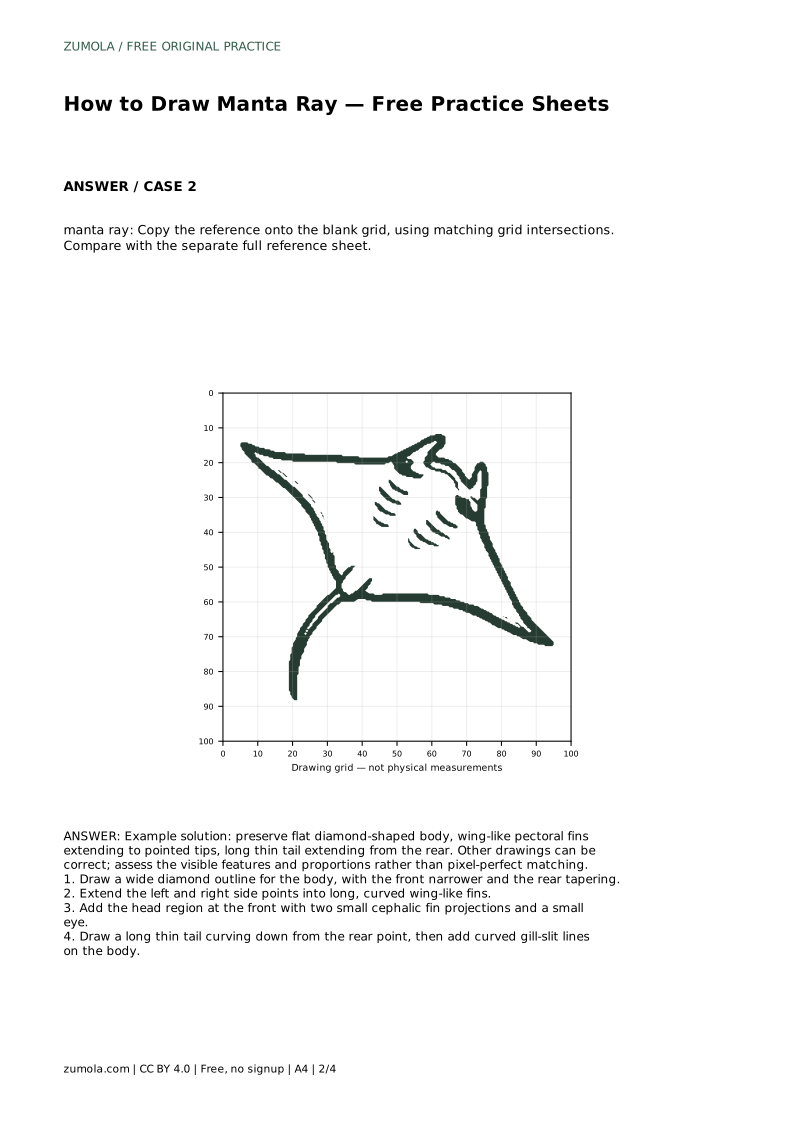
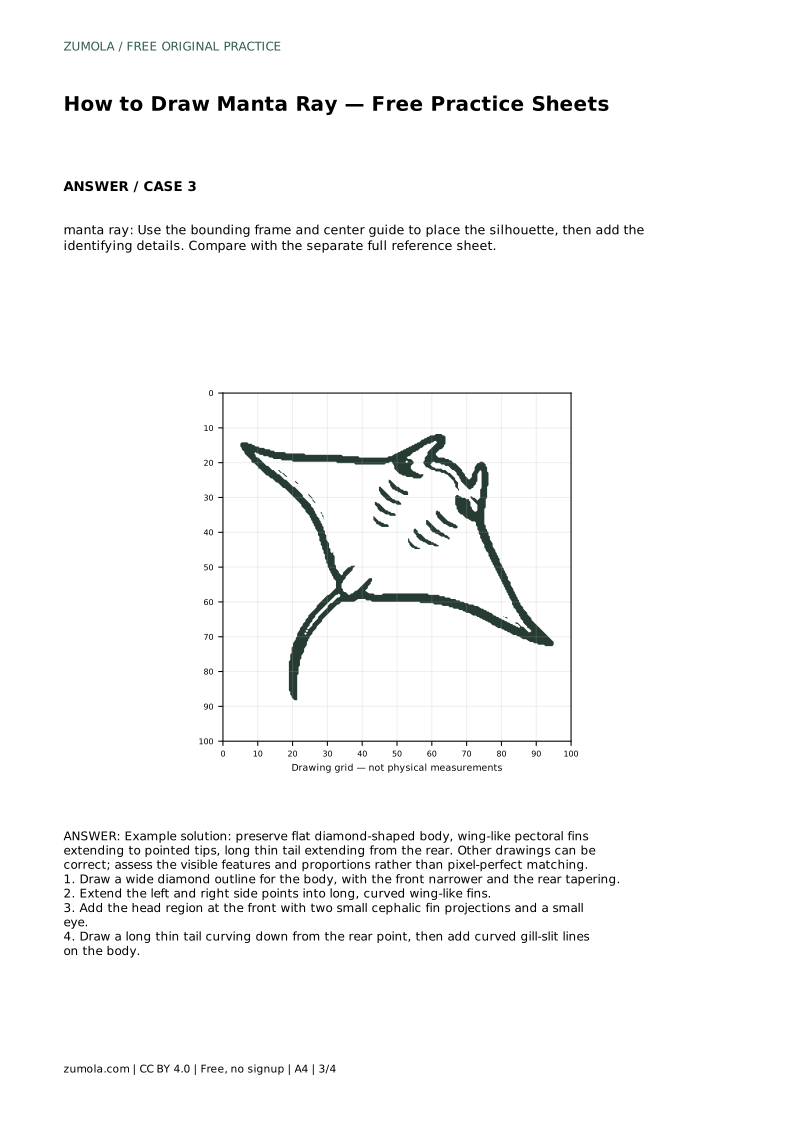
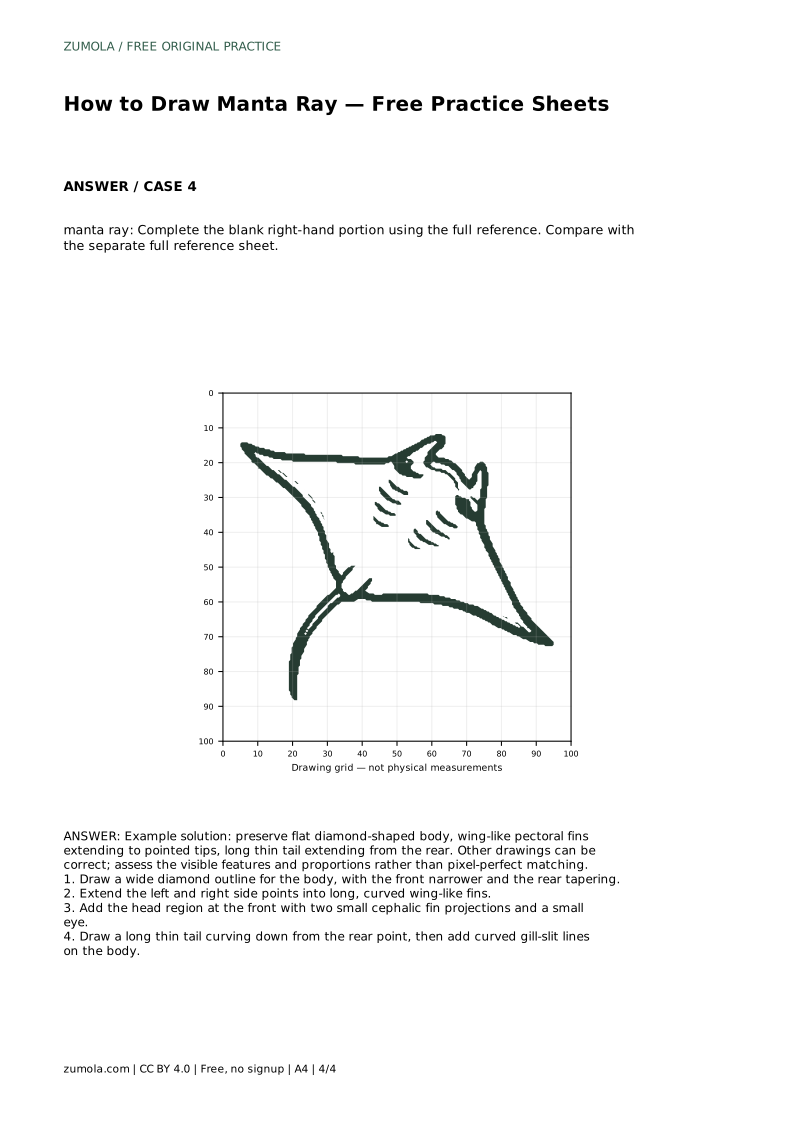
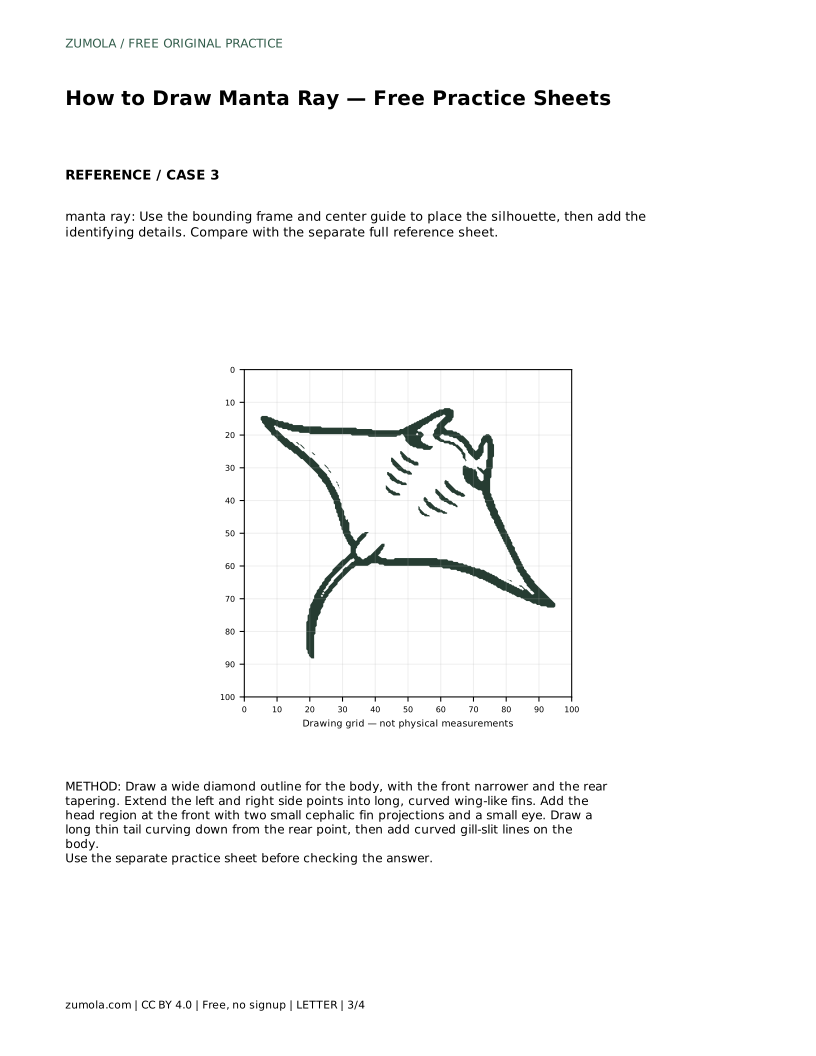
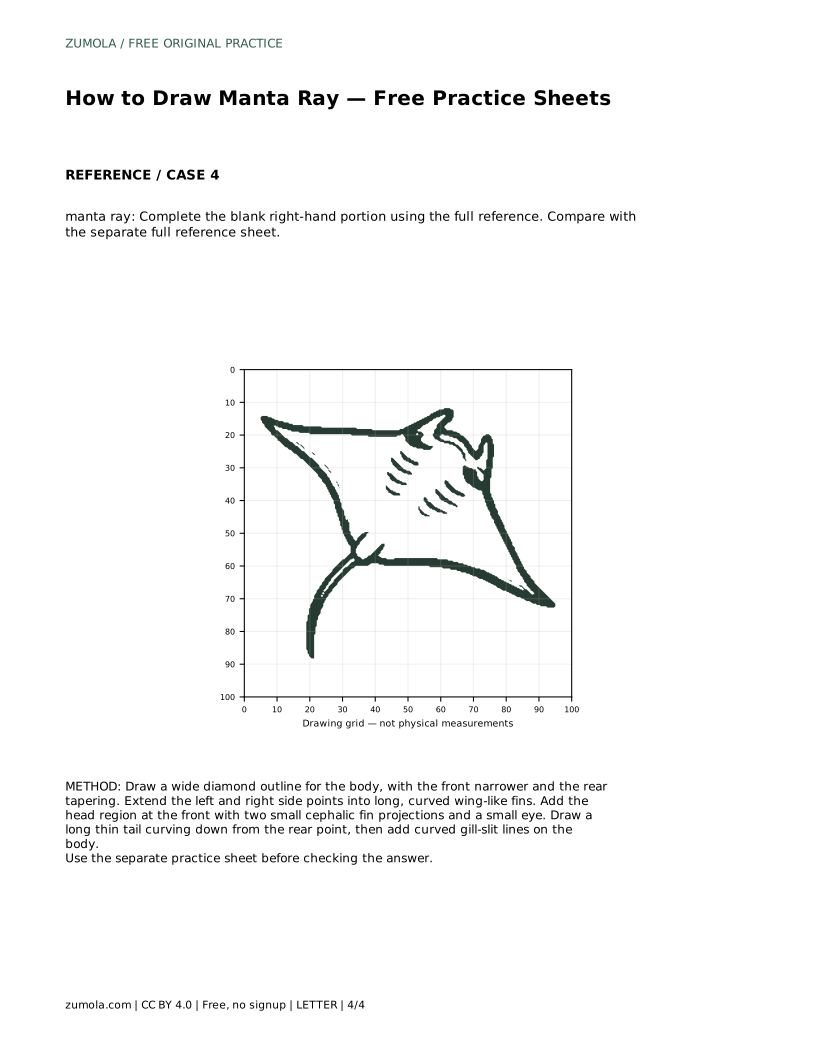
Example solution: preserve flat diamond-shaped body, wing-like pectoral fins extending to pointed tips, long thin tail extending from the rear. Other drawings can be correct; assess the visible features and proportions rather than pixel-perfect matching. Draw a wide diamond outline for the body, with the front narrower and the rear tapering. Extend the left and right side points into long, curved wing-like fins. Add the head region at the front with two small cephalic fin projections and a small eye. Draw a long thin tail curving down from the rear point, then add curved gill-slit lines on the body.
No. Slight differences in length and curve look natural. Aim for balance rather than identical measurement.
Place them on the body area behind the head, spaced evenly and curved to follow the body's shape.
Yes. This method uses a top-down view, but the same features, flat body, wing fins, head projections, and thin tail, apply from other angles.
All drawing practice · Free coordinate paper
Original resources · CC BY 4.0 · Free for personal and classroom use with attribution.