Reference diagrams
LETTER · Download PDF
A4 · Download PDF
Free original resources
Learn a clear method for drawing a mosquito with a tapered abdomen, rounded thorax, narrow wings, proboscis, antennae, and six long jointed legs.
Four original cases, with reference diagrams, practice sheets and worked answers. Everything is free; no signup required.
LETTER · Download PDF
A4 · Download PDF
LETTER · Download PDF
A4 · Download PDF
LETTER · Download PDF
A4 · Download PDF
Use A4 or US Letter to match your printer. Use the stated values and conditions to solve each exercise; diagrams are not physical measuring rulers.
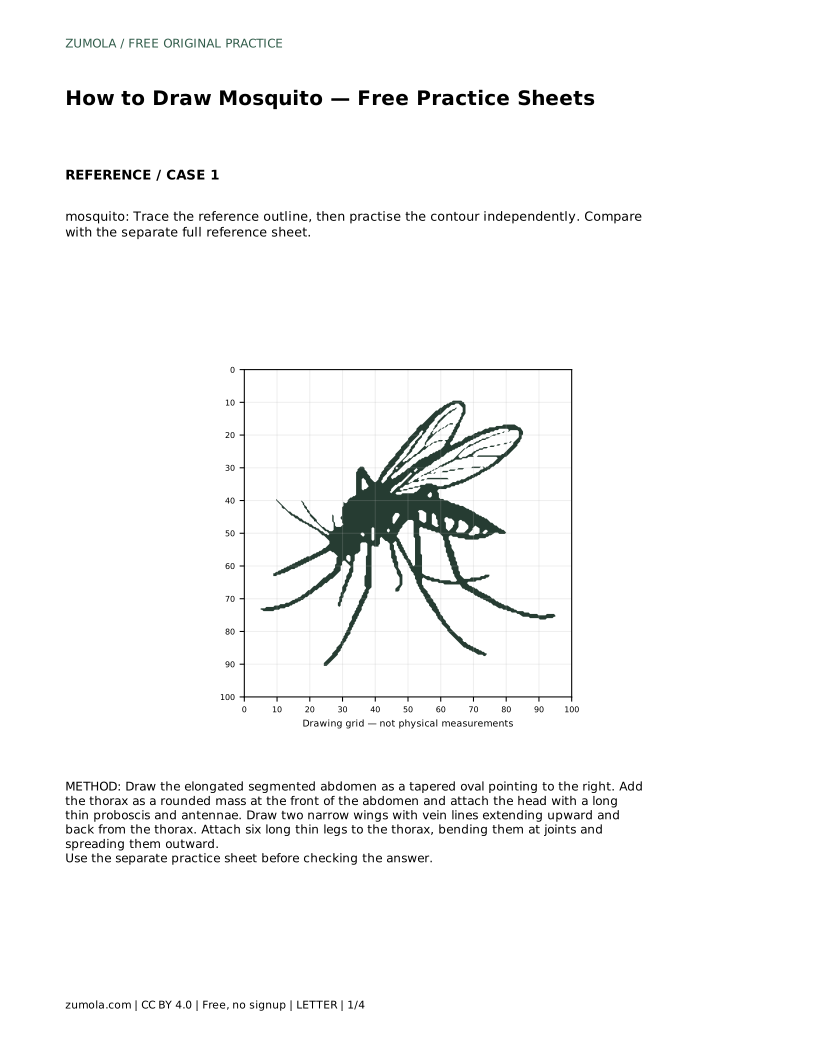
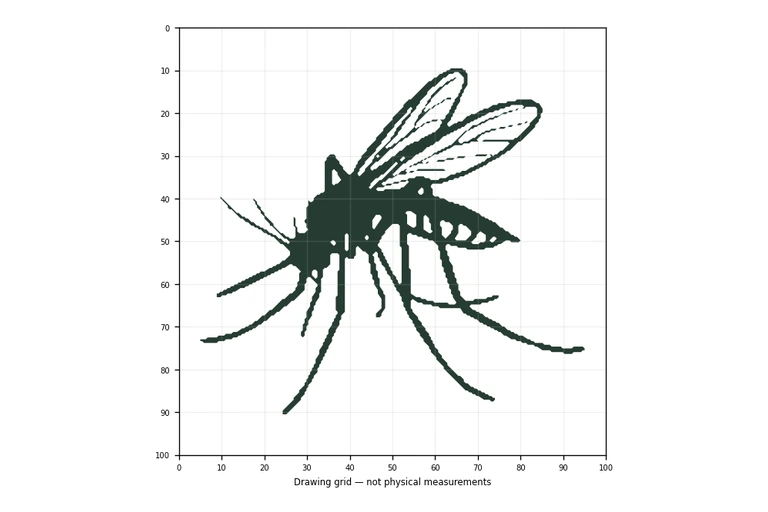
A mosquito drawing works best when you build the body in order: abdomen, thorax, head, wings, then legs. The long thin legs and narrow wings carry most of the silhouette, so place them deliberately rather than adding them as an afterthought. The practice sheets let you trace a reference outline, copy onto a grid, use a bounding frame and center guide, or complete a blank half. Each route trains the same observation skill: matching visible features and proportions, not producing a pixel-perfect copy.
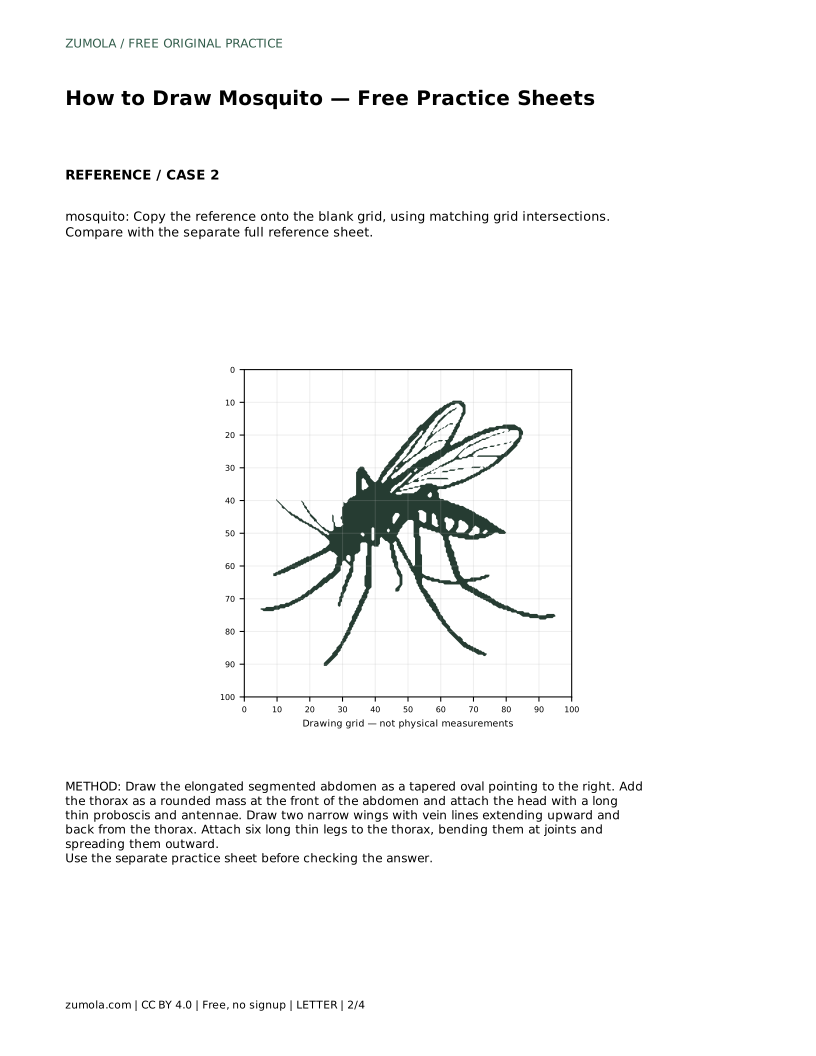
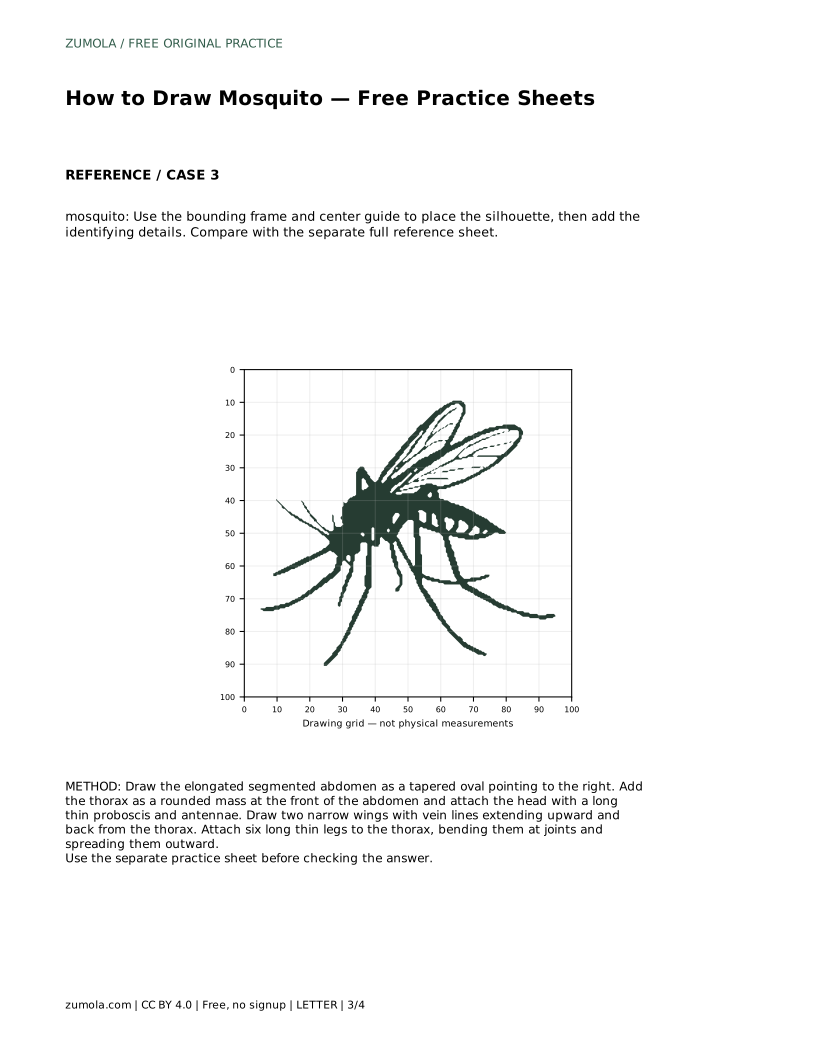
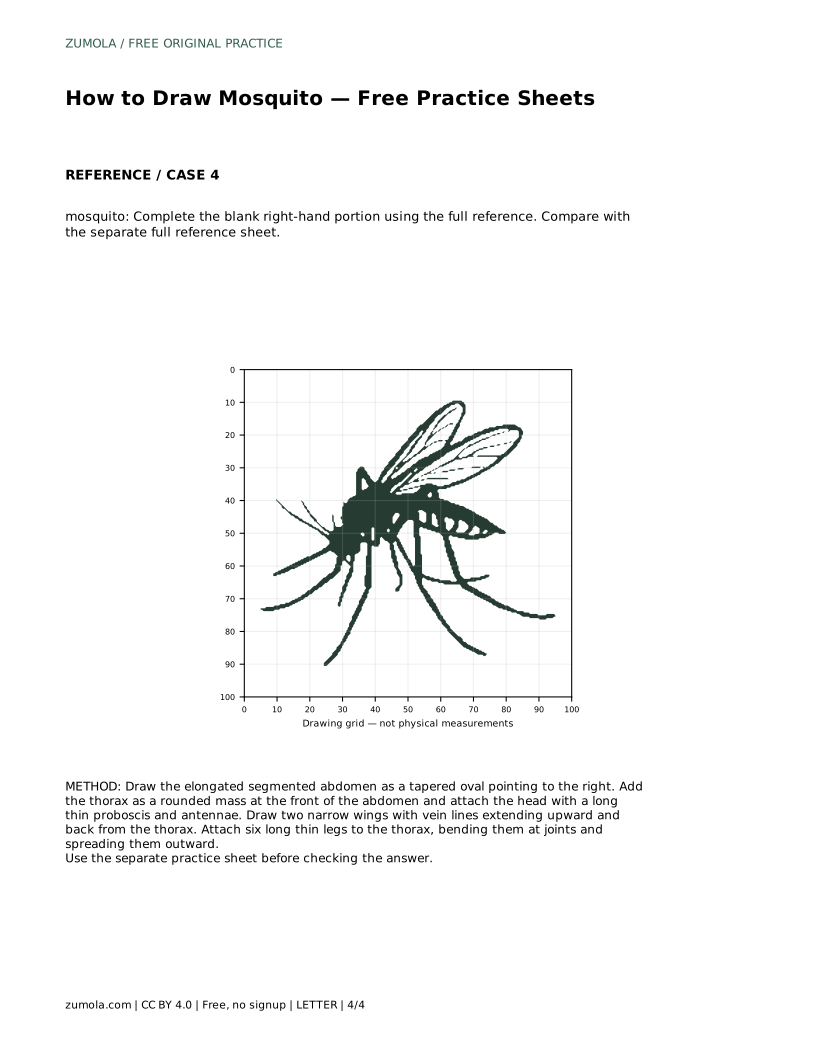
Begin with the elongated segmented abdomen, drawn as a tapered oval pointing to the right. Keep it slim and slightly curved so it reads as an insect body rather than a generic oval. Add the thorax as a rounded mass at the front of the abdomen, then attach the head. The head is small compared with the thorax, but it carries two identifying details: a long thin proboscis and a pair of antennae. Draw the proboscis as a single narrow line extending forward from the head, and keep the antennae short and fine. Check that the three body masses connect without gaps and that the abdomen is clearly longer than the thorax.
Draw two narrow wings extending upward and back from the thorax. Keep them long and slim, and add a few vein lines inside each wing rather than filling them with heavy shading. The wings should sit close to the body but remain visible against the background. Next, attach six long thin legs to the thorax. Each leg bends at joints, so plan the angles before drawing: a leg that runs straight from body to tip looks stiff, while a clear bend reads as an insect leg. Spread the legs outward so the drawing has space around the body. Count the legs as you go; six is the target, and a missing or doubled leg is easy to spot in a finished drawing.
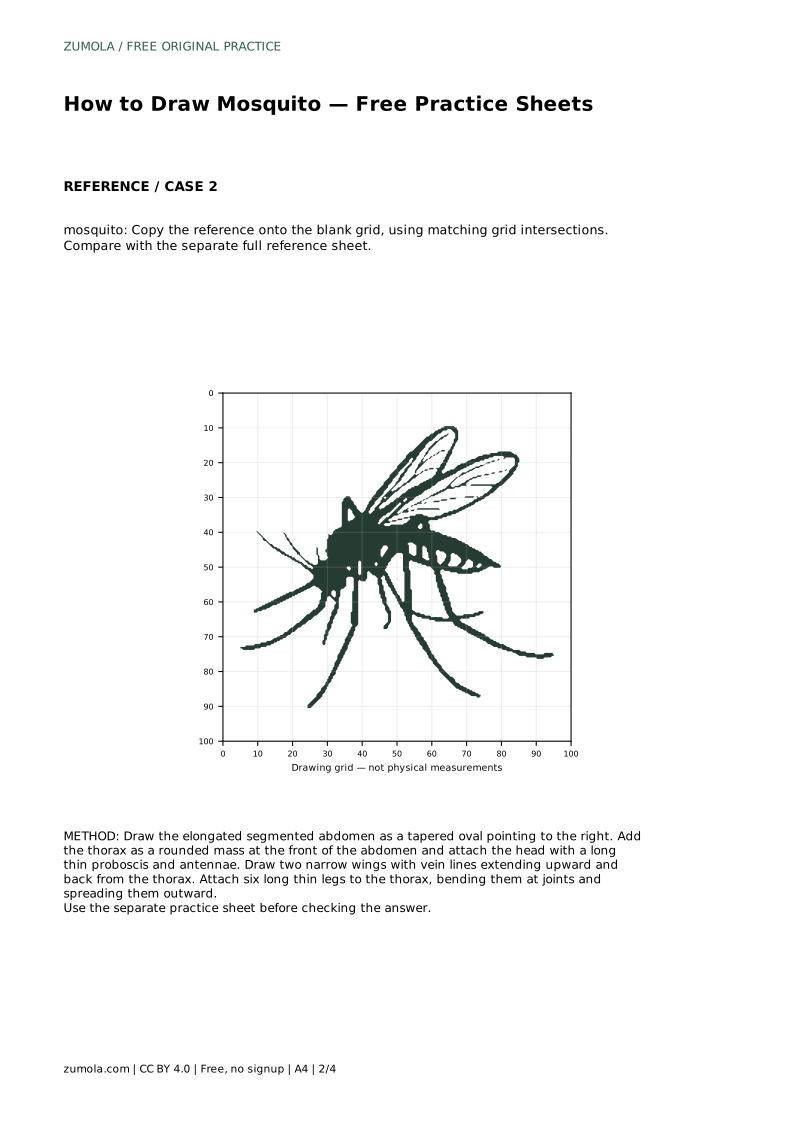
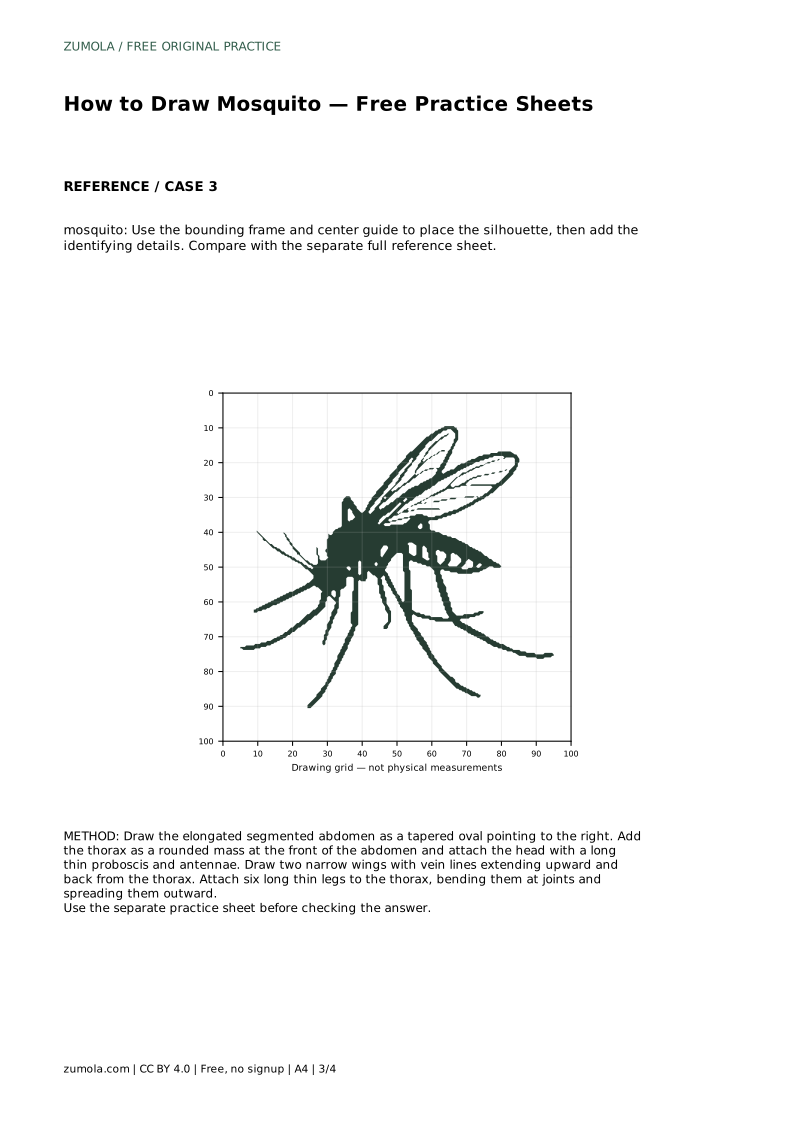
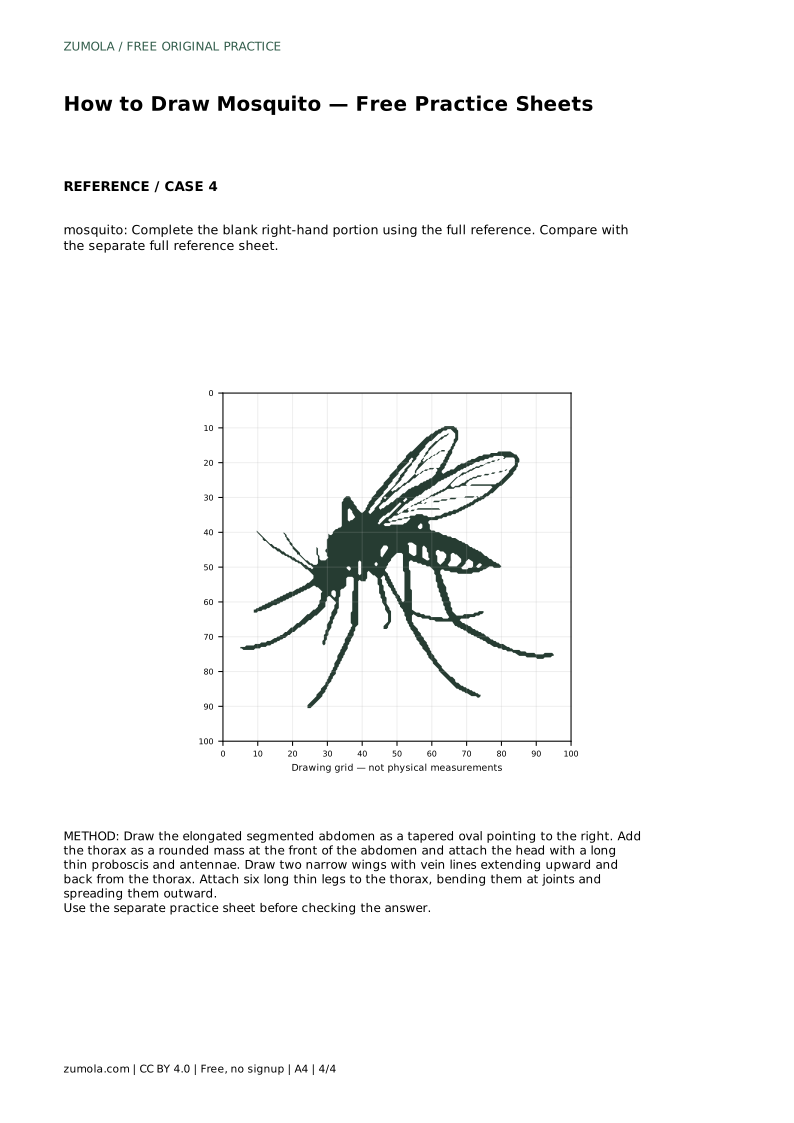
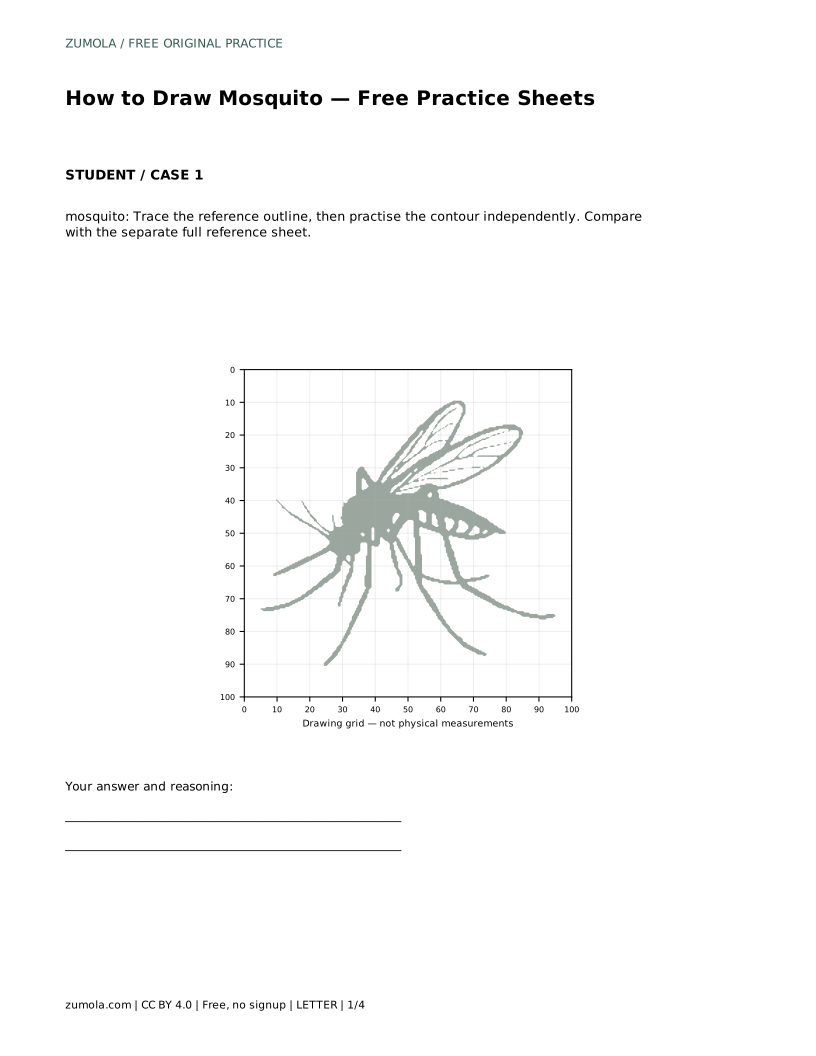
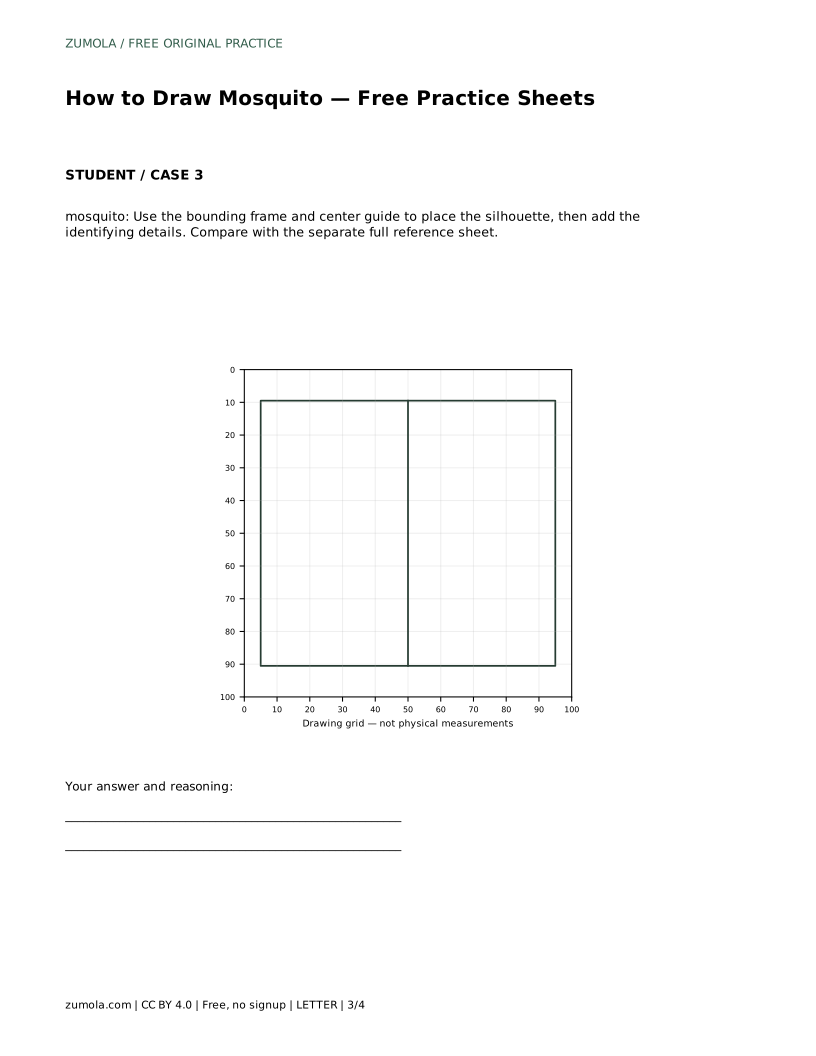
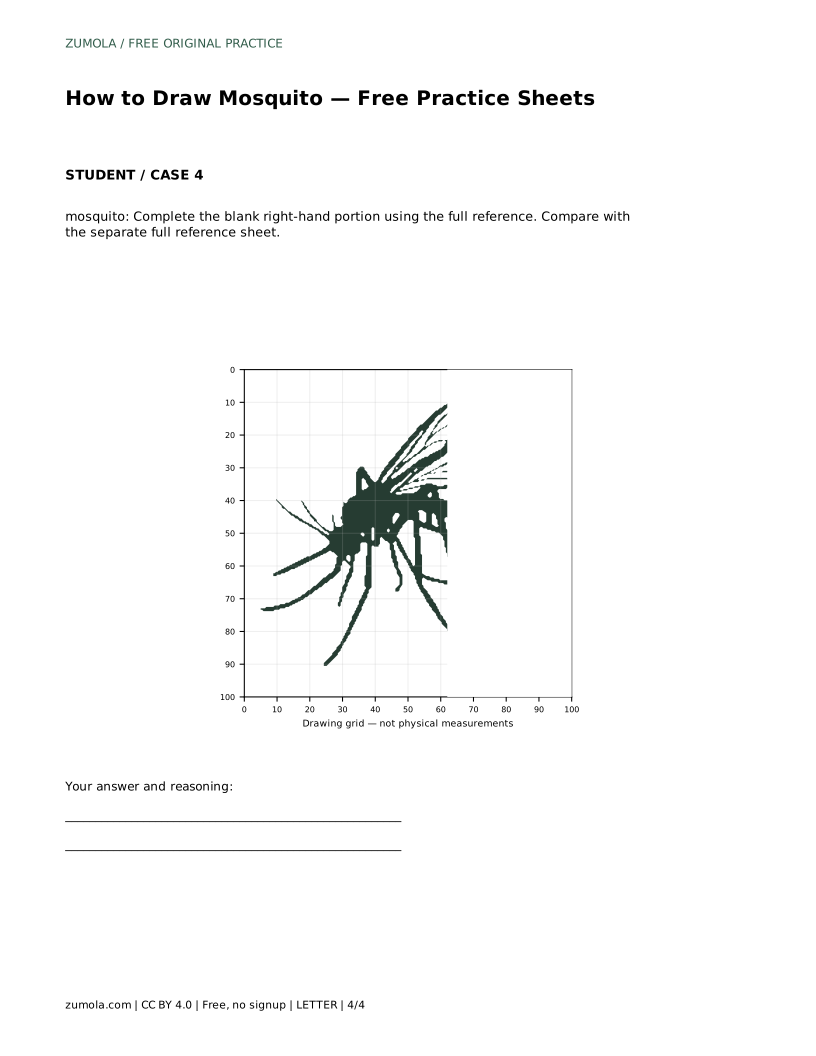
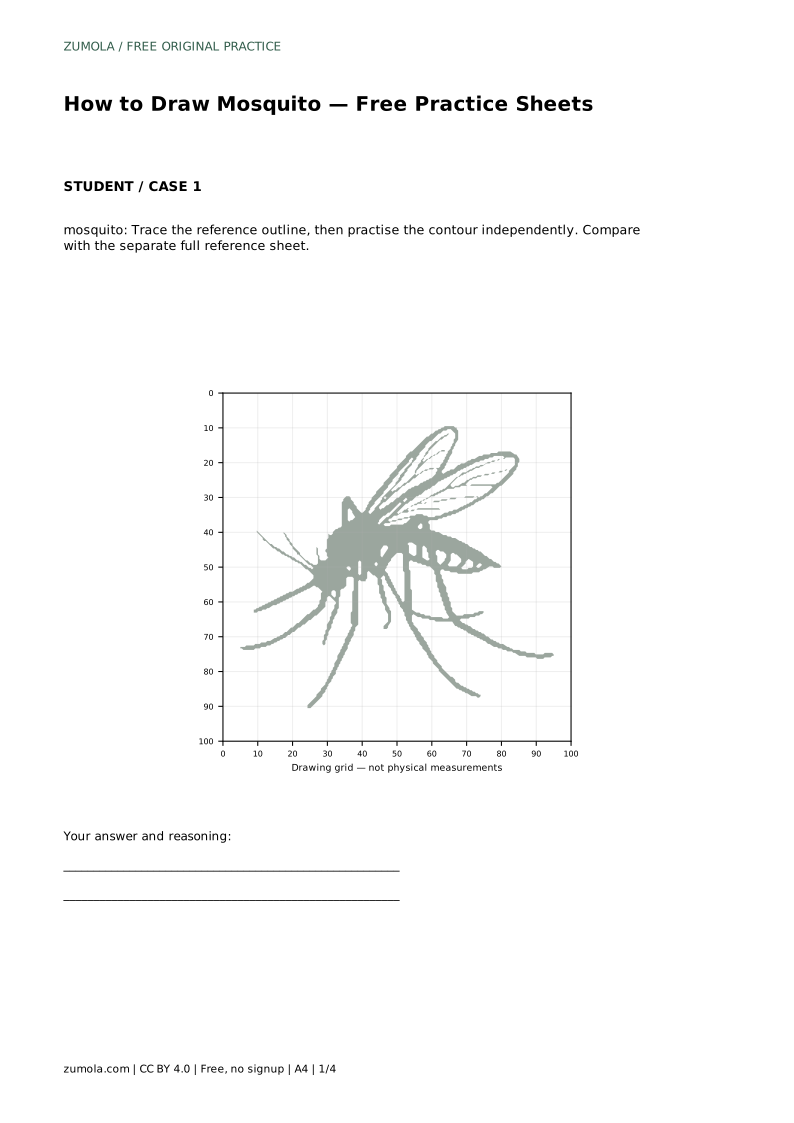
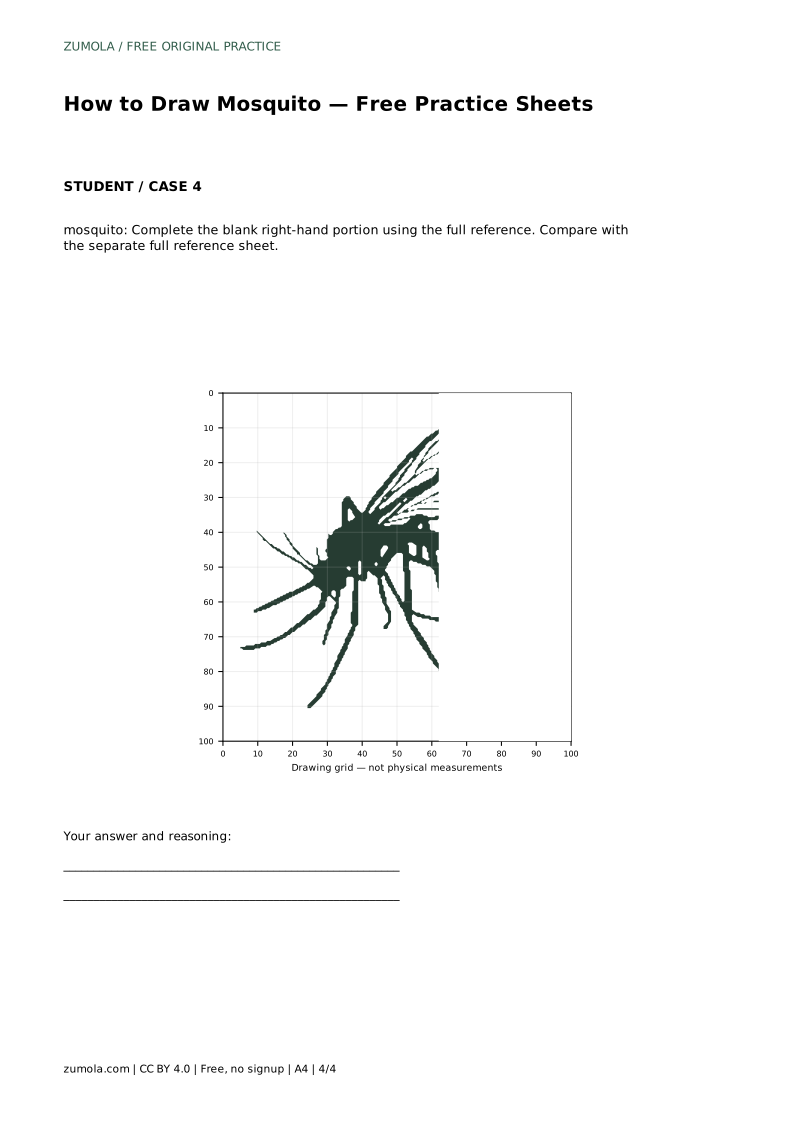
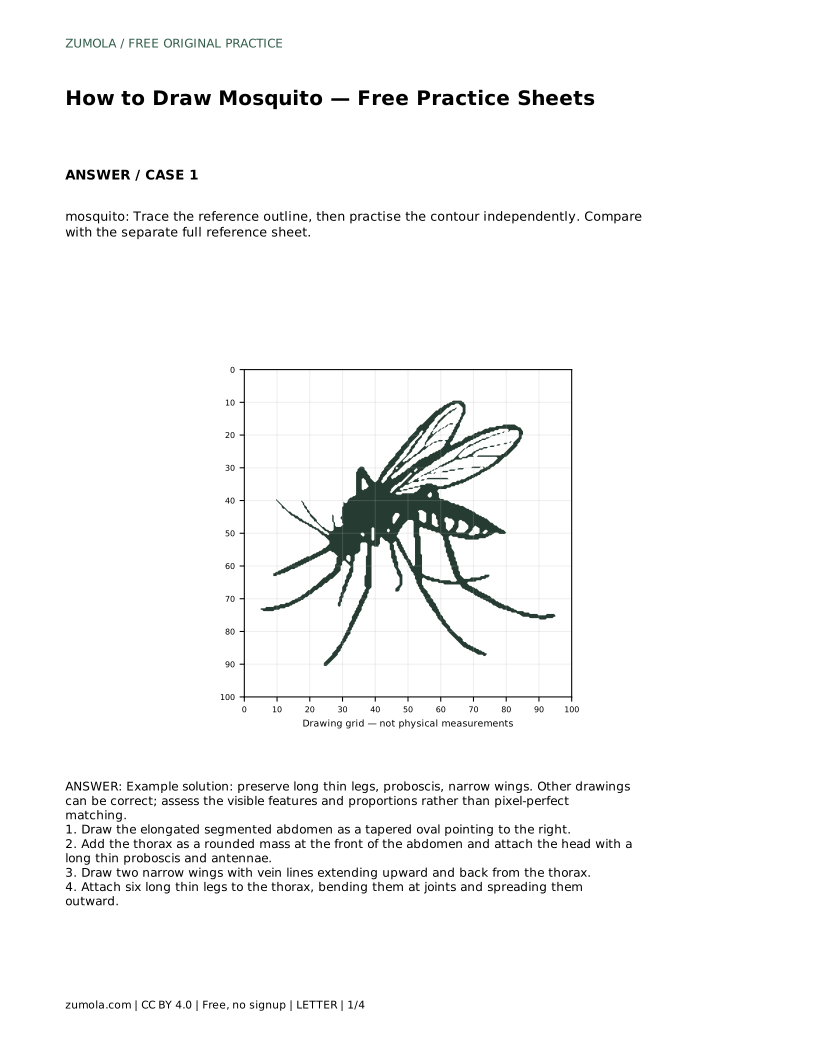
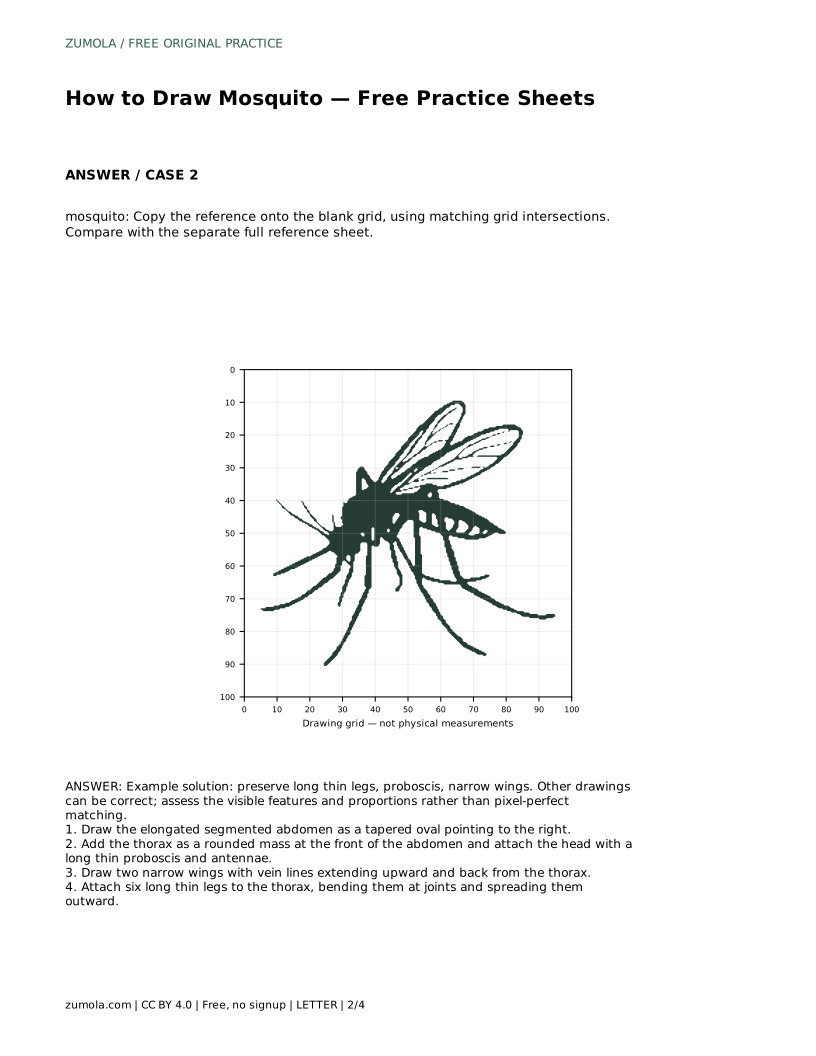
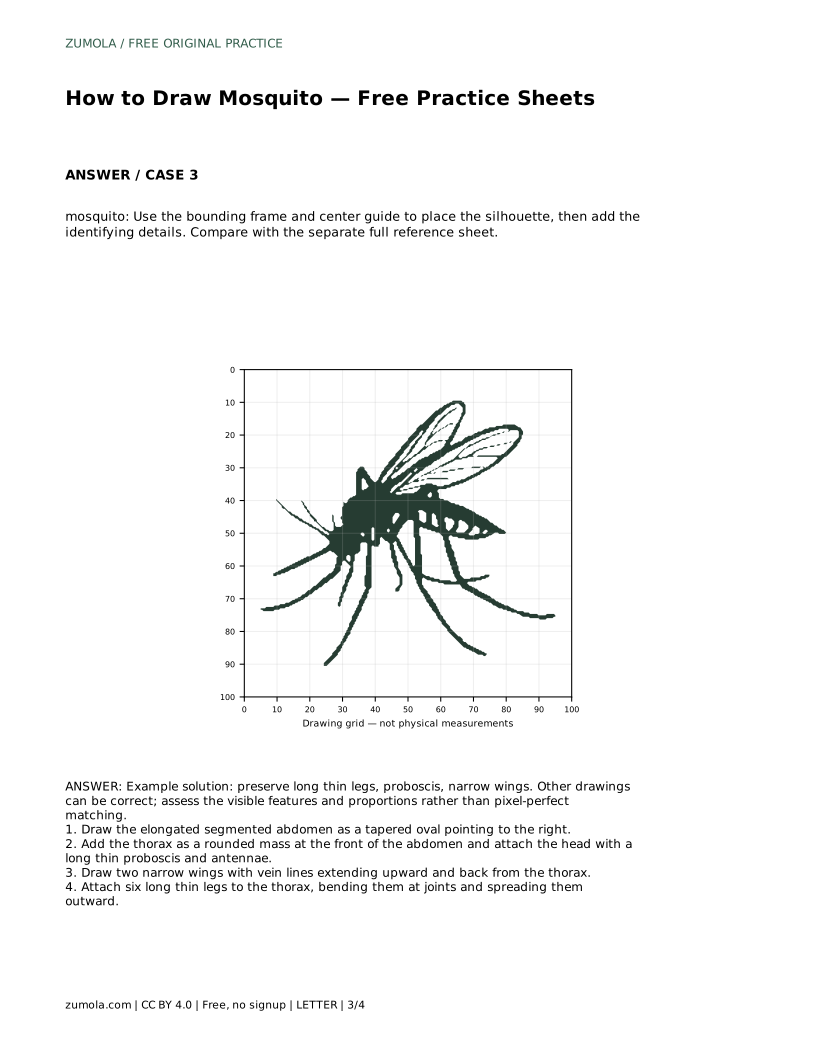
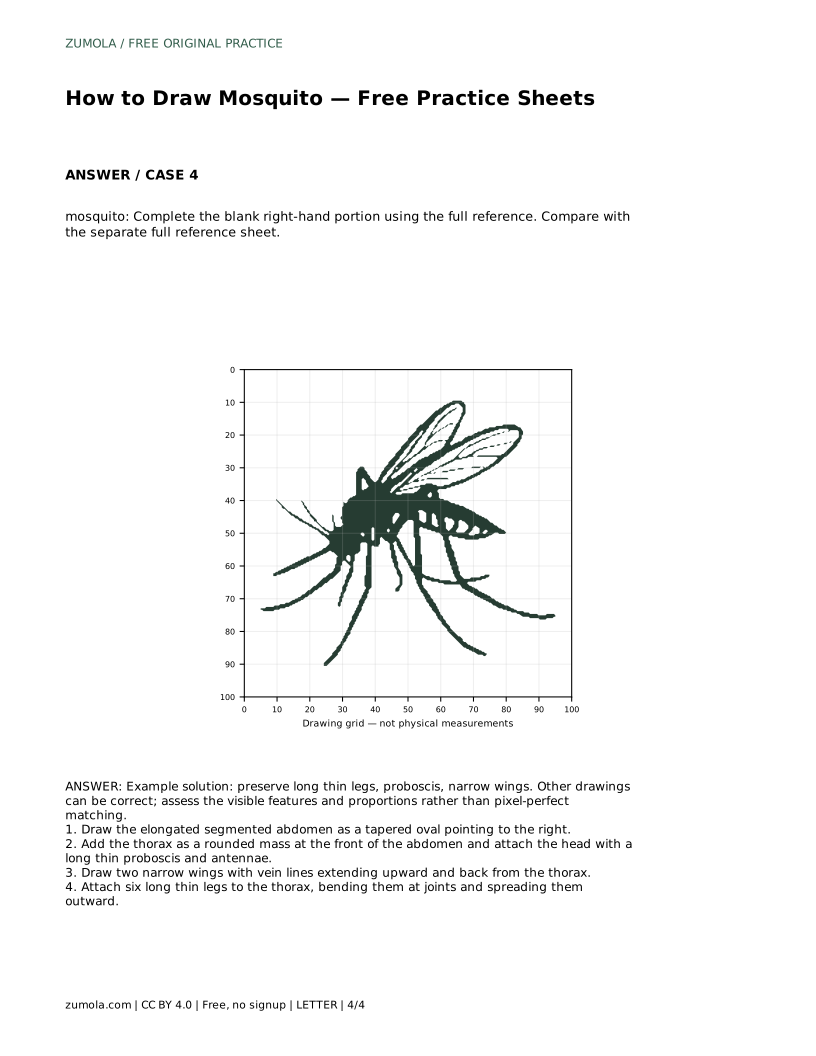
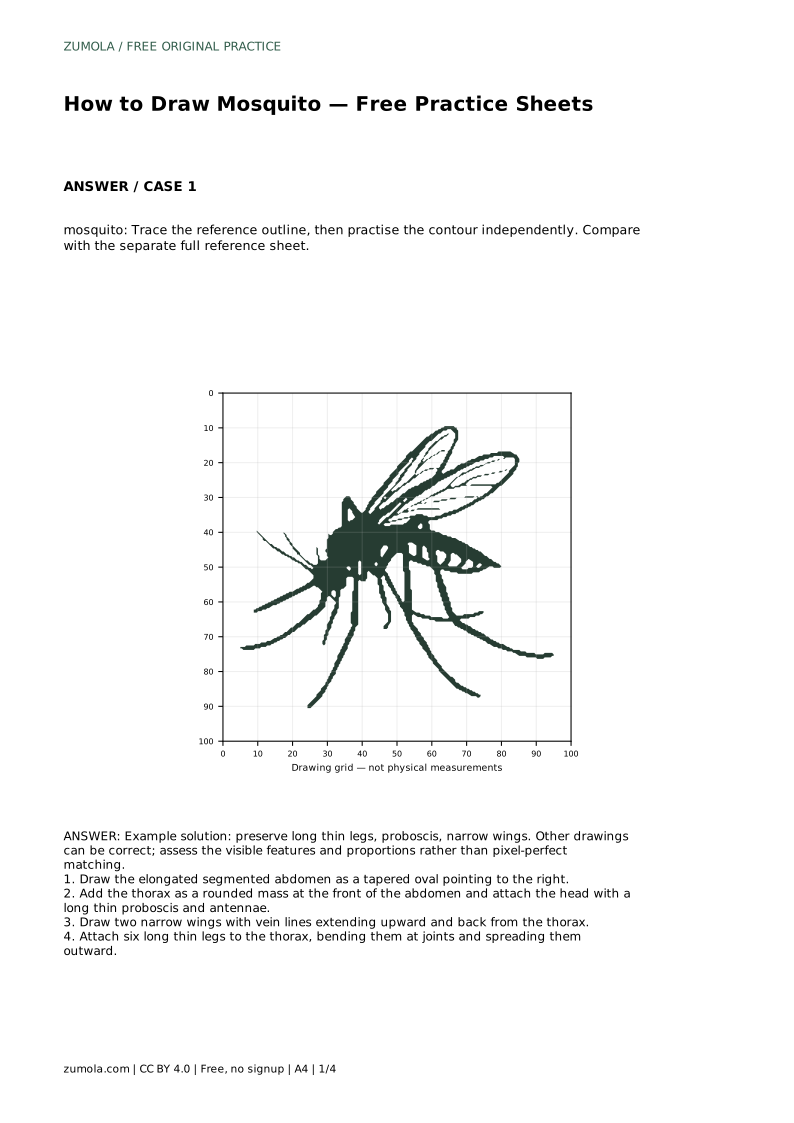
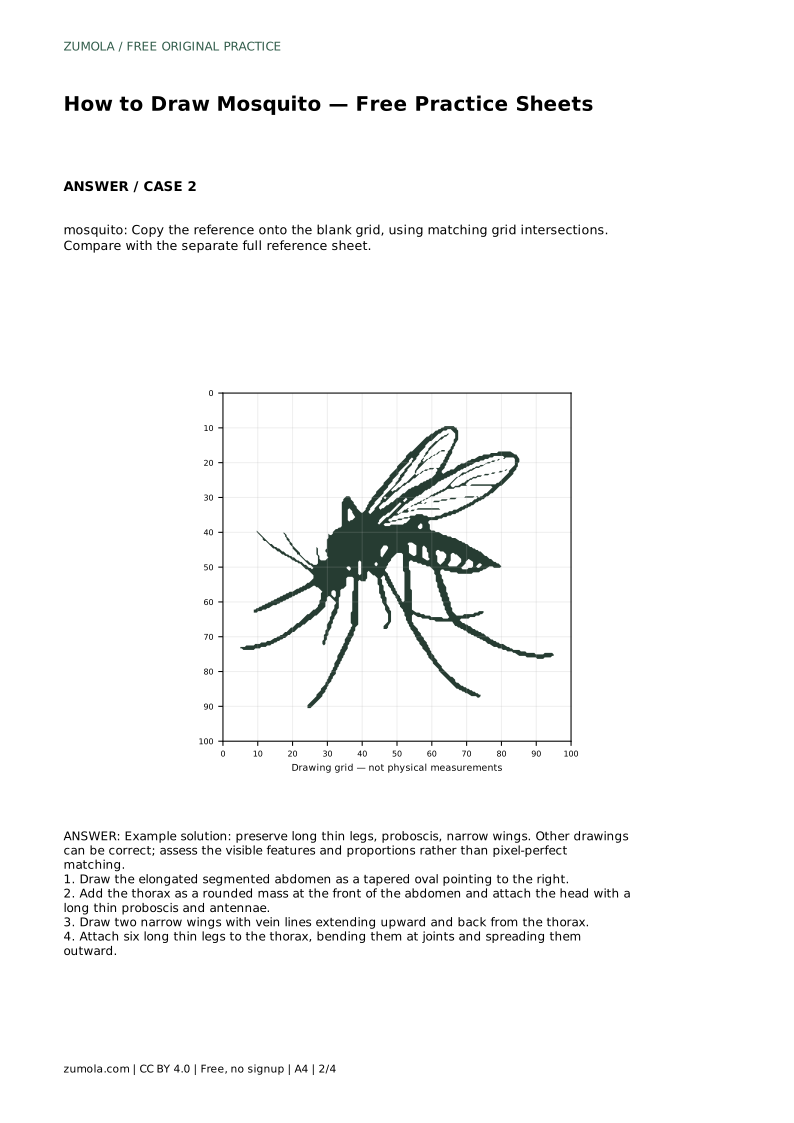
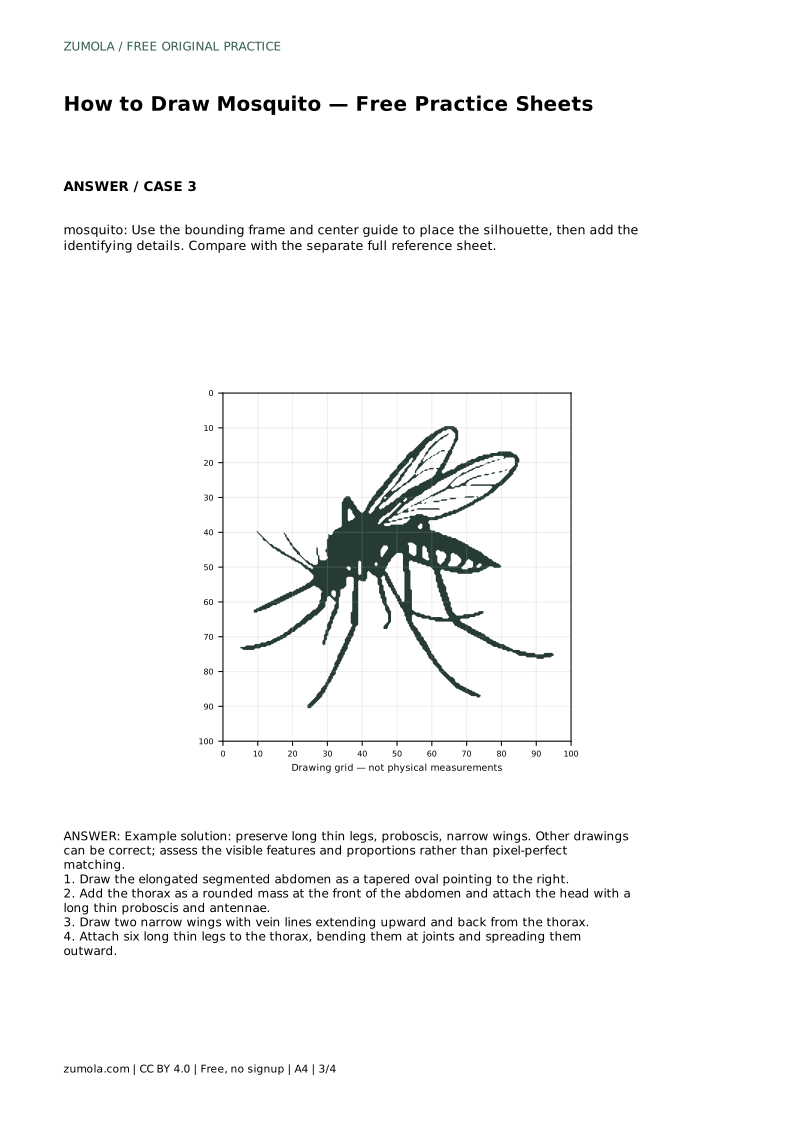
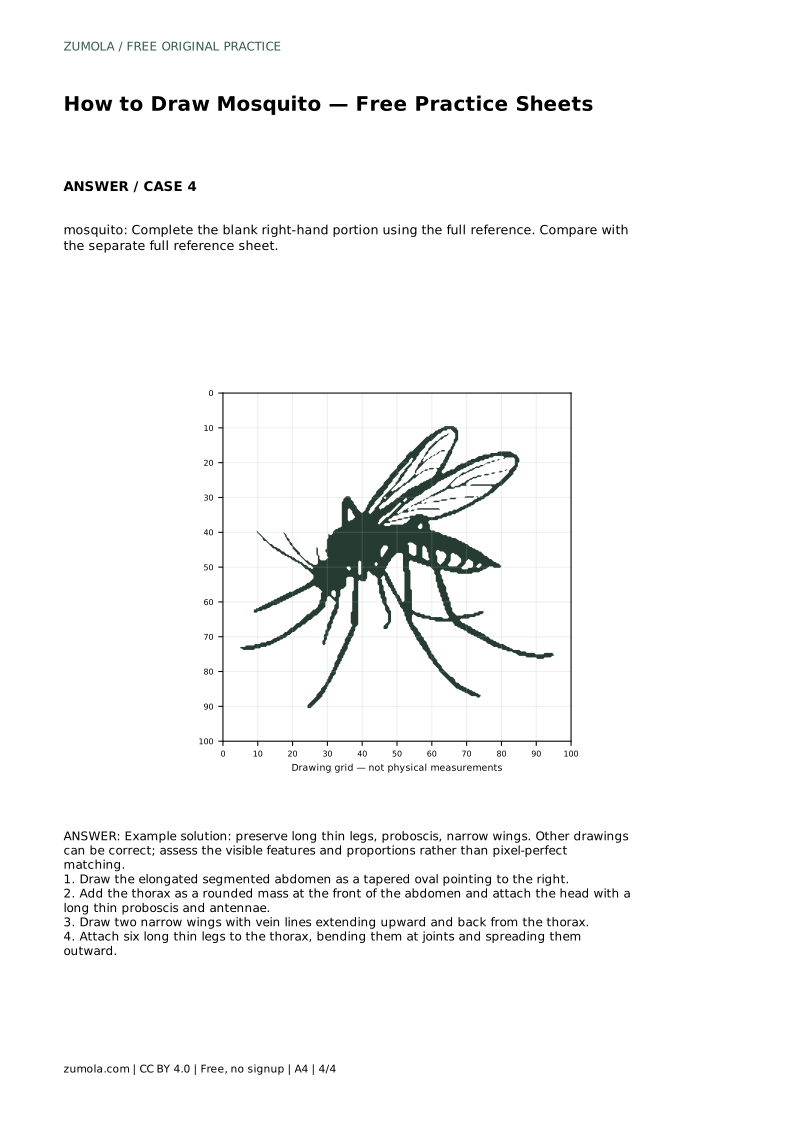
The trace sheet asks you to follow the reference outline, then practise the contour independently and compare with the separate full reference sheet. The grid sheet asks you to copy the reference onto the blank grid using matching grid intersections, which helps you judge where each body part sits relative to the others. The bounding frame and center guide help you place the overall silhouette before adding identifying details. The half-completed sheet asks you to finish the blank right-hand portion using the full reference. In every variant, compare your drawing with the reference after you finish, and note which feature drifted: body length, wing angle, leg spread, or head details.
A mosquito drawing has multiple valid outcomes. Two drawings can both be correct while differing in leg angles, wing tilt, or abdomen curve. Judge the visible features and proportions rather than pixel-perfect matching. Ask whether the abdomen is elongated and tapered, the thorax rounded, the wings narrow with vein lines, the proboscis long and thin, and the legs six in number, long, thin, and jointed. If one of those features is unclear, redraw that part rather than starting over.
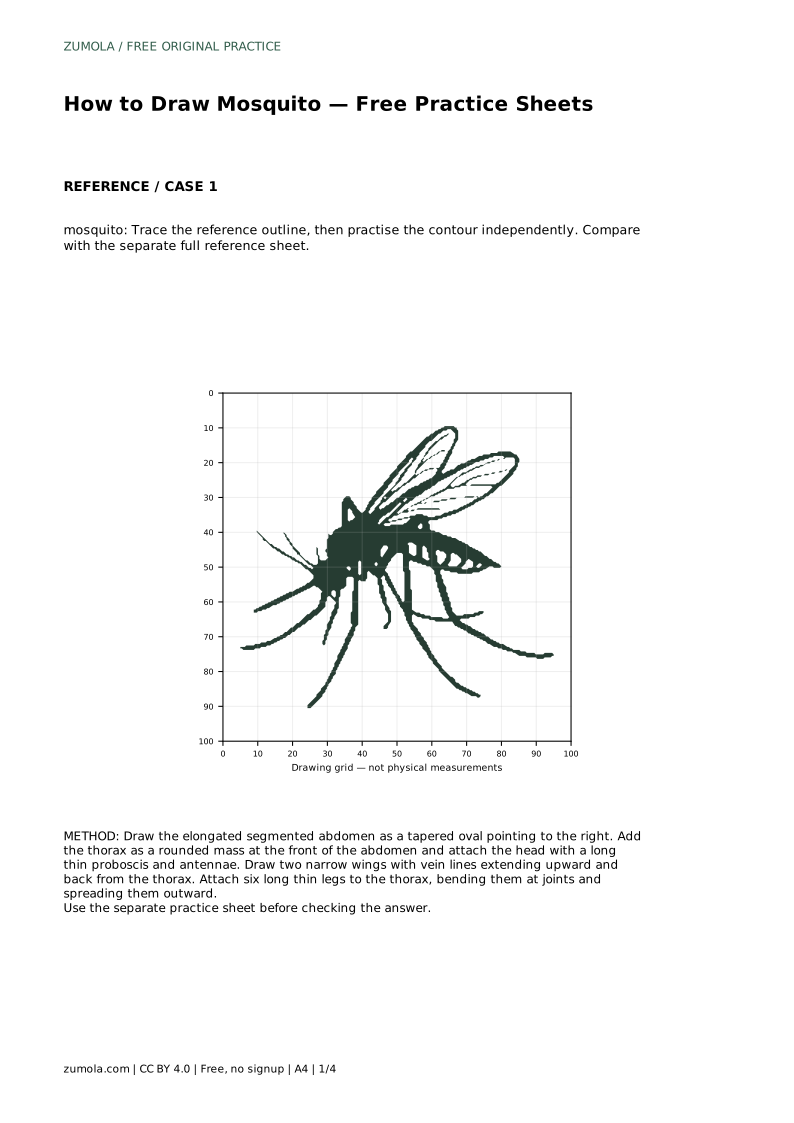
mosquito: Trace the reference outline, then practise the contour independently. Compare with the separate full reference sheet.
Example solution: preserve long thin legs, proboscis, narrow wings. Other drawings can be correct; assess the visible features and proportions rather than pixel-perfect matching. Draw the elongated segmented abdomen as a tapered oval pointing to the right. Add the thorax as a rounded mass at the front of the abdomen and attach the head with a long thin proboscis and antennae. Draw two narrow wings with vein lines extending upward and back from the thorax. Attach six long thin legs to the thorax, bending them at joints and spreading them outward.
Six. Attach all six to the thorax, not the abdomen, and count them before finishing.
Vein lines help the narrow wings read as wings rather than plain shapes. Keep them light and separate.
Yes. Leg angles, wing tilt, and abdomen curve can vary. Check that the identifying features and proportions are present.
All drawing practice · Free coordinate paper
Original resources · CC BY 4.0 · Free for personal and classroom use with attribution.