Reference diagrams
LETTER · Download PDF
A4 · Download PDF
Free original resources
Learn to draw a realistic black widow spider by building the body, eight jointed legs, and front fangs, then check your work against a feature-based rubric.
Four original cases, with reference diagrams, practice sheets and worked answers. Everything is free; no signup required.
LETTER · Download PDF
A4 · Download PDF
LETTER · Download PDF
A4 · Download PDF
LETTER · Download PDF
A4 · Download PDF
Use A4 or US Letter to match your printer. Use the stated values and conditions to solve each exercise; diagrams are not physical measuring rulers.
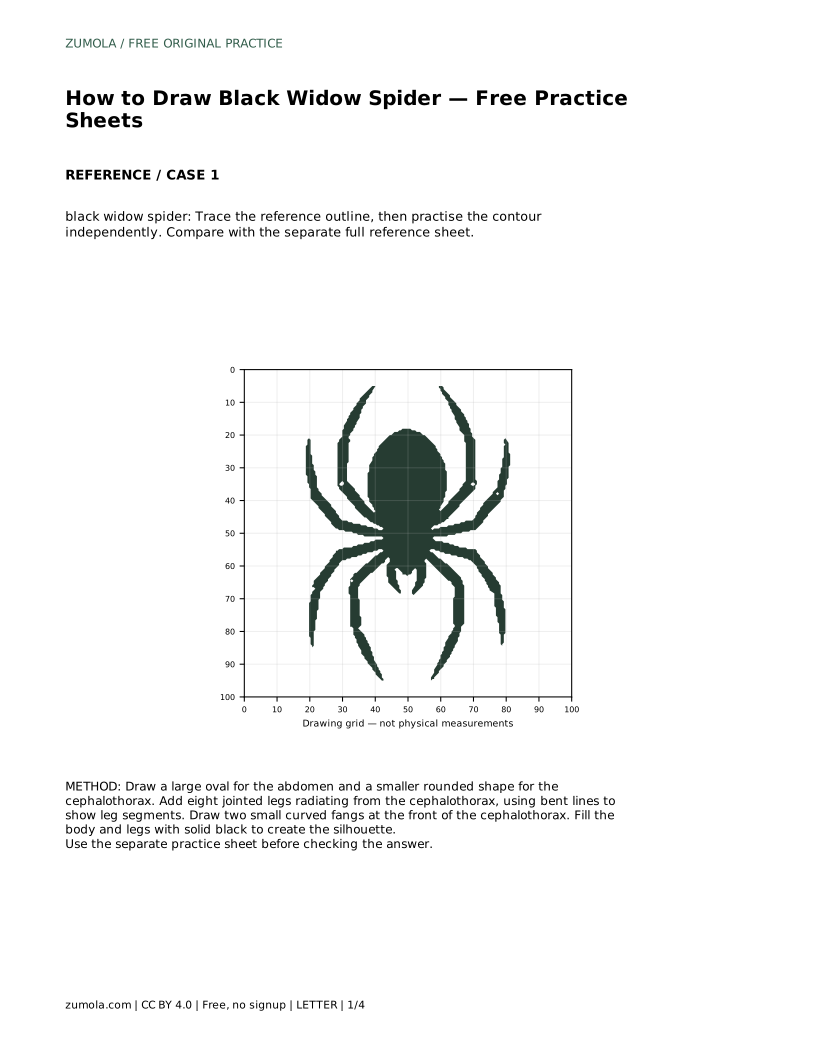
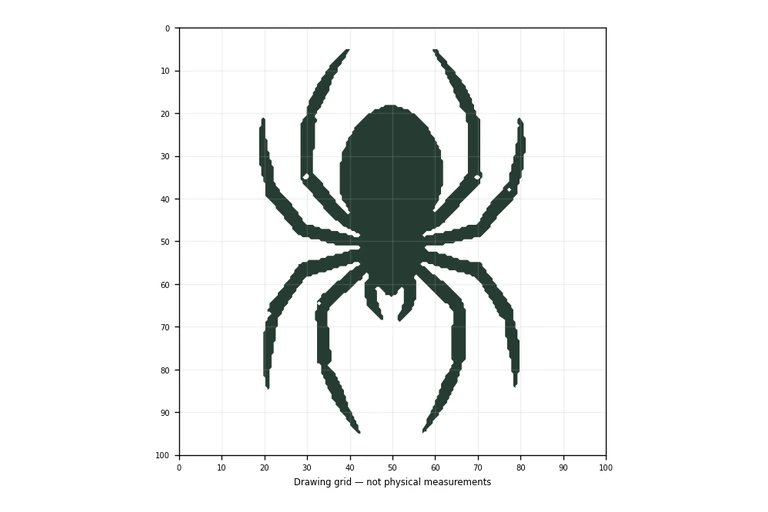
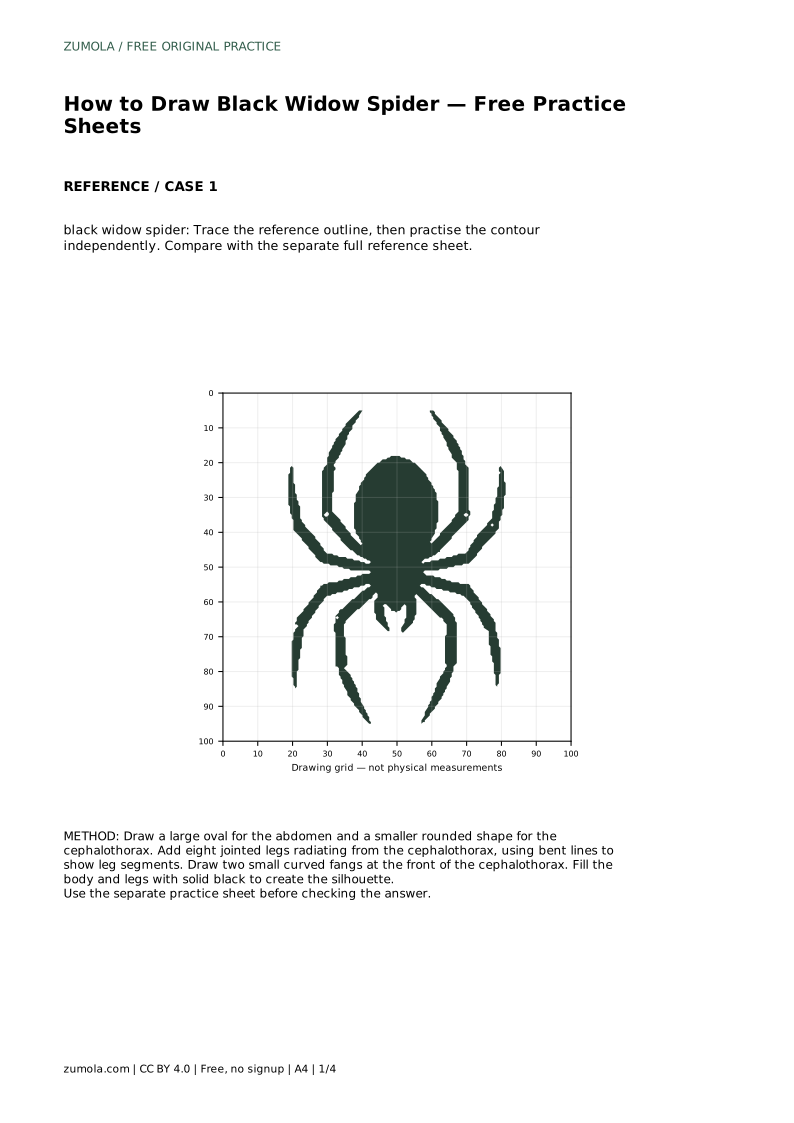
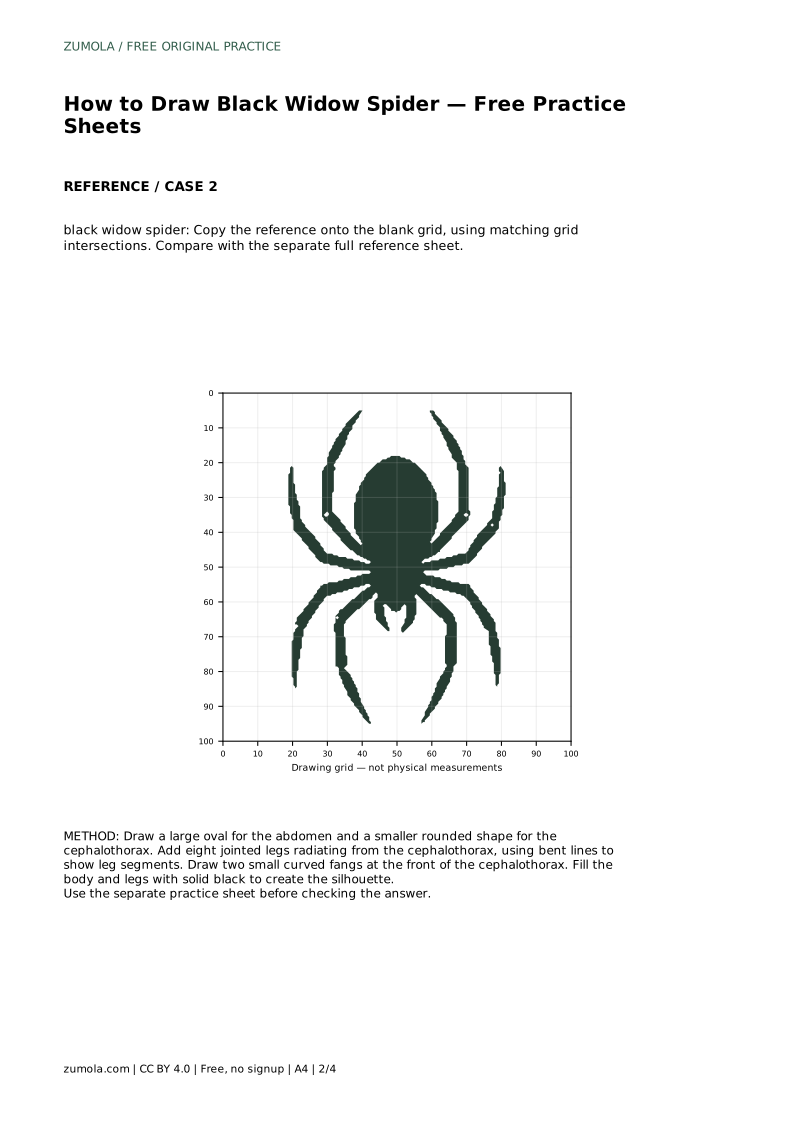
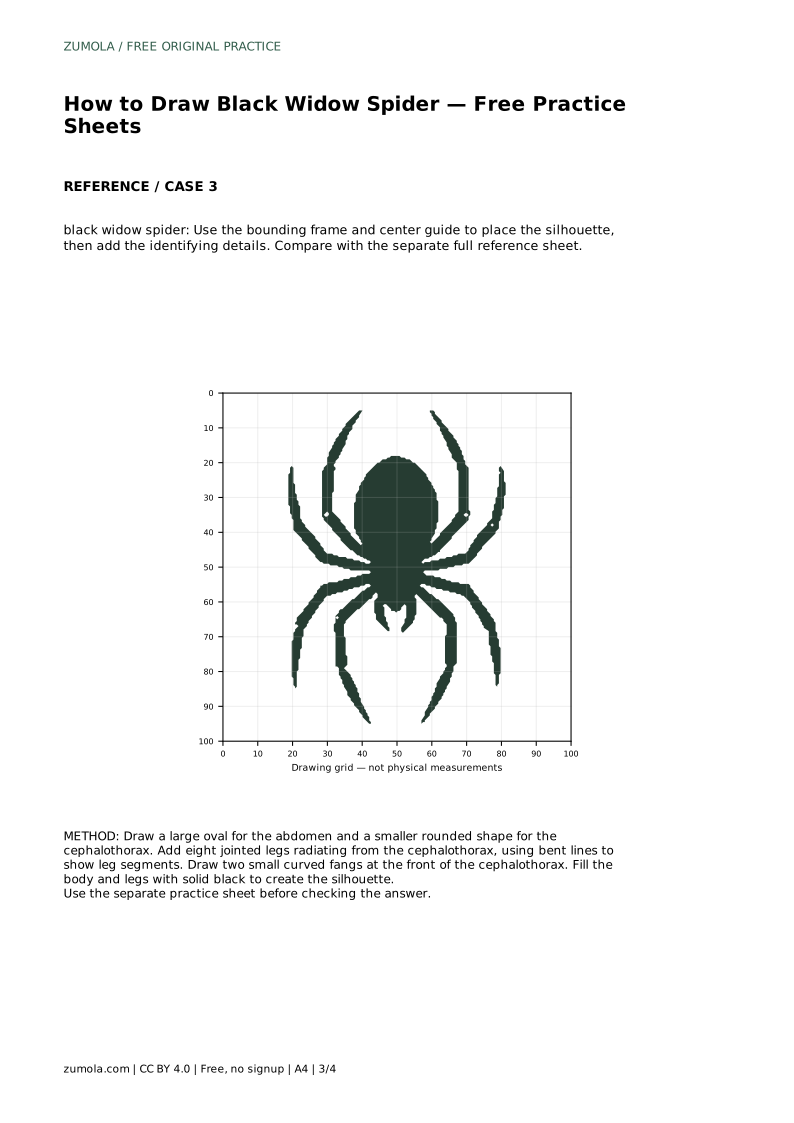
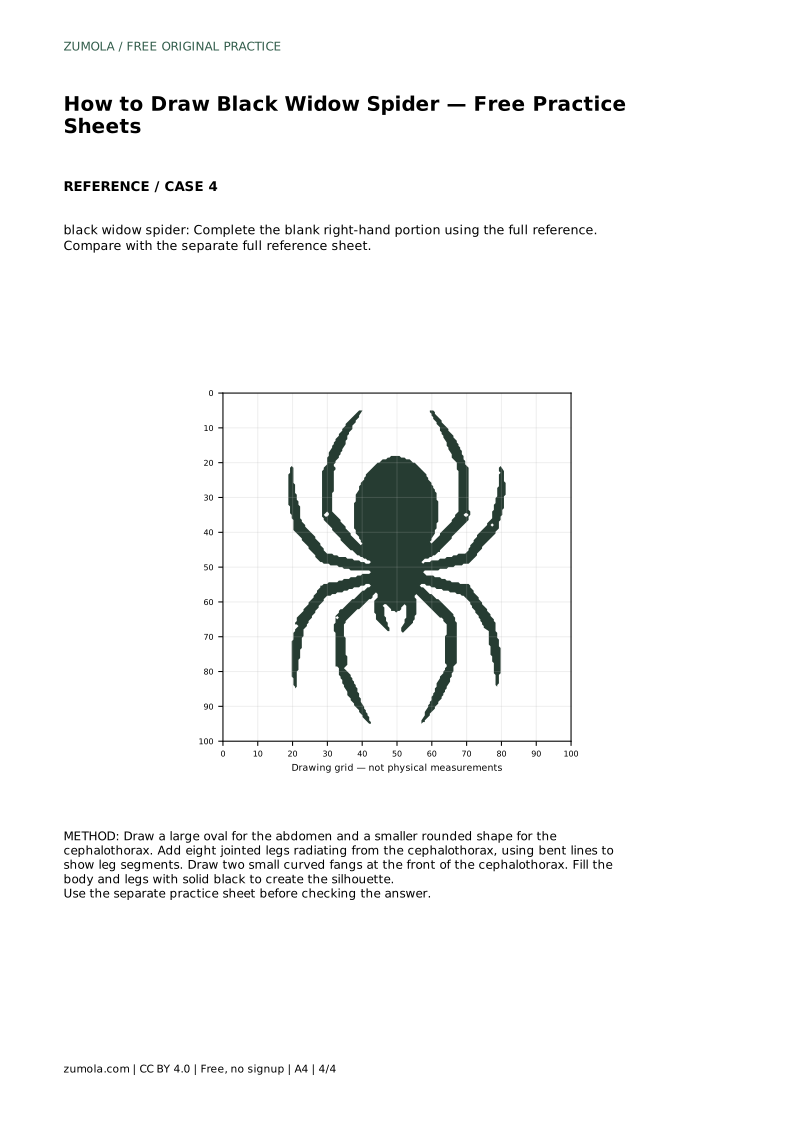
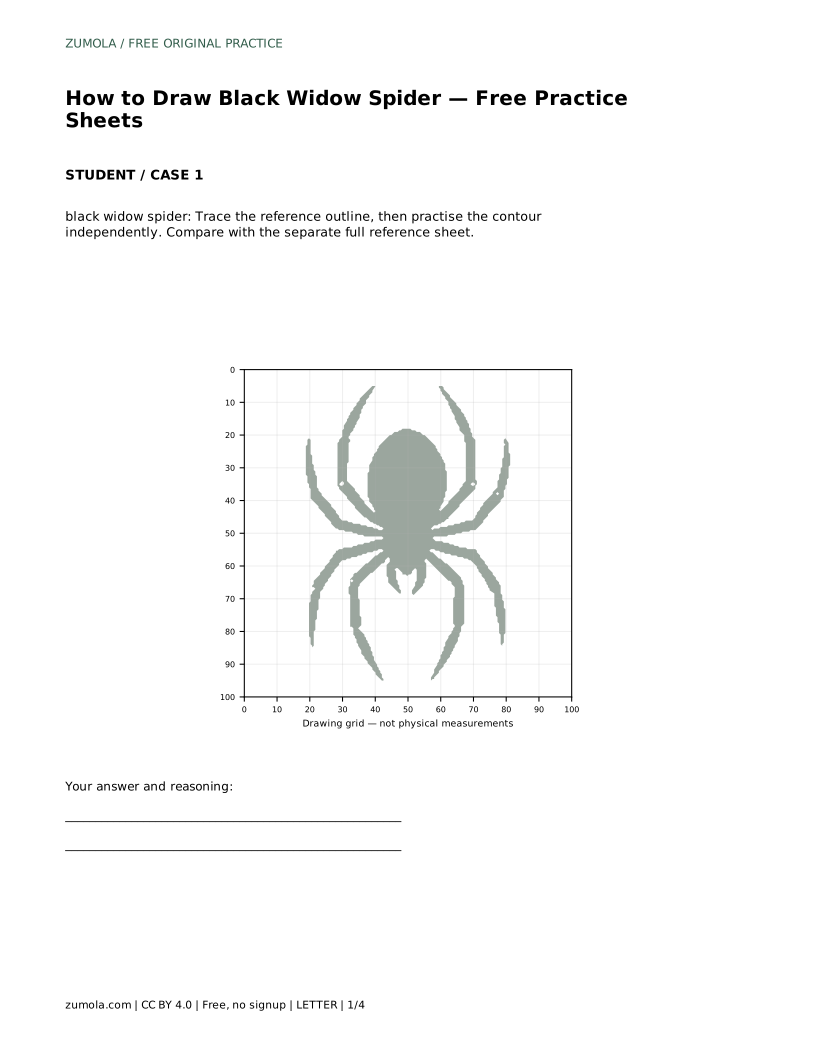
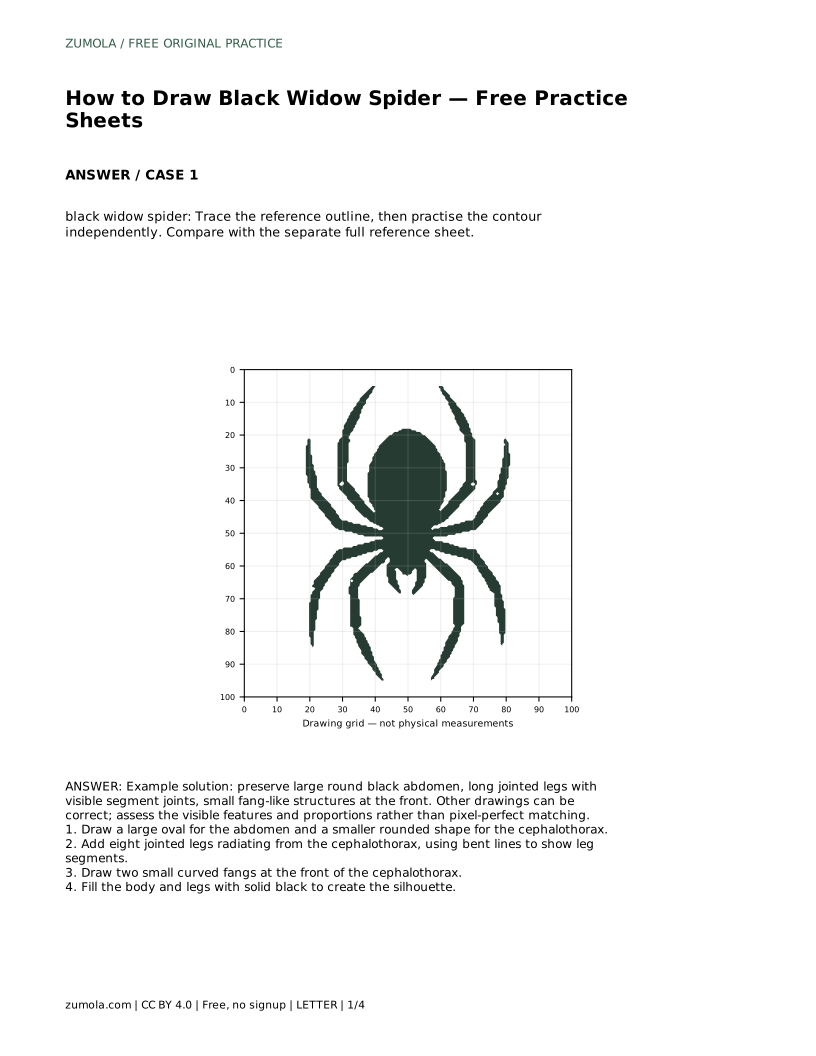
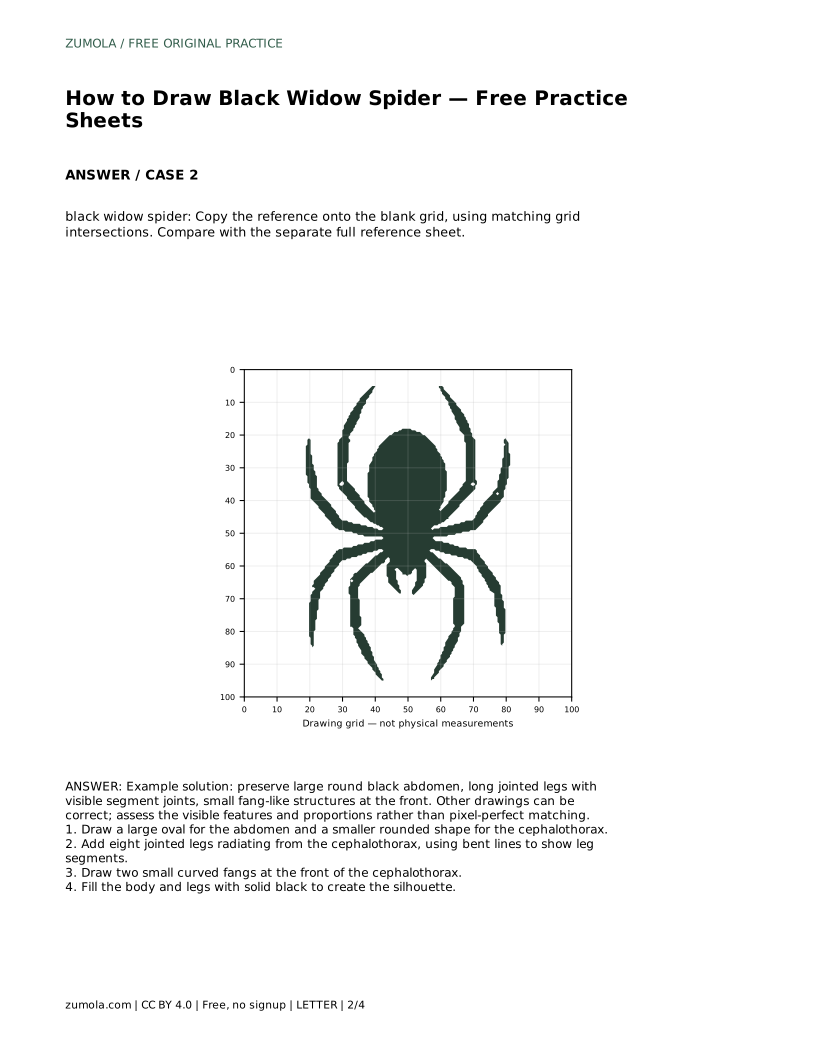
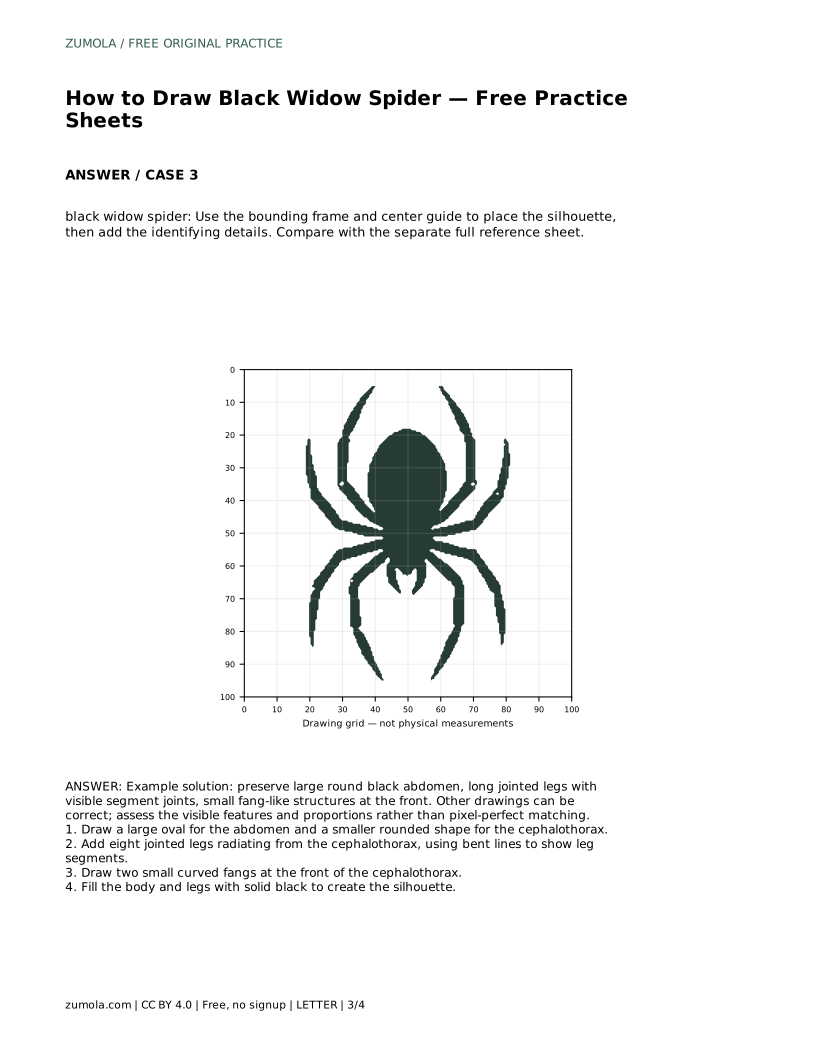
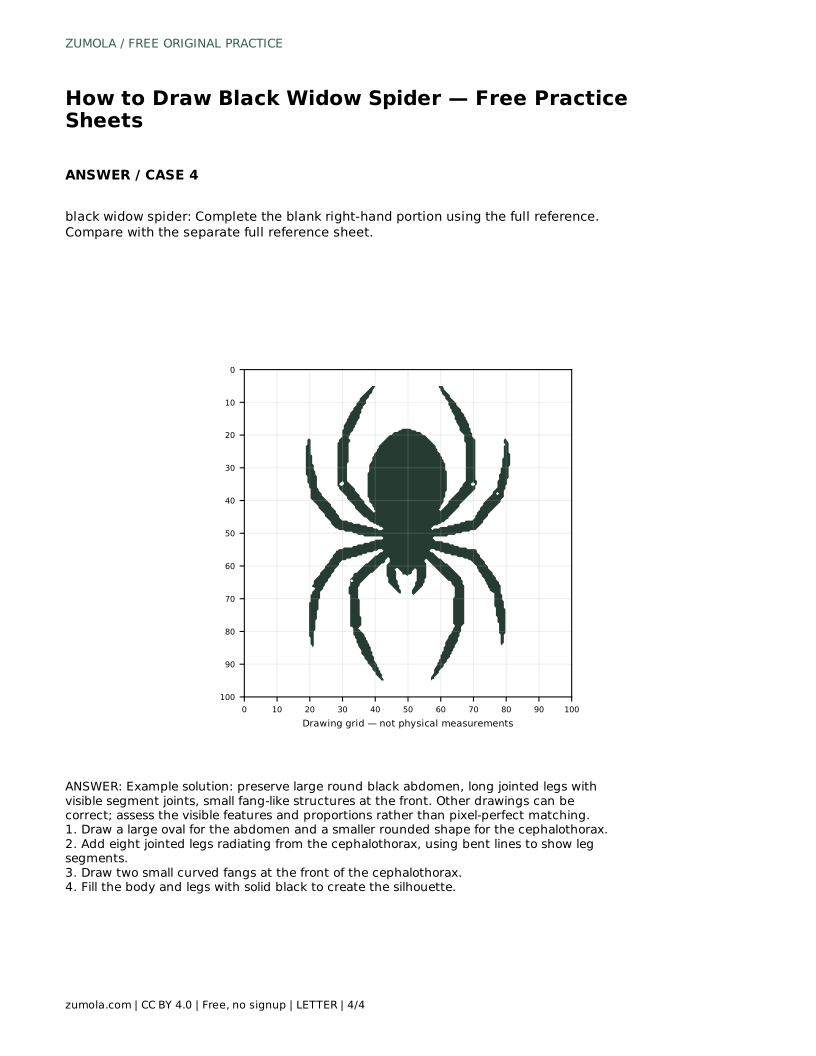
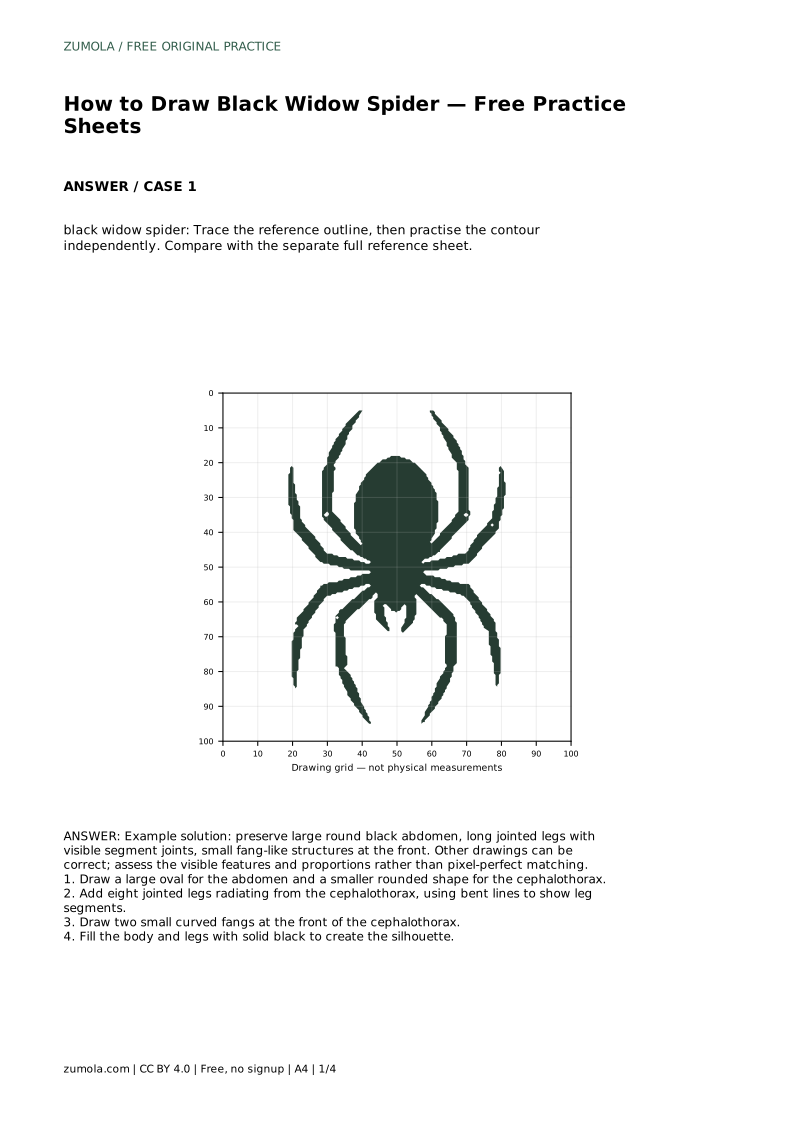
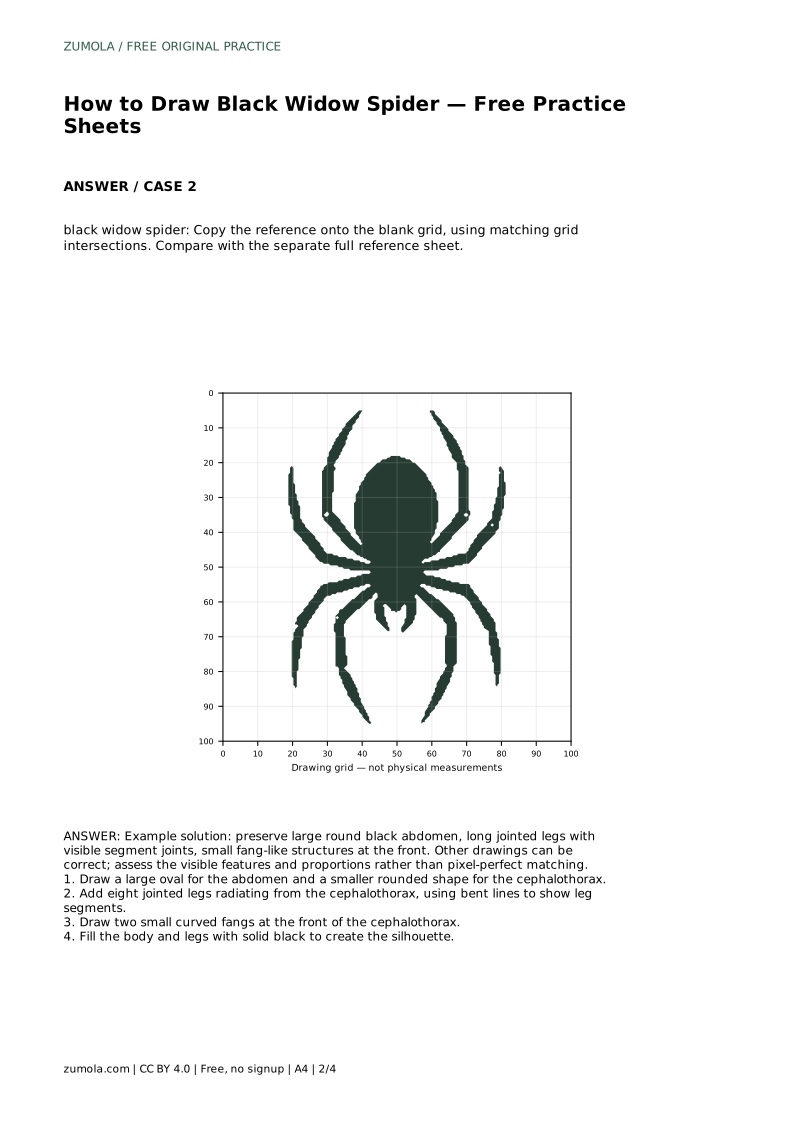
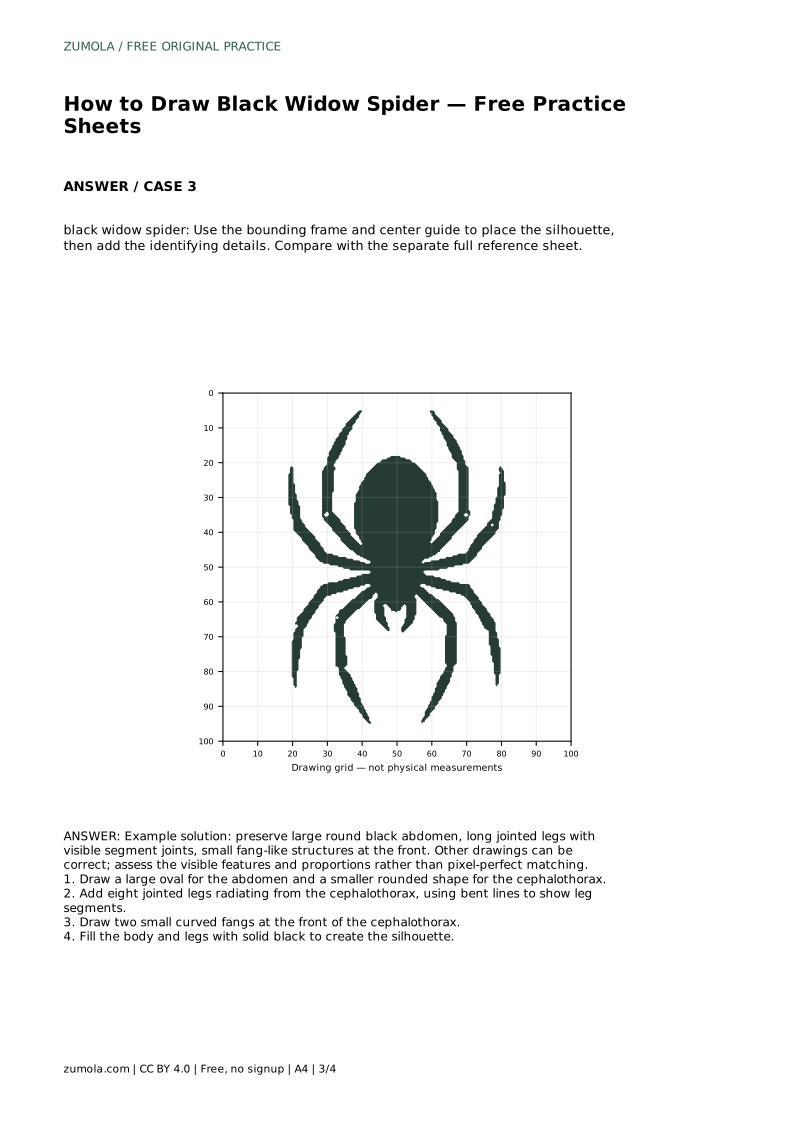
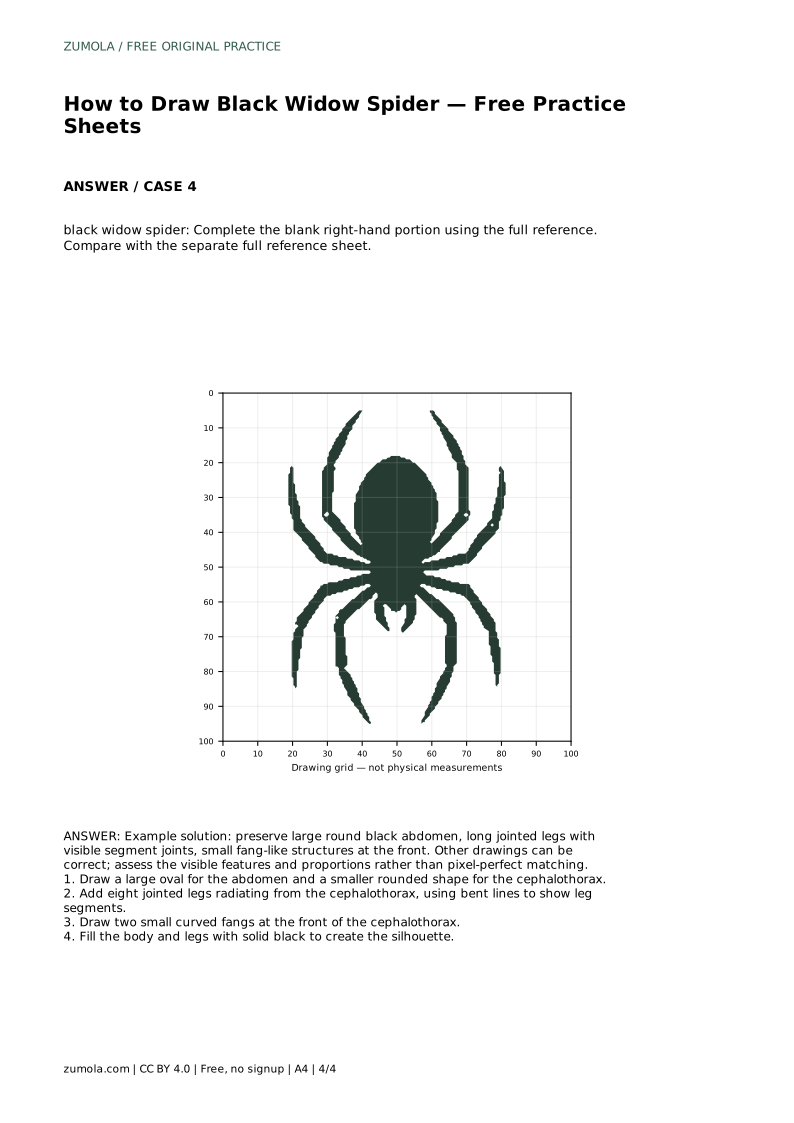
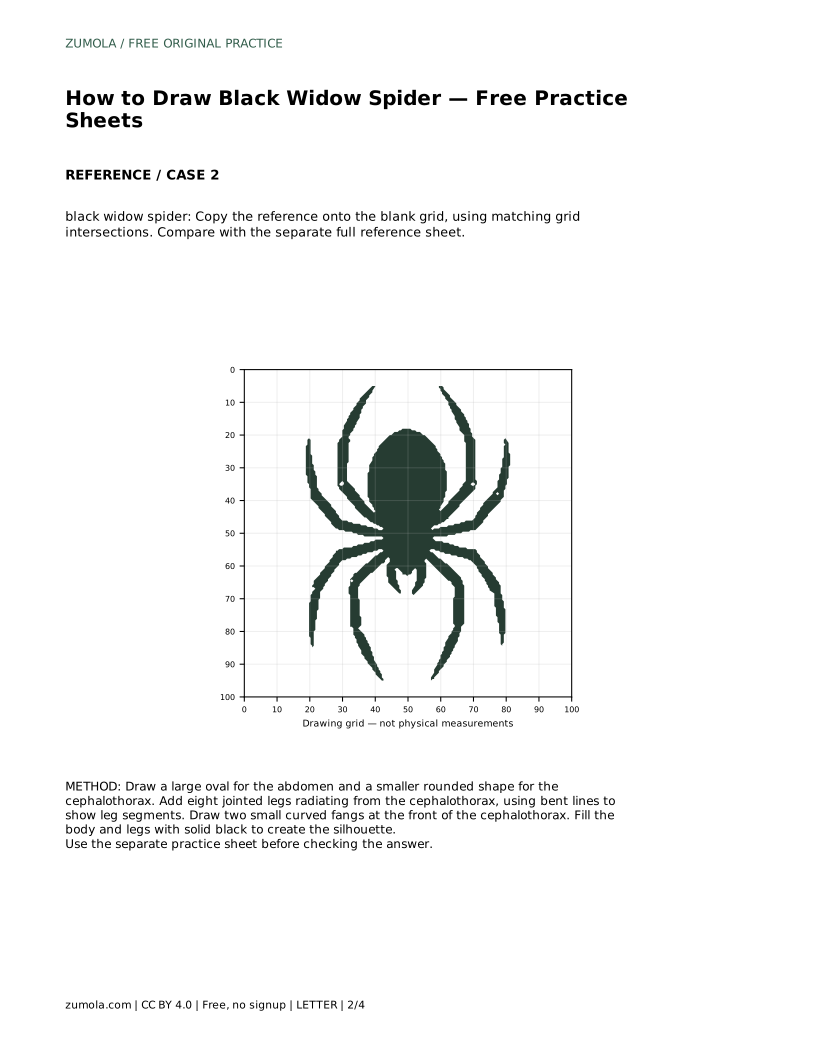
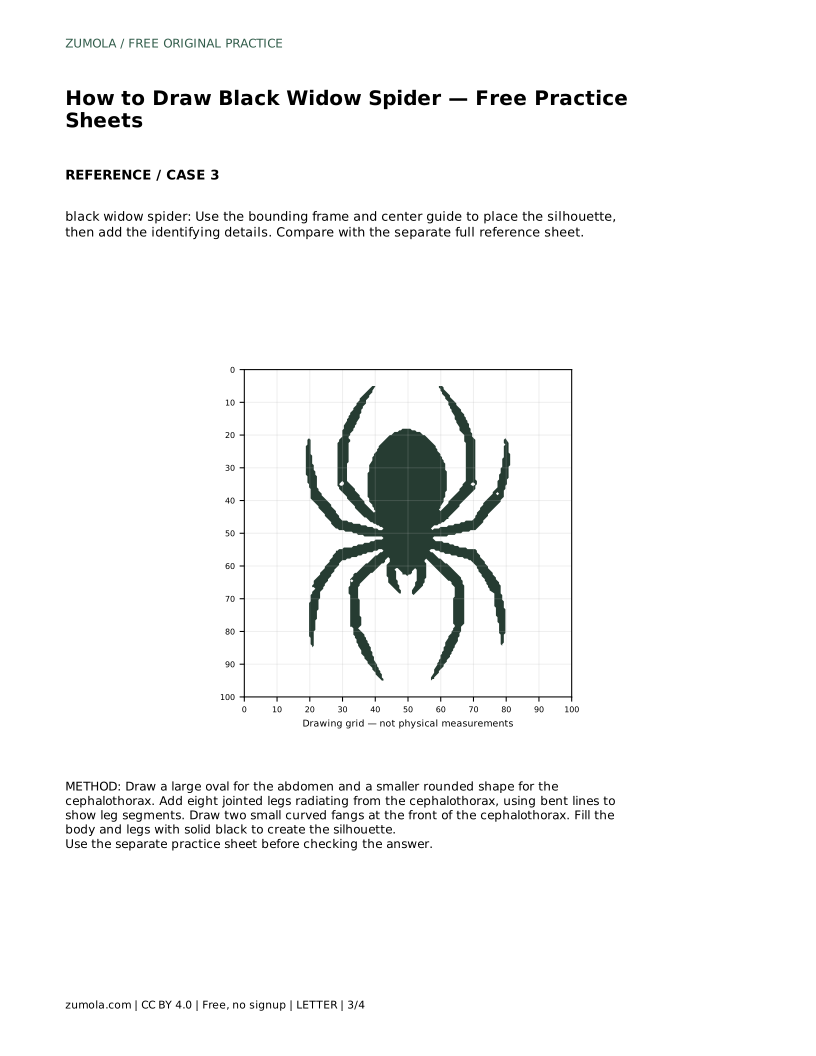
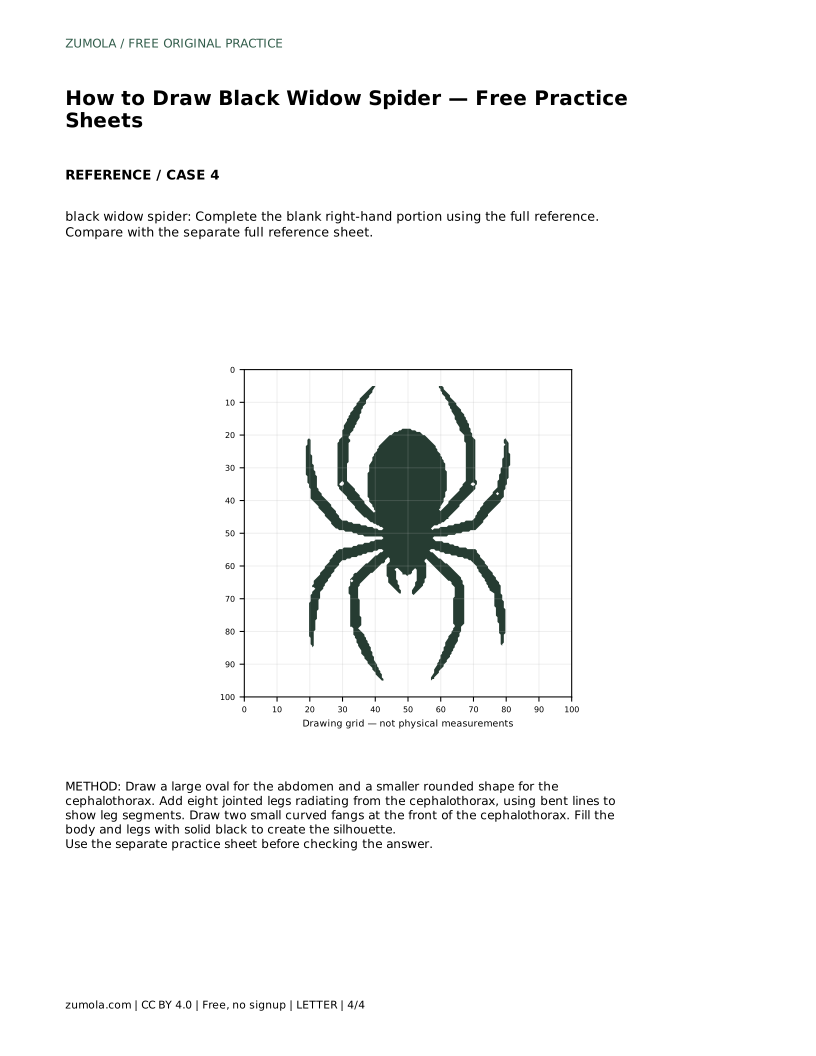
A realistic black widow drawing depends on a few clear features: a large rounded abdomen, a smaller cephalothorax, eight long jointed legs, and two small fang-like structures at the front. This page explains how to build that silhouette step by step and how to use the practice sheets to compare your drawing with a separate full reference. Because drawings can differ and still be correct, you will assess visible features and proportions rather than pixel-perfect matching.
Begin by placing the two main body shapes before any legs. Draw a large oval for the abdomen and a smaller rounded shape for the cephalothorax, the front body section where the legs attach. Keep the abdomen clearly larger than the cephalothorax; that contrast is central to the black widow silhouette.
Position the smaller shape at the front of the larger oval, touching or slightly overlapping it. Leave space around the body for the legs to extend outward. Light pencil strokes are easier to adjust than heavy ones, so keep the outline provisional until the proportions look right.
Black widows have eight legs, and each leg should read as jointed rather than as a single straight line. Radiate the legs from the cephalothorax, using bent lines to show the leg segments. A bend near the body and another farther out gives each leg a natural articulated look.
Arrange the legs in pairs, spreading them to both sides and toward the front and back. Keep the bends consistent enough that the spider looks balanced, but vary the angles slightly so the legs do not appear mechanical. Count the legs before moving on; eight is the correct number.
At the front of the cephalothorax, draw two small curved fangs. Keep them small relative to the body; they are identifying details, not dominant features. Once the body, legs, and fangs are placed, fill the body and legs with solid black to create the silhouette.
Fill carefully around the leg joints so the segments remain visible rather than merging into one dark mass. Step back and compare your drawing with the separate full reference sheet, checking the large abdomen, the eight jointed legs, and the small front fangs.
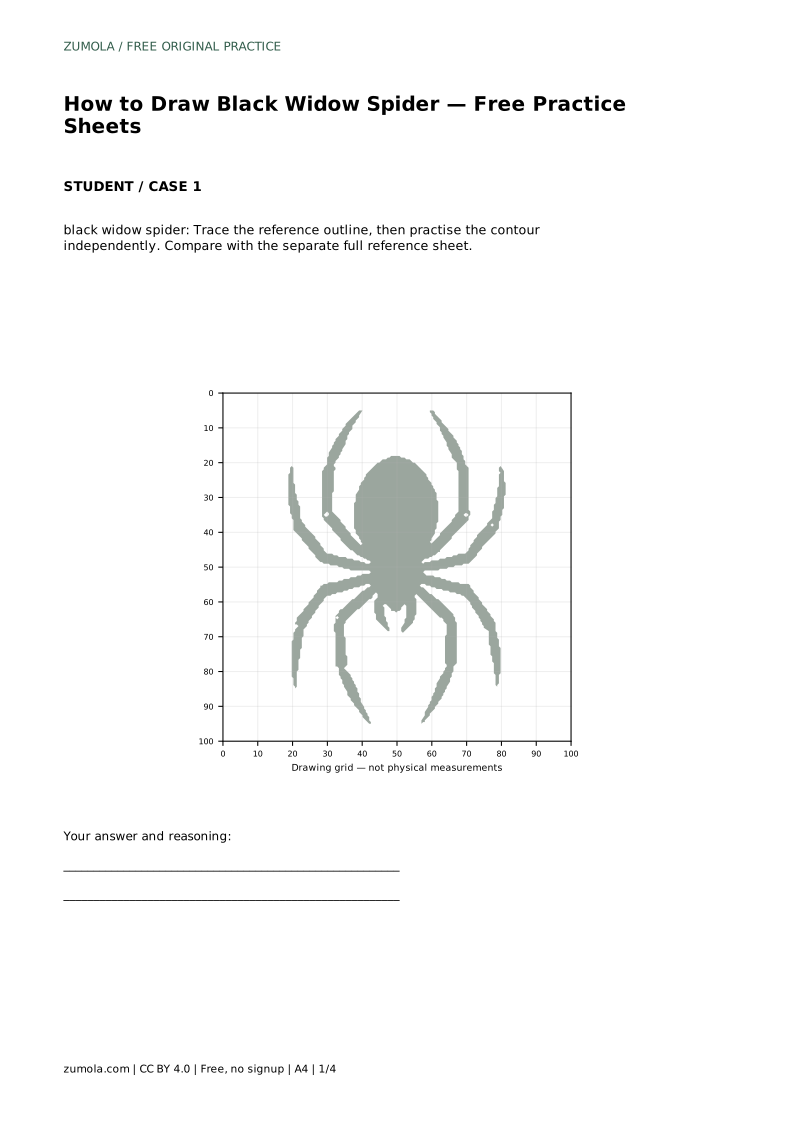
black widow spider: Trace the reference outline, then practise the contour independently. Compare with the separate full reference sheet.
Example solution: preserve large round black abdomen, long jointed legs with visible segment joints, small fang-like structures at the front. Other drawings can be correct; assess the visible features and proportions rather than pixel-perfect matching. Draw a large oval for the abdomen and a smaller rounded shape for the cephalothorax. Add eight jointed legs radiating from the cephalothorax, using bent lines to show leg segments. Draw two small curved fangs at the front of the cephalothorax. Fill the body and legs with solid black to create the silhouette.
Eight legs, arranged as four on each side of the cephalothorax, each drawn with visible joint bends.
No. Other drawings can be correct. Assess the visible features and proportions, such as the large round abdomen, jointed legs, and small front fangs, rather than pixel-perfect matching.
Draw two small curved fangs at the front of the cephalothorax, kept small relative to the body.
All drawing practice · Free coordinate paper
Original resources · CC BY 4.0 · Free for personal and classroom use with attribution.