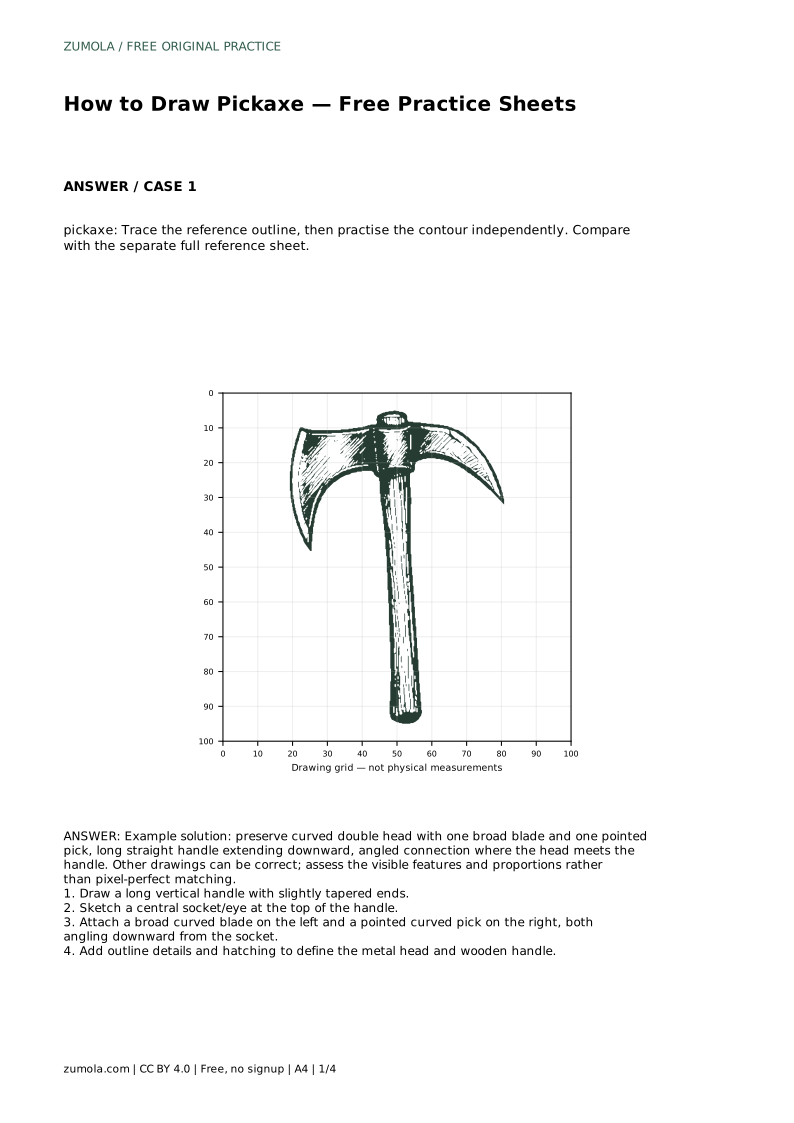
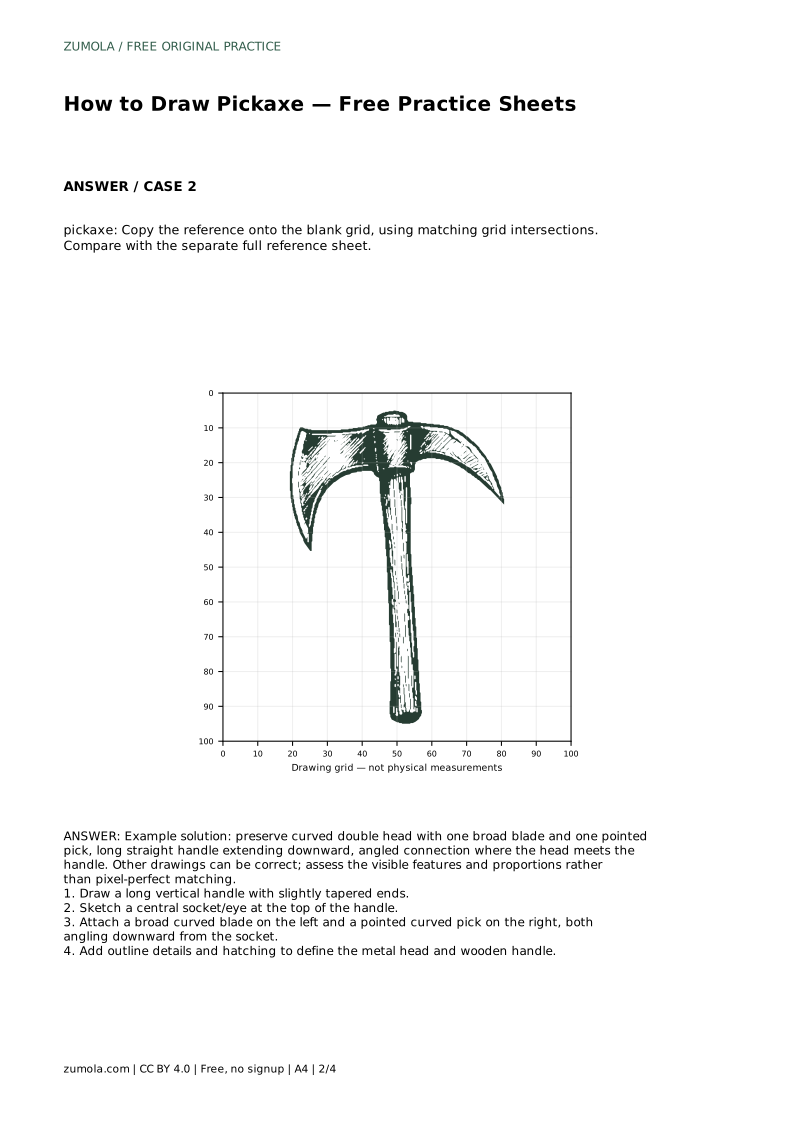
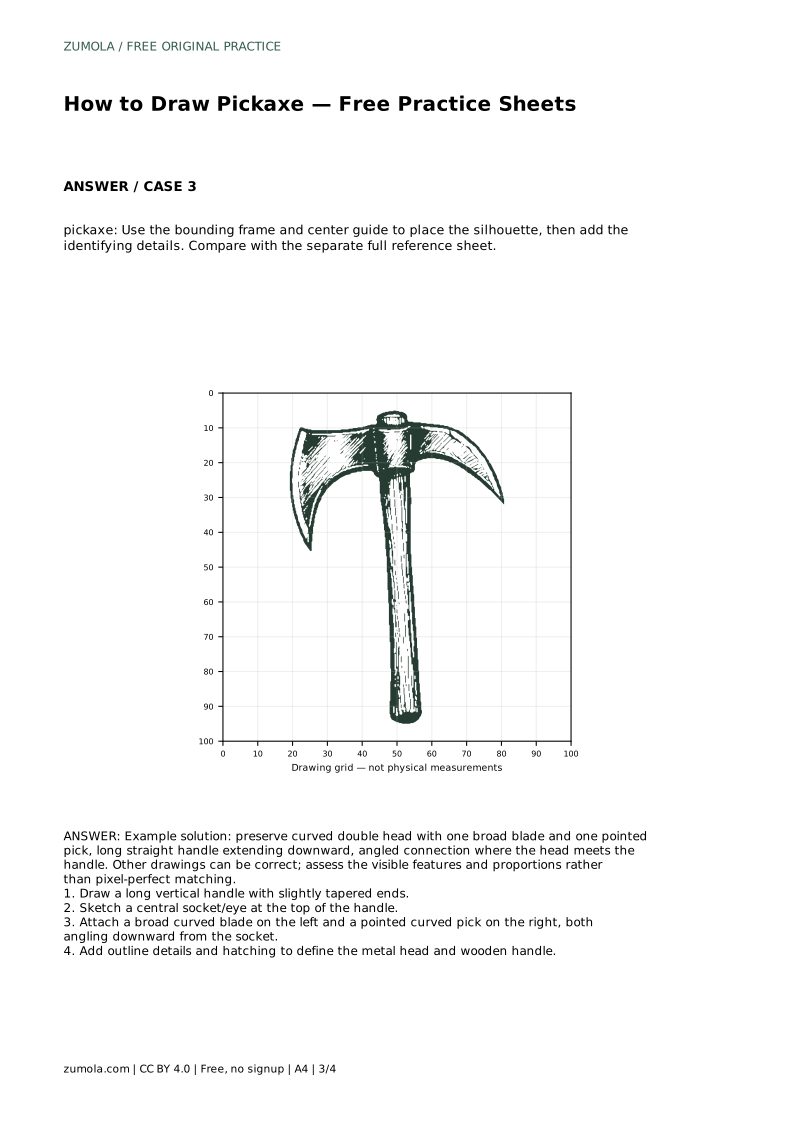
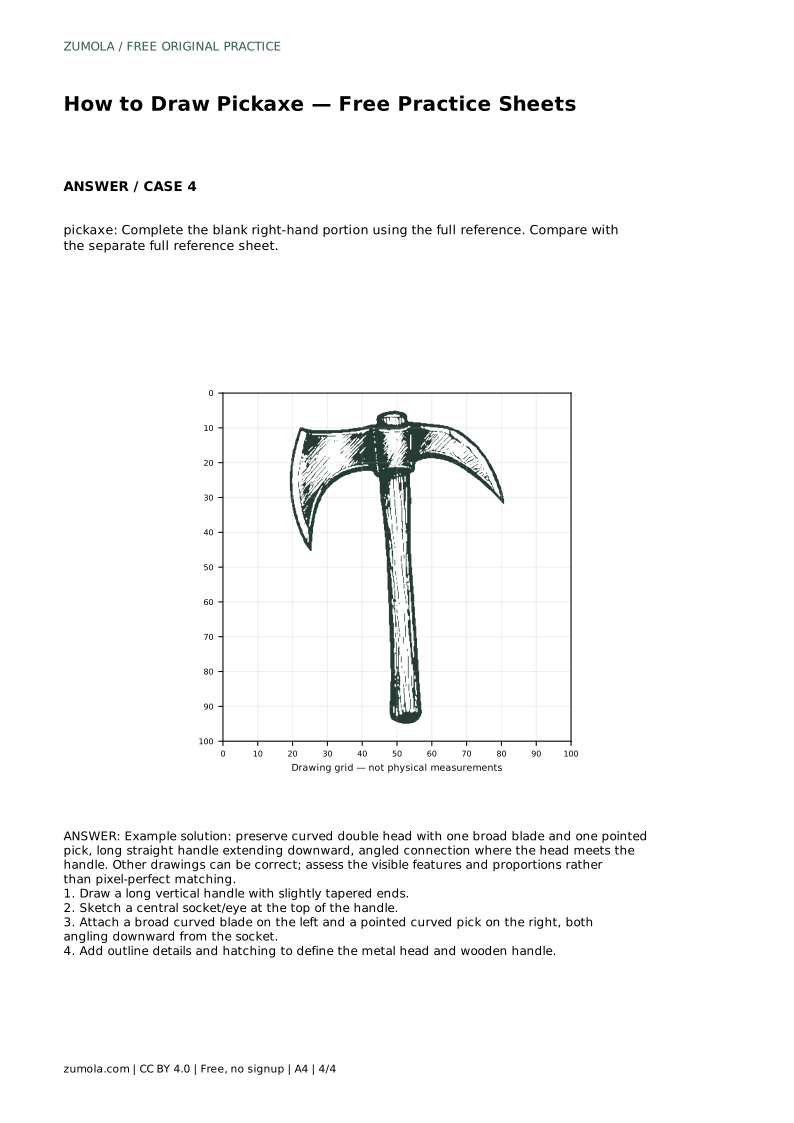
Reference diagrams
LETTER · Download PDF
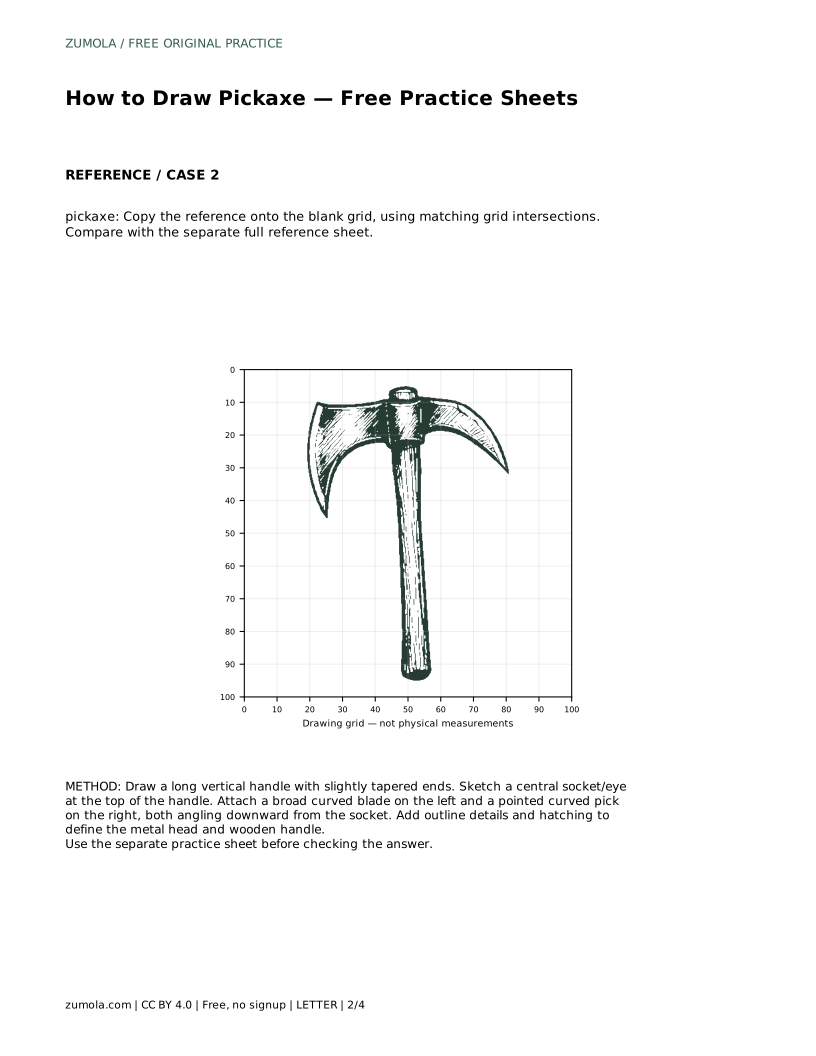
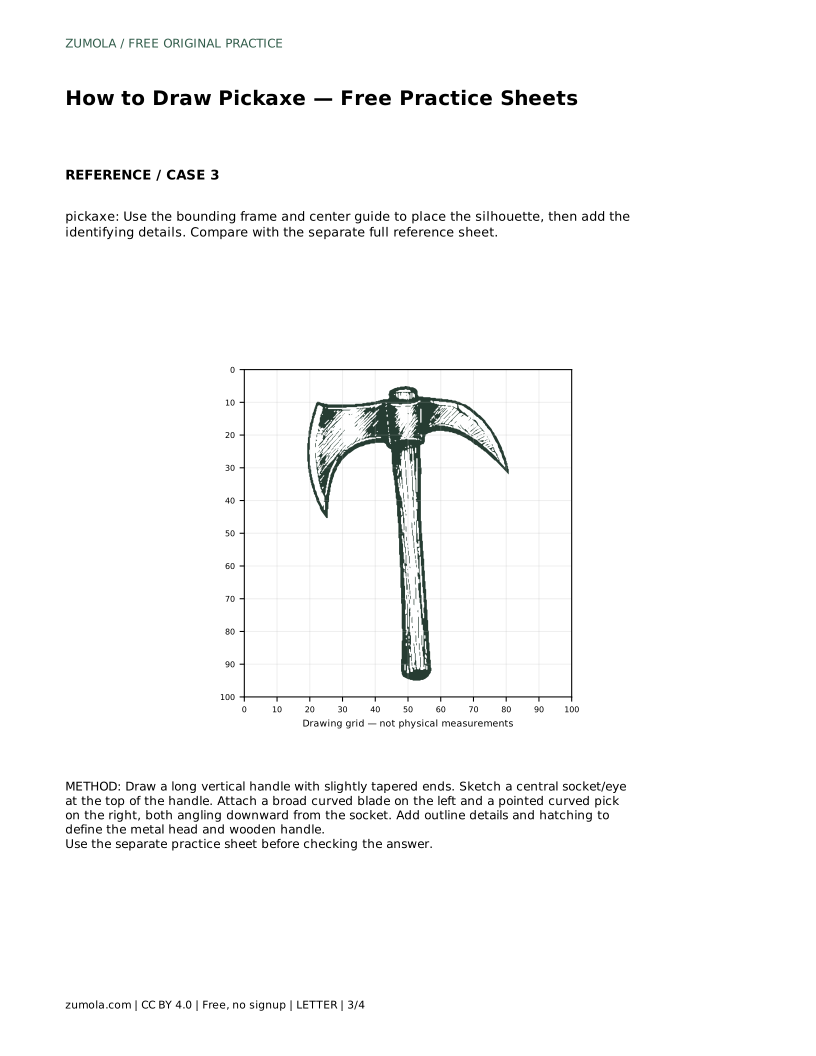
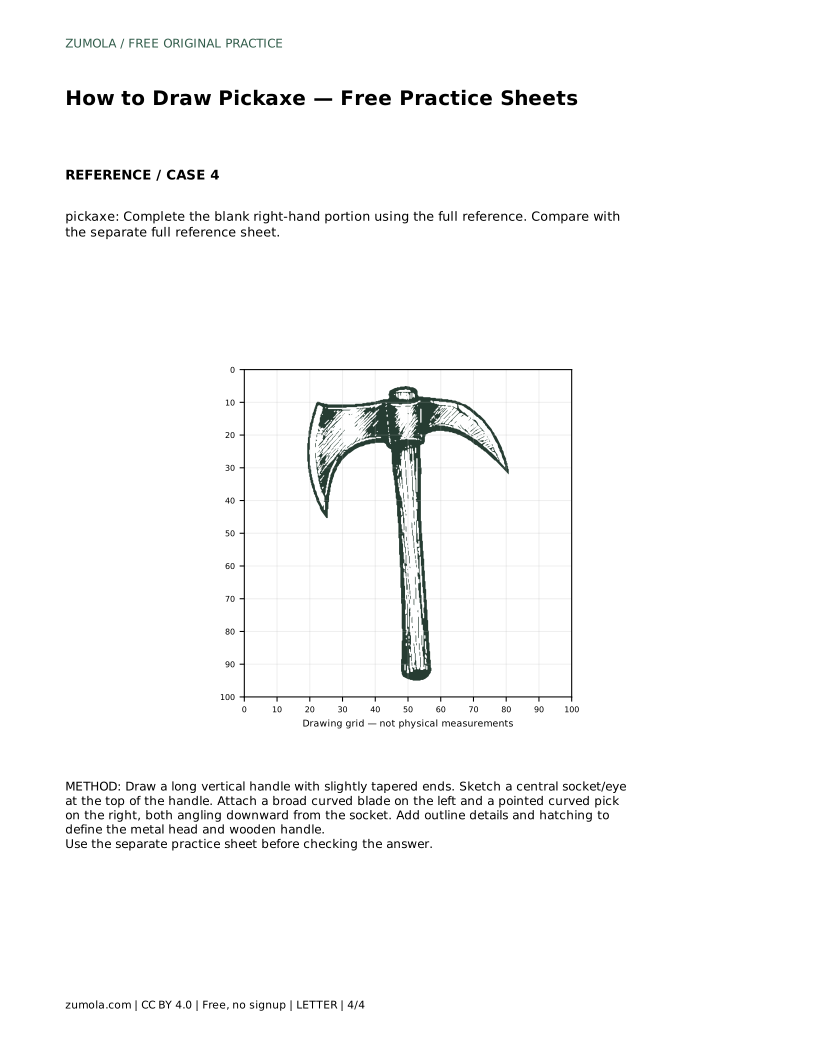
A4 · Download PDF
Free original resources
Learn to draw a pickaxe by building the handle, socket, broad blade and pointed pick in order. Practise with tracing, grid and partial-reference sheets.
Four original cases, with reference diagrams, practice sheets and worked answers. Everything is free; no signup required.
LETTER · Download PDF
A4 · Download PDF
LETTER · Download PDF
A4 · Download PDF
LETTER · Download PDF
A4 · Download PDF
Use A4 or US Letter to match your printer. Use the stated values and conditions to solve each exercise; diagrams are not physical measuring rulers.
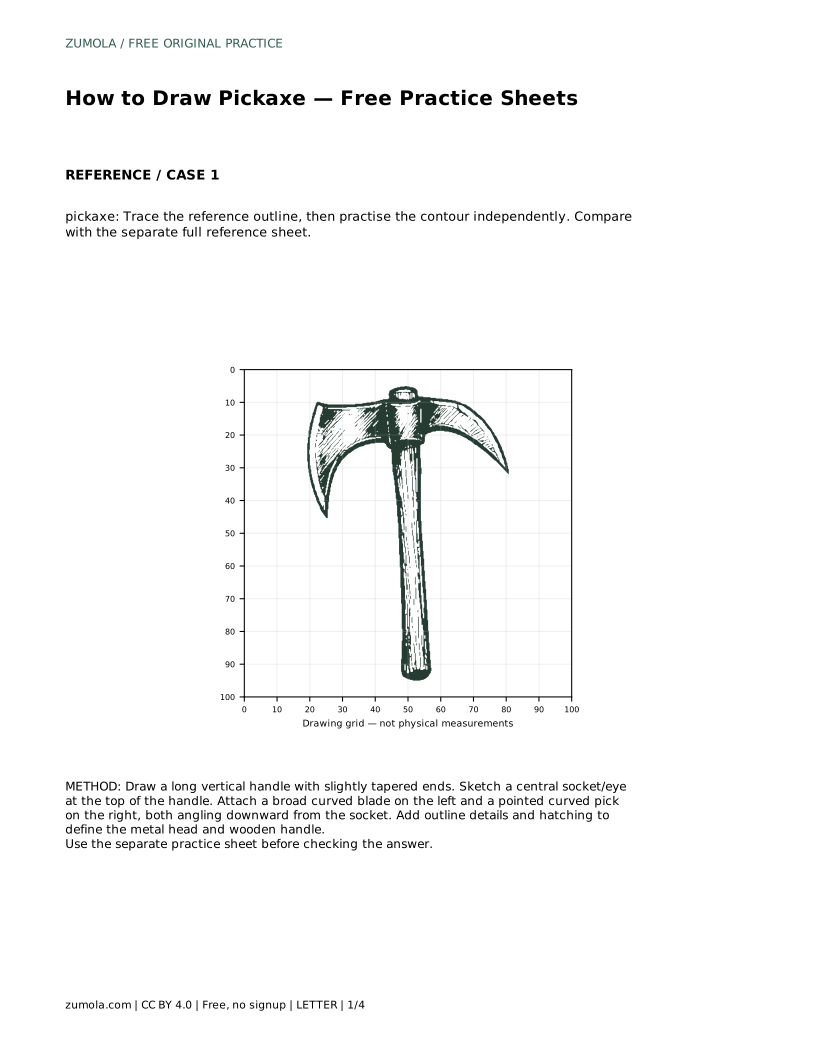
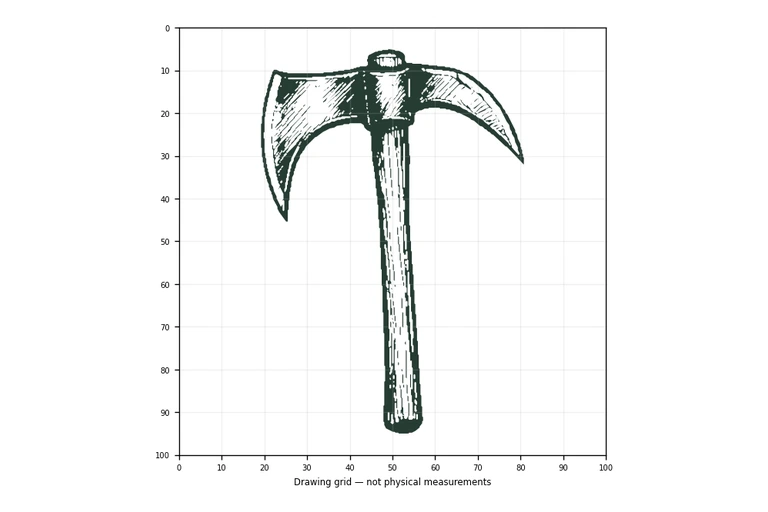
A pickaxe is easy to recognise but surprisingly easy to draw lopsided. The head has two different ends, and the handle meets it at an angle rather than straight through the middle. This guide breaks the drawing into a clear order: handle first, then the central socket, then each end of the head. You can use the practice sheets to trace the outline, copy it onto a grid, or complete a partly drawn version, then check your work against the full reference.
Begin with the long handle because it sets the overall direction of the tool. Draw a vertical line with slightly tapered ends, wider near the top where the head attaches and narrower toward the base. Keep the sides roughly parallel so the handle reads as a solid shaft rather than a wedge.
At the top of the handle, sketch a small central socket, sometimes called the eye. This is the block where the metal head passes through or attaches. It should sit at the top of the shaft and be wide enough to support both ends of the head. Placing this socket before the blades keeps the two sides balanced.
A pickaxe head is not symmetrical. One side is a broad blade, often curved and wider at the cutting edge. The other side is a pointed pick that tapers to a tip. Both ends angle downward from the socket, which gives the tool its characteristic arched shape.
Draw the broad blade on one side first, curving it outward and down. Then draw the pointed pick on the other side, narrowing it steadily to a tip. Keep the two ends at a similar height so the head looks balanced, even though their shapes differ. The angle where each end meets the socket should look deliberate, not pinched.
Once the silhouette is in place, add details that separate metal from wood. Outline the socket clearly, add a few lines along the handle to suggest grain, and use light hatching on the head to show its curve. Keep detail lines following the form rather than crossing it at random.
If you are using a practice sheet, compare your drawing with the separate full reference sheet only after you finish. Look at the overall proportions first, then the shape of each end, then the connection at the socket. Small differences are fine; the drawing should read as a pickaxe, not match every pixel.
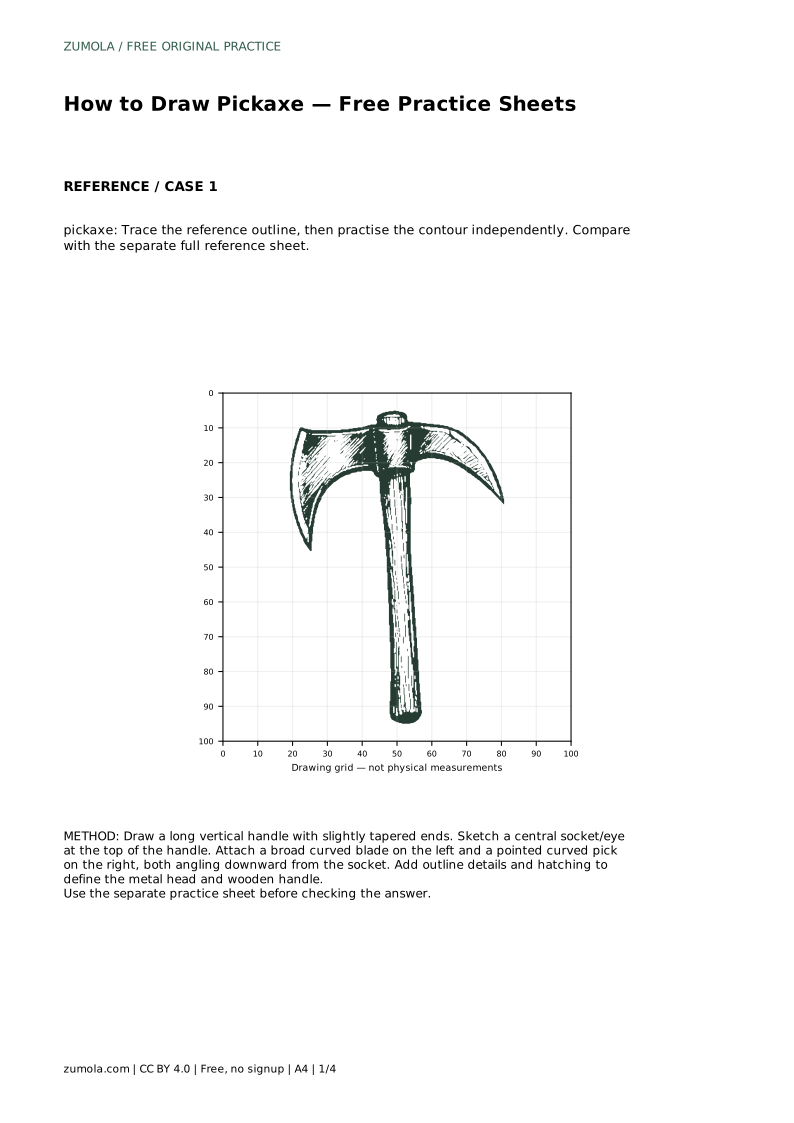
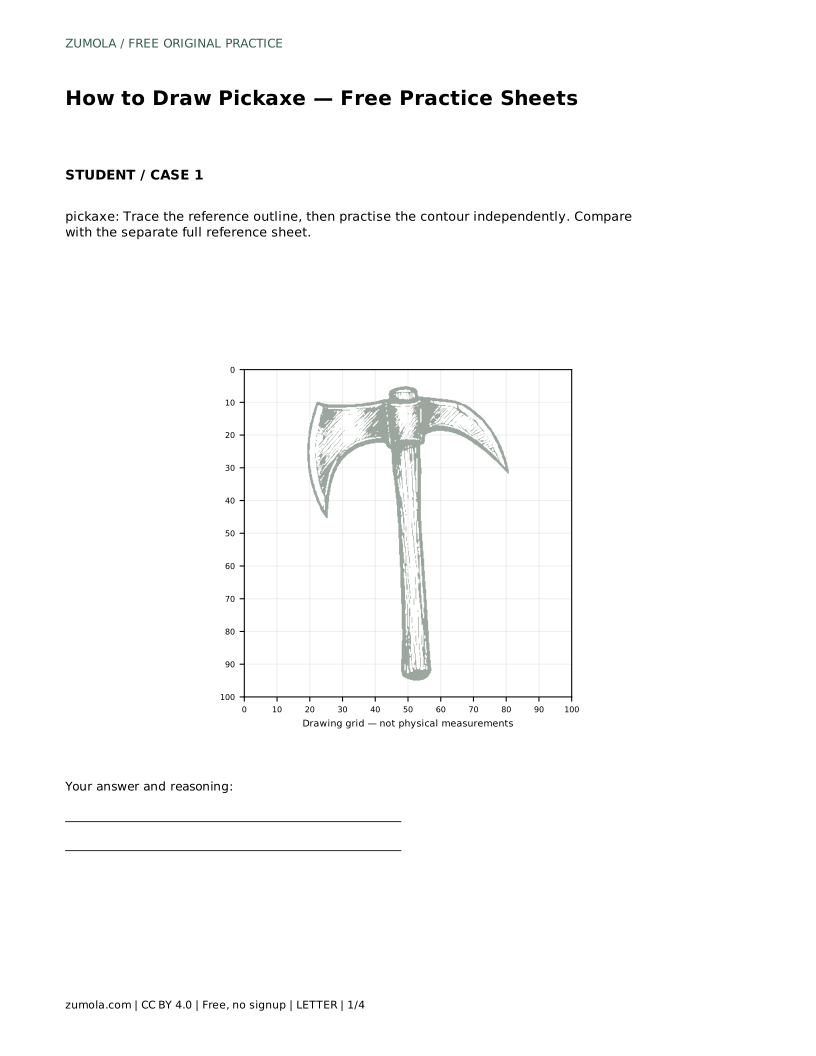
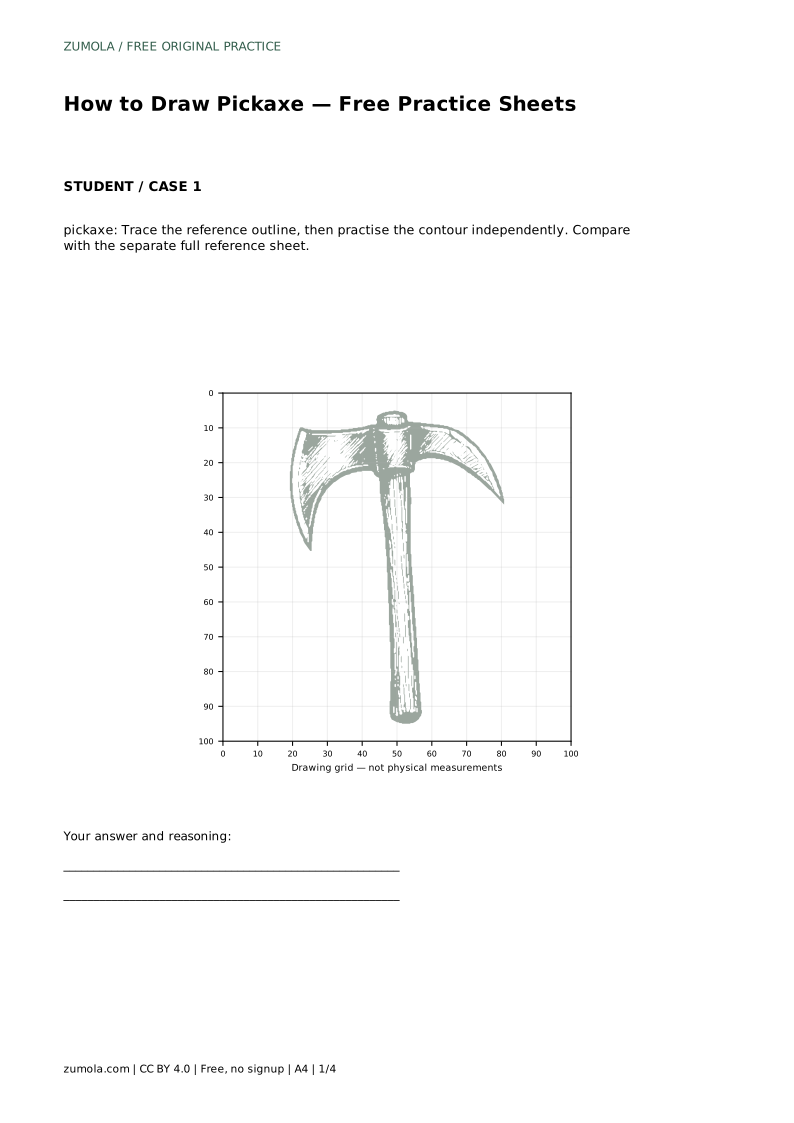
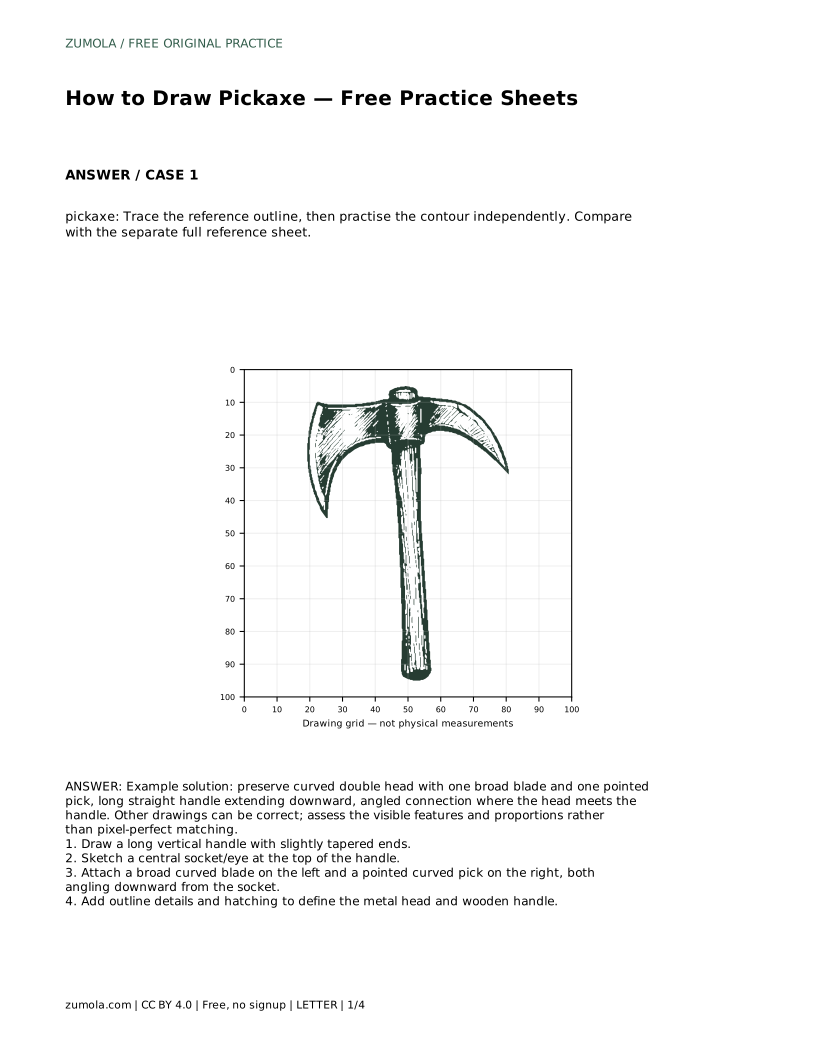
pickaxe: Trace the reference outline, then practise the contour independently. Compare with the separate full reference sheet.
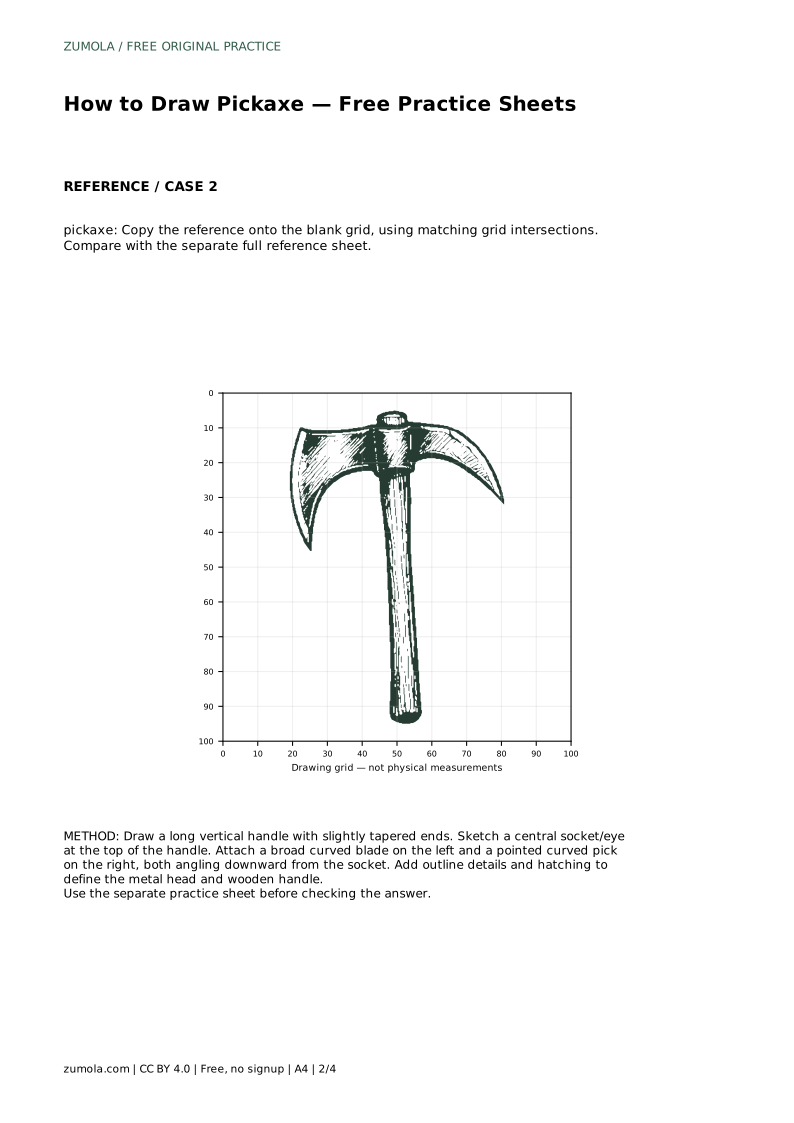
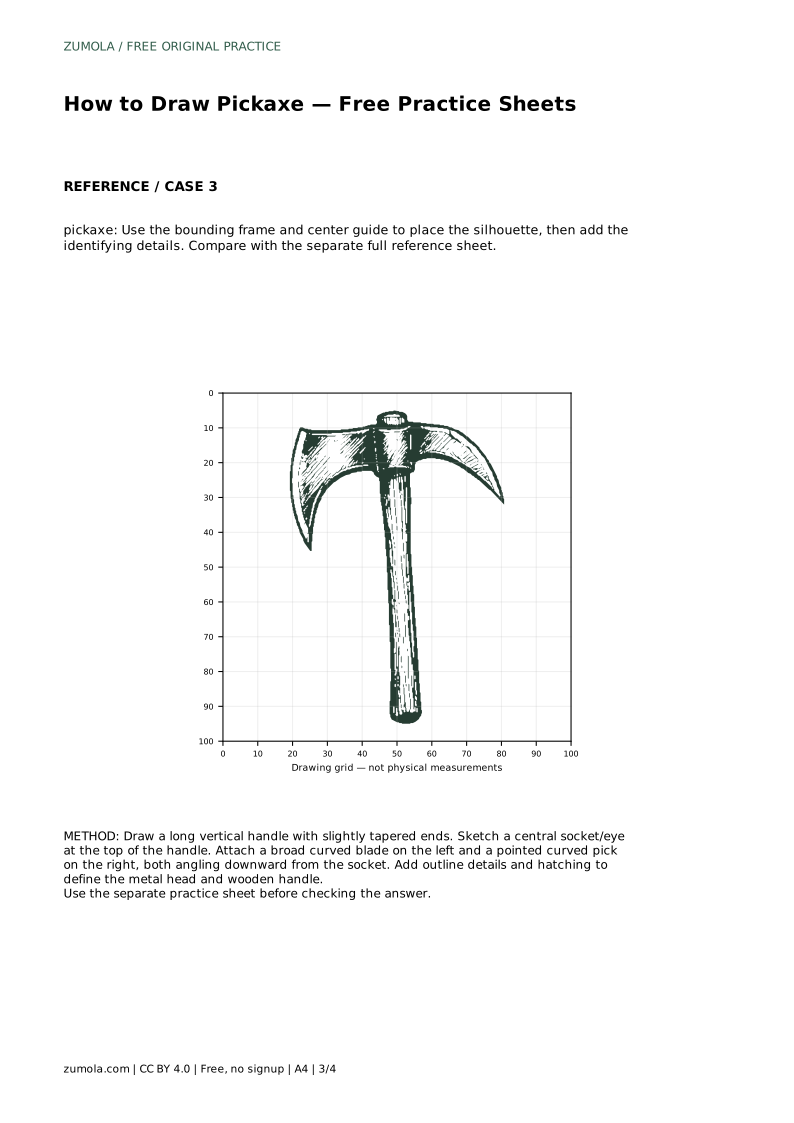
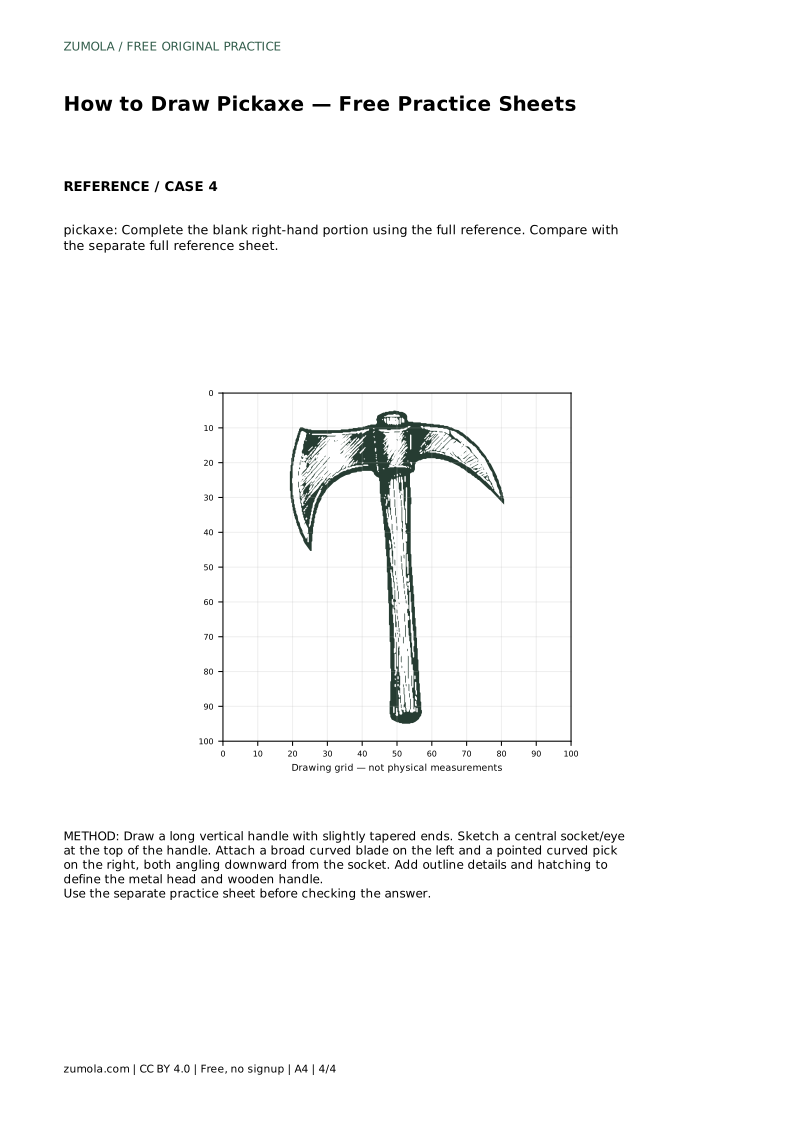
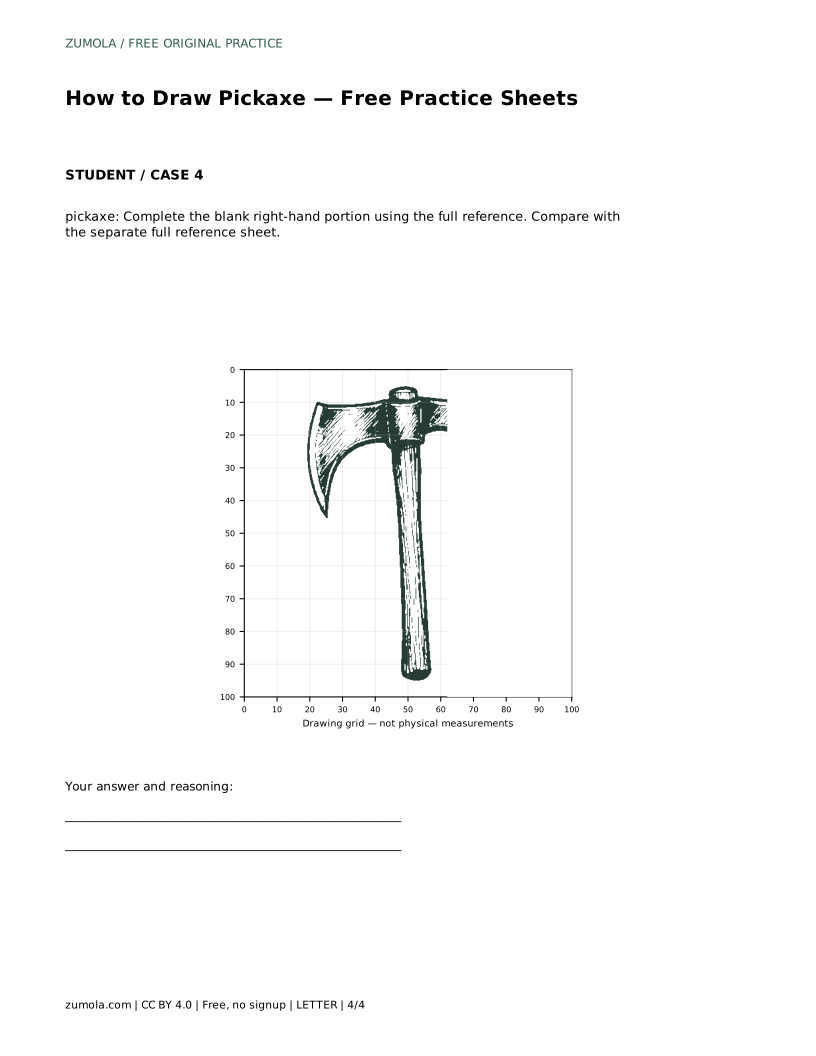
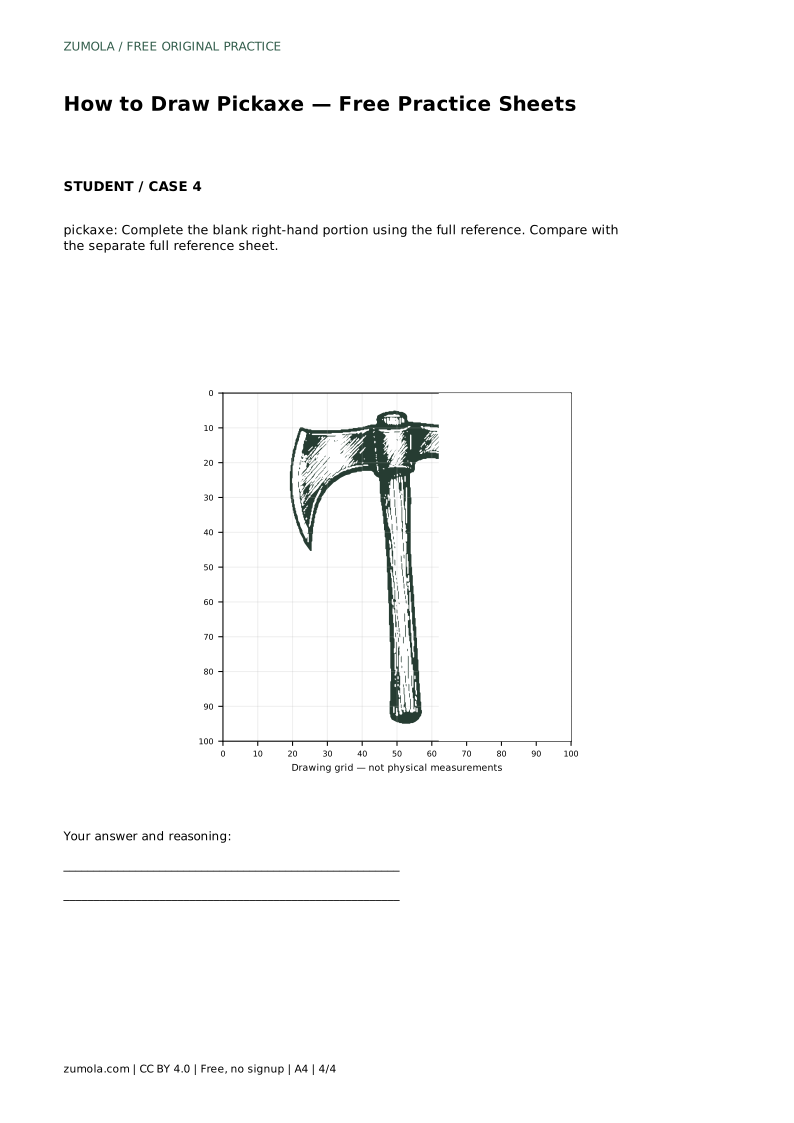
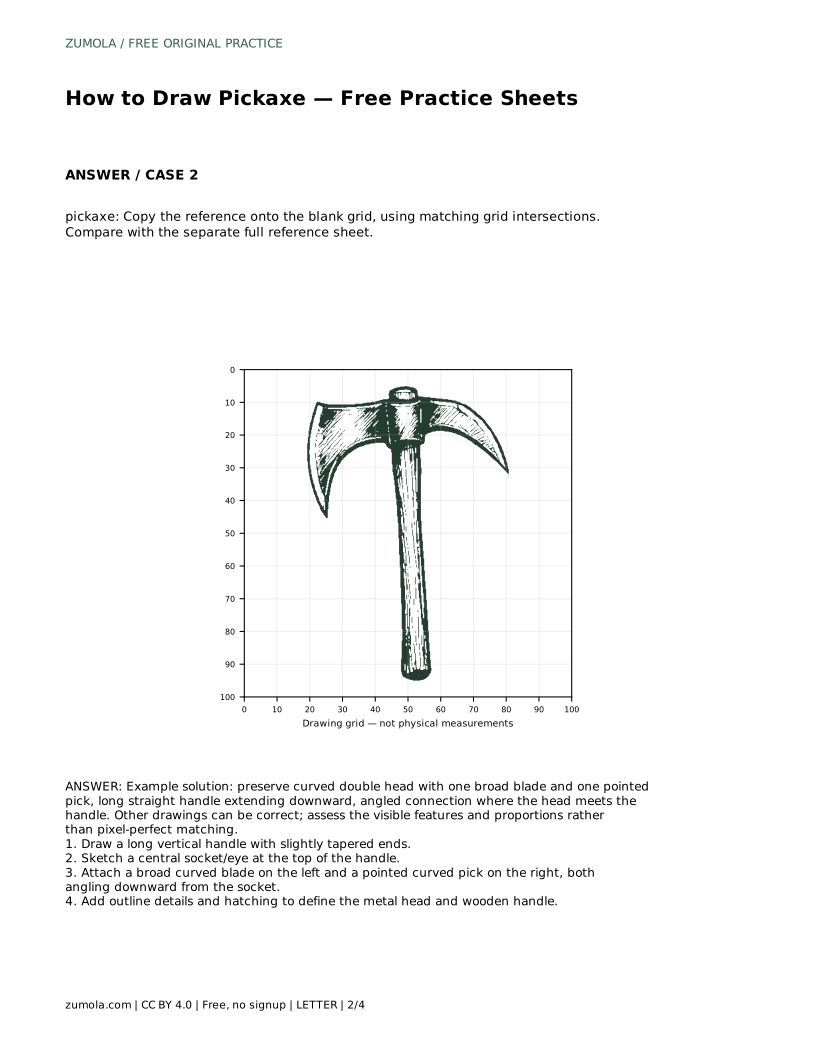
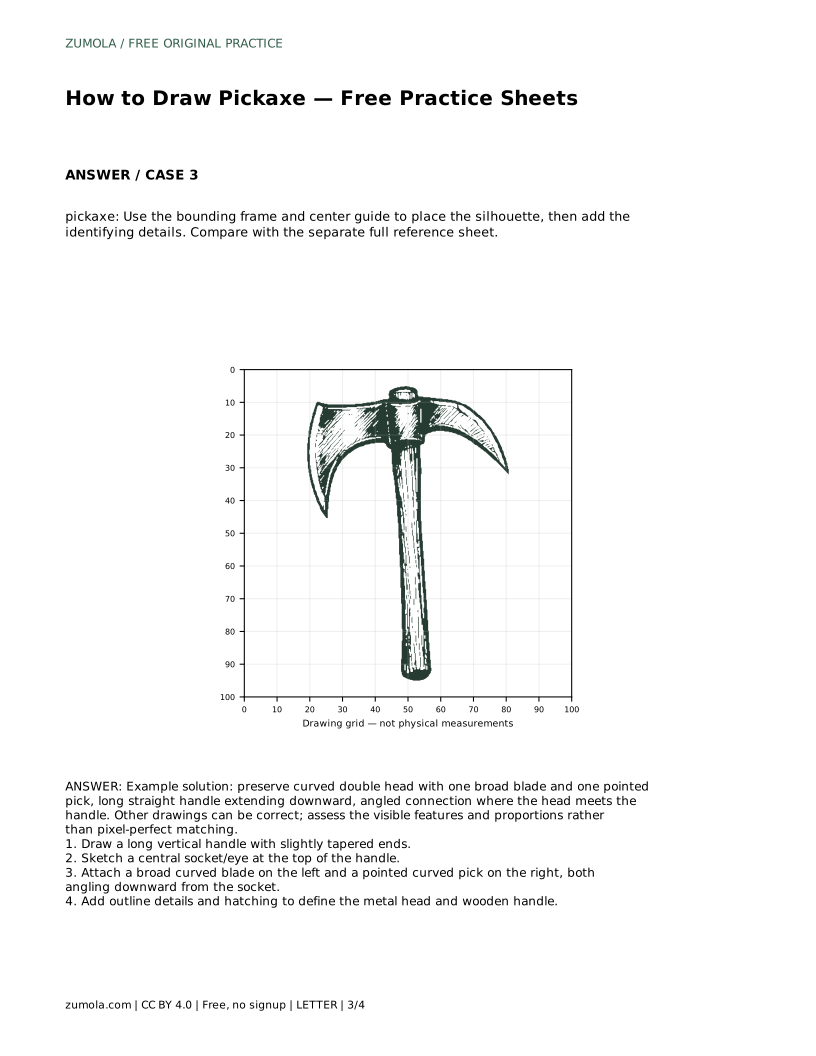
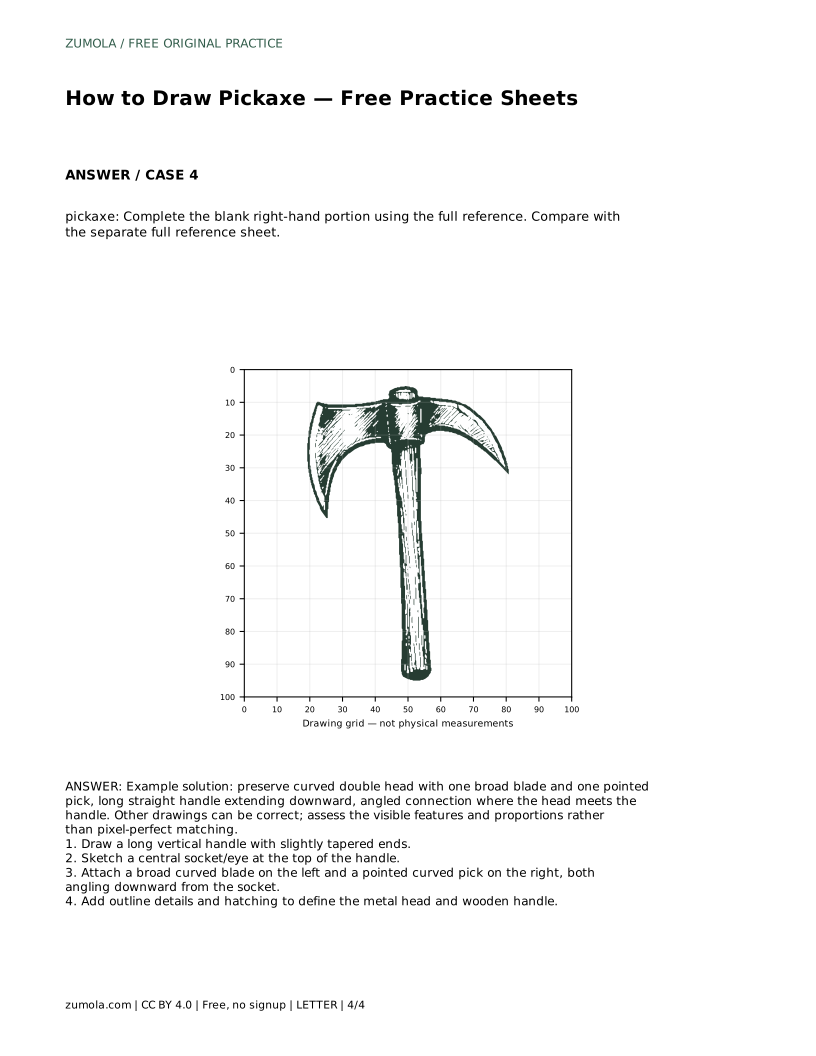
Example solution: preserve curved double head with one broad blade and one pointed pick, long straight handle extending downward, angled connection where the head meets the handle. Other drawings can be correct; assess the visible features and proportions rather than pixel-perfect matching. Draw a long vertical handle with slightly tapered ends. Sketch a central socket/eye at the top of the handle. Attach a broad curved blade on the left and a pointed curved pick on the right, both angling downward from the socket. Add outline details and hatching to define the metal head and wooden handle.
No. Either side can hold the broad blade as long as the other side is the pointed pick. Choose one arrangement and keep it consistent.
You can, but the handle usually gives the best guide for direction and proportion. Drawing it first makes it easier to centre the socket.
Check that the handle is long and straight, the socket is visible, one end is broad and curved, the other is pointed, and both ends angle downward from the socket.
All drawing practice · Free coordinate paper
Original resources · CC BY 4.0 · Free for personal and classroom use with attribution.