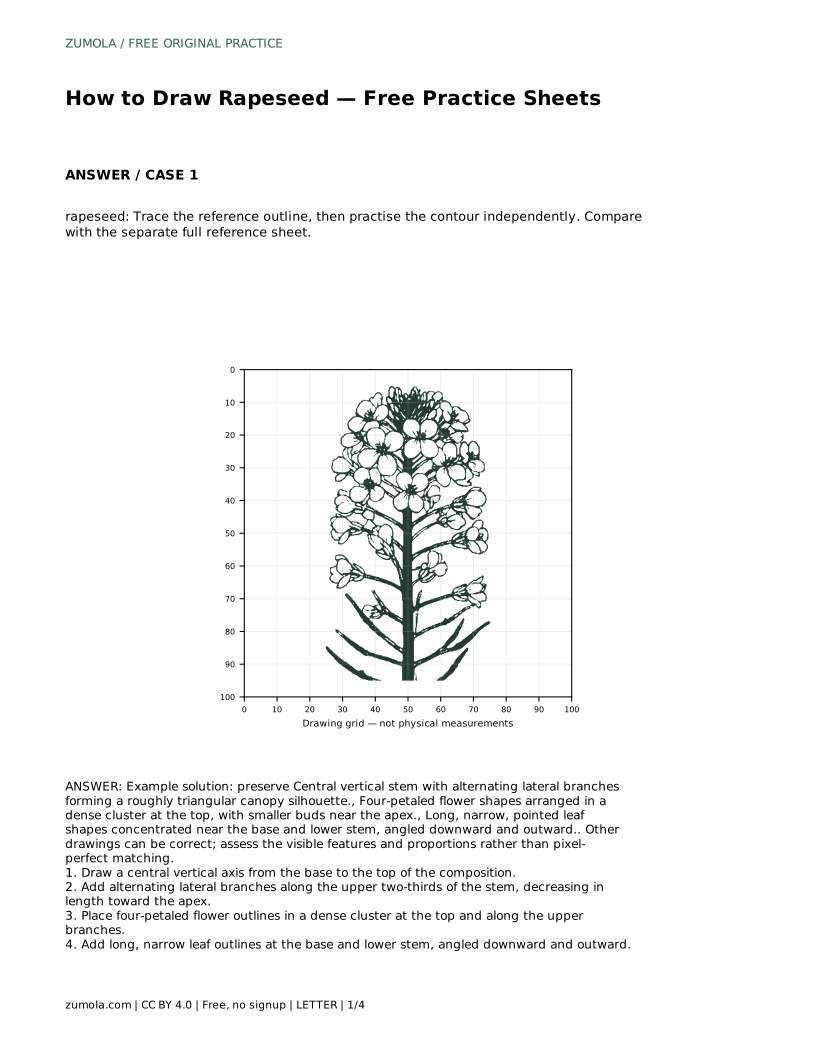
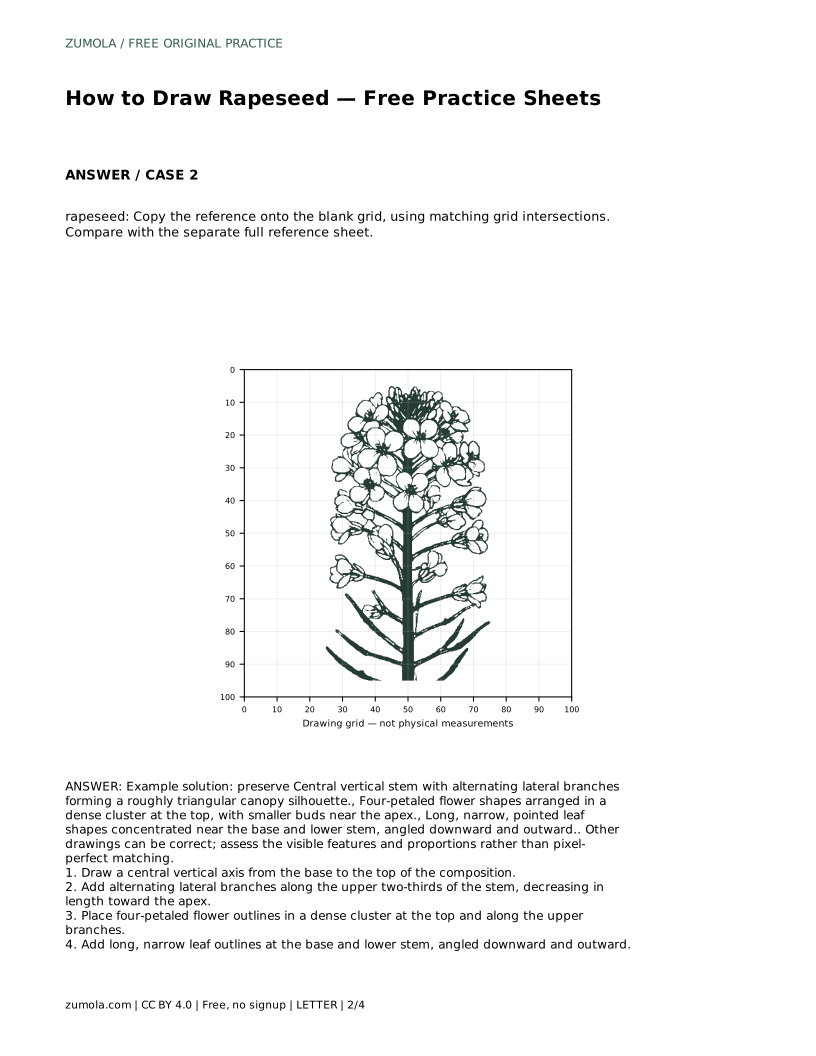
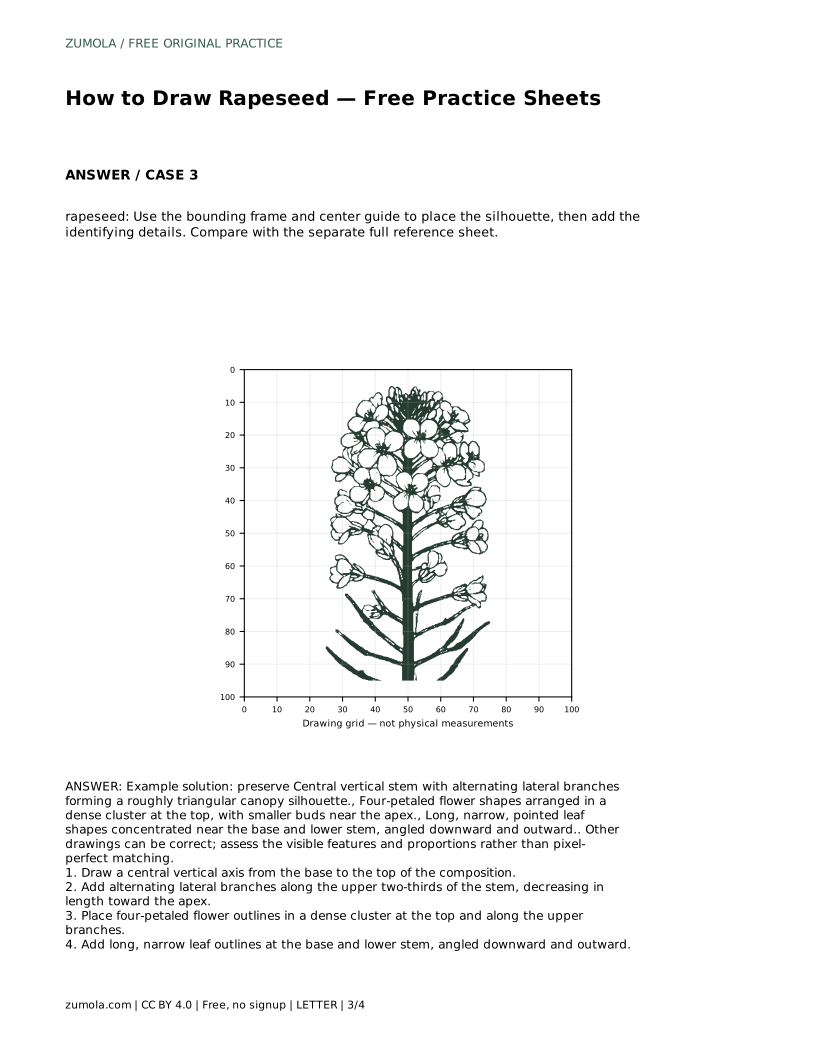
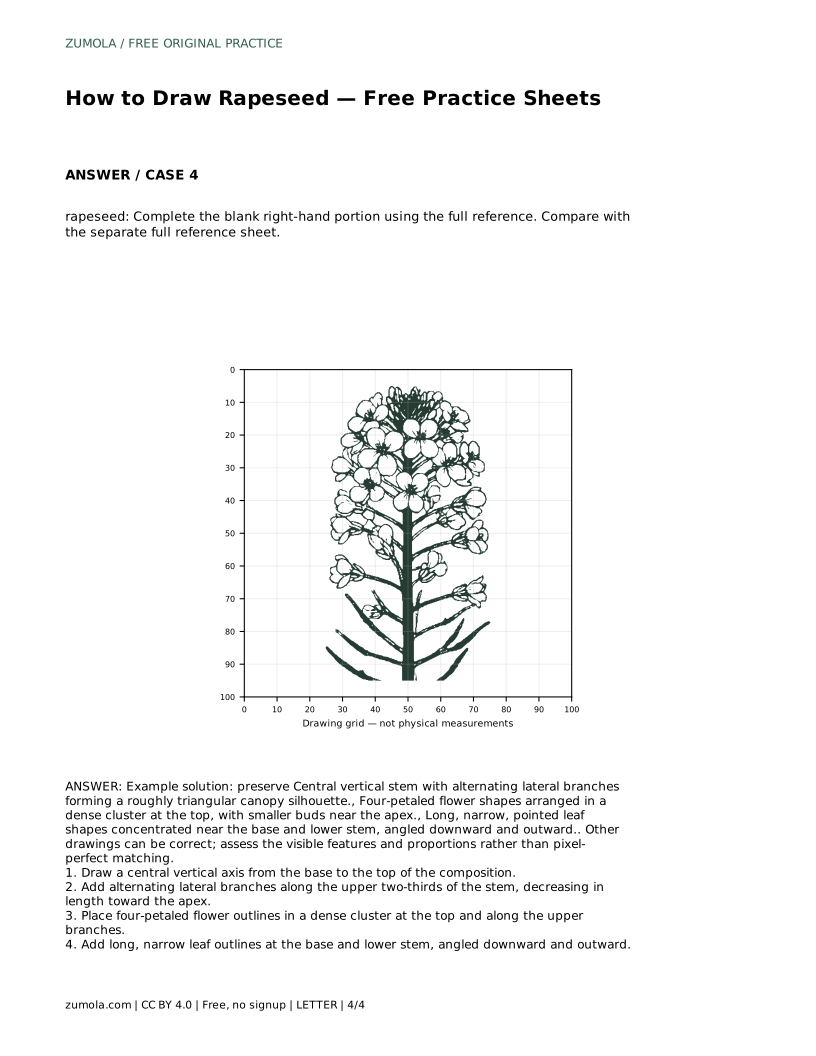
Reference diagrams
LETTER · Download PDF
A4 · Download PDF
Free original resources
Learn to draw rapeseed by building a central stem, alternating branches, a triangular canopy, four-petaled flowers, and narrow lower leaves.
Four original cases, with reference diagrams, practice sheets and worked answers. Everything is free; no signup required.
LETTER · Download PDF
A4 · Download PDF
LETTER · Download PDF
A4 · Download PDF
LETTER · Download PDF
A4 · Download PDF
Use A4 or US Letter to match your printer. Use the stated values and conditions to solve each exercise; diagrams are not physical measuring rulers.
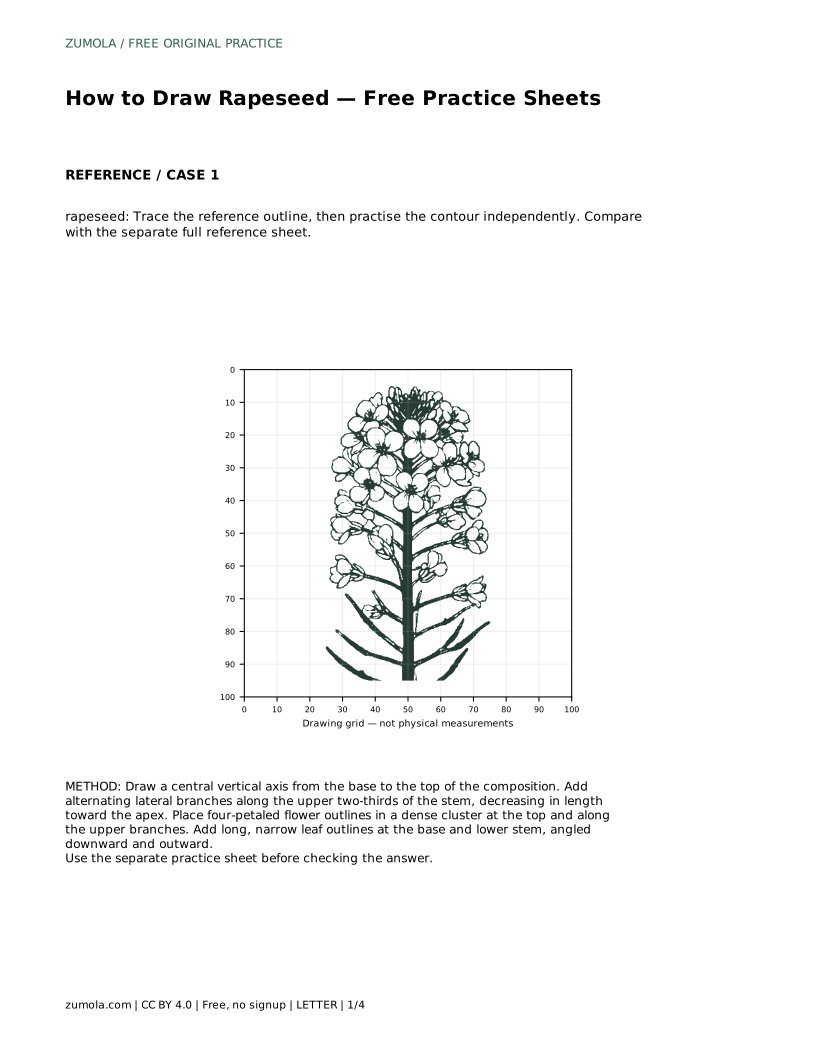
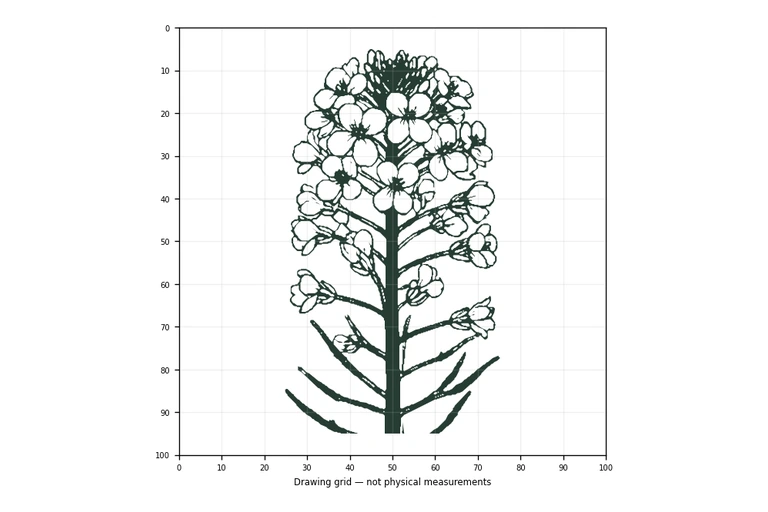
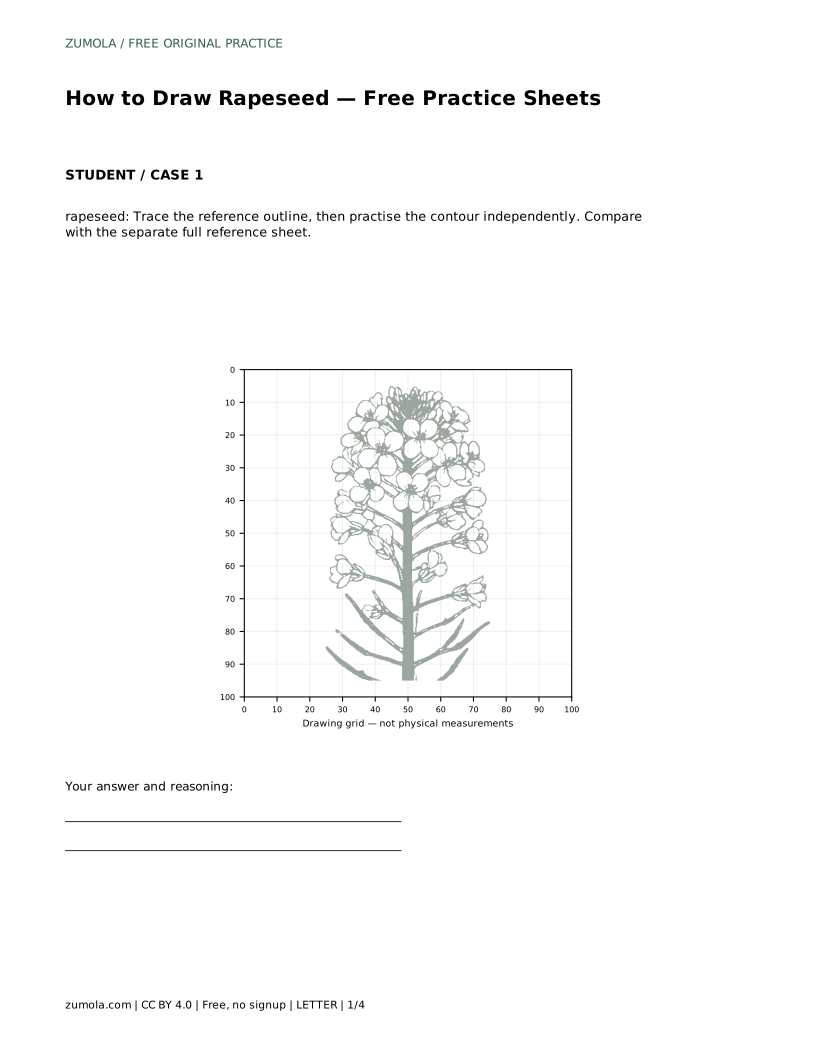
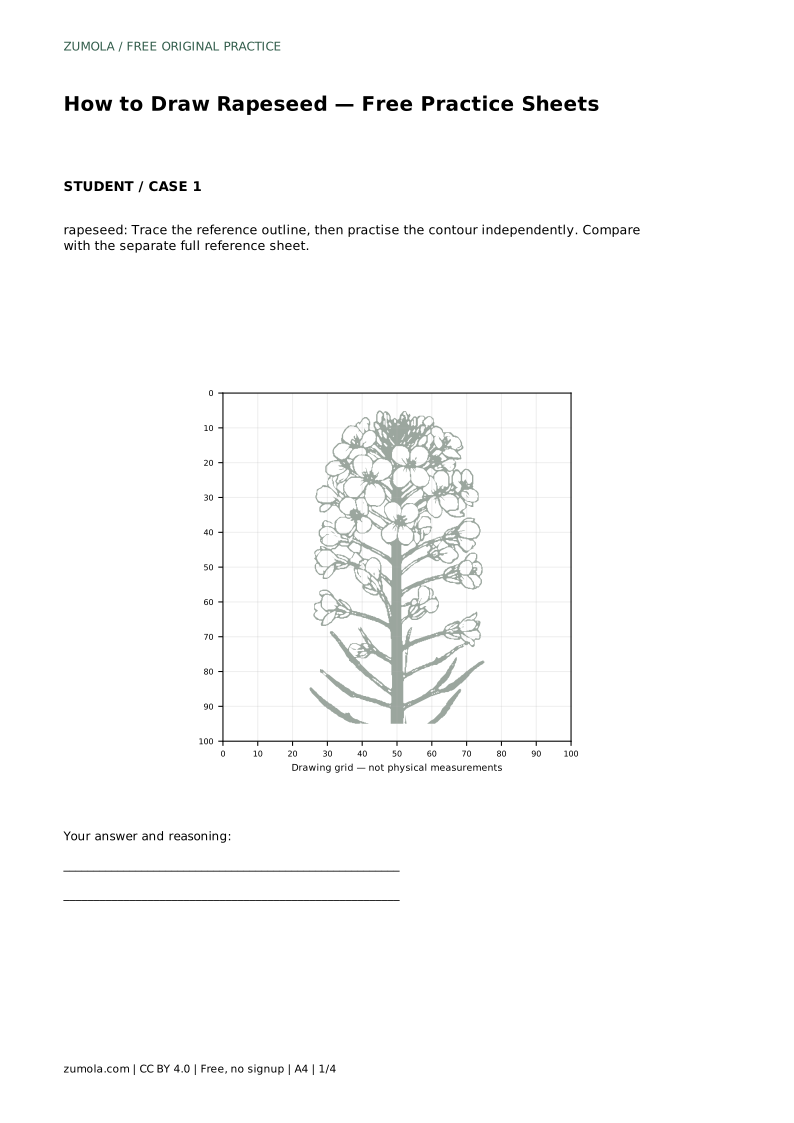
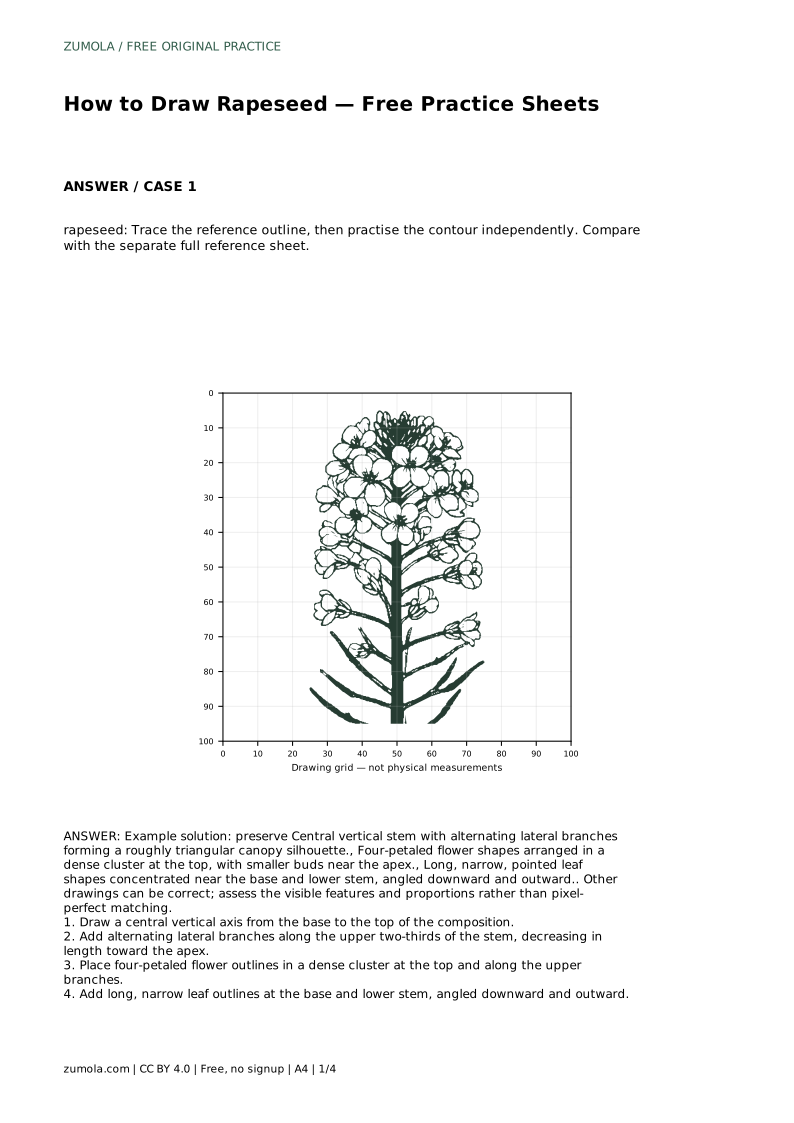
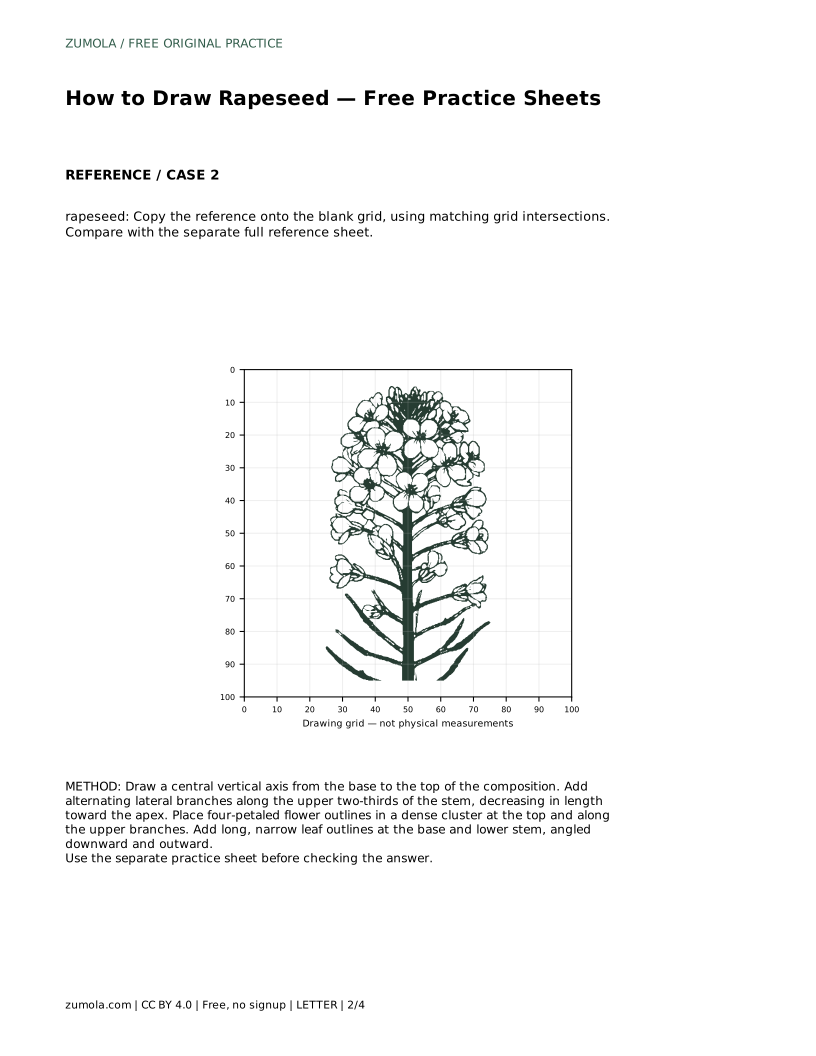
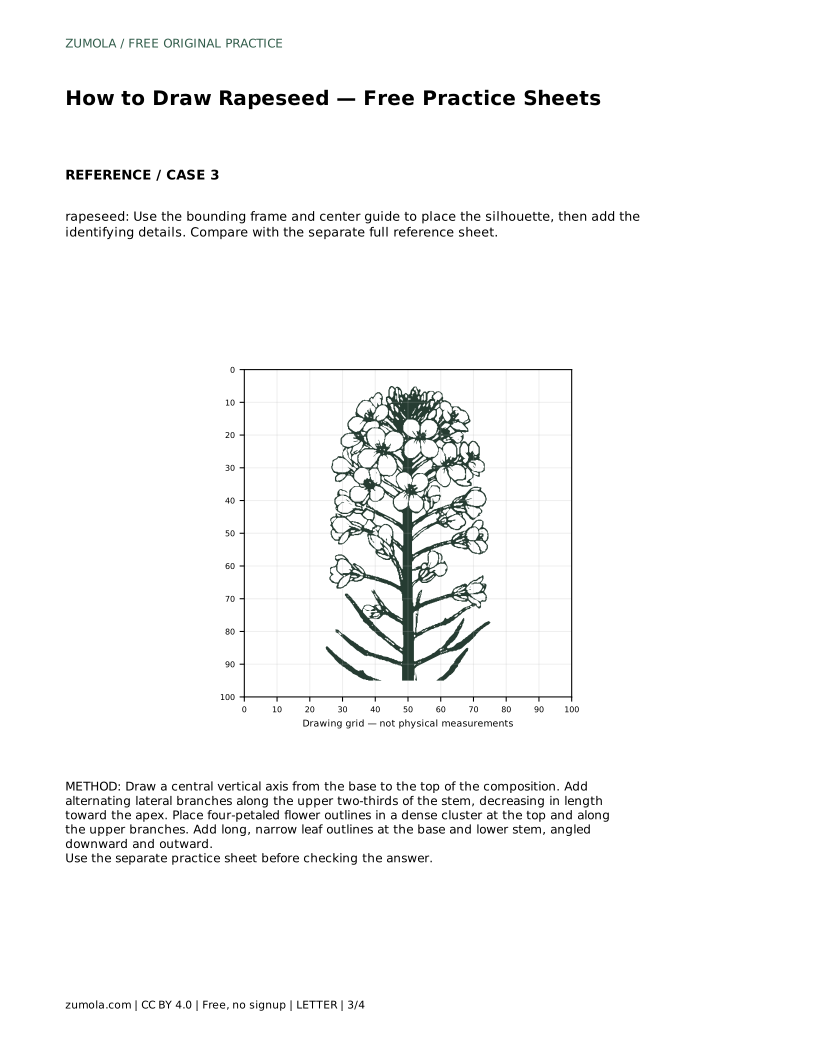
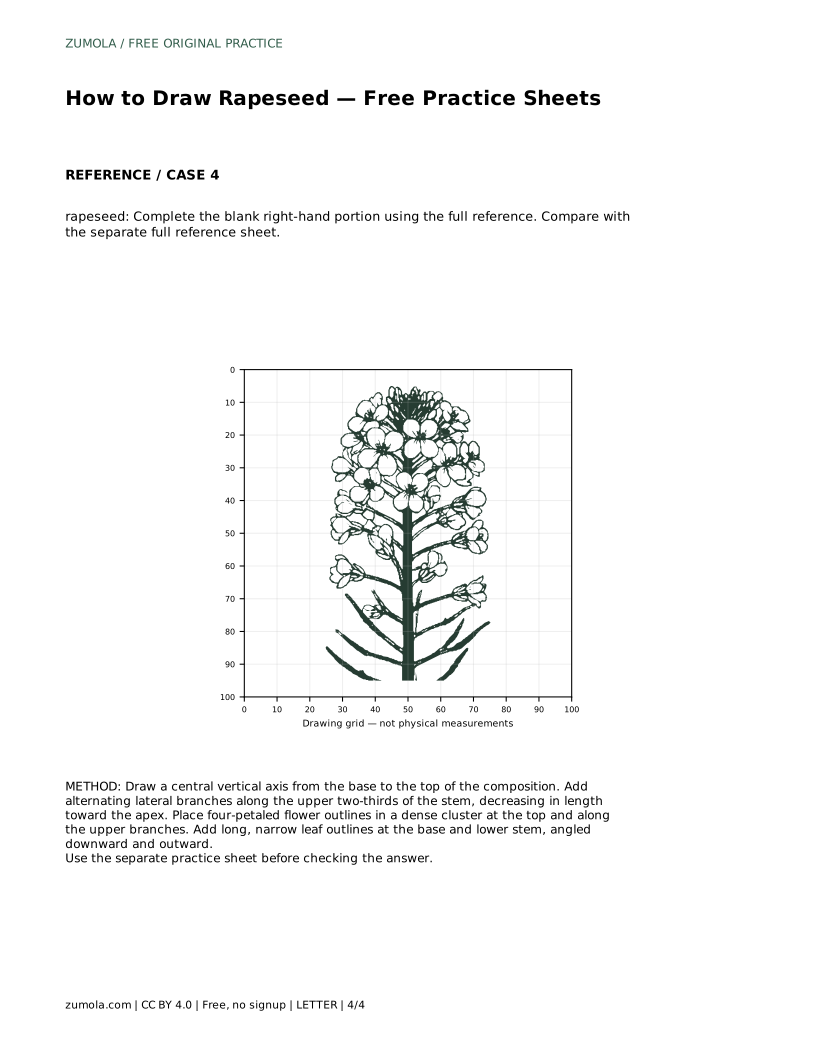
Rapeseed is easier to draw when you treat it as a structure rather than a scatter of yellow dots. Begin with one central vertical stem, then add alternating lateral branches that shorten toward the top. This creates the plant's roughly triangular canopy silhouette. The flower cluster sits densely at the top, while long, narrow leaves gather near the base and lower stem. The practice sheets let you trace, copy onto a grid, use a bounding frame and center guide, or complete a blank portion, then compare your work with the separate full reference sheet.
Start with a single central vertical axis running from the base to the top of the composition. This line is the spine of the drawing and controls the plant's overall height and balance. Keep it straight enough to read as one stem, but allow slight natural variation if you prefer.
Next, add lateral branches along the upper two-thirds of the stem. Alternate them from side to side rather than placing them in pairs. Make each branch shorter than the one below it so the canopy narrows toward the apex. This decreasing length is what produces the triangular silhouette.
Rapeseed flowers are commonly drawn with four petals arranged around a small center. Place these four-petaled outlines in a dense cluster at the top and along the upper branches. Smaller buds can sit near the apex, where the cluster is tightest. Keep the flower shapes simple and consistent so the cluster reads as one mass rather than isolated symbols.
Leaves belong mainly at the base and lower stem. Draw them long, narrow, and pointed, angled downward and outward. Avoid filling the upper canopy with large leaves, because that changes the plant's recognizable profile. A few small leaves may appear higher up, but the strong concentration should remain low.
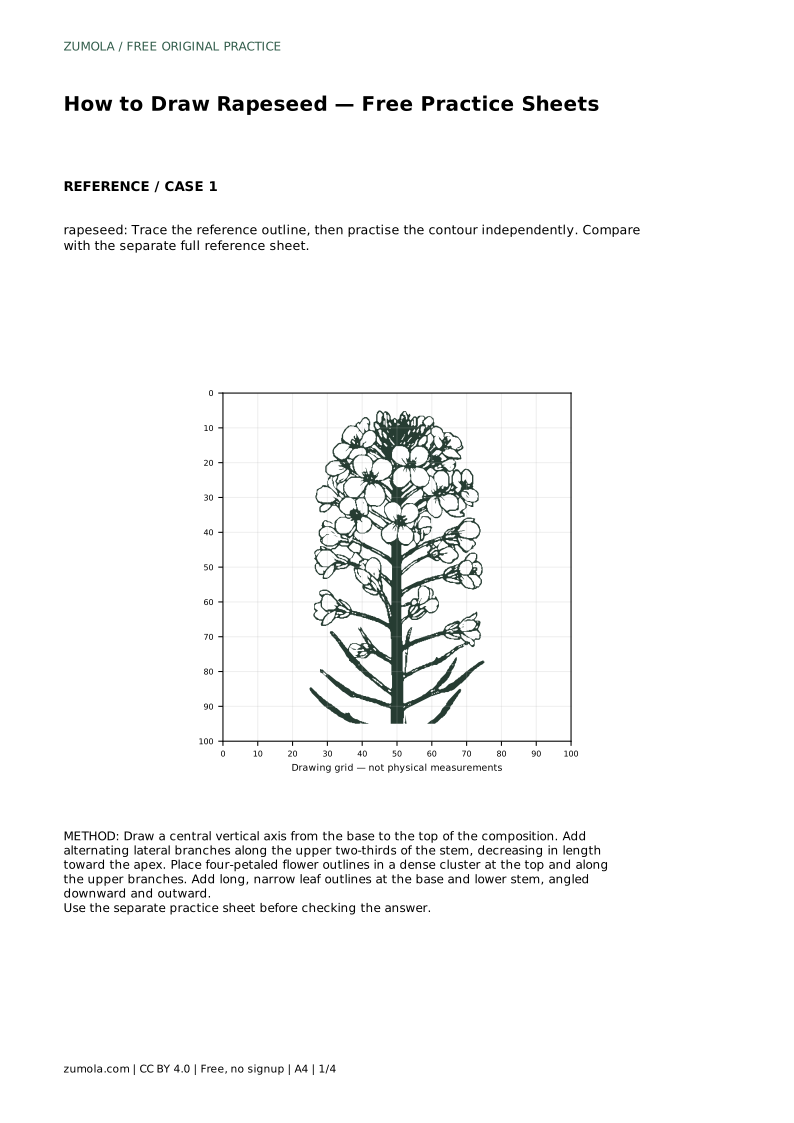
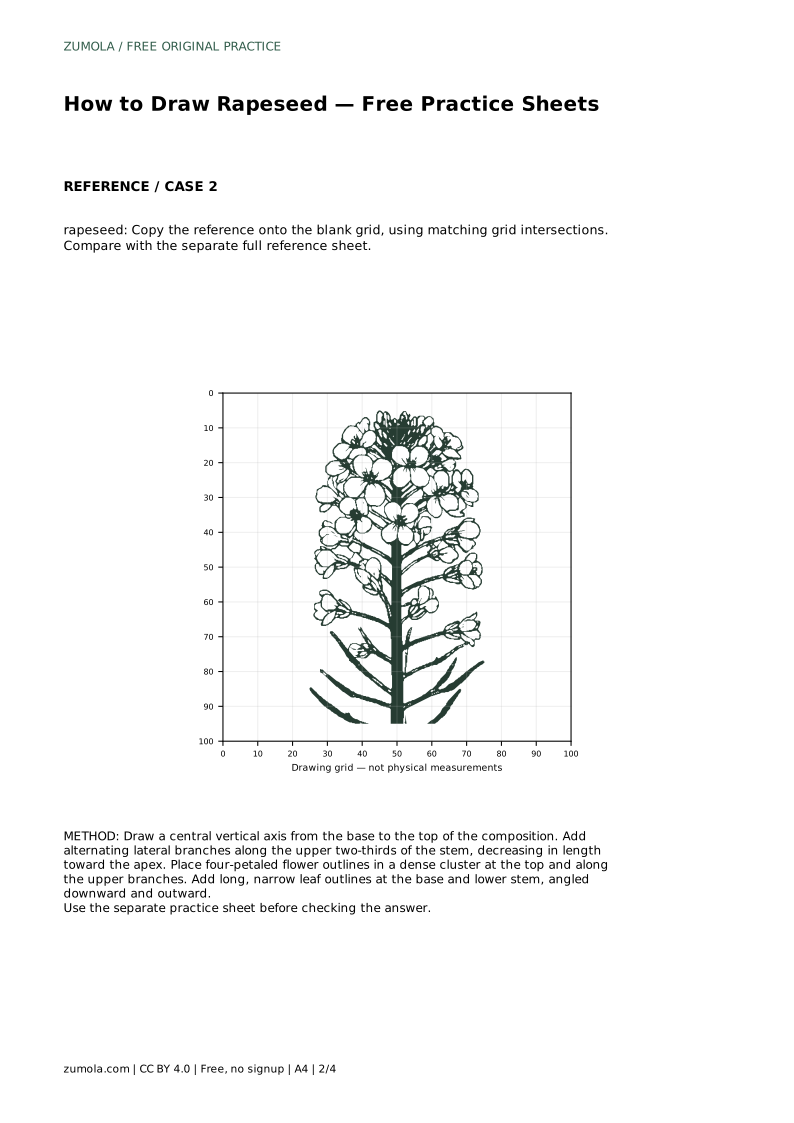
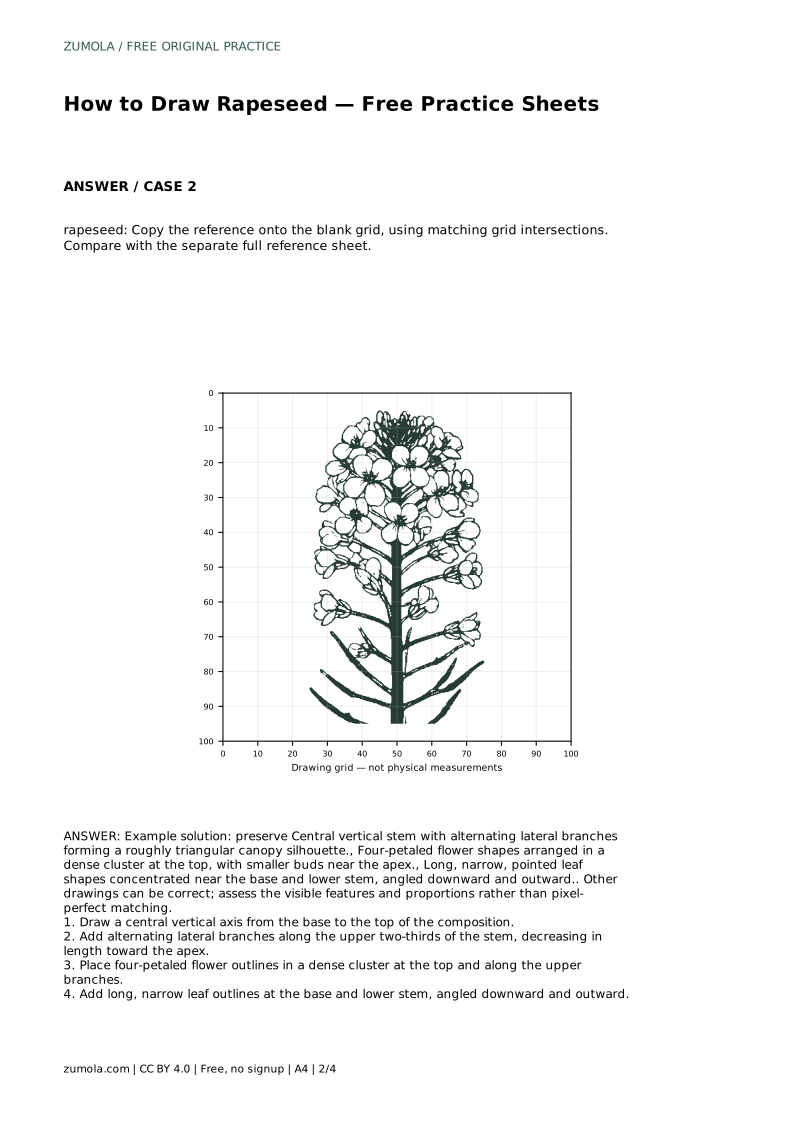
Tracing the reference outline helps you feel the contour and branch spacing. After tracing, practise the contour independently on blank paper and compare with the separate full reference sheet. Copying onto a blank grid trains you to match intersections and proportions rather than copying shapes by eye alone.
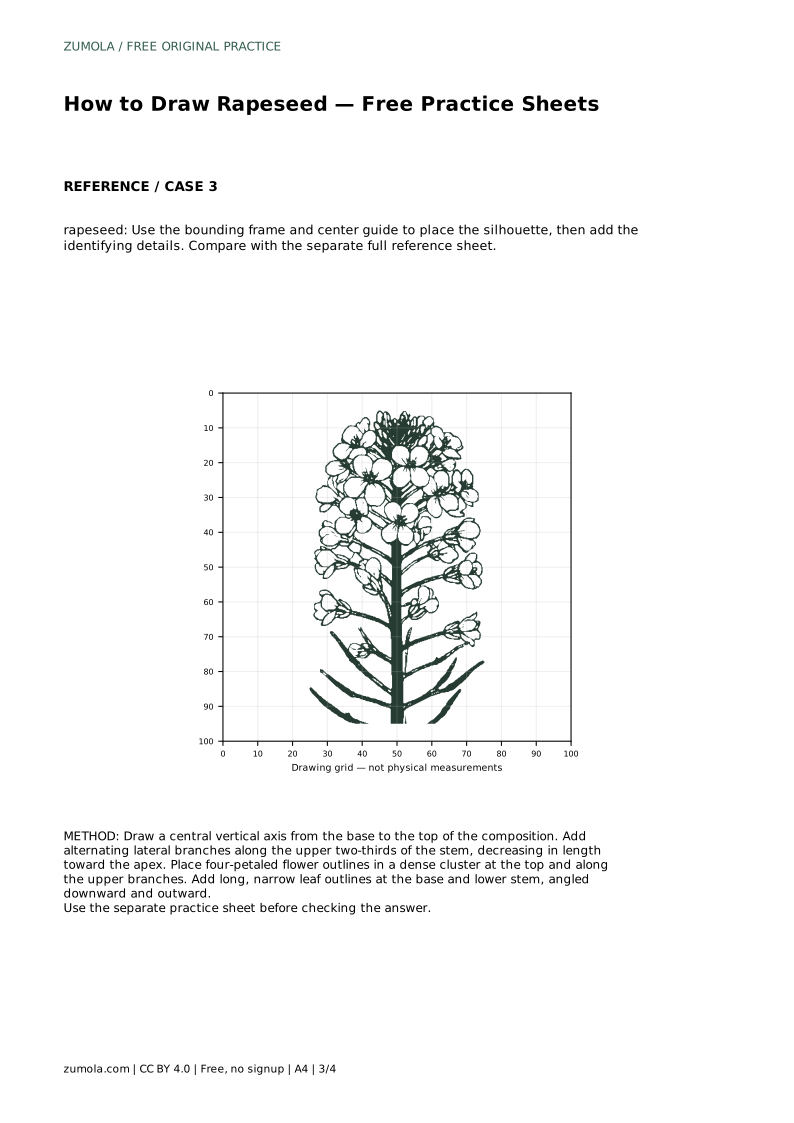
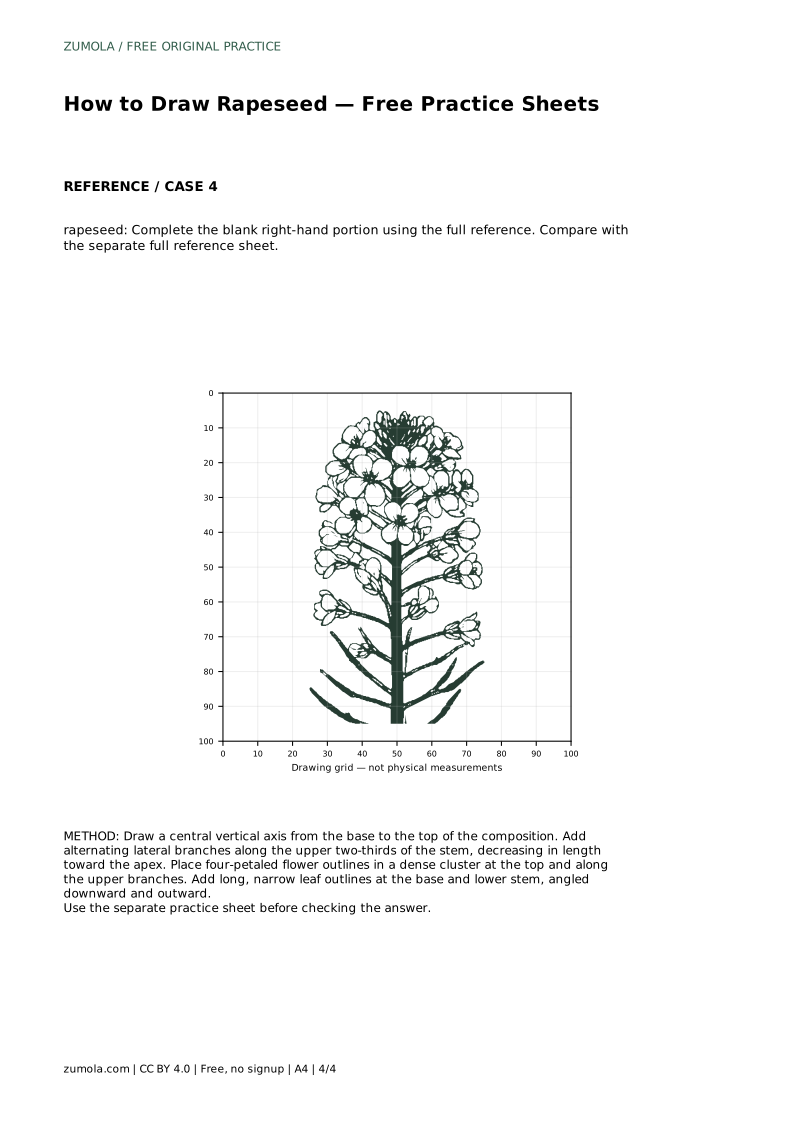
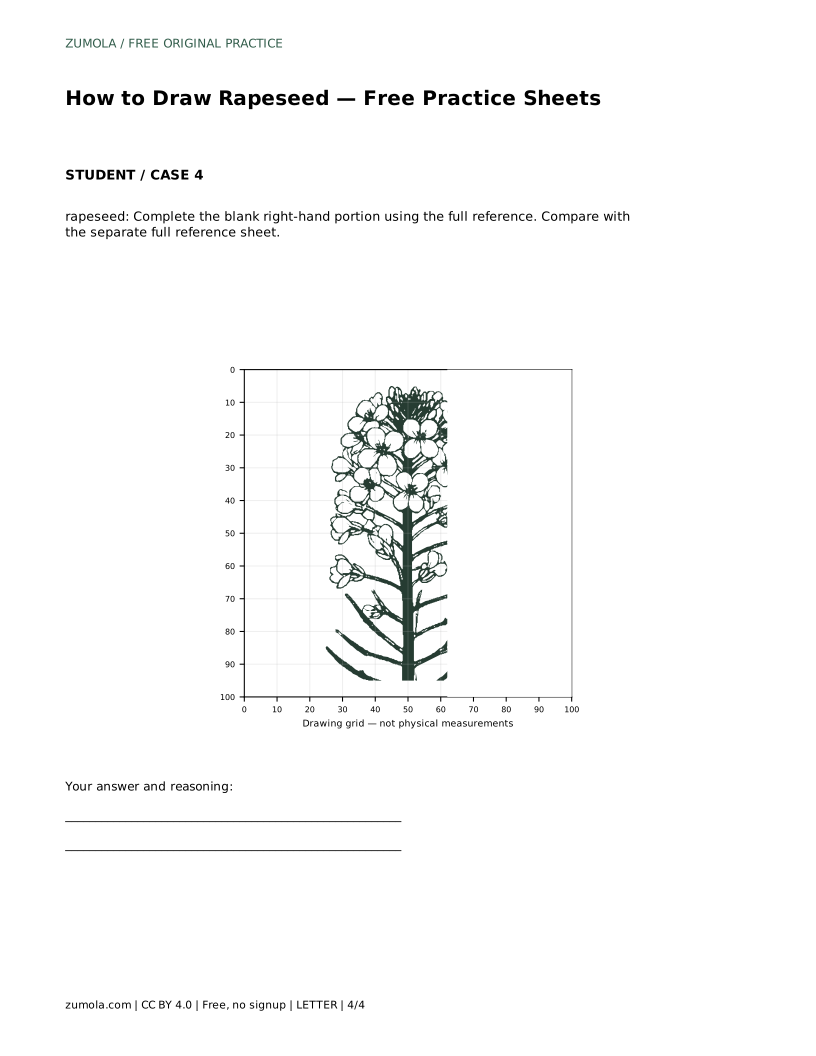
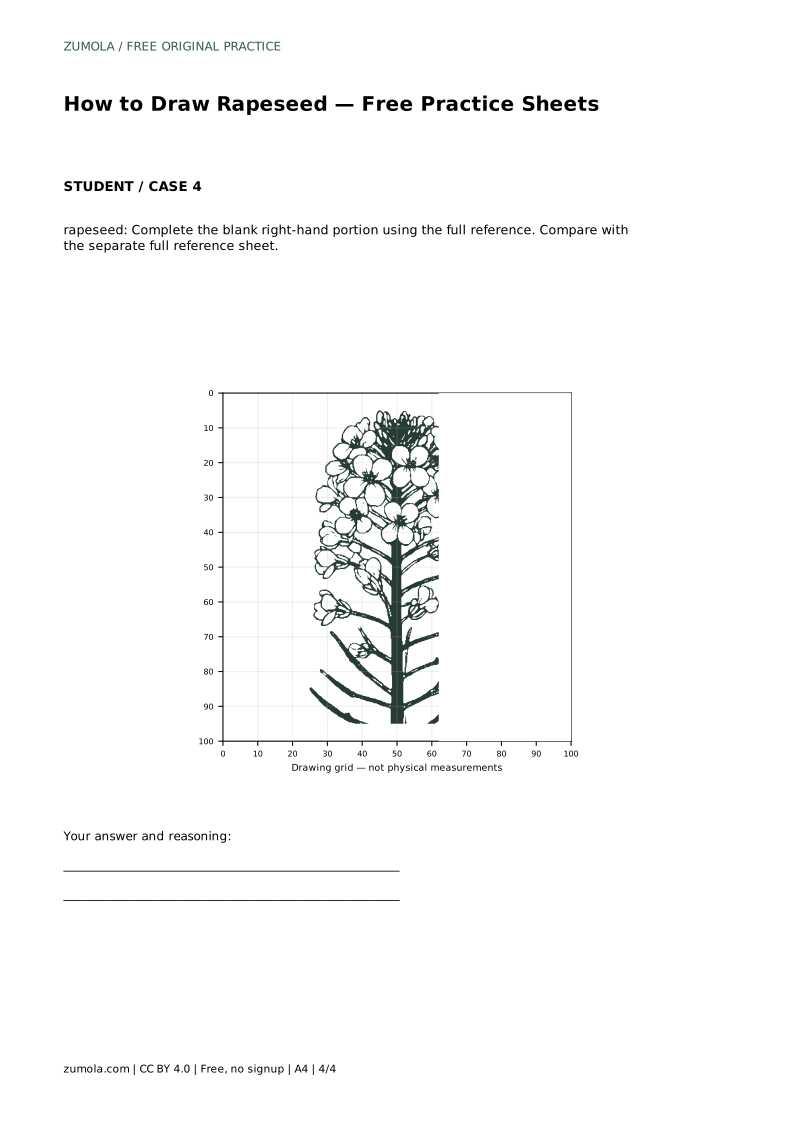
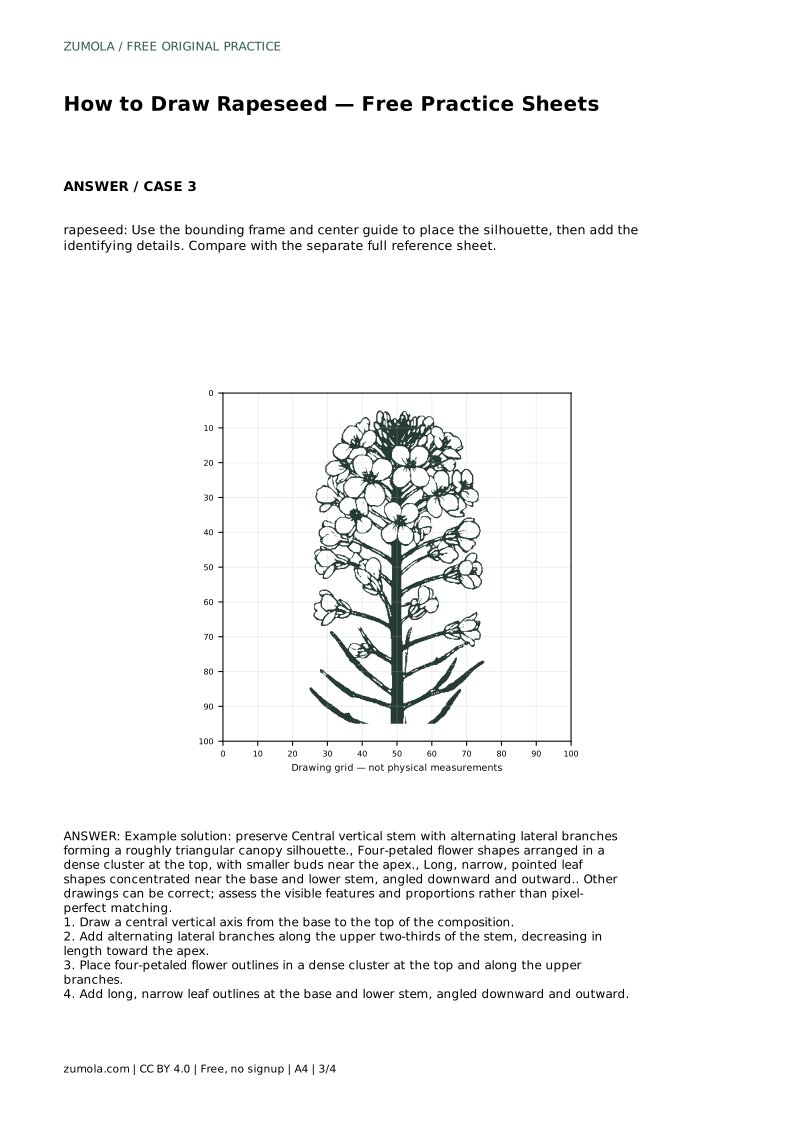
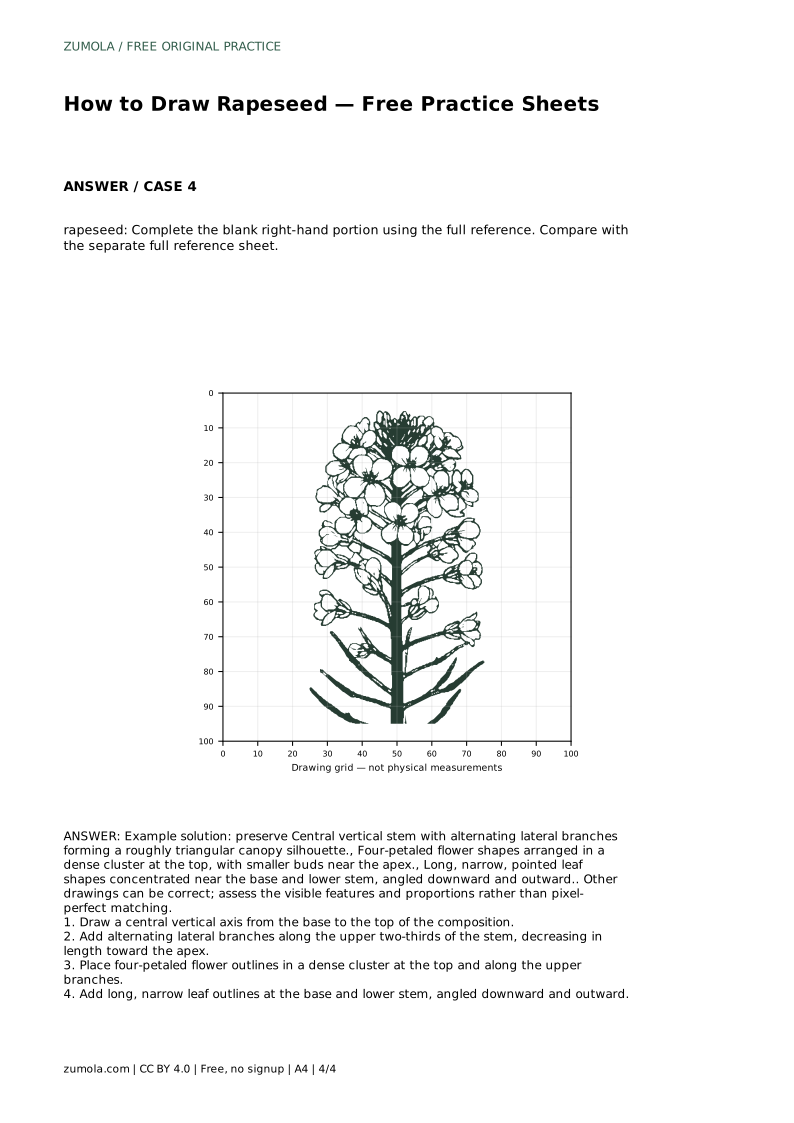
The bounding frame and center guide help you place the silhouette before adding identifying details. The blank right-hand portion asks you to complete the missing side using the full reference. In every version, compare visible features and proportions rather than aiming for pixel-perfect matching. Rapeseed drawings can vary and still be correct.
A common problem is a canopy that is too wide or too round. Check that branch length decreases steadily toward the apex and that the overall silhouette narrows upward. Another issue is flower density: the top should feel clustered, not evenly spaced like a pattern.
Leaves often become too broad or too high on the stem. Keep them narrow and concentrated near the base. Before refining edges, step back and compare the stem height, canopy width, and leaf zone against the reference.
rapeseed: Trace the reference outline, then practise the contour independently. Compare with the separate full reference sheet.
Example solution: preserve Central vertical stem with alternating lateral branches forming a roughly triangular canopy silhouette., Four-petaled flower shapes arranged in a dense cluster at the top, with smaller buds near the apex., Long, narrow, pointed leaf shapes concentrated near the base and lower stem, angled downward and outward.. Other drawings can be correct; assess the visible features and proportions rather than pixel-perfect matching. Draw a central vertical axis from the base to the top of the composition. Add alternating lateral branches along the upper two-thirds of the stem, decreasing in length toward the apex. Place four-petaled flower outlines in a dense cluster at the top and along the upper branches. Add long, narrow leaf outlines at the base and lower stem, angled downward and outward.
Use four petals arranged around a small center. Keep the shapes simple so the dense cluster remains readable.
Concentrate long, narrow, pointed leaves at the base and lower stem, angled downward and outward. Keep the upper canopy mostly flowers and buds.
No. Other drawings can be correct. Assess visible features and proportions, such as the central stem, alternating branches, triangular canopy, four-petaled flowers, and narrow lower leaves.
All drawing practice · Free coordinate paper
Original resources · CC BY 4.0 · Free for personal and classroom use with attribution.