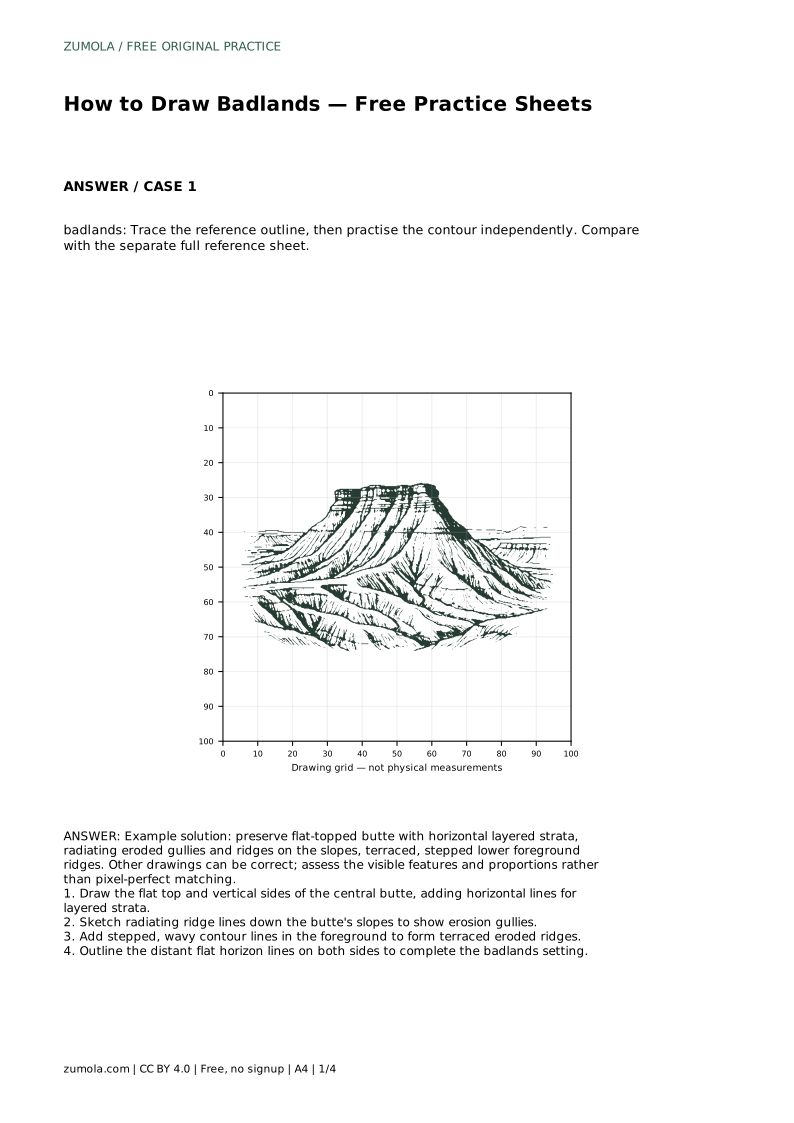
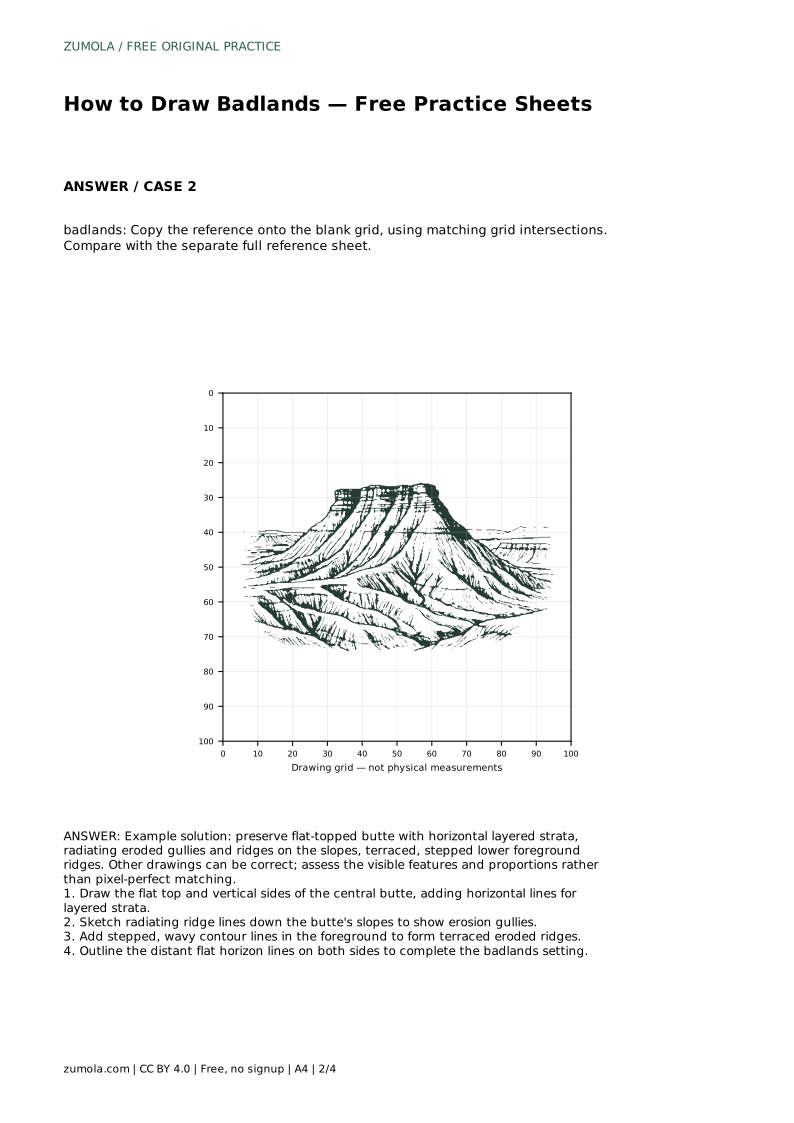
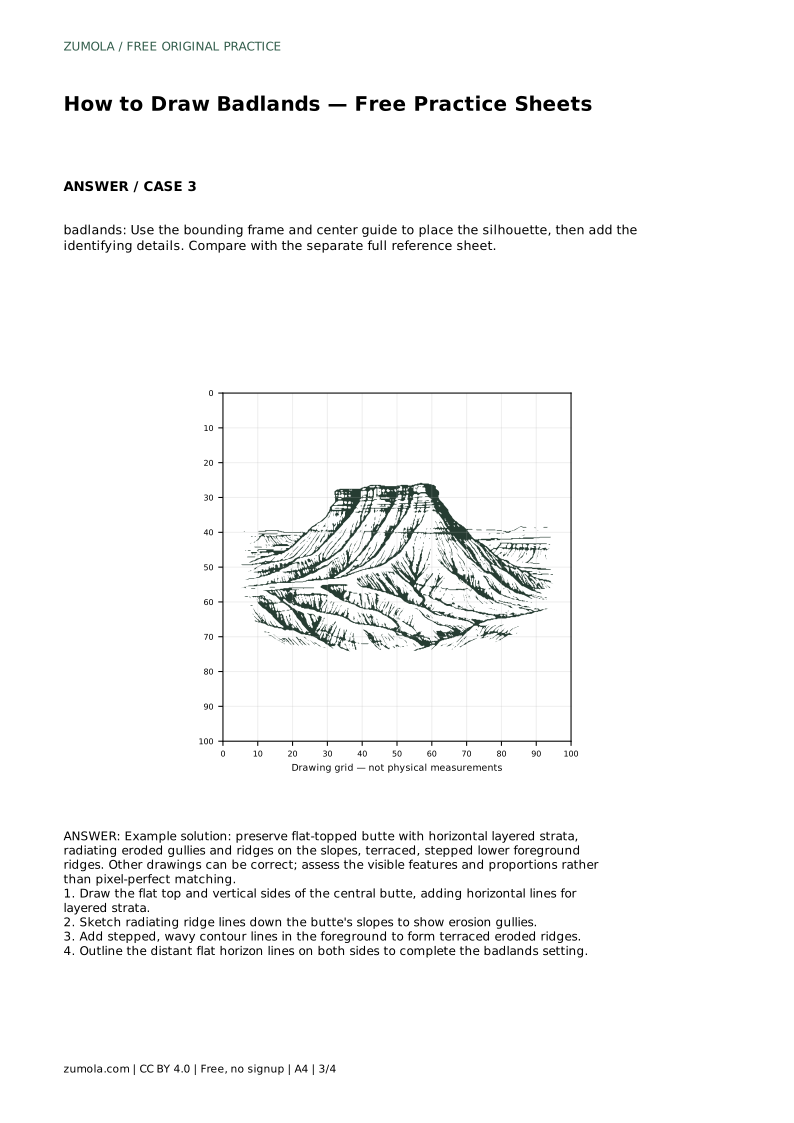
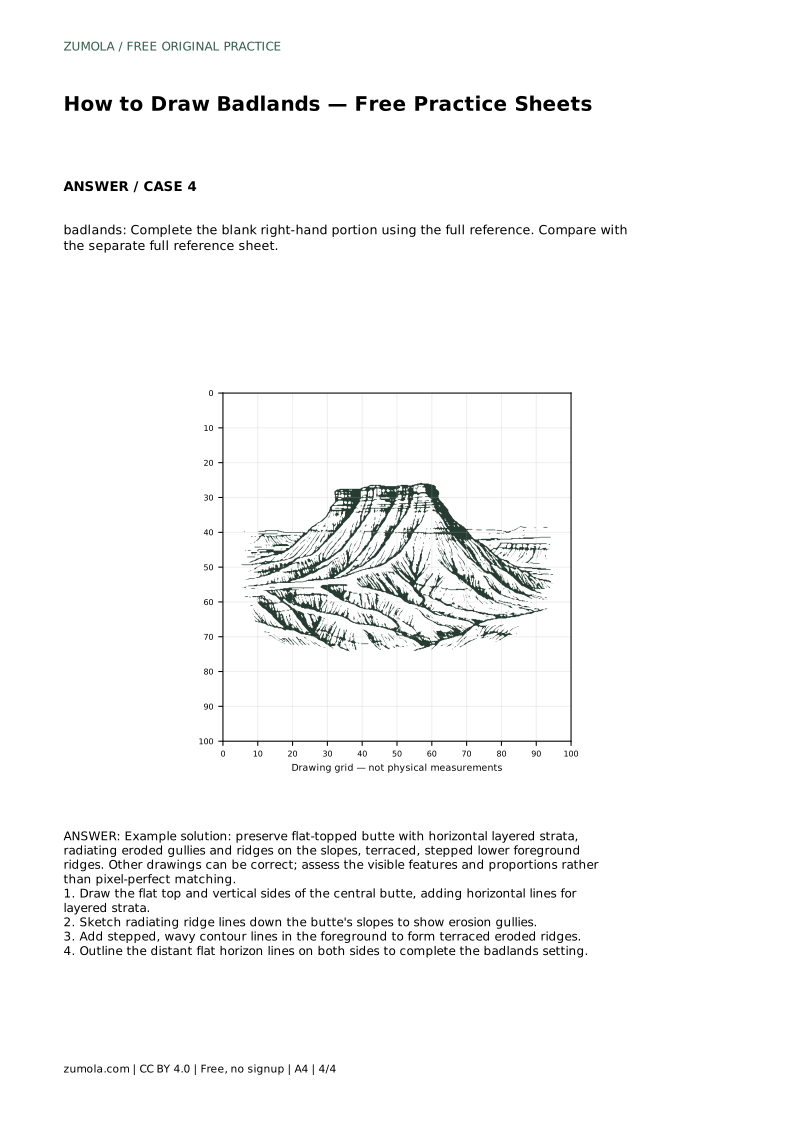
Reference diagrams
LETTER · Download PDF
A4 · Download PDF
Free original resources
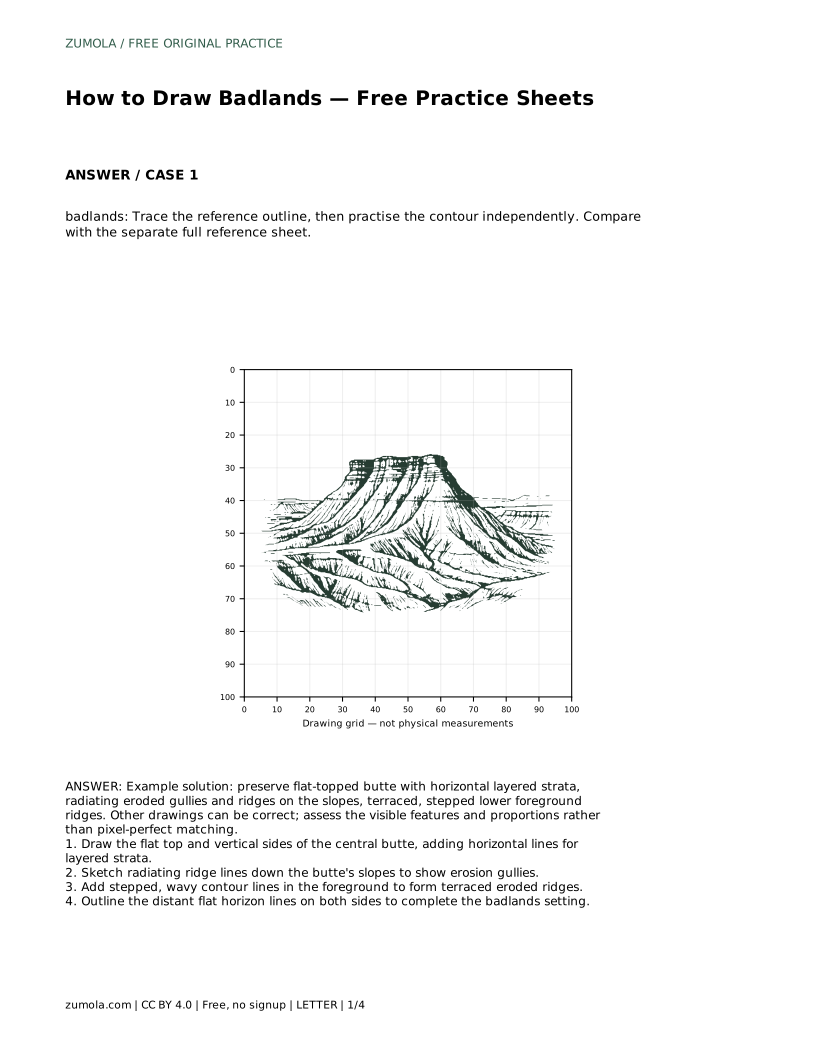
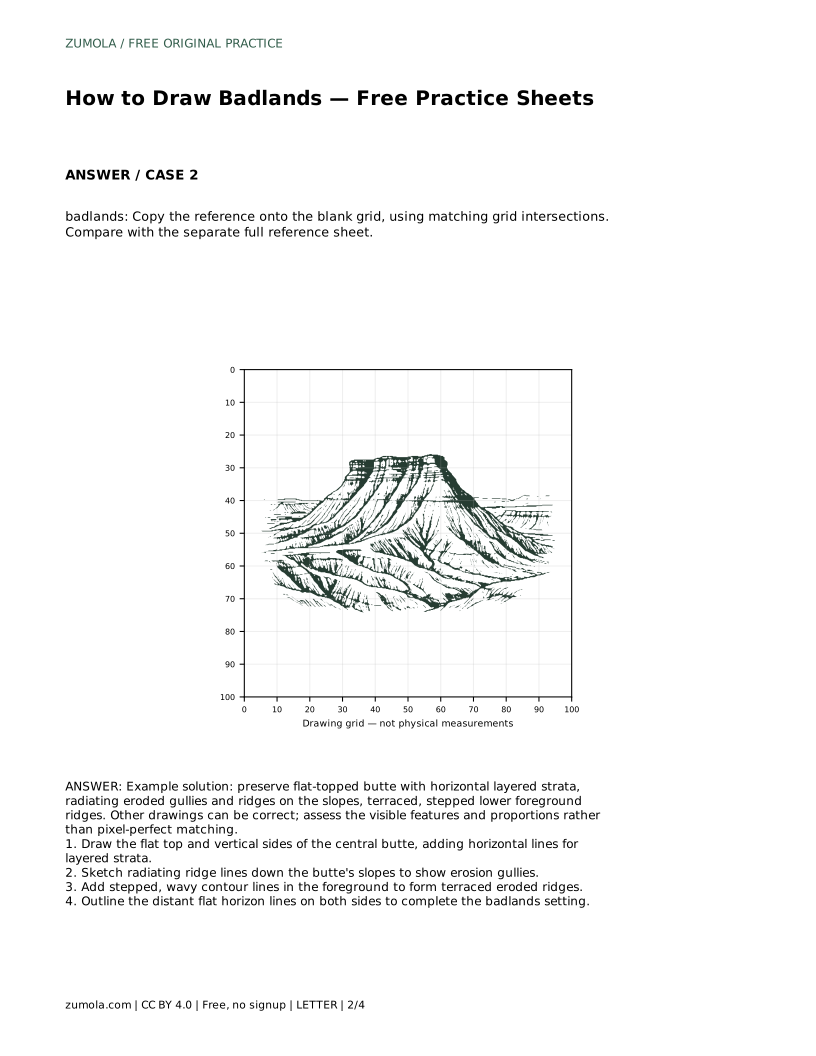
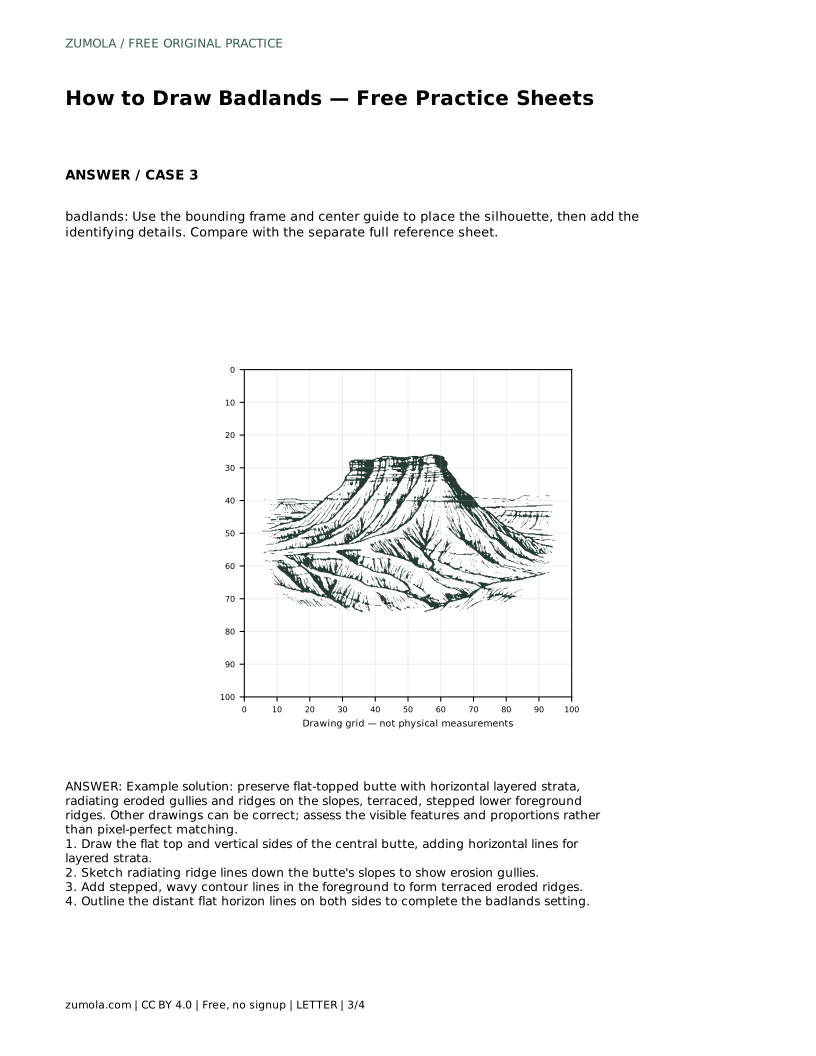
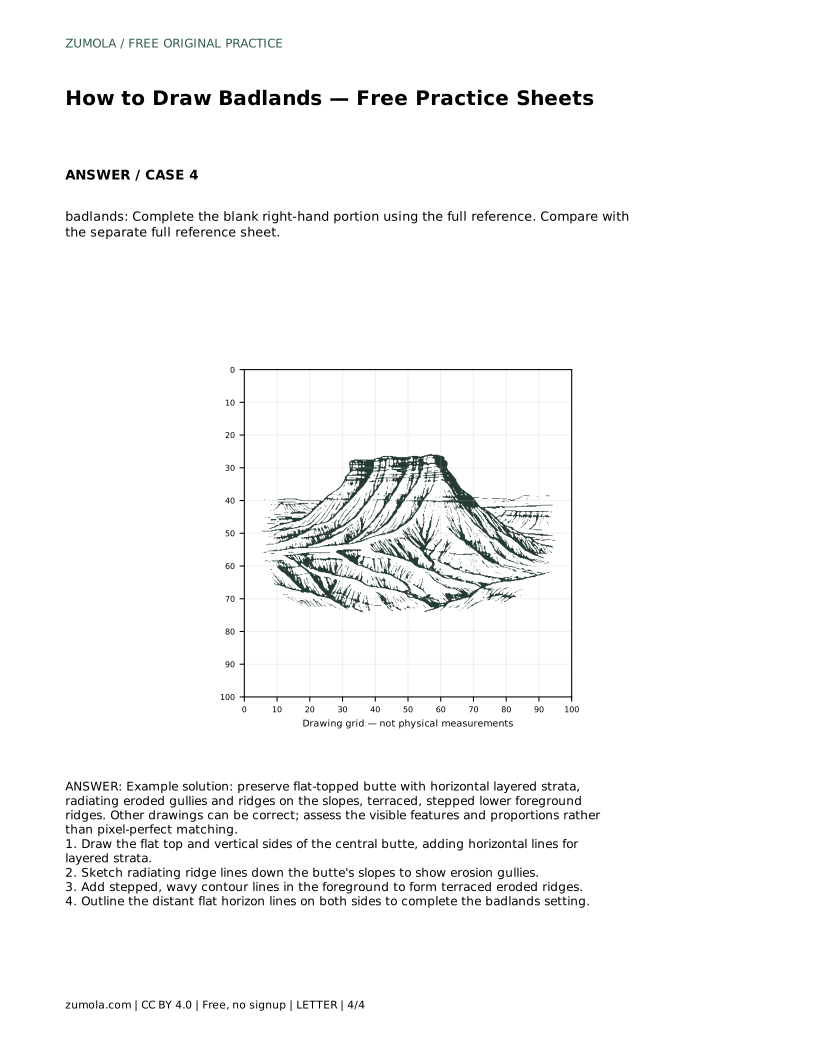
Learn to draw badlands with flat-topped buttes, horizontal strata, radiating erosion gullies, and terraced foreground ridges. Includes a worked example and rubric.
Four original cases, with reference diagrams, practice sheets and worked answers. Everything is free; no signup required.
LETTER · Download PDF
A4 · Download PDF
LETTER · Download PDF
A4 · Download PDF
LETTER · Download PDF
A4 · Download PDF
Use A4 or US Letter to match your printer. Use the stated values and conditions to solve each exercise; diagrams are not physical measuring rulers.
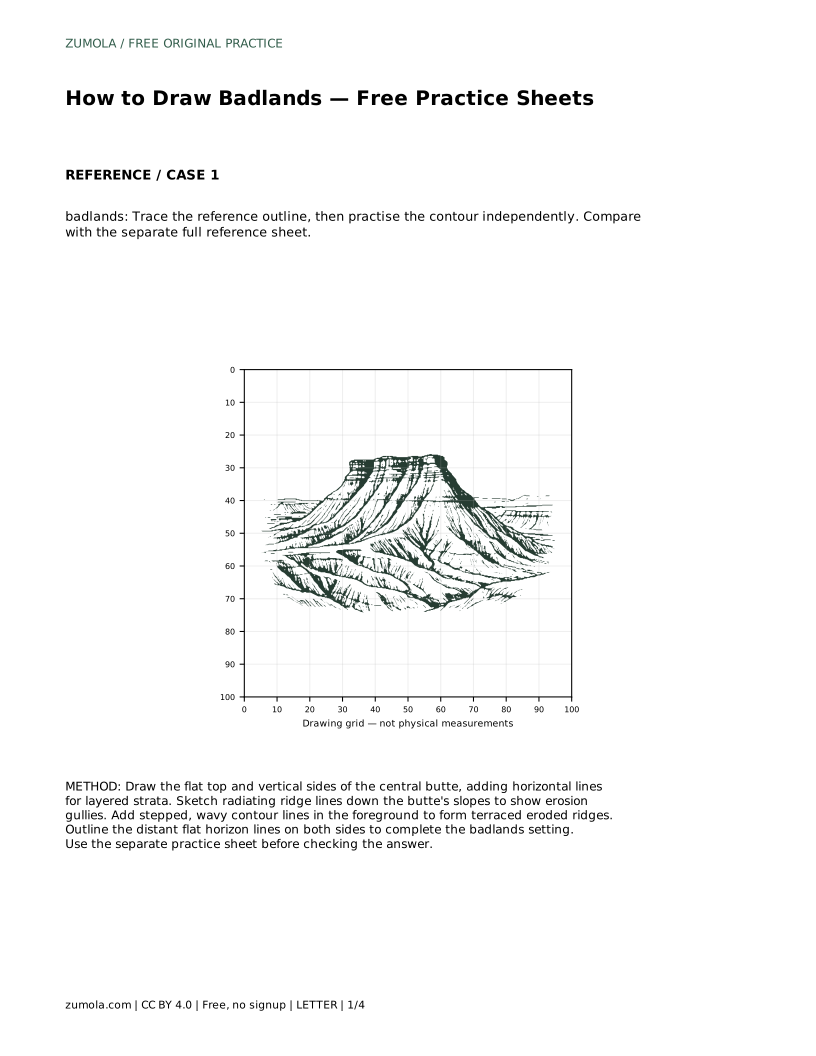
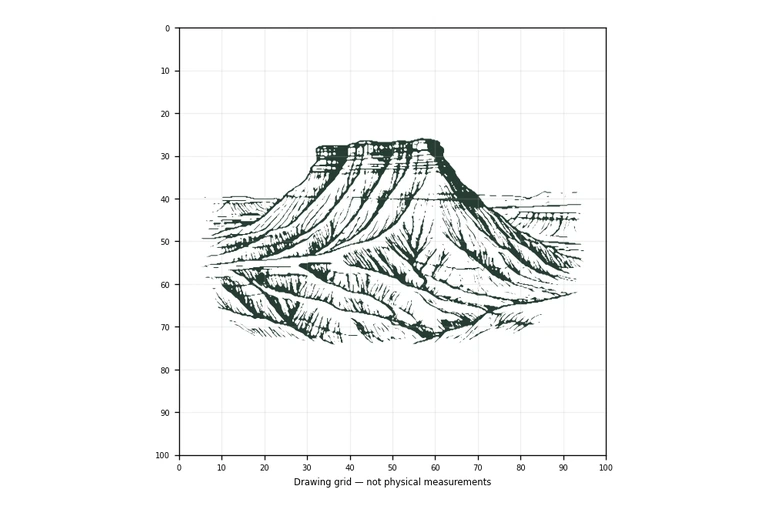
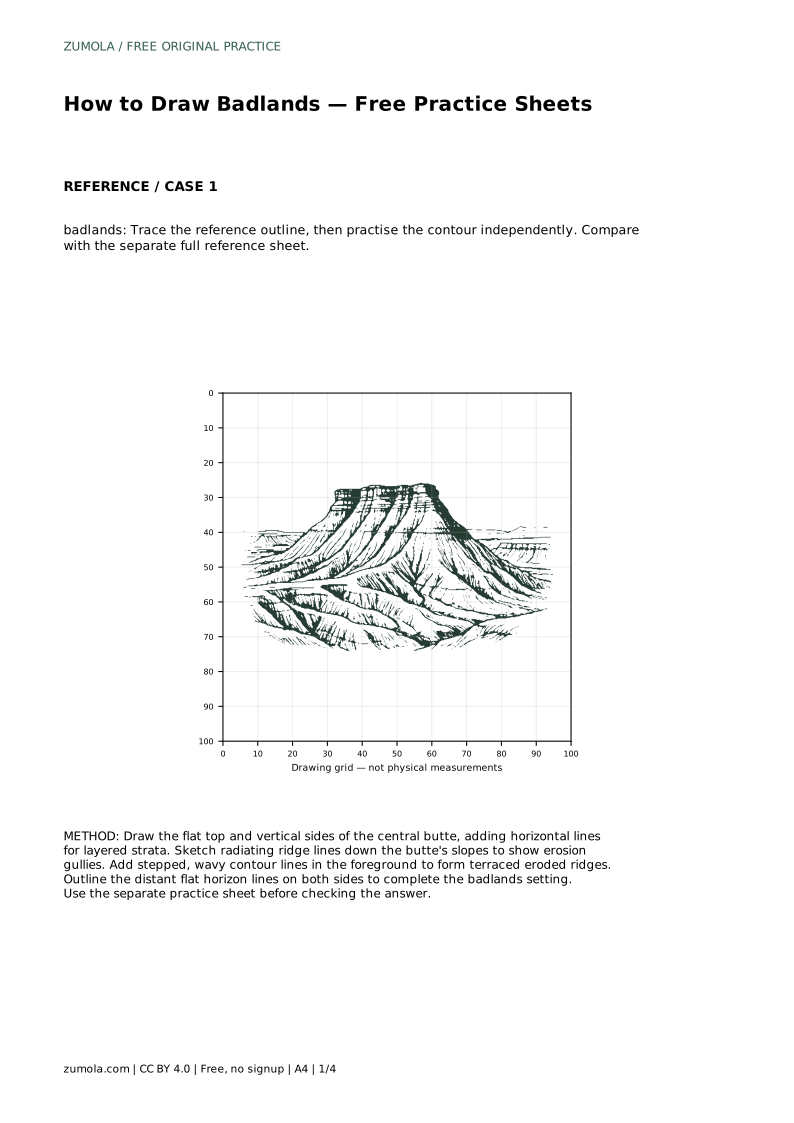
Badlands are easier to draw when you treat them as a set of landform clues rather than a single outline. A flat-topped butte, horizontal layers, gullies running down the slopes, and stepped ridges in the foreground all signal erosion. This guide explains how to build those features in order, then how to check your drawing against a reference sheet without expecting a pixel-perfect match.
Begin with the central butte because it anchors the whole scene. Draw a flat top first, then bring the sides down nearly vertically. Keep the top level rather than rounded; the flat cap is one of the strongest visual signals of a badlands landform.
Once the silhouette is in place, add horizontal lines across the butte to suggest layered strata. Space them roughly evenly, but allow slight variation so the layers look natural rather than mechanical. These lines should follow the shape of the butte, staying horizontal across the flat top and continuing down the sides.
Erosion gullies are the lines that run down the slopes, spreading outward from the upper part of the butte. Draw them as radiating ridges rather than random scratches. They should fan out as they descend, which makes the slope read as worn away by water.
In the foreground, use stepped, wavy contour lines to build terraced ridges. Each step should sit slightly lower than the one behind it, creating a sense of layered ground. Keep the waves gentle and repeated so the foreground reads as eroded terrain rather than a flat plane.
Complete the setting with distant flat horizon lines on both sides of the butte. These lines should sit lower than the butte top and stay relatively straight, giving the scene depth without competing with the central form.
When comparing with a reference sheet, judge visible features and proportions rather than exact line placement. A correct drawing preserves the flat-topped butte, horizontal strata, radiating gullies, and terraced foreground ridges. Different line weights, spacing, and foreground shapes can still be valid.
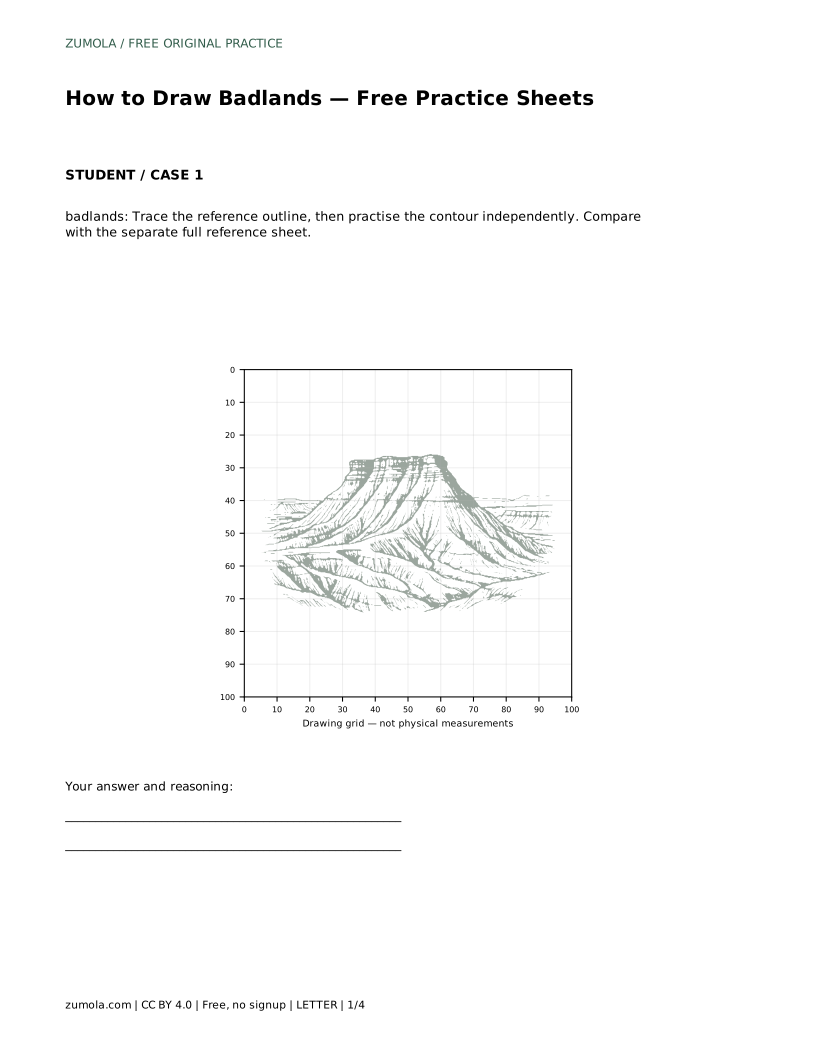
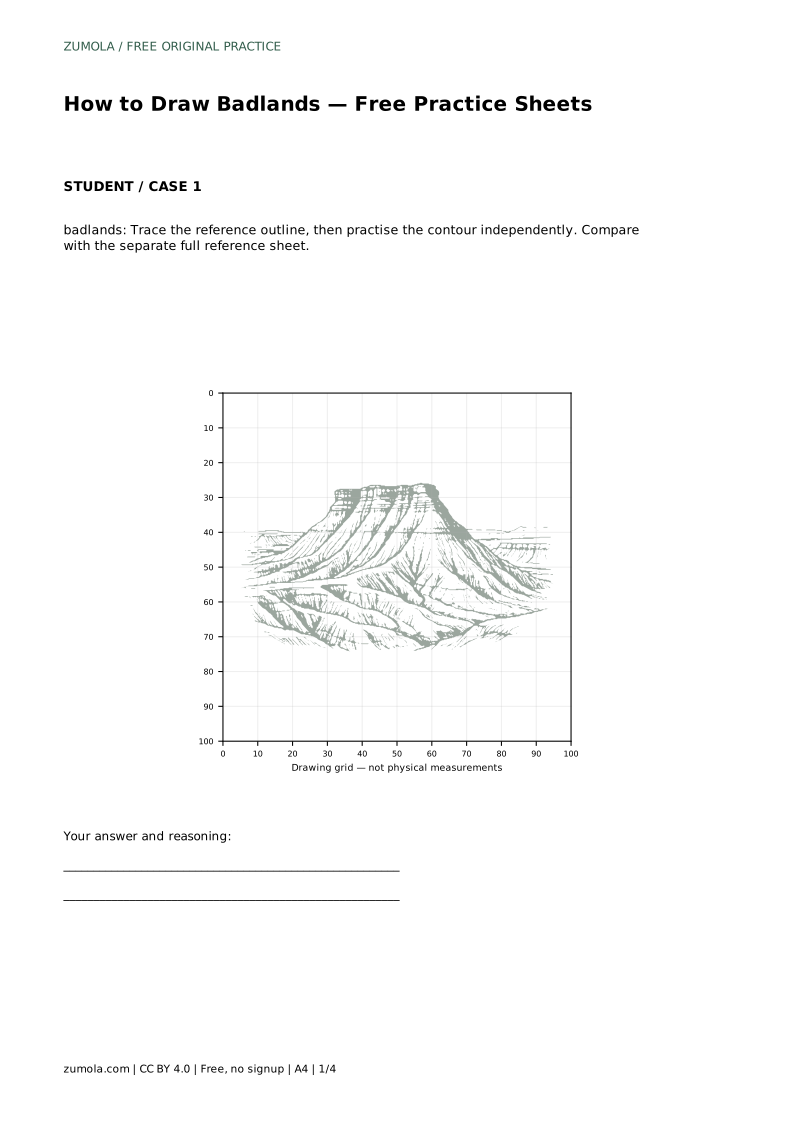
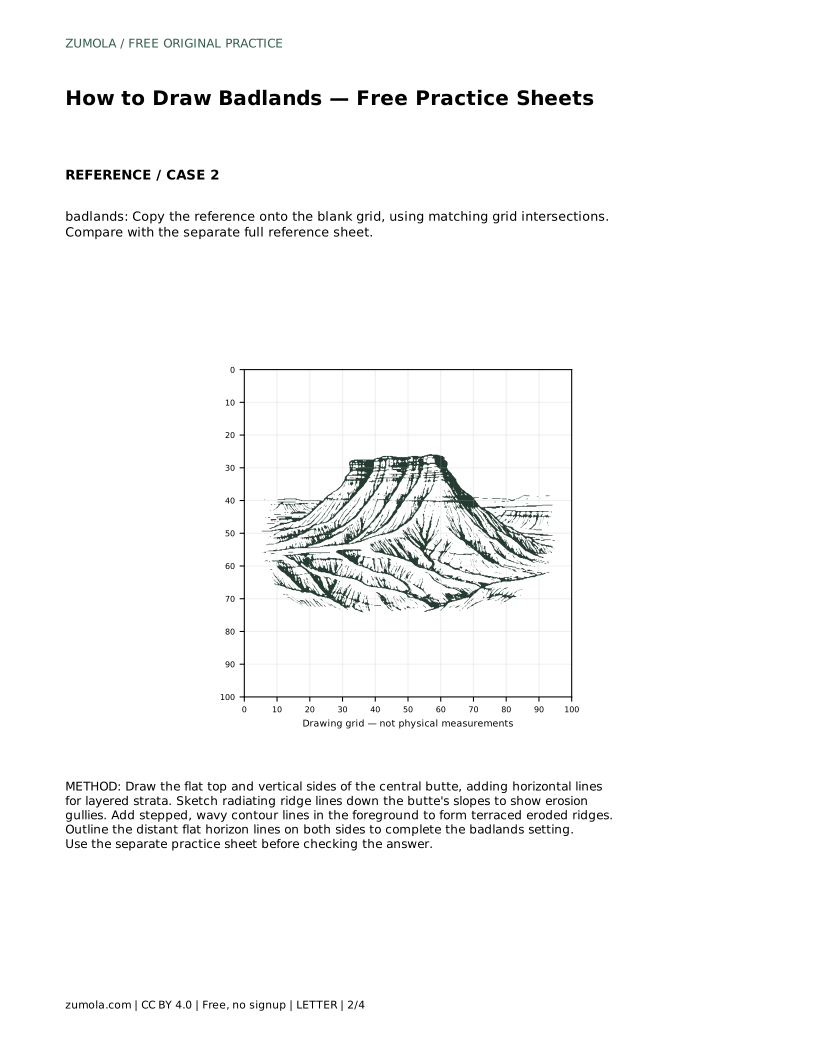
badlands: Trace the reference outline, then practise the contour independently. Compare with the separate full reference sheet.
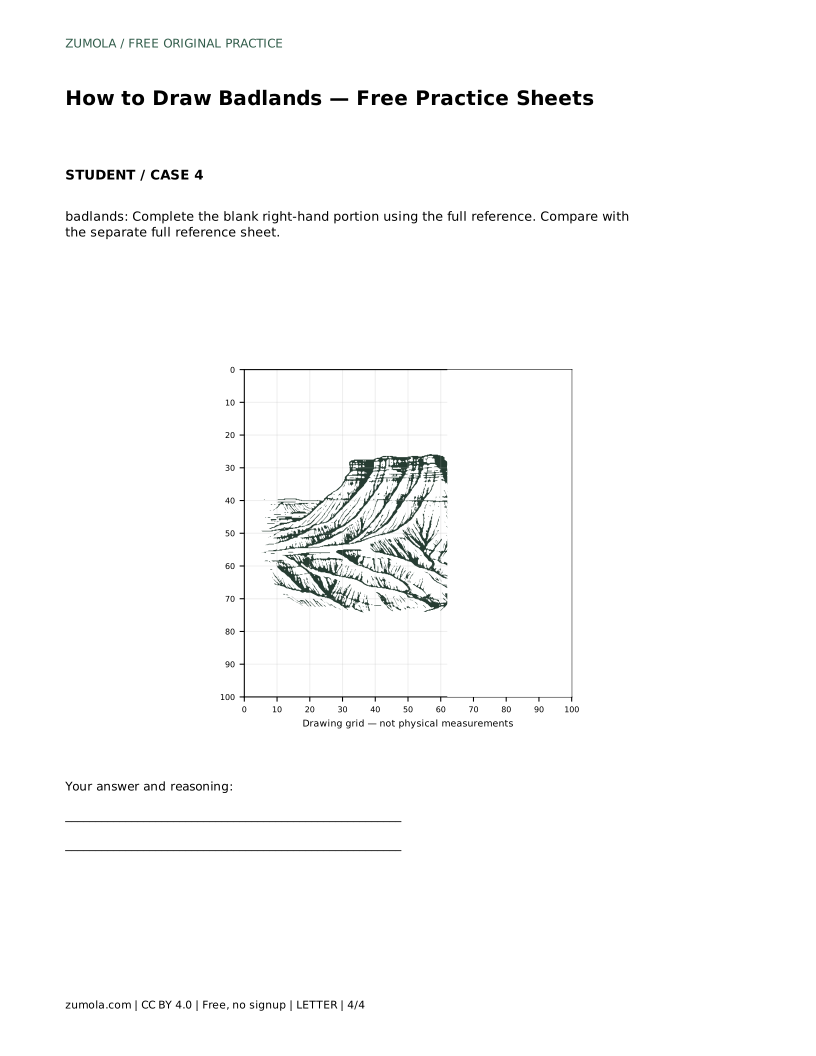
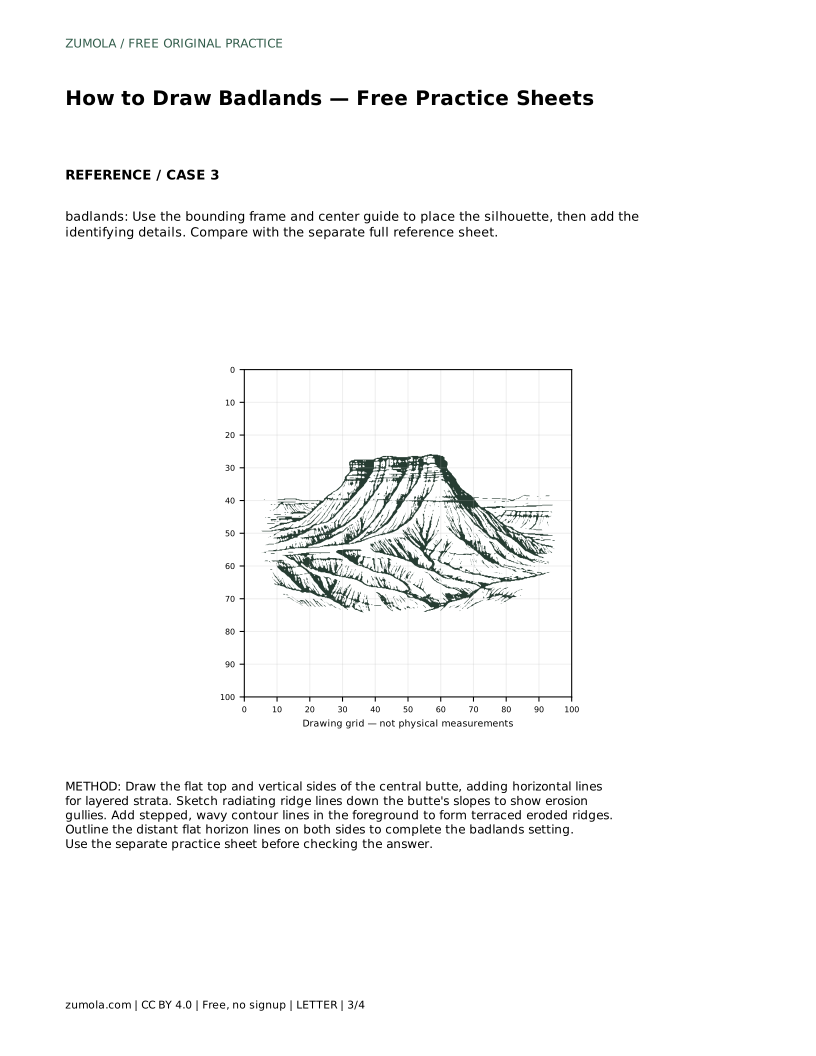
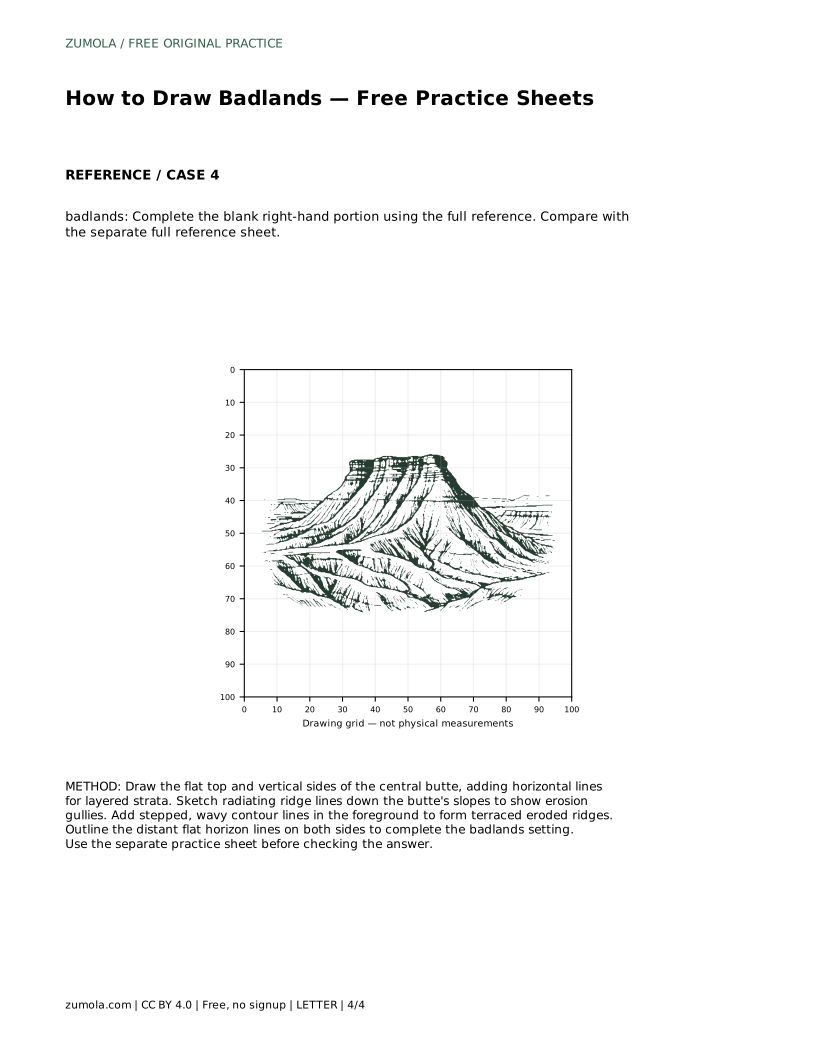
Example solution: preserve flat-topped butte with horizontal layered strata, radiating eroded gullies and ridges on the slopes, terraced, stepped lower foreground ridges. Other drawings can be correct; assess the visible features and proportions rather than pixel-perfect matching. Draw the flat top and vertical sides of the central butte, adding horizontal lines for layered strata. Sketch radiating ridge lines down the butte's slopes to show erosion gullies. Add stepped, wavy contour lines in the foreground to form terraced eroded ridges. Outline the distant flat horizon lines on both sides to complete the badlands setting.
No. Assess visible features and proportions rather than pixel-perfect matching. Other drawings can be correct if they preserve the key landform clues.
A flat-topped butte with horizontal layered strata, radiating erosion gullies on the slopes, and terraced, stepped foreground ridges.
Yes. The count can vary as long as the features remain clear and the proportions stay believable.
All drawing practice · Free coordinate paper
Original resources · CC BY 4.0 · Free for personal and classroom use with attribution.